With an angled lipstick, a small turn of the bullet changes how much of it touches your lips. Use the broad slanted face to lay down color on larger areas, such as the center of the lower lip. For narrow spots like the Cupid's bow or mouth corners, use the high edge of the cut or switch to a small lip brush. Knowing the difference shows you what to adjust as you work with the same lipstick.
Start by extending only a little lipstick and looking in the mirror at where it touches your lip before moving it. A new, well-defined tip and one that has rounded with use cover different areas even when held the same way. Check the shape of the bullet and how you apply it before adjusting the intensity.
1. Identify the angled face and high edge
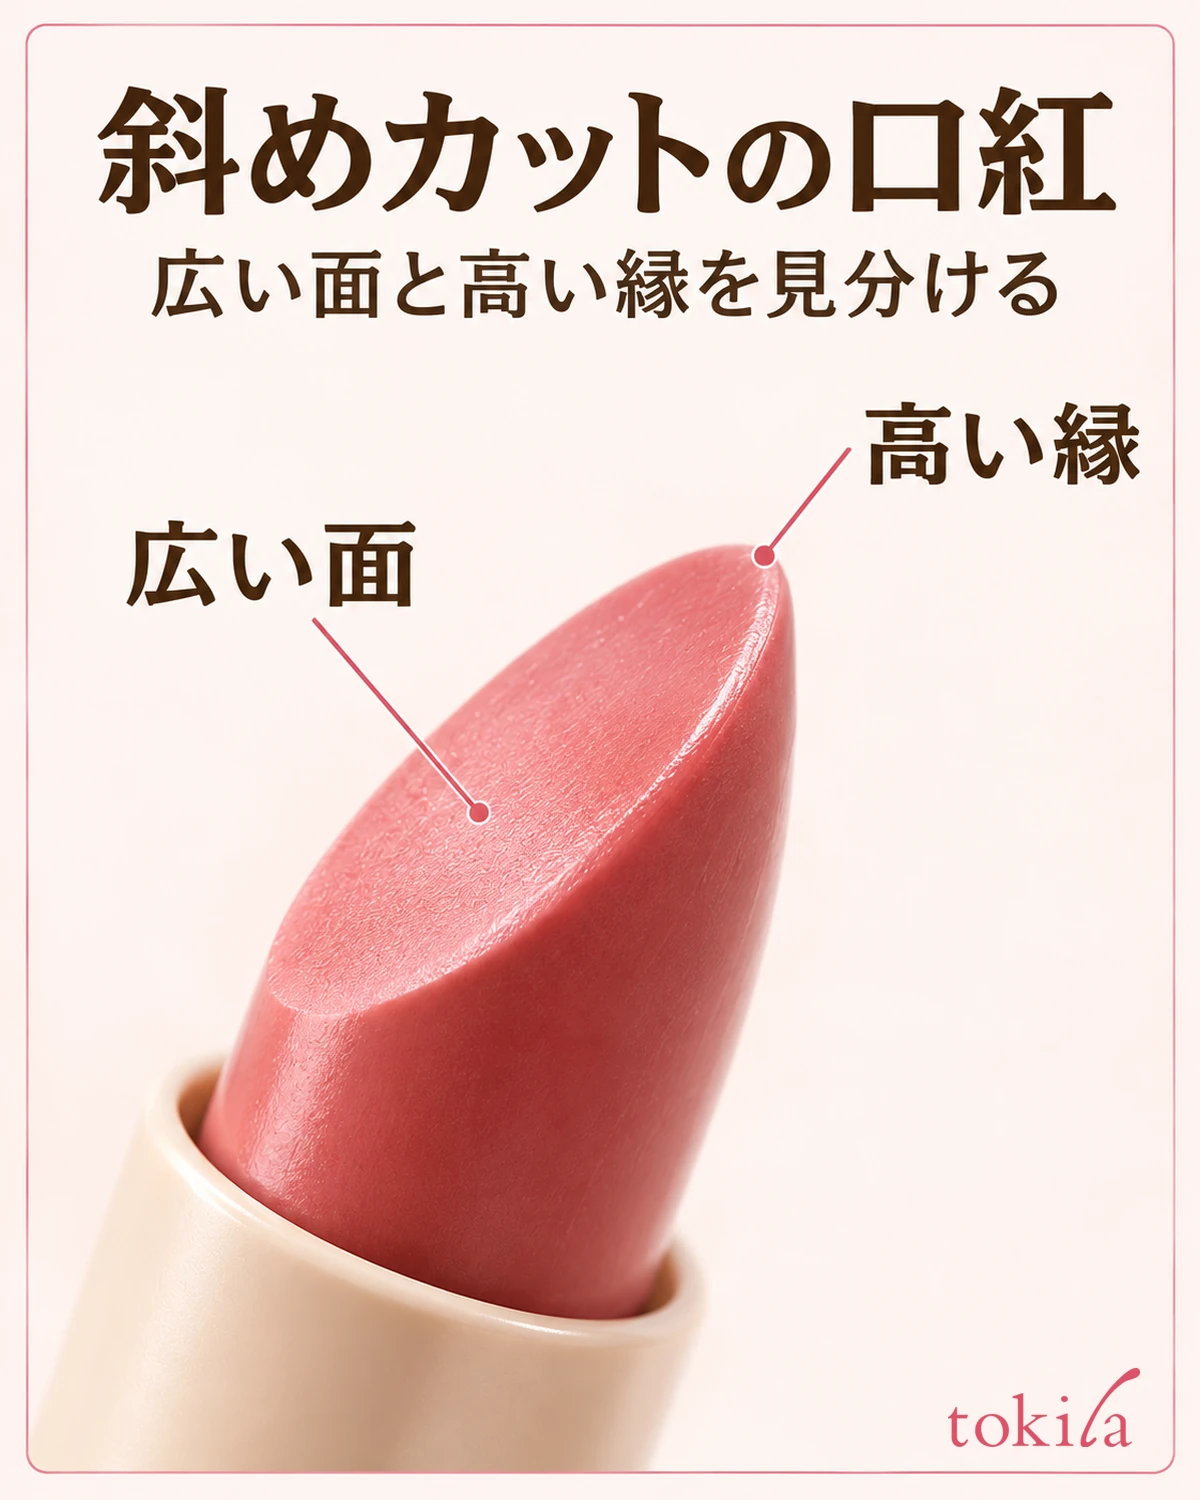
After removing the cap, turn the bullet slightly and view it from the side. The flat, broad part of the slant is the cut face. The point along its perimeter farthest from the tube is the high edge. Some tips are rounded, so there is no need to look for a sharp corner. Tilt the lipstick slightly to find the broad face and a part that can make narrower contact.
Follow the product directions for how far to extend the bullet. There is no need to extend it farther to inspect the angle: turn the tube sideways or move it into better light. Hold the case rather than pinching the bullet. If the color isn't transferring well, change the angle first. Pressing hard enough to indent the lip strains the bullet.
On a used lipstick, one side may have rounded off while the other still has a narrow edge. If the shape is hard to see straight on, turn it halfway around and compare both sides. If every part seems to make broad contact, you don't have to finish the edges of your lips with the stick alone.
On a shallow slant, there is less difference between applying with the face and the edge. On a steeper slant, a slight turn can change the point of contact. Look at the bullet from the side in the mirror and picture how much of it will fit inside your lip line. If you can't see it well, lift it away first instead of rotating the tube all the way around while it touches your lip.
To turn the bullet, adjust the tube in your fingers and bring it back to the mirror, rather than twisting your wrist far around. This makes it easier to track the top and bottom of the angled face. Set the extension first, then change only the orientation of the whole tube. With a straight cylindrical or rounded bullet that has no defined slope, you can apply directly on the broad areas and use a tool for details.
2. Lightly touch the broad face to the center of the lower lip
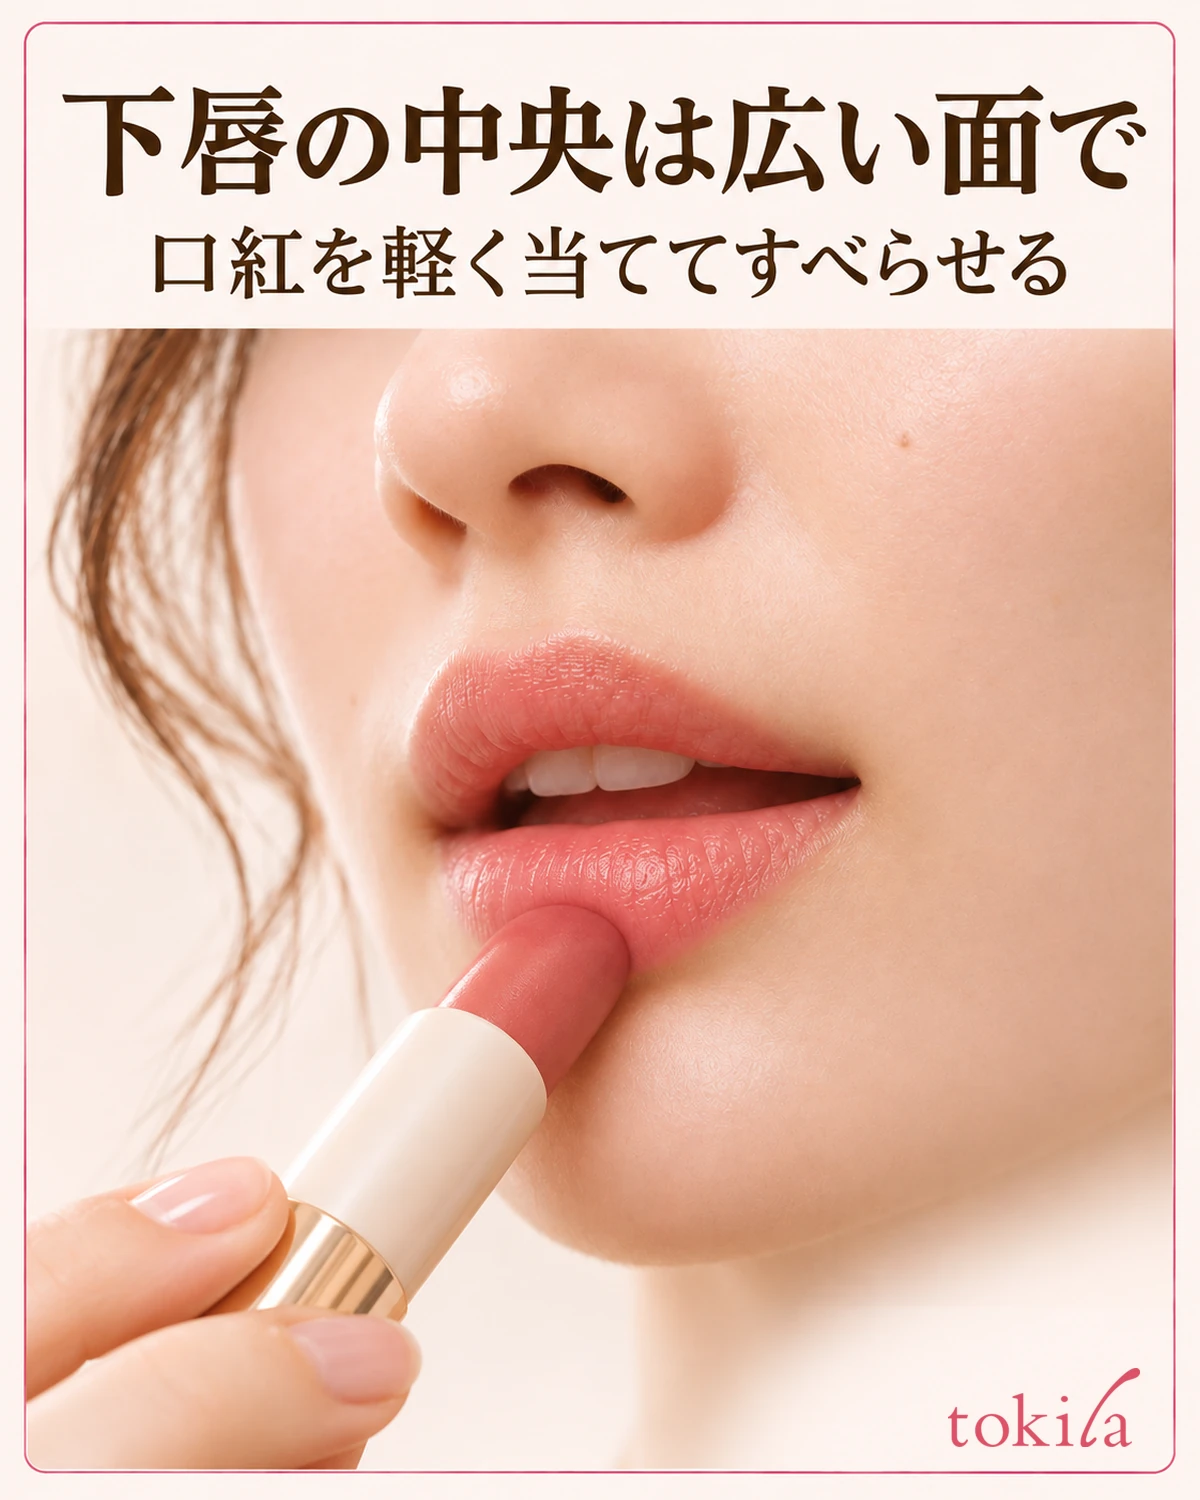
Start in the middle of the lower lip. Part your lips just enough to see the lower lip line, and lightly set the cut face inside it. Point the high side of the slant in the direction you're moving, then glide a short distance from the center to one side. Lift the bullet, change your grip, and start from the center on the other side as well. Stop before the corner and check the width of the color in the mirror before continuing.
Using the cut face doesn't mean pressing its entire surface against the lip. If the center of your lip is narrow and the face might extend beyond it at the top or bottom, hold the tube a little more upright to reduce contact. Applying while the lips are stretched changes how the outline looks when relaxed. Relaxing your mouth after doing one side makes it easier to judge the result.
If you see a line of color in only one spot inside the lip, check whether you used the broad face or the edge before going back over it. If only the edge touched, tilt the face down a little and set it back against the broad central area. If you already have enough color from the first stroke, leave the rest alone and fill in only the missing spots later.
To see how much color transfers, make one short stroke at the center of the lower lip, then lift the bullet away. If the lipstick lays down strong color right away, spread that first amount before adding more. If a light shade is hard to see, change your distance from the mirror slightly while keeping the lighting the same so you can distinguish reflections from the color.
Even if one side is easy to apply, moving the stick in the opposite direction without turning it leaves the high edge facing backward. Lift the tube away and turn it so you don't have to change direction by pressing. If the side opposite your dominant hand is awkward, turn your face a little and look for an angle where you can see the contact in the mirror before twisting your hand.
3. Set the high edge just inside the Cupid's bow
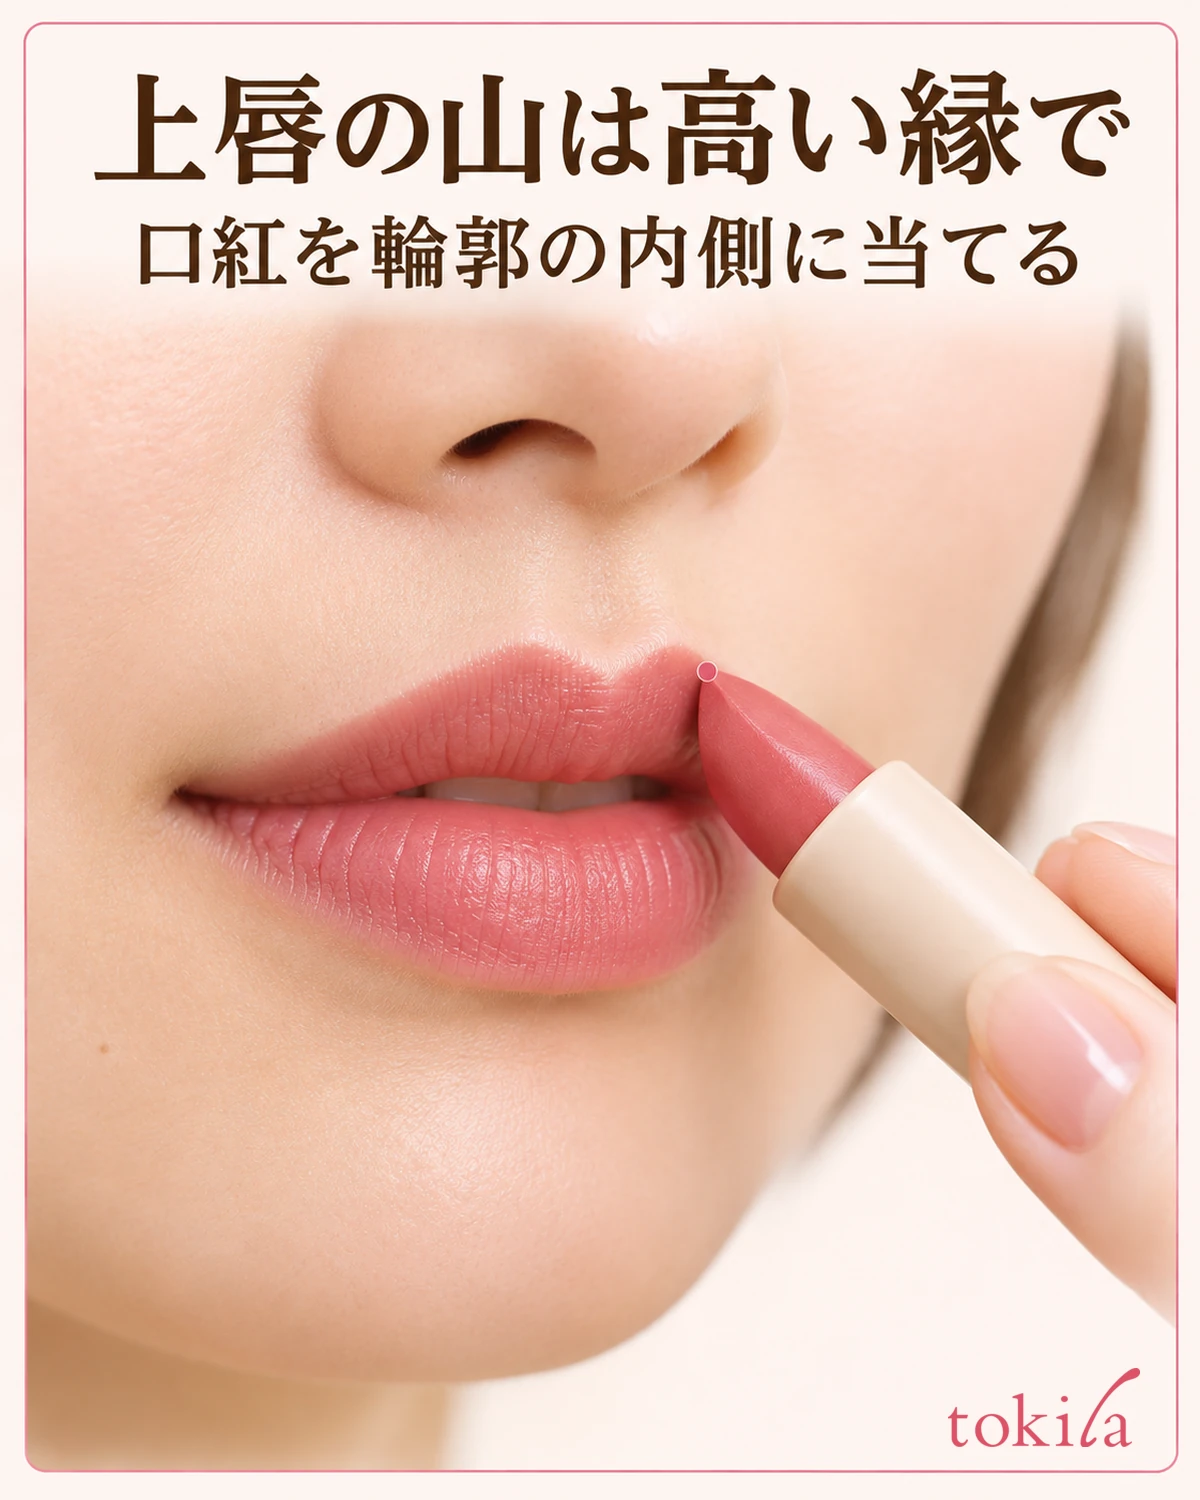
For the upper lip, turn the tube so the high edge of the slant faces up. Find the dip at the center and both peaks of the upper lip in the mirror, then place the high edge just inside one peak. Instead of pushing upward, keep the edge inside the lip line and make a short outward stroke following the slope of the peak. Do the two sides separately, lifting the bullet near the center to reset your grip.
If the tube blocks your view of where it touches, lower your hand slightly or change the mirror angle. If you sweep it across without seeing the tip, it's easy to miss the broad face crossing the lip line. Use the boundary between the natural lip color and surrounding skin as your guide, without extending the lipstick to the lighter rim above the lip.
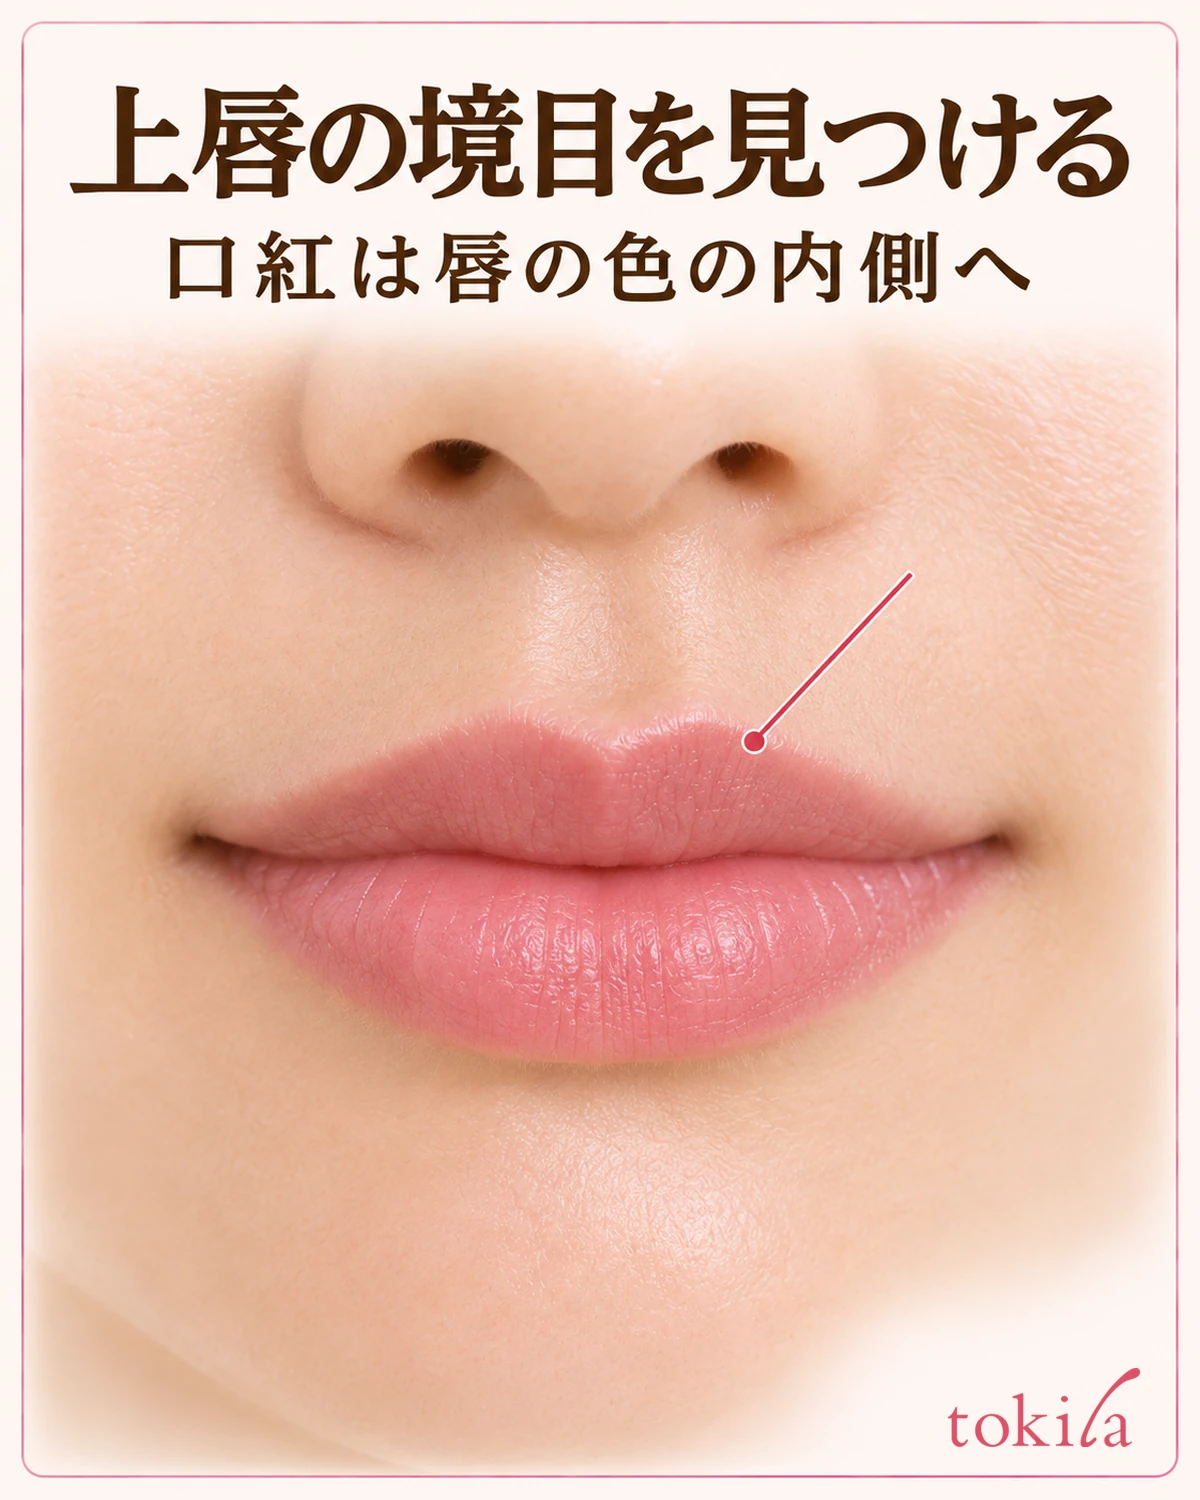
Even when you want a defined Cupid's bow, you don't need to force the two peaks to be the same height. Place a short touch of color on each side, then face forward and fill in only the spots where the line looks broken. For a softer look, you can lightly blend the color from inside the lip line with a clean fingertip instead of tracing the edge repeatedly.
4. Switch to a brush if the bullet won't fit at the corners
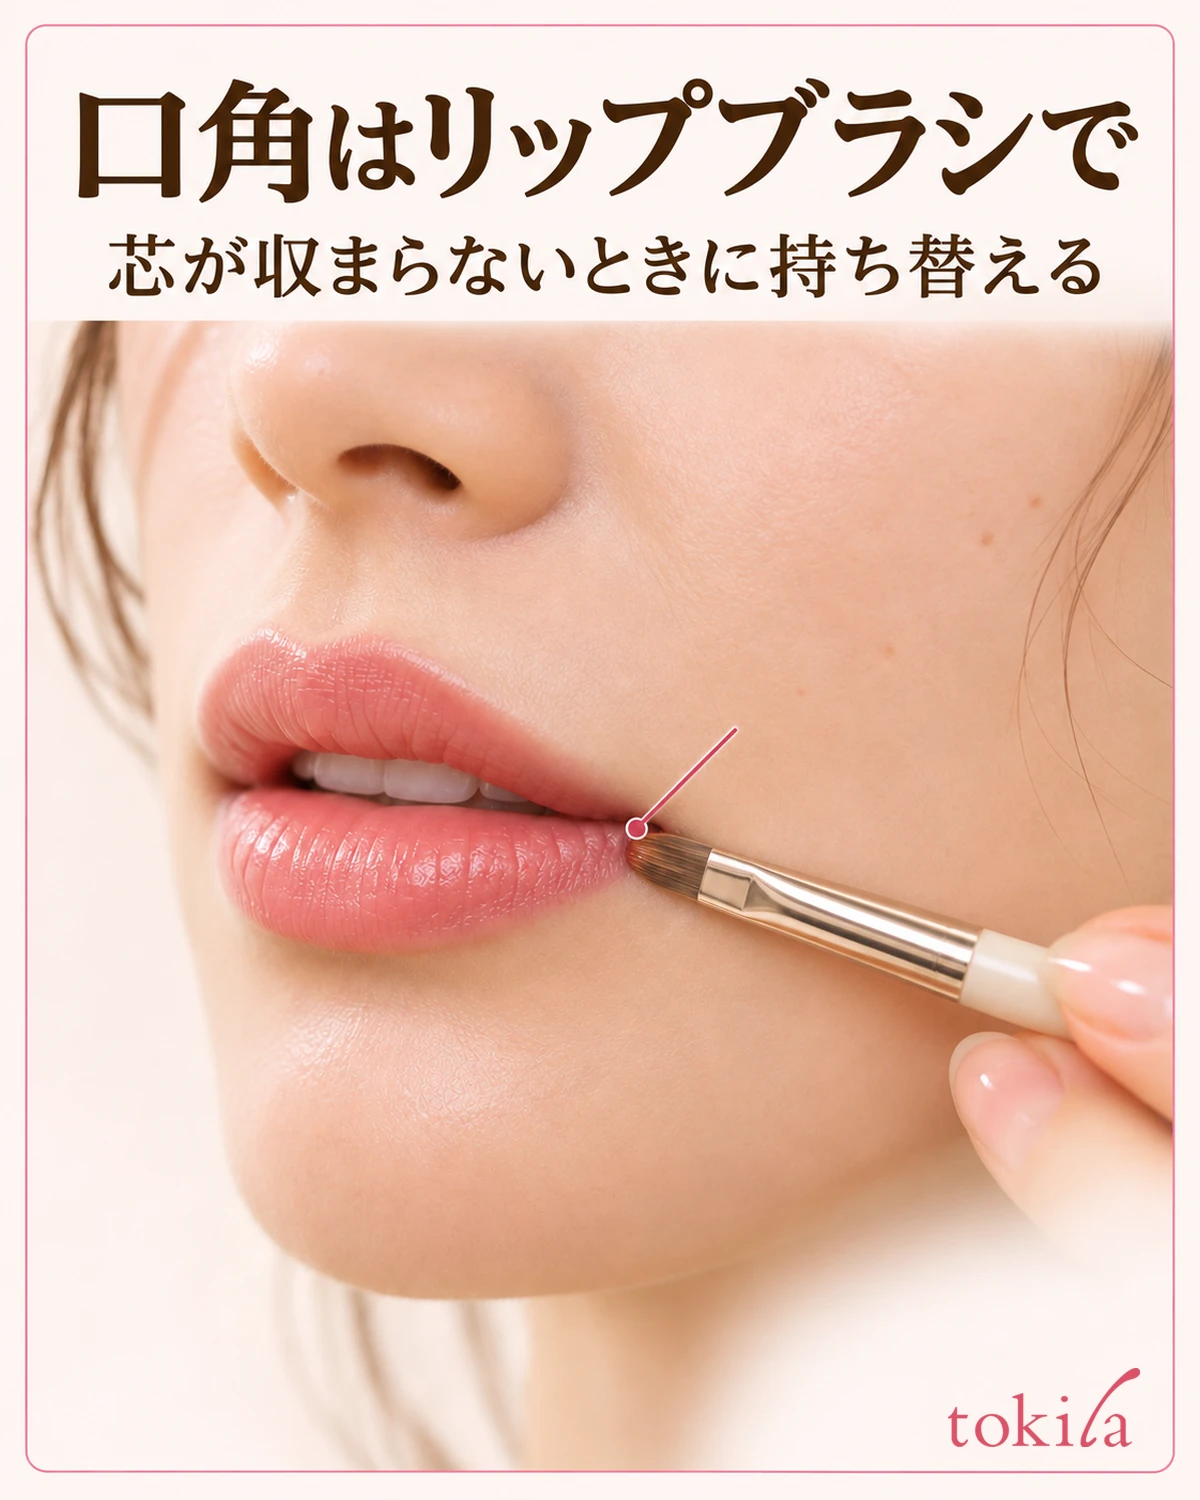
Part your lips slightly to see the area just before the corners where the two lips meet. If the rest of the bullet looks likely to touch the surrounding skin even with only the high edge in place, stop applying from the tube there. Instead of pressing a wide bullet into the corner, pick up a little color with a lip brush and make a short stroke from the already colored area toward the gap so you can see the point of contact.
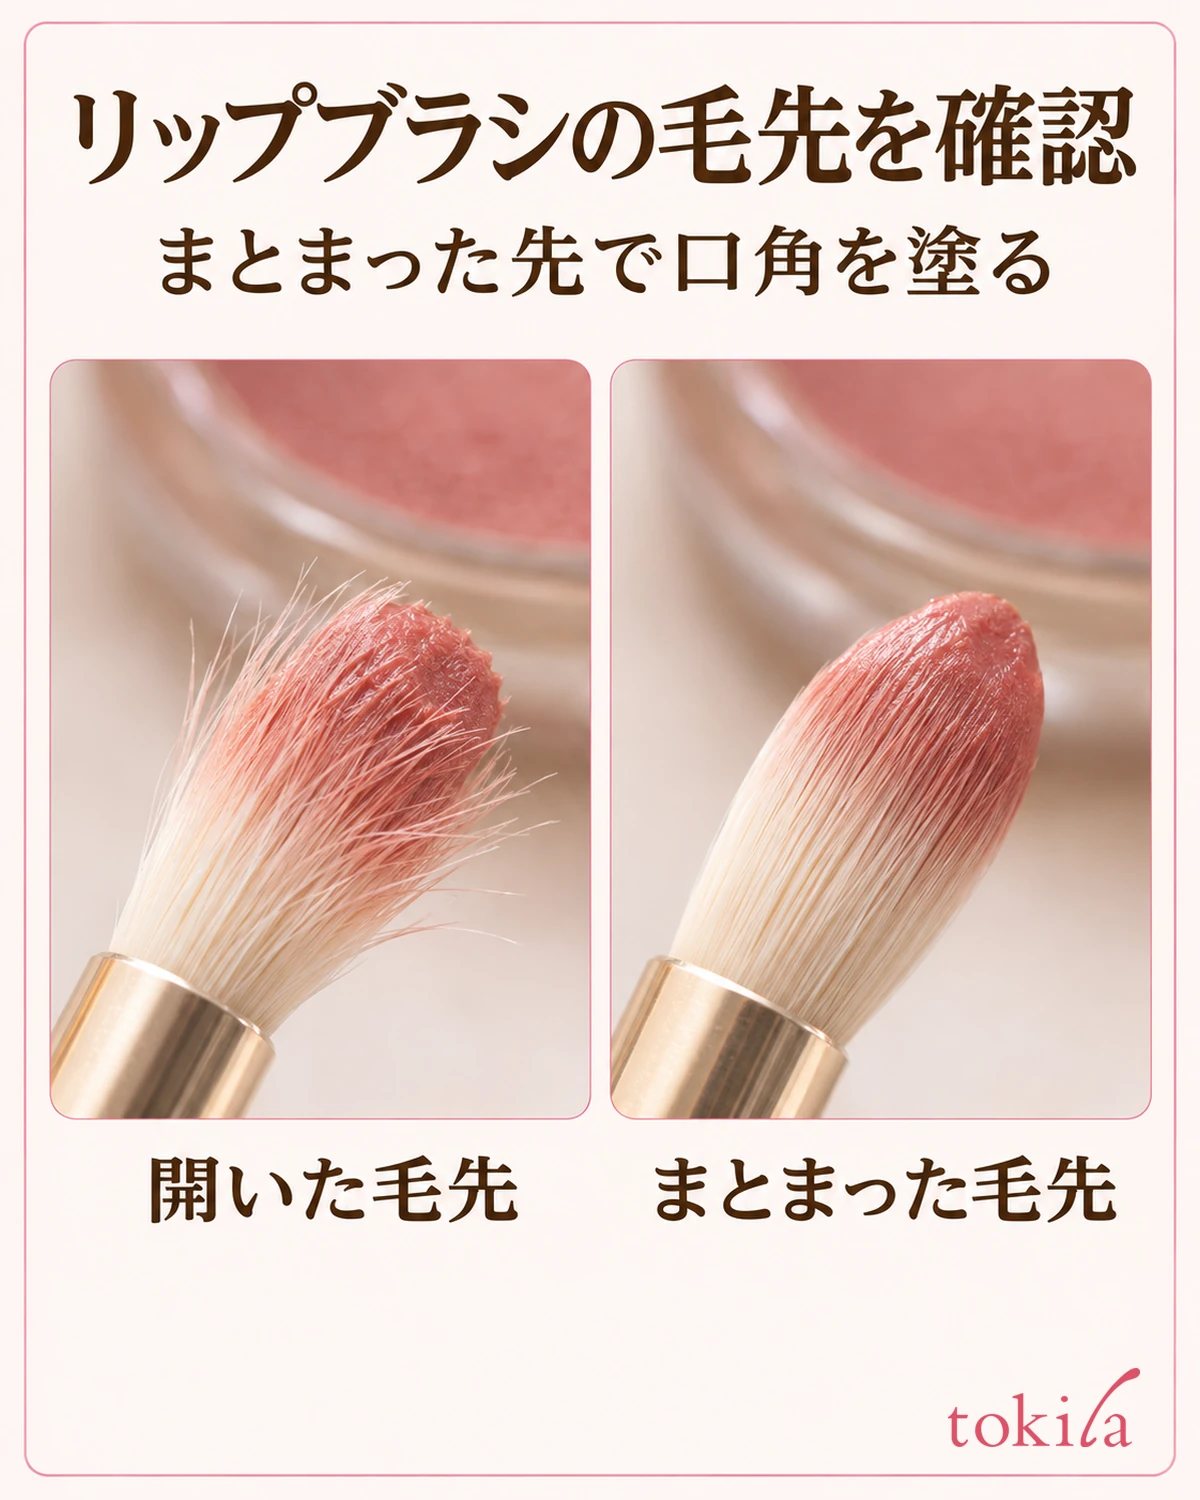
When using a brush, check the width of the colored tip after picking up lipstick. Splayed bristles make wider contact on both sides even when you're aiming at a narrow spot. Lightly place the side where the bristles stay together inside the lip line. After bridging the gap once, lift the brush and close your lips naturally. Distinguish the shadow at the corner from a gap in color before adding more only where needed.
If you want to finish without a brush, you can use the tip of a clean little finger to blend the color placed in the center toward the ends a little at a time. If your finger hides the boundary, don't try to reach the very edge; compare the two sides from the front. If the color looks heavy only at the corners, see how to fix lipstick buildup at the corners of the mouth and check for overlapping color before adding more.
With a short travel brush, check whether the colored bristle tip fits just before the corner rather than focusing on handle length. For a fine line, use the thin side of the flat tip and place a short stroke inside the lip line. Wait until you've checked that it connects to the adjacent color before blending broadly with the whole tip.
5. Relax your mouth and touch up only the color boundaries
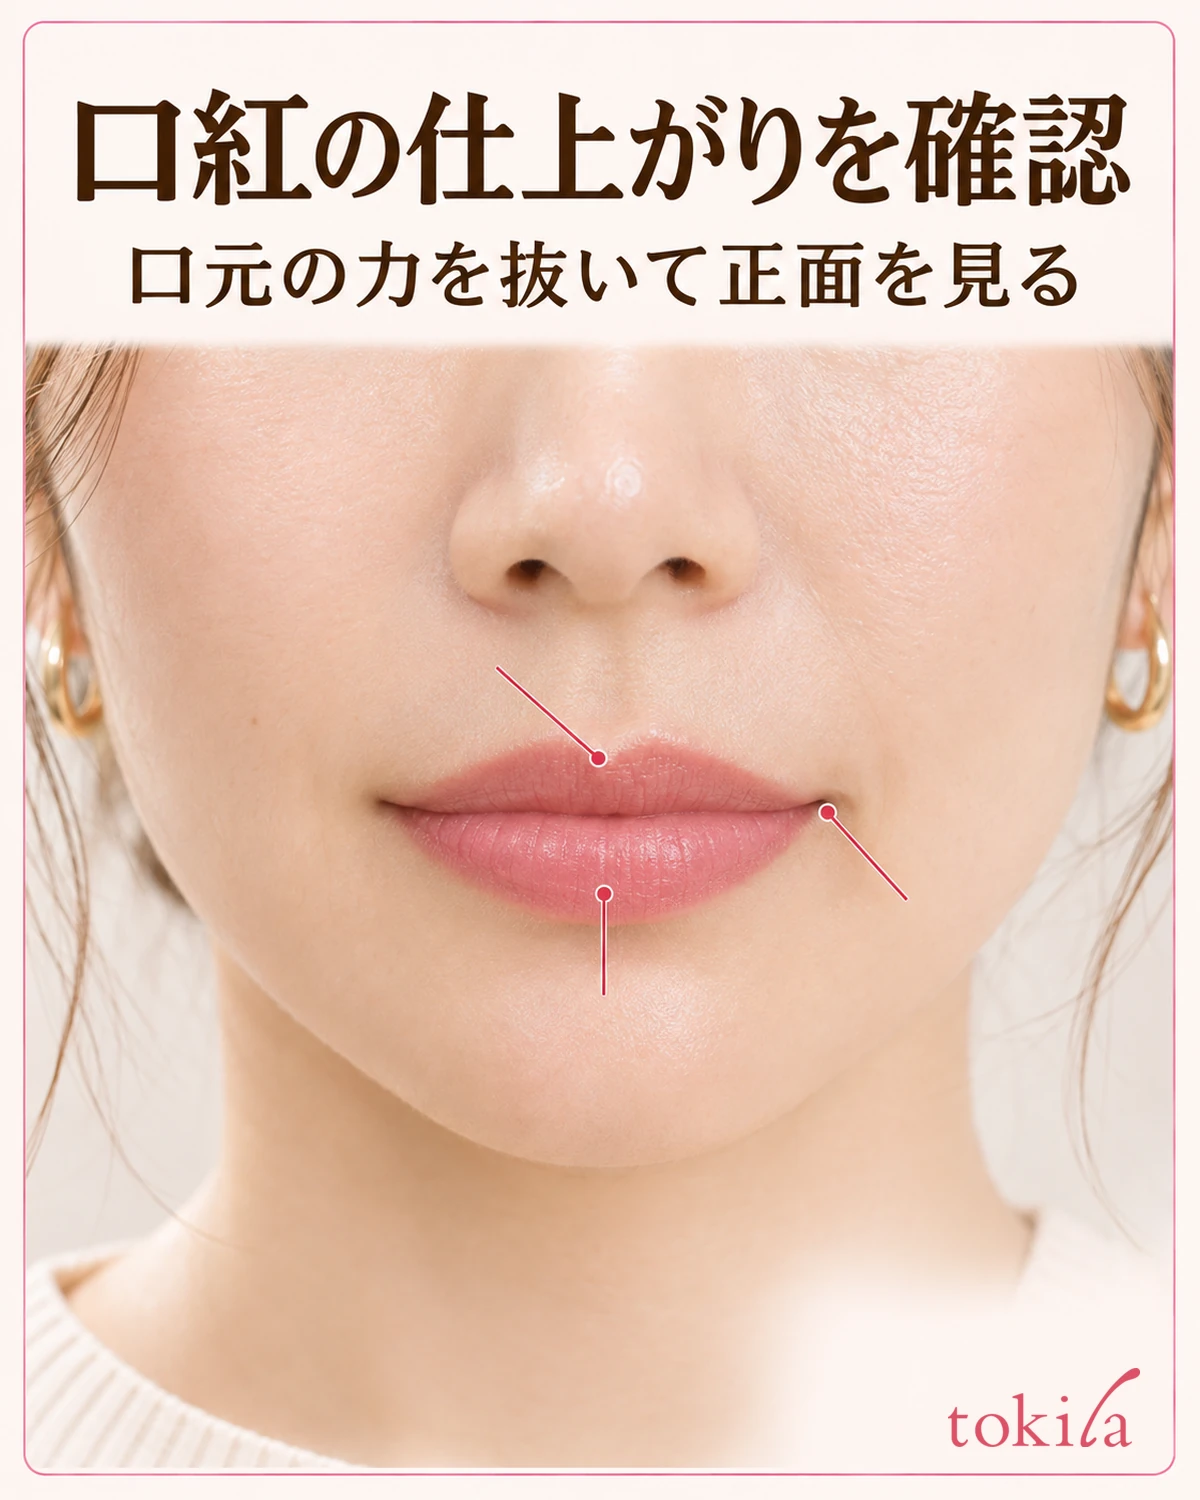
Once you're done, look straight ahead with your usual expression without getting too close to the mirror. Check for a streak at the center of the lower lip, then any sudden breaks on either side of the Cupid's bow, then any extra depth of color just at the corners. Looking separately at the inner area when your mouth is open and the outline when it's naturally closed makes it easier to decide where to add color.
If a small spot of color goes outside the lip line, gently remove just that spot with a clean cotton swab before redrawing the entire lip, then look at the boundary. Follow the product directions if they specify a removal method. If there's a gap inside the line after removing the spot, add a little color just there. Continuing to widen the outline to hide stray color makes it tempting to fill in the other side, expanding the area you have to fix.
After checking the details, step back from the mirror a little to see the whole mouth. A small boundary that caught your eye up close can stay as it is if it looks natural from the front at a normal distance. Decide here when to stop instead of redrawing one side repeatedly. This helps you avoid changing the intensity or outline too much.
The next time you use the same lipstick, recall one spot that didn't go well. If a thin line remained on the lower lip, reconsider how you place the broad face. If color went beyond the Cupid's bow, check the edge position. If the bullet got in the way at the corners, reconsider where to switch to the brush. If the bullet has rounded and no longer applies the same width, try changing your grip or tool before adding pressure.