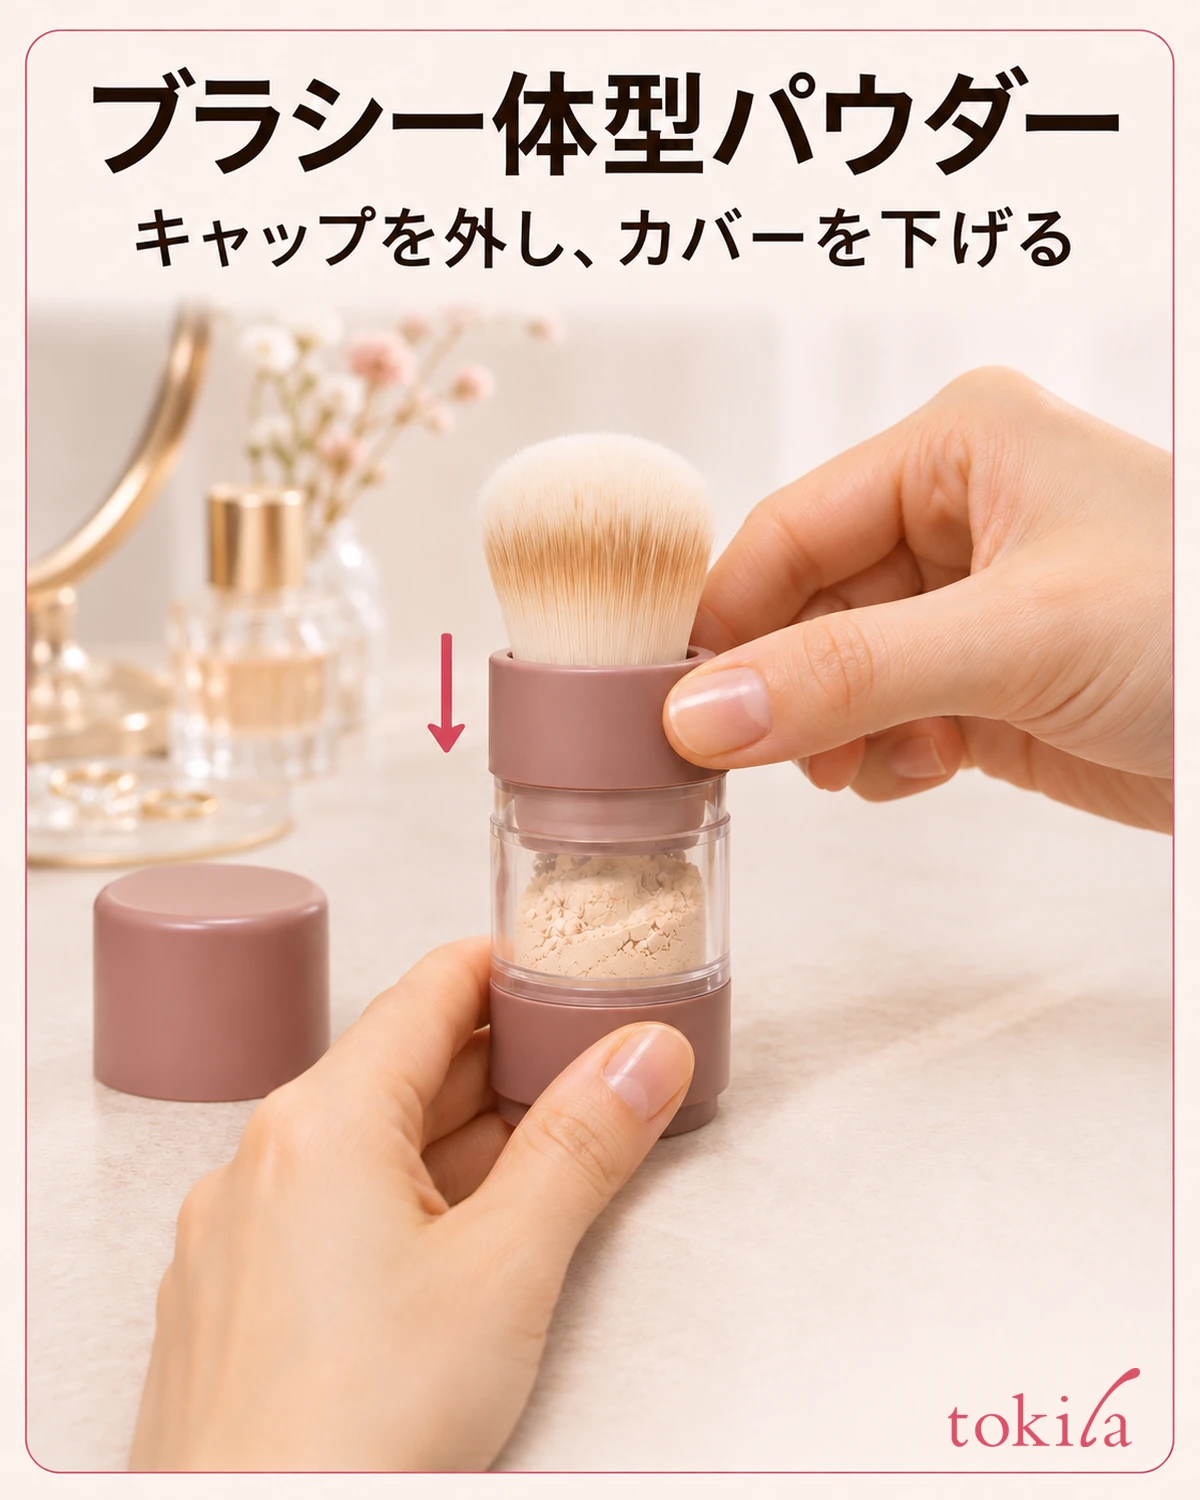
With jarred brow pomade, it can be hard to tell how much will go onto your brow if you start drawing right after dipping into the jar. Pick up a little at a time, work it into the tip of an angled brush, and use short strokes from the arch toward the tail. Use what is left on the brush to fill the inner brow lightly, adjusting it against the depth of color you have already built from the center outward.
This article covers cream pomade that adds color to the brows. It is used differently from clear gel that combs and shapes the hairs or tinted brow mascara that comes with a brush in the tube. Follow your product's instructions if it tells you how to load the brush or when the color can be blended.
Pair Brow Pomade with a Slim-Tipped Angled Brush
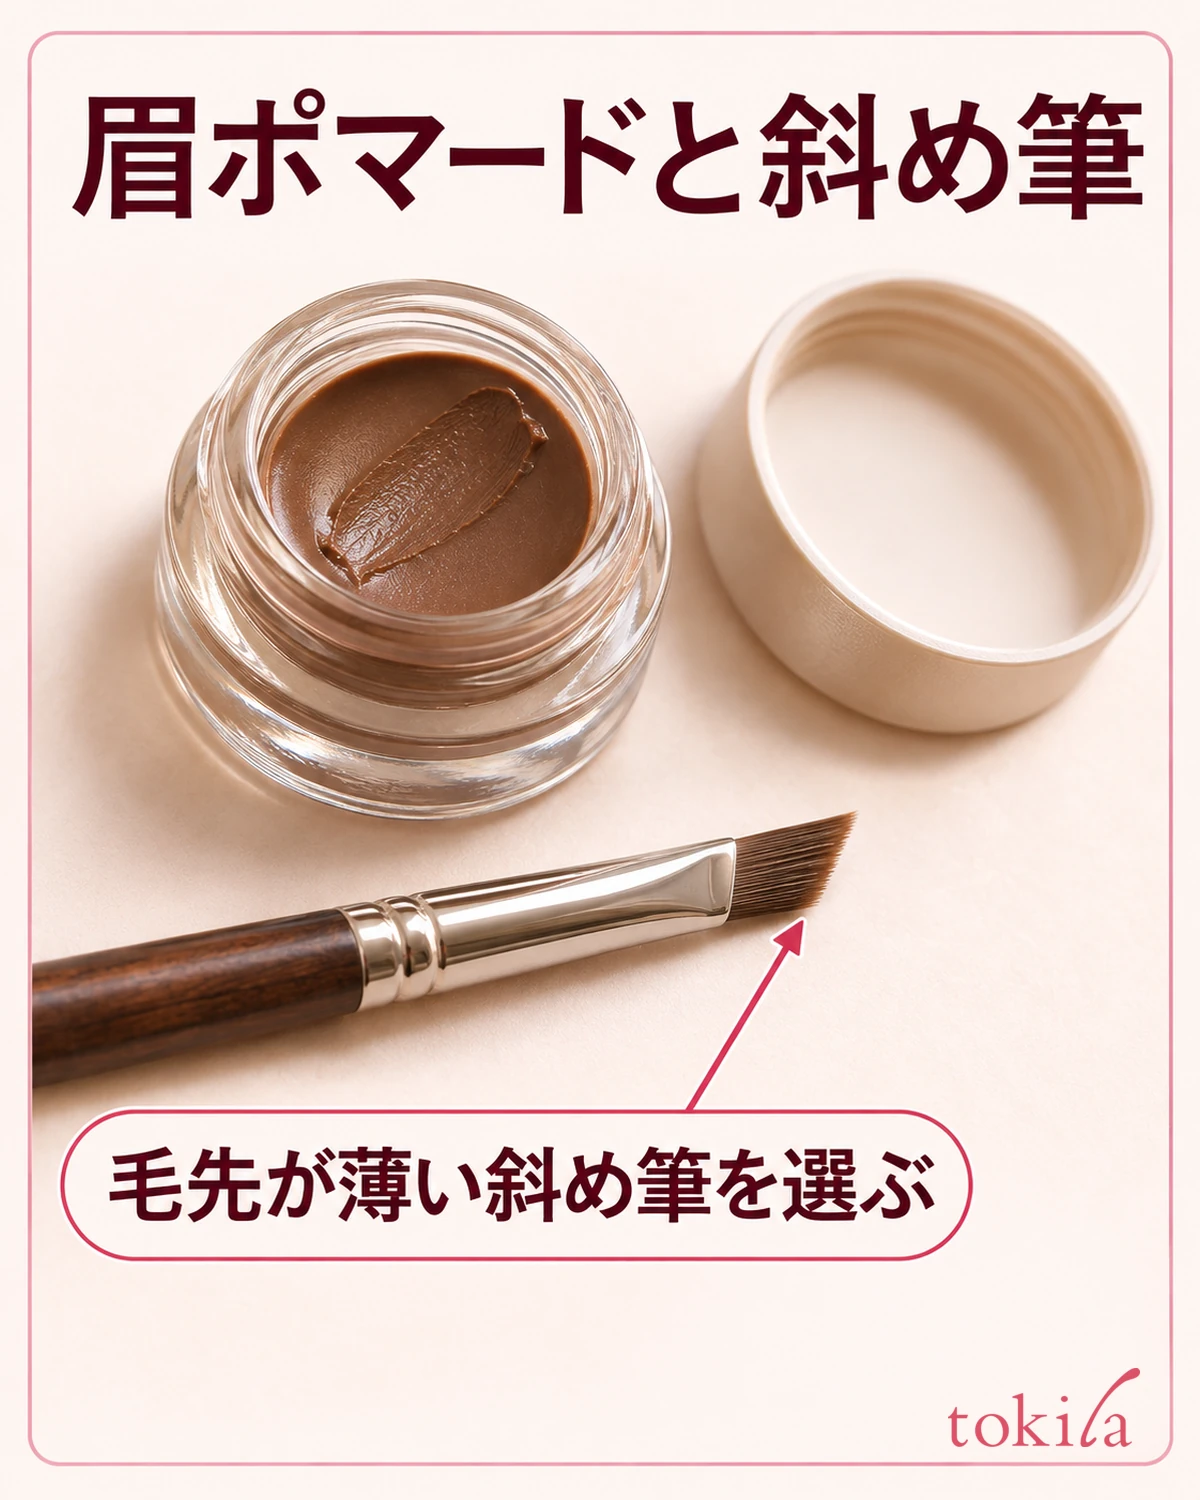
First, check the container or box to make sure it is a tinted pomade for eyebrows. If the product specifies a brush, take a look at that shape first. When choosing an angled brush, look at the bristles from the front and the side. From the front, one side should be longer; from the side, the bristles should come together in a thin edge. Pressing the broad face against skin tends to deposit a patch of color, so use the angled edge to add thin strokes.
Touch just the tip of the brush lightly to the edge of the pomade's surface instead of pressing it deep into the jar. There is no need to pick up enough for both brows at once. If you see a clump or the pomade obscures the angled outline, adjust the amount on the tip in the next step before touching your brow.
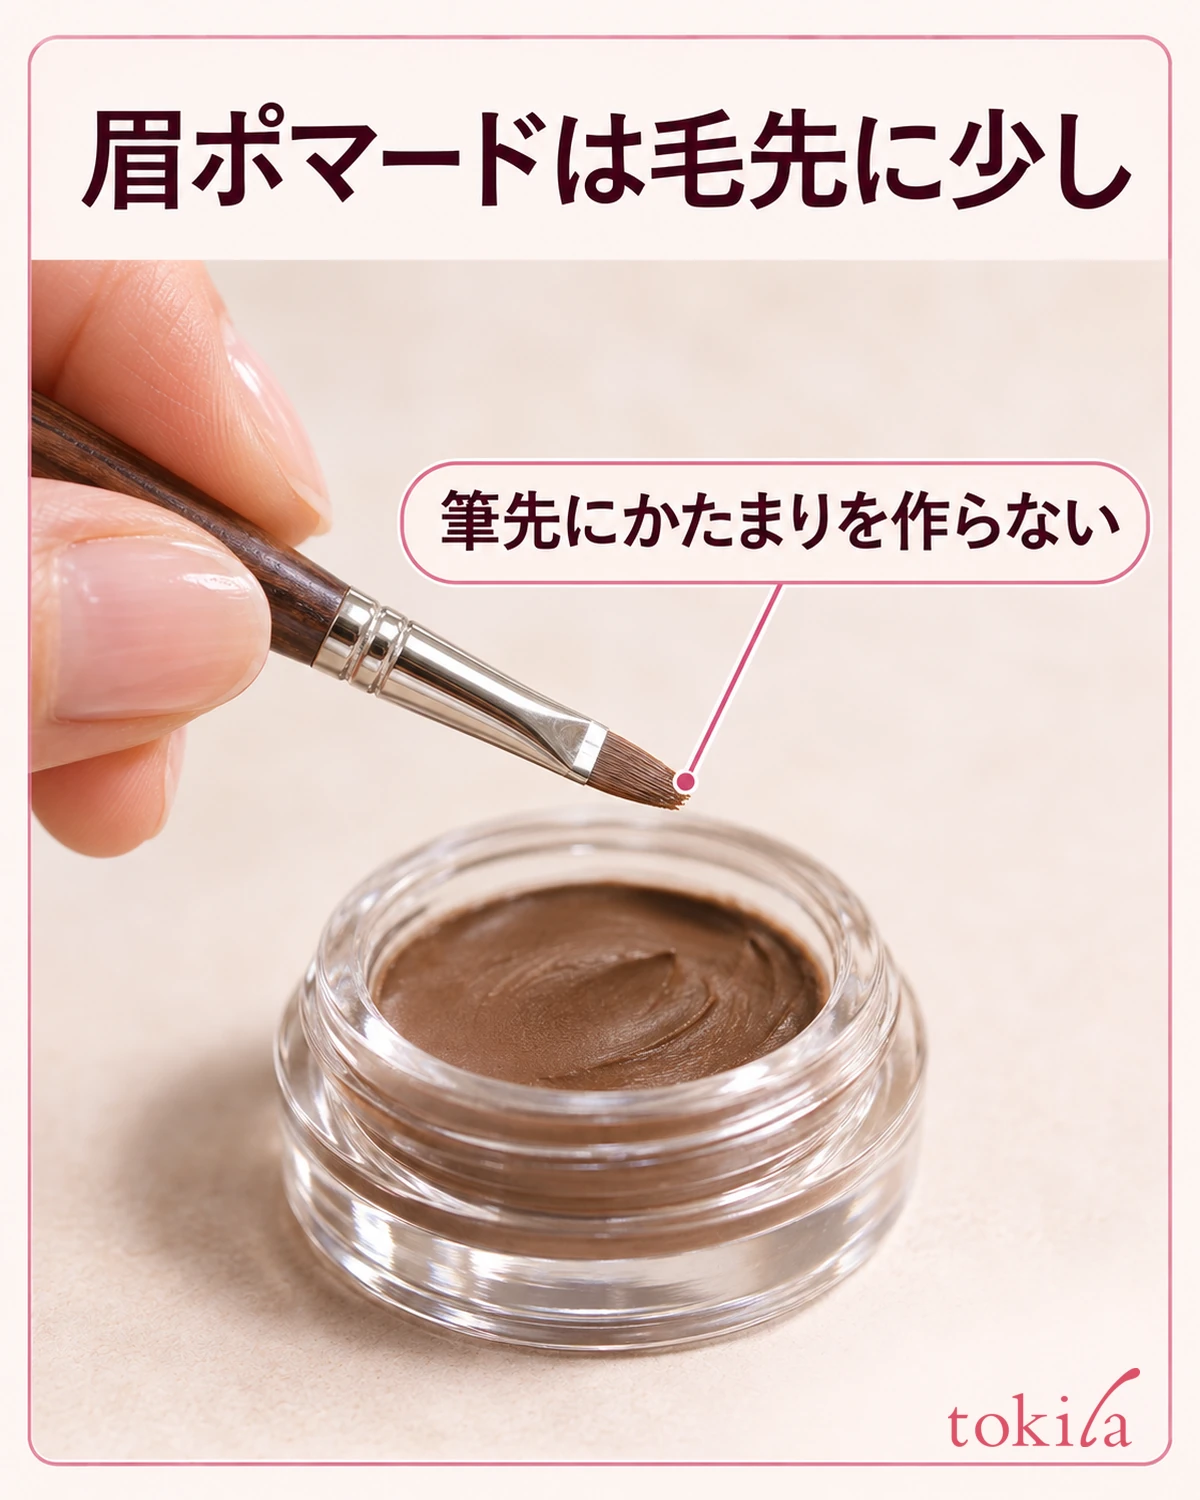
Hold the brush flat and check whether the color has spread toward the metal ferrule. If the bristles split in two or a few stick out when viewed from the side, the stroke can split even when you move the brush in one direction. Clean and dry the brush and straighten the bristles before using it.
Before adding color, look straight into the mirror and see where there are hairs and where skin shows between the arch and tail. Start with your face upright: tilting it changes how high each brow looks to you. Seeing the area your hairs already cover makes it easier to decide where to add color.
Spread the Pomade Thinly Across the Brush Tip
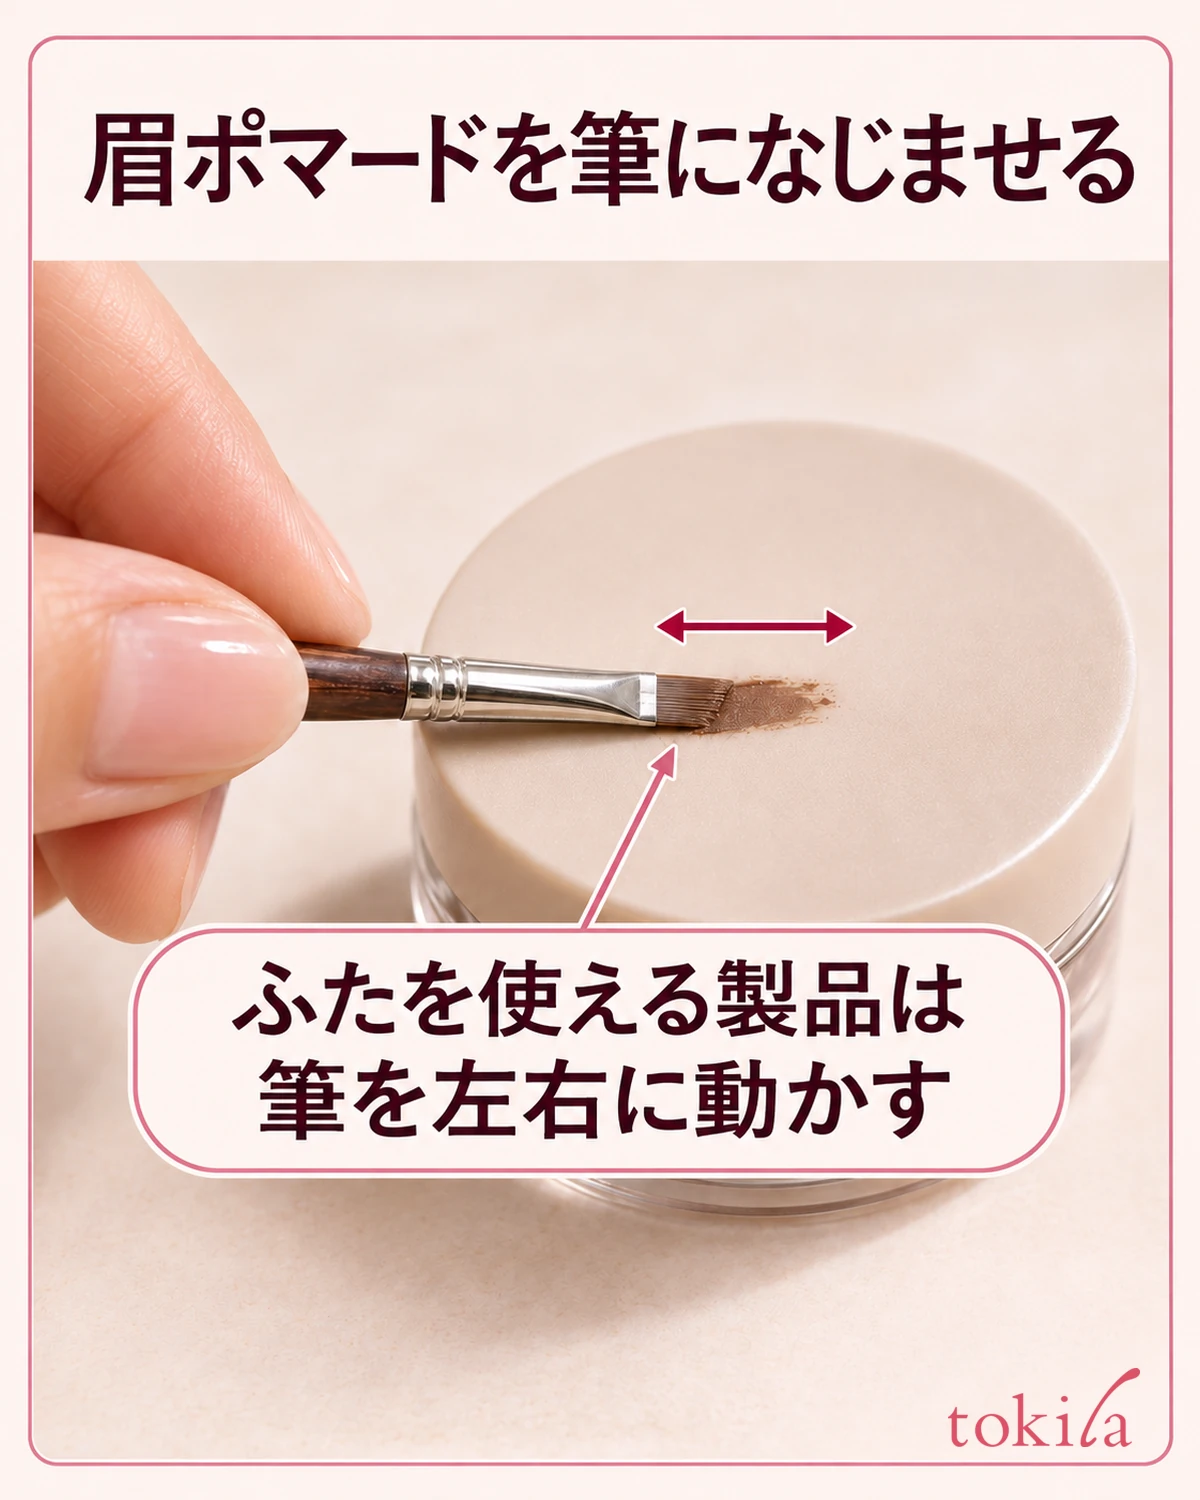
Once you have picked up a little pomade, spread it across the tip before drawing. If your product recommends using the lid, close the jar, touch the brush lightly to a small amount of pomade on top of the lid, and move it from side to side. Check that the color is not concentrated on the corner, and stop while you can still see the shape of the bristles. Follow your product if it gives different instructions for the lid.
Turn the brush sideways to see whether the outline is still visible and whether any lump of color sticks out past the angled edge. Pressing the bristles flat makes their thickness harder to judge. If the pomade is on one side, turn the brush over, smooth it lightly onto the other side, and check where the color has spread.
If you can test the brush on a clean surface before touching your brow, draw one short line. If only the first point of contact makes a dark, round mark, smooth out the clump on the tip before taking more pomade. If the line is patchy or faint, check separately for color left on the tip and the angle at which you are holding it before scooping up more.
You do not need to reload the same amount every time you switch brows. Try one stroke with what is left and replenish it a little only if you cannot place color where you intend. To match the intensity on both sides, judge the middle and tail as seen from the front rather than counting how often you dipped into the jar.
Use Short Strokes from the Arch to the Tail, Following the Hairs
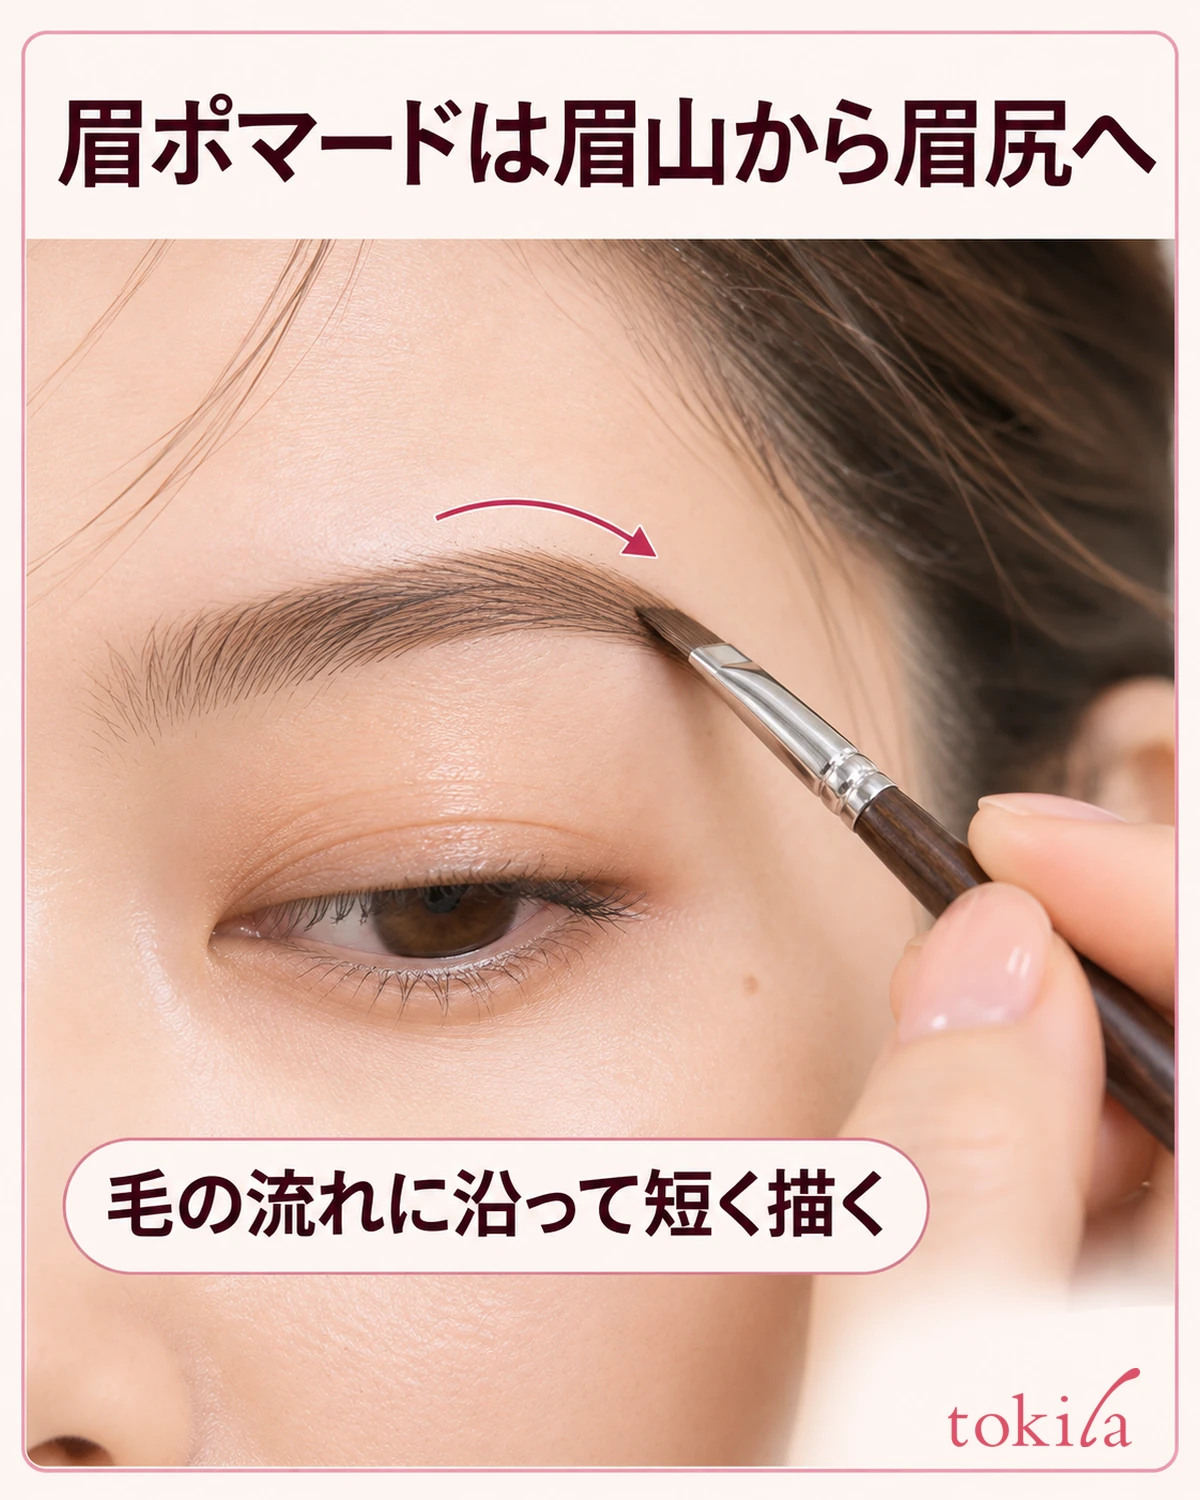
Start around the highest part of the brow and work toward the tail, using short strokes only where you want more color. Use a mirror to check which way the hairs lie at that spot. Touch down lightly with the angled edge, move it a short distance in the direction the hairs grow, and lift it. Leaving the brush against your skin and dragging it all the way to the tail can cover the spaces you wanted to fill with one dark line.
Leave areas that already look full and move to the next gap. For instance, if there is a small gap just past the arch, add a short stroke in the direction of adjacent hairs rather than coloring the whole area around it. If you want a narrower look as you approach the tail, use the corner of the tip so less of it touches your skin.
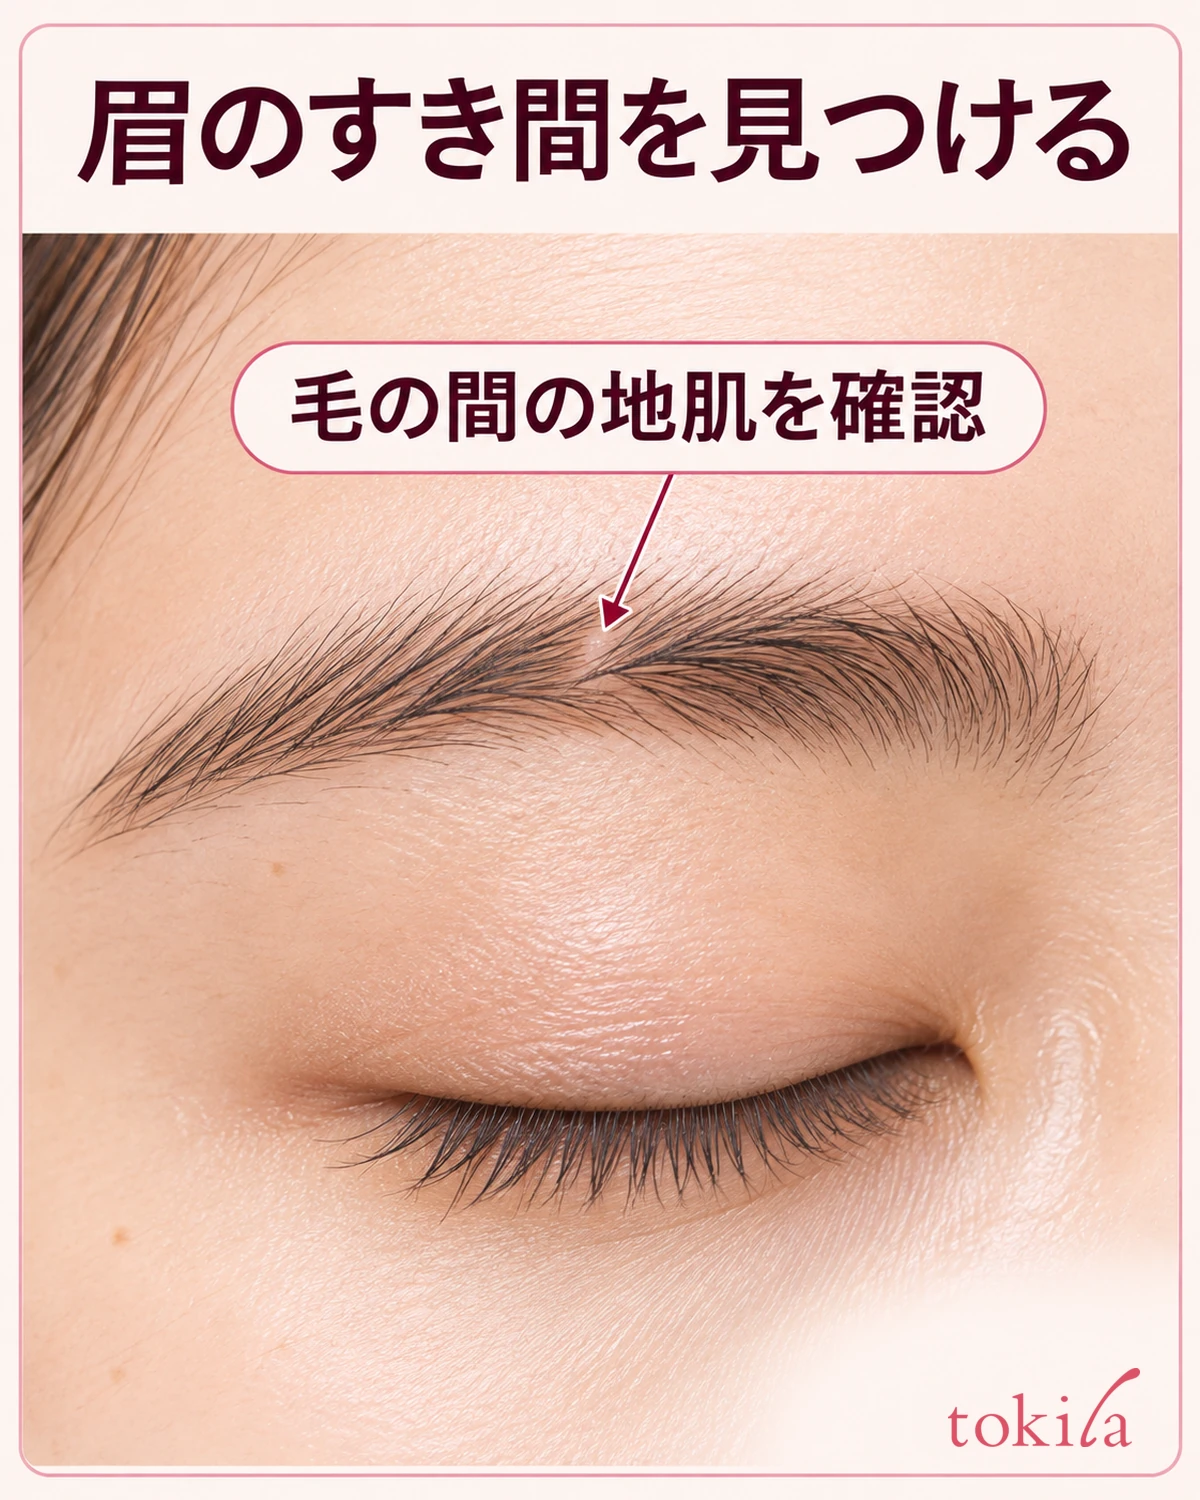
When looking for gaps, use a close mirror to check individual hairs, then step back and look straight on. Skin may show up close even when the brows look about equally full from the front. Instead of filling every exposed spot, start with the ones that stand out when you step back.
Even if you want to change the length of the tail, it is easier to tell what made the brow too dark if you adjust the amount of pomade and redraw the outline separately. Draw to the usual end of the brow first and then decide whether you need to extend it. If you are unsure where to add fine strokes, you can also refer to the steps for finding missing hairs when using a liquid brow product, keeping in mind that the tools differ.
Use What Is Left on the Brush at the Inner Brow and Compare Both Sides
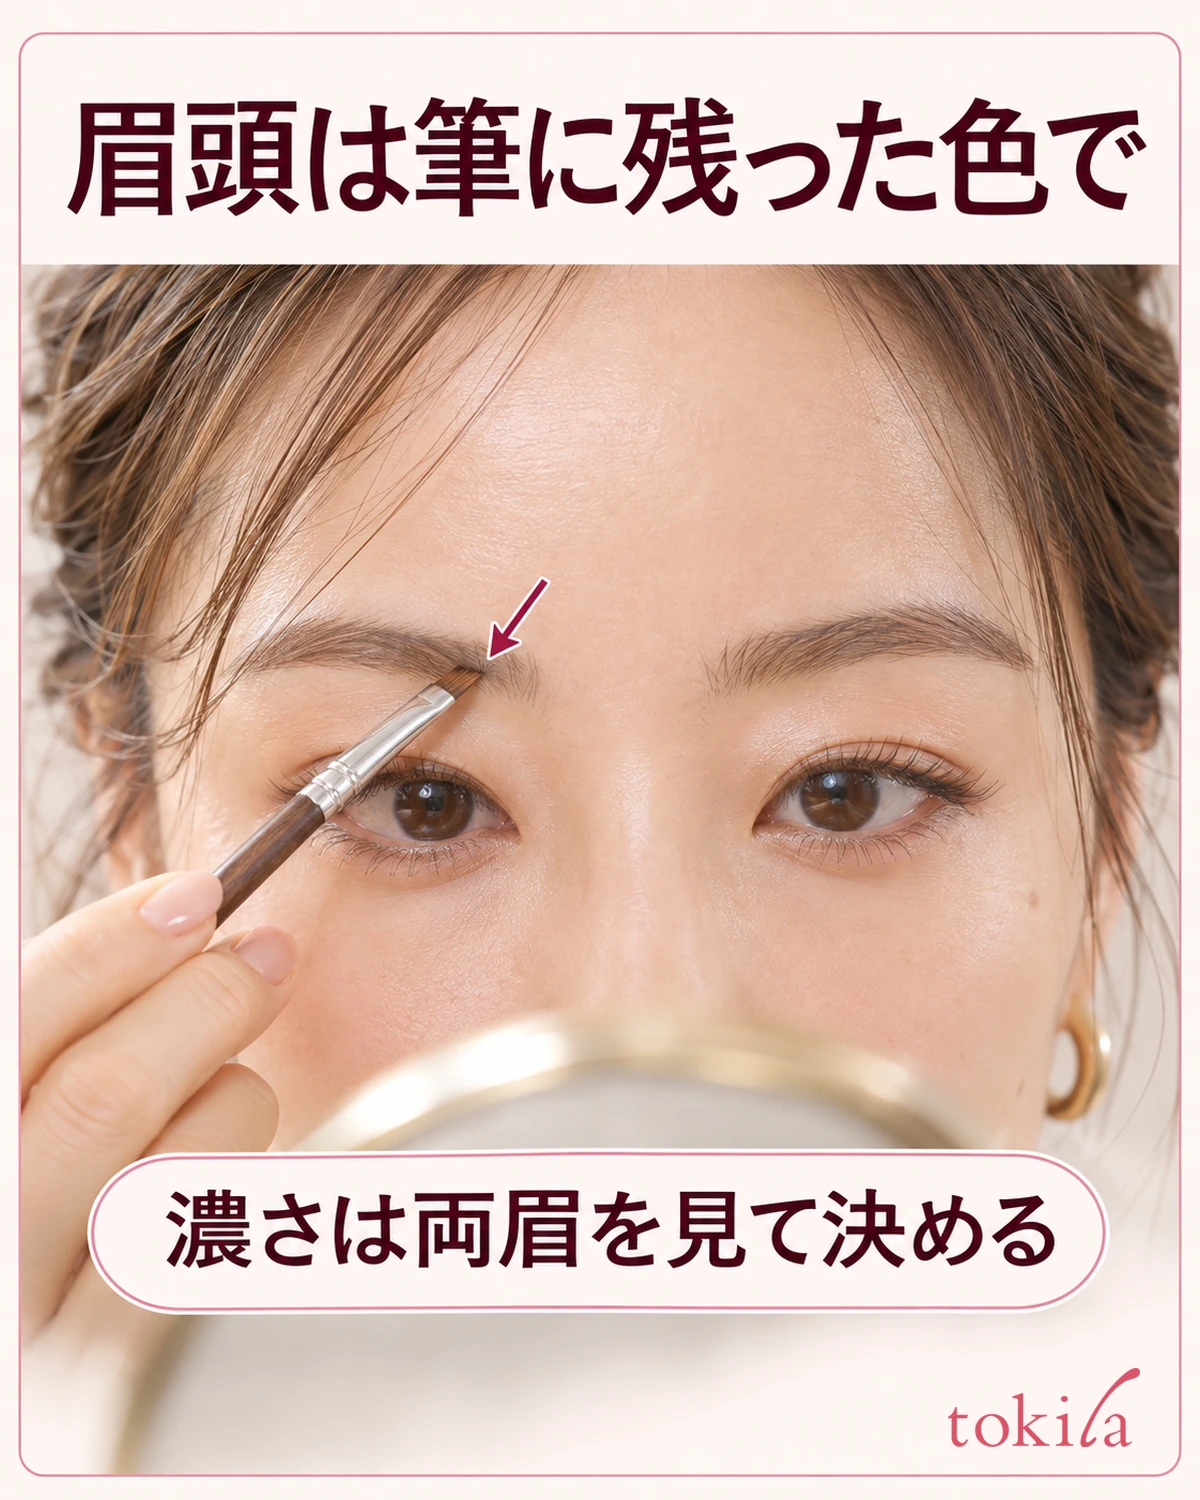
Once you have filled the area from the arch outward, look at the tip before loading it again. If there is color left, lightly touch it to a gap in the inner brow. Where the hairs point upward, use short strokes in that direction. One dark stroke from the inner corner outward can make the edge stand out, so lift the brush after each stroke in areas you want to keep light.
If the inner brow barely needs any color, leave it alone and look straight into the mirror again. To compare both sides, line up the mirror with the height of your face and check that one side is not lit more strongly. If one brow has more hairs, it is easier to adjust by seeing where the color stands out than by drawing the same number of strokes.
If the brows look different, pick one area: the inner brow, the arch through the tail, or the outline. If it is the lighter tail you want to adjust, there is no need to fill in the inner brow as well. Add one short stroke, set the brush down, and step back. If the difference no longer bothers you, finish there.
If It Looks Too Dark, Stop Adding Color and Check the Direction of the Hairs
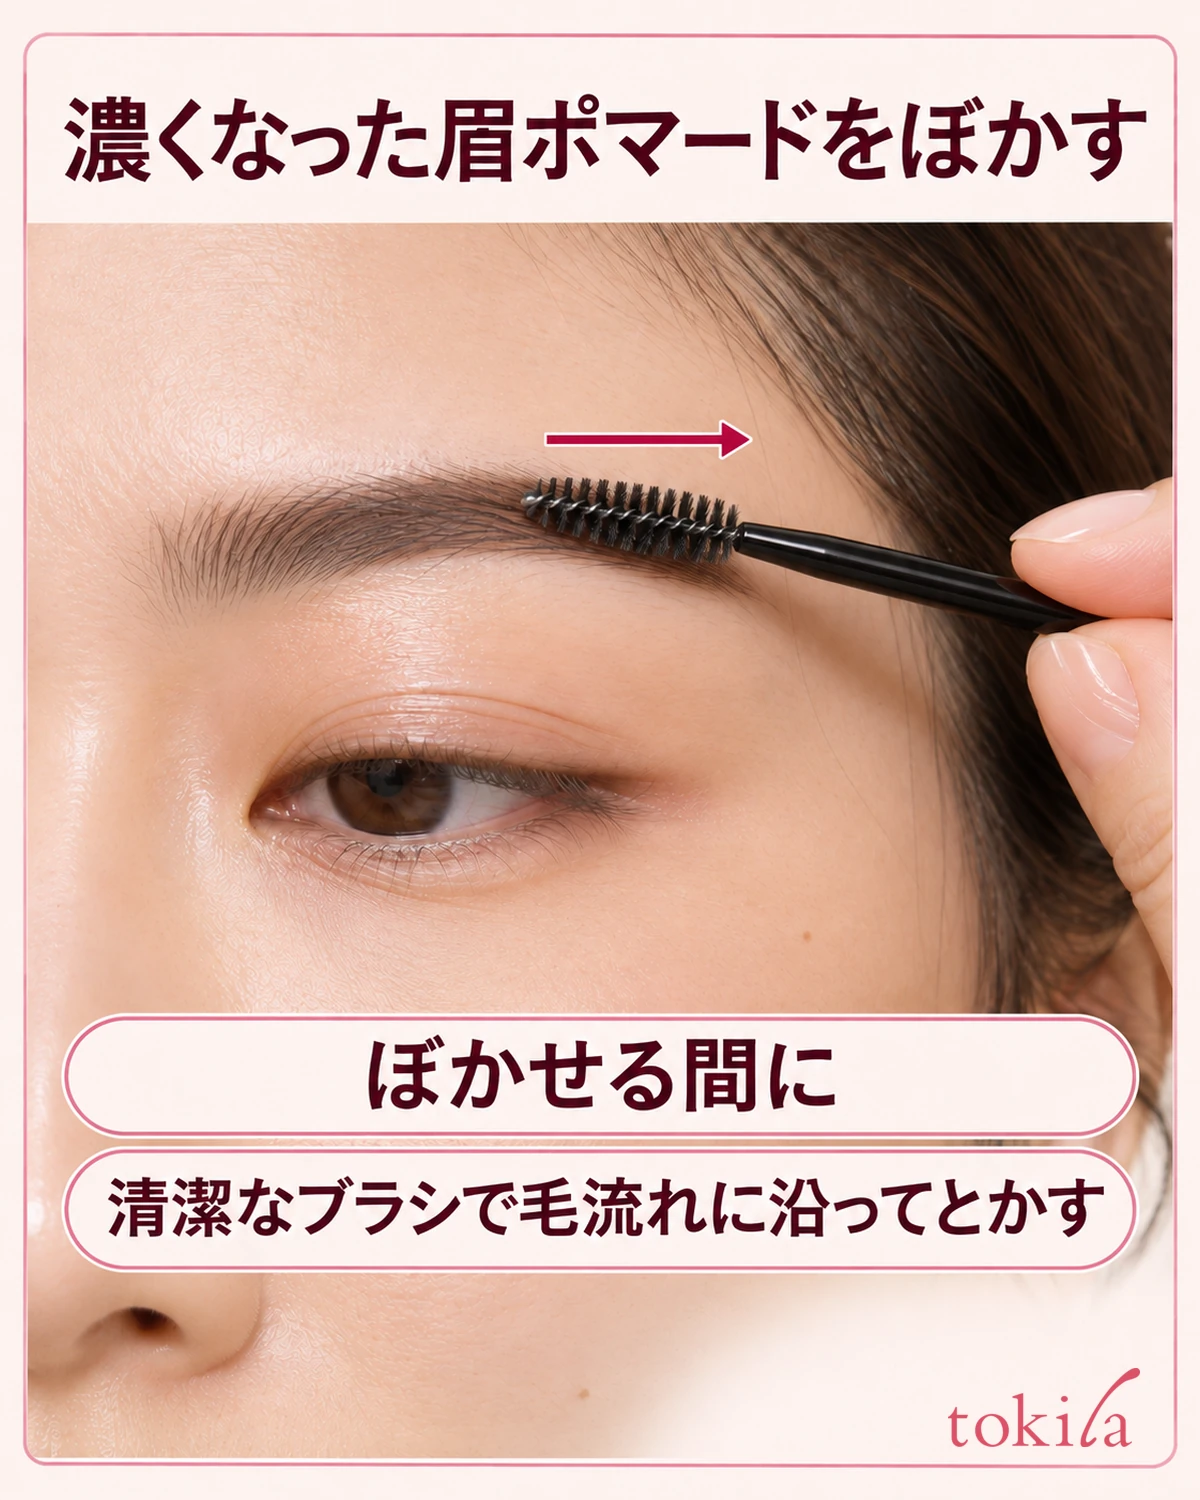
If part of the inner brow or a line at the tail looks too dark, check where the color has built up before darkening the other side to match. If your product can be blended with a brush immediately after application, lightly run a clean spoolie with no pomade on it in the direction of the hairs. Instead of combing the whole brow repeatedly, pass over the dark spot once and step back to check.
If the color has already dried and will not move, or if blending makes the line spread, stop rubbing and check how to remove your product. Distinguish between a stroke that extends well outside the outline and one that is in the right place but too dark. This helps you decide how much to redo.
If the same spot is likely to get too dark again, change just one thing first: pick up less pomade, spread it more thinly on the lid, or make the first contact closer to the arch. Knowing what you changed helps you tell whether too much of the brush touched the skin or there was too much product on it. When you finish, close the lid securely and care for the brush according to the directions for the pomade and the tool.