When a brow palette has a creamy wax next to a dry powder, it can be hard to tell which to pick up first. If yours is designed for outlining with wax before adding powder, use the tip of the brush to draw only where the hairs stop. Leaving the rest of the brow unfilled makes it easier to see where the powder should go next.
This guide is for eyebrow makeup palettes that contain wax and powder in the same case. They are used differently from clear styling wax that holds hairs in place or wax for hair removal. Start by checking whether the wax in your palette is for outlining and which product goes on first.
1. Identify the wax and check which product goes first
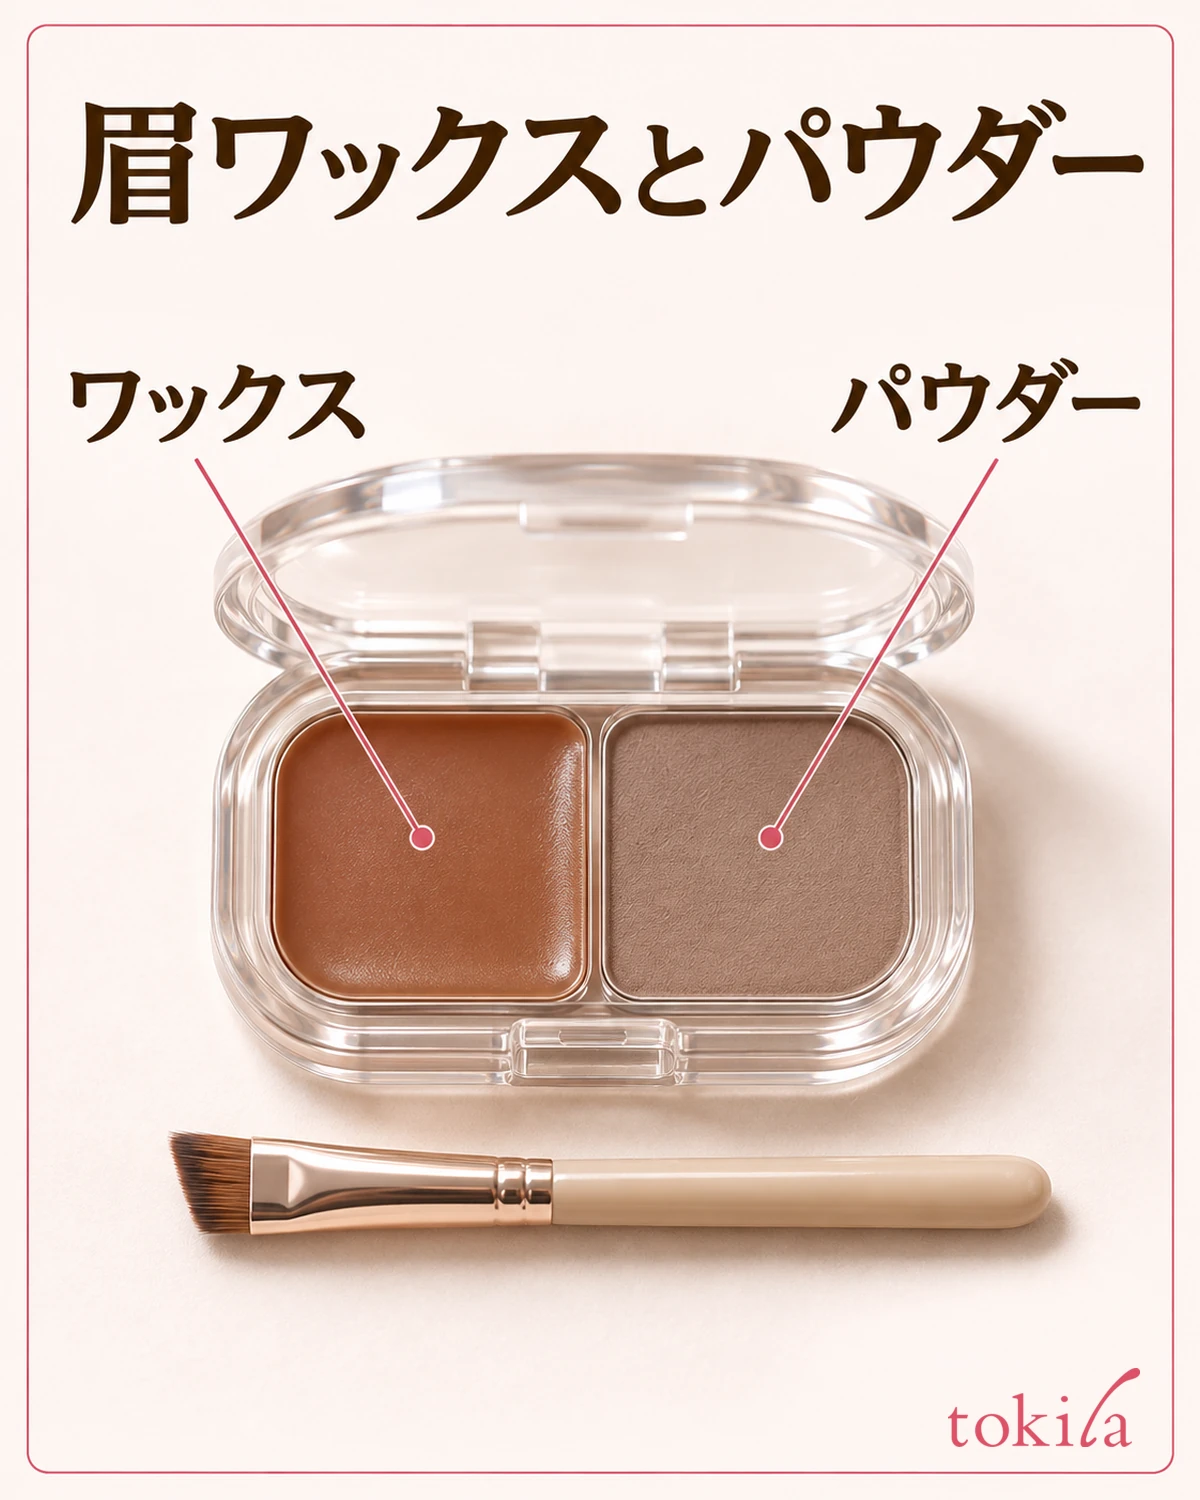
Open the case and match the placement of each product with the diagram in the directions. A creamy-looking pan may be wax and a less reflective pan may be powder, but appearance alone does not tell you which is which. Instead of starting with the darker shade, read what each product is for, such as outlining, creating a base, or finishing.
If the directions call for outlining with wax, use it first to fill out the brow shape, then add powder. Even if the wax is tinted, it does not have to provide all the color you want in the final look. Since you will add powder later, begin by drawing only where there are no hairs or where the outline looks broken.
If you are deciding what to buy, look beyond the shade pairing. Check when the wax is meant to be used and whether the palette has a tool for drawing fine lines and another for blending powder. If you are used to layering different shades from a powder palette, remembering that a similar-looking case may contain more than powder will help you choose.
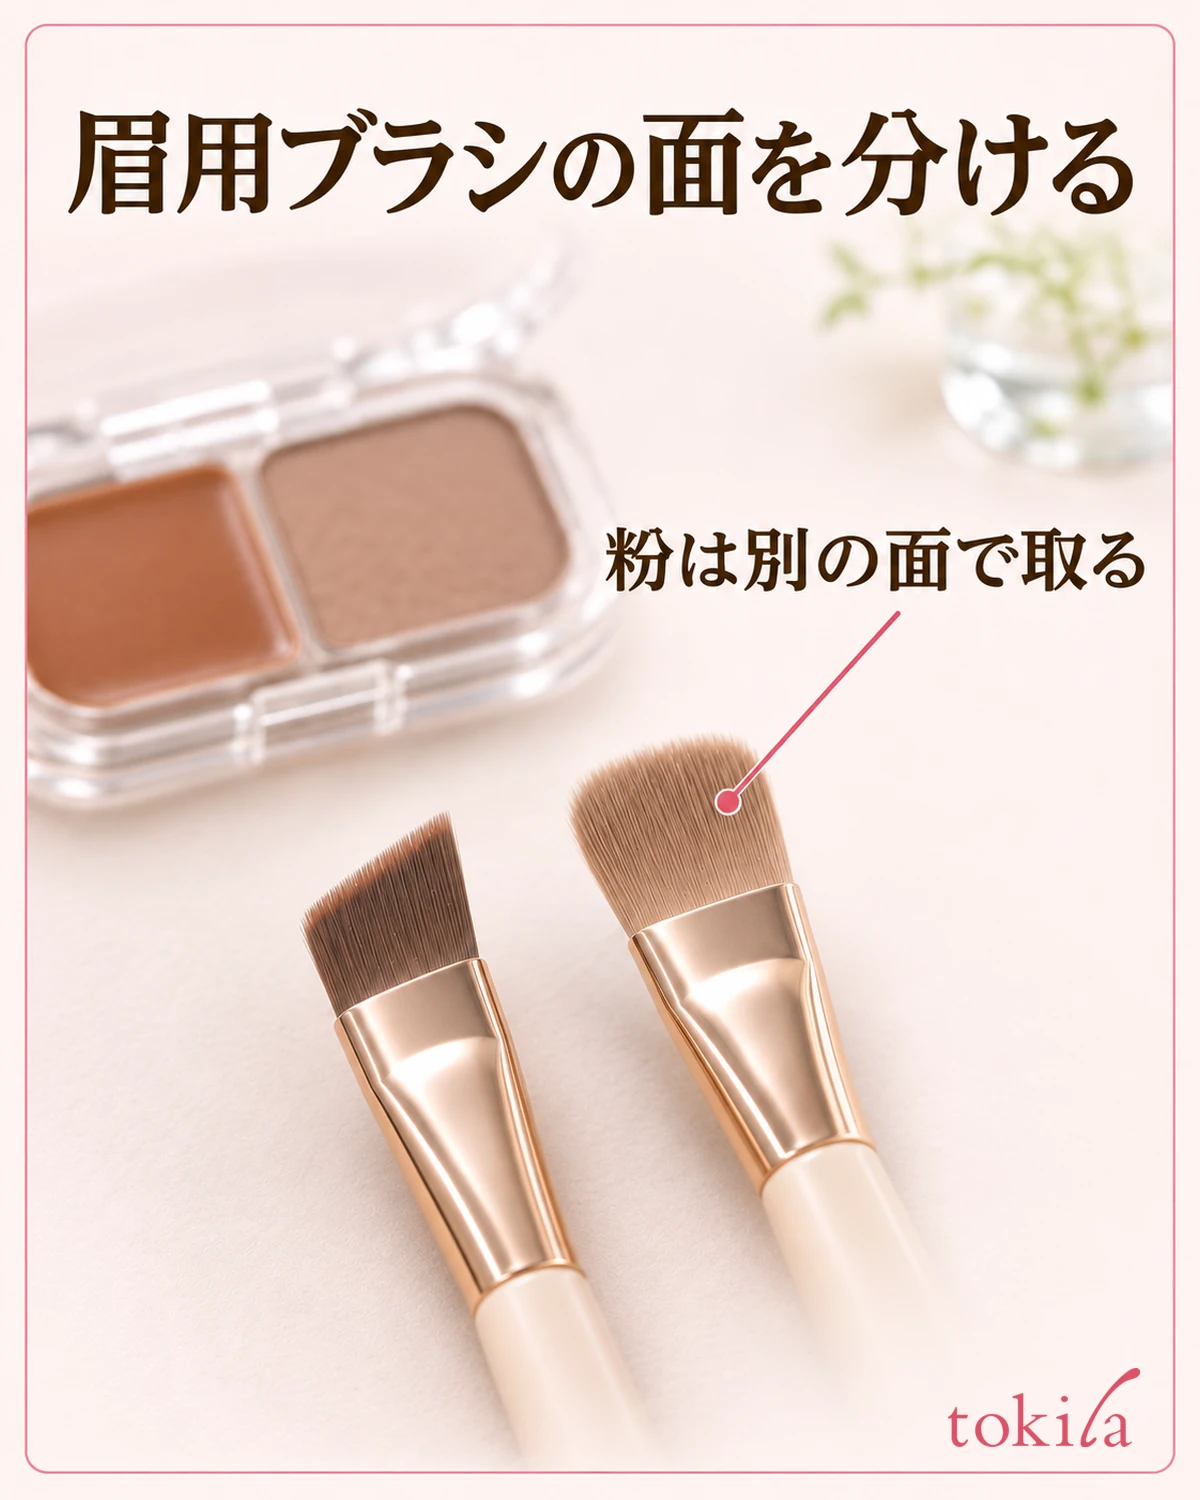
If the product comes with a brush, check which end to use for each formula. Dipping the same side straight into the powder after picking up wax can transfer wax to the powder pan. Use the ends separately as directed, or set out separate brushes first if the product allows it.
2. Pick up outlining wax with just the tip of an angled brush
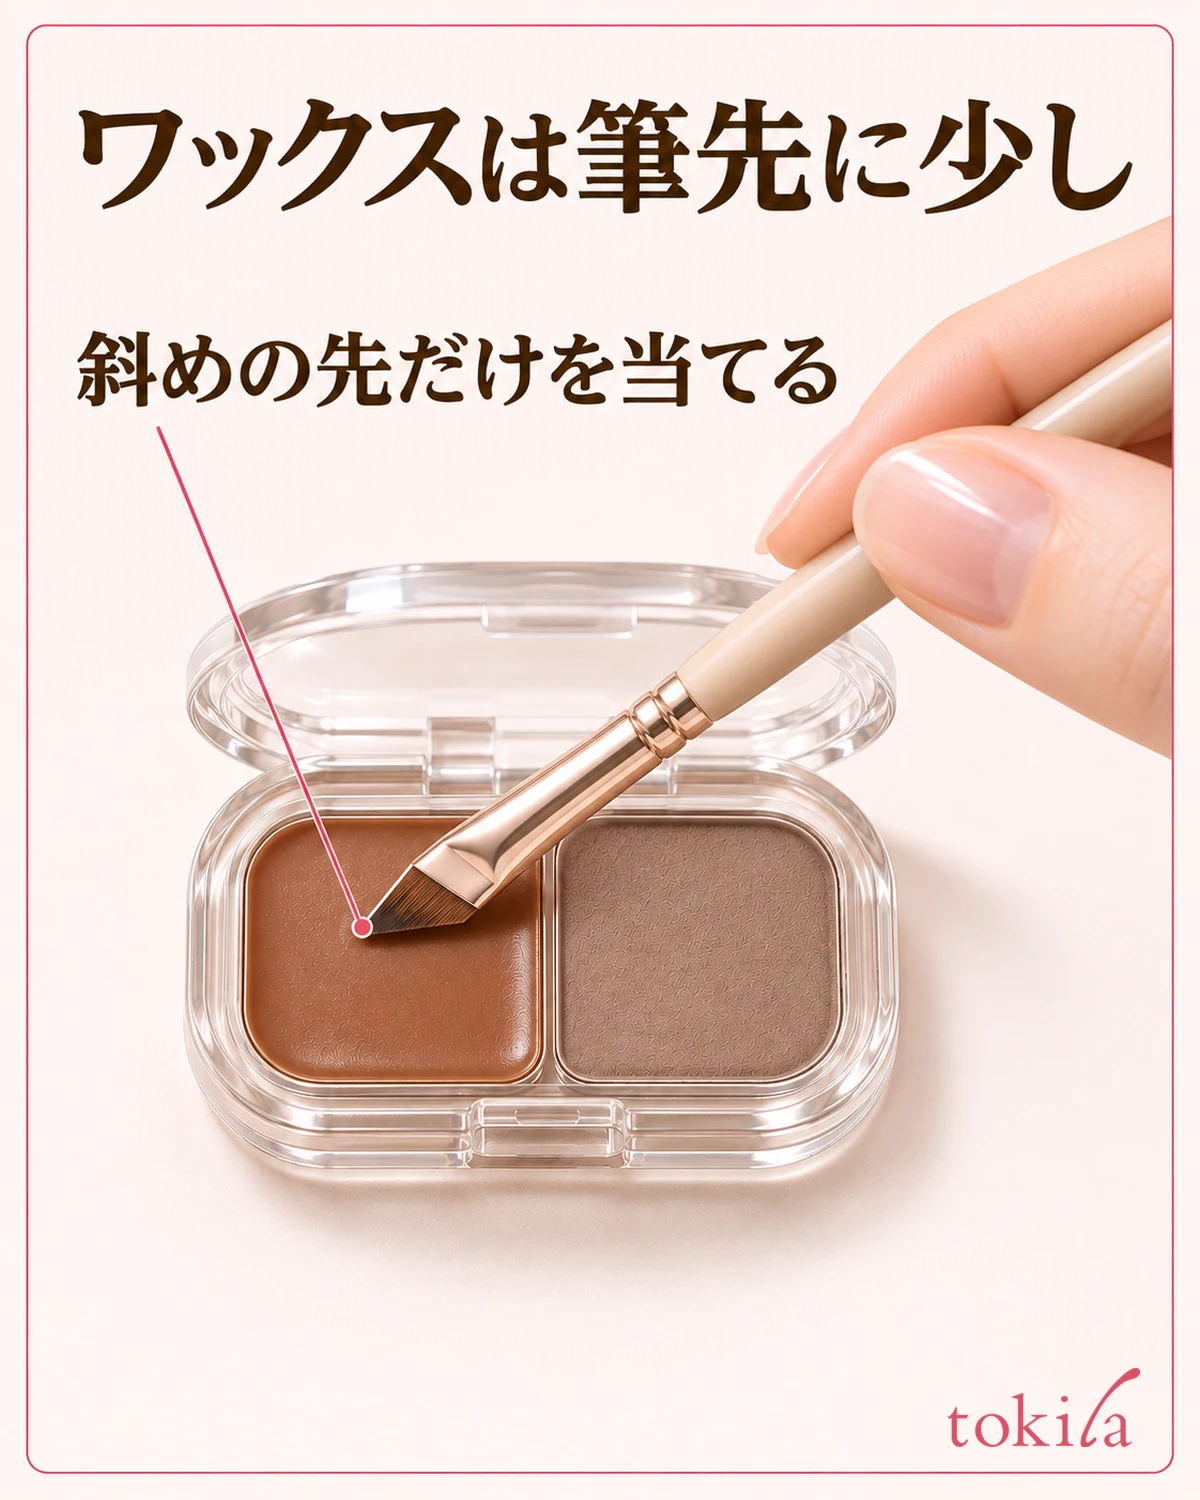
If an angled brush is meant for the wax, tilt it slightly and touch the angled tip lightly to the surface. Avoid pressing the broad side of the bristles into the wax right away. Start with just enough that you can still see the shape of the tip. Look at the brush from the side. If the tip has a rounded lump on it, pick up a smaller amount instead of spreading the lump from the front of the brow.
If the brush picks up nothing, check that the brush and formula match before pressing harder. Make sure you are not using the powder end and that leftover wax has not hardened on the bristles. Clean the included brush as directed, and avoid adding water or oil to soften the wax.
You do not need to start with the same amount for both brows. If one tail has a continuous line of natural hairs and only the other has a short gap, you will use the wax in different places and amounts. It is easier to adjust if you first choose where to draw in the mirror than if you try to match the amounts on the palette.
If you want to fill a narrow area but color coats the whole width of the brush, it will be hard to narrow the line once the brush touches your brow. Turn the brush to see which angle lets the thin edge touch the skin, so you can use the angled corner to place a short stroke.
3. Outline the brow tail with wax, filling only the breaks
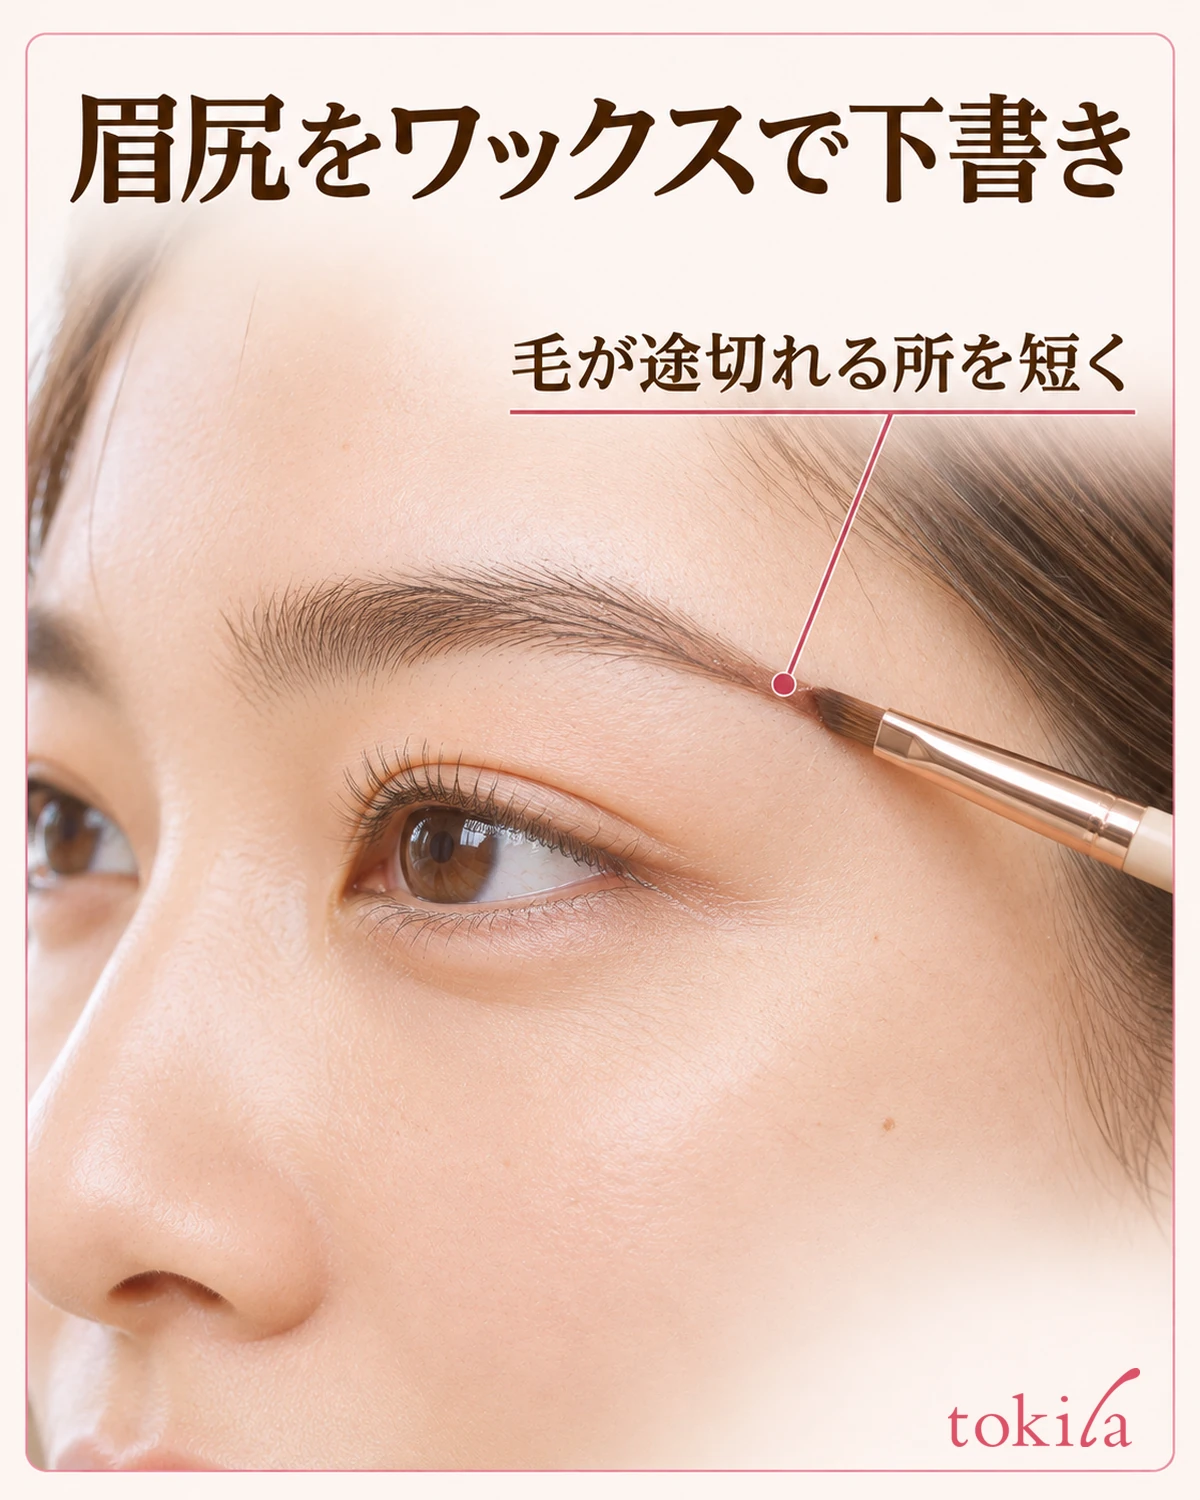
Set the mirror directly in front of you and look from the middle of the brow outward for the point where the hairs begin to look farther apart. If the tail needs outlining, touch the fine tip of the angled brush to that section and draw short strokes in the direction of the surrounding hairs. Lift the brush after each stroke instead of drawing one line from front to tail. That gives you a chance to check where to stop.
Filling a wide, hairless patch at the tail can make it look like a flat block of color. If the first stroke seems insufficient, check whether it needs to be longer or whether there is a separate gap beside it before making it thicker. If only the space beside the stroke is bare, add a short line there instead of retracing the first one.
If the wide side of the brush touches below the brow and makes the outline too thick, stop before adding powder on top. Gently clean up just the outside of the outline with a cotton swab or similar tool. If it is hard to remove, follow the product's removal instructions. Instead of rubbing and spreading the color, remove just that short section if needed, then redraw it with a different brush angle and amount of wax.
Check where both brows end once you have applied the wax. Even if their shapes differ slightly, you do not need to build up color until every sparse patch disappears. The next step with powder is to fill the visible skin between hairs. Keep that separate from extending the tail farther.
4. Fill remaining gaps with powder and use what is left on the brush at the front
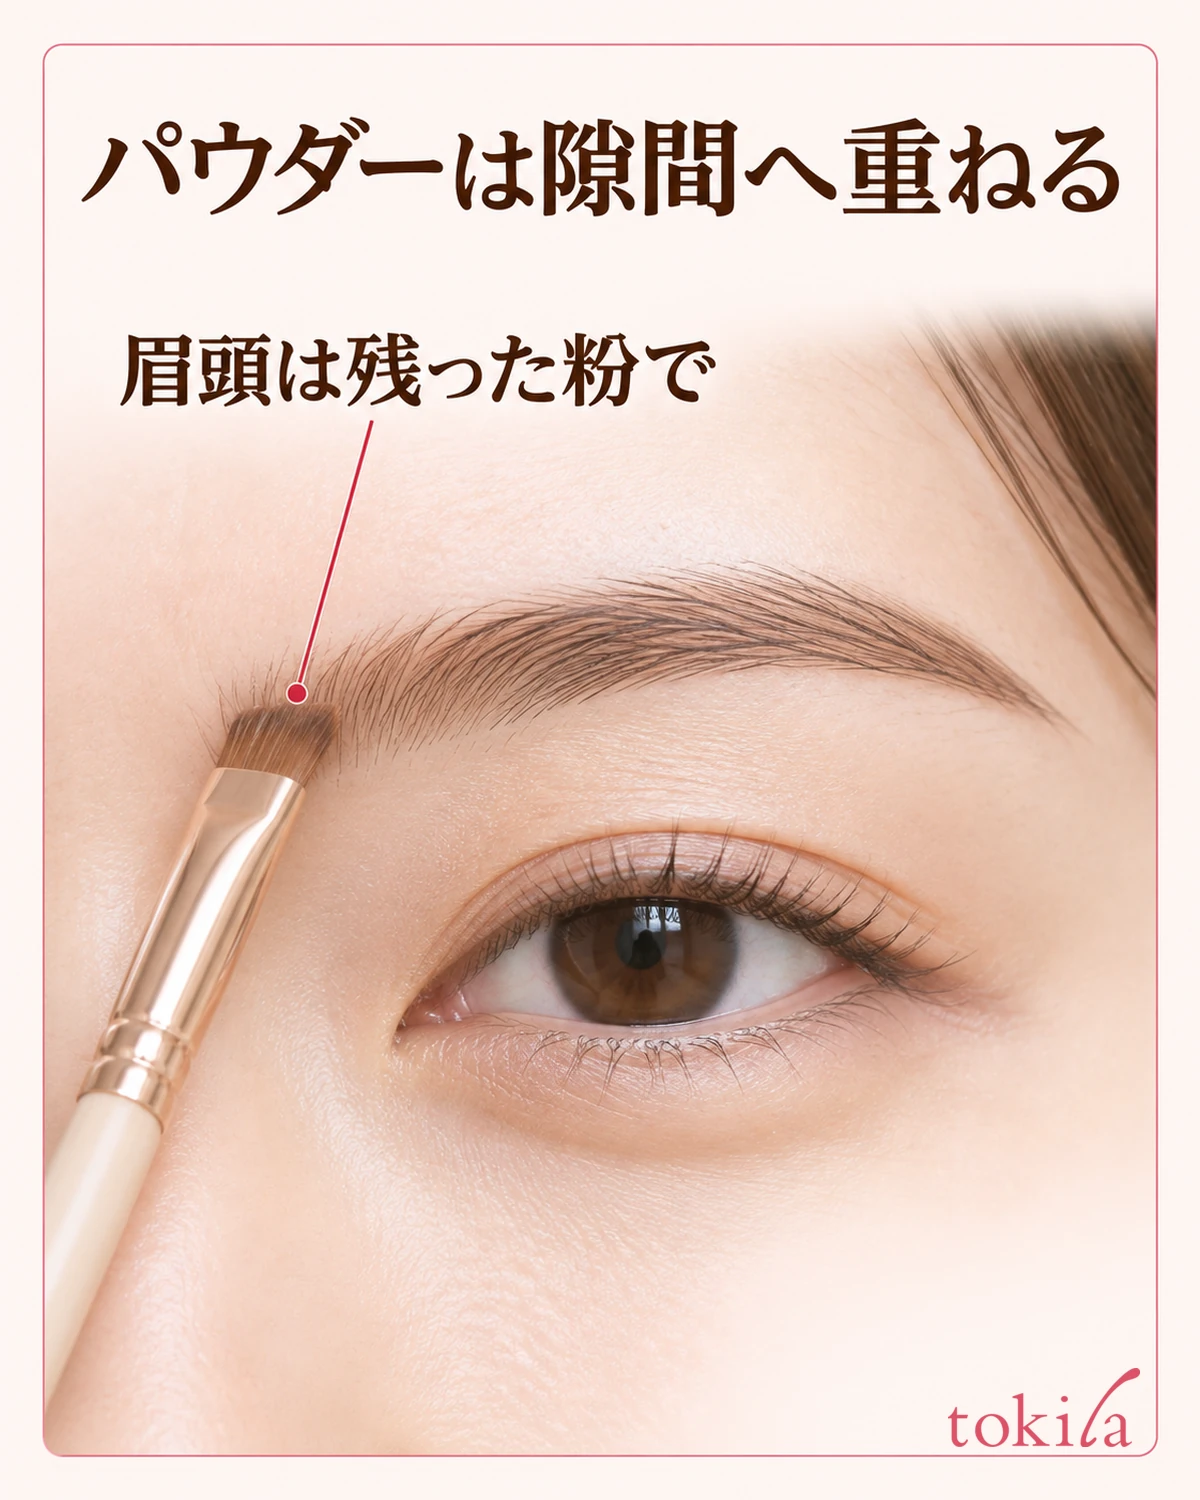
Switch to the powder side of the brush. Start from the middle of the brow outward, adding a little at a time where too much skin still shows after outlining. Rather than rubbing the wax line to spread it, place powder between the hairs in short sections and lift the brush. Pick up more powder only after looking in the mirror and finding a spot that still needs filling.
At the front of the brow near the nose, try the powder left on the brush before adding more wax to outline it. Touch the soft side of the brush lightly between the hairs and check that it has not left a line at the edge. If you put powder where there are already hairs, the distinction between hair and skin becomes harder to see. Leave areas without noticeable gaps alone.
If powder builds up in one spot, look closely to see where it has collected before adding color to the other brow to match. If it is concentrated where you spread the wax widely, adjust the width or amount of the outline next time before changing the powder shade. If the powder brush itself has clumps, check whether you kept it separate from the side you used to pick up wax.
If just the front of the brow looks dark and square, see how to fix brow fronts that look too dark. Before switching palettes, check whether you applied too much powder or whether the wax line under it is too wide as well. That makes it easier to decide what to leave in place.
5. Move the mirror back and check the depth of color and edges on both brows
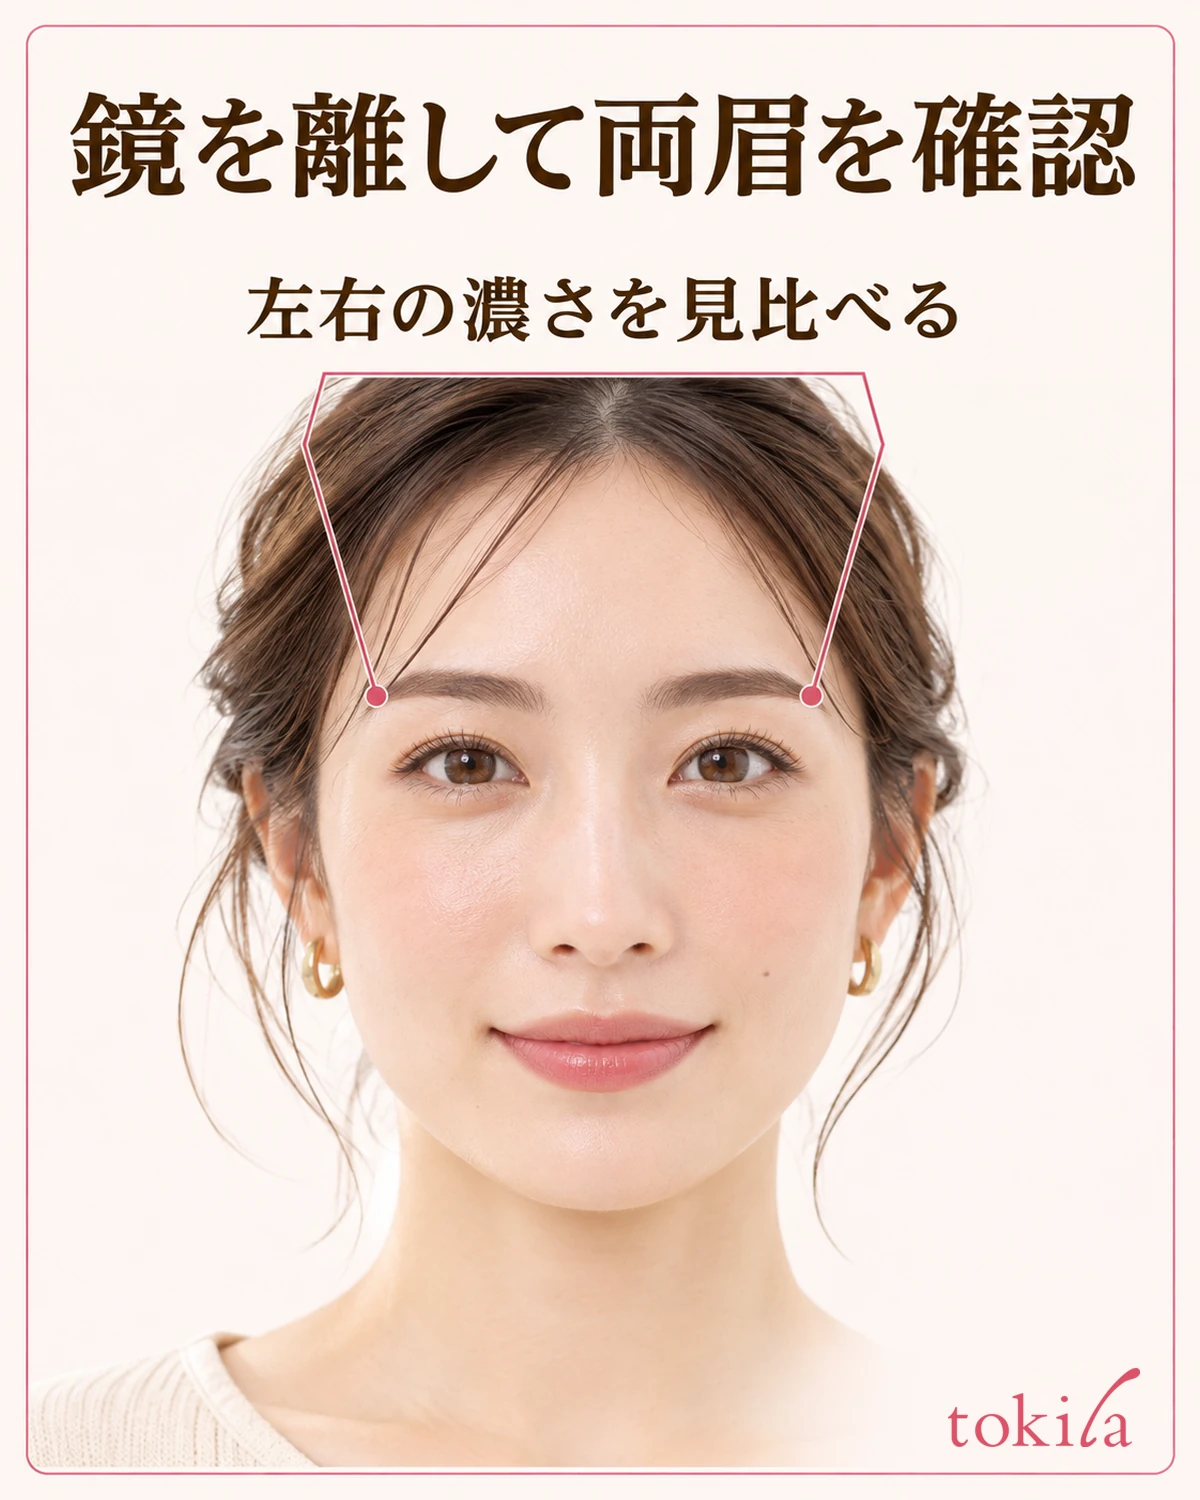
To finish, stop looking at each brow separately up close and move the mirror back a little so you can see both at once. Check where the tails end, how dark the fronts look, and how smoothly the color runs from the middle outward, in that order. If you notice a problem, choose the one spot to fix before bringing the mirror closer again.
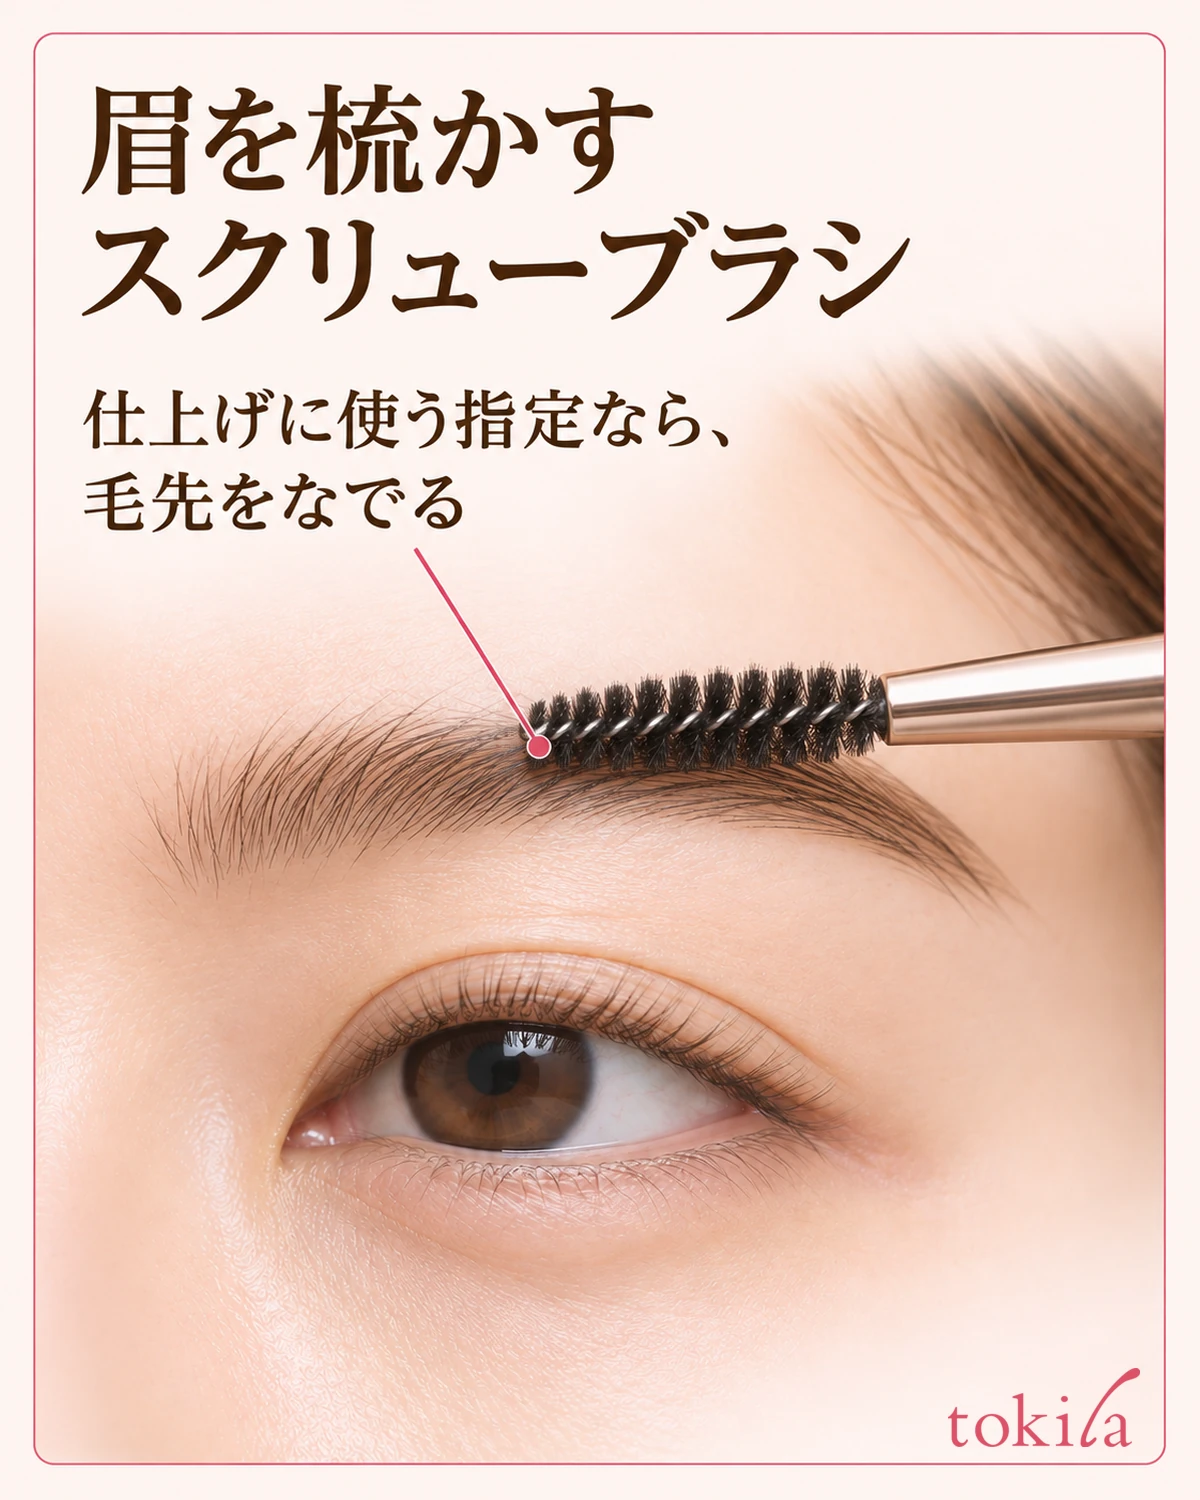
If the directions call for finishing with a spoolie, run it lightly over the surface of the brow hairs instead of scrubbing the skin where you applied color. Follow any direction specified for brushing. If only the hair tips point outward, check in the mirror where the spoolie will touch before moving it. That way, you will not pass repeatedly over the outline you want to keep.
On days when both brows look too heavy, change one thing the next time. If the outline is too long, shorten the section where you put the wax. If only the fronts are too dark, use what is left on the brush without picking up more powder. Changing one amount at a time, rather than making large changes to both, helps you see which step affected the depth of color.
Afterward, see what is left on each side of the brush and clean it according to the directions. Next time, remember to outline only where the shape needs filling, add powder to the remaining gaps, and look at both brows together at the end. When you switch to a new palette, check the role and order of the two products again.