Have you opened a cushion blush and wondered how firmly to press the puff, or whether to slide it over your cheeks? First, learn the sequence: lightly pick up blush from the cushion with the dedicated puff, check the colored surface, and touch it to your cheeks a little at a time. Rather than aiming for your preferred intensity in one application, look straight at your face and decide where to add more.
This article covers blush picked up with a puff from a cushion containing liquid. Powder blush applied with an included puff, and products with a sponge tip placed directly against the cheek, have different structures. Even among blushes applied with a puff, choose movements that match your product's instructions.
1. Check that it is cushion blush, along with application order and tools
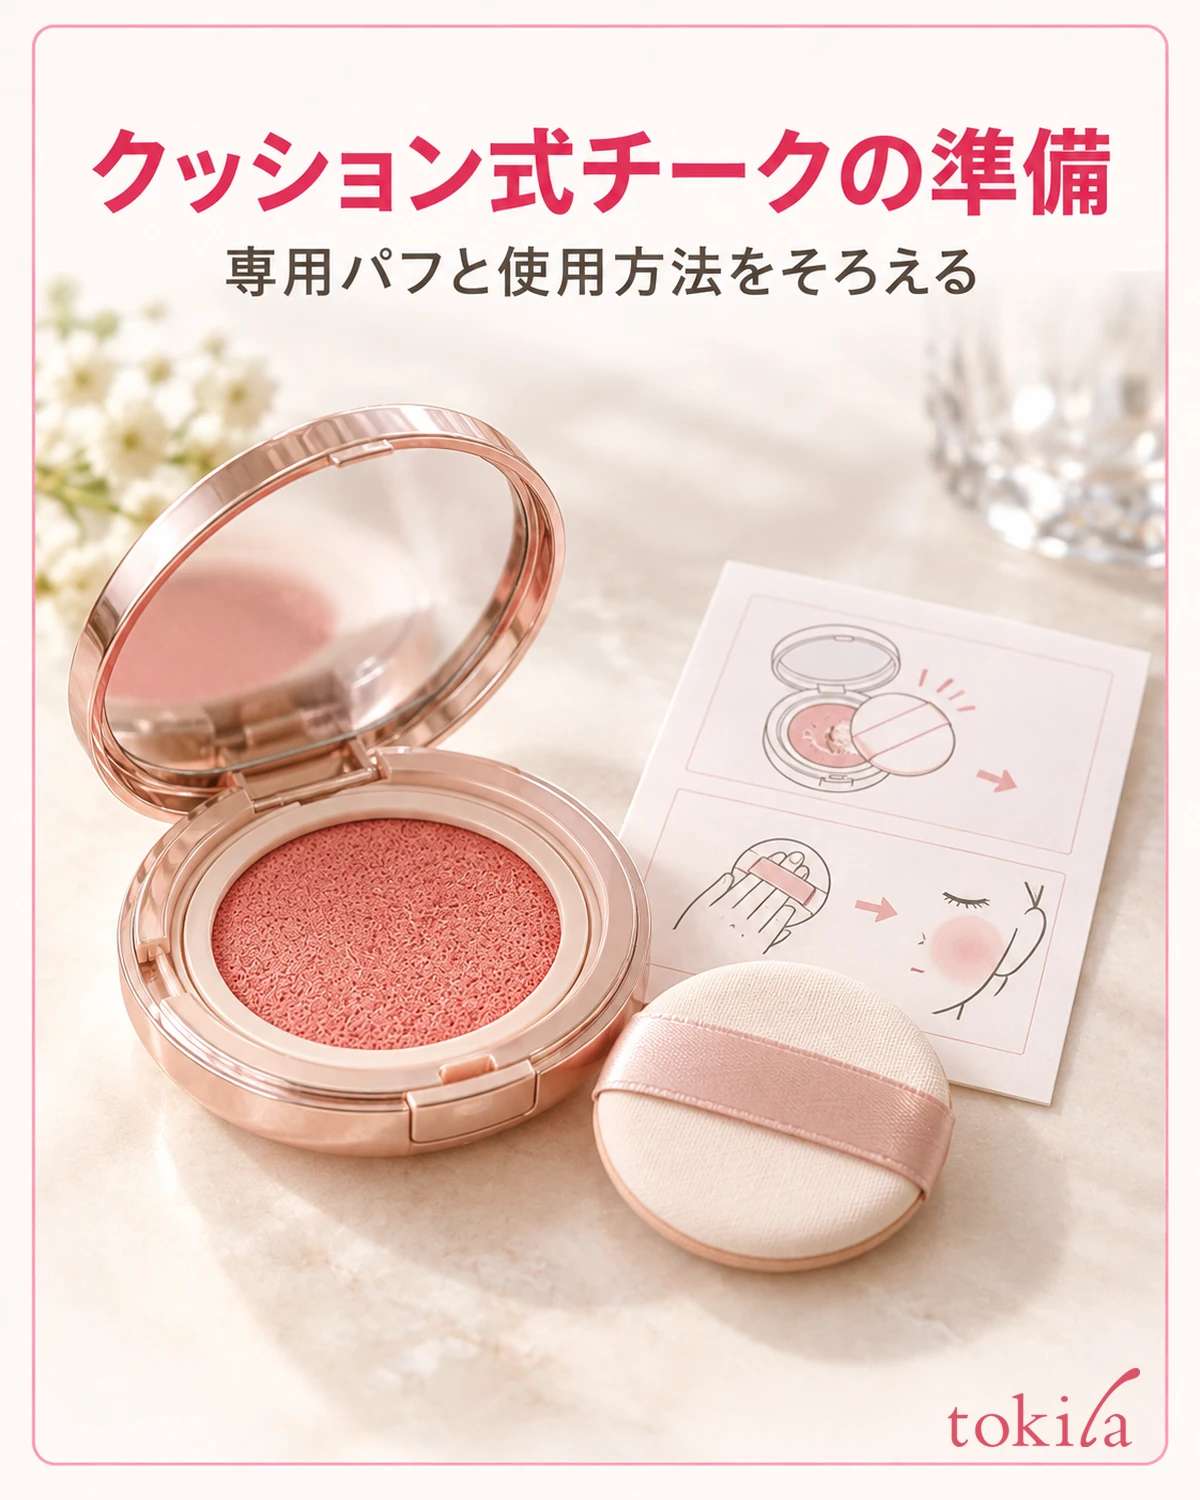
Read the container name and directions to check whether the blush is picked up by pressing a dedicated puff against a cushion containing blush. Cushion foundation may look similar, but its purpose and application area differ. Instead of applying the same approach used to pick up a dose of foundation, think about the amount needed to add color to your cheeks.
Determine its order within base makeup by reading the directions for the blush and the products layered with it. A cushion container alone does not establish a universal rule to apply it before or after face powder. Deciding how far to complete your base first helps avoid trying to rearrange the order after applying blush.
Use a clean puff compatible with your product. Sharing a puff already used for cushion foundation makes colored areas harder to distinguish. Keep blush and base puffs separate, and dry washed puffs according to their care instructions before use. Do not decide on your own to wet a puff whose instructions do not call for it.
When choosing a color, it is also important not to judge how it will look on your cheeks solely by its intensity in the container. The same color can create a different impression depending on the amount picked up and the area layered. On your first use, check the technique with one color and one puff. For color combinations, refer to lip and cheek combinations and consider your whole face, including your lips.
Prepare a stable place on the table for the container and mirror. Even when holding the container in one hand, position yourself so you do not tense the hand holding the puff too much. Follow instructions for opening films and included parts; start using the original structure rather than digging into the cushion with a finger or transferring its contents elsewhere.
2. Pick up lightly with the dedicated puff and check its colored surface
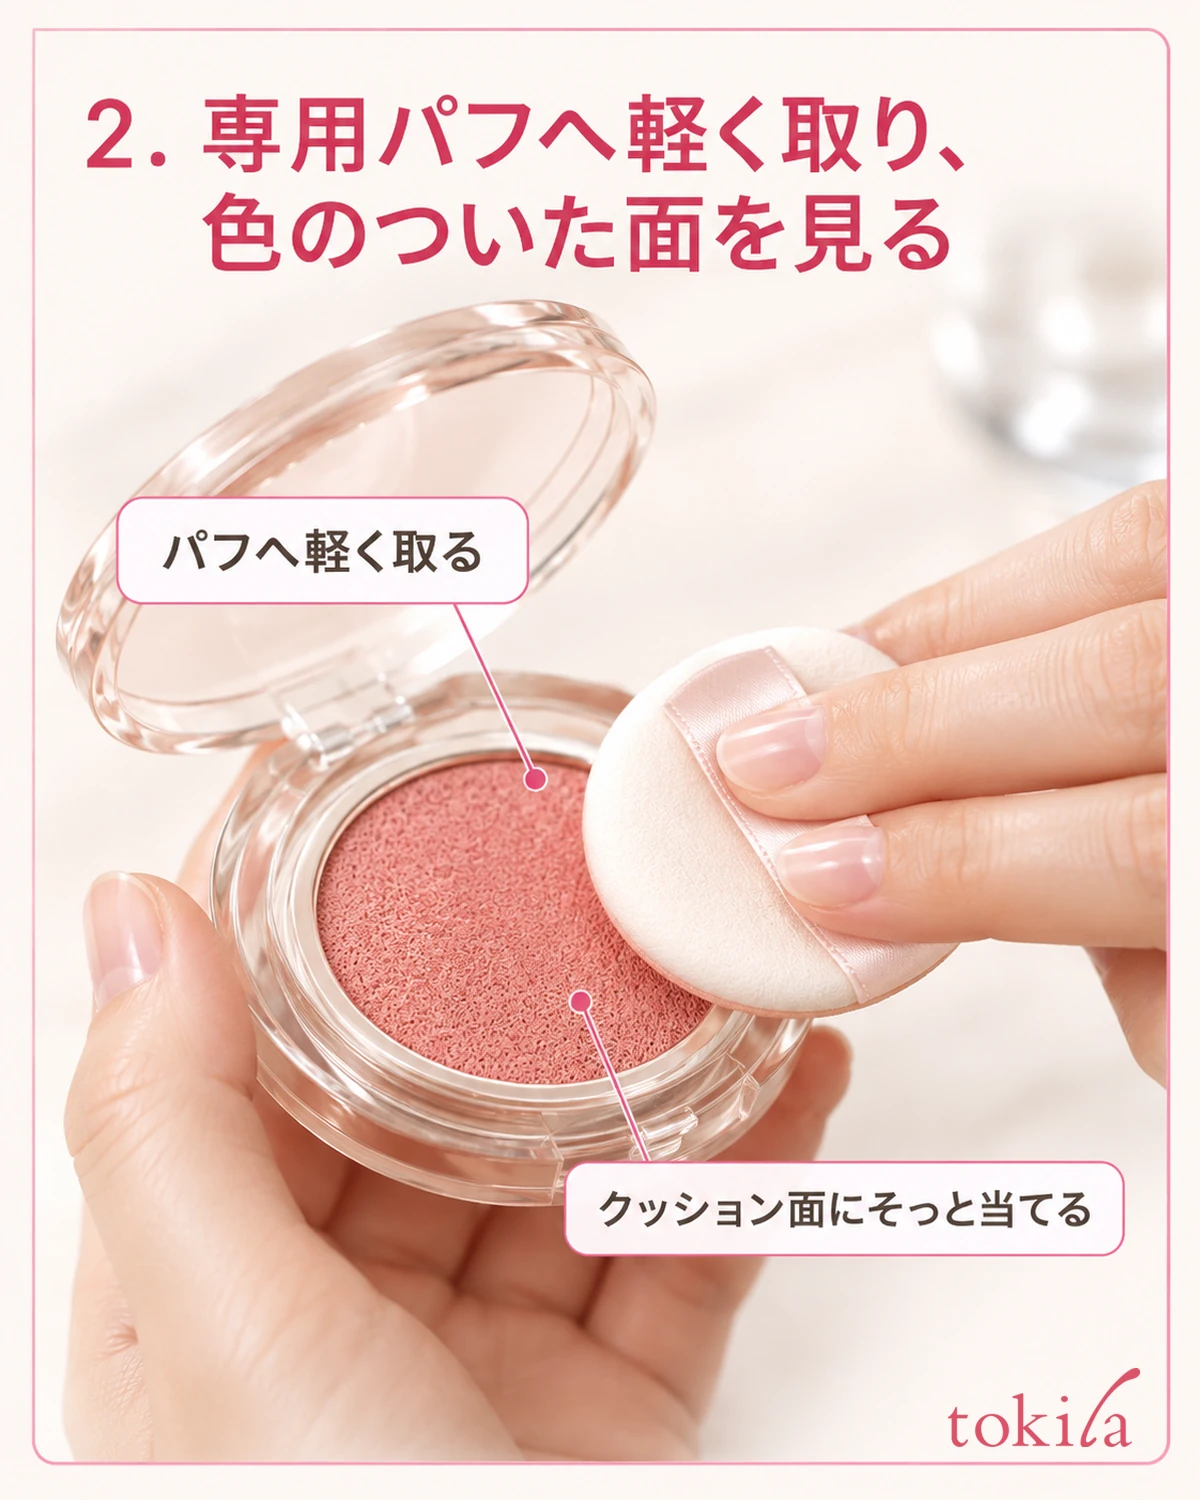
Open the inner lid and lightly press the puff's skin-contact surface against the cushion. If the product specifies a number of presses or a pressing position, follow those conditions. Pressing deeper does not necessarily give an amount that is easier to use, so on your first try, lift it away after picking some up once and turn the puff's surface toward you to check it.
Look at where blush has attached and whether too much liquid has gathered in one spot. Distinguish the ribbon side from the skin-contact side, and hold it so the colored area can face your cheek. The color and area shown in the supplementary photo are not a measure of an actual dose. Use it as a check to help adjust from a small amount with your own product.
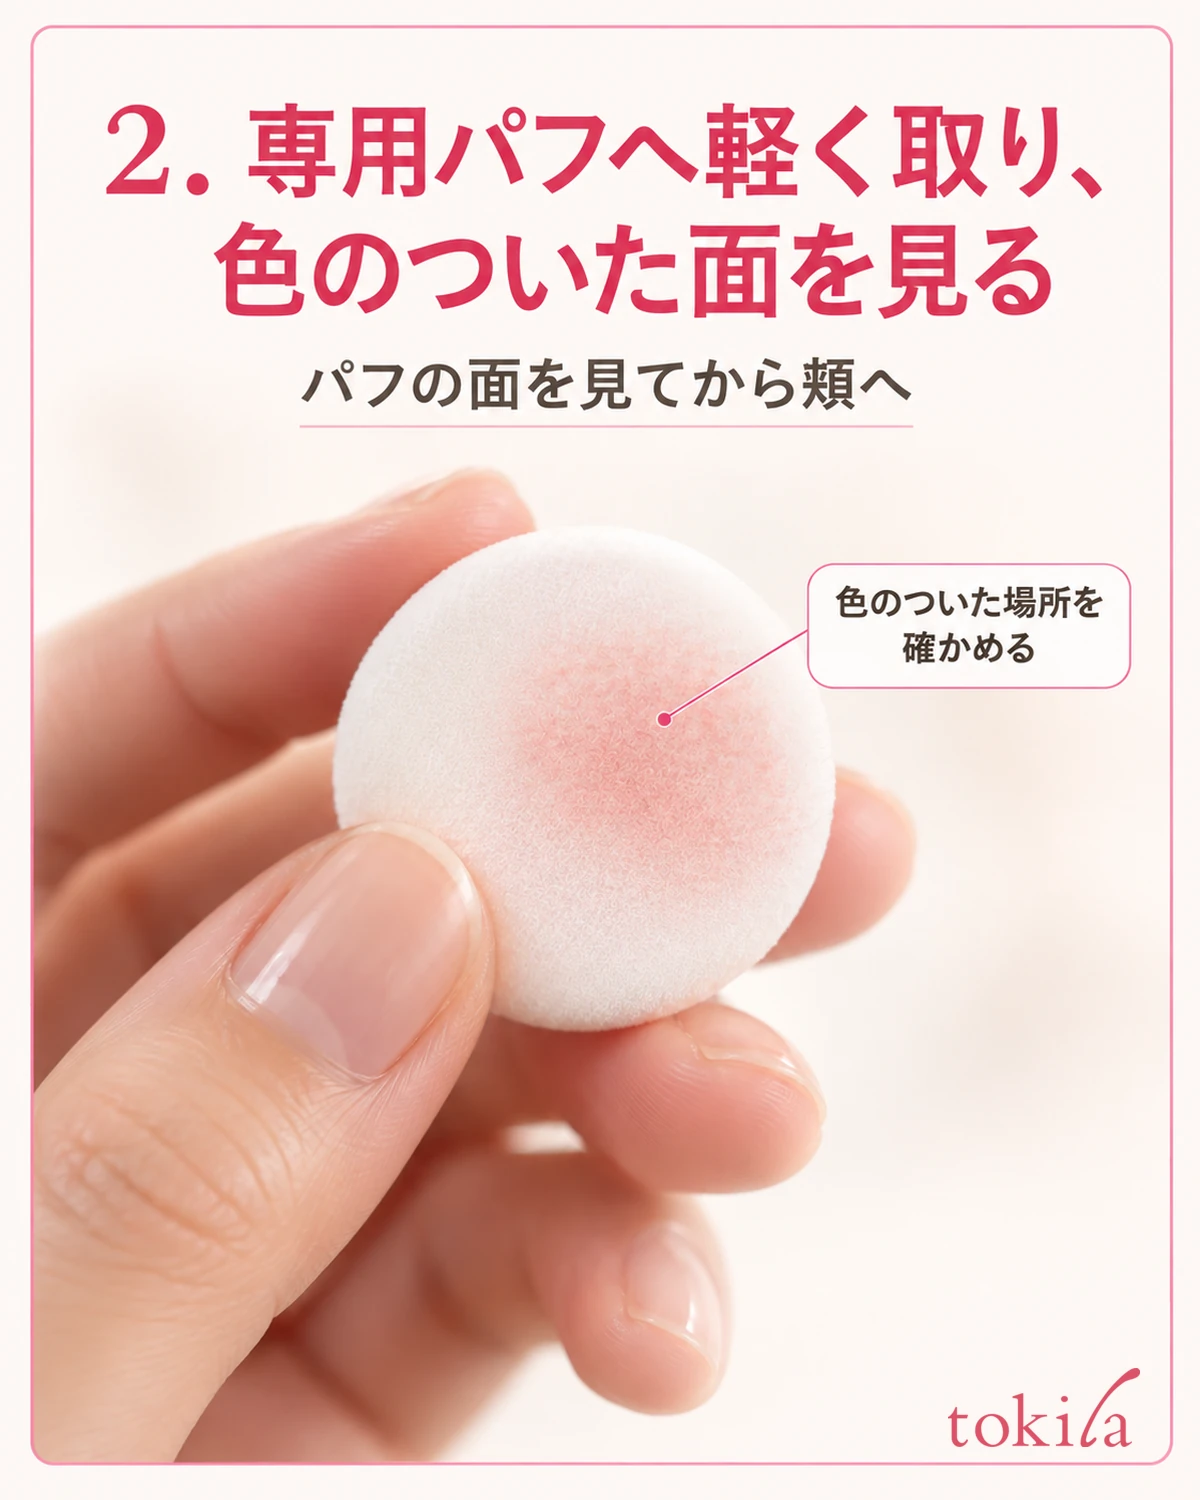
Rather than aiming to color the puff evenly all the way to its edge, check your grip and the position of the color before moving it to your cheek. Instead of pressing repeatedly because you cannot see color, also check its orientation and pickup surface. If the container's mirror makes the underside hard to see, move it a little away from your face and look at your hands.
If you pick up too much, prioritize the product's recommended adjustment method. Do not make scraping firmly against the inner lid or container rim, diluting with water, or pressing it back into the cushion universal steps. Instead of pressing an overly wet puff straight onto your cheek, start by considering a lighter touch the next time you pick up blush.
Even if the cushion surface is hard to see, check instructions before enlarging holes with a needle or nail, or flipping the cushion over. Handling a change in dispensing involves the remaining amount and container structure. Keeping first-use practice separate from dealing with the last of the contents helps narrow down the checks needed.
3. Lightly touch the puff where you want color on your cheeks
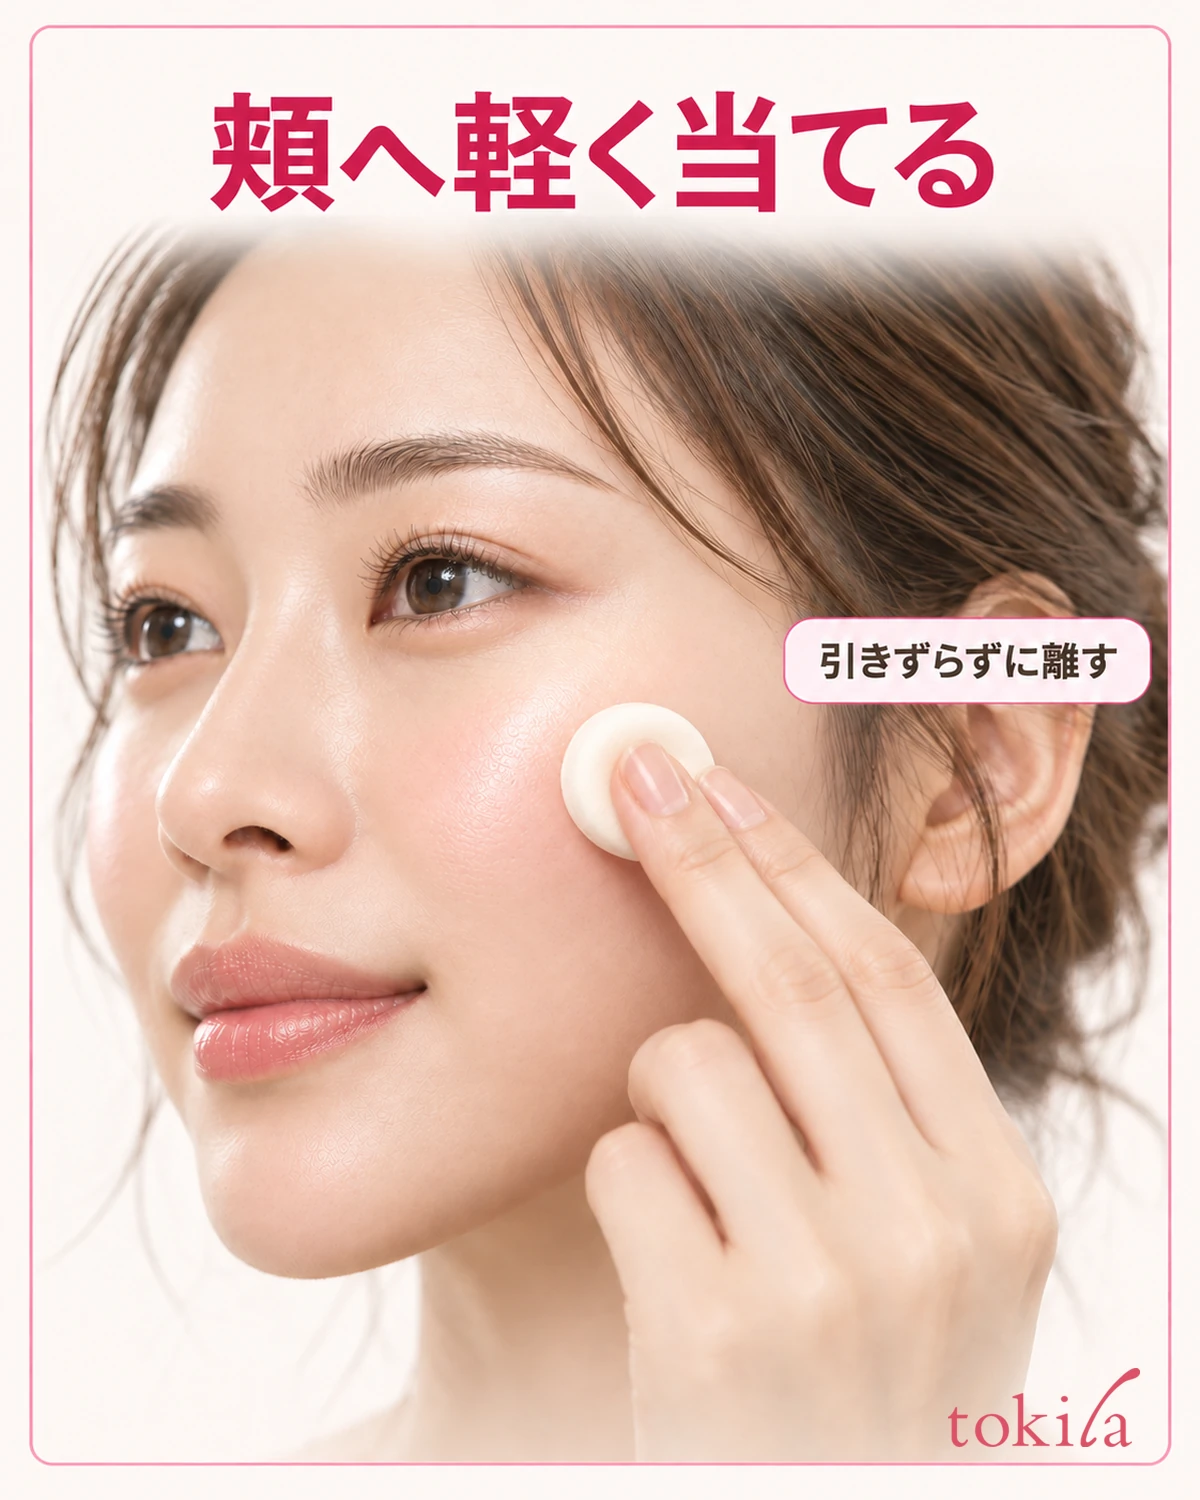
Look straight at your face and first decide where you want color today. If starting at the high point of your cheek, place a small amount nearby, then blend by lightly touching and lifting the puff. Instead of moving back and forth over a wide area from the start, check application over a small area before adjusting the surroundings.
Support the puff with fingers through the ribbon and turn its surface toward your cheek. Rather than dragging it with a large wrist movement, break the motion into light contact, lifting away, and slightly changing position. Avoiding pressure that pushes the cheek skin downward or sliding to the edge of your face in one movement helps you understand the area covered.
Instead of finishing one cheek intensely and trying to match the other, review both while they are still lightly applied. Cheek shape and lighting differ between sides, so touching them the same number of times may not produce the same appearance. Before adding more with the puff, return the mirror to the front and check whether only one side is in a dark shadow.
When blending color outward, first see how much you can adjust with the current puff before picking up more. Continually adding new liquid while trying to soften an edge changes both the area and intensity. The key is to separate your purposes one at a time: adding color, or simply blending the edge.
If your base seems to have shifted midway, pause rather than trying to fix it by pressing more times. An area with light color and an area where base has come off are different conditions. Examine the finish up close; if layering alone cannot resolve it, redo only the necessary area following the products' removal instructions.
4. Check the area from the front, then layer only where needed
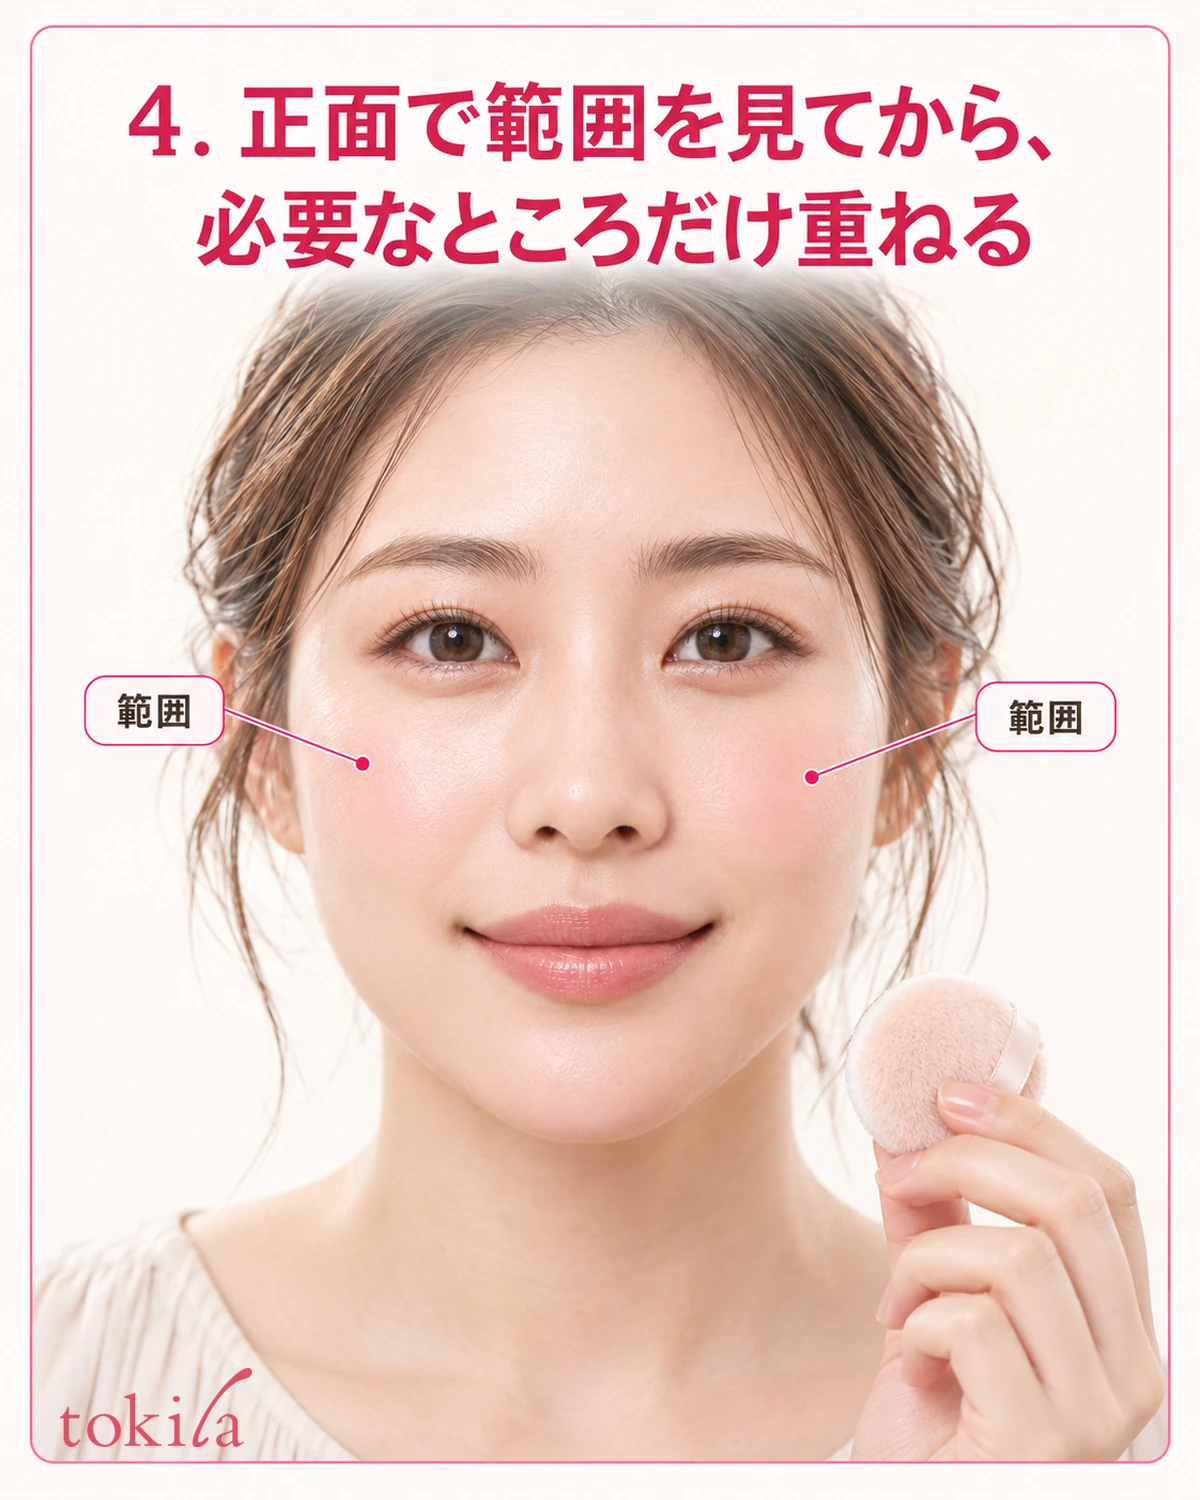
Move the puff away from your face and return the mirror to a distance showing your whole face, rather than only your cheeks. Check the visible colored area on each side, its distance from your nose and mouth, and the strength of the edges in turn. Small differences that stand out in a close mirror may feel fine when you see your whole face.
If you want a little more color, use a product suitable for layering and add small amounts where it looks light. Rather than spreading the same amount over the entire cheek again because it seems light, decide where to add before picking up more. Areas that reached sufficient intensity in the previous application can be left as they are.
If differences between sides bother you, align the mirror angle and lighting before judging. With only one side of your face turned toward the light, differences in shine and shadow are easily mistaken for blush intensity. Check whether the difference remains when facing forward, then decide where to add color. Do not use the cheek color in generated photos as the correct result for your own skin.
Before trying to conceal an overly intense area with large amounts of another color or foundation, identify the area needing correction. The response differs depending on whether it is only the edge or the entire cheek. How to fix too much blush can also help you distinguish the situation. If removal is necessary, adjust gently without rubbing, using a product suitable for the cheeks.
You can decide the final intensity in relation to lipstick and eye makeup too. Different preferred balances are natural on a day when blush is the focus and a day when you want your eyes to stand out. Rather than fixing a number of touches as completion, look at your whole face and decide when to stop; this helps you use the amount from your first try as a guide next time.
5. Put away the puff and container and decide how to pick up blush next time
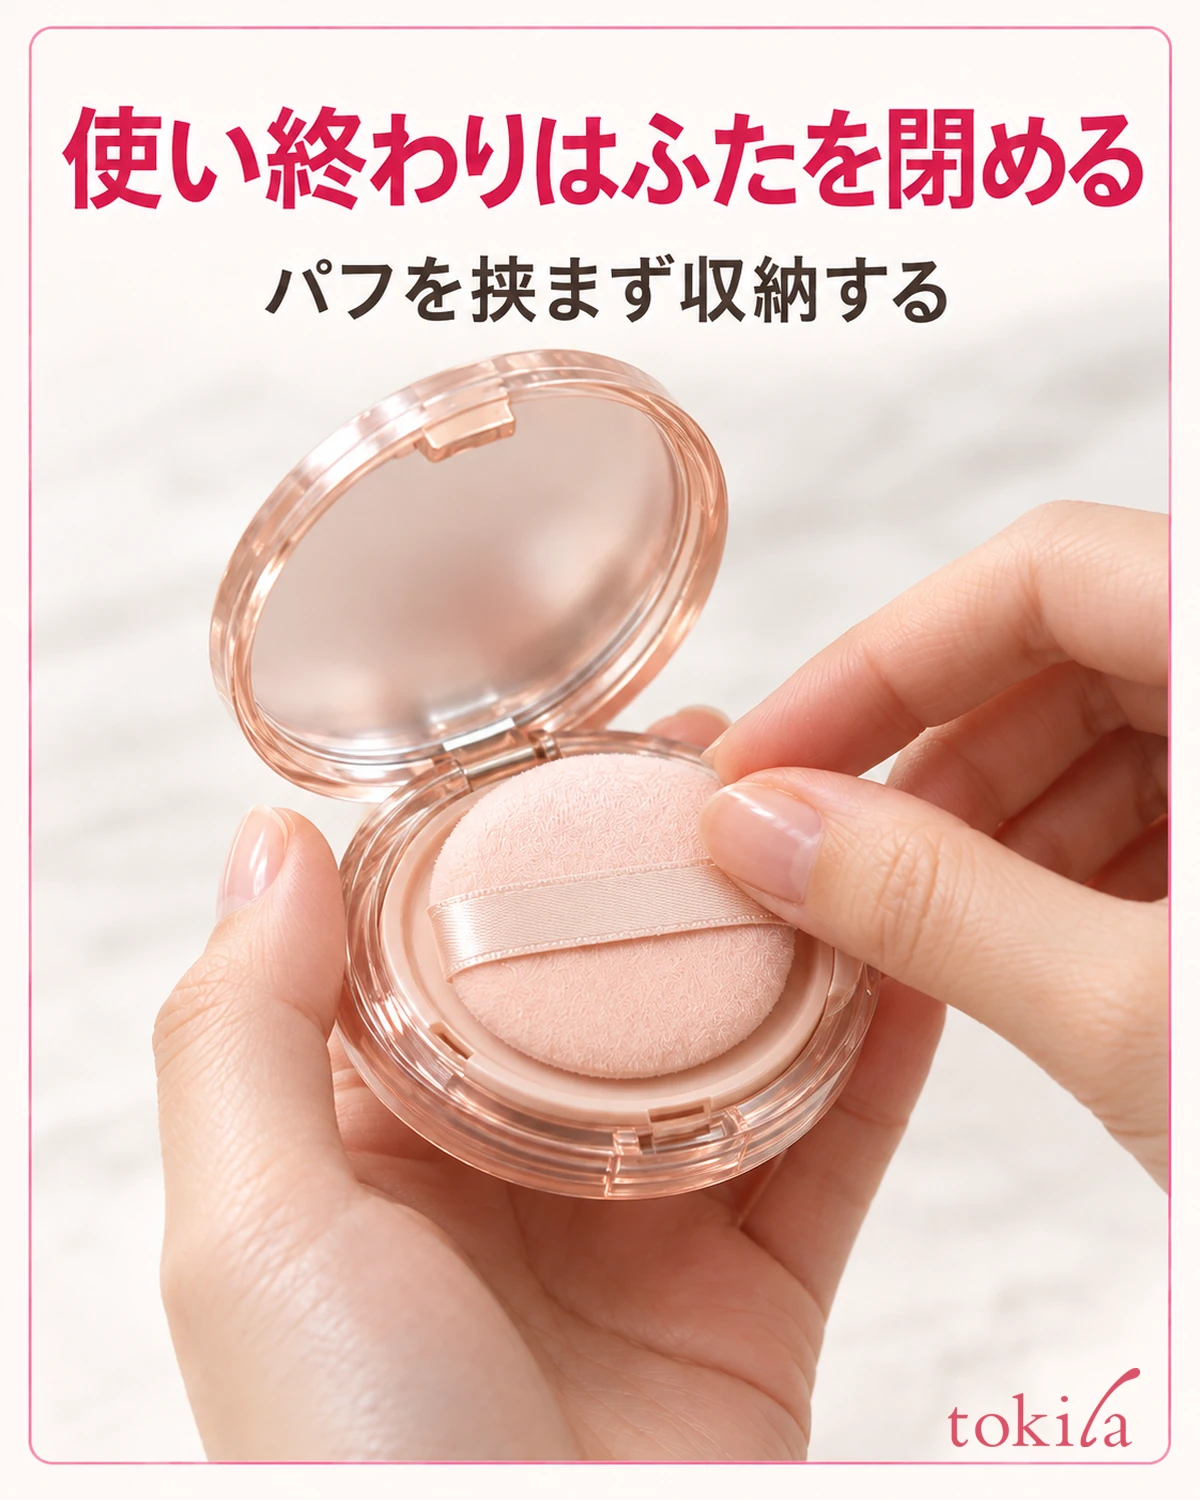
When finished, close the inner and outer lids as directed for the product. If it has puff storage, return the puff there. Keep the liquid-containing cushion surface separate from the puff storage, and check before closing that the puff's edge is not caught in the lid rim.
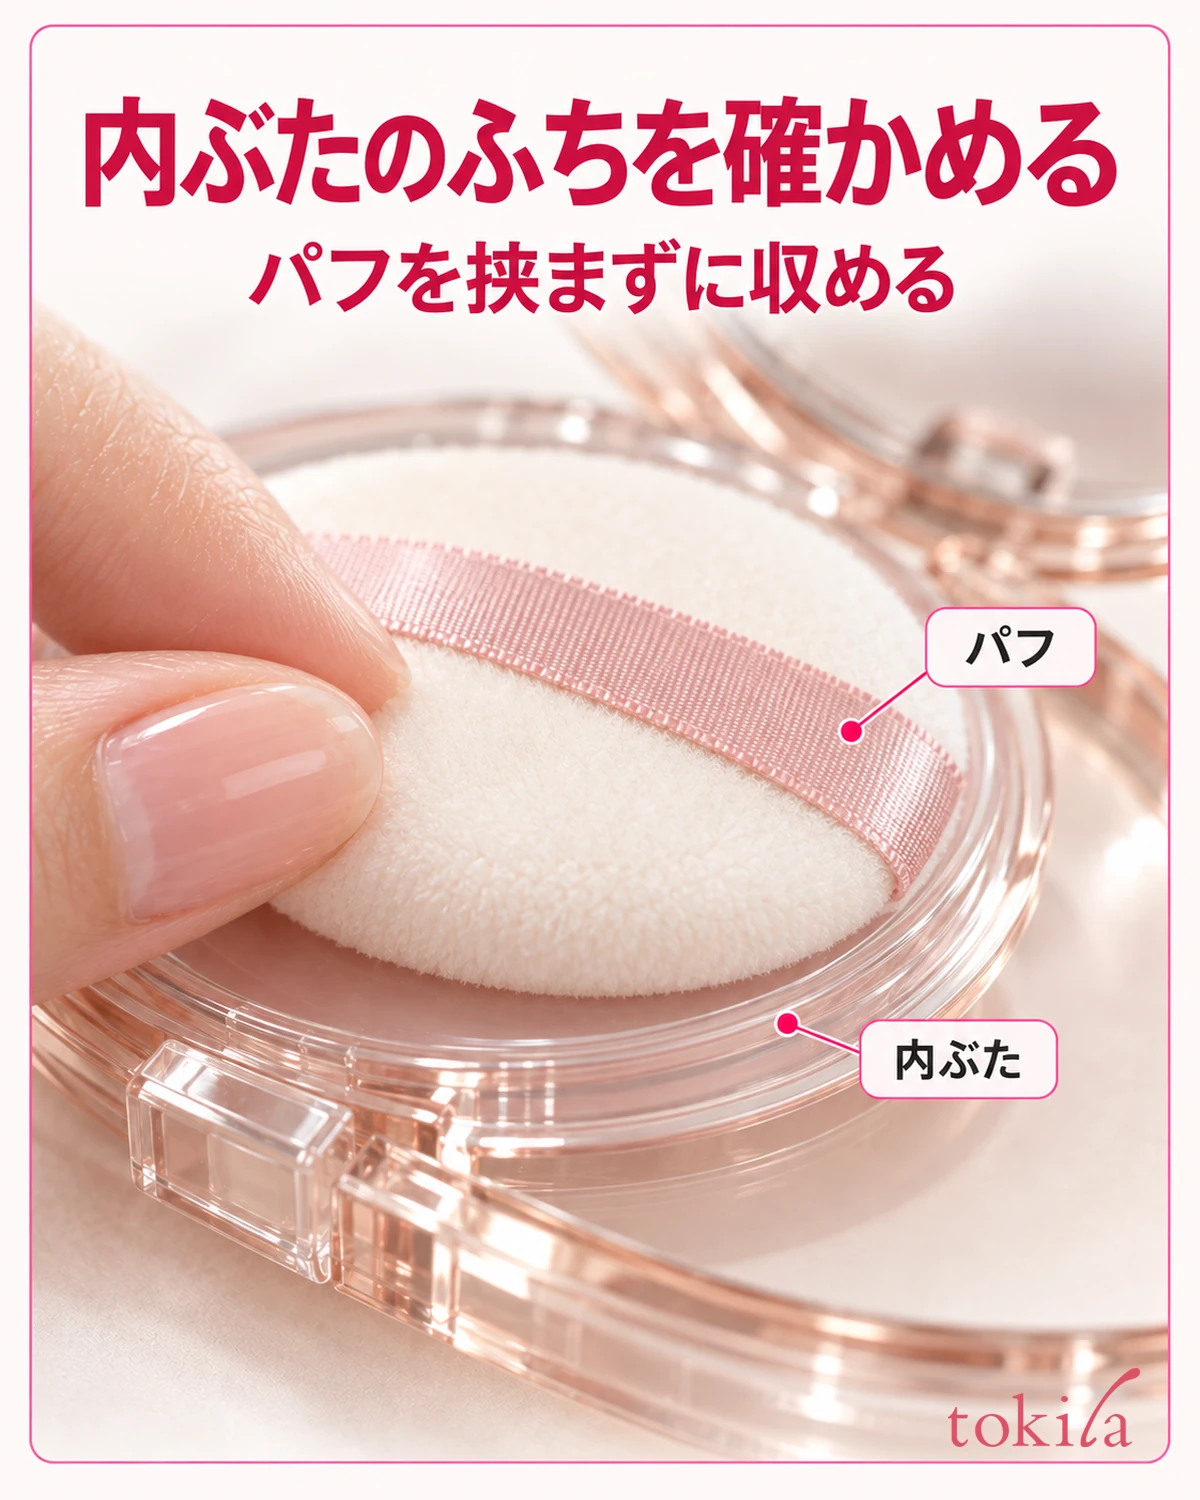
The supplementary photo enlarges the relationship between the inner lid's rim and the puff position. It is intended to show whether stored items overlap, rather than how to press firmly to close it. Case structures differ by product; if yours lacks the same storage shape, follow its instructions.
Before caring for the puff, check whether it is washable, which cleanser can be used, and how to dry it. Do not establish a universal rule to rinse a puff containing residual liquid every time or spray it with alcohol. If wear or dirt concerns you, check compatible replacements too, rather than compensating for an unusable puff with pressure adjustments.
If redness, itching, irritation, or other skin abnormalities occur, stop using it and consult a dermatologist or similar professional according to the product's precautions. Treat makeup adjustments for overly intense blush separately from a product that does not suit your skin. It is also important not to layer onto wounds, swelling, or other abnormal areas to cover them with color.
For next time, remember just one thing: the pressure used to pick up blush, where you first placed it on your cheek, or the area you added to. If it applied too intensely this time, narrow down what to change, such as using lighter pickup pressure next time. Check the container mechanism, pick up a little, place it lightly, and look at your whole face before finishing. Try this sequence with your blush and your preferred finish.