Have you bought a slim nail spatula but wondered which end to use, or where to put it while stirring gel? A spatula has a different role from an application brush. Even tools that look similar may differ in the materials they can handle and how they should be cared for.
This article explains how to check a nail spatula's shape and purpose, prepare before handling materials, and separate and put away the tip you have used. It does not provide recipes for changing gel formulas or methods for filing natural nails. Work with the instructions for both your tool and your material as a pair.
1. Match the spatula's purpose with the material's instructions
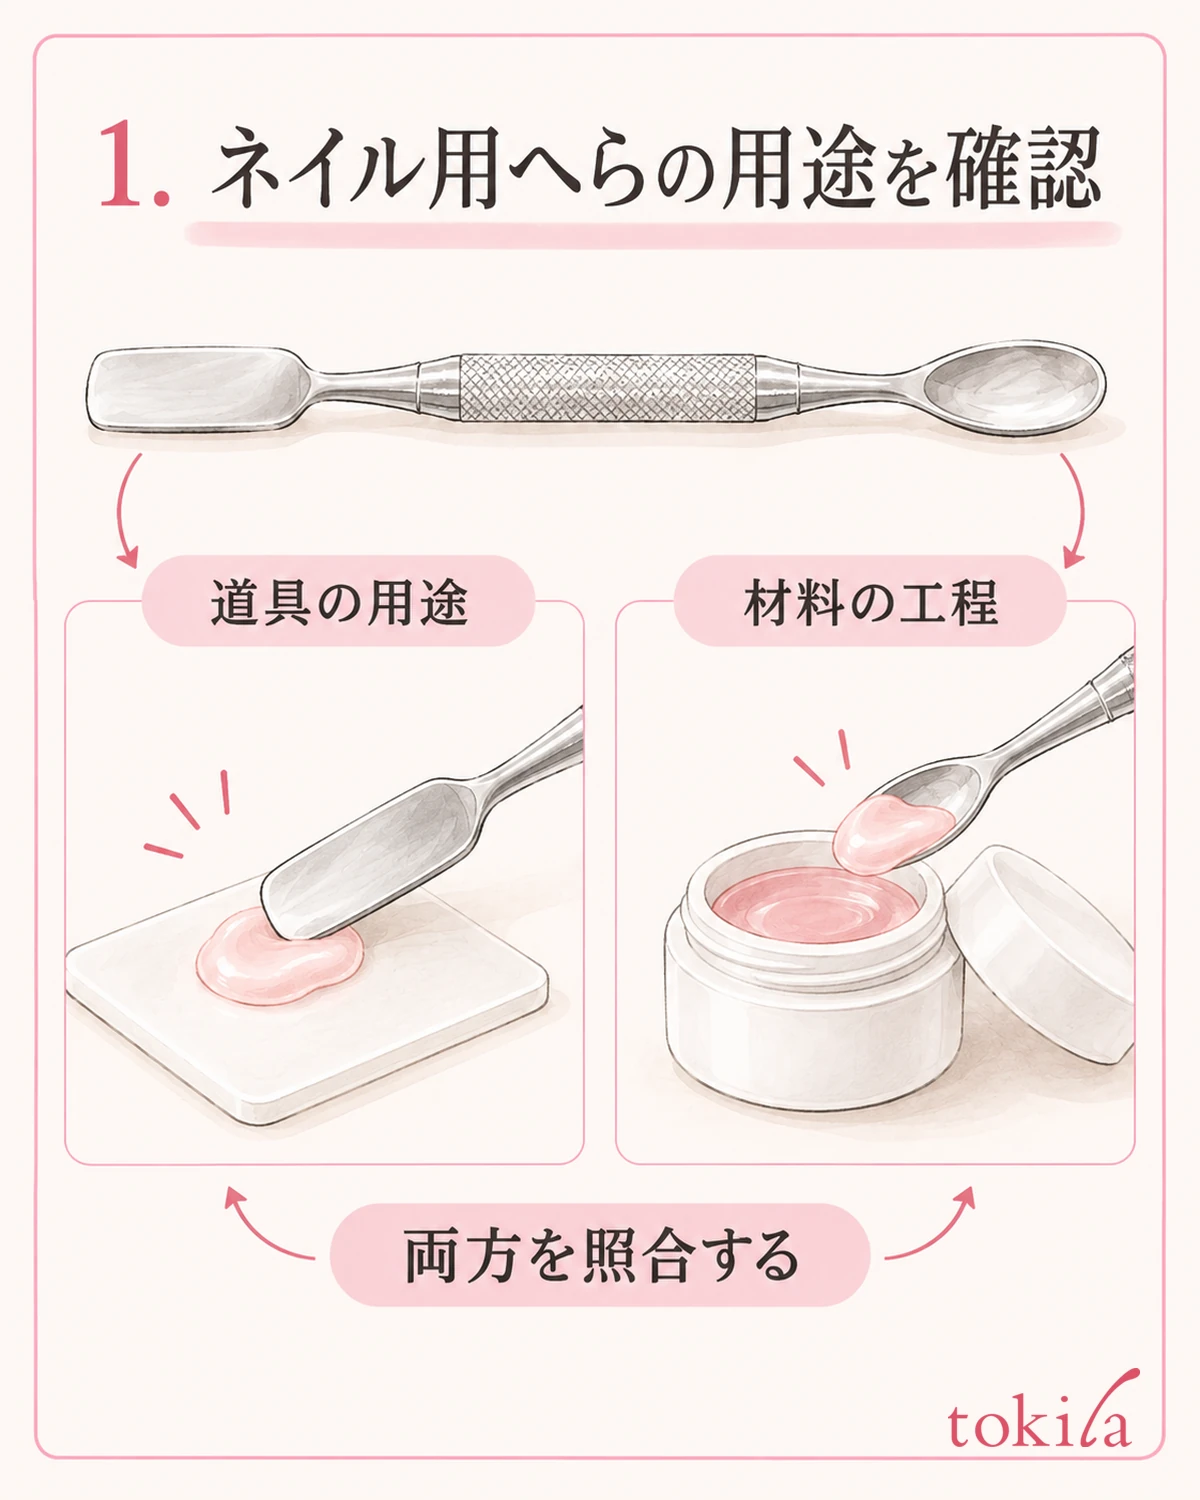
First, read the tool's packaging to find out what the spatula is intended to do. Distinguish between listed uses such as stirring gel and scooping powder or glitter. Start by avoiding the assumption that the shape of the blade makes it suitable for every nail material.
Next, read the instructions for the material you want to use. Check whether it needs stirring, requires no stirring, or specifies which other materials it can be mixed with. A spatula being sold as a mixing tool does not mean that a particular gel should be mixed. Do not add steps to a material's process solely because of the tool's intended use.
Also distinguish between stirring a material within its container and mixing in a different material. If the color looks uneven, do not replace stirring with adding another color, water, or a solvent you have on hand. Even for materials that permit mixing, keep combinations and amounts within the instructions provided.
For example, two transparent gels can have different purposes and handling conditions. Do not treat a gel intended for mixing colors and one intended for securing decorations or another purpose as interchangeable based only on how thick they look. Check the material's name and instructions before choosing the tip you need.
Even if you have a dining spoon or skincare spatula, this guide does not recommend simply substituting it. Prepare a tool whose nail-related purpose, compatible materials, and care instructions you can verify. There is no need to extend its use to pushing cuticles or scraping the nail surface.
Begin with one material and one tool, and choose one task for today. If you only need to scoop out a portion, you do not have to add color mixing. Prepare for the operations required by the material's instructions, rather than thinking in terms of everything you might have to do.
2. Examine both ends and choose the working surface and grip
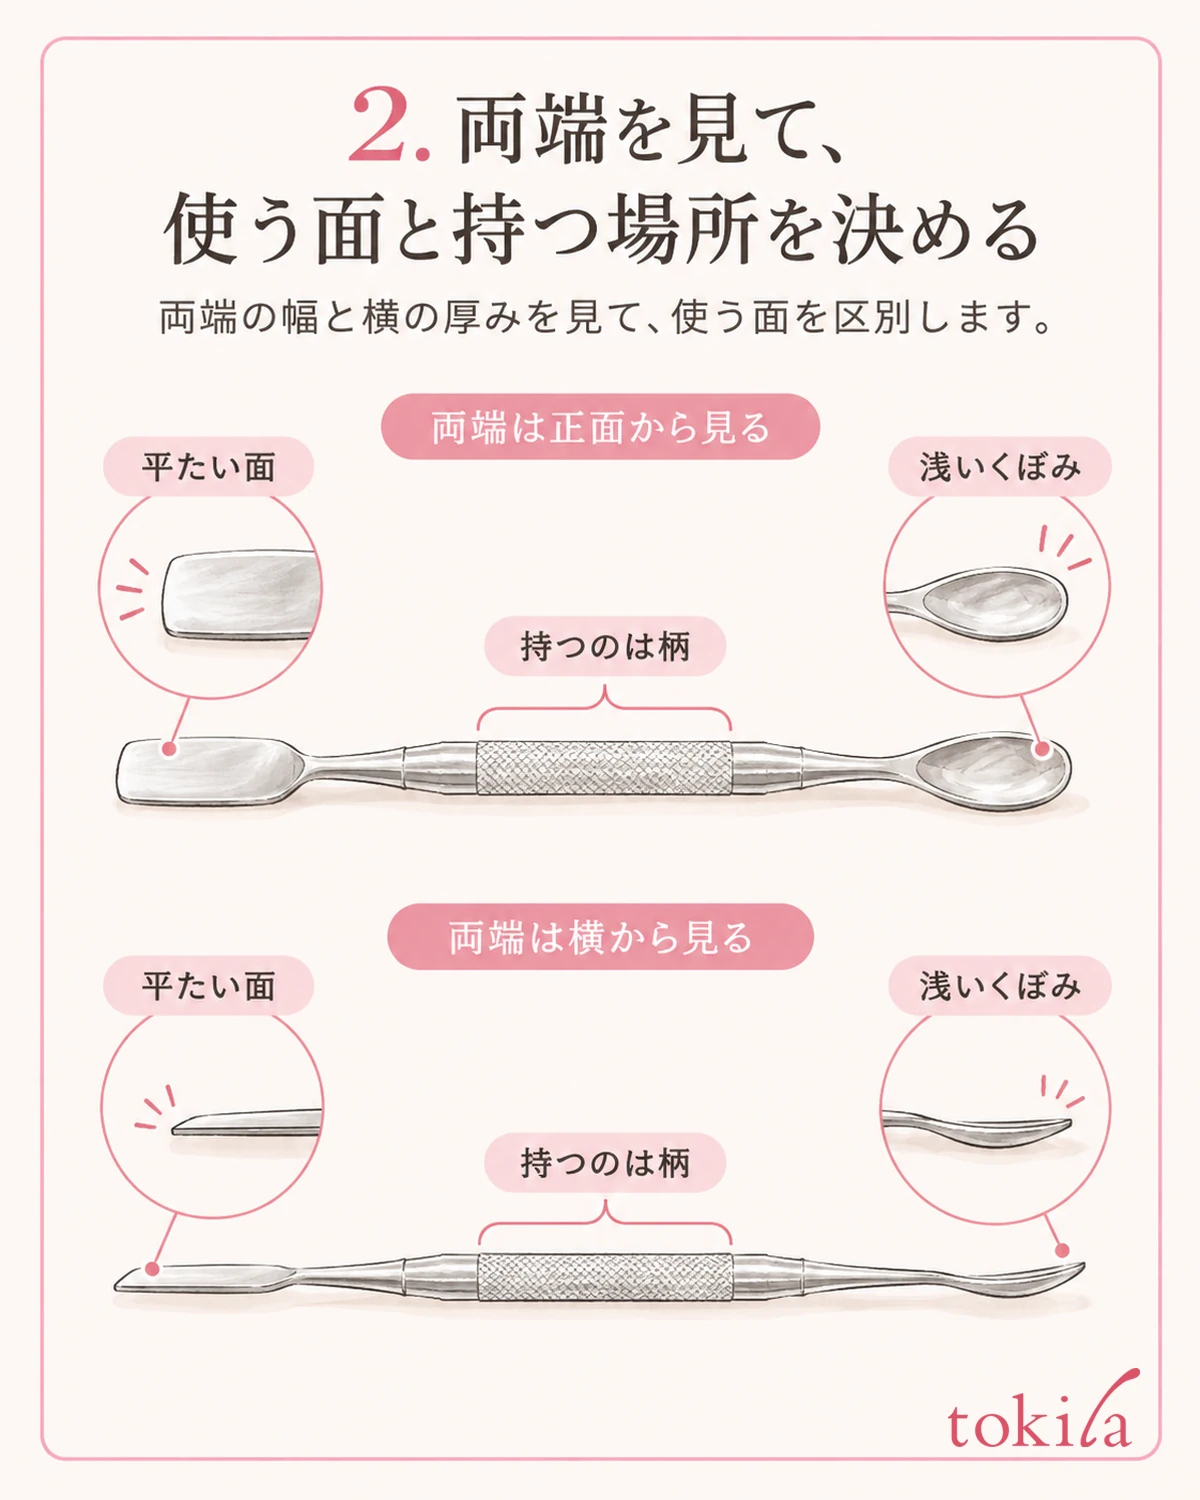
Lay the tool down before any material is on it and examine each end. Identify features actually present on your tool, such as a flat surface, shallow hollow, or differences in width. Not every spatula has the same two types of tips.
After viewing the width from the front, look at the thickness and curvature from the side. A tip that looks wide from the front may be a thin plate from the side. Distinguishing the surface from the edge makes it easier to consider where the material will sit. This is not an instruction to use the edge as a blade.
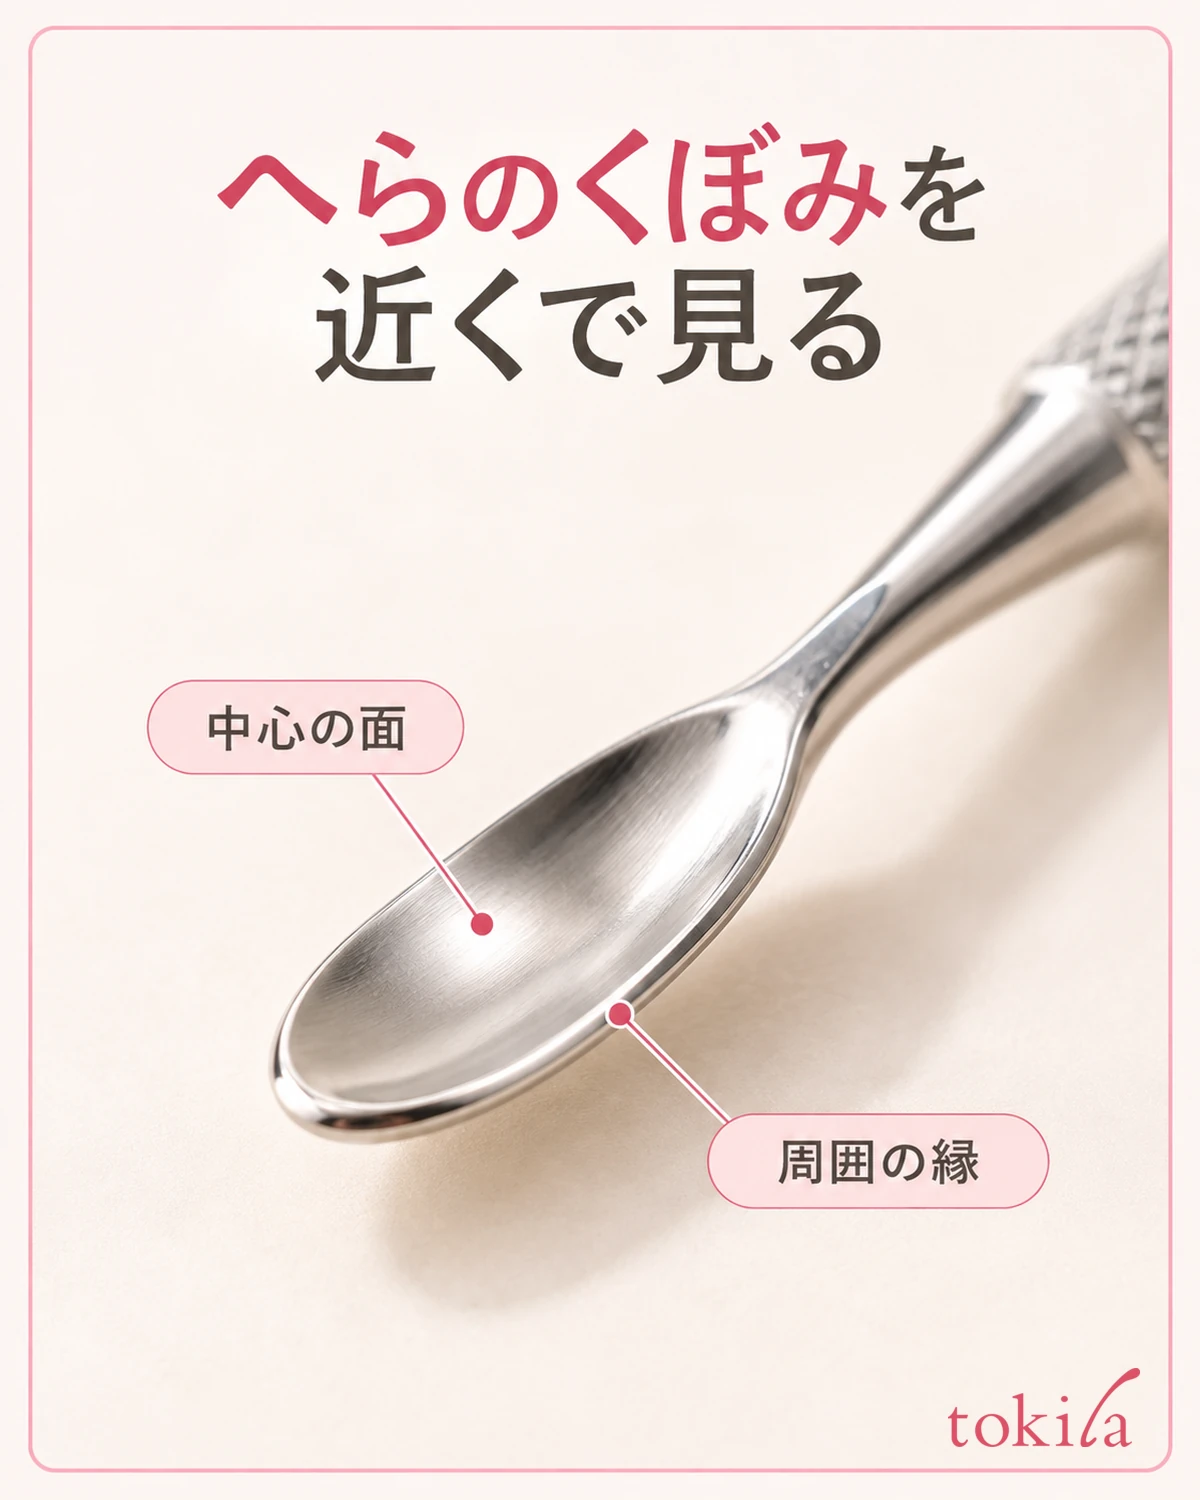
For a shallow, hollowed tip, look closely at the central surface and surrounding rim. Even if the tool is intended for scooping powder, do not assume a universal number of scoops; return to the material's instructions and the amount needed. Do not judge the material of the tool or its solvent resistance by its shine alone.
Once you have chosen an end, hold a part that will not touch the material, such as the middle of the handle. Check that there is enough room to keep your fingers and sleeves away from the opposite tip. Even with a double-ended tool, you do not need to put material on both ends during the same task.
If you see chips, bends, or residue that cannot be removed, check how to handle the tool before putting it into a material's container. Filing down roughness or forcing a bent tip back into shape is not a universal repair procedure. Distinguish the tool's condition before work from residue left afterward.
If you lose track of which end you used when changing your grip, start by using just one end. Compare the tool with its packaged instructions and decide on the working surface, grip, and resting direction before opening the material. This can also help organize how often you move your fingers during the task.
3. Prepare a resting place for the tip before taking out materials
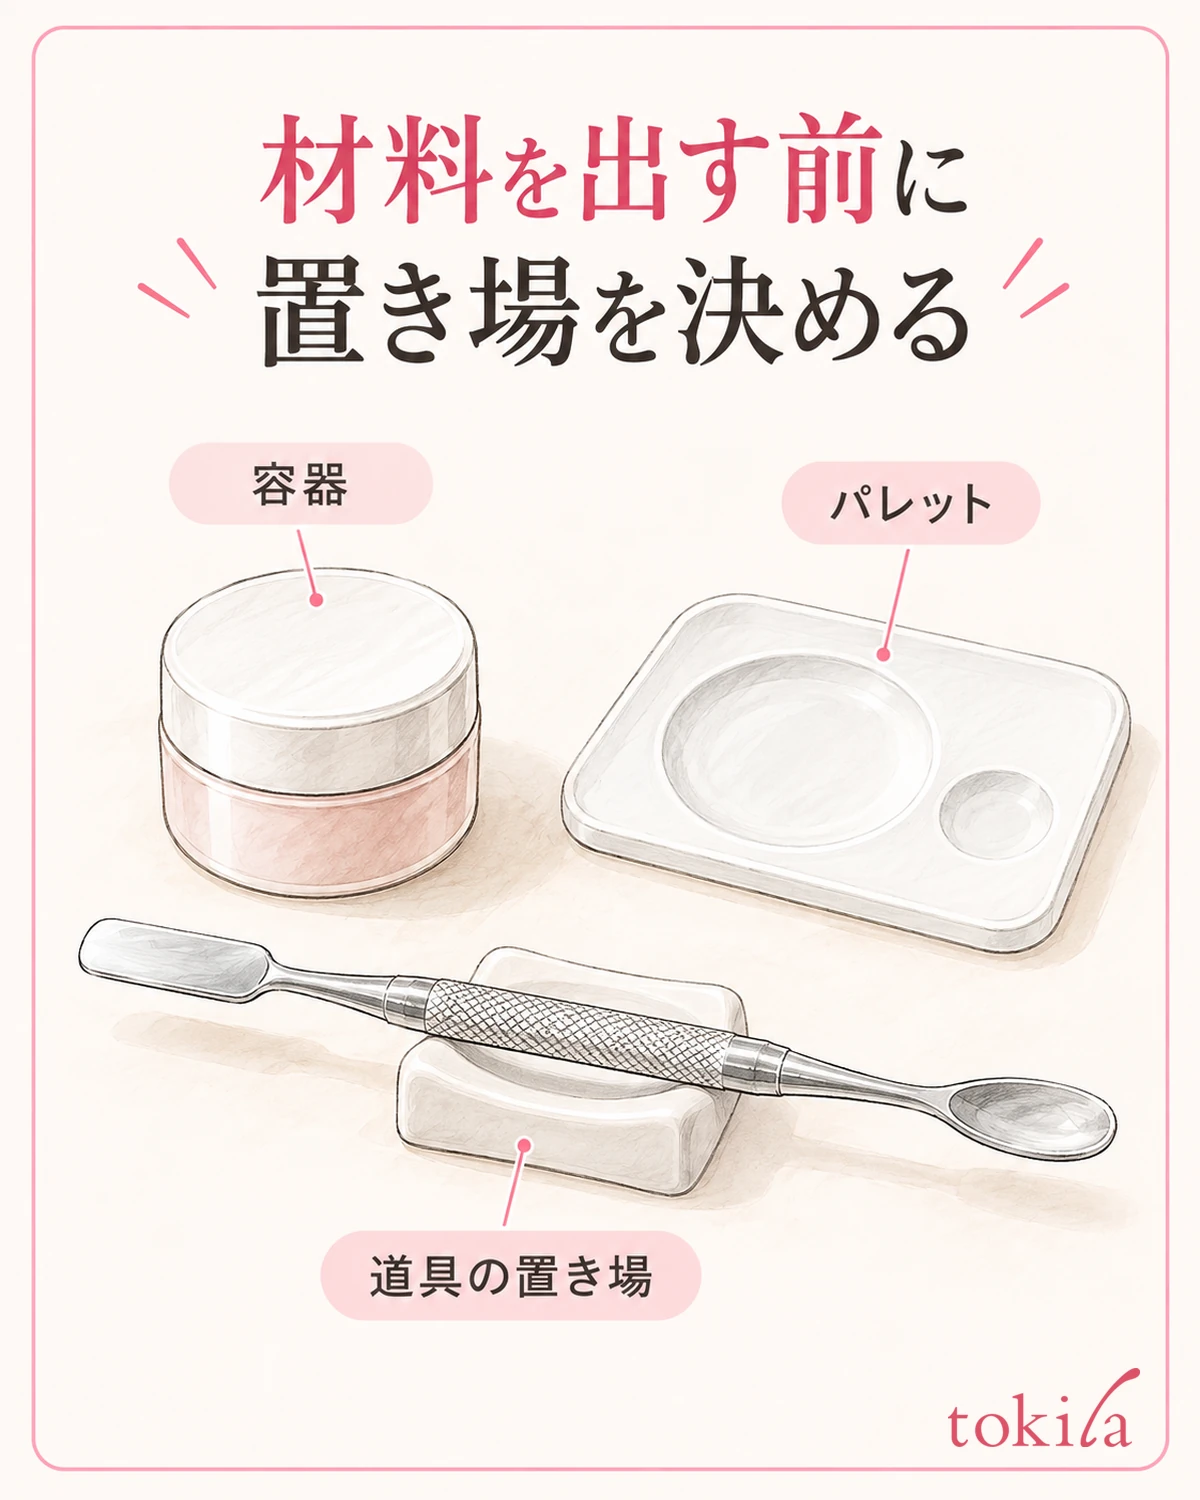
Arrange your work surface before opening the material so that you do not have to search for a resting place while holding the spatula. On a flat, stable surface, tentatively position the container, a compatible palette, and a resting place for the tool. Choose a rest compatible with the material as well.
A double-ended tool still has a second tip even when you use only one end. Distinguish the grip from the tips, and check a resting position that does not press the material-contact surface against the table or unused tools. Look beyond whether the handle is supported: check where the tips are as well.
With nothing on the tool, rehearse picking it up, carrying it to the palette, setting it down, and picking it up again. If your sleeve passes over the container, the handle extends beyond the worktop, or the tool rolls, adjust the arrangement before taking out materials. Choose the left-to-right arrangement to suit your dominant hand and work surface.
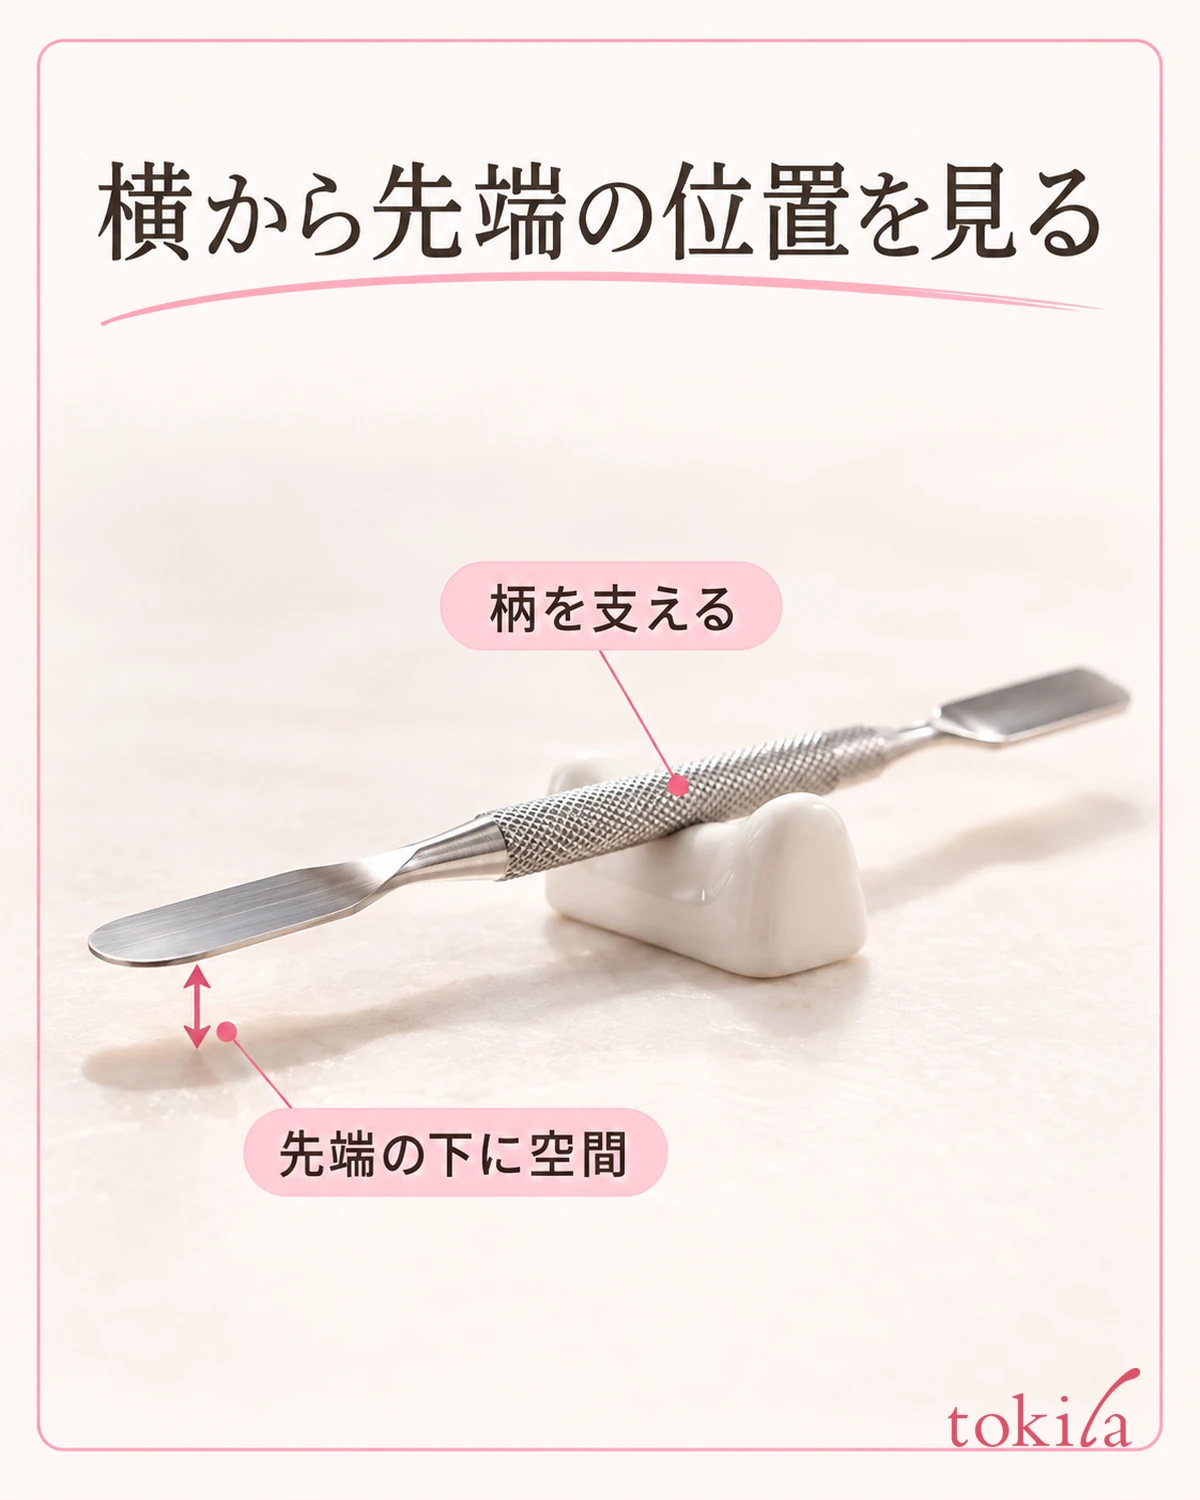
When the tool is resting, look from the side to see whether there is space beneath the tip. Even with a rest, reconsider the position if the tool's length causes its tip to touch the surface. Do not compensate by bending the tool or balancing it across a container's rim.
Separate the place for used tools from the place for tools after care. Stacking both in the same small dish can make it difficult to tell which are unused. Rather than laying out many tools at once, prepare the one you need and its compatible care supplies.
If you use a paper palette, you can also checkhow to separate one sheet and position it. Check the palette's compatible materials and the spatula's compatible materials separately, rather than deciding they can be combined based on the instructions for only one of them.
4. Choose one working end and keep other materials out
Use the tool only when you have confirmed that the material's instructions call for the operation. If no stirring is required, do not add a mixing step simply because you are holding a spatula. If stirring is specified, follow your material's instructions rather than borrowing motions, times, or repetition counts from another material.
When portioning material, use a compatible tip to take the amount needed and carry it to the place you prepared. Instead of taking a heaping scoop at once, consider the material's quantity instructions and the area you will work on. Checking how to handle leftovers before removing the material also helps you plan the sequence.
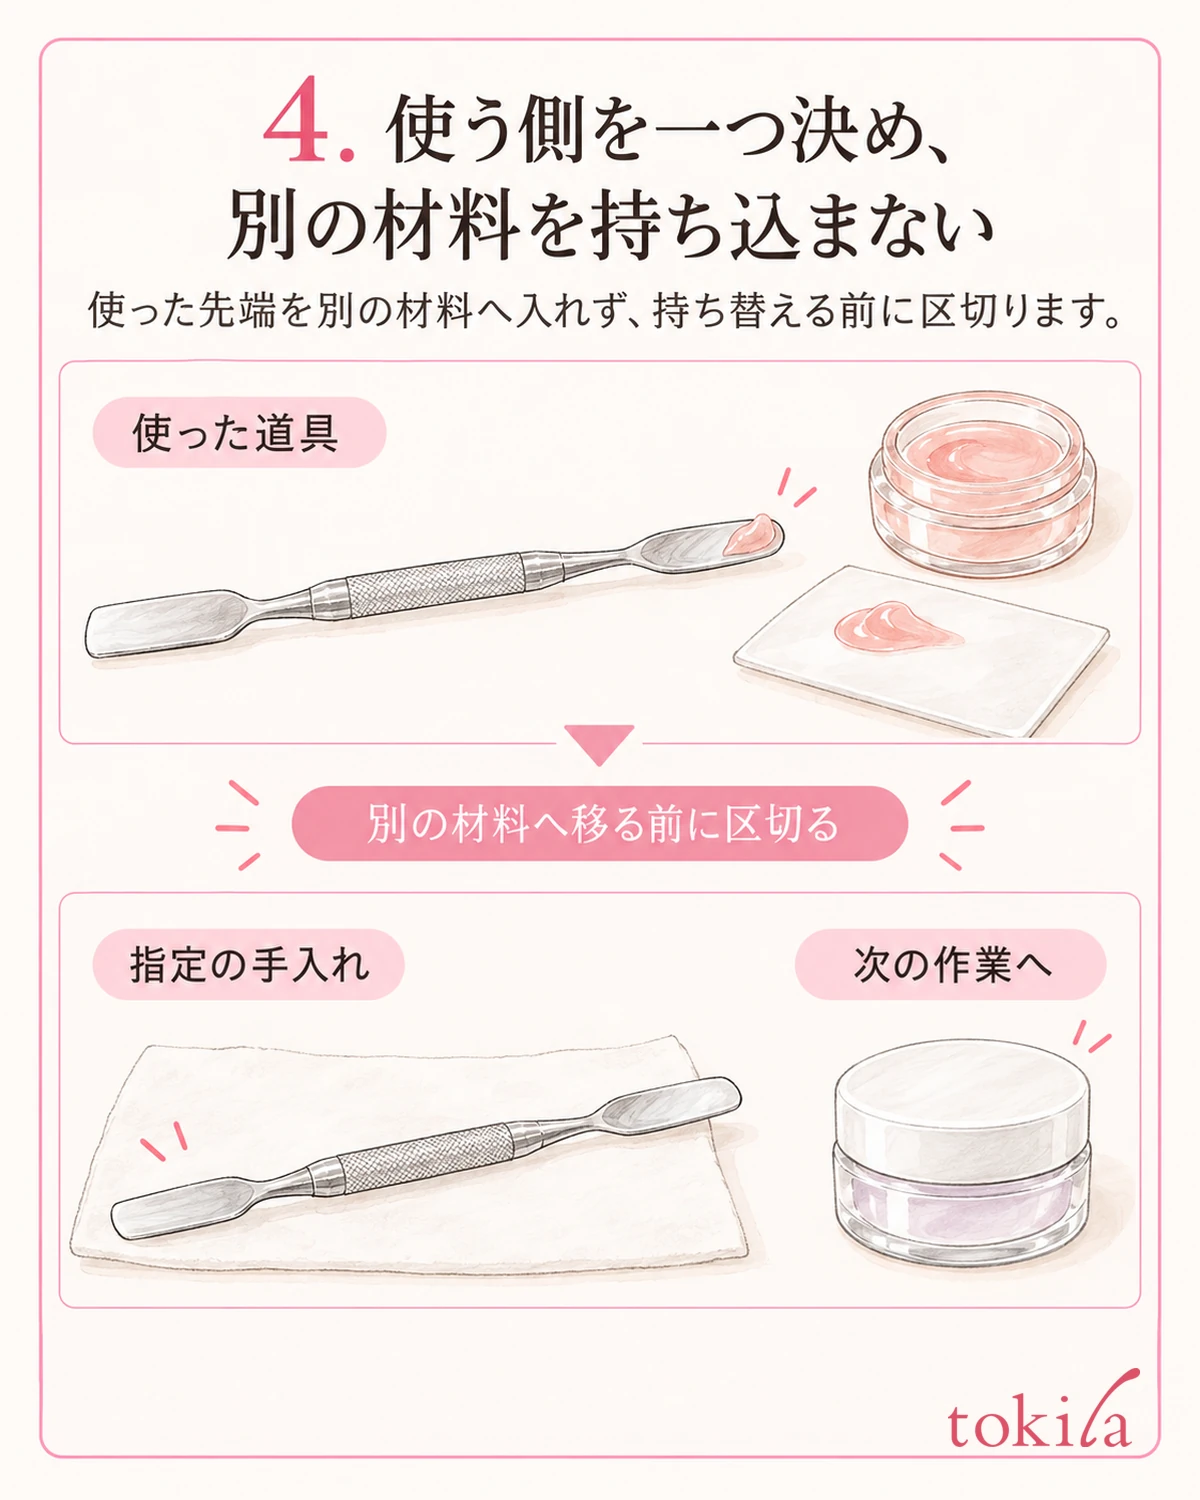
When using two colors, keep a tip carrying one color out of another container. Even if one end looks clean, material on the handle or rest can transfer when you change your grip. Check the whole tool and its resting place, rather than judging by the tip's appearance alone.
Before moving to another material, complete the care appropriate to both tool and material, or prepare another compatible tool. Do not assume that assigning one color to each end always prevents mixing. Simply flipping the tool before care is not a reason to proceed to the next container.
If you are forcefully poking the bottom of a container, scraping out hardened material, or pressing the spatula against the wall until it bends, reconsider whether the action fits its intended use. Do not try to restore a material that seems different from usual by applying force or adding solvent. Set the tool down and return to the material's instructions.
Even when moving on to a practice sample, separate mixing from application. Do not search for a brush or practice tip while material remains on the spatula; set it in the place you chose. Build a sequence in which you put away what you are holding before picking up the next tool.
5. Check the tips and handle, then follow the specified care before storage
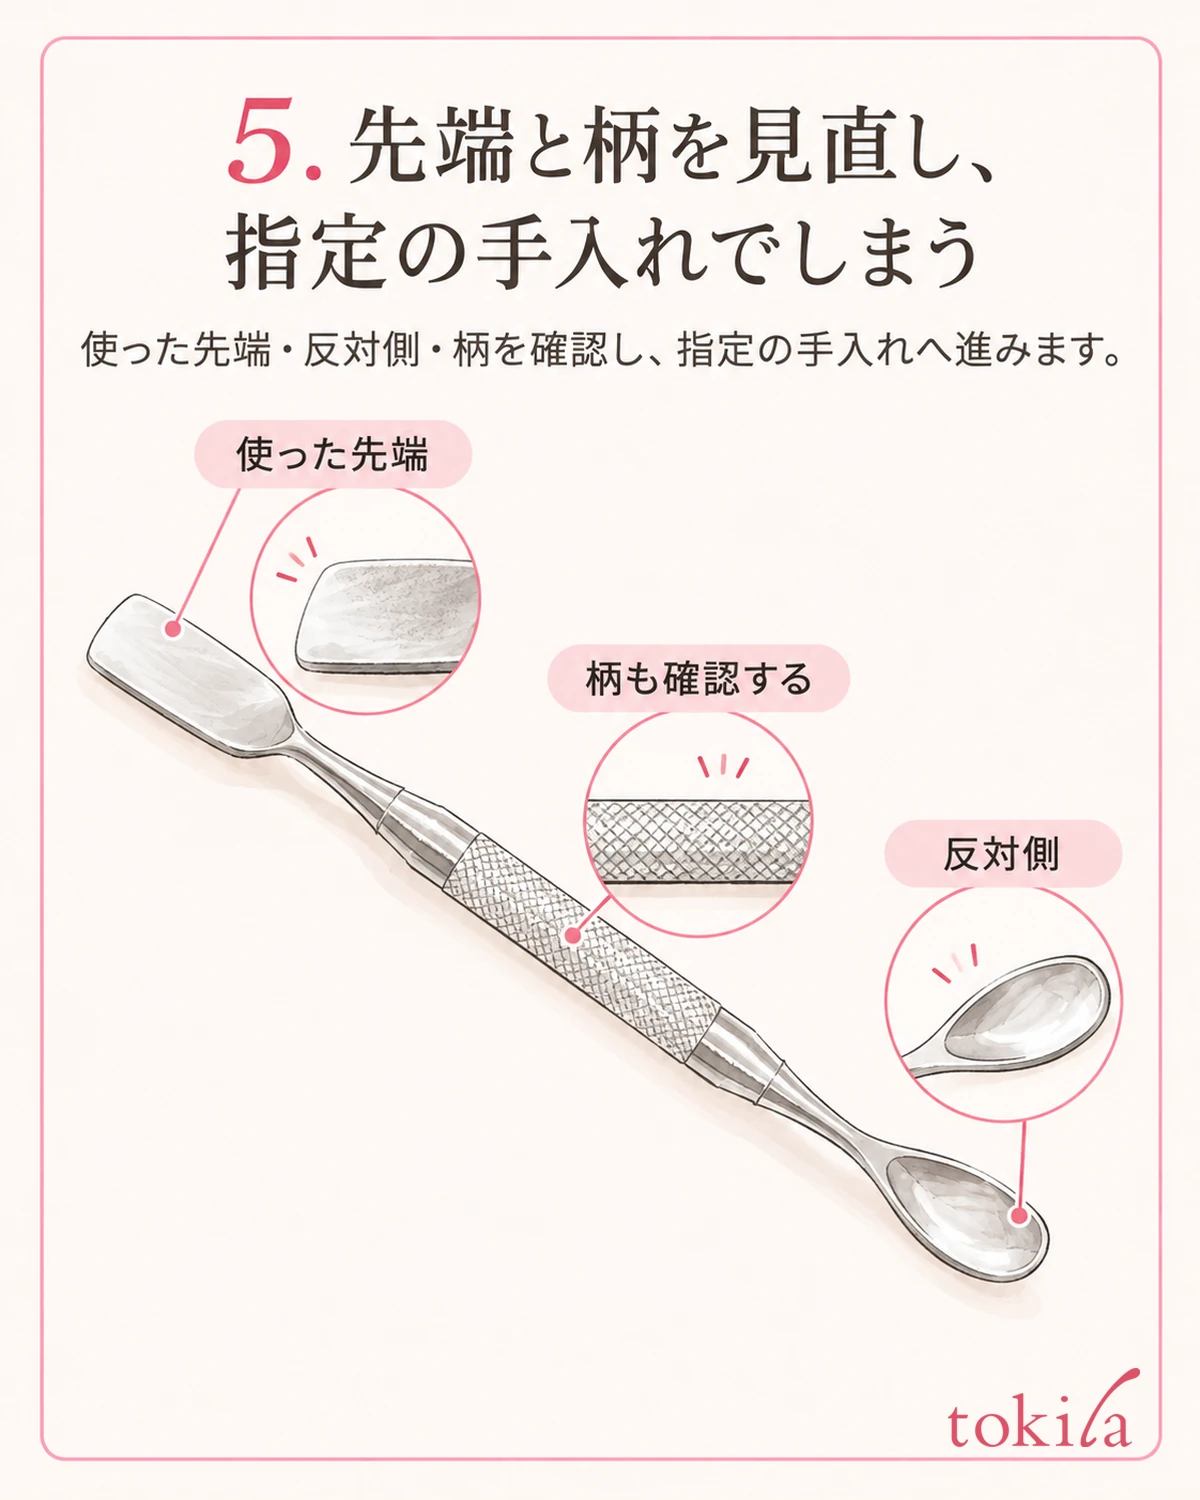
After work, check for residue on the used tip, opposite end, and handle, in that order. Change the angle of the light slightly to look for transparent material as well as obvious color. However, do not assume that a transparent appearance means clean or that a lack of tackiness means care is complete.
Follow the instructions for both the spatula's material and the material left on it. Do not assume that a metallic appearance means every cleaning liquid is suitable, or that plastic only needs rinsing with water. Check the specified cleaner, whether washing with water is permitted, and any drying steps before proceeding.
If wiping is specified, use compatible supplies to remove residue from the tips and handle, without repeatedly passing the same dirty surface over the entire tool. If washing is specified, follow the instructed method and prepare the tool for storage. Do not substitute one liquid or one repetition count for every tool.
If residue or damage remains after care, reconsider how to handle the tool before returning it to clean tools. Do not add methods such as scraping hardened material off with a nail or blade or heating it over a flame. Check whether the instructions cover the situation.
Store the tool so its tips are not forced against other tools and so you can distinguish both ends next time. Follow the storage conditions for both tool and material. Leaving a used tool inside a container and closing the lid is not a substitute for a proper storage place.
Make any note for next time specific, such as "portion with the flat end" or "look at the tip's position from the side of the rest." Match the tool's purpose with the material's process, distinguish the two ends and grip, and decide on a resting place. Start by learning the shape and prepare a tool-and-material pair you can handle without uncertainty.