When you apply lipstick straight from the tube, you may be able to trace your Cupid’s bow, yet lose sight of the area you’re working on near the corners of your mouth. If you have a flat lip brush, pick up the same lipstick with it. Use the thin edge of the bristles for the outline and the broad face for the inside of your lips.
This guide shows how to apply stick lipstick with a single flat brush. You can also use it just where application is tricky. Start by picking up color and evening out the bristles, then turn the brush so you can see where it will touch next in the mirror.
1. Pick up lipstick on the broad face of the flat brush
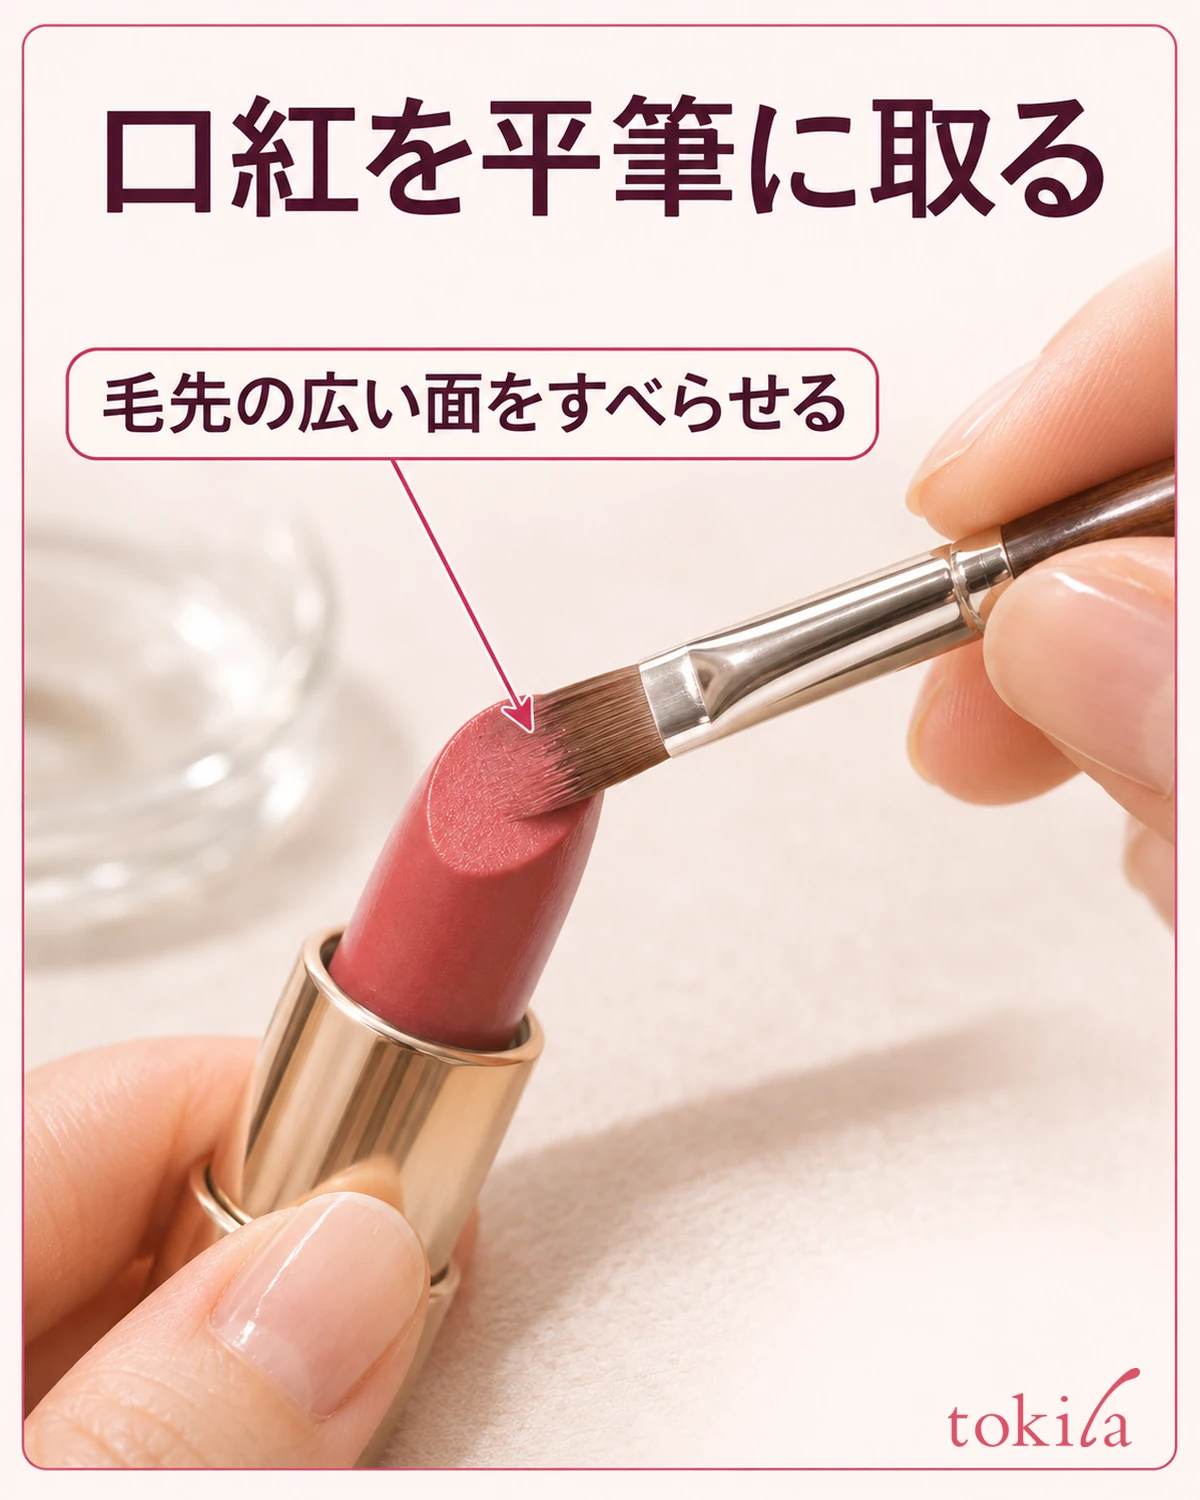
Use a flat lip brush with a bundle of bristles that looks wide from the front and thin from the side. Before loading any color, roll the handle slightly between your fingers and find the broad face and the thin edge. Learning how to turn it now makes it easier to switch sides without looking away from the mirror later.
Use a clean, dry brush and twist up the lipstick only far enough for the broad face to touch it. If you hold the brush upright and push as though making a hole, color will clump on part of the tip. Lay the broad face against the lipstick and pick up color with a short glide. Use little pressure on a soft bullet; even on a firmer surface, don’t press hard enough to splay the bristles. Follow the product directions if they specify a particular application method.
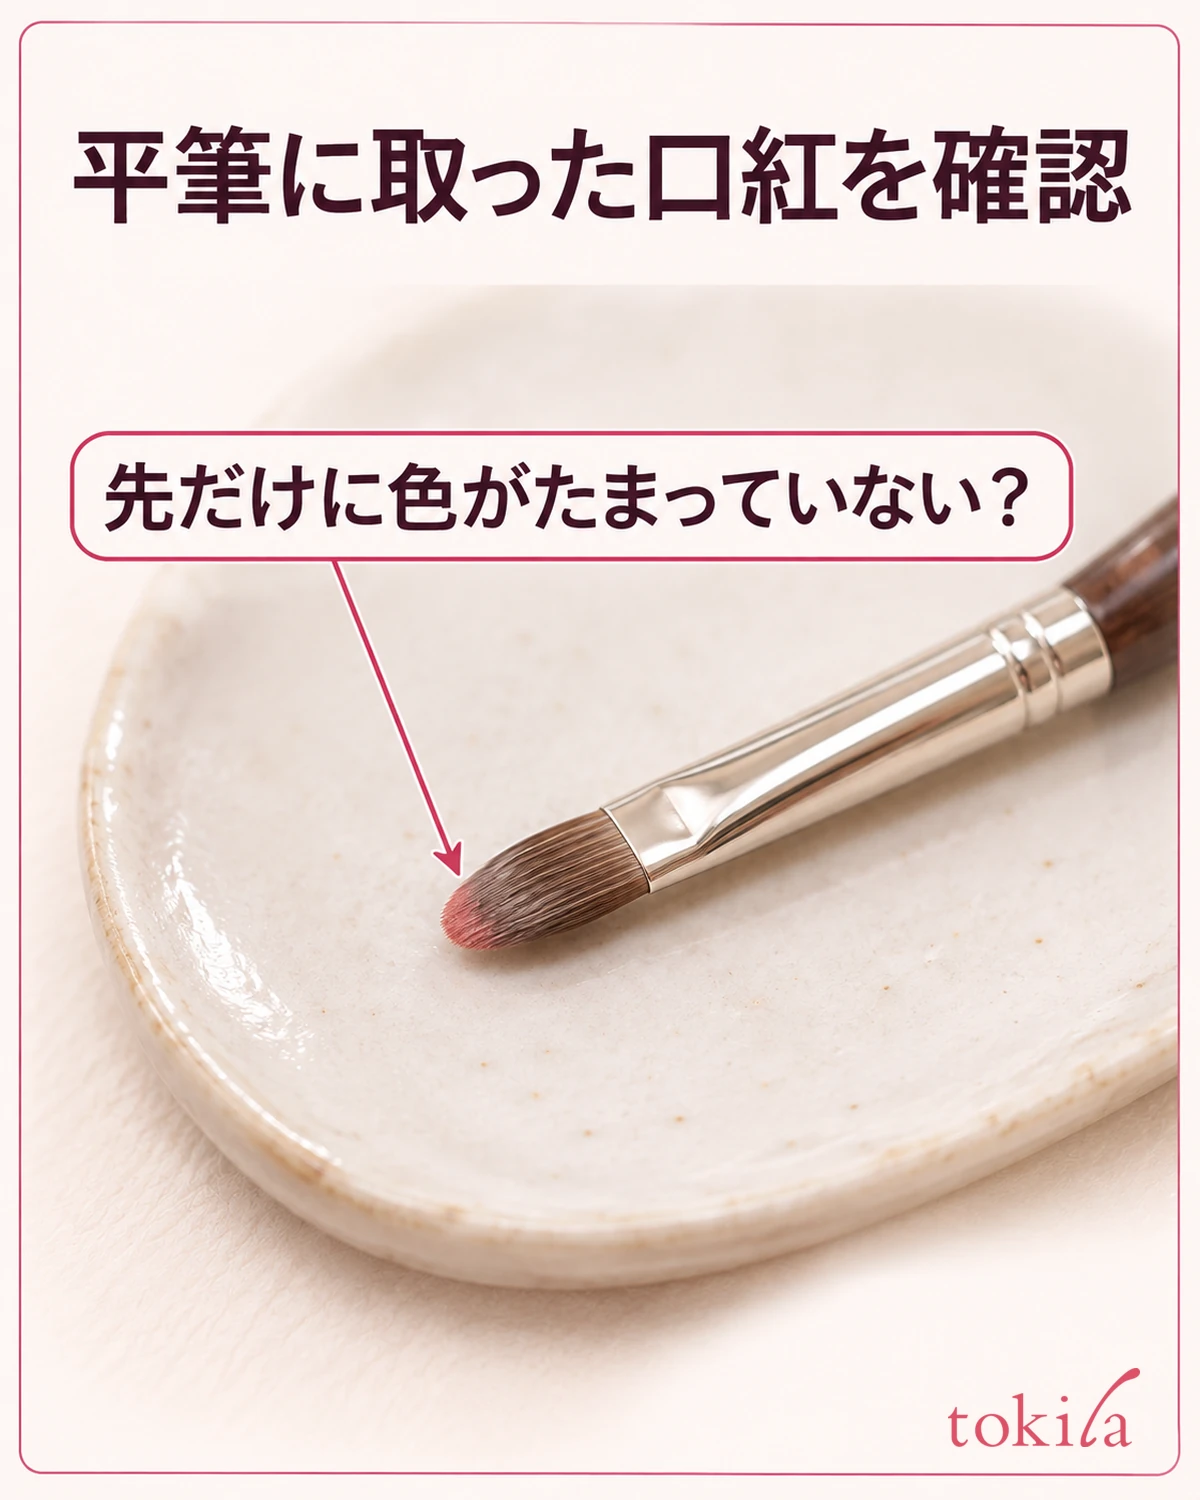
Look at the brush from the side. If there is a clump of color at the tip, lay the brush flat on a clean palette or similar surface and even out the excess before touching the lip line. Notice which face has color and which edge does not. If the color stops transferring partway through, there is no need to touch another spot and then pick up more. Lift the brush off your lips and check which face was making contact.
Holding the brush close to the tip can make it easier to track the point of contact. But if your fingers are so close that the bristles disappear from view in the mirror, your hand will block the lip line. Move your grip back a little until you can see which way the bristles extend from the metal ferrule. If your hand tends to shake, try resting your elbow on the counter or changing the height of your hand between loading the brush and looking in the mirror.
2. Trace the lip line with the thin edge of the bristles
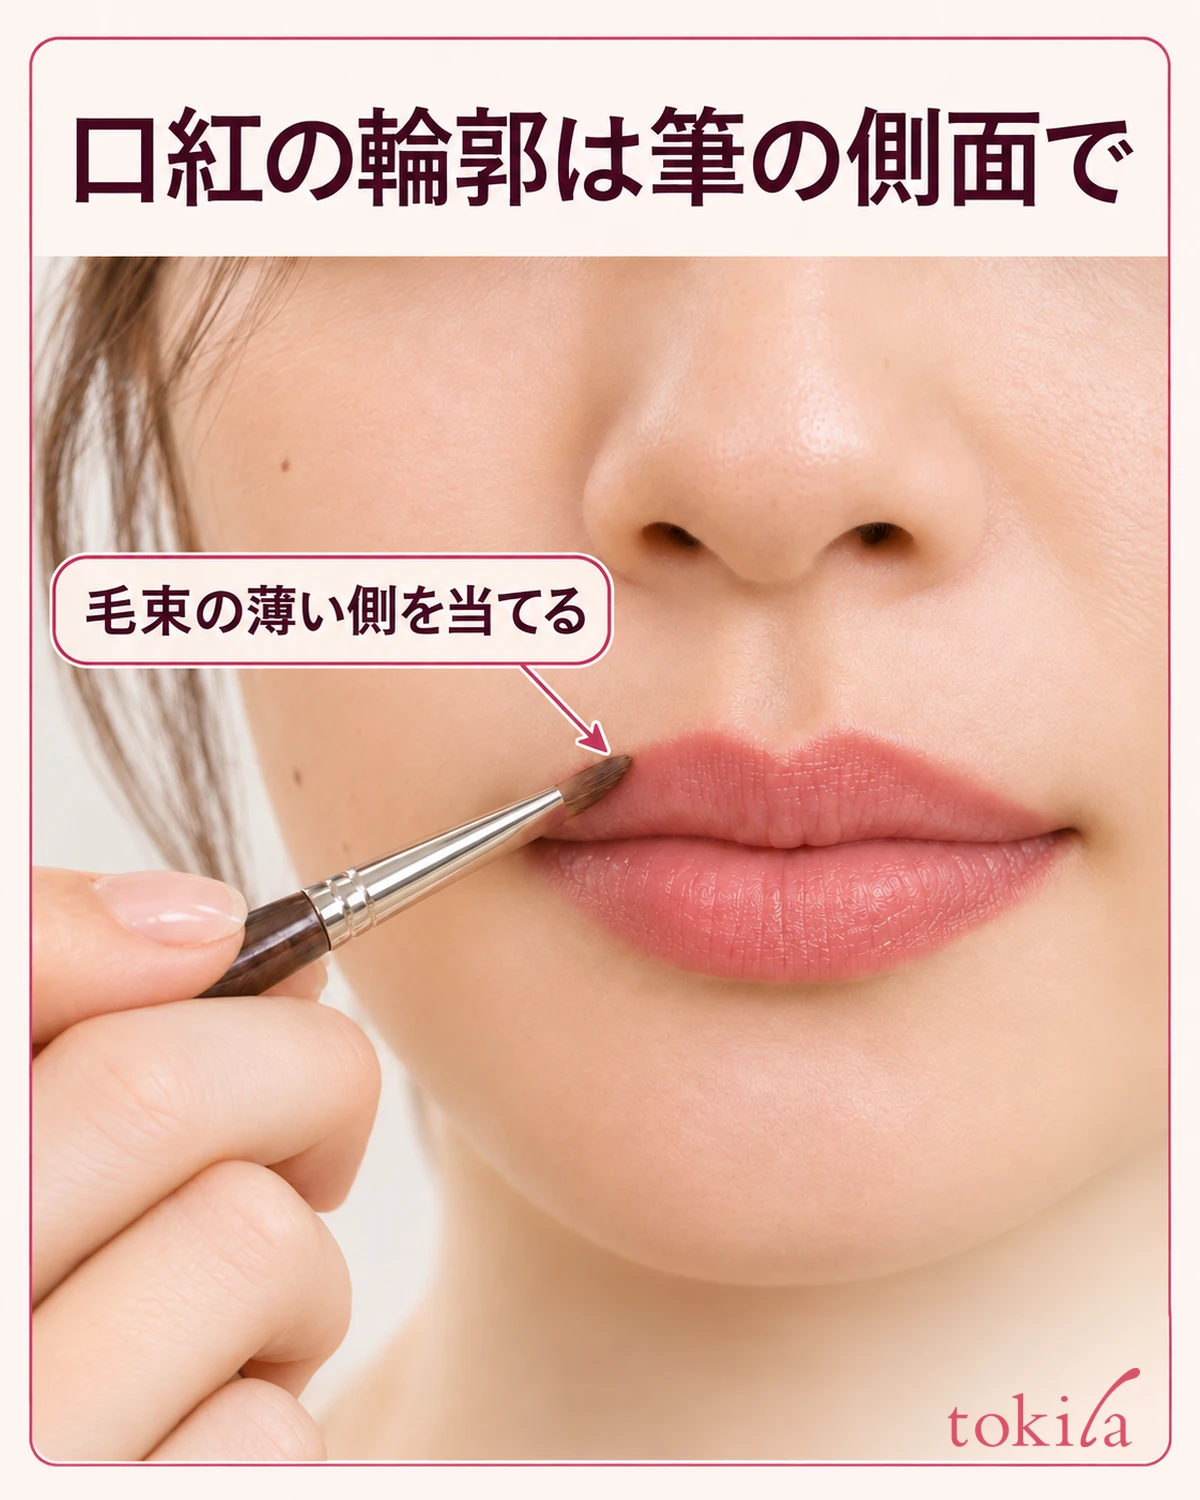
Face the mirror and relax your lips. Look at your Cupid’s bow, the center of your lower lip, and both corners of your mouth. Start by placing lipstick along the outline you can see. If the brush strays, it will be easier to tell where than if you substantially redraw your lip shape. If the two sides of your Cupid’s bow look slightly different, face the mirror directly again and compare them before adding color outside the line to make them look the same.
Roll the handle so the thin edge of the bristles touches just inside the lip line. Laying a small stretch of that edge along the lip makes the point of contact easier to see than holding the brush as though poking the lip with its tip. At the Cupid’s bow, lift and turn the brush to follow each slope separately instead of moving across the dip in one stroke.
When working from the corner toward the center, don’t force the brush into the very end where the lips meet. Open your lips slightly, start where you can see the outline, and connect the color toward the center. If your hand blocks your view on one side, try adjusting the angle of the mirror or your wrist slightly before turning your face far to the side. If the line breaks, check that the correct edge is touching before picking up more color.
The spot where the brush first touched can look darker. Before going over it again, see whether the darker area stays inside the lip line. If it does, you can connect that color to the interior in the next step. If it extends outside, remove the color beyond the line first. There’s no need to go around the whole edge again to match the intensity.
3. Lay the brush flat to fill in the lips
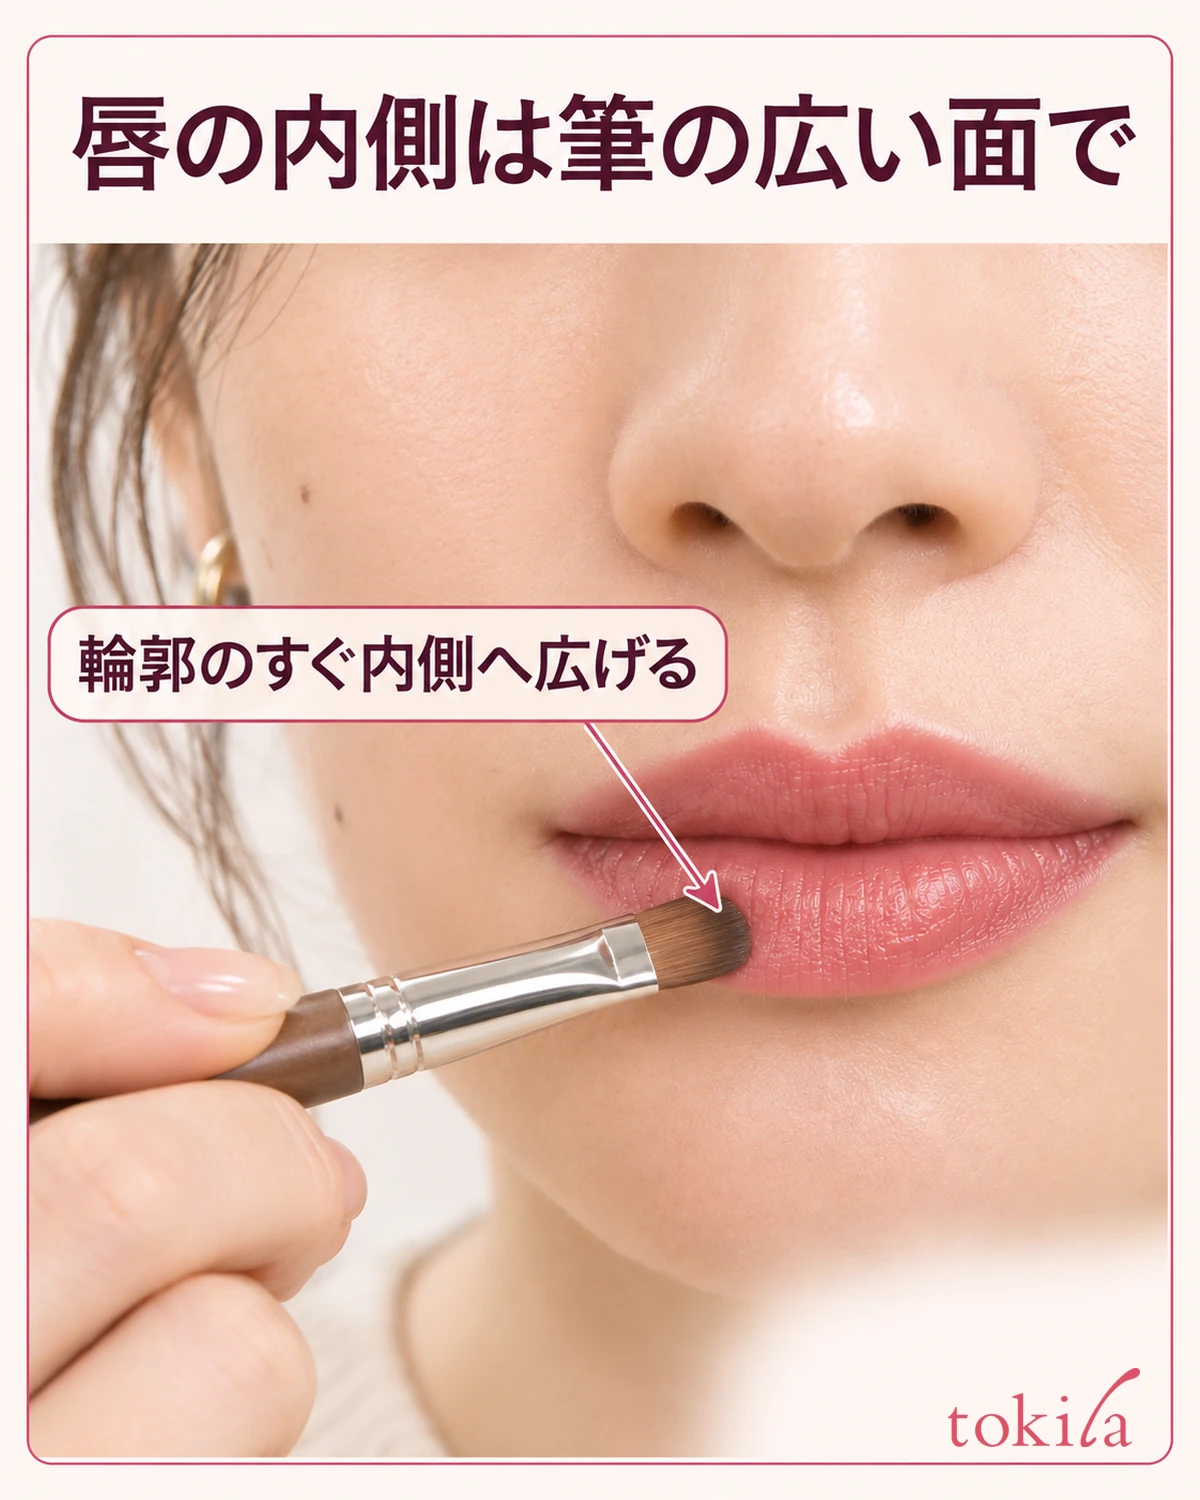
Once the outline is in place, turn the broad face toward the inside of the lips. On the lower lip, start near the middle and spread the color up to just inside the line you traced. Connecting the color from the inside helps avoid layering more color just along the edge.
Change the brush angle as you fill in the upper lip. Use the broad face across wider areas. As you approach the narrower spots near the Cupid’s bow or the corners, lift the brush and switch to the thin edge. If you bend the bristles against the lip to change their width without turning the handle, the tip can fan out and make the contact point harder to see.
If the inside of the lips needs more color, pick up what you need and apply it only there. If one freshly painted spot is darker, check how much lipstick is left on the brush before adding color everywhere. You can even out the lipstick on the tip and blend it toward an adjacent lighter area. Repeatedly rubbing over a long stretch can move color that is already in place, so lift the brush and check in the mirror.
If the lower lip overlaps when you apply lipstick to the upper one, open your mouth slightly and try raising the mirror. Bringing your chin too close to the mirror can make the Cupid’s bow easy to see but leave the lower outline out of view. After filling in the lips, move your face back, look at the upper and lower lips separately, and then place the brush on the next spot.
4. Fix missed spots at the corners separately from color outside the line
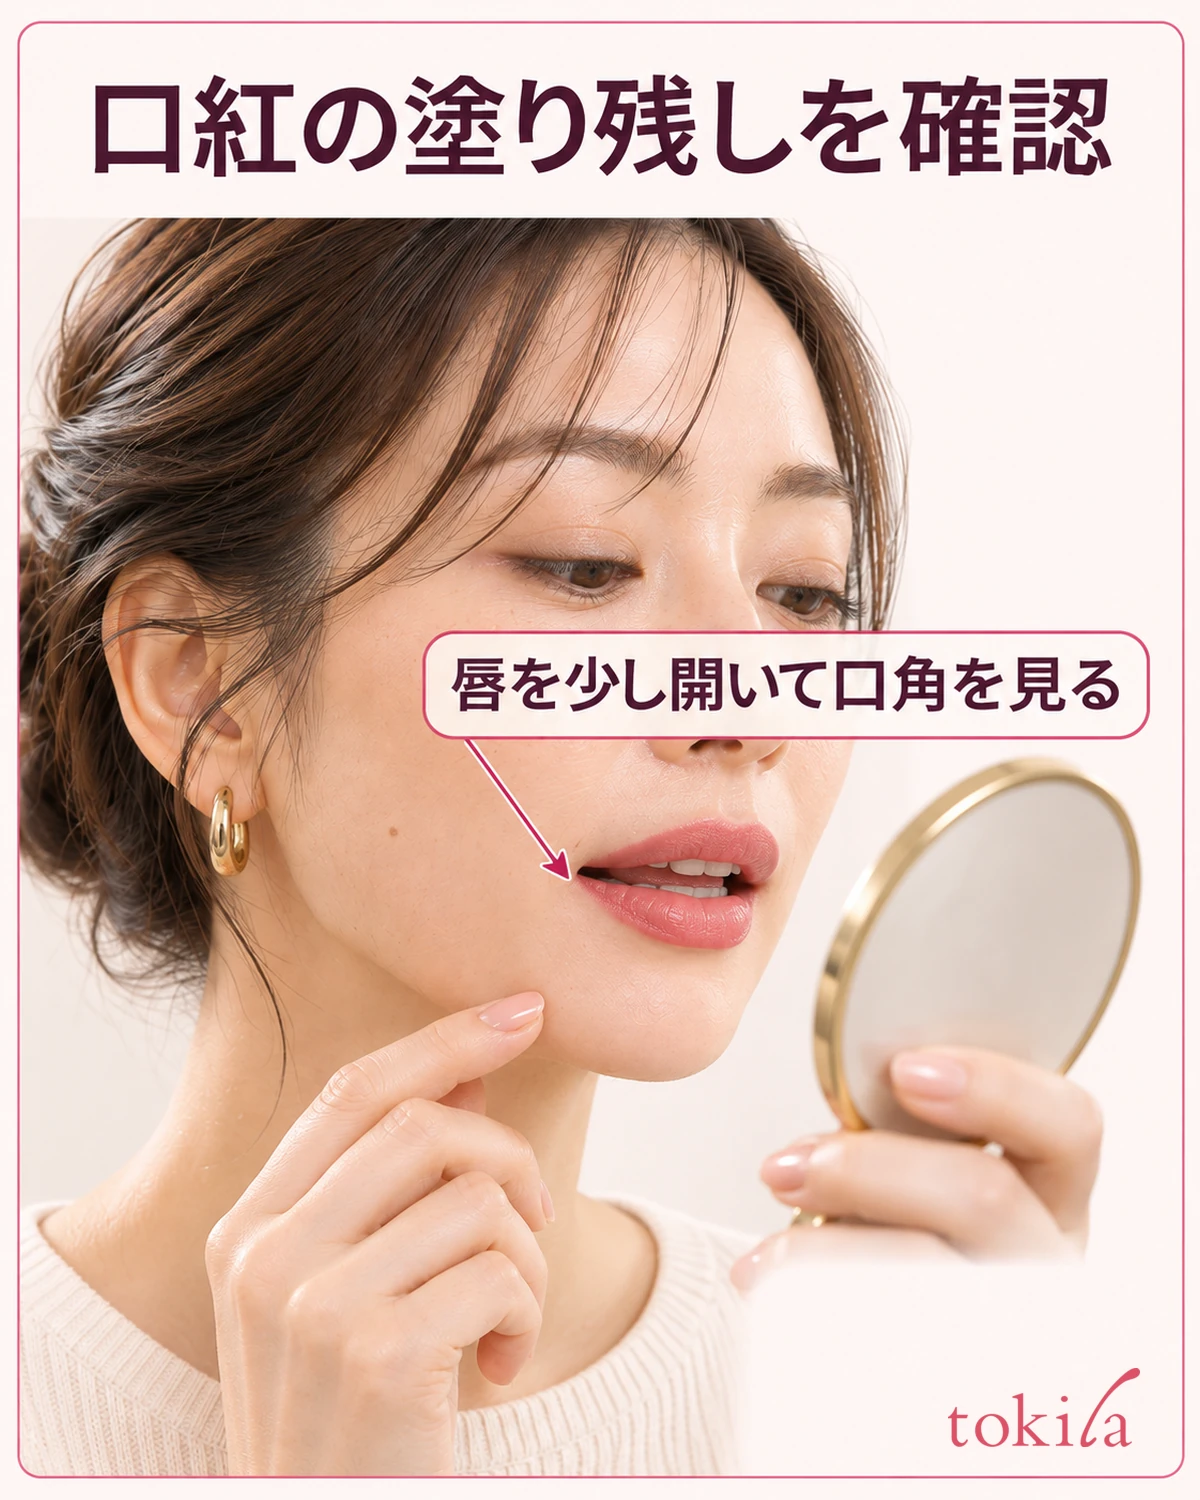
To finish, close your lips naturally and look at the balance of color, then part them slightly to check both corners. If a spot that was hidden when your lips were closed looks faint, use the thin edge to add color only to the visible lip. Lipstick already collecting in the corners is a separate issue. See how to adjust lipstick that builds up at the corners.
If a tiny bit of lipstick lands outside the outline, gently remove just that color with a clean cotton swab before spreading it with the brush. Rotate to a clean part of the swab once color transfers. If you wipe away part of the lip line as well, turn the brush and add color only where it connects to the remaining outline, instead of starting over with the broad face.
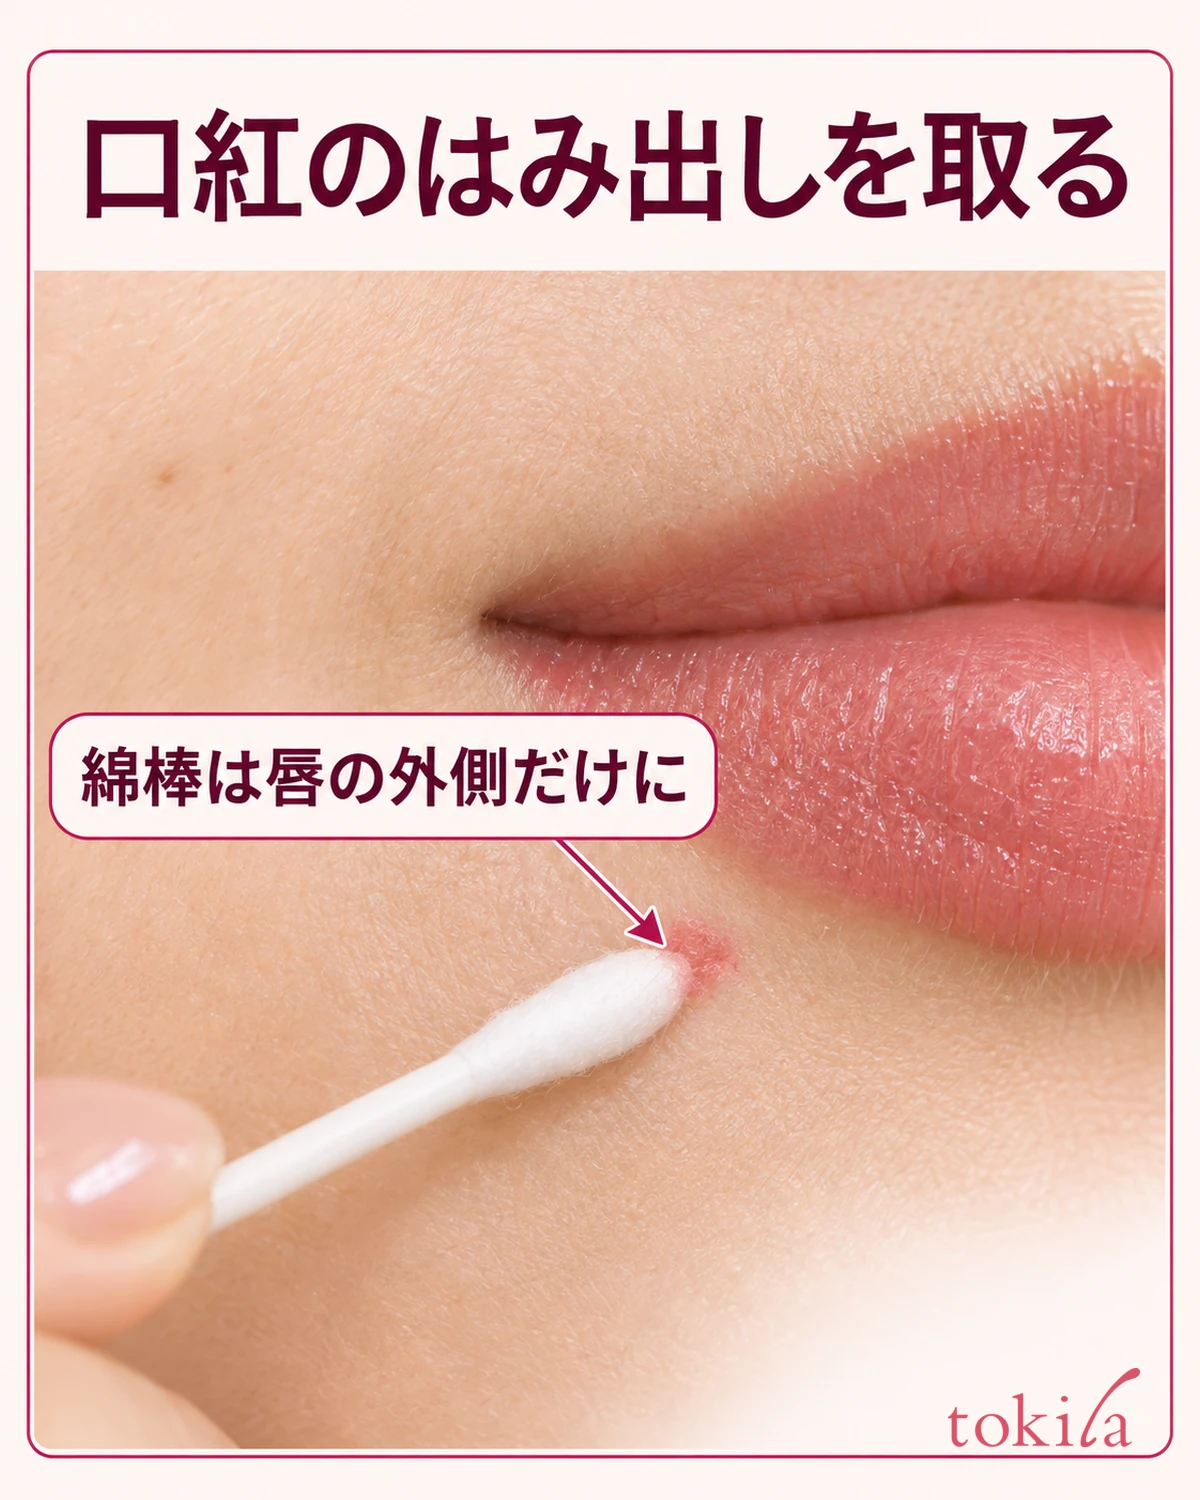
A close-up view makes missed spots easier to find, while moving the mirror back slightly helps you see whether the outline alone looks too dark. If a spot you noticed up close looks fine from farther away, you can stop there. Return the brush only to areas that need color rather than applying the same number of strokes to each side or lip.
5. Tidy the bristles before putting the brush away
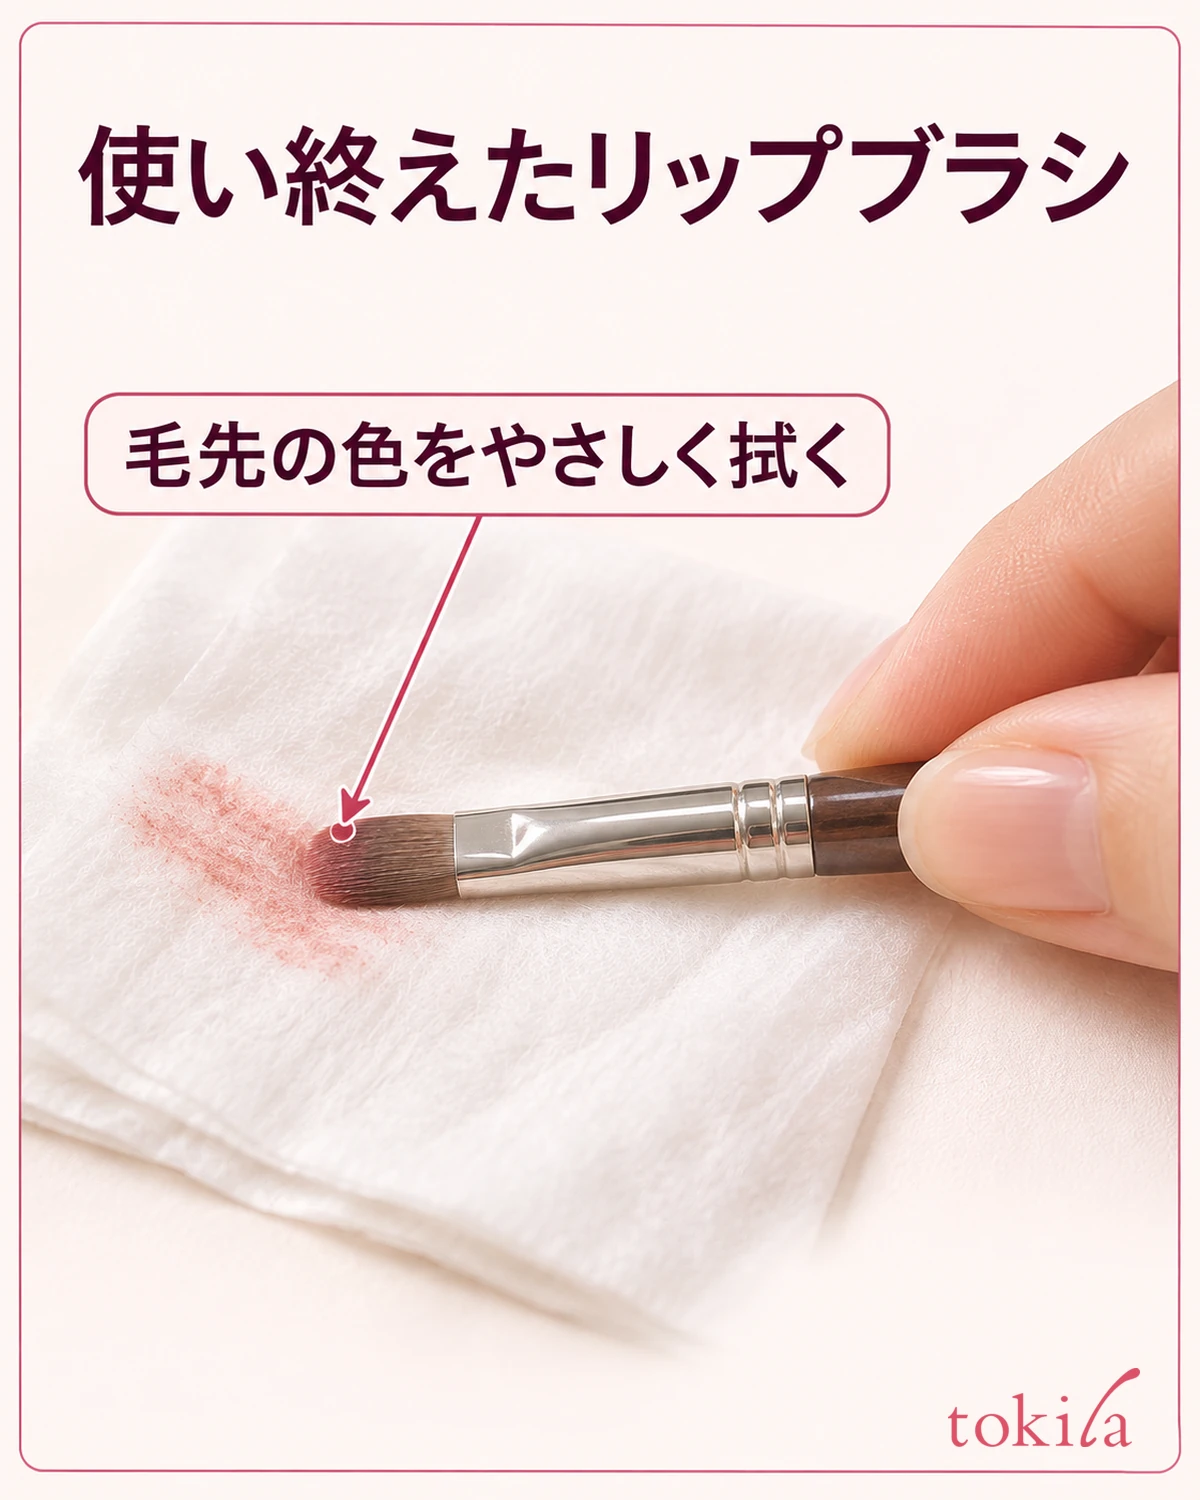
If the brush directions recommend wiping, lay the bristles flat on a tissue or similar material and gently wipe off the remaining lipstick. Instead of pinching and pulling the tips hard, place the broad face down and shift the contact point as you wipe. Check the care instructions to see whether the brush is washable and what cleanser to use. If you wash it with water, let it dry thoroughly as directed before storing it.
If you plan to use a pale lipstick next, check for color left in the bristles. If dark color remains at their base, switch to a clean brush before touching the next bullet. When replacing a travel brush cap, check how the brush is meant to be stored instead of pushing splayed bristles into the cap.
Next time you use the same lipstick, recall where switching faces of the brush made it easier to apply. Even a simple split can help you keep moving: the thin edge for the Cupid’s bow and corners, the broad face for the inside of the lower lip. Before changing how intense the lipstick looks, try changing which part of the brush touches your lips.