
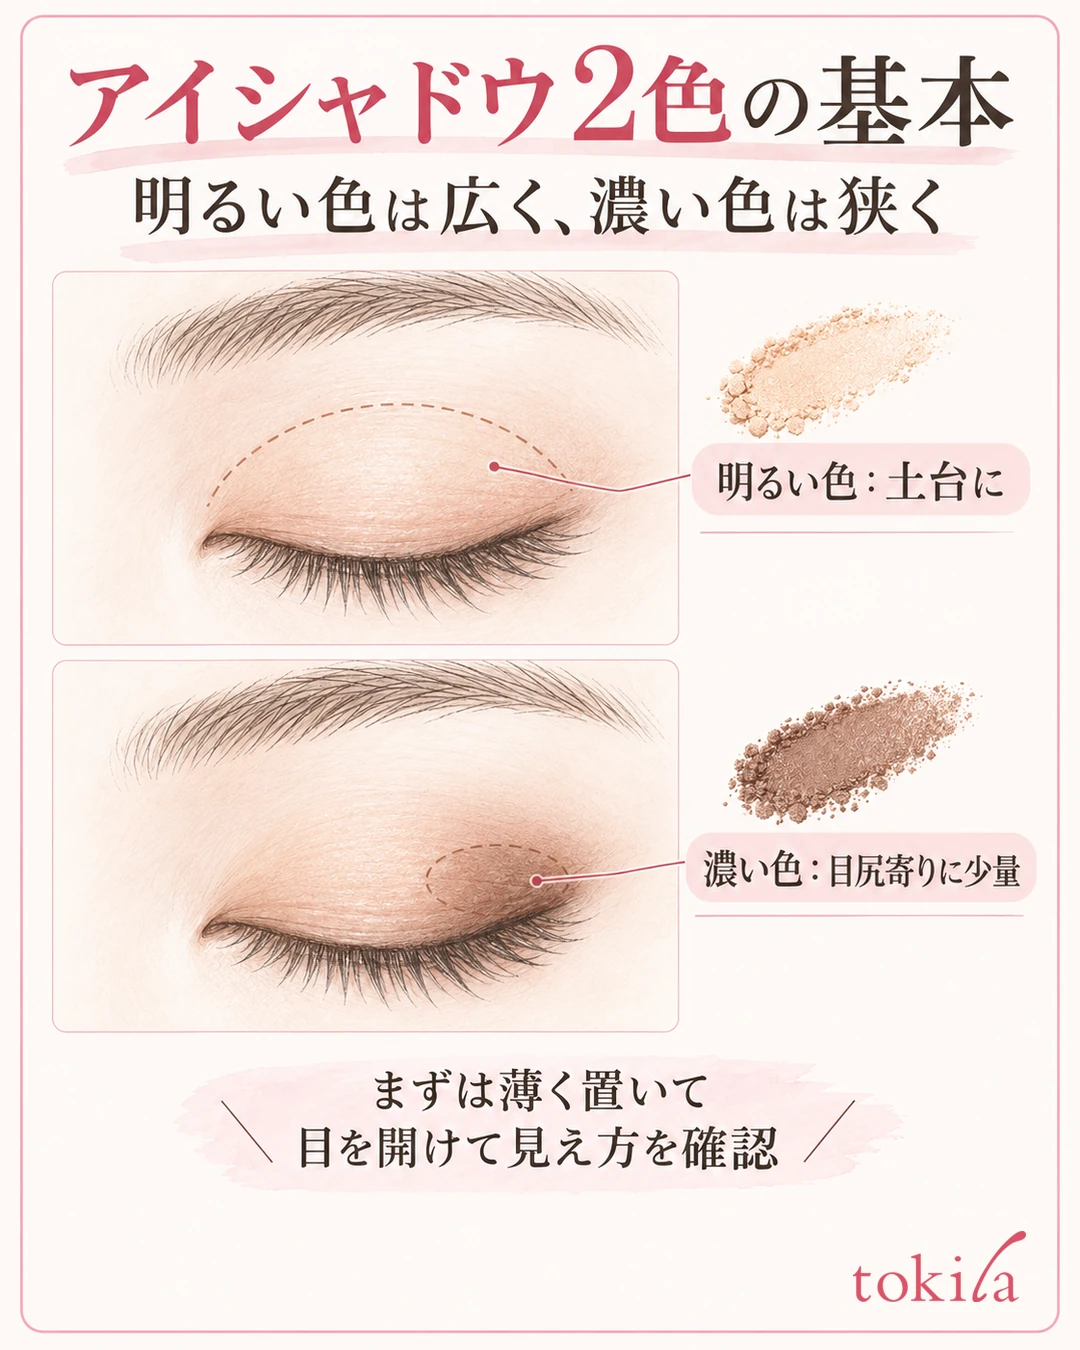
When using two eyeshadow colors, it is easiest to keep their roles straight if you start by placing the light color over a wider area and the darker color over a narrower one. The order to try is four steps: spread the light color thinly, place a small amount of the dark color toward the outer corner, blend the border, and check with your eyes open. Don't go dark from the start; add color only where you need it.
This article focuses on using powder shadows you already own, and explains how to choose colors, where to apply them, and how to blend the border. For cream or stick shadows, follow the product's instructions. Eyelid shape and color payoff vary from person to person, so rather than copying the widths in the illustrations exactly, it is important to check with your own eyes open.
1. Divide the two colors into a "wide-use color" and a "narrow-use color"
First, pick one color that looks light on your skin and one that looks darker than it. For example, a pale beige and a brown, or a pale pink and a reddish brown. With two colors from the same family, it is easier to follow the change when you blend the border.
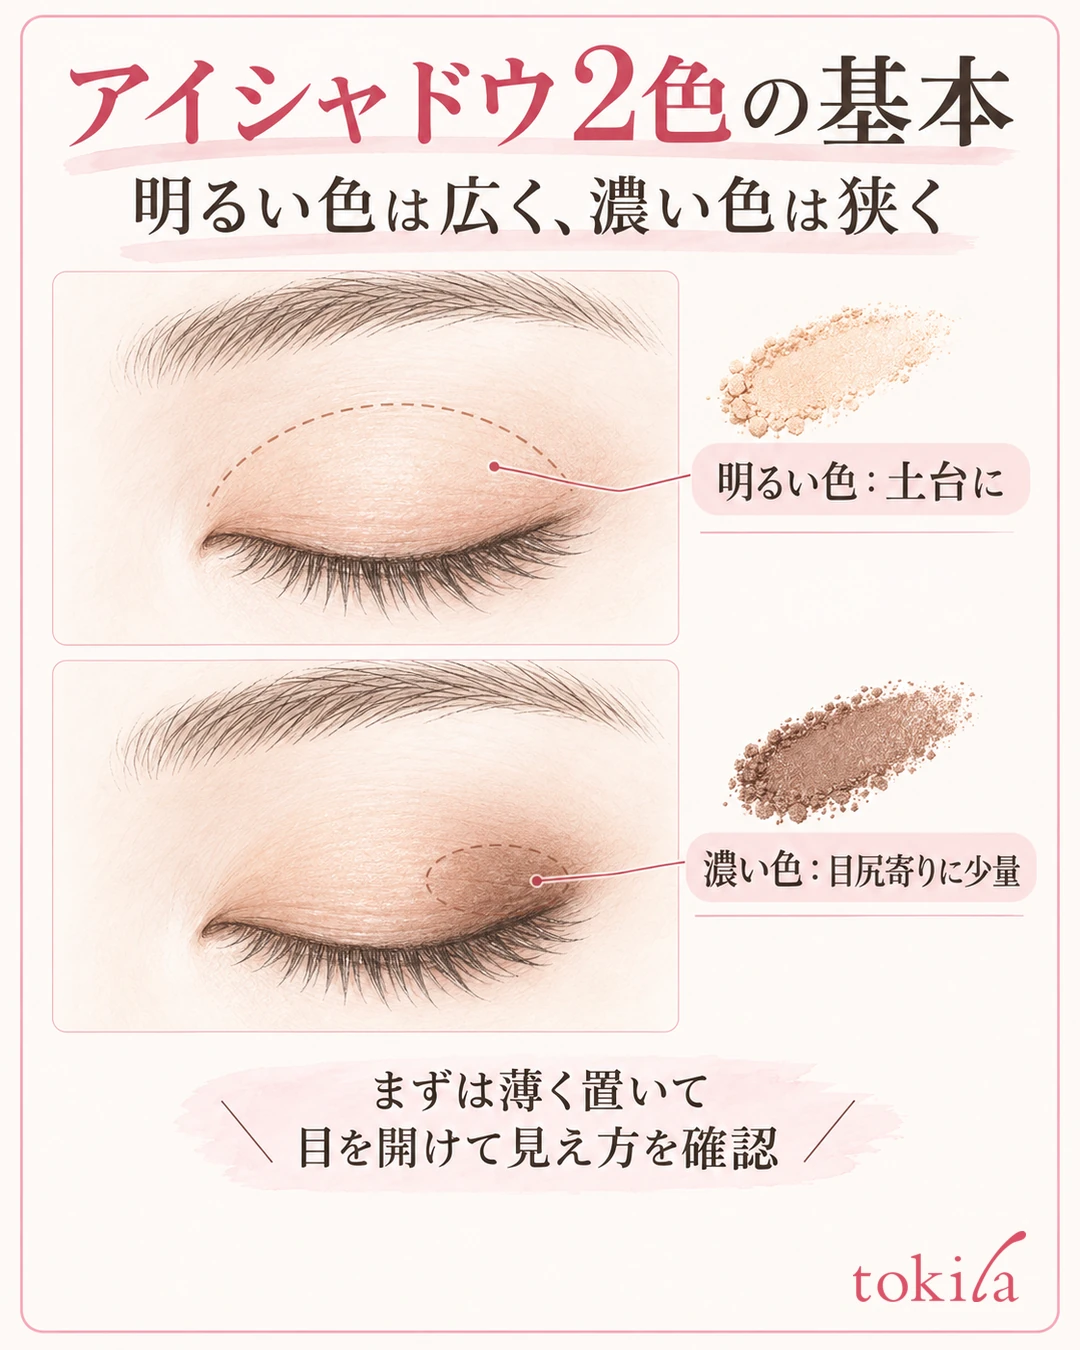
The light color here does not have to be white. If you can see the difference from the dark color when you apply it thinly on your own eyelid, it works. Some colors look pale but are strongly pigmented, and some reflect a lot of light, so don't decide the roles from the colors in the palette alone.
For your first practice, choosing a pairing whose color border is easy to see makes adjusting easier than using large-particle glitter in both colors. On days you want to use glitter, use less of the color you spread widely and check how strong the shine is. Using more of the dark color does not make the result better.
Compare the color payoff on the back of your hand and keep your tools separate
Place a small amount of each of the two colors on a clean back of your hand and look at the difference in depth and how they spread. Color looks different on the back of the hand and on the eyelid, so this is a preliminary check to learn the amount. Observe how fine the particles are, whether the color goes on dark even in a small amount, and whether it turns sheer when blended.
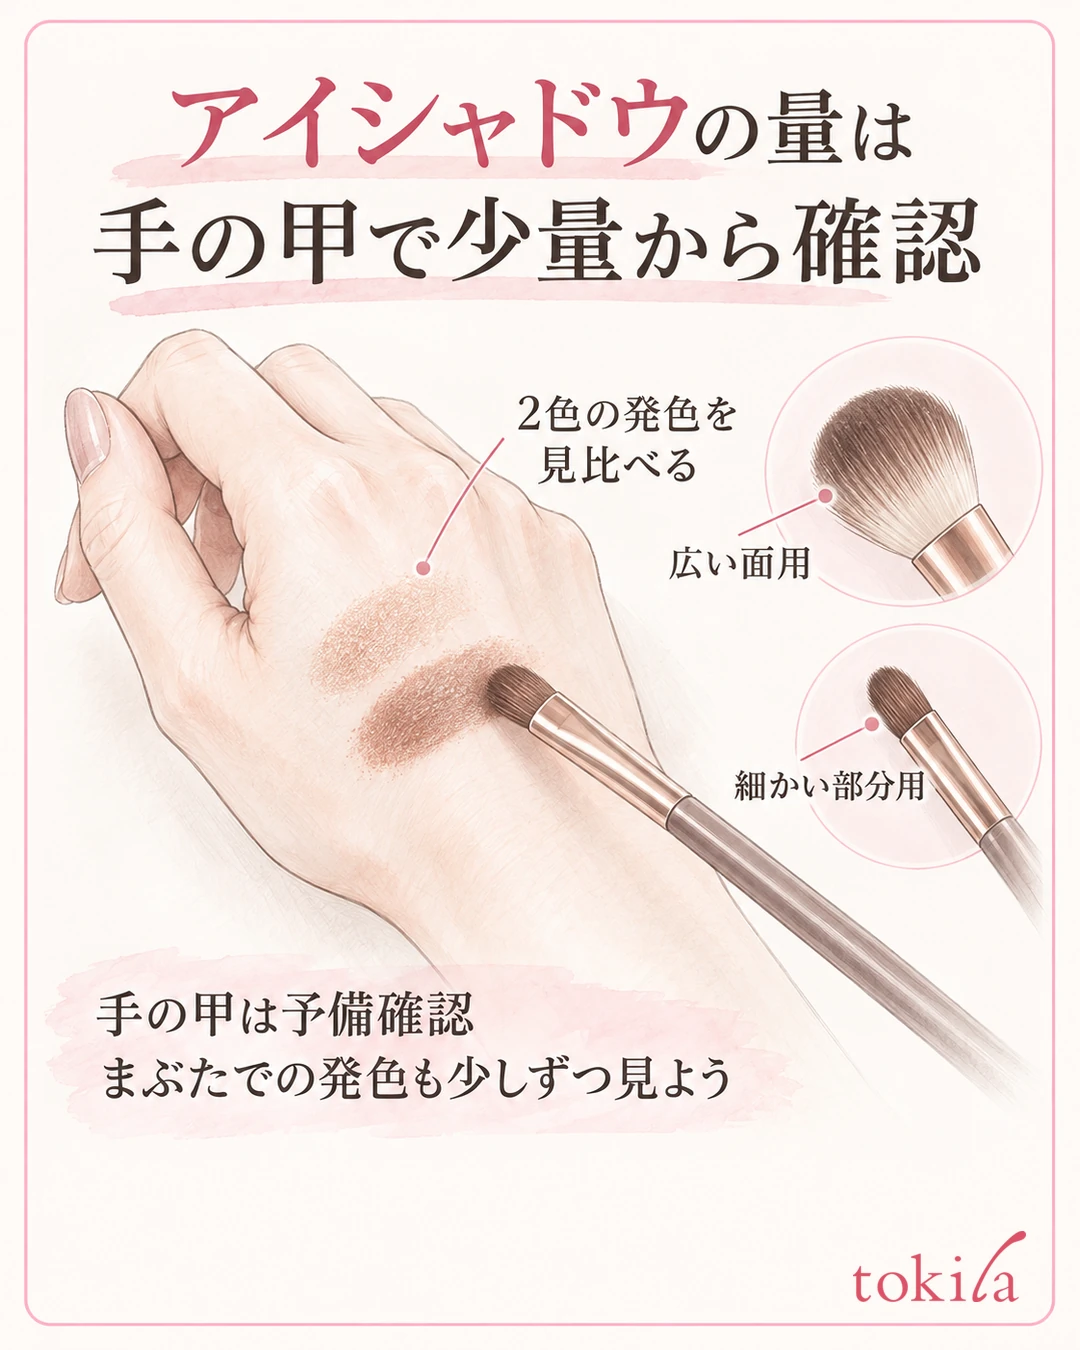
Prepare a larger brush or tip for wide areas and a smaller tool for narrow areas.
If you have only one, start with the light color, and before switching colors, remove the leftover powder according to how the tool is meant to be handled. For blending, use a clean, dry tool with no powder left on it. If you pick up the light color again with a tool that has dark color on it, it becomes hard to tell which color you added. Just deciding the order in which you use things beforehand makes fixes along the way easier.
2. Spread the light color thinly to build a base
Pick up a small amount with a brush or tip, adjust the amount on the back of your hand, and then apply it to the eyelid. Rather than covering everything up to the brow bone at once, start with the movable part of the upper eyelid and blend lightly and thinly. If you start at a level where your skin still shows through, you can widen the area later.
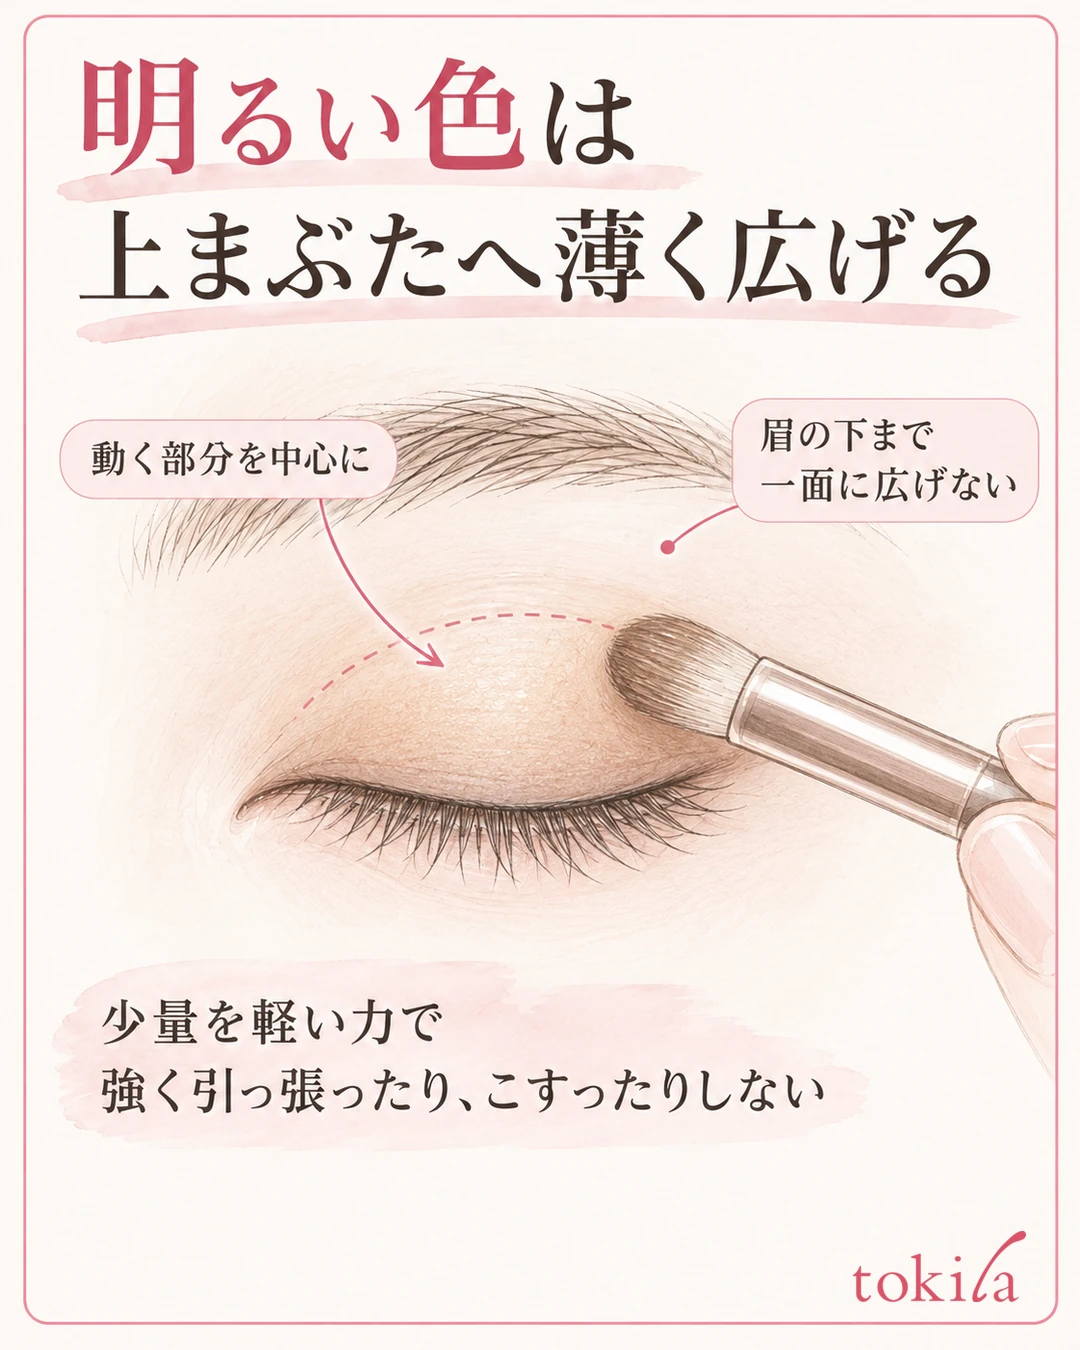
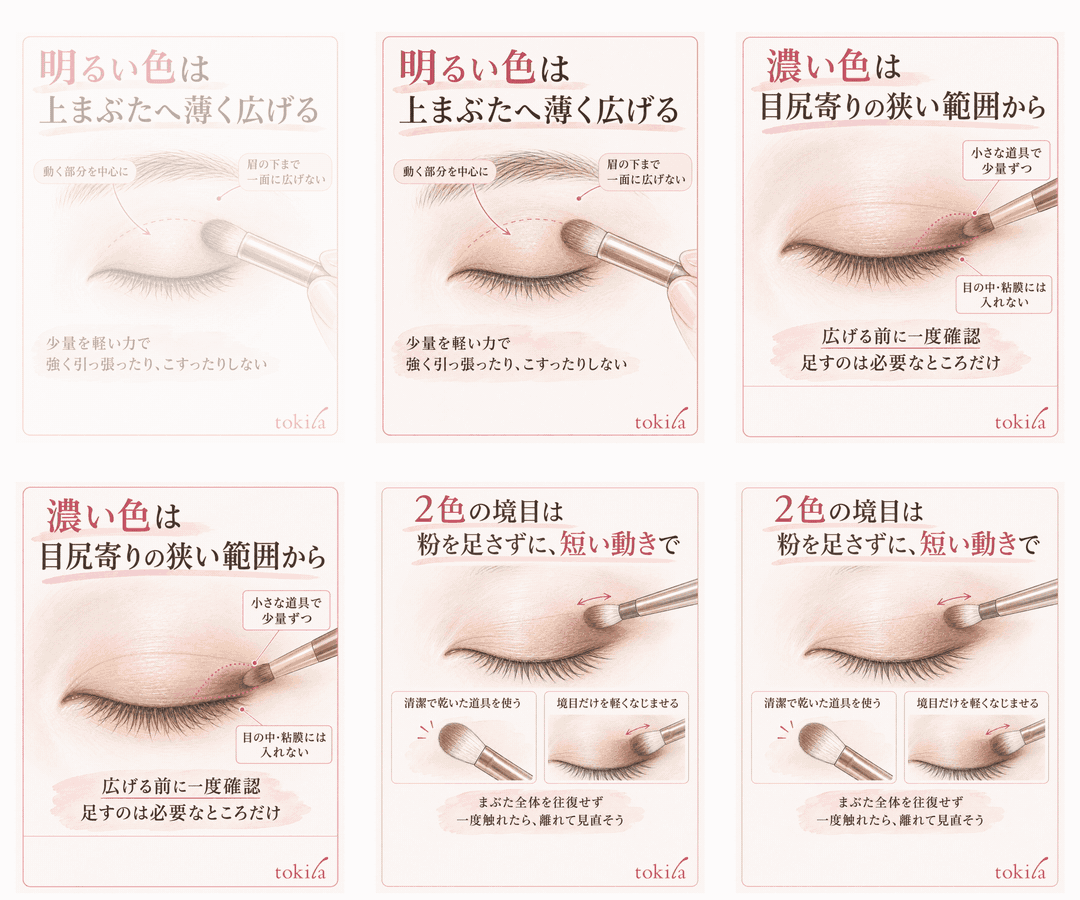
Blend upward from the lash line so that no sharp line is left where the color ends. Don't pull the eyelid hard or rub it over and over; tidy it up with few movements. If you use an eyeshadow base, use an eye-area product in the specified amount. Layering it thickly does not always make the color go on more nicely.
If powder falls onto your cheek, remove it with a clean tool before layering foundation over it. Rubbing dark powder around can make it look like a shadow under the eye. Reducing the amount you pick up at the start is also a way to cut down on how often you have to fix fallen powder.
Place a mirror slightly lower to see where you are applying
When applying to the upper eyelid, hold a hand mirror slightly below your face and lower your gaze so the surface is easier to see. Squeezing your eyes shut creates wrinkles and makes it hard to tell where to place color, so check with a relaxed, downcast gaze.
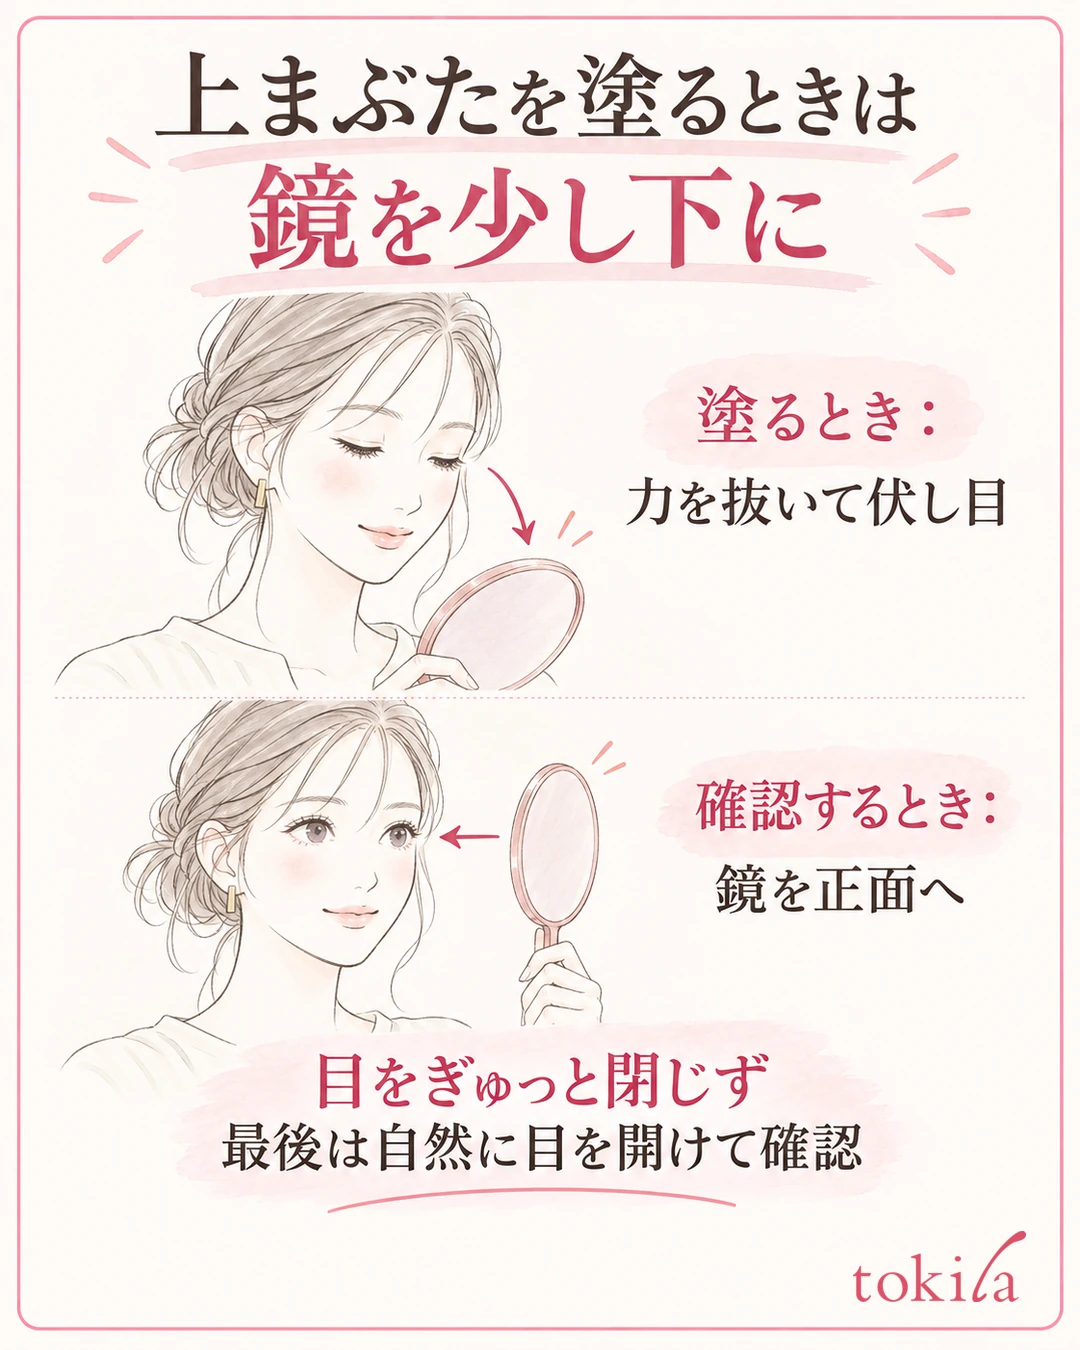
Rather than finishing one side dark and then trying to catch up on the other, apply the light color thinly to both sides before moving on. If your eyelids differ in shape from left to right, checking how they look with your eyes open will give you adjustments that suit your goal better than matching the same width with your eyes closed.
It is also important not to judge the finished look with the mirror still held low. The angle at which you apply is different from the front angle at which other people see you. Bring the mirror back in front of your face once, and check that the border of the light color is not strongly left on the upper part of the lid, before moving on to the dark color.
3. Add the dark color starting from a narrow area near the outer corner
Pick up a small amount of the dark color with a smaller tool and place it toward the outer corner of the upper eyelid. Try a short area first and, if needed, blend it little by little toward the center of the eye. If you make the whole lid dark from the start, the difference in roles from the light color becomes hard to see.
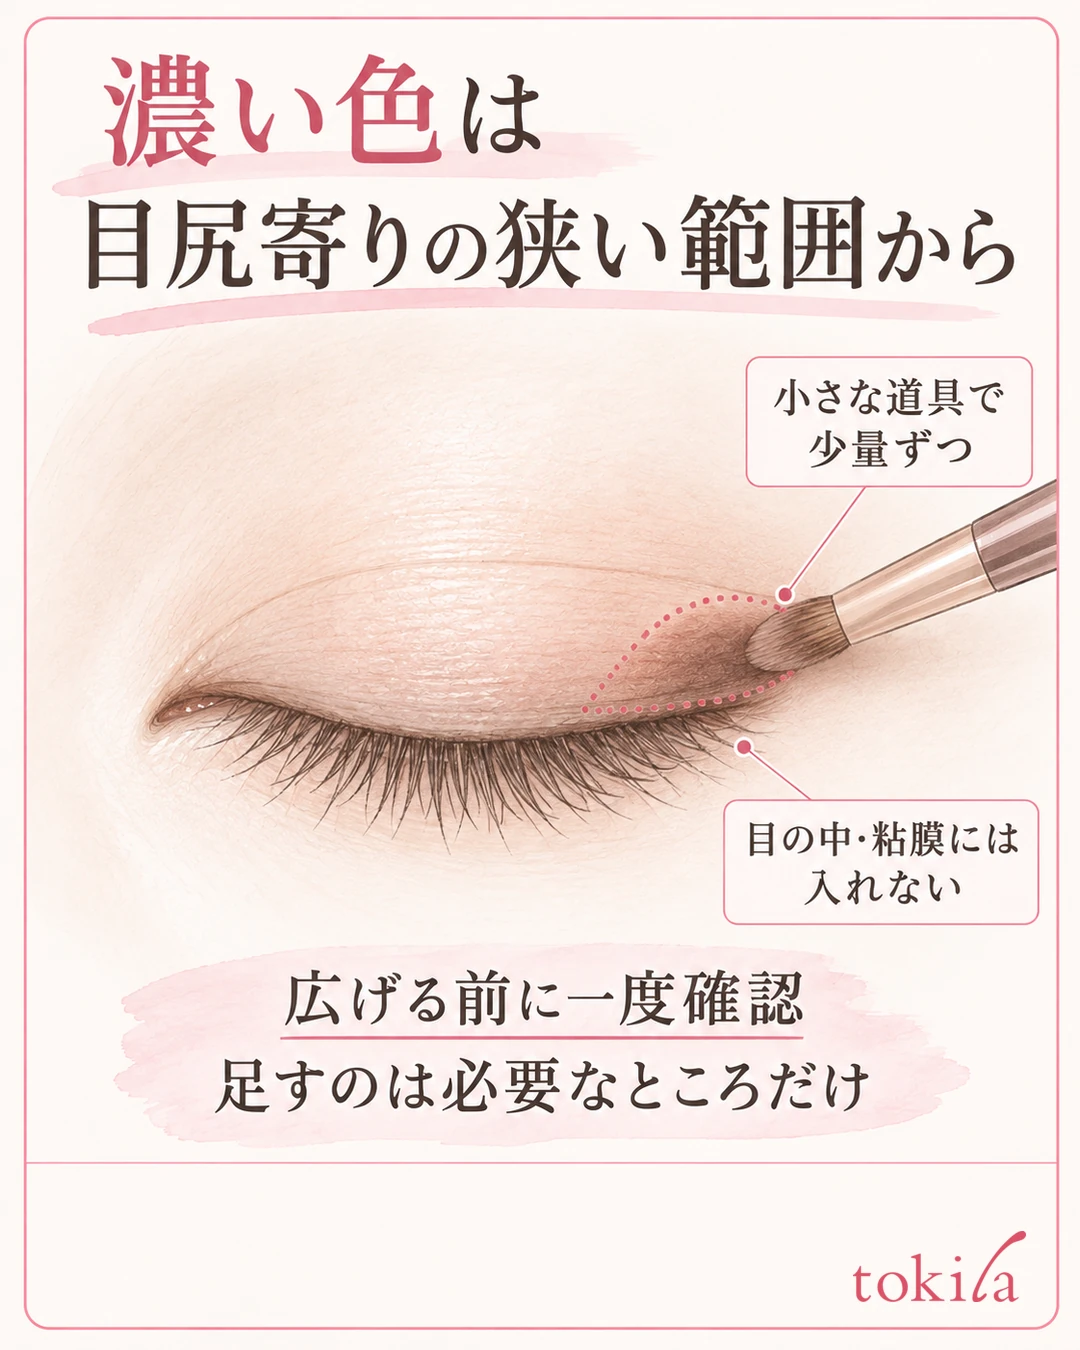
When applying along the lash line, keep it out of your eyes and off the mucous membrane. Rather than forcing a large tool to target a thin area, switch to a tool with a smaller tip. When you want a deeper color, add a small amount to the same spot and avoid spreading it up into the upper area at the same time.
Whether to extend the color outward from the outer corner or keep it inside the shape of the eye depends on the impression you want and on your own eye area. If you narrow today's goal to practicing the contrast of two colors, finishing with just the upper eyelid is enough. You don't need to extend it to the lower lid at the same time.
Don't rely on the double-eyelid width alone; check with your eyes open
If you decide "the dark color goes all the way across the crease width," the area of color becomes large on people with a wide crease, and it can be hidden on people with a hidden double eyelid. You also can't prescribe the same width for everyone based only on the categories of monolid, hidden double, and double eyelid.
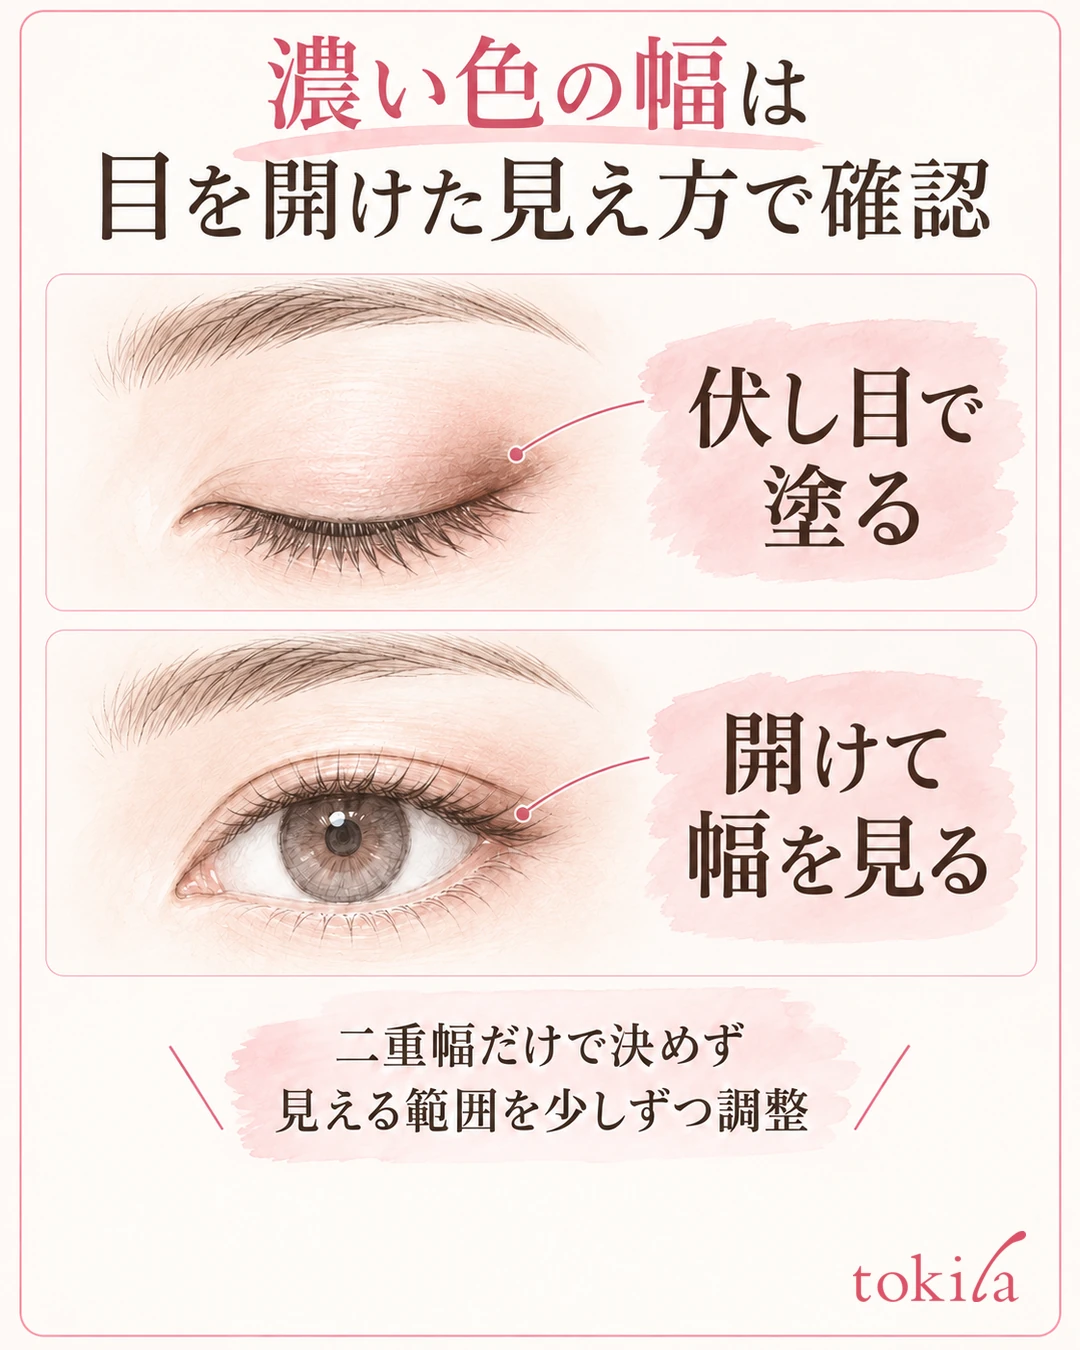
Here, use how much of the thinly placed dark color is visible when your eyes are open as your guide.
If you can't see it, don't spread it upward all at once; add a little toward the outer corner and check again. Conversely, if it looks heavy, stop adding the dark color and tidy the upper border. Rather than trying to change the shape of your eyes, think of it as adjusting the area of color you use, and the places to fix narrow down.
4. Blend the border with a tool that has no color on it
If the border between the two colors looks like a line, lightly blend just around the border with a clean, dry brush or tip that has no powder on it. Don't press the skin with the bristles; touch once with a short movement and then look again. If you blend with a tool that has dark color on it, you may end up adding even more color when you meant to correct it.
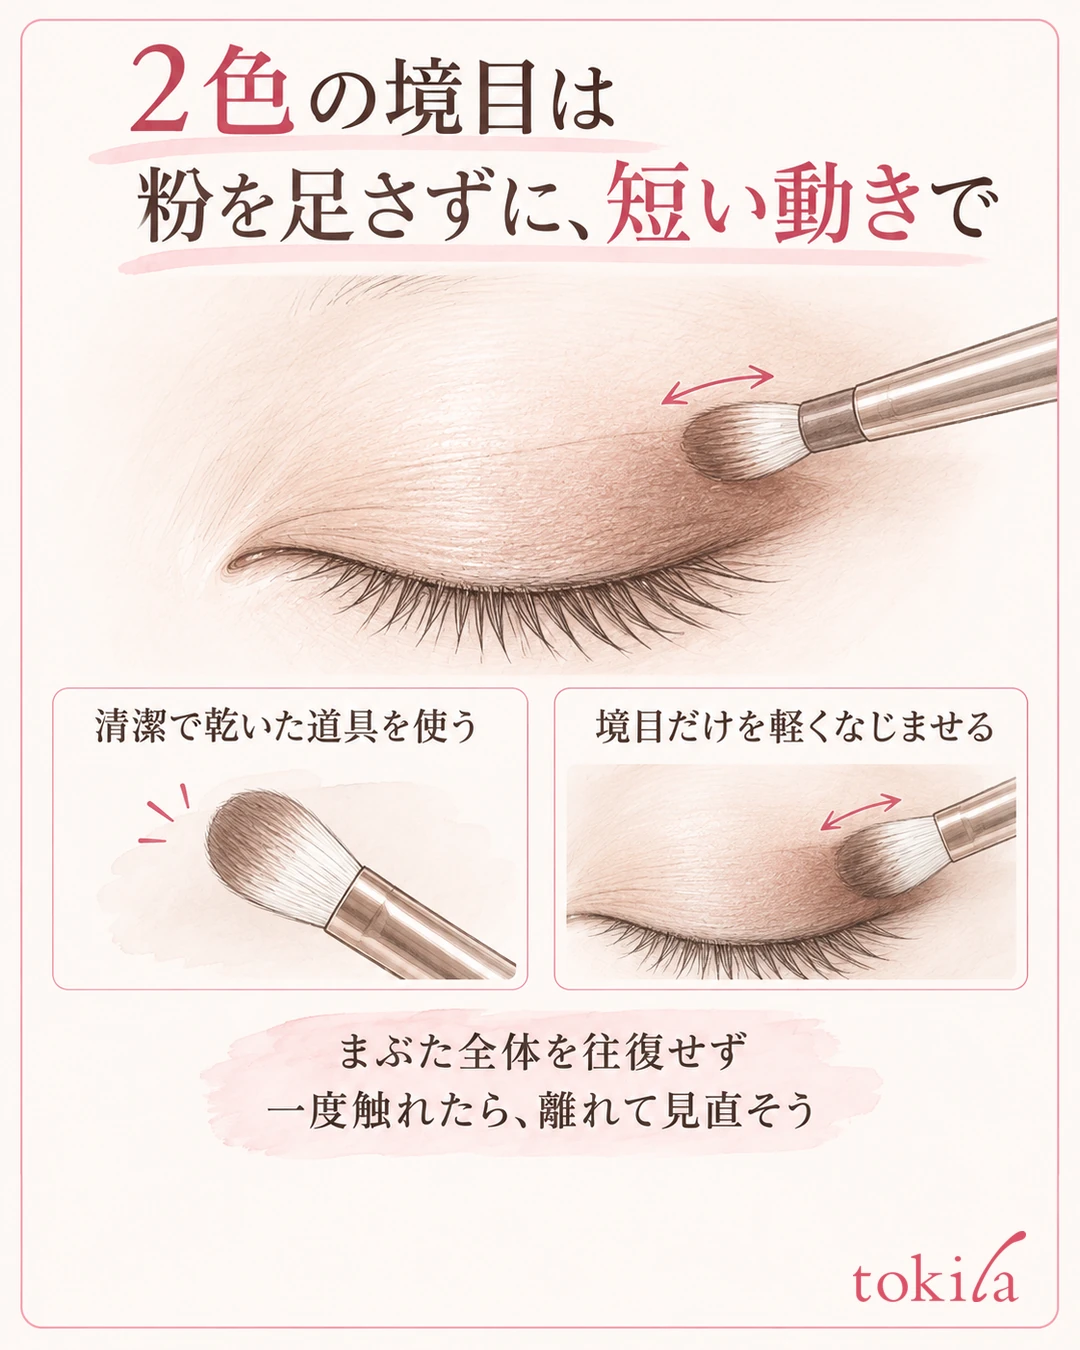
Move it only where the upper edge of the dark color meets the light color. If you sweep the dark color back and forth over the whole lid, both colors tend to end up at the same depth. Tidy the border with small movements, then look from a distance and check that no abrupt color change remains.
If blending makes the color disappear, put a small amount back where it's needed. Rather than going back and forth many times to create a perfect gradation, aim for "the dark area is narrow and fades naturally outward." Don't rub until your skin turns red.
If it gets too dark, decide what to take away before adding more
If it feels too dark and you layer a lot of the light color over it, the powder becomes thick and the color can look muddy. First lightly remove the excess powder with a clean tool and check which part is too wide.
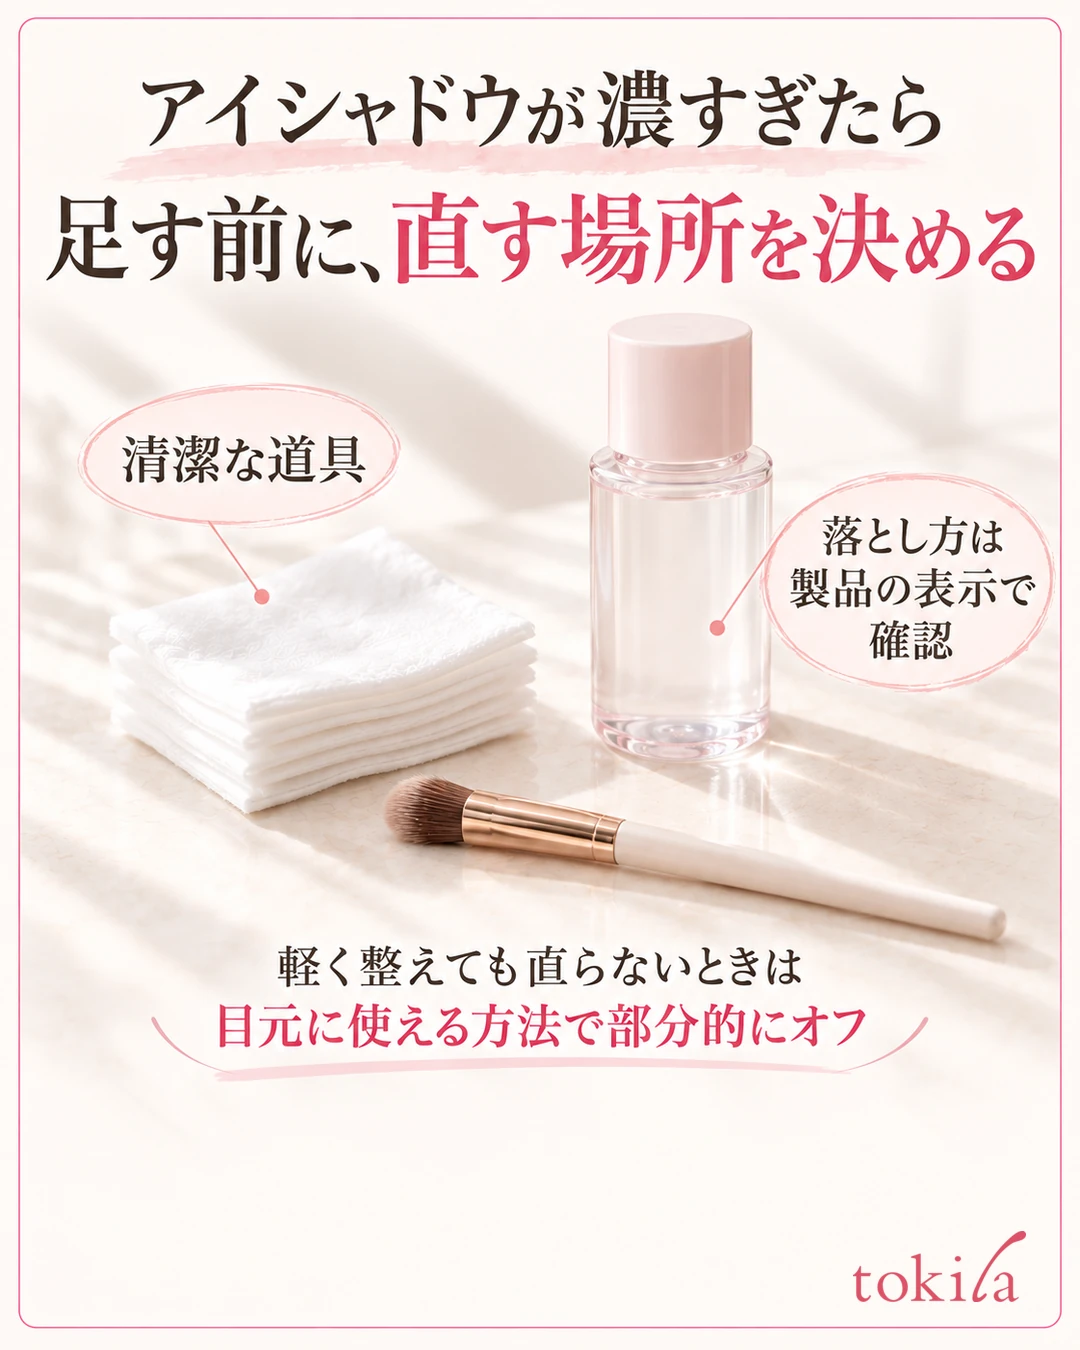
If only one part is dark, tidy that spot. If the whole area has become thick and doesn't improve with a light touch, use a remover that can be used on the eye area according to the product's instructions, remove the necessary area, and start over. Keep it out of your eyes, and don't layer powder over it while it is still wet.
The next time you apply, change just one thing: either reduce the amount you pick up or narrow the place where you put it first. If you change the amount, the color and the tools all at once, you won't know what led to the improvement. When practicing with the two colors you own, this small record is useful.
5. Check the result from the front and from a little distance
Finally, bring the mirror back to the front, open your eyes naturally, and check the depth on the left and right and the area that is visible. Looking at the eye area up close makes small differences bother you, but they may not stand out across the whole face. Also look at it from a distance close to how you normally look when talking with someone.
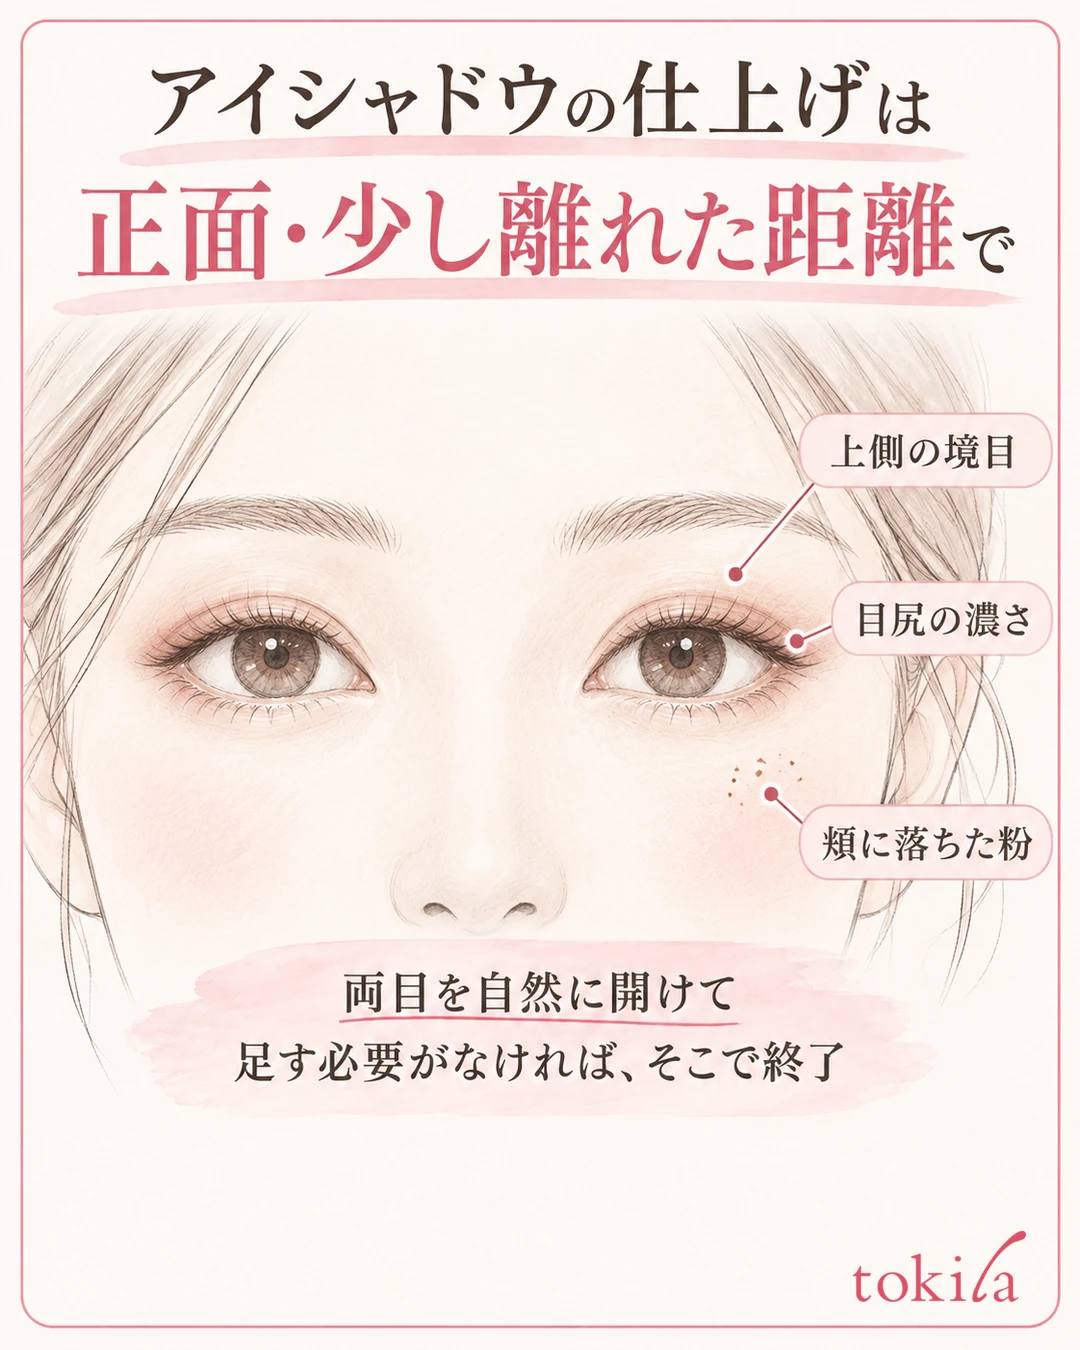
There are three things to check: the depth at the outer corners, the upper border, and powder that fell onto the cheeks. If nothing needs to be added, you are done there. Glitter stands out in a mirror with strong light and shading is hard to see in a dark place, so if possible, briefly check under another level of brightness too.
After you add eyeliner and mascara, the depth of the whole eye area changes. Even if the eyeshadow alone looks lacking at its stage, judging after finishing the rest of your makeup keeps you from layering on too much color. Try changing the habit of adding the same amount every time into a habit of deciding by looking at the result.
Choose cheek color and lipstick after checking how strong the eyes are
On days you finish the eyes boldly with the two colors, try cheek color and lipstick lightly and check the whole face. On days you keep the eyes soft, deciding which feature you want to show off, such as adding color to the lips, helps you organize your color scheme. For more detail, see also combining eyeshadow, cheek color and lip color.
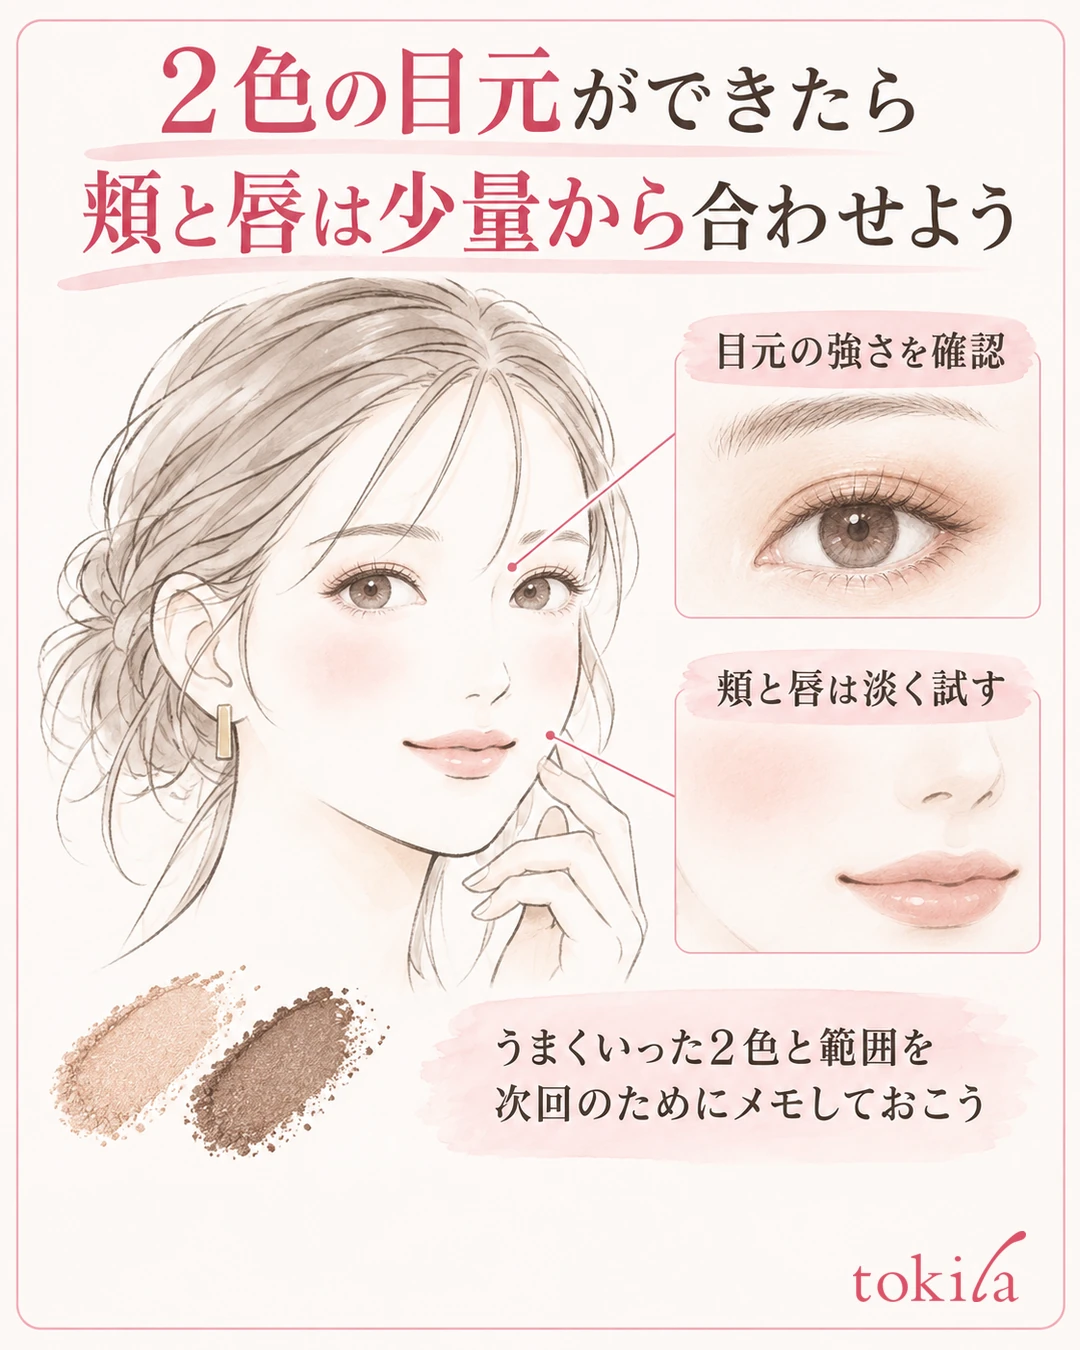
If it went well today, jot down the two colors you chose and the area where you placed the dark color. Next time you can start from the same conditions and change the amount and area little by little. Before you increase the number of colors, the two-color application is practice for learning how depth looks on your own eyelid.
Written by the tokila editorial team. The team organized adjustment steps you can try with the tools you already have.
If eyeshadow settles into your eyelid crease, you can check the base before applying, the amount, and how to touch up.
If powder or glitter falling onto your cheeks bothers you, you can check how to prevent eyeshadow powder and glitter from falling: amount, tools and touch-ups.
If eyeshadow looks faint even after you apply it, you can check how to tell color from shine, and how to review your tools, placement and blending area.



