
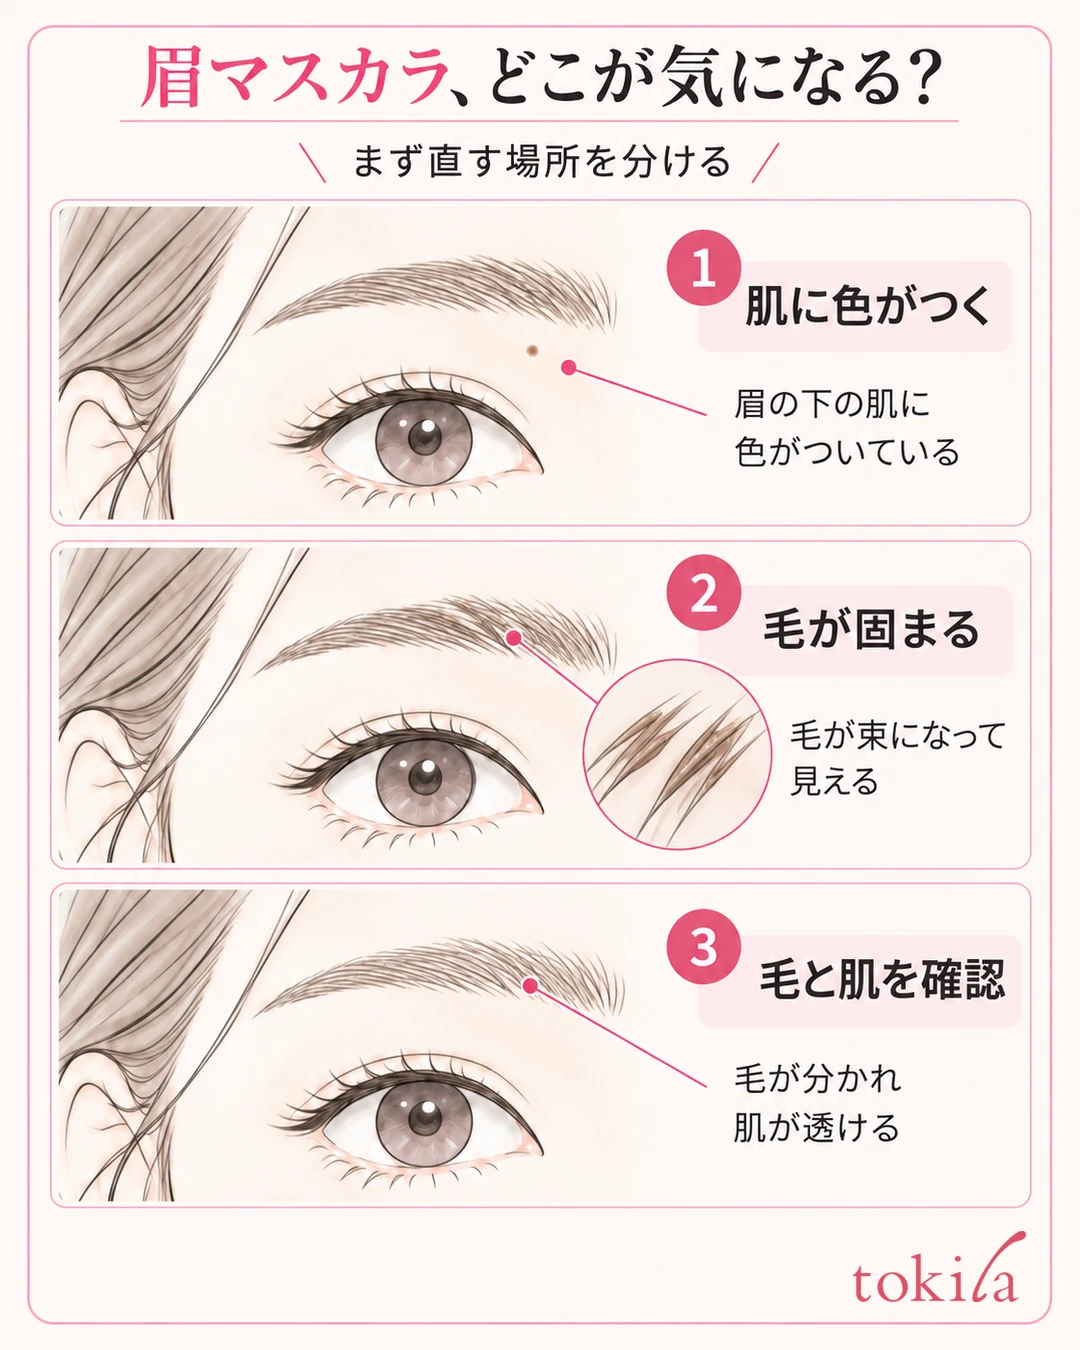
If brow mascara gets on your skin or makes your brow hairs look clumped and sticky, check "color on the skin" and "product on the hairs" separately before layering more color. The basics are to adjust the amount of product on the brush and lightly touch only the brow hairs. Remove any color that gets on the skin in a small area, and redraw only where needed.
This article explains how to prepare and apply brow mascara to reduce transfer to the skin, and how to recover when it goes wrong. How easy it is to handle changes with hair length, growth pattern and brush shape, so follow the directions for the product you own.
1. Check skin color and clumped hairs separately
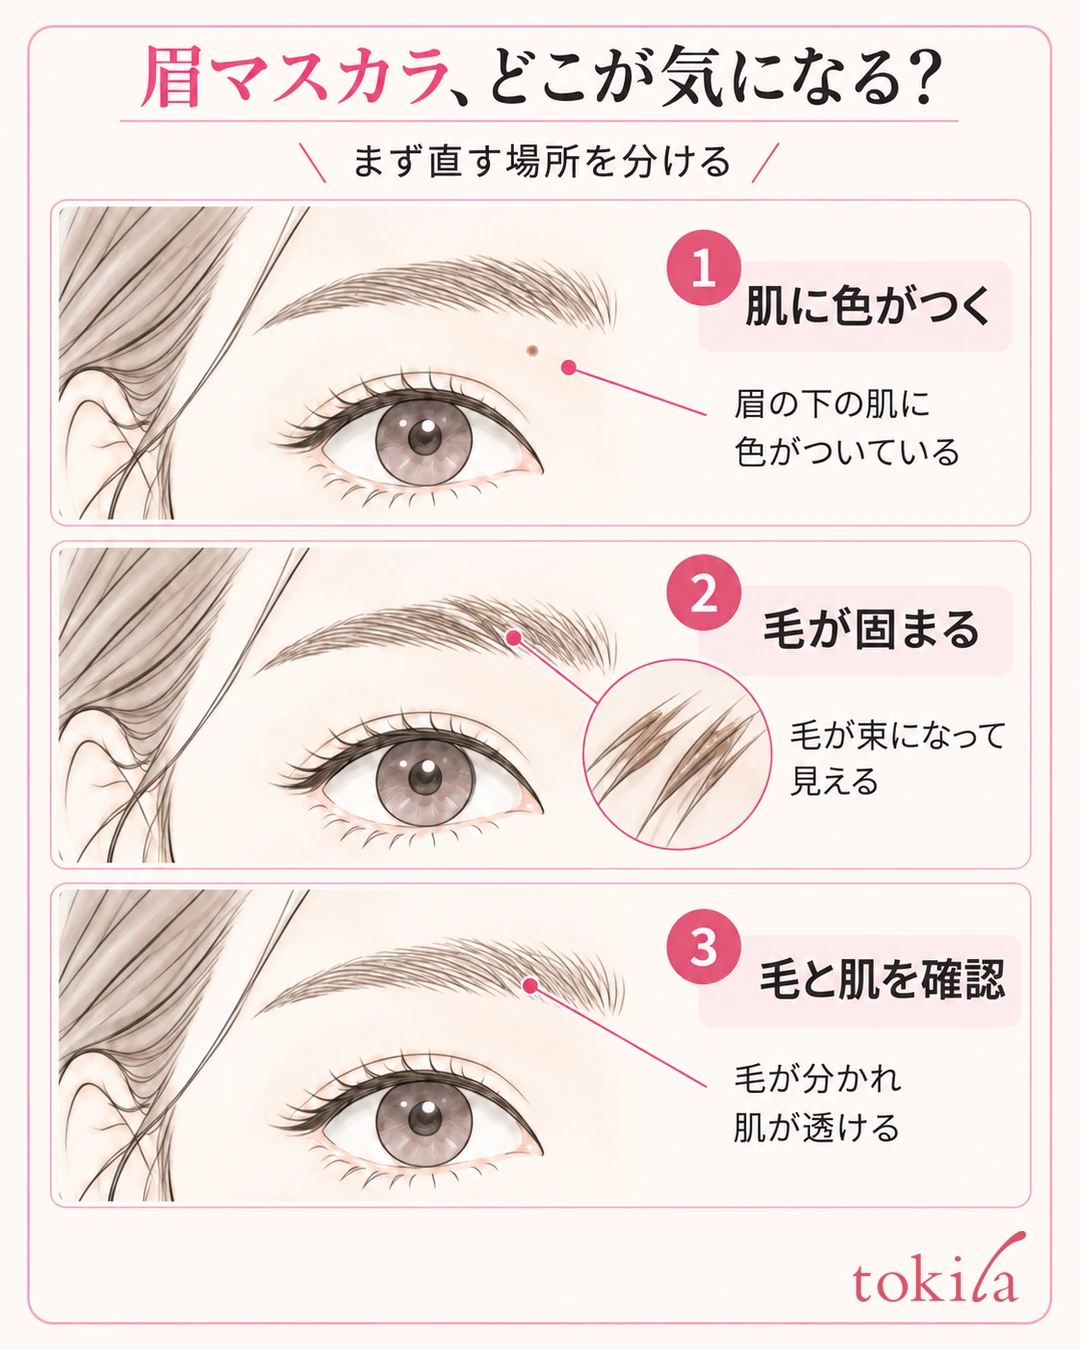
First, place a mirror in a stable spot and look at your brows up close. If there are clusters of color dots or patches between the hairs or outside the brow, it is likely product has transferred to the skin. On the other hand, if the skin is visible but the hairs are bundled together, it is a case for reviewing the amount of product or how you layer it. Both look like "dark brows," but what needs fixing is different.
Check where the color got on by dividing the brow into the inner end, middle and tail. Putting the position into a single phrase, such as patchy color only at the inner end or dots outside a thin tail, makes it easier to decide where to place the brush next. Before redoing the whole brow, narrow down the spots that bother you.
Distinguish clumped hairs from the darkness of the outline you drew, too. If a line made with pencil or powder stands out, applying more brow mascara does not necessarily make the line itself disappear. Rather than adding more product, stop for a moment and think back to which step made it look strong.
If your natural brow hair is only showing through a little darker, there is no need to judge it a failure right away. The finish varies with hair density and color combinations. If you go back and forth many times with the goal of making every single hair the same color, there are more chances of touching the skin and more product ends up on the hairs. Decide beforehand how much you want to change the color in today's makeup.
After looking closely at your brows, step back from the mirror and check both brows and the eye area together. Light coming from one side can look like a difference in color, so match your face direction and the light when comparing. Do not judge the finished color from an image filter alone; check whether it still bothers you at your usual distance.
If your main concern is a difference in height or length, go to how to check and draw uneven eyebrows. This article focuses on where brow mascara product ends up, rather than designing a new brow shape.
2. Before applying, adjust the excess product on the brush
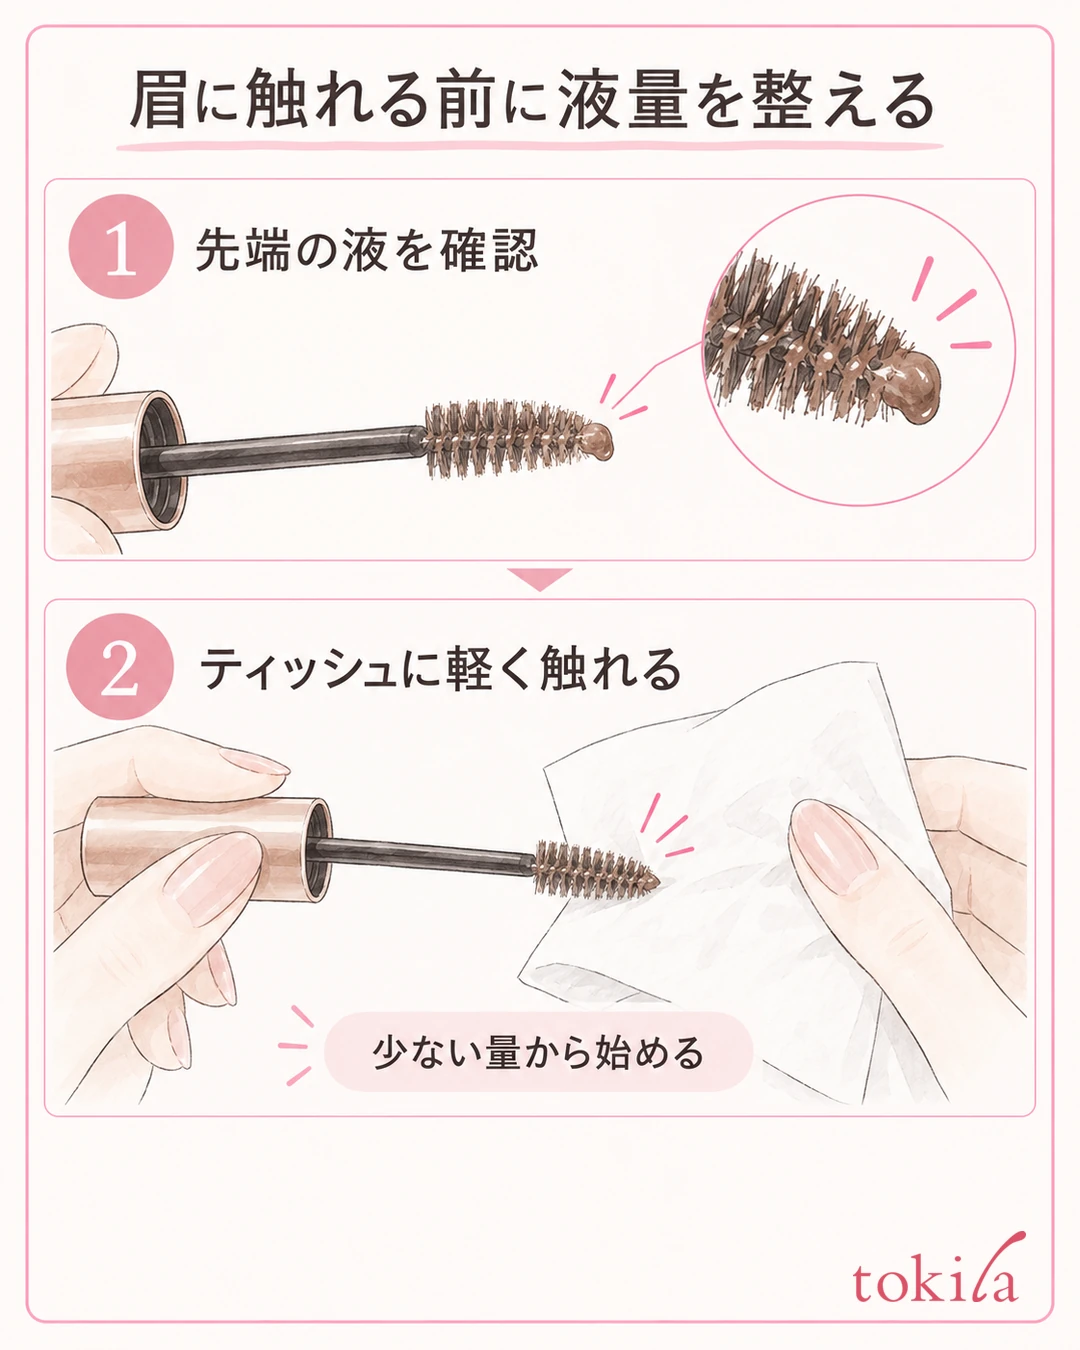
Before use, take out the brush and check for clumps of product on the tip or on one side. Do not transfer the visible amount straight to your brows; adjust the excess according to the product's directions. Before using it on areas with sparse hair such as the tail of the brow, check in particular that product has not gathered at the tip.
If you use a tissue, lightly touch it to a clean surface and blend the product evenly on the brush. Do not press hard, bending the bristles or tangling fibers in them.
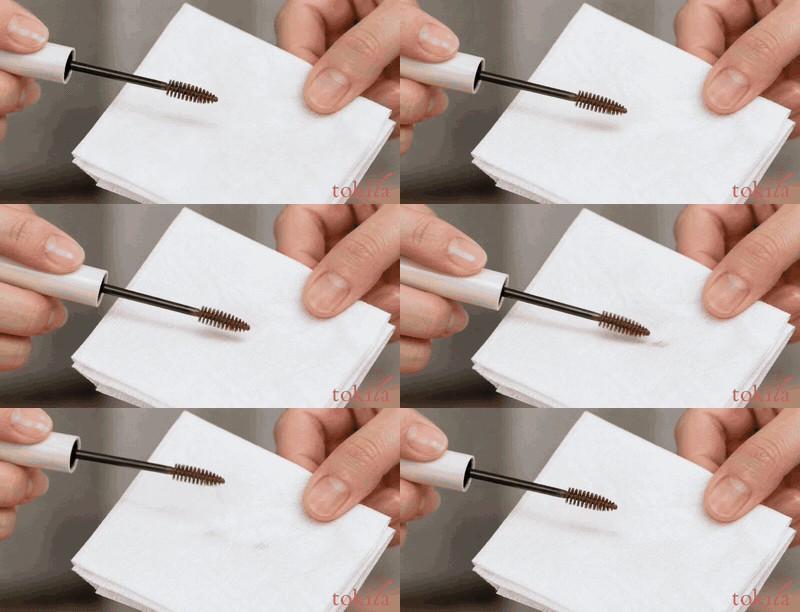
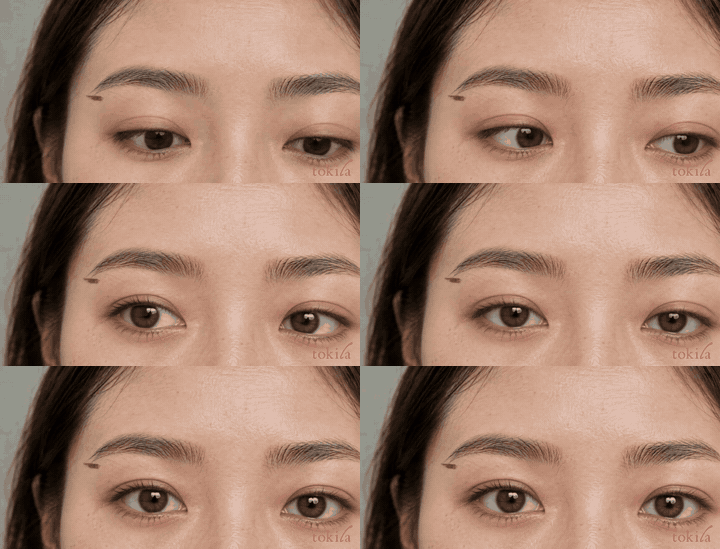
How to watch the video
Hold a clean tissue, lightly touch the brush to it, then lift it away. Do not press hard or rub broadly; adjust the excess product according to the product's directions.
This video is a reference example showing how to touch the tissue. It is not a standard for how much product to leave or how much pressure to use. After lifting the brush, check that no clumps of product or tissue fibers remain on the tip before using it on your brows.
Check the brush after adjusting it, too. A good clue is whether the spaces between the bristles are filled with product, and whether a clump remains only at the tip. You do not need to wipe it until completely dry, but also avoid immediately picking up a large amount again because you wiped off too much. Start by trying a small area with a small amount, and check on your brow whether it is enough.
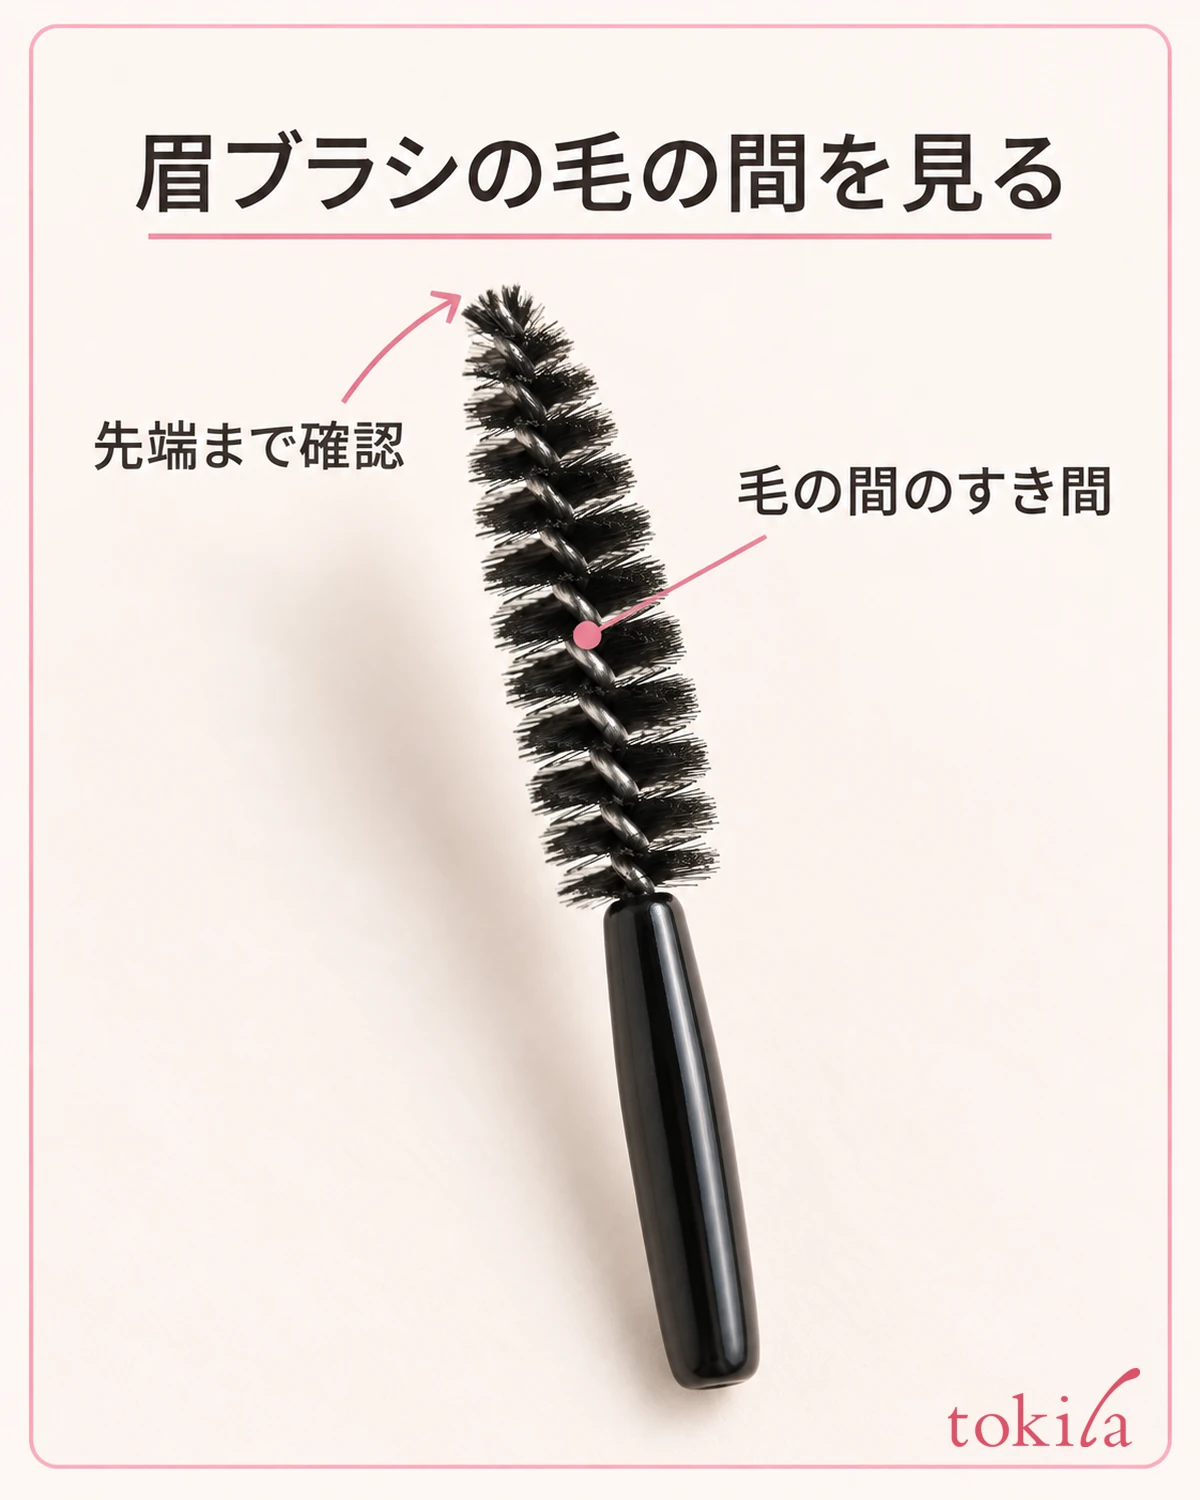
Do not put old product from the rim or stem of the container back onto the part you use on your brows. If the product has hardened and is hard to use, check its condition before forcing yourself to keep using it.
Lightly smooth the direction of your brow hairs with a clean spoolie before applying the product. Once you can see where hairs overlap or are short, you no longer need to run over the whole brow with the same pressure. The aim here is not to change the shape much, but to check the direction of the hairs and how much skin shows.
Keep your tools together so you do not have to search midway. Preparing a separate clean brush and a cotton swab with no product on them reduces the mistake of spreading transferred color with the applying tool. Do not try to coat the fine hair tips in one go; start with the small amount you prepared.
3. Lightly touch only the brow hairs without pushing the brush in
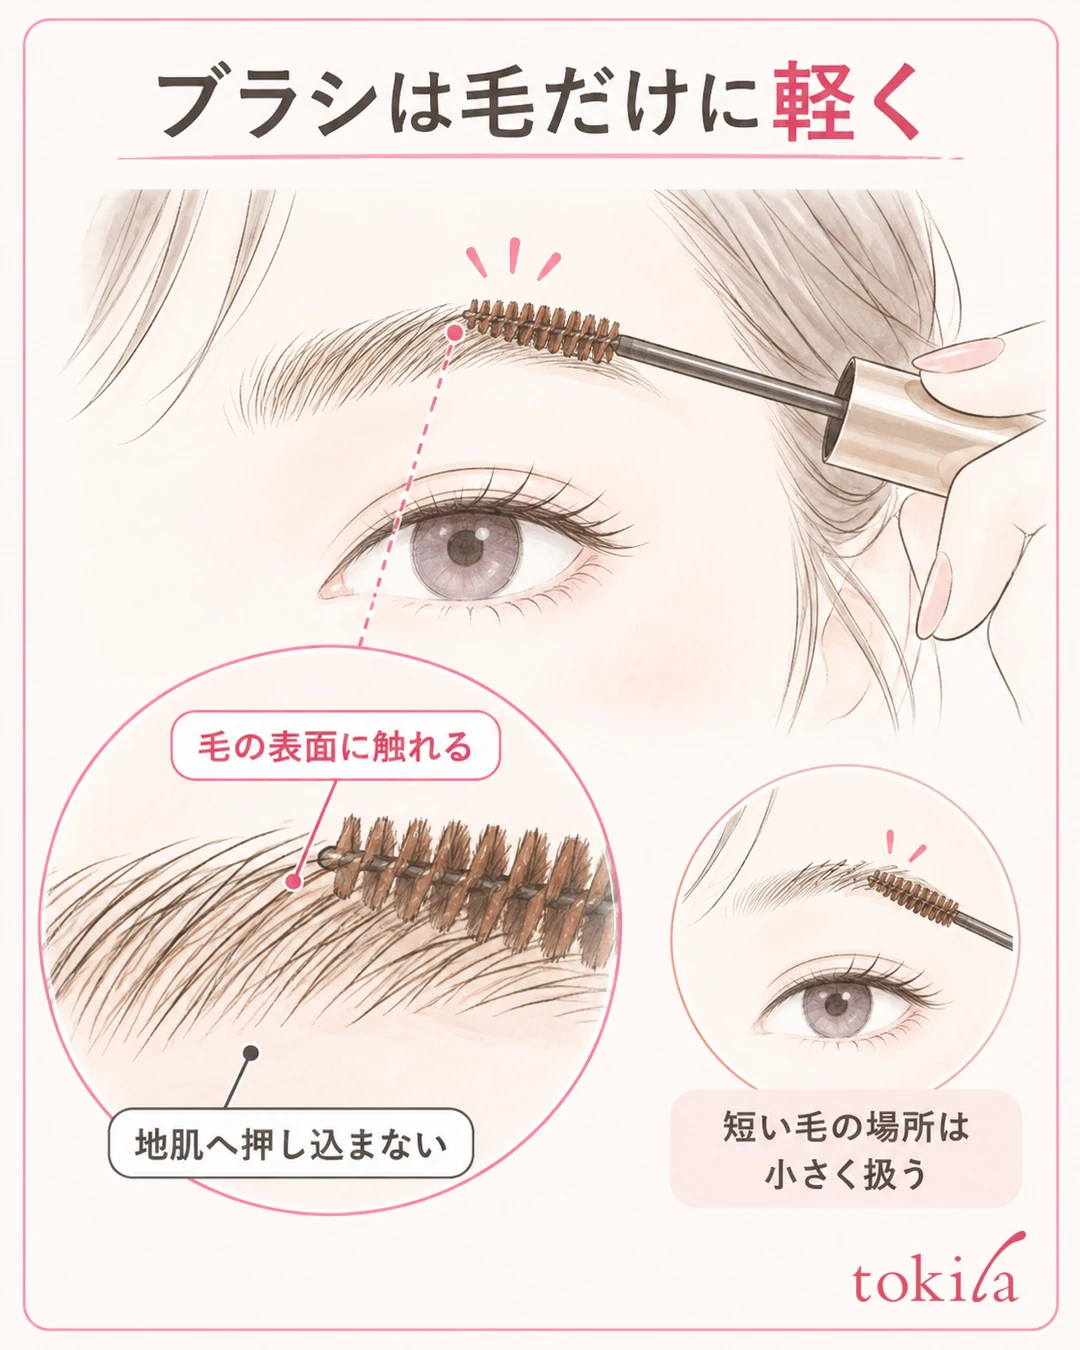
Looking in the mirror, decide where the bristle tips will touch the brow hairs. Do not push into the skin under the brow; touch lightly on the surface of the hairs. If you press harder to get the product to the roots, it is easier to touch the skin as well. In areas with short hairs, make your movements smaller and do not sweep back and forth widely without being able to see where you are touching.
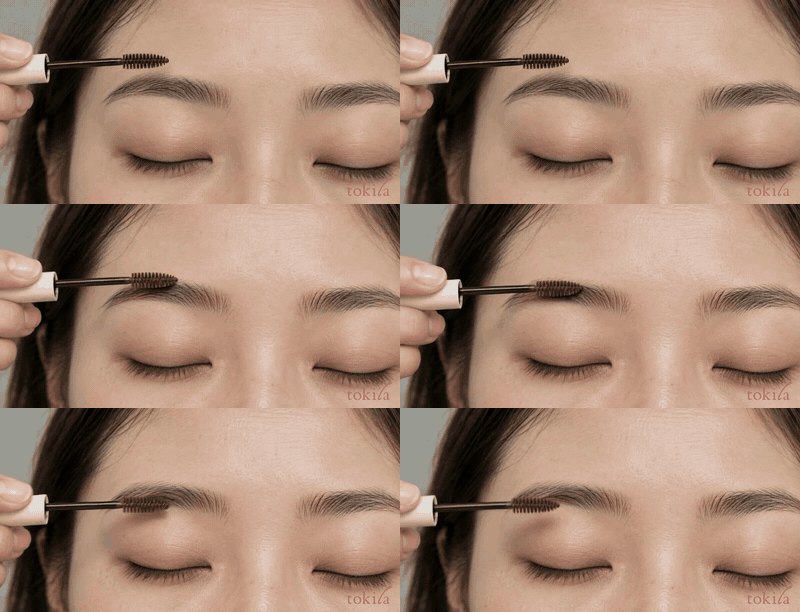
Check the product's directions for the direction of application. Even when you use it in the opposite direction, do not turn it into rubbing against the skin. Keep the lightness with which the brush touches the hairs, and stop once you have handled one area.
It is also important not to trace the inner end and tail of the brow strongly in the same direction. Look at how your own hair grows: hairs standing up at the inner end, and hairs pointing sideways or diagonally from the middle to the tail. Finish by calming the hair tips along that flow. Prioritize the hair direction you actually see and the product's instructions over the arrows in the diagram or general steps.
When looking for missed spots, check whether you can handle them with the brush you have now before picking up more product. Even if a single dark hair bothers you, there is no need to repeatedly redo the area around it. If the brush is hard to place in a narrow spot, rather than forcing the tip or angle and pressing on the skin, stop there and look at the whole.
When the hairs have clumped, do not pull on them hard after they dry; tidy them according to the product's directions. Lightly pass a clean brush along the hair flow, and if you feel resistance, do not increase the force.
For a part that has hardened and does not move, decide whether to remove and redo it rather than combing it repeatedly. Do not use methods such as pulling the brow hairs apart or scraping a clump off with a fingernail. Because you are working near the eyes, keep the tip pointed away from your eyes and proceed with the mirror and your hand steady.
4. Redo color on the skin in a small area
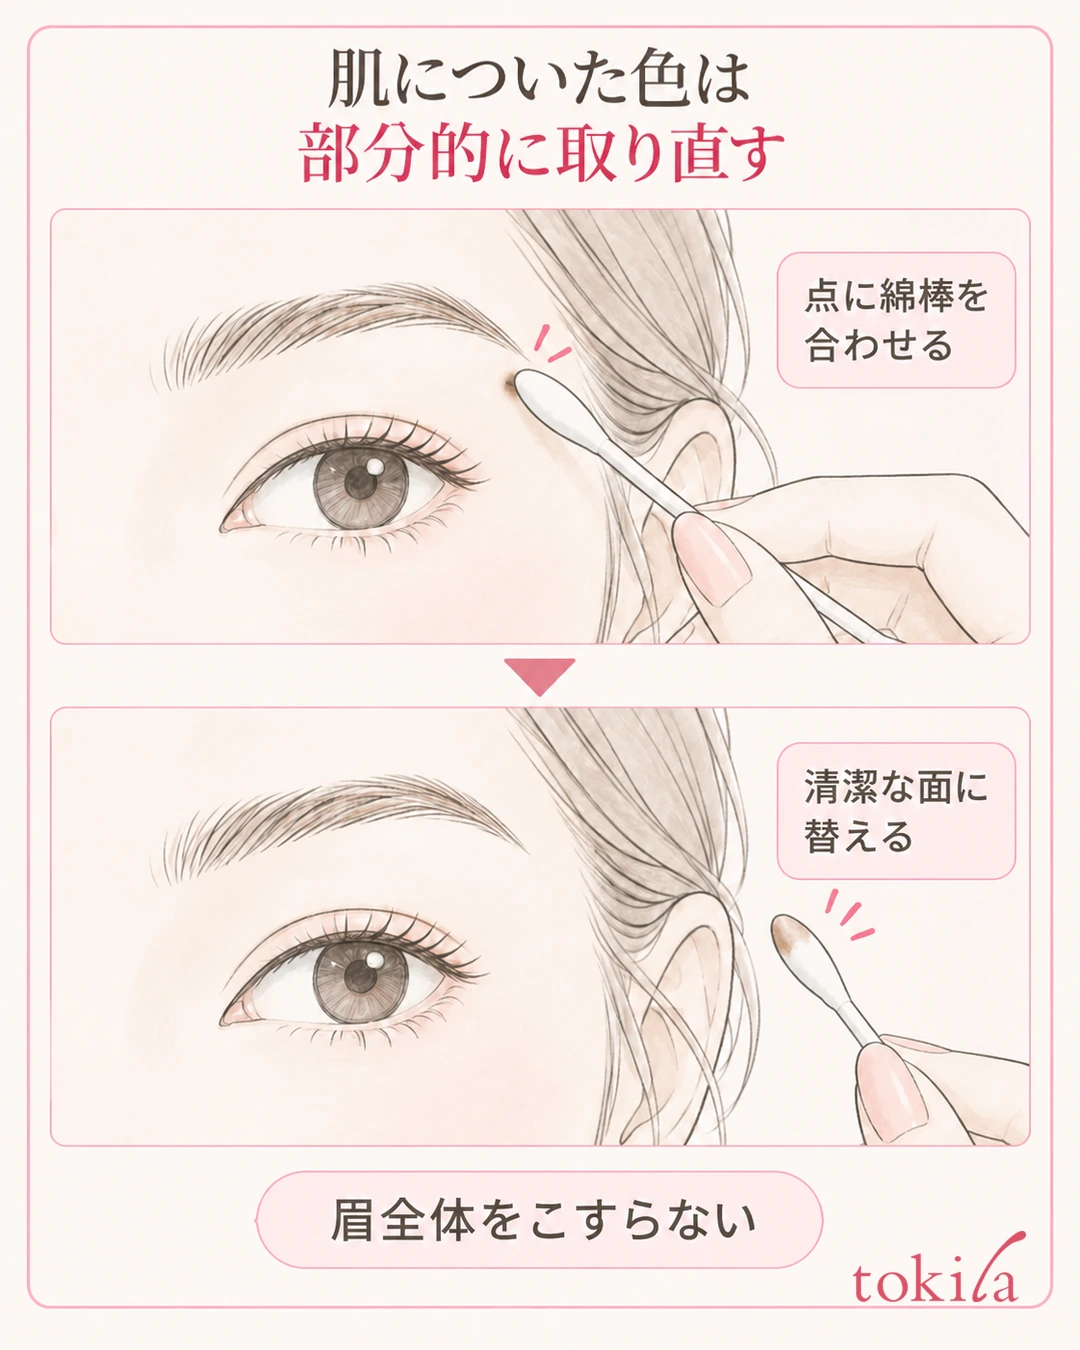
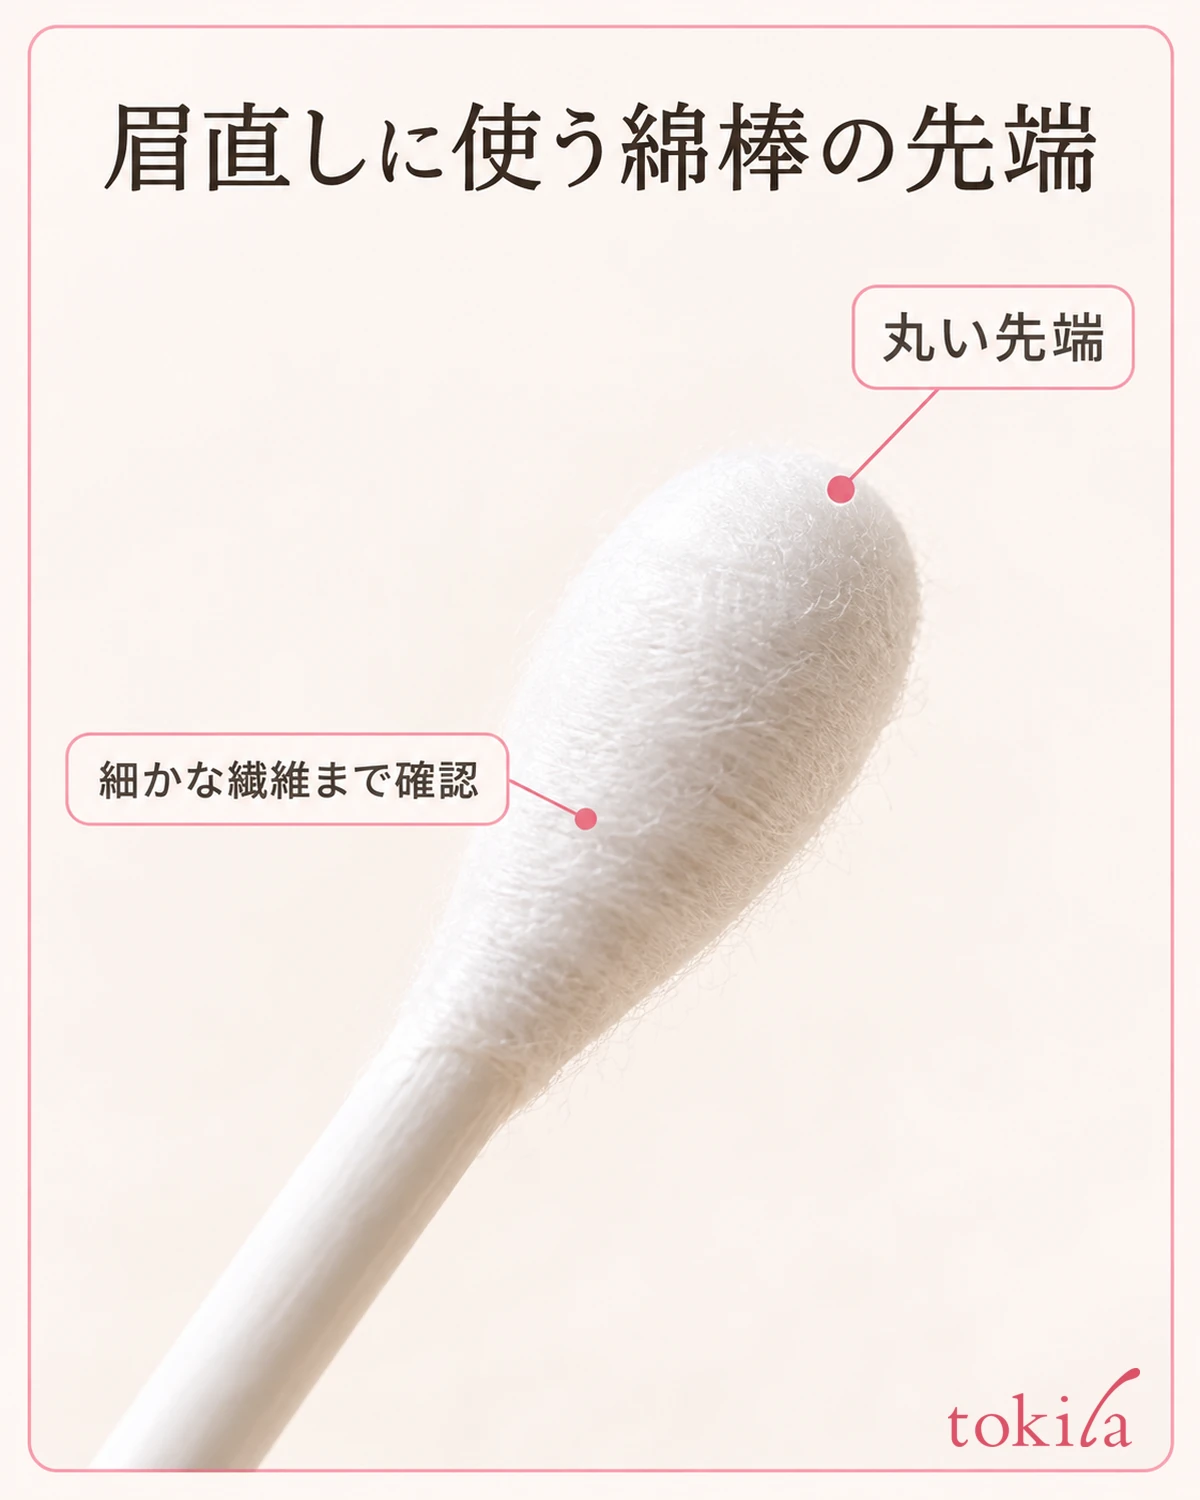
If color gets on the skin, put the brush down without layering new brow mascara. With a clean cotton swab, lightly touch the small spot where the color got on and remove it.
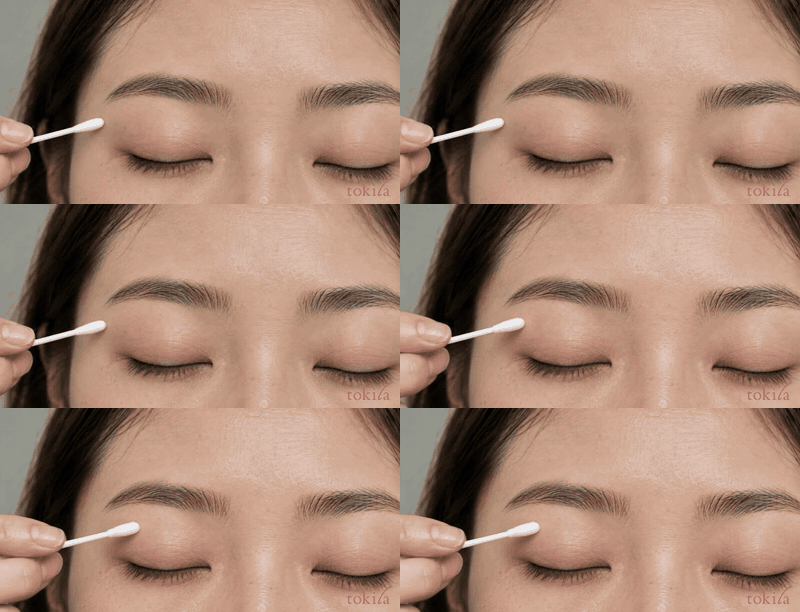
If you are fixing a dot outside the brow, line up the tip of the swab with the dot and avoid tracing broadly over the brow hairs or the outline you drew. When the removed color transfers to the swab, switch to a clean side. Going back and forth with the same dirty tip can spread the color to the surrounding area when you meant to erase the dot. Look at how it comes off once before deciding your next move.
For color that dries and remains, check how to remove it rather than increasing the force. Some brow mascaras can be removed with facial cleanser, while others recommend an eye and lip makeup remover. Do not assume everything comes off by rubbing with water alone.
When you use makeup remover on just one spot, follow that product's directions and use a small amount, taking care not to get it in your eyes. Do not wet a wide area to erase everything at once; remove only the spot that bothers you. If you feel irritation or pain, stop touching up and discontinue use.
After removing the color, check whether the base around the brow or the lines you drew have been erased. Fill in only as much as needed where the skin base has thinned, and redraw the brow line only where it is now lacking. Whether you need to use brow mascara over it again is decided by looking at the hair color. There is no need to add product to the whole brow just to hide the repaired skin.
If color has spread widely between the hairs and the outline breaks down the more you fix it locally, it can sometimes be easier to remove that brow makeup and start over. On days when you lack time or tools, stop at tidying up the dot-like transfer and do not force yourself to return to a perfect finish.
If the issue is not transfer to the skin but that the color of your brow hairs is hard to change, see also how to review the product, amount and application of brow mascara. It explains how to separate hair color, drawn lines and gaps with no hair, and adjust according to the directions of the product you own.
5. Check both brows and pick one condition to change next time
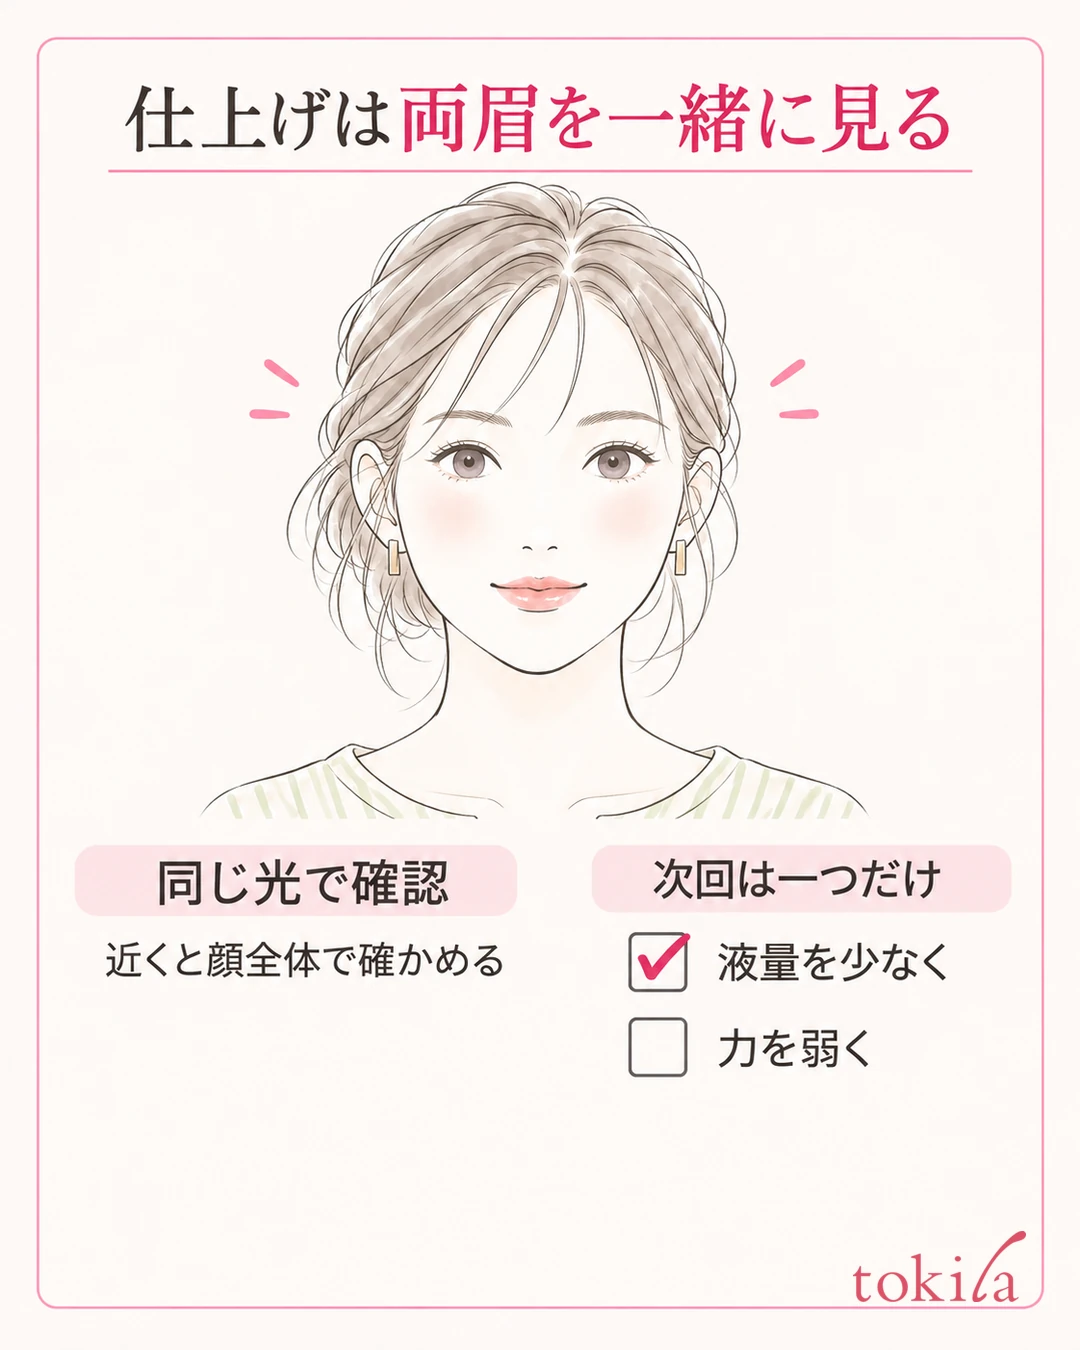
For the finish, step back from the mirror and look at both brows in the same light. Up close, check for clumped hairs and transfer to the skin; across the whole face, check the strength of the color and how it connects with the eye area. If one side looks darker, do not build the other side up to the same amount; first review what bothers you about the darker side.
There is no need to fill in from the inner end to the tail with the same darkness. If you put the same amount of product on areas with different hair amounts and lengths, skin stands out where hair is sparse and the hairs clump easily where it is dense. Think of matching the color and applying the same amount of product as separate things.
If transfer to the skin keeps happening, pick one condition to change next time. For example, leave less product on the brush at the start, lighten the pressure of the brush, or make your movements smaller in areas with short hairs. Rather than changing product amount, movement and tools all at once, you can look back at which adjustment made it easier to handle.
Three items are enough for your notes: "where it got on," "the state of the brush before applying" and "what to change next." If you write "a dot got on under the brow tail, product remained on the tip, next time adjust the amount at the tip," what to watch next becomes specific. Do not set counts or seconds as the right answer for everyone; use your own hair and the condition of the product as your clues.
If it is still hard to reach narrow areas after reviewing amount and placement, check the size and shape of the brush. Even a smaller brush will not necessarily eliminate transfer to the skin. Before buying another, sort out whether the difficulty is at the inner end or the tail, or whether the hairs are short, and refer to the official shape descriptions or ask in store.
If you want to see the order in which to fit brow makeup, go to the basic order of makeup. The key points this time are to adjust the product, lightly touch only the hairs, and redo the color on the skin in a small area. Check at two distances, up close and across the whole face, and stop the operation where needed.



