
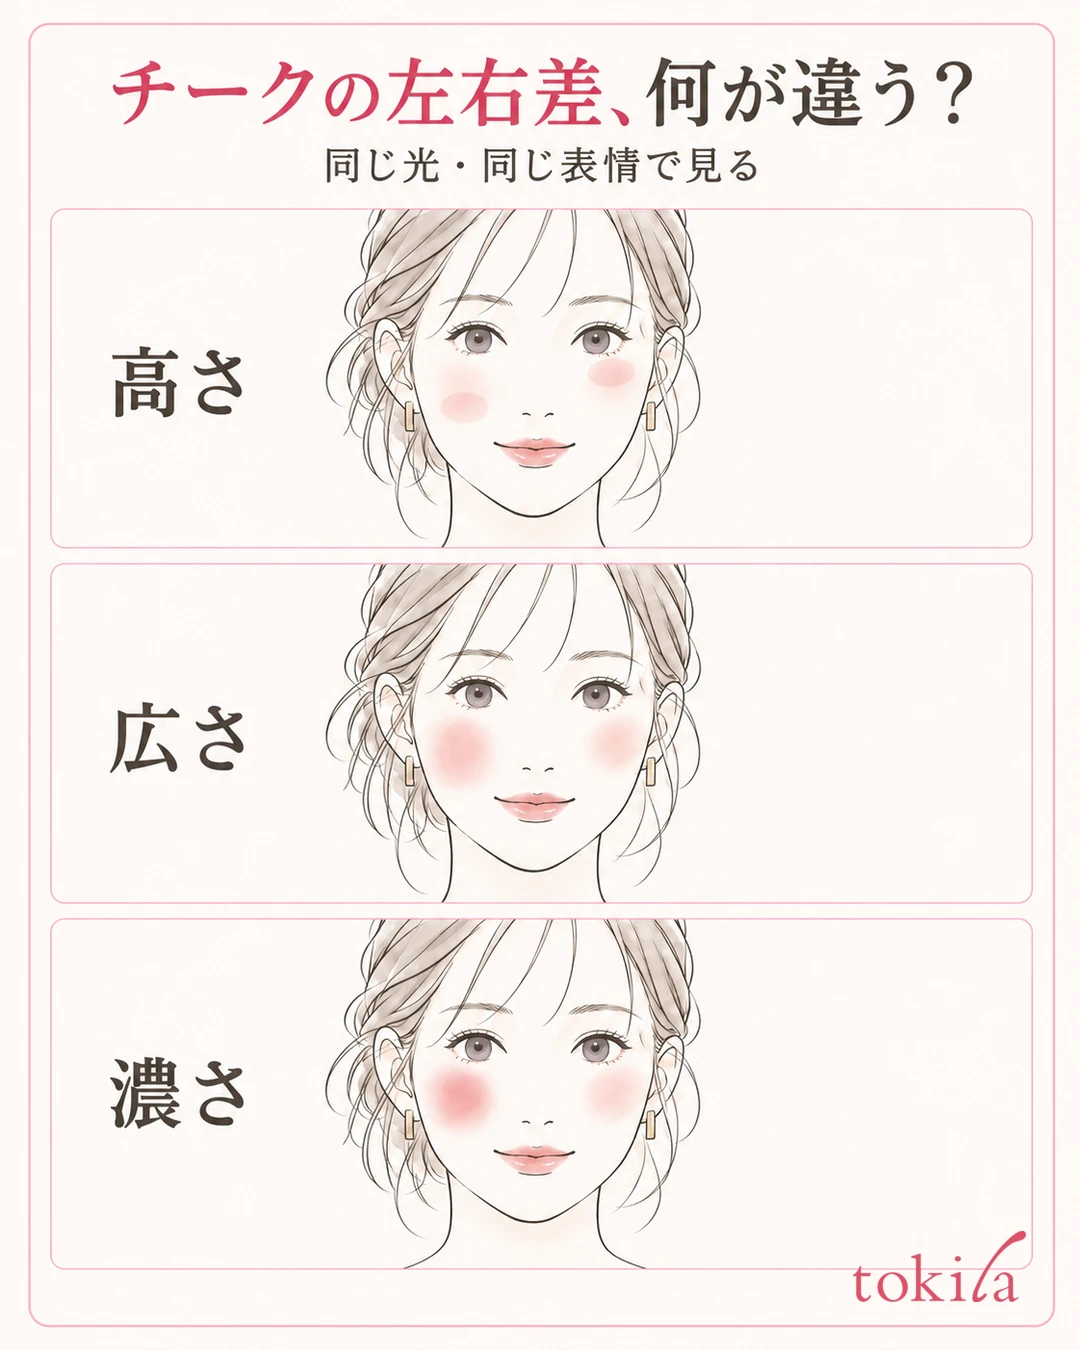
You applied blush to both cheeks, but one side looks lower, wider or stronger. As you keep adding color to the other side to even things out, both can turn into large patches of color. If the difference between left and right bothers you, first set up your mirror and the direction of your face, then pick just one thing to fix: height, width or intensity.
This article is mainly a routine for evening out how the left and right sides look right after applying powder blush. The aim is not to make your face perfectly symmetrical, but to make small adjustments to the position or strength of color that bothers you in today's finish.
1. Look at height, width and intensity separately, in the same light and with the same expression
First put the brush down and place a mirror in front of you that shows both cheeks at once. Avoid judging while your face is tilted to one side or the mirror is shifted sideways. When a window or light hits from one direction, the same color can look stronger on one cheek because of the reflection. Return your face to a neutral position, then check whether a difference in color remains.
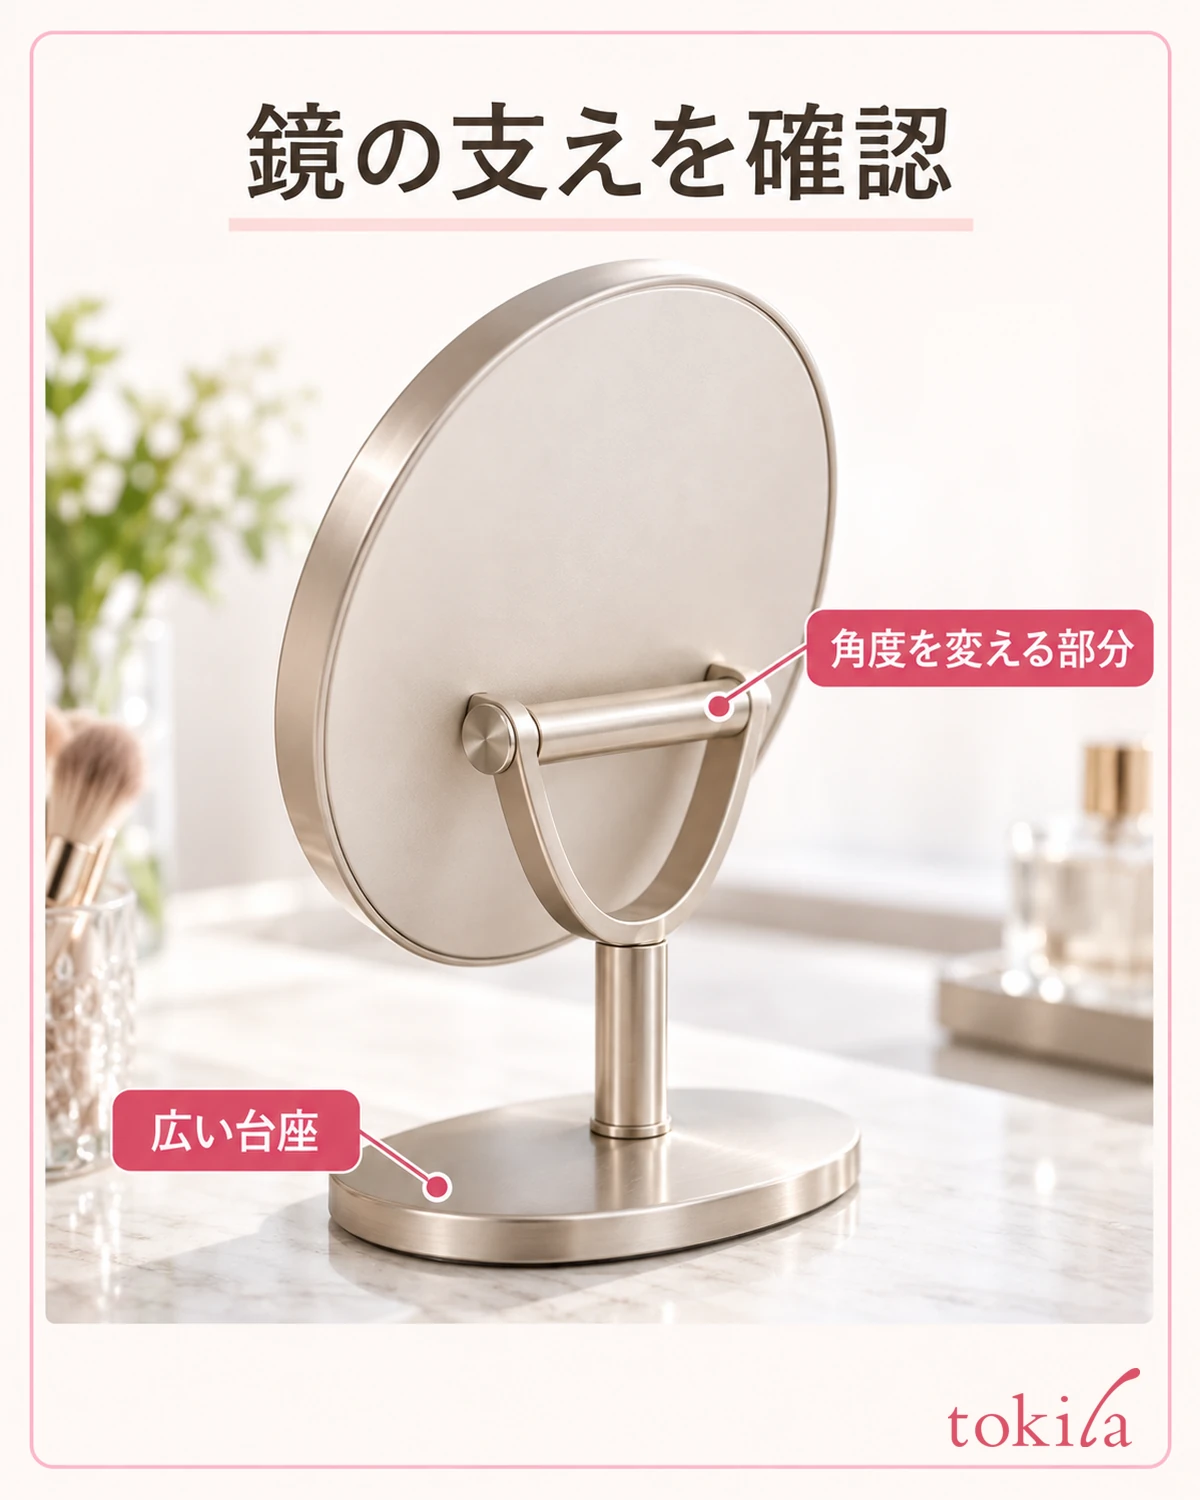
Start by checking with a natural expression. If you raise the corner of your mouth on one side only or pull your cheek with your hand, the position of the color seems to move too. A smile can help you find where to place color, but also look at the finished balance with your expression back to neutral. Before bringing the mirror closer, check how it looks from the distance at which you usually face other people.
For height, compare the position where the color looks strongest on each cheek. For width, look at how far the color extends toward the nose, toward the ear and downward. For intensity, check whether one side catches the eye more under the same lighting. Don't try to fix all three at once; put the difference that bothers you into words, such as "only one side is wider toward the bottom."
The stronger side can look larger even when the center is in the same place. So before spreading color on the other side just because one side looks wide, check the strength of the color as well. Think of the reflection of pearl and the depth of color as separate things, and after turning your face slightly to the left and right, return to facing front.
The height of your cheekbones, your skin tone and the roundness of your cheeks naturally differ between left and right. You do not need to copy the level face in the illustration as the correct answer for your own face. What you are looking at is the position and strength of the blush you have added. If there are small dark spots and pale gaps within a cheek, also see how to deal with patchy blush, and check them separately from the left-right position.
2. Check the starting point on both cheeks and decide how far to spread the color first
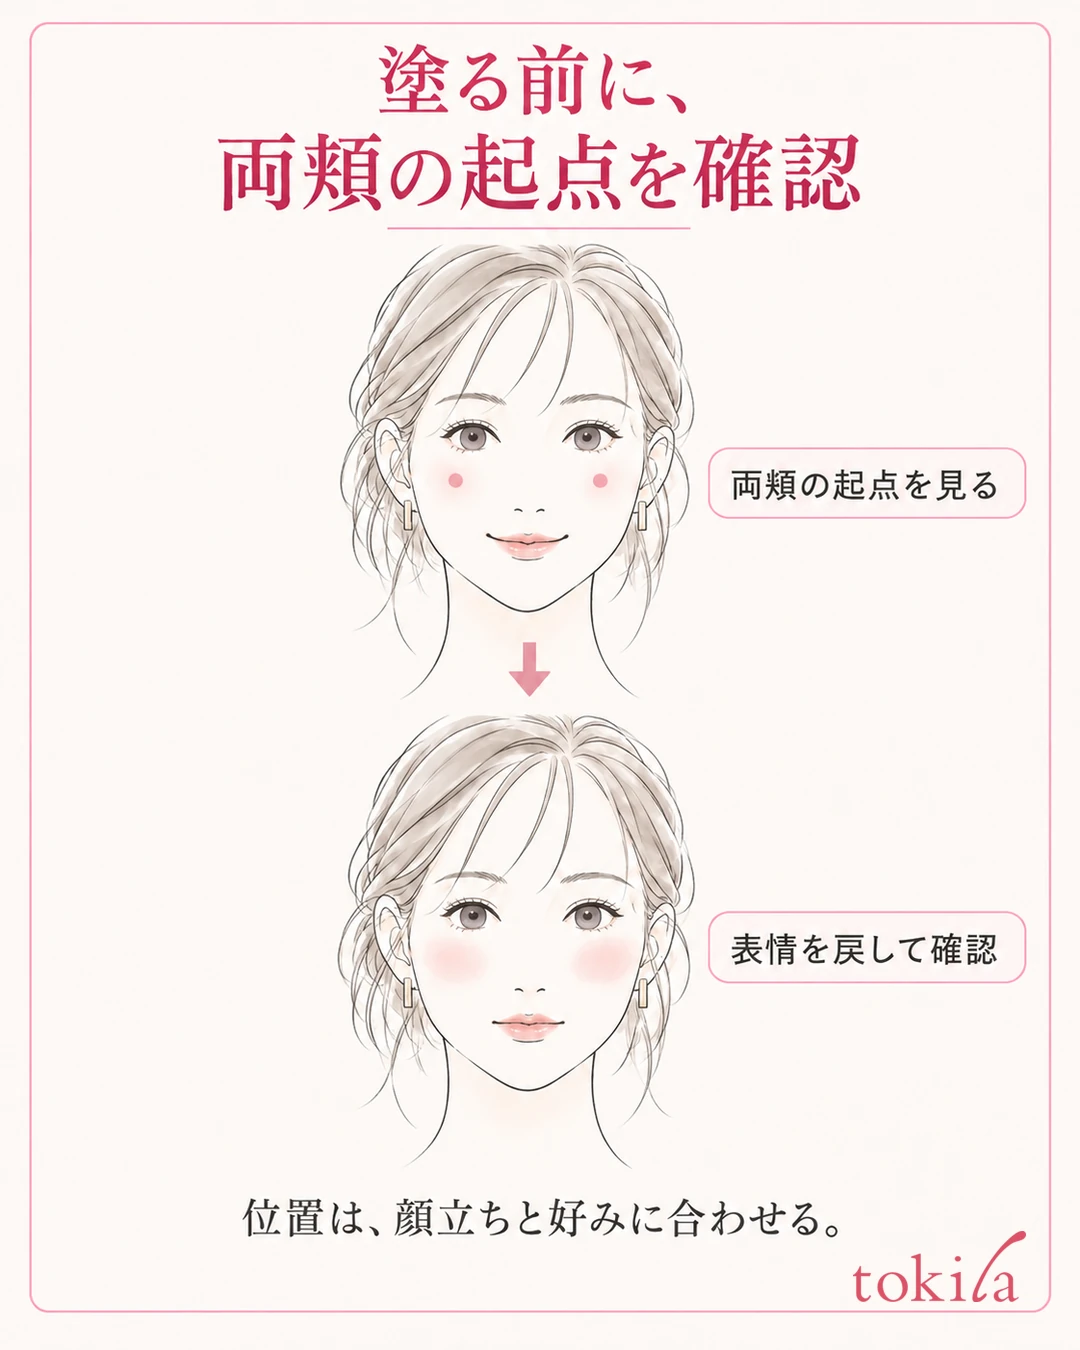
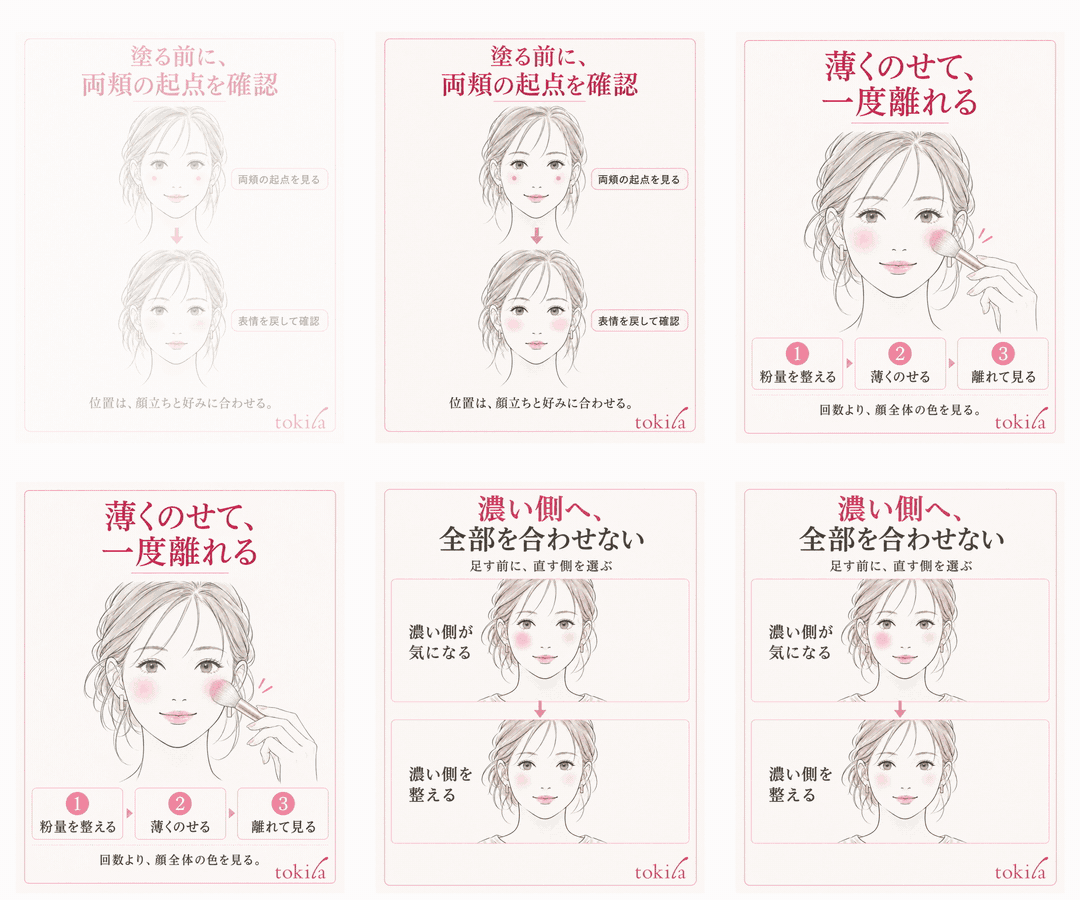
Before applying, find the starting point where the brush first touches each cheek. This is just one clue, and it does not mean that everyone should draw a large circle at the same height.
Return the mirror to face front and look at the relationship with the eyes and cheekbones on both sides. The key is not to use different states as your reference, such as the center of a smiling cheek on one side and the lower spot with the expression relaxed on the other. You can check the planned position with the brush held away from your skin, without drawing lines on your face to measure.
Next, decide in which direction and how far you want to spread the color from the starting point. Whether to spread it softly sideways or follow the cheekbone can change depending on your features and the impression you want. This article does not narrow it down to a single correct shape; it emphasizes starting on both sides with the same intention.
If the spreading direction differs, the same amount of powder can look round on one side and long and narrow on the other. To begin with, look at how far you will place color toward the nose, toward the ear and downward. If you make big sweeping brush movements on one side only, the outer edge of the color also becomes harder to follow. If you start narrow and light, you can add color later only in the direction you need.
If the brush is larger than the planned area, check the instructions for which side of the bristles to use. Rather than narrowing the area by holding the handle short and pressing hard, match the working surface of the tool with a light touch. Even when you use the same tool on both cheeks, it helps to check that the way you hold it has not changed.
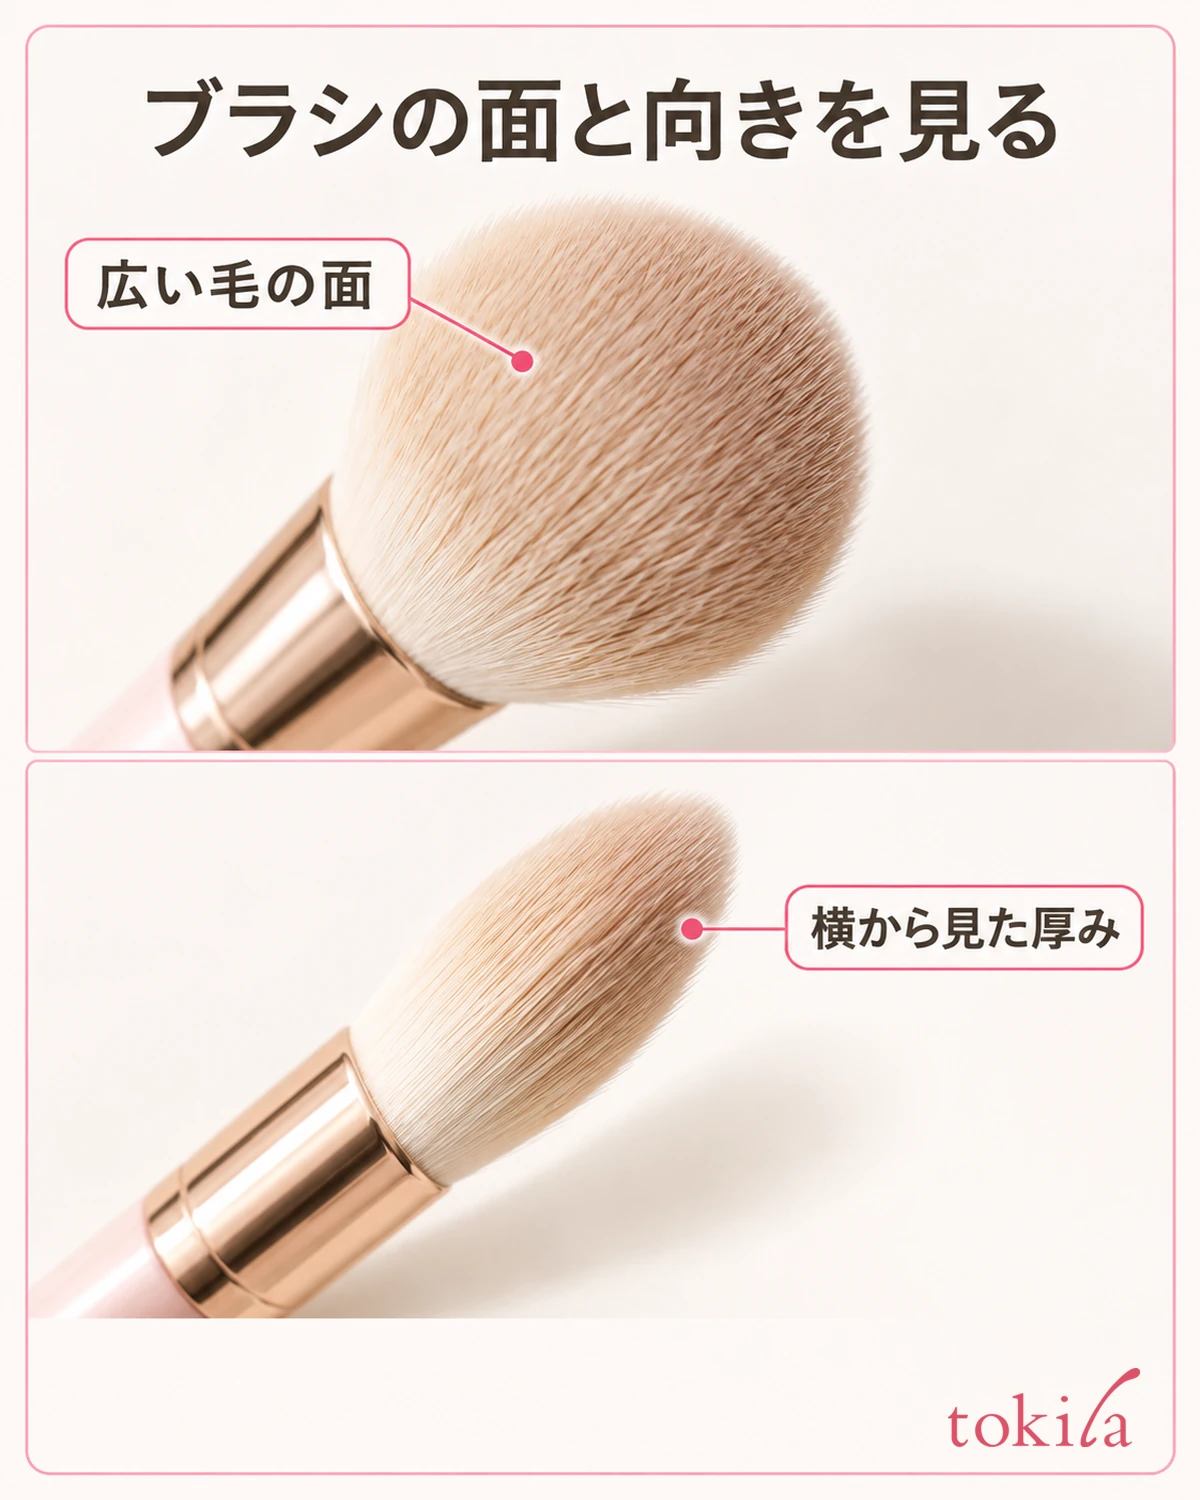
3. Adjust the amount of powder, apply thinly one side at a time and lift off once
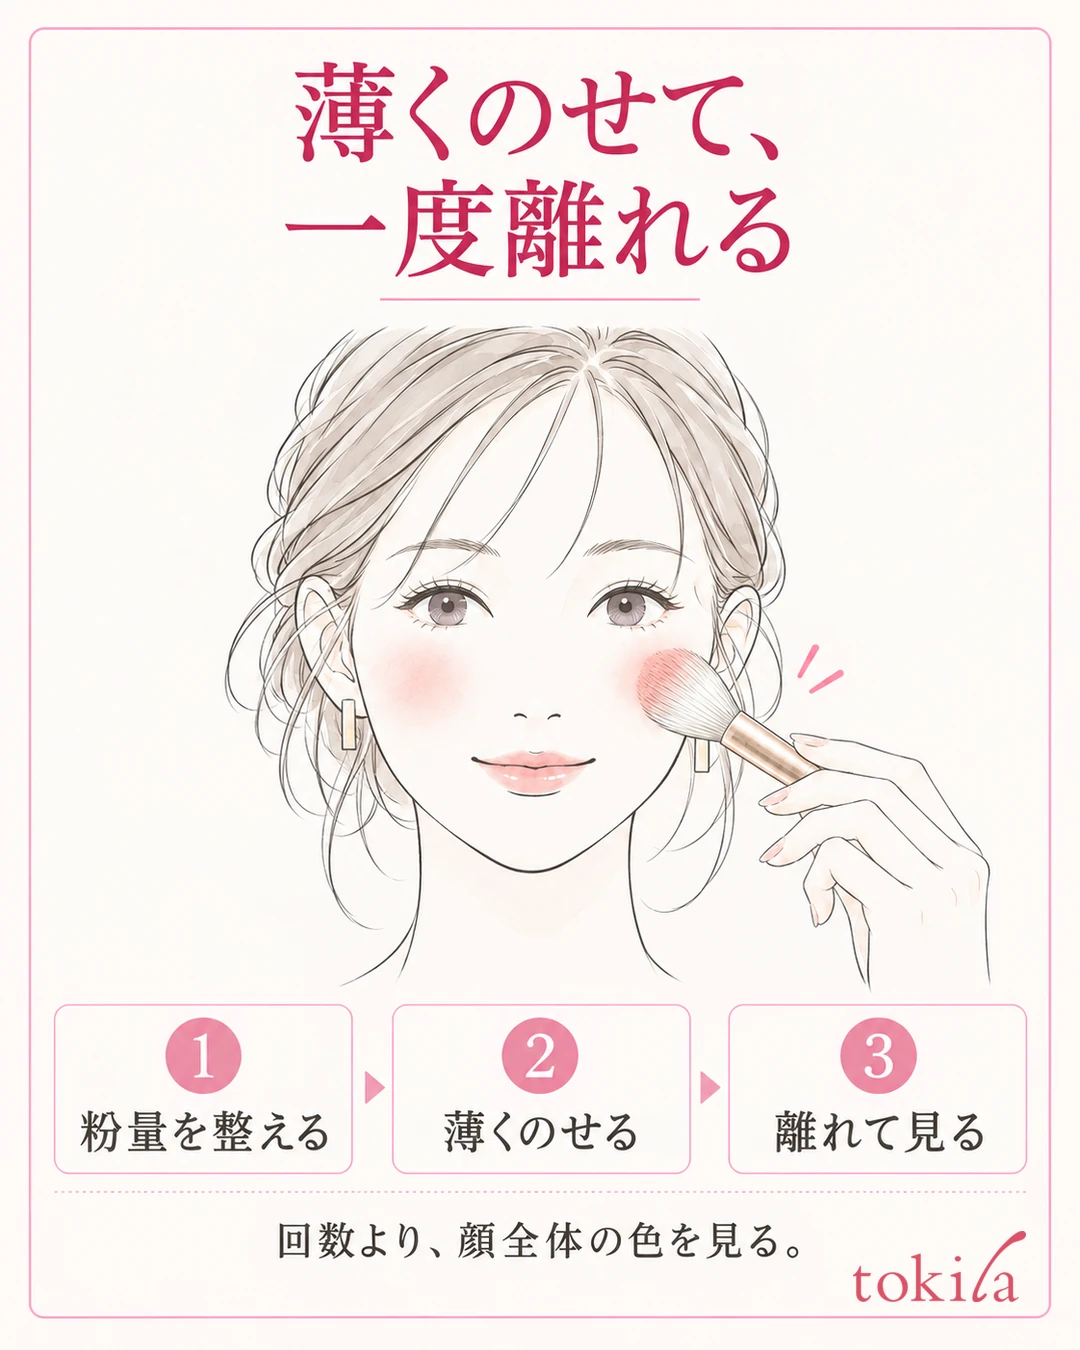
To even out left and right, do not treat dipping the brush into the container the same number of times as an absolute rule. The amount carried changes with how the powder picks up, the bristle surface and the condition of the product's surface. Load the brush following the product's instructions, tidy off the excess powder, and then apply thinly to the first cheek.
Check with clean hands, or use the method your product's instructions describe. The back of your hand is a clue to the amount, and it does not mean the finished color on a cheek with base applied will always be the same.
Lightly touch the working surface of the brush to the planned starting point. Do not press so hard that the bristles flatten; blend a little in the chosen direction and then lift off the skin for the time being. Even if the color feels light, do not reload right away; step back from the mirror. Not trying to reach the final depth in the first pass is the trick to keeping the next adjustment small.
When you move to the other side, repeat the same preparation: pick up powder, tidy off the excess, apply thinly and step back to look. Do not assume that the powder left on the brush after the first cheek is necessarily one portion for the other side. If you have freshly picked up more powder for one side only, check without skipping the step of adjusting the amount.
Your wrist may move easily on one side, while on the other the handle or your fingers may overlap the mirror. Rather than tilting your face a lot and forcing the same movement, lift the tool away to a position where you can see the mirror, and check again the surface that touches and the starting point. Putting more force on the side you find difficult is not a common procedure for evening out left and right.
Even when you add small amounts alternately, always look at both sides together after applying. Stop by looking at the strength of color across the whole face, rather than matching the number of applications. Cream and liquid products differ in how quickly they dry and whether they can be applied directly. Do not apply the preparation for powder as it is; follow the designated tool and order.
4. Toward the lower, wider or stronger side, do not match the other side too closely
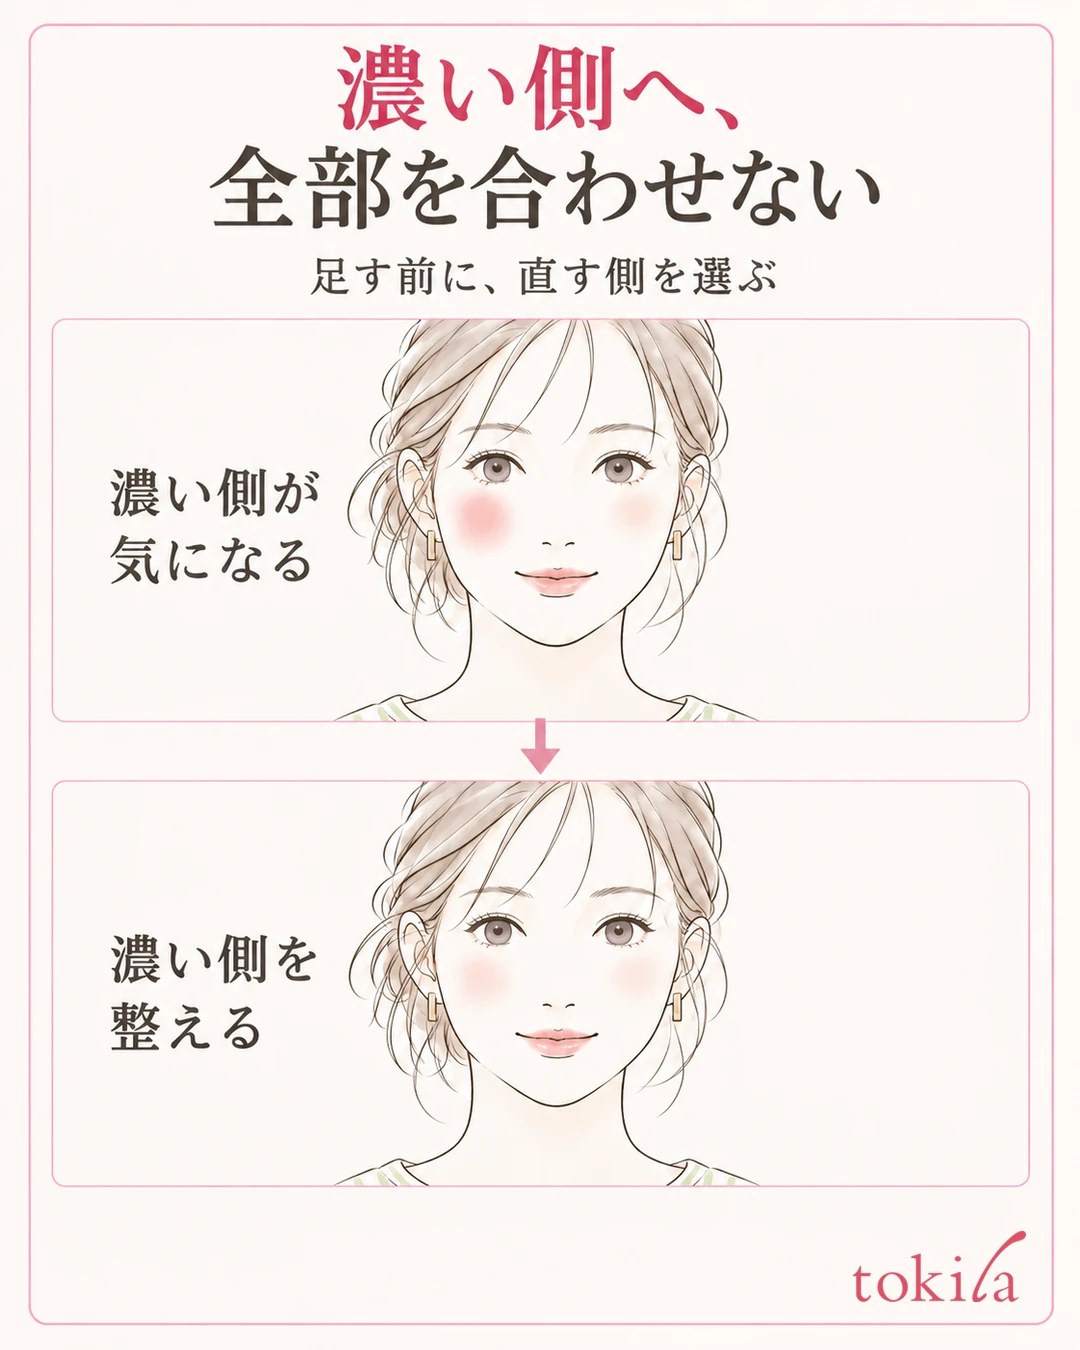
If a difference between left and right remains after applying, first choose the cheek closer to your preference. If you try to even things out only by spreading the other side to match the lower, wider side, or layering the other side to match the stronger side, you may drift away from the finish you first aimed for. Separate the places where you add from the places you want to reduce.
If the position is the same, only one side is lighter and the stronger side is within a range you like, add a small amount only where the lighter side falls short. You do not need to layer the same amount over both whole cheeks again. Without widening the outer edge toward the nose or downward, add a little where you want color, then lift the tool away and check again.
If one side is too strong, stop adding to the lighter side and consider tidying the color or the edge of the stronger side. For powder blush, lightly touch the spot that bothers you with a clean, soft brush that has not picked up new color, and see how it looks. For adjusting the depth in detail, you can check how to fix blush when you have applied too much.
Color that has spread low or downward does not necessarily move neatly upward if you carry it up with a brush. Before connecting a broad area of color further up, look at the range you want to keep. If a spot that bothers you remains even after lightly tidying it, you can also remove the blush and base from that spot in a way that suits your product and redo it.
When removing color from one area, follow the instructions for your makeup remover and do not spread the dirtied surface to the surrounding skin. After use, restore the cleanup, moisturizer and any base and UV protection you need, and place color thinly again at the starting point you first decided. If you try to hide the position by thickly covering a large area with white powder or concealer, the difference in texture may stand out instead.
If streaks of skin color increase the more you touch, or the color becomes blotchy, do not keep working on evening out left and right. Get the condition of your base in order first. If the makeup has broken down after some time, go to makeup touch-ups to match how it breaks down. Do not keep layering corrections on areas with pain or irritation; follow the product's cautions.
5. Decide when to stop by looking at the whole face, and remember the starting point for next time
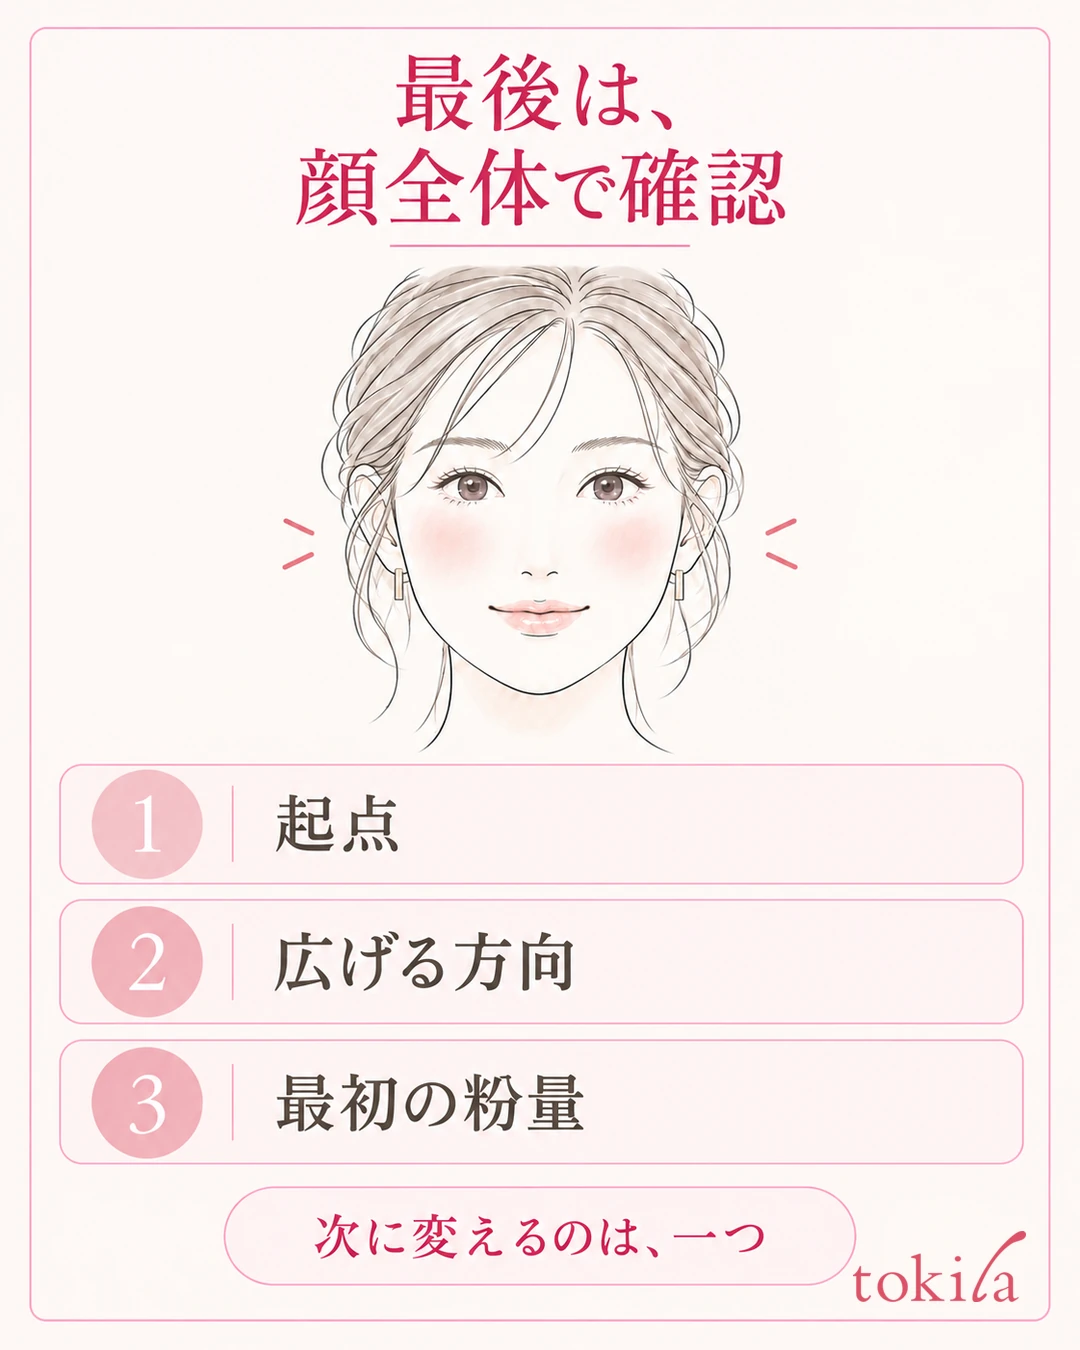
Finally, step back from the mirror a little and return your gaze to your whole face with a natural expression. After looking at the center, outer edge and strength of the color on both cheeks in turn, check them including the eyes and mouth. Even if a small difference bothers you in a close mirror, you can finish without adding more if it blends in across the whole face.
After looking from the front, turn slightly to the side and check whether the color has spread too far toward the ears. Rather than comparing left and right from separate angles, return to the same front-facing direction and judge. If you use a photo as an aid, do not use an image with skin retouching or a color filter as the correct answer for the amount of powder.
Making the edges of the color look as if aligned with a ruler is not the condition for finishing blush. While keeping natural variation in depth and the natural difference between the left and right of your face, the time to stop is when the lowness or width of one side that bothered you today has settled. A good guide is not to keep filling in differences in facial contour or skin tone with makeup when the applied areas already blend in.
Next time, change one of these: the starting point, the spreading direction or the first amount of powder. Connect observation and change, such as the range to move if "only the left spread downward," or the powder preparation if "only the right is strong on the first pass." Rather than replacing the product and the brush all at once, you can look back on which step became easier to handle.
Short notes are enough, such as "I checked the starting point on both cheeks first" or "I swung the brush widely on the side I find difficult." On days when the difference in your blush bothers you, try this flow to build the habit of judging before you keep adding: look under the same conditions, decide the starting point and outer edge, apply thinly and lift off, and choose the side to fix.



