
After you change your hair color, only your usual brows look black. Or conversely, after you switch to lighter brows, they become hard to find on your face. Matching brow and hair color doesn't always mean making them the same color. First look under the same light and separate which is bothering you: brightness, undertone, or the density where the hairs overlap.
Here we introduce the order for reviewing the color scheme of your whole face, using the brow makeup you have and your usual hairstyle. Think of it separately from how to change the shape of your brows or the steps for transferring brow mascara product onto the hairs. This is a comparison to help you get closer to an impression you feel comfortable with, not to settle on a single color that suits you.
1. View your hair and both brows under the same light, in your usual hairstyle

Start by putting your brow tools aside and looking in a mirror that shows your hair, both brows, eyes and mouth together. Don't decide with your bangs pushed up only; check with them down as usual too. On days when your bangs cast a shadow on your brows and days when you show your forehead, the same brows look like different amounts.
Choose a place where light doesn't hit only one side of your face strongly. Don't compare hair by the window with brows in shadow, or bring only your brows close to a bright light. If you change the light partway through, go back to the original conditions before adding color, and look at both again.
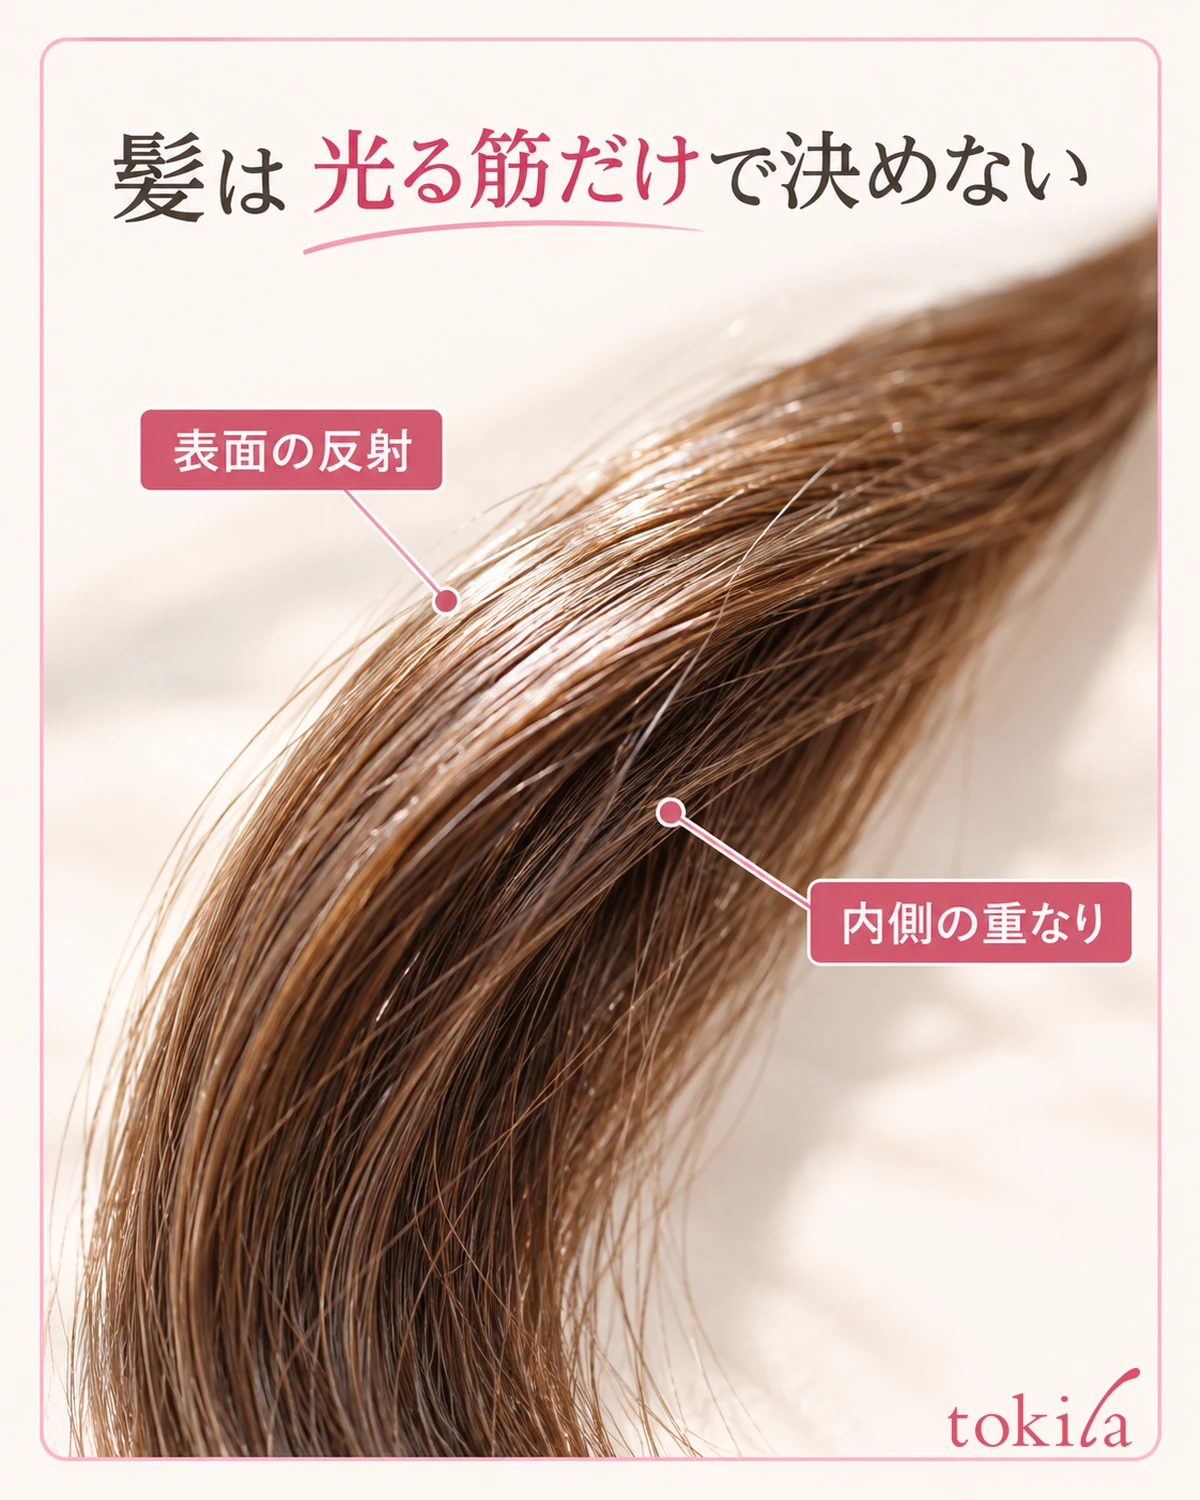
Look not only at the brightest surface of your hair, but also at the strands visible at the side of your face and the inner layers. Even if the surface reflects brightly, the area around your face can look dark. If only the ends are dyed or the roots have grown out, don't sum up your whole head of hair with a single color name; use the part closest to your face as your starting point for comparison.
If you look closely at a strand, distinguish the streaks where light passes through the surface from the inner part where the hairs overlap. Don't make only the thin shining streaks your target for brow color; check how much of that brightness actually shows when your hair is back in its usual style. You don't need to pull your hair or pluck any to compare.
Photos on a smartphone can be used as a record, but automatic brightness correction and screen settings can make colors look different from the mirror. Don't replace anything right away based on a photo alone; check in a mirror in the same place too. If you take one, use it as a record with the face direction and light matched, without adding edits.
This check is not a color diagnosis. Put into words the relationships you can see now, such as "the surface of my hair is bright, but the sides of my face are dark" or "my brows look strong when I put my bangs down." Once you know what differs, you can cut down on adding shapes you don't need.
2. Think of brightness, undertone and drawn density separately
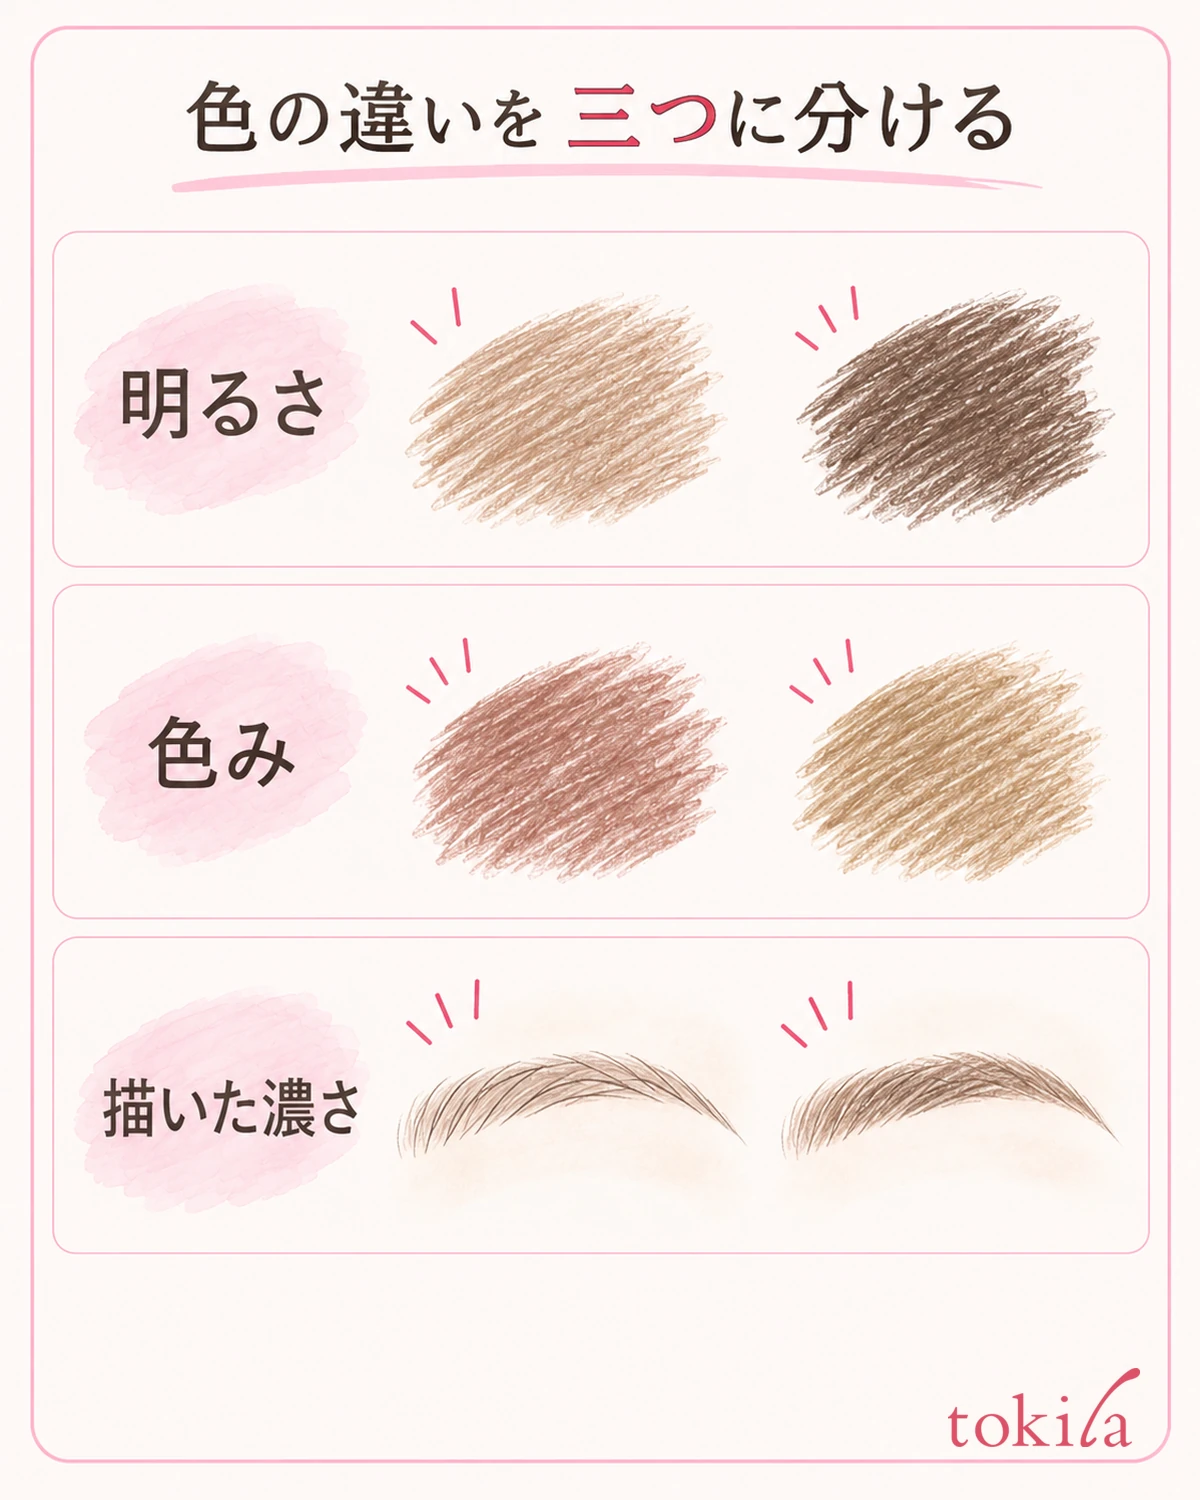
First look at the difference that bothers you as a difference between light and dark. Next, check whether it is a brown that feels reddish, a brown that feels yellowish, or one that looks closer to gray. Finally, see whether only the places where hairs overlap or the pencil lines are dark. The axis of comparison is not changing these three at once.
Even if your hair is dark, you don't have to fill in your brows black. Conversely, because your hair is light, you don't necessarily have to lighten your brows to the same brightness. There are days you want your brows to keep their presence, and days you want them to look soft. Rather than fixing how many levels lighter they should be, look for the strength you want across your whole face.
When undertone bothers you, comparing candidates that don't differ much in brightness makes it easier to sort out what you changed. For example, you can try a brow color that feels redder than your current one with reddish hair, but there is no rule that you must match it to the same red. Look at your skin, eyes and the colors around your eyes together as well.
If only the square block at the head of your brow is strong, the issue may be how much you drew rather than the choice of color. Before thickening the outer outline of your brows or adding more color to the lighter side, check where it is dark. Where to blend when the head of your brow is too dark is an adjustment separate from buying a new color.
Even if you can't put your skin tone into a single category, you can still compare. Look at your whole face that day and see whether you feel at ease with the color you have, or want to try a different undertone. Rather than narrowing your choices to "this skin, only this color," check using your preferences and the range of products you already have.
On days when you are very unsure, decide that today you will look only at brightness. Even among products with similar color names, the depth and sheerness of the finish aren't necessarily the same. The next step is not matching names but checking how it looks when you actually use it on your brows.
3. Separate the role of the hair color from the color you draw into gaps
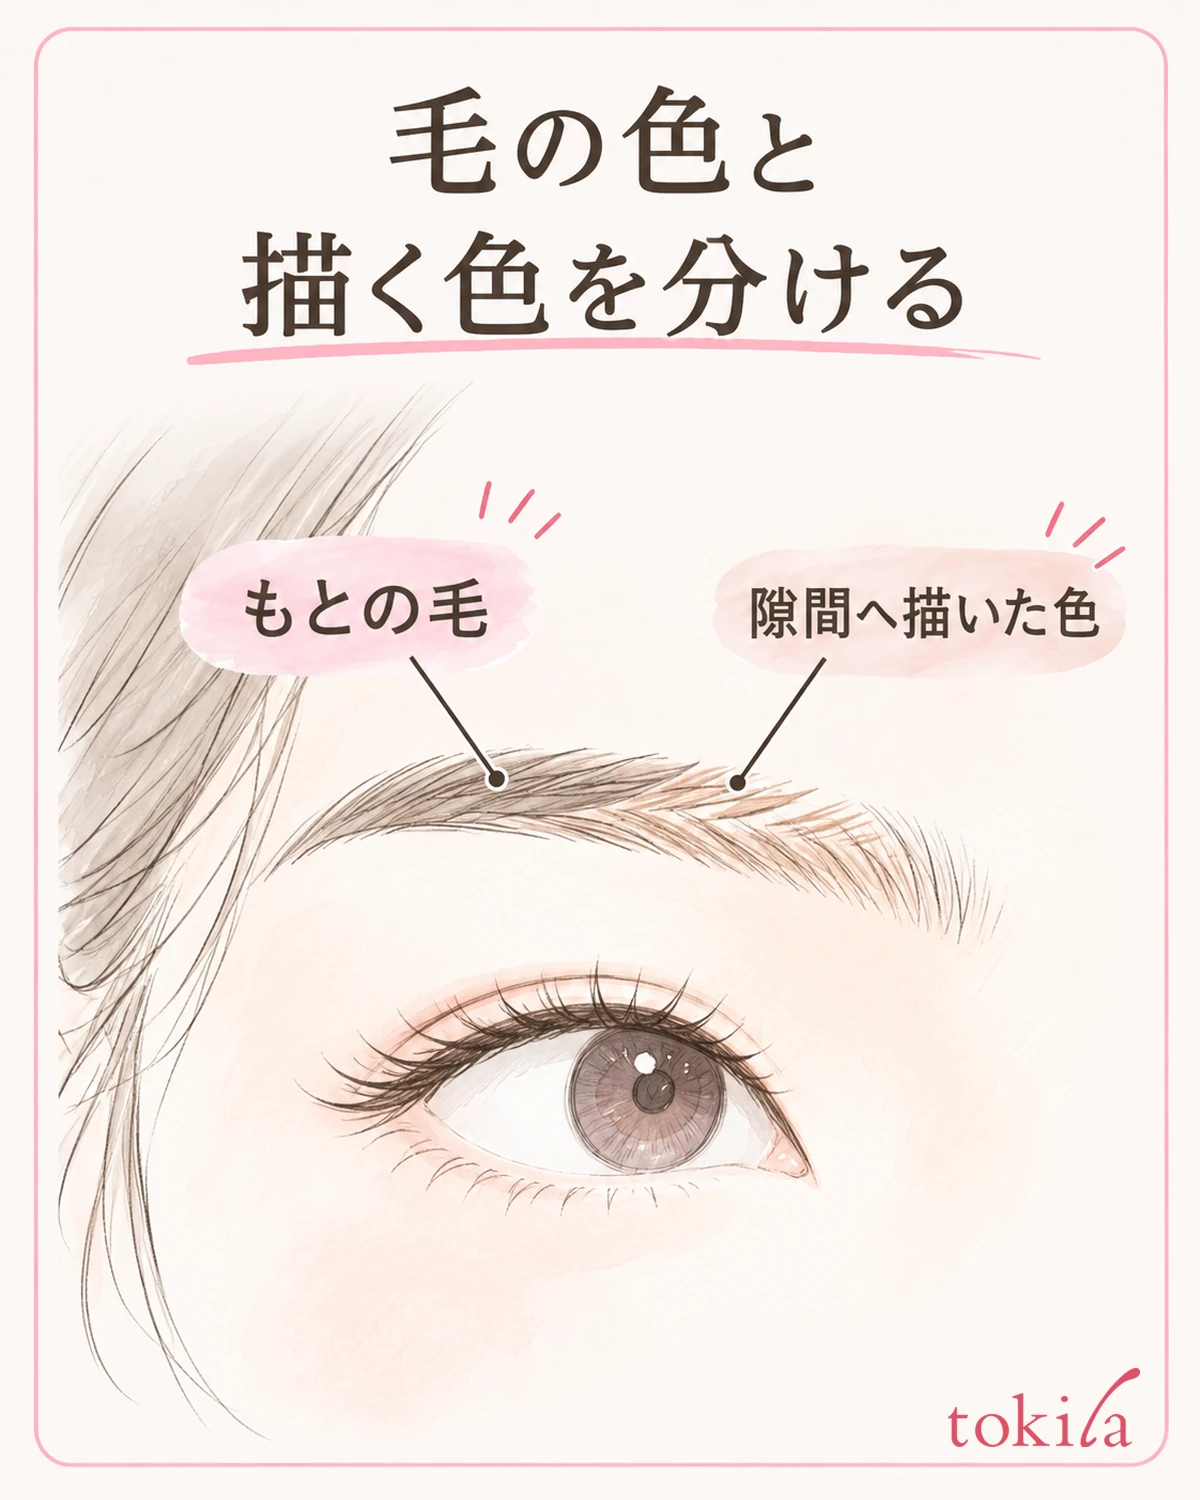
A brow is not a single flat plane of color. Your natural hairs, the bare skin that shows in the gaps between them, and the parts filled in with pencil or powder overlap. Once you separate whether only the center, where there are many hairs, is dark or the drawn outline is dark, it becomes easier to choose which tool to use.
Check the difference in roles: a pencil fills in what is missing with short strokes, powder places color lightly over the range you need, and tinted brow mascara adjusts the color of the hairs. However, shapes and the order of using them together differ from product to product. Use the purpose and directions of the products you have as your standard.
Even if you want your hairs to look lighter, adding a lot of light powder to the skin does not necessarily change the natural hairs to the same color. Conversely, don't fill sparse gaps by painting over them with brow mascara product. Sort out which tool changes which place, and then handle only the parts you need.
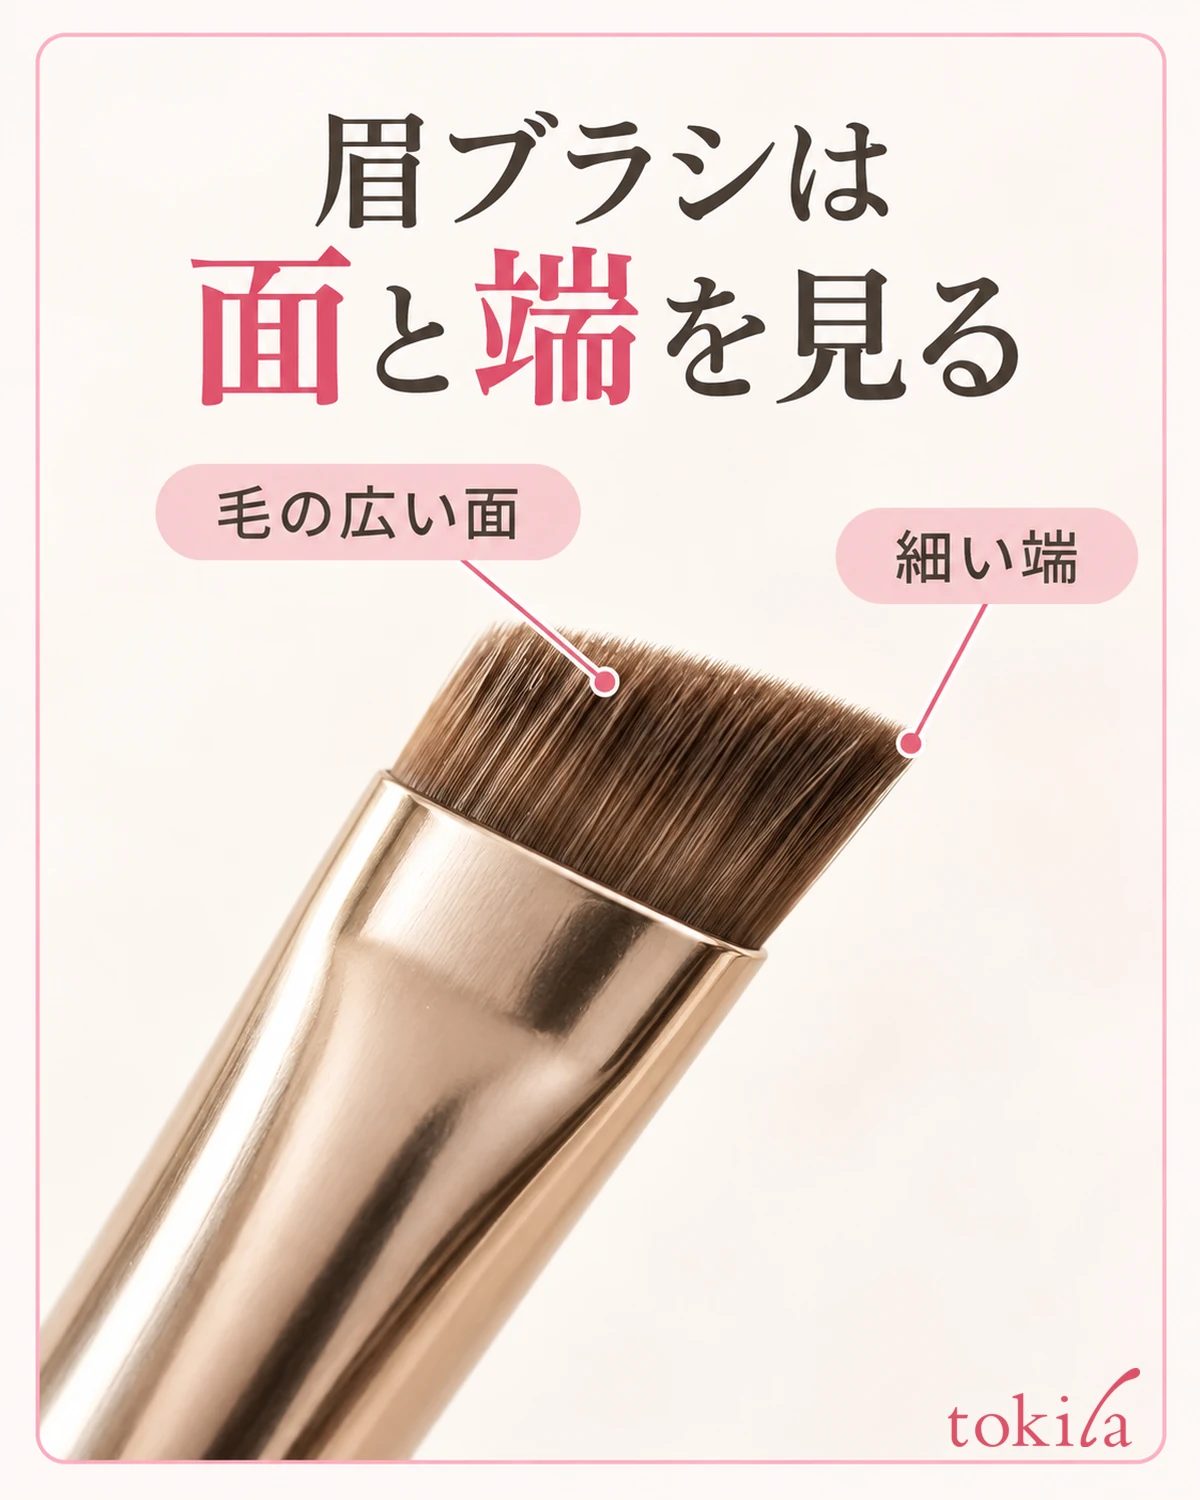
When you put powder into a thin gap, tell apart the bristle surface of the brow brush from its fine edge. With an angled brush tip, the width of the broad surface and the tip are different. If it is hard to handle, for example the bristles are splayed or lumps of powder remain, don't press hard to make the line thinner; switch to a tool that has been cared for.
When you use brow mascara too, avoid combing dry hairs again and again to get closer to the brightness you want. Treat a worry about small color transfer separately from checking the brow mascara product, amount of product and how you apply it. Choosing a color and applying the product correctly are different tasks.
Don't add plucking, bleaching, or using hair dye on your brows as an extension of this color matching. Today, compare within the range of the brow makeup you have, and stop using it if your skin feels any irritation. Before changing colors, first keep the conditions that you can handle without strain.
4. Change just one thing with a small amount, and go back to compare with the whole face
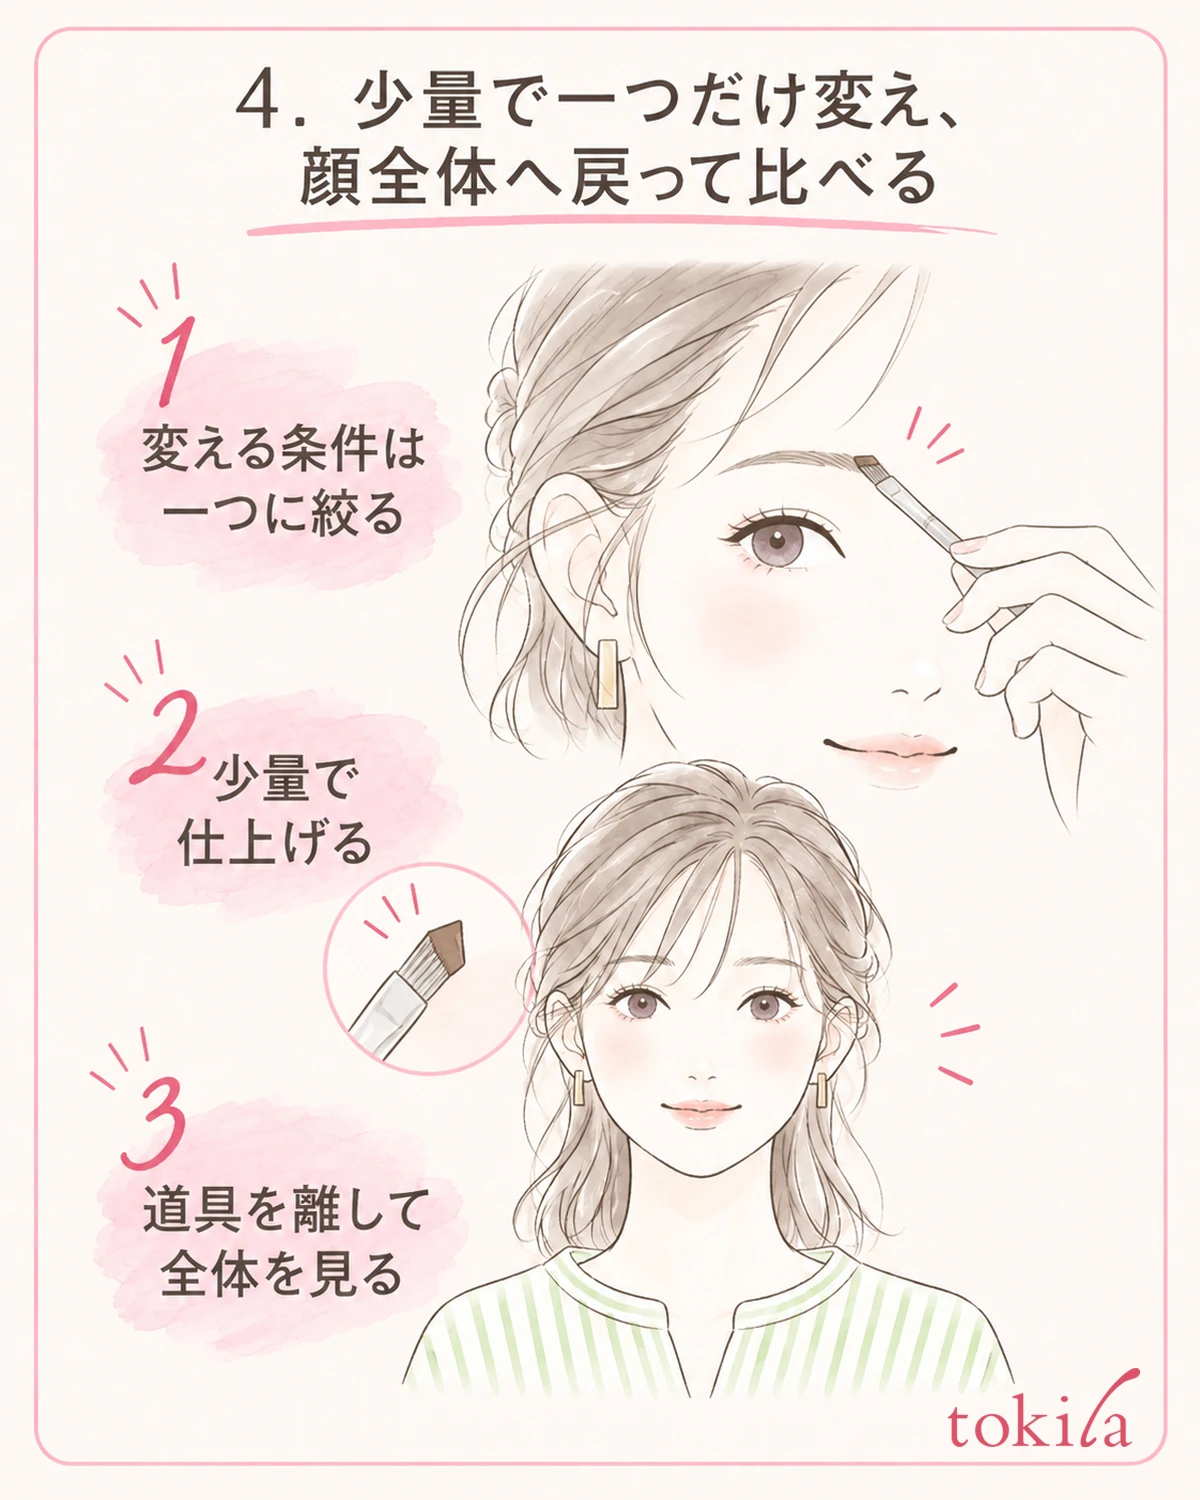
Once you've decided on the color to use, finish starting from a small amount, following the product's directions. Narrow it down to one: whether today you will use less of your usual color, try a different undertone, or change the color you use on the hairs. If you change the shape, length and thickness at the same time, it becomes hard to tell the difference in color scheme.
You don't have to add color the same number of times to your left and right brows. If the amount of hair differs, the same amount looks different in depth. Rather than finishing one side and chasing the other, finish a little at a time and look with the tool away from your brow each time. What you compare is the overall impression, not the number of times.
Up close a little of your natural hair color may remain, yet when you step back from the mirror it can already give the impression you want. Don't make filling in every hair to a single color your finishing condition. Look at your hair and brows together, and check that only your eyes or mouth haven't been left behind.
Put your bangs back in their usual position and look at the difference from when your forehead is showing. If just moving your bangs made it look calmer, you may not need to add more brow color. After turning your face slightly to the left and right, return to the front and close off your judgment there.
If you made them too dark, don't hide it by layering a lot of a lighter color over the top. Tidy the parts you need with a method that suits the product, and once the surrounding base is removed too, fix it from there. If you are using products with different ways of removal together, don't deal with everything using the method for just one product.
On days when the finish won't settle, you can choose to end the comparison. If you've corrected it many times and start to notice your bare skin, put your tools down rather than keep searching for the right color on the spot. It is fine to treat the point where you got back to a finish you can use every day as the day's stopping point.
5. Restore the hairstyle and the focus of your makeup, then choose next time's color
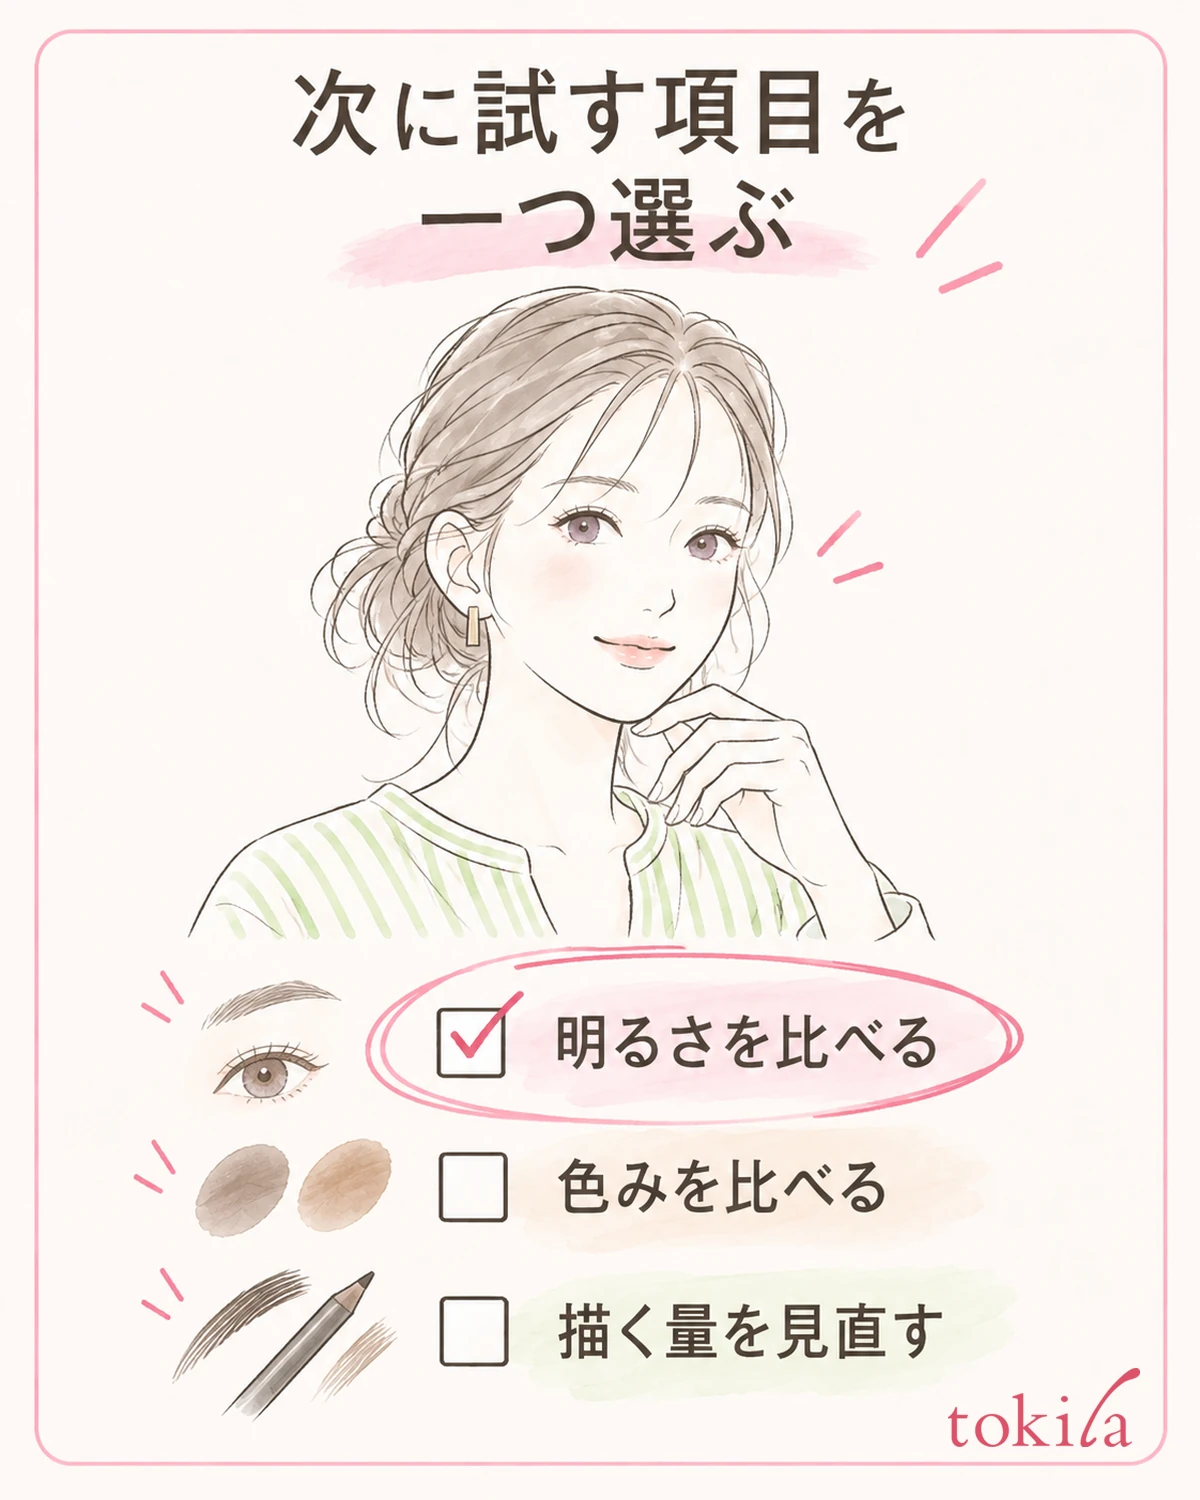
At the end, move away from the magnifying mirror for your brows alone and check your hairstyle and your whole face. On a day when lips are the focus and a day when your eyes are defined, the strength you want to leave in your brows can change too. Rather than deciding on one right answer from your hair color alone, see whether it feels settled within that day's color scheme.
For example, keep the item you changed and how it looks as a pair, such as "the black block of my brows no longer bothers me, but the shape is still visible" or "when I changed the redness, it looked separate from my hair and was harder to see." You don't need to stretch a personal impression into a result that has the same effect for everyone.
If you buy more, first decide which item gave you trouble. If only the darkness bothers you, look at candidates for brightness; if redness or yellowness bothers you, candidates for undertone; if only the drawn line is strong, review your tools or the amount. Don't order by color name alone; note down the number of the products you have and which part you want to change.
Even when you can try colors in a store, don't assume the color on the back of your hand alone settles how your brows will finish. How it looks changes with the tool you use, the amount you apply and the color of your own brows. Follow the product's description and a trial method that can be used on skin, and don't force a decision all at once; connect it to checking your whole face.
Next time, check the one thing you chose this time, such as putting your bangs back to compare, drawing less, or trying a different undertone at a similar brightness. A short note is enough for a record. On days when your hair has grown, you've changed your part, or you've changed your clothes or the colors around your eyes, the same color as before isn't necessarily the right one.
Matching brow and hair color is a flow of looking under the same light, separating the differences, choosing the role of each tool, and comparing with small amounts. If you are stuck on your brows alone, also refer to a color scheme that decides the focus among eyes, cheeks and lips, and make time to go back to your whole face.



