
You apply French nail polish and one nail ends up with a thicker white tip. As you add white to the neighboring nails to match, the French tips can end up deeper than you planned. The first thing to compare is not how opaque the white is, but the width from the nail tip to the color boundary, and the curve of that boundary.
This article covers making a white band at the nail tip with regular nail polish that dries naturally. The same steps do not apply to gel polish cured under a light, press-on nails, or corrections done at a salon. Rather than making every finger exactly the same size, try using one nail as a sample and balancing the look of the whole hand.
Check the width, curve and opacity of the white band separately
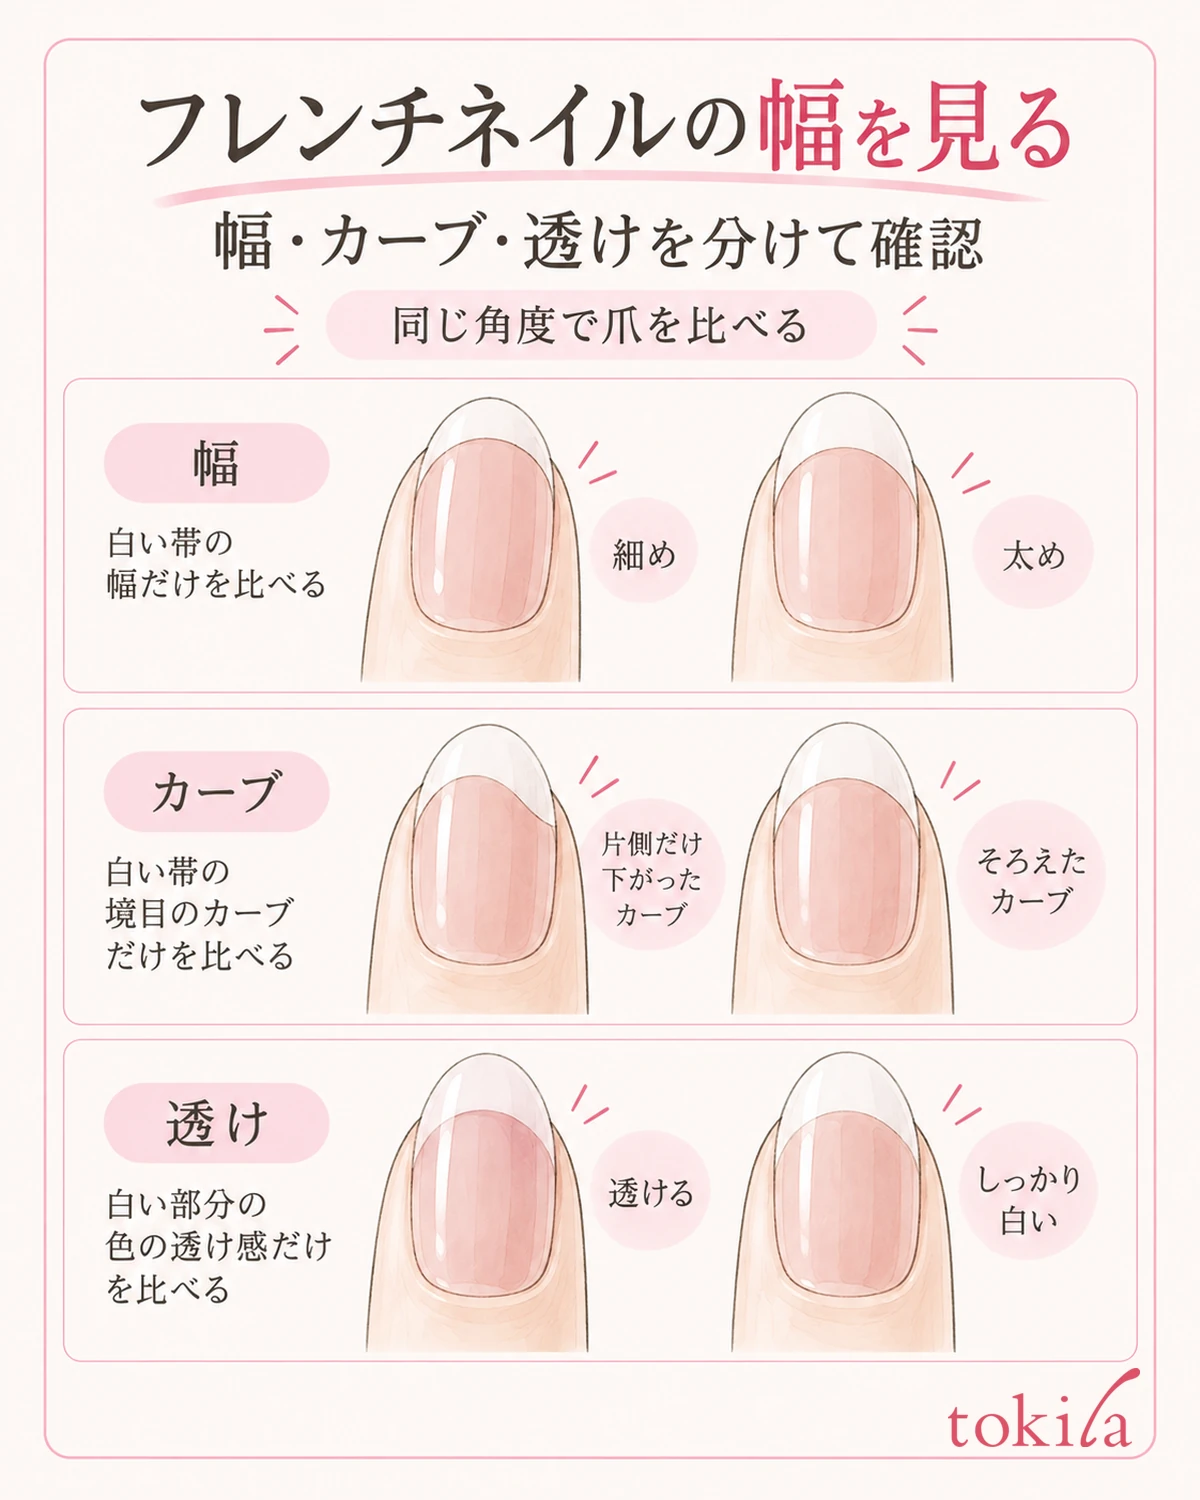
Before adding more polish, rest your hand on a desk and extend your fingers lightly. Compare the nails without bending your fingers back or tilting a single finger sideways, so that the surfaces of the nails face roughly the same direction. Your thumb faces a different direction from the other fingers, so don't force it into line; check it separately, turned to face the same way.
Look in this order: the width from the nail tip to the boundary between the white and the base color, the height of the boundary at the center and at both sides, and finally how the white shows through. If the white is only thin and sheer but you widen the area, the differences in width grow too. Treat a concern about opacity and a boundary that has crept too far toward the cuticle as separate problems.
The length and width of the nails differ from finger to finger. You don't need to match every white band to the same number of millimeters. For example, if the white looks wide on a short nail, instead of copying the band from a longer nail, look at how much of the base color you would like to leave showing. Both a slim band and a deeper band are valid design choices.
When looking at the boundary of the white band, distinguish white reflections from the lighting from the white you painted. A streak of light that moves when you tilt your hand slightly should not be used as a guide for where to add polish. Turn your hand back to where the boundary is visible and check along the outline of the nail itself.
If you focus on a single nail, you tend to notice even very small wobbles. Looking at all your fingers from a little farther away makes it easier to tell apart differences that are not worth fixing from a difference that stands out on just one nail. If you use photos, don't judge from a single angled shot; compare your hand against a photo taken from the same angle.
First, pick the one thing that bothers you most among "the band is wide," "one side is deeper" and "the color is pale." Whether it is acceptable to increase the white area is what decides your next step. The shape of the natural white tip of your nail doesn't have to match the white band you paint over it either. Use the finish you have decided on as your standard.
Decide on one sample nail and the boundary position before painting
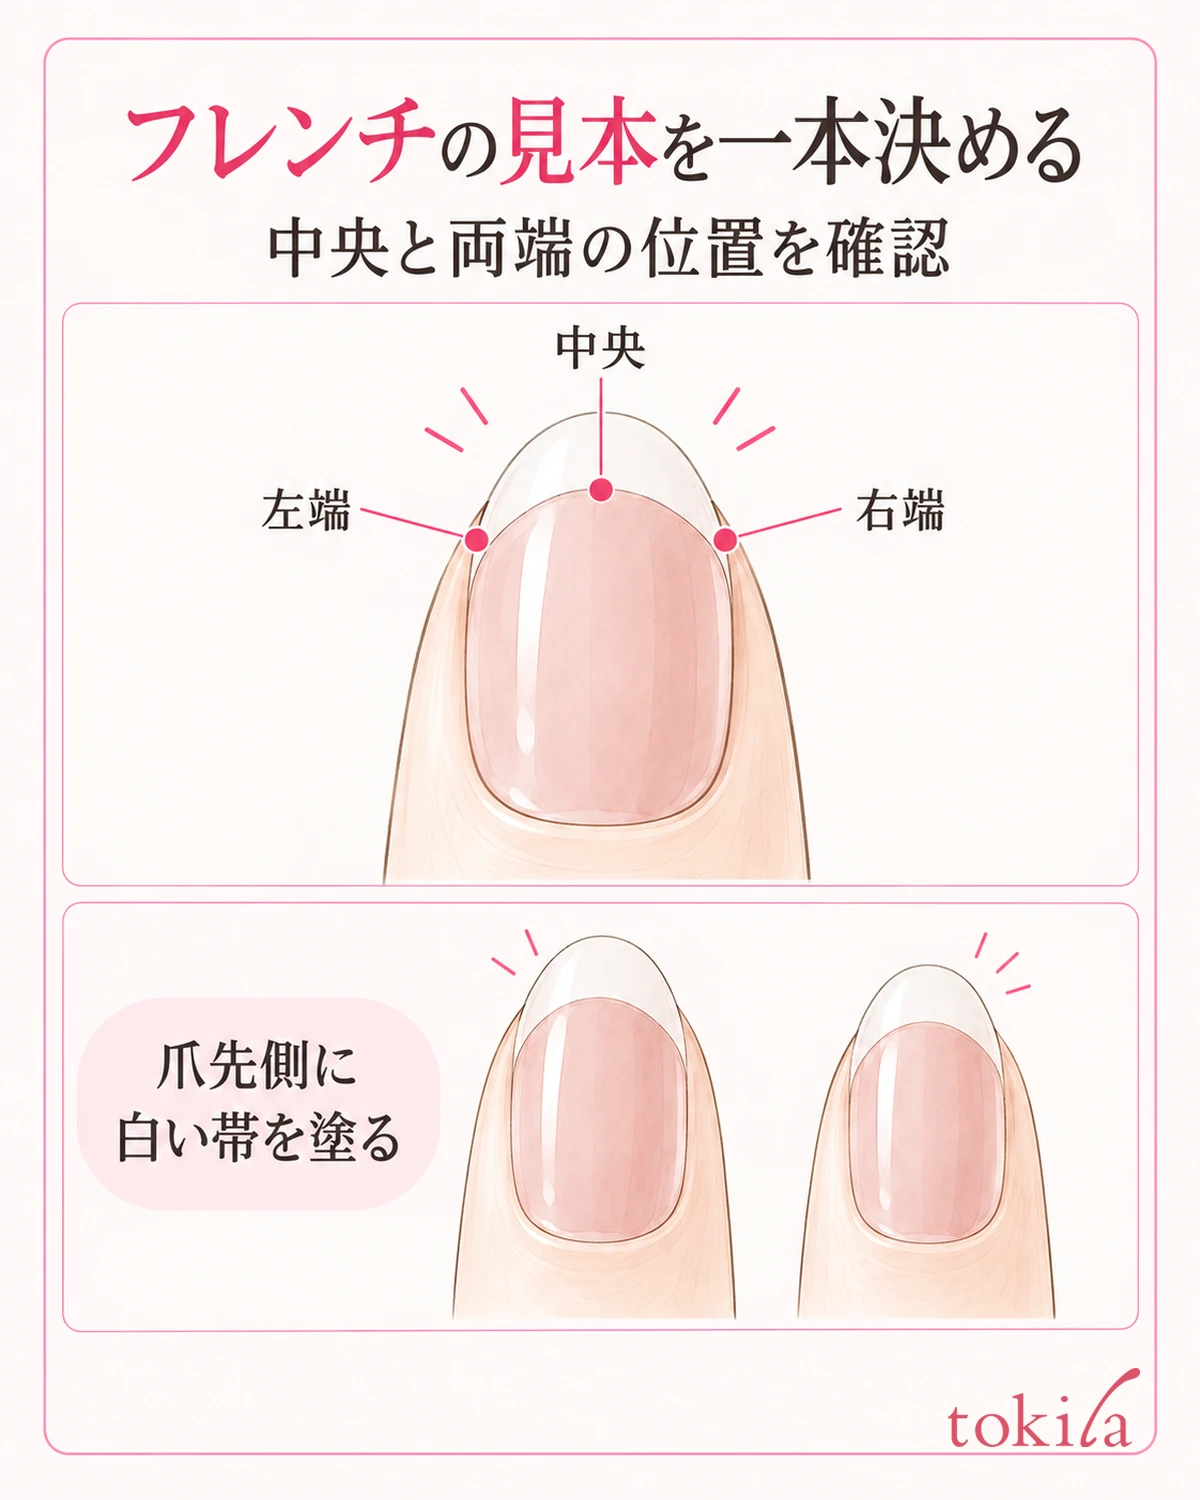
If you haven't painted the white yet, first choose one nail to be your sample. A finger that is easy to paint and whose nail outline is easy to see is fine. Rather than putting white on all ten nails right away, decide the thinness of the band and the impression of the curve on that one nail, then move on to the next finger.
First, decide by eye how far the white band will extend at the center of the nail. Next, think about where the left and right ends will connect. If you paint while unsure whether you want a deep arc or a shallow arc that follows the nail tip, the center may come out thin while only one side stretches toward the cuticle.
Even if your natural nail tip slants from left to right, you can choose whether the line of color slants too. However, you don't need to suddenly refile the shape of your nail just to make the line look level. Don't mix changing the shape of your nail with painting the white band; choose a shape you can draw comfortably that day.
Keep the sample as a standard even after you finish painting. If you add white to match a neighboring nail that came out a little thicker, the position you are comparing against shifts. While you work, don't forget which nail you chose first.
If your nail tips are very short, one option is not to aim for the same white area as in a photo of long nails. Check on one nail first, for example by leaving more of the sheer base showing or keeping the white thin. You don't have to assume that the same width suits every length.
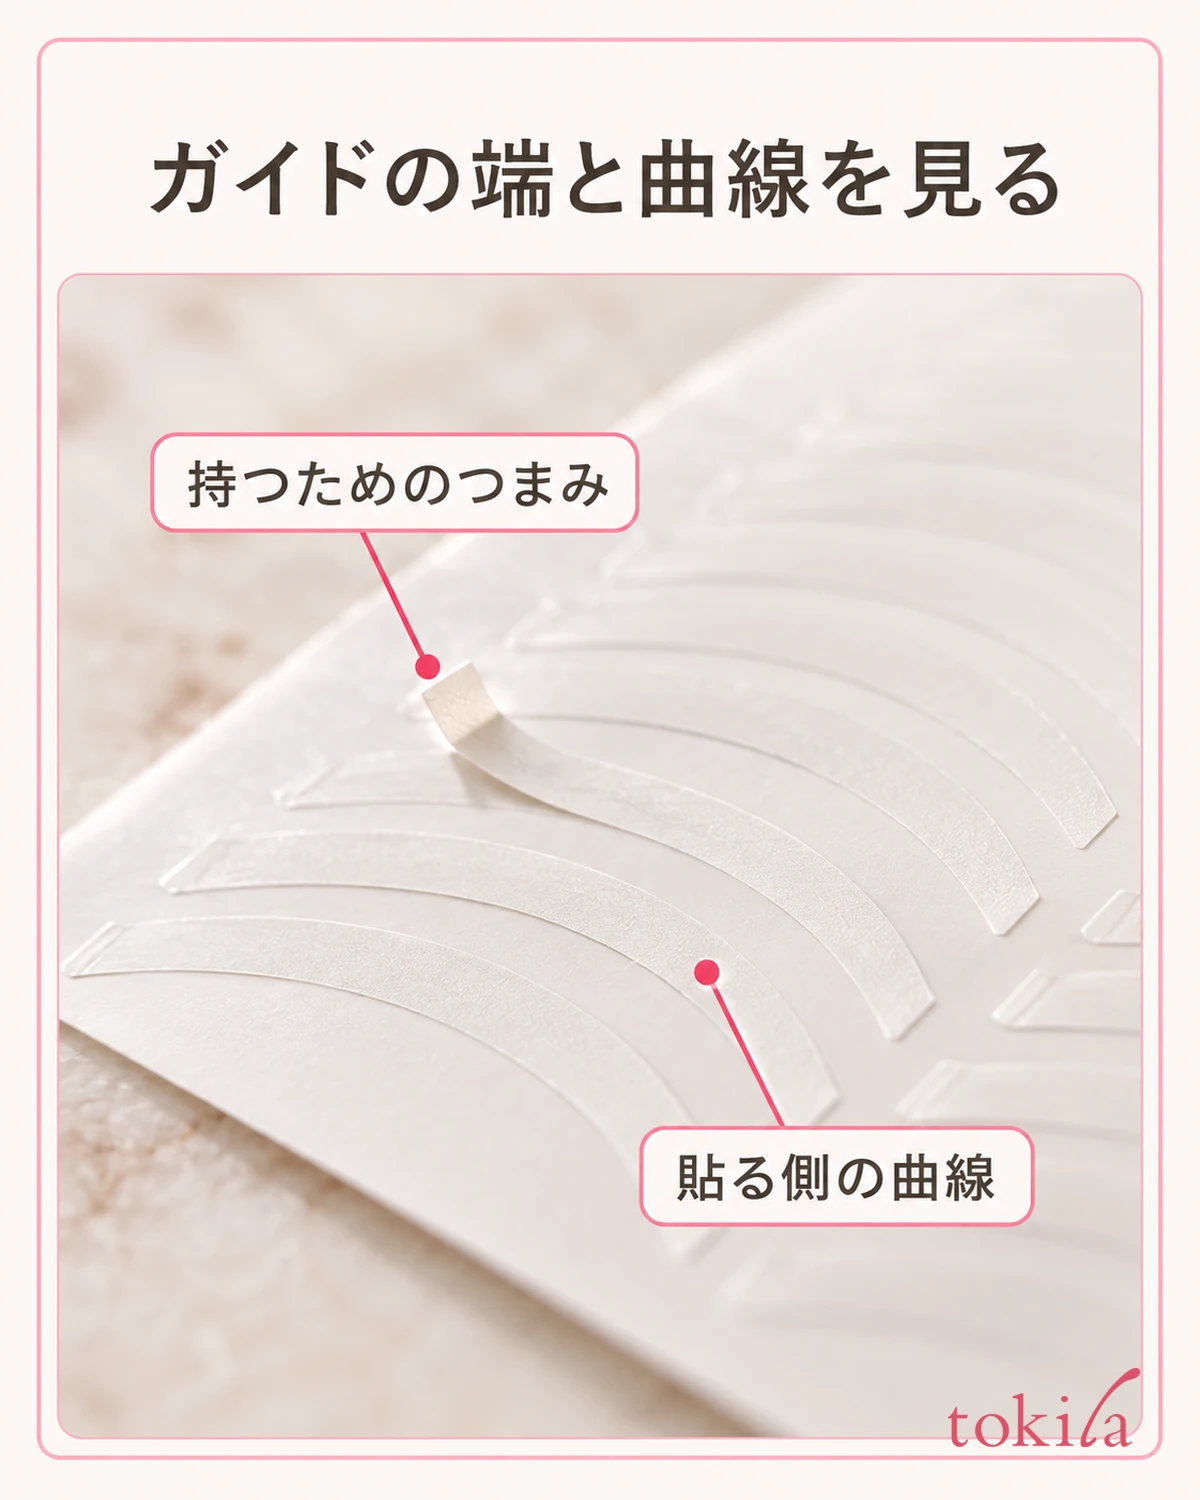
Check the intended use and layering method of each color, base coat and top coat you prepare. If a product needs the base to dry, meet that condition before moving on to the white. Don't compare while bumping neighboring fingers when the sample nail is still soft enough to smudge. If you use guide stickers, use only ones where you know which polish they are compatible with and when to apply and peel them.
Support your hands and start from a narrow area with the tip of the brush
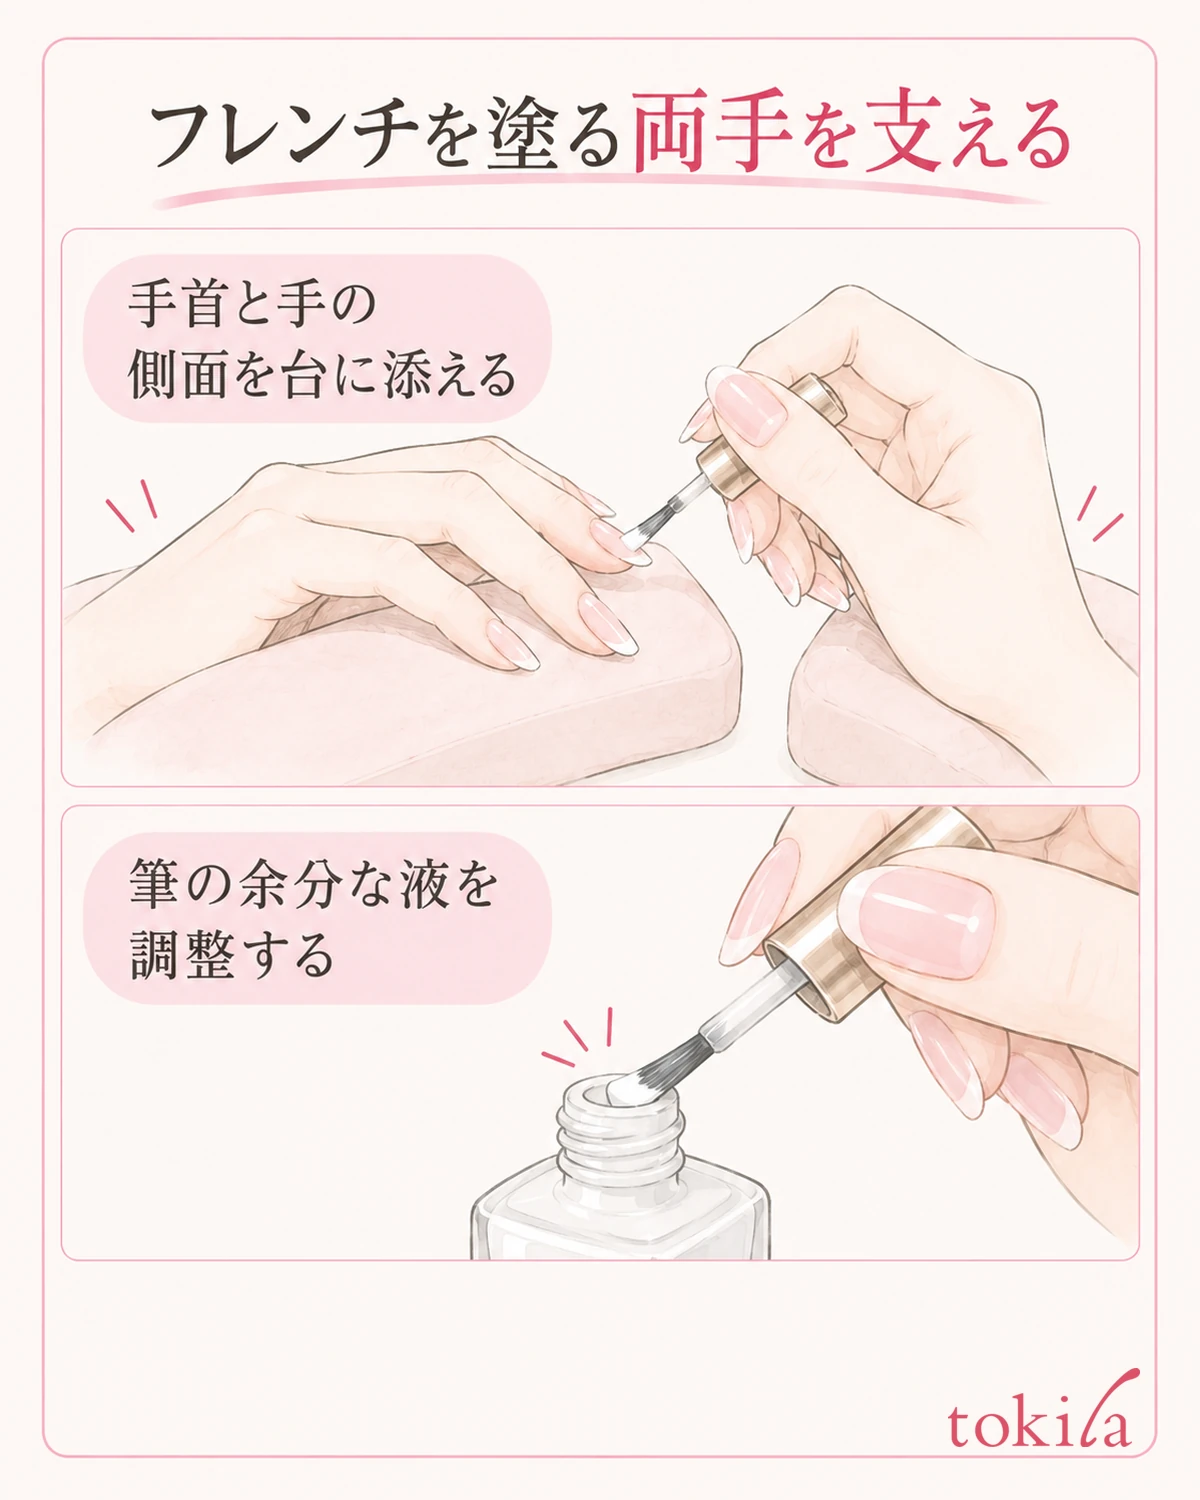
Place the hand you are painting on the desk and, if needed, put a stable support under your wrist. Lightly rest the wrist or side of the hand holding the brush on a rest as well, so neither hand floats in the air. Also check that freshly painted nails are not touching the places you are using for support.
After taking the brush out of the bottle, adjust the excess polish in a way that suits the product. If a large drop remains on one side when it touches the nail tip, it is easy to put polish over a wider area than the line you are aiming for. On the other hand, wiping off too much can make the brush streaky, so rather than fixing how many times you wipe, adjust by looking at the polish gathered at the brush tip.
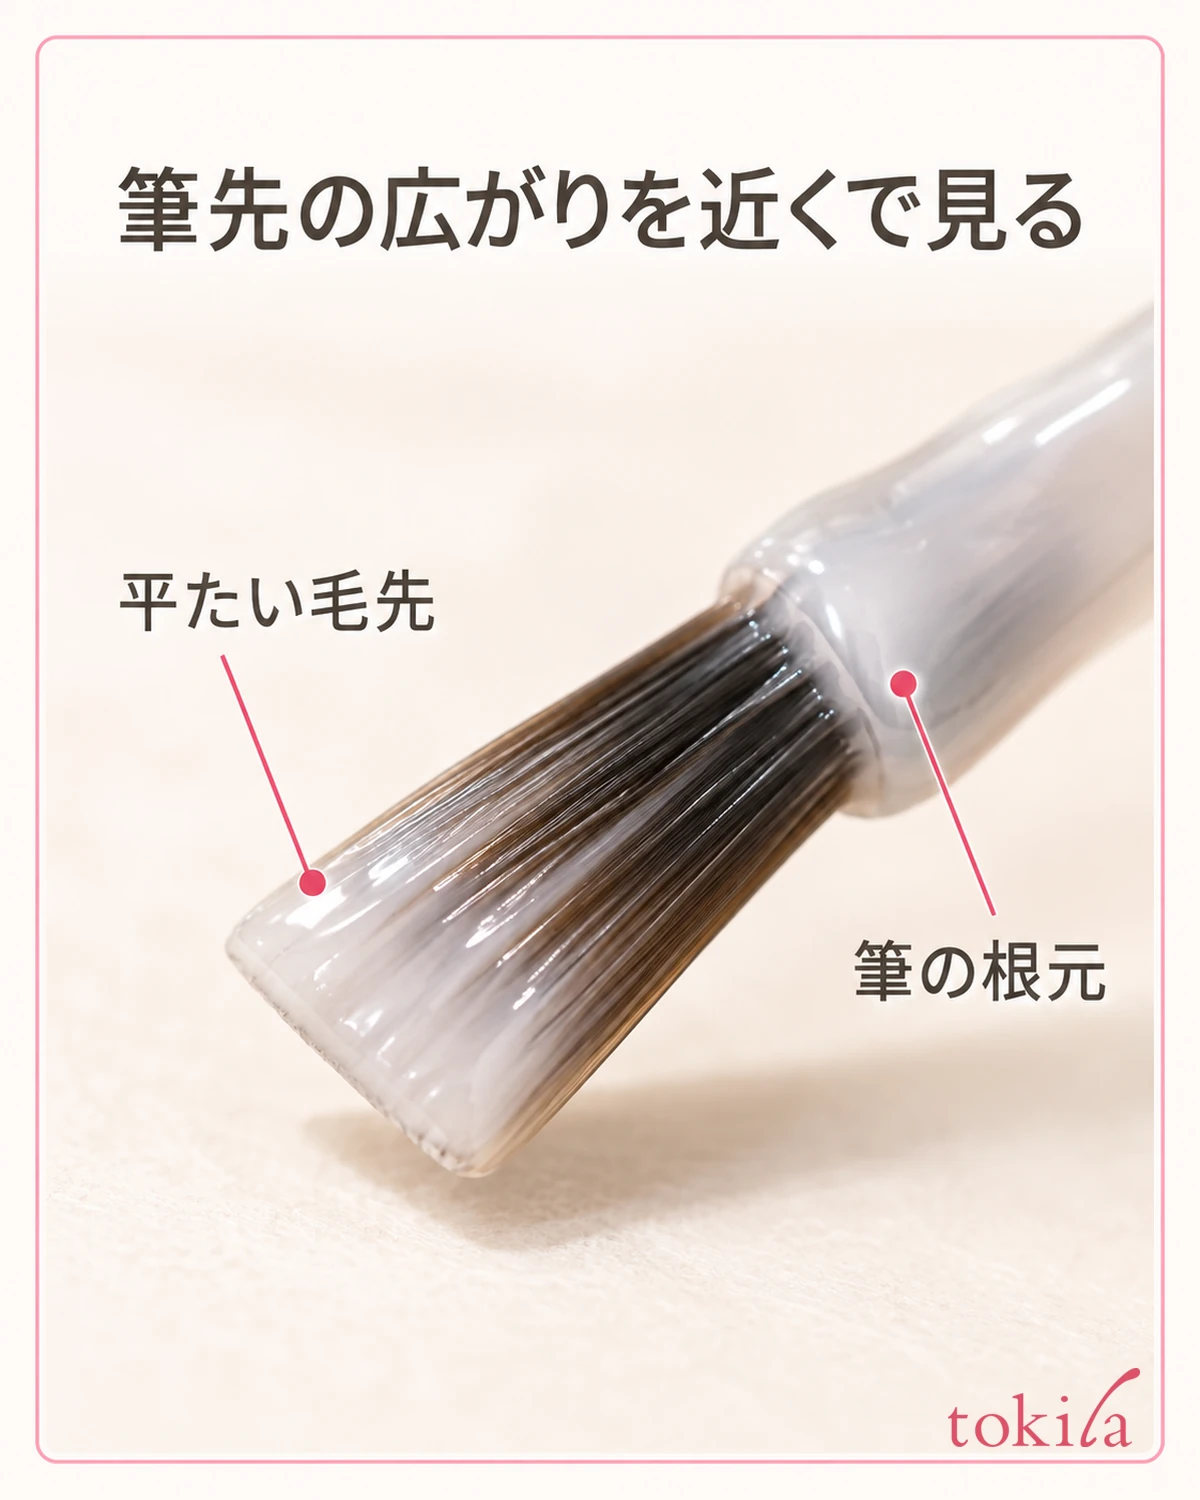
Place the white on the nail-tip side of the boundary you decided on. Rather than pressing a wide brush hard to make the band, start from a narrow area that you can control with the brush you have. Connect the boundary and the nail-tip side with short strokes, and don't put force into trying to draw the full width in one pass.
If the far side of the nail is hard to see, rather than twisting the brush around to chase it, change the angle of the finger you are painting a little and stop where you can see. The key is to return to the center and left and right positions you decided earlier and check them, and not to change the band's width every time you move your wrist.
If you switch to a thin brush, make sure it is a tool that can be used with nail polish, use it in a way that matches the product's instructions, and clean up afterward. Avoid changing the shape of the brush in the bottle by cutting it, or adding another solvent. The posture for painting the dominant hand is also covered in how to support your hand when painting your dominant hand's nails.
Don't widen all the nails to match one thick nail
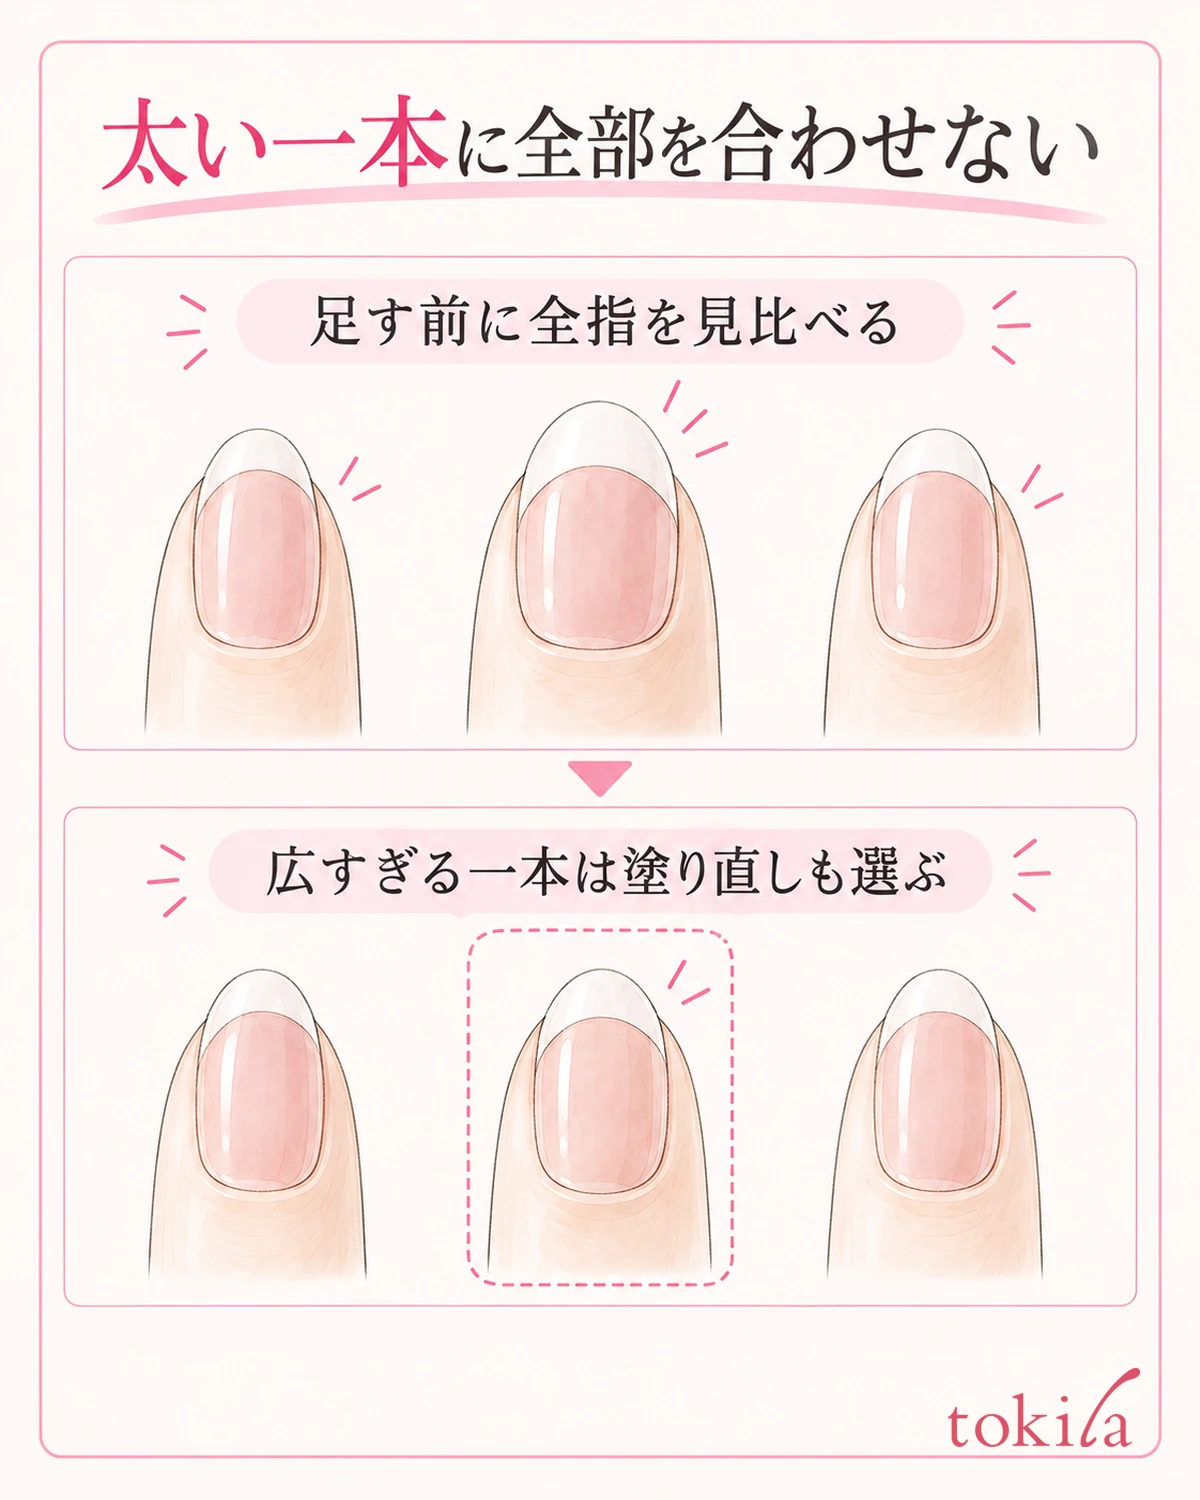
After painting the white, check it against the sample before moving to the next finger. If one nail comes out wider, thickening all the rest to match it takes you away from the finish you decided on at the start. First, decide whether that wider nail is still within your taste if left as it is, or whether you want to redo it.
If adding just a little to the narrow part would balance it and a wider band is fine, check the product's conditions for layering, then place a small amount only on the side that needs it. Don't add polish to the side that is already thick, and don't increase the opacity of the white as well. It is important not to chase the lower side of the boundary and keep making the left and right sides deeper in turn.
If the white band turns out deeper than you wanted, you can't always hide it by painting the base color over it. Over a sheer base the white remains, and only the layers you've added get thicker. When the line is almost dry, rather than scraping it with a nail or something hard, this is a situation where it is easier to see your way forward by removing that one nail with the matching remover and repainting.
When you repaint, check which remover matches the polish and remove it as directed. Don't try to remove gel the same way as regular polish, and don't scrape your nails to get rid of the white. If the color spreads to the surrounding skin, see how to place the cotton when removing nail polish.
If repeated redoing leaves your nails or surrounding skin dry, or causes redness or pain, stop for the day. Don't keep using remover while feeling irritation just to make the nails match. If symptoms continue, consult a medical institution.
If a line wobbles only slightly, you can also choose to finish there for the day. Rather than eliminating the difference between left and right completely, prioritize keeping the coating from getting too thick and keeping the area of base color you wanted to leave. Don't treat the job as finished with polish still on your skin; remove it in the way the product instructs.
After drying, look at all your fingers and use it for the next nail
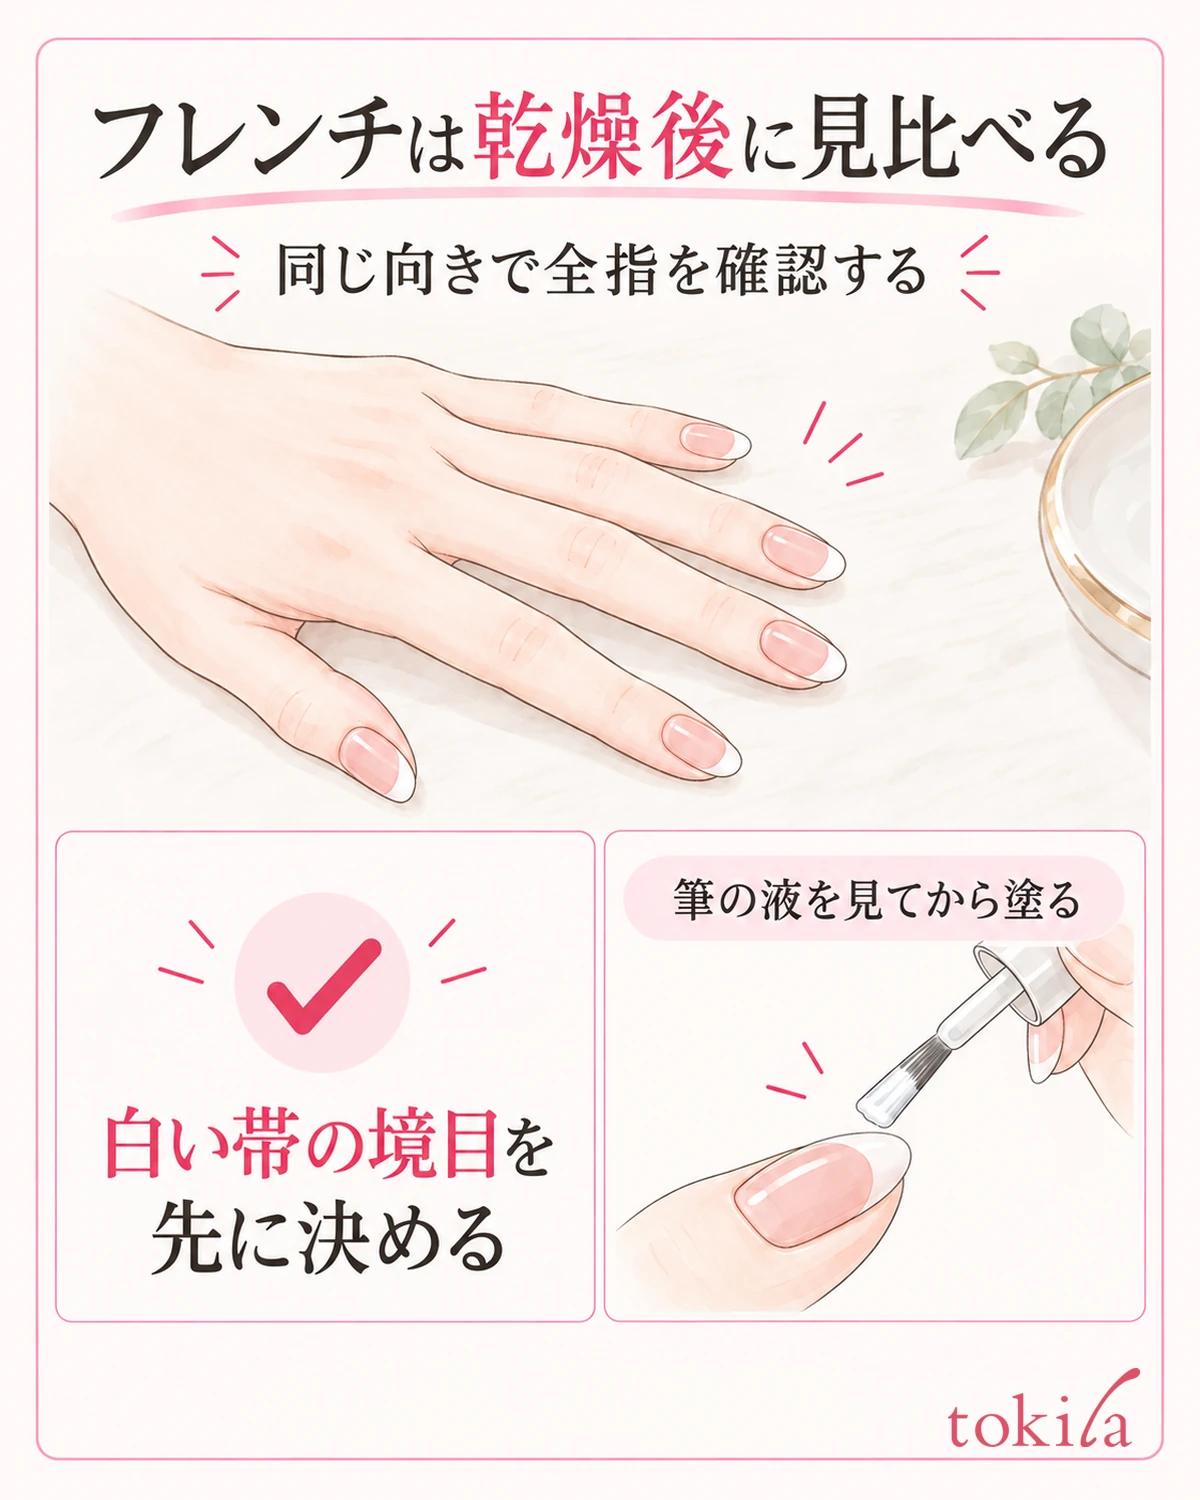
When you finish painting, let the polish dry according to the conditions of the product you use, and finish with a top coat if needed. Don't treat a surface that is dry to the touch as the same as fully dry inside, and avoid deciding on a single drying time for everything. There is no need to bump your fingertips to check.
Place all your fingers under the same light and see whether the white band is deeper on just one nail, or whether the direction of the curve leans to one side. Check the thumb separately, facing it forward, so you don't mistake a difference in angle for a difference in width. Separating the up-close check of the lines from the impression of the whole hand from a little farther away makes it easier to avoid adding polish over and over for tiny differences.
For your notes on the day, besides the combination of white and base you used, it helps to briefly record which finger's width changed. Write in a way that tells you where to look next time, such as "only the right ring finger is deep" or "polish pools at the left edge." Reflections can hide the boundary of the white in a photo alone, so add a short note on what you noticed.
Next time, pick one specific change, such as deciding the central boundary a little closer to the nail tip, checking before you put polish on the brush, or resting your wrist on a support before moving. Compared with changing the width, brush, color and way of supporting your hand all at once, this makes it easier to look back on what differed from last time. This is a way of organizing practice and does not guarantee the same result.
You can choose the width of the French white to suit the length and shape of your nails and the look you want. Make one nail the sample to decide the width and curve, and check all your fingers before adding more. Keeping this order in mind helps sort out the uncertainty of the standard changing every time you paint. Start with the nail that is easiest to draw and find the band thickness you like.



