
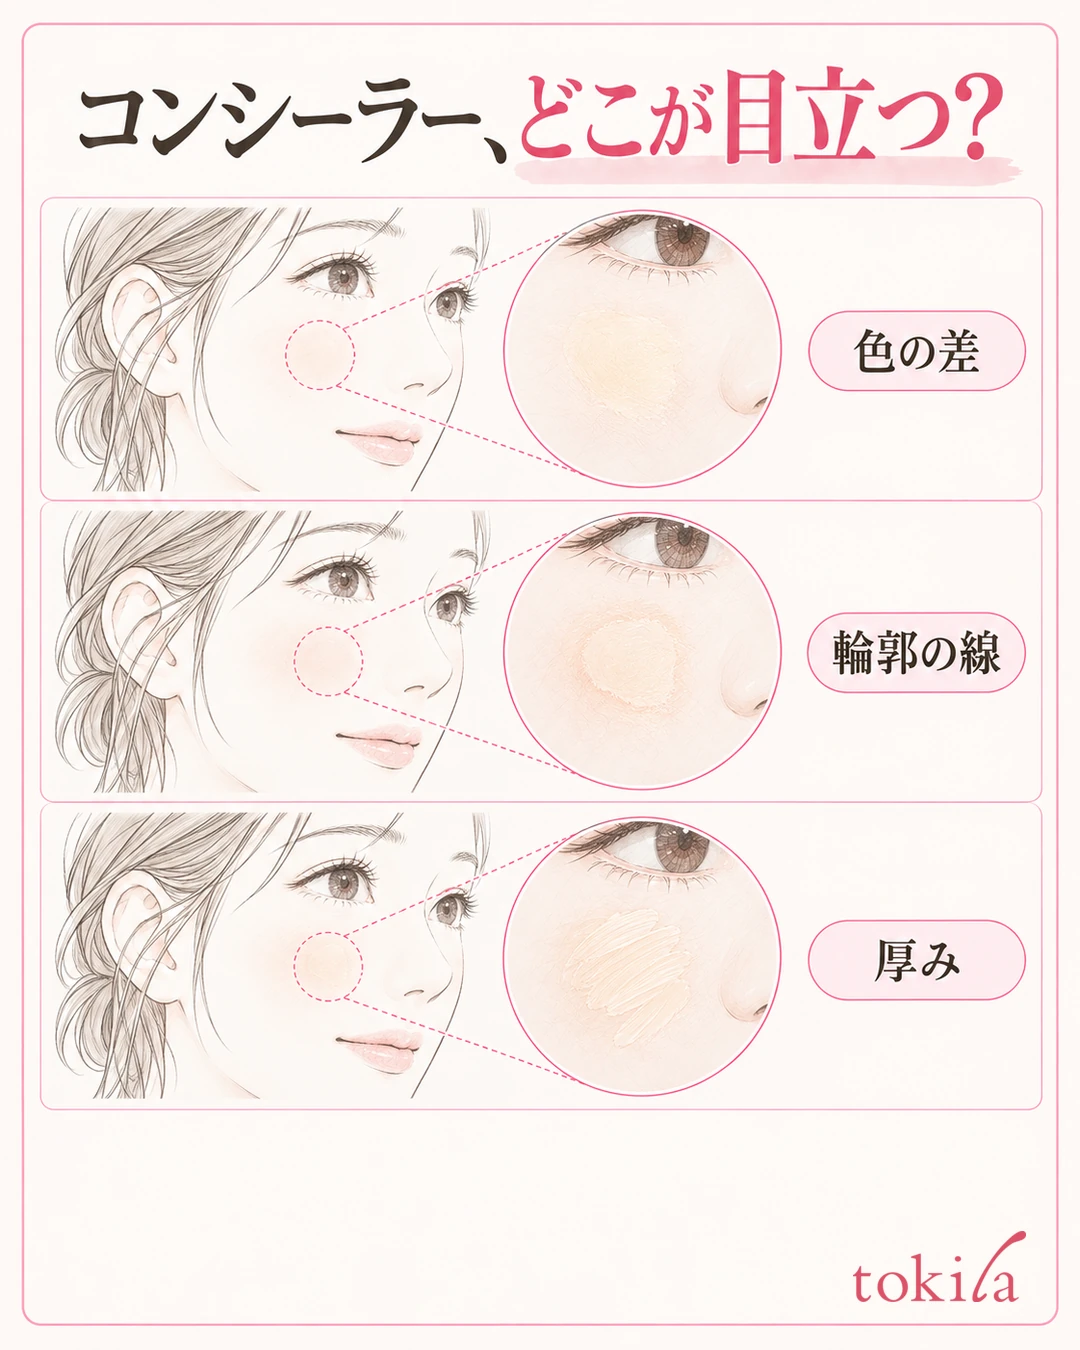
You covered the spot on your cheek, but the area you applied to looks round and bright. The more you blur the outline, the more the color in the center comes off. When the edge of your concealer stands out, check the "color difference," the "area you applied" and "where you blend" separately before layering more.
This article deals with the edge that shows right after you pinpoint-cover a flat part of your cheek. Using five diagrams, it walks through placing a small amount, telling the center you want to keep from the surrounding area, and checking with the mirror held away. It does not cover concealer creasing in the fine lines under the eyes, acne treatment, or diagnosing skin conditions.
1. Tell color difference, outline and thickness apart in the same light
First stop and put the mirror straight in front of your face. Check in order whether the area you applied looks brighter than its surroundings, whether only the outer edge of the colored patch stands out sharply, or whether the thickness is noticeable. In any case, the starting point is not to try to fill it in by adding more concealer right away.
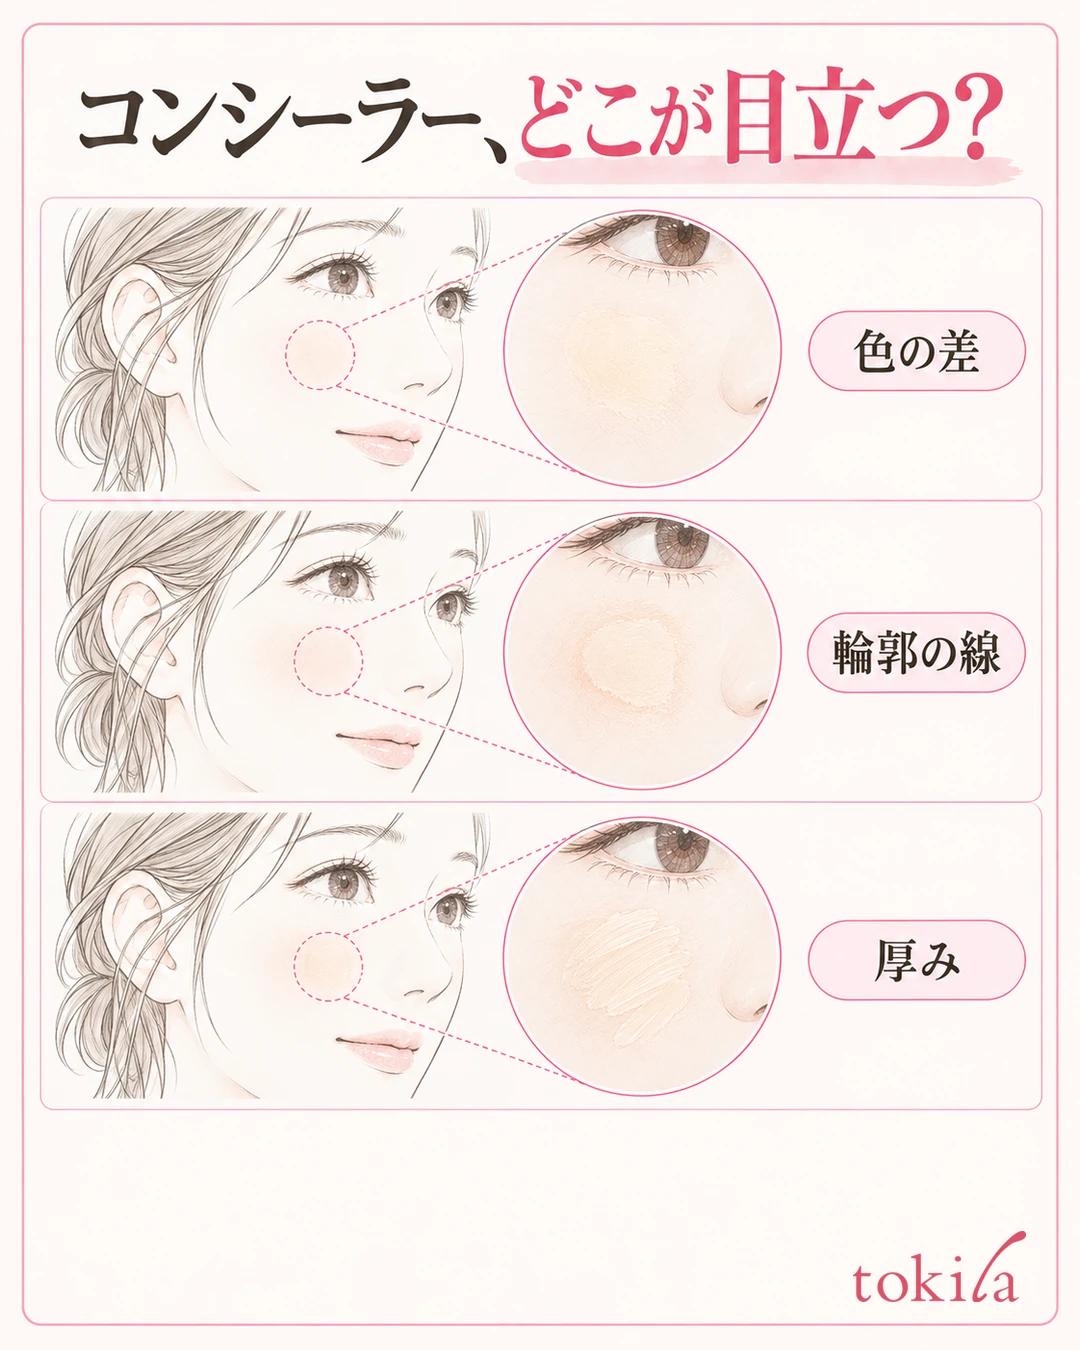
To judge the color difference, compare the area where you applied concealer with the base right next to it. Rather than using only your forehead or the back of your hand as a reference, check how it connects with the cheek you actually want to finish. The shade meant to brighten and the shade meant to cover a spot are not necessarily chosen the same way.
If the outline is what stands out, look at the outer edge of the colored patch. If the center looks natural but only the surroundings show up as a round line, reviewing the area you blend is one option. On the other hand, if the whole applied area looks whitish, or too yellow or red, the color difference may remain even if you keep touching only the edge.
For thickness, check whether the same kind of raised or heavy texture shows at the applied spot even when you move your face slightly. Do not treat every shadow that changes with the light as a missed spot. After looking at the outline with the mirror close, move back to a distance where your whole face fits and see whether it still bothers you with your usual expression.
While comparing, keep the lighting, the angle of your face and the mirror distance as consistent as you can. Avoid judging only the color difference by looking at one side in strong window light and the other in a dim room. If you use photos, colors can change with retouching, so rely mainly on the mirror.
There is one condition to fix right away. If "only the outline shows," look at the surroundings; if "the whole patch is different," look at the color and amount; if "it is thick and moves," look at the layers you stacked. If your main concern is color gathering under the eyes, see Rethinking amount and range to prevent creasing under the eyes.
2. Check a color that blends with the surroundings, and the order and tools of the products you have
Choose a color for covering by how it connects with the cheek after application. Do not decide only by the color of the spot, the color of the packaging, or someone else's shade number; check whether it blends with the surrounding foundation. Separating the step where you want to add brightness from the step where you want to cover a small area makes it easier to check before buying more.
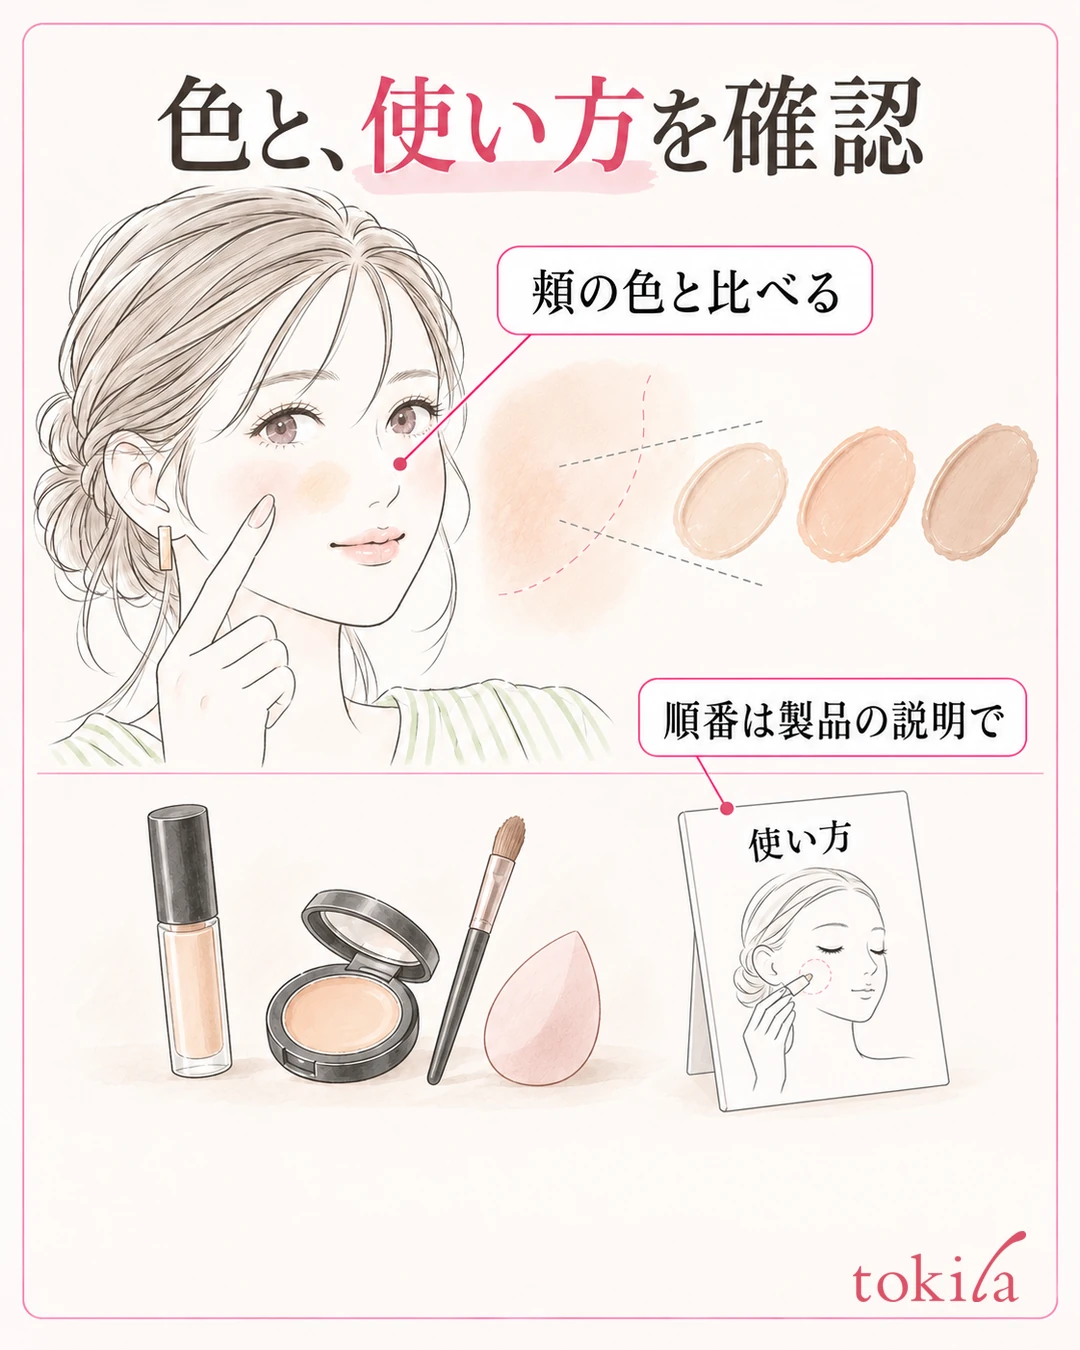
There are choices in form and texture, but do not decide by shape alone, such as "a stick will always suit" or "a liquid will be too thin for everyone."
For the order of application, check the instructions for both your foundation and your concealer. As a general guide it goes after a liquid base and before a powder base, but follow the product's or finish's instructions first. If you keep adding a thick color over a powdered surface, that is a cue to review the order and the number of layers.
The same order or the same finger movement should not be applied uniformly to every concealer.
Match your tools to the product as well. Choose from what is recommended, such as a brush that can handle a small area or clean fingers. If the bristles are so wide that they touch the center every time, check whether you can choose a surface that lets you work in a smaller space. Rather than pressing a large tool hard to force it into a small area, keep the tip visible.
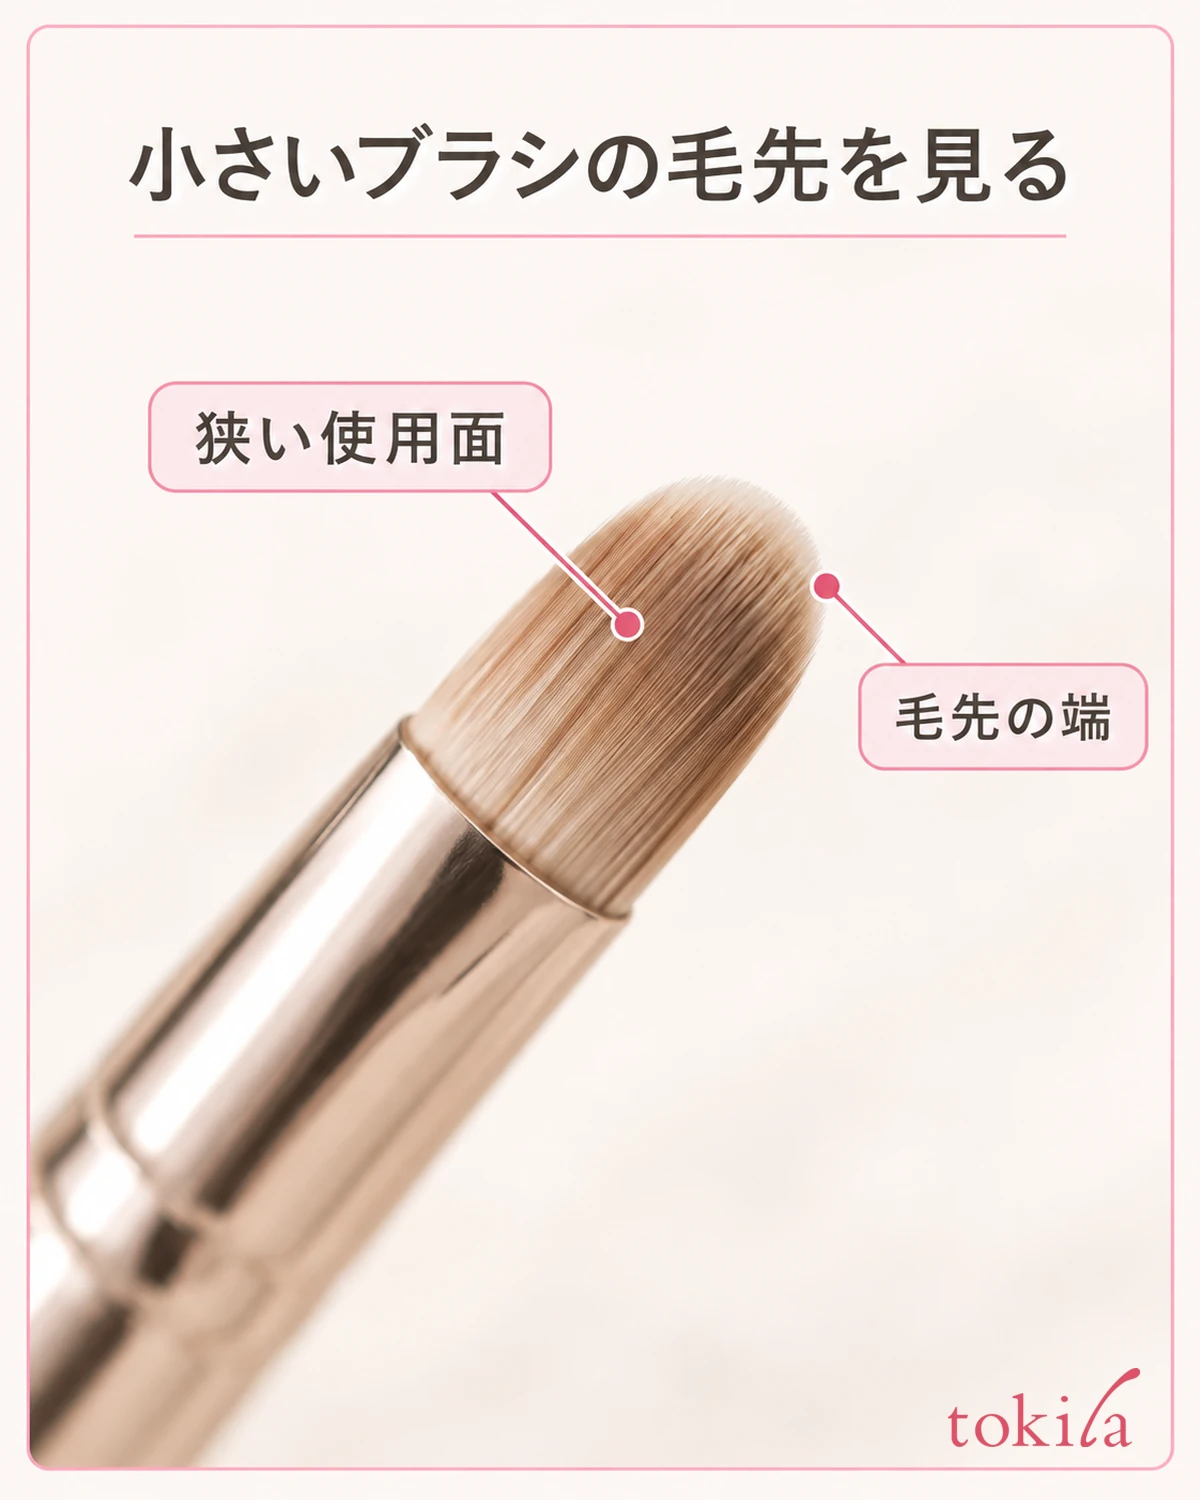
Prepare with skincare and primer in the specified amounts, and check that you are not layering over leftover product on the surface. Do not make it a common rule to skip moisturizer or to always add powder. Handle containers and tools cleanly, and do not keep covering over areas with pain or wounds on the skin.
3. Place a small amount and blend the outline while avoiding the center you want to keep
Before applying, decide on one spot and the color you want to cover. Following the product's instructions, start with a small amount that can cover the necessary area. If you spread it over a wide part of the cheek from the start, the area you have to tidy at the edge widens too. Rather than treating the number of dots or millimeters as the one right answer, look at the amount you have and the area you applied.
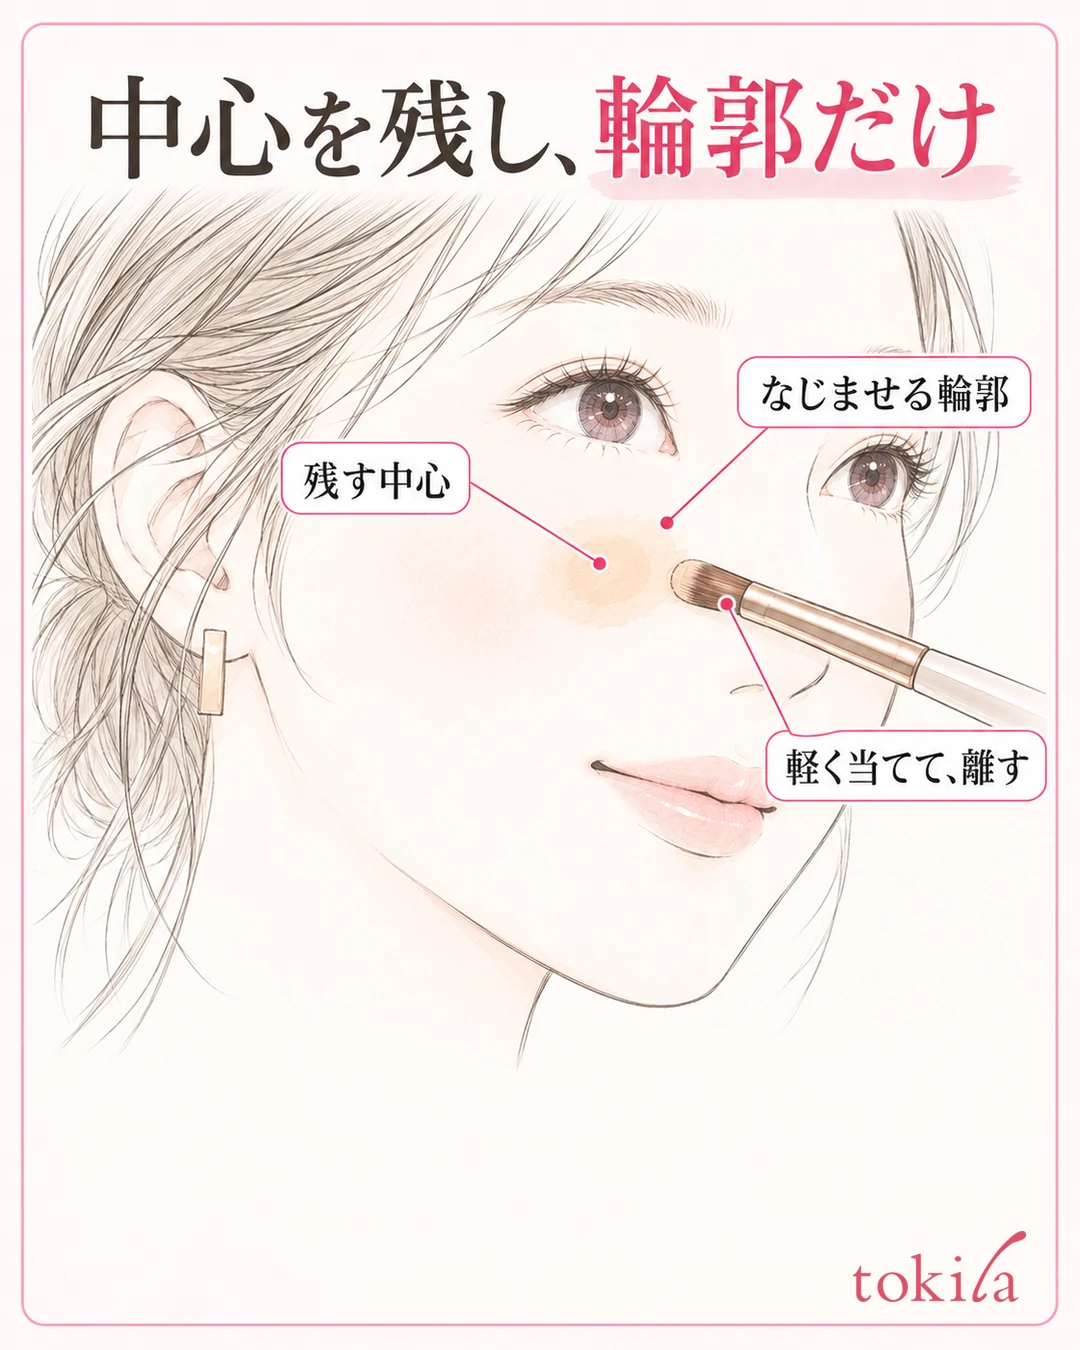
In this article too, after blending once, judge whether the coverage is enough, and avoid repeatedly layering the same amount as at first.
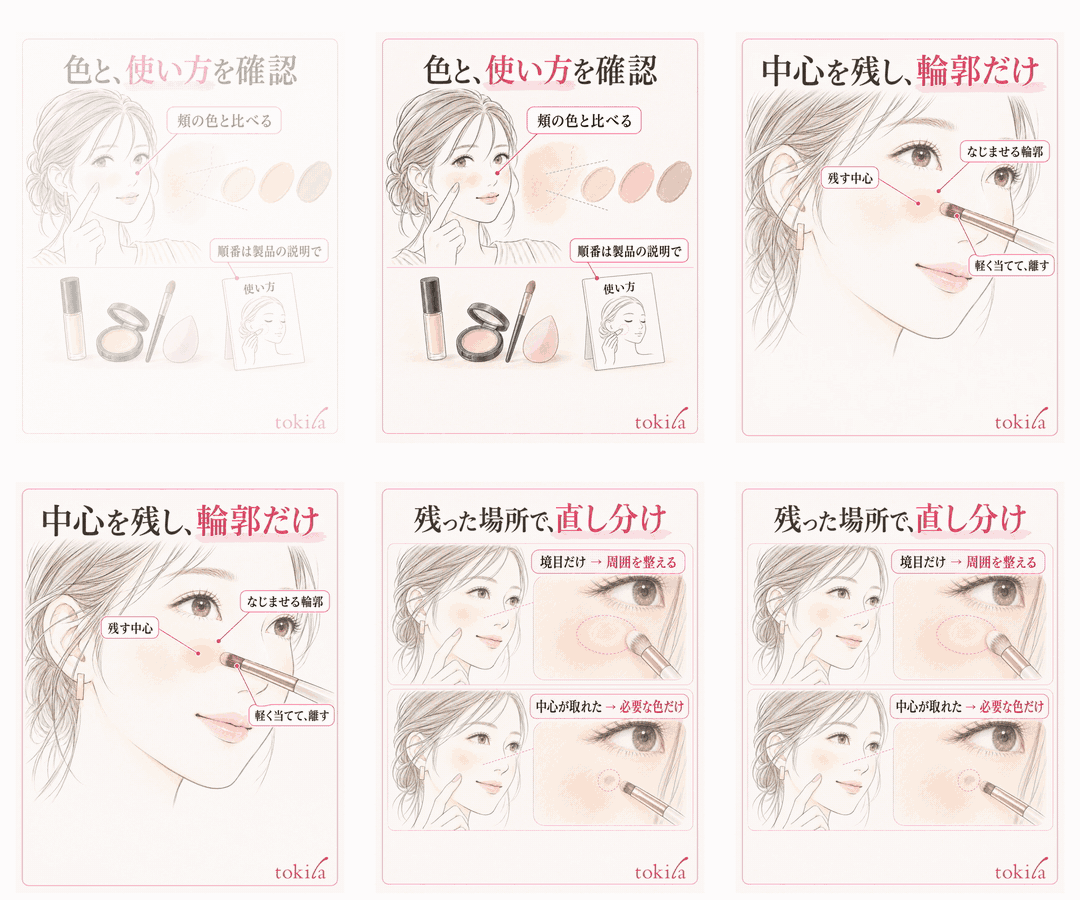
Once the color you want to keep is on the center of the spot, look at the outline around it. If you use a brush, touch it lightly at a position where the bristles do not cross the center but reach the outer edge of the colored patch. Instead of drawing circles over and over, blend a short stretch in small movements and check from a distance.
Even if you do not own the specific brush shown, this can serve as a reference for checking whether a tool that suits your product can handle that small area.
If the product is meant to be blended with fingers, check the surface of the fingertip that touches. If you touch the outer edge with a lot of fresh color on your finger, the step of blurring the outline tends to become an extra application. Remove the excess color and keep to a light touch-and-release motion. Avoid going back and forth, pressing the center again and again, taking off the coverage and then adding more.
The round patch in the diagram is a schematic for separating the center you keep from the outline you touch. It is not an instruction to draw a circle of the same size on your skin. Once you have blended one part, move the mirror away, and finish at the places where the edge no longer bothers you. There is no need to touch the other side or the surroundings just to match the number of passes.
4. Fix it differently when only the edge remains and when the center has come off
If the outline is still visible after blending, first check whether the center of the colored patch remains. If the coverage in the center looks natural and only the outer edge bothers you, one option is to lightly tidy that short stretch. Check before adding new concealer outward and enlarging the area of the colored patch.
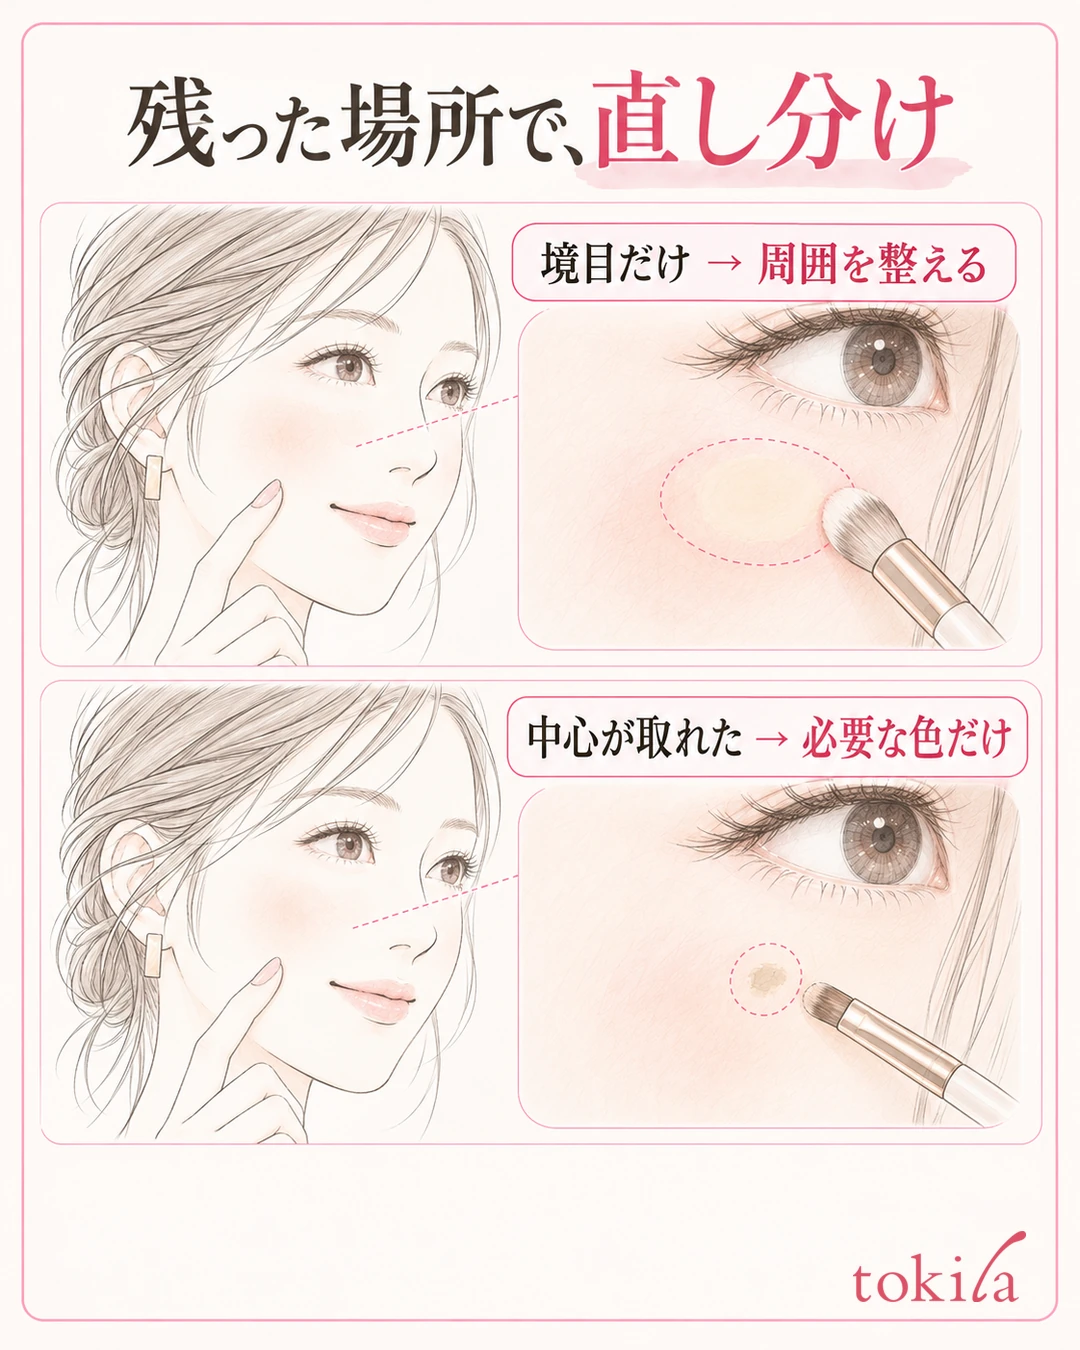
If the center has become thin, do not keep blurring the same spot. Look at the color that remains and put a small amount back only on the center that is still needed. After that, bring the tool to the surrounding outline. If you end up rubbing the center every time to take off color and then painting a wide area again, review the size of your tool and where you touch.
If the whole colored patch is brighter than its surroundings or has a different tone, do not try to solve it with amount alone. Adding more of the same color can even widen the difference. If you have another shade, match it within the range the product allows, but do not mix products in the container if their instructions do not describe how to mix them.
When thickness or lifting of the base is noticeable, redoing the necessary area may be easier to handle than continuing to hide it by layering a thin color on top. Follow the instructions of the cleanser or remover you use, do not wipe the surroundings hard, and tidy starting from a small area. Avoid rubbing a hard-to-remove color over and over with a dry tool.
After redoing it, tidy the surface according to the instructions of the products you used, restore the skincare and base you need, and then cover. Where you removed sunscreen, add UV protection as well. Avoid hurriedly layering powder on a damp surface, or putting back the same amount as before the redo all at once.
If you finish with powder, do so after tidying the outline, using the specified tool and the amount you need. Powder is not meant to erase every color difference or thickness. If it looks powdery the more you add, stop adding and check which layer of concealer and base to review.
5. Decide when to stop by looking at the whole face, and change just one thing next time
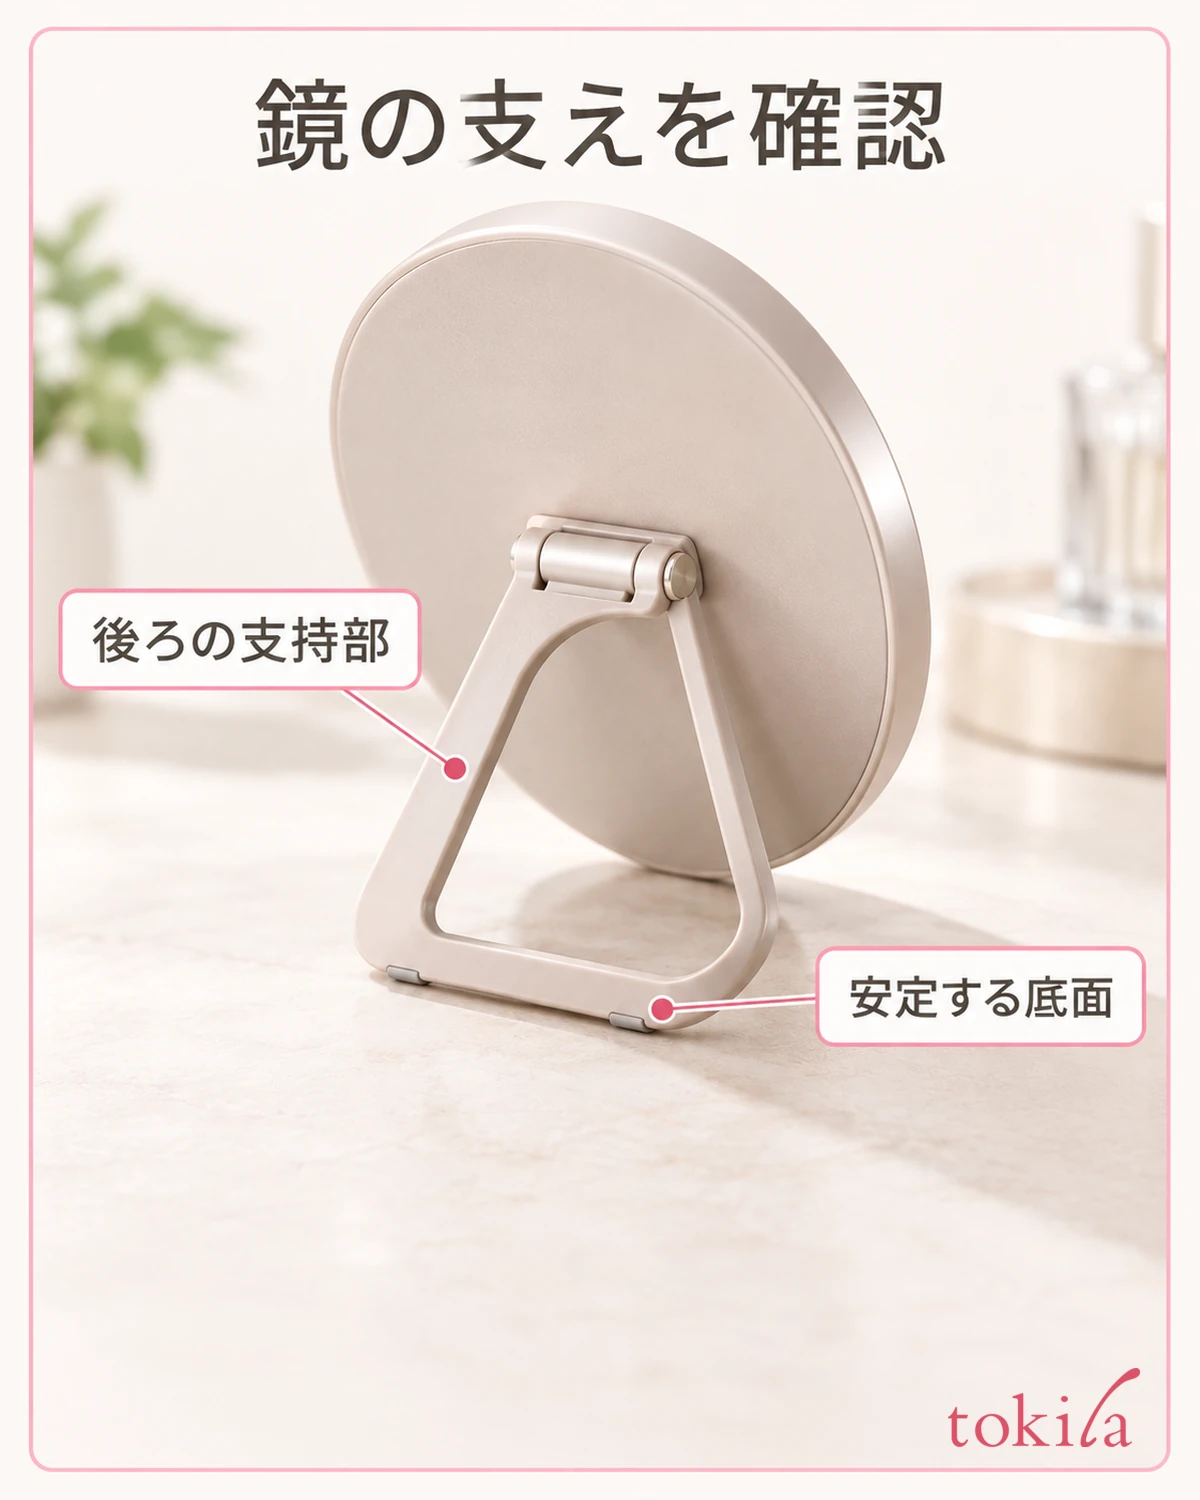
Finally, move the tools away and look in a mirror that shows your whole face. Check in order whether the covered spot shows as a round patch of color, whether it blends with the surrounding cheek, and whether it is the finish you want. There is no need to keep layering until you erase every small color variation or skin texture that a magnifying mirror reveals.

Turn your face back to the front and look in your usual indoor light as well. Do not treat bumps that show up only in strong side light the same as a missed spot. On days you use blush or similar, also check the whole look after finishing. If you are bothered by the difference between a deep cheek color and the beige on the spot, do not increase the coverage right away; look at which patch of color stands out.
When the coverage you need remains after tidying and the outer edge no longer bothers you, you are done. A faint spot being slightly visible and the edge of your makeup standing out are separate judgments. Even if you choose a finish that hides everything, check the thickness and outline each time you add more, and see whether you are drifting away from the impression you want.
Next time, change just one of these: the color, the first amount, where you blend, or the working surface of the tool. For example, on a day when the center came off, "make the area where you touch the outline smaller"; on a day when the outer edge spread, "narrow the area of the first application." Noting briefly what you changed makes it easier to see the conditions you are trying with what you own.
On the days you try it, keep the lighting and the timing of your check consistent. Comparing only right after applying in the morning with how it wears off in the evening is not a comparison of the same concern. Also check the color left on the tip of the container or on the tool, and follow the product's method for cleaning after use. Before buying a new tool, see whether you can handle a small area with a clean one.
If you want to sort out the types and the basic order, see The basics of how to use concealer. For rethinking the edge, try it all the way through: observe in the same light, place a small amount, keep the center and blend the outline, separate adding from redoing, and finish by looking at the whole face.
Written by the tokila editorial team. We organized judgments and adjustment steps you can review with the tools you already have.



