
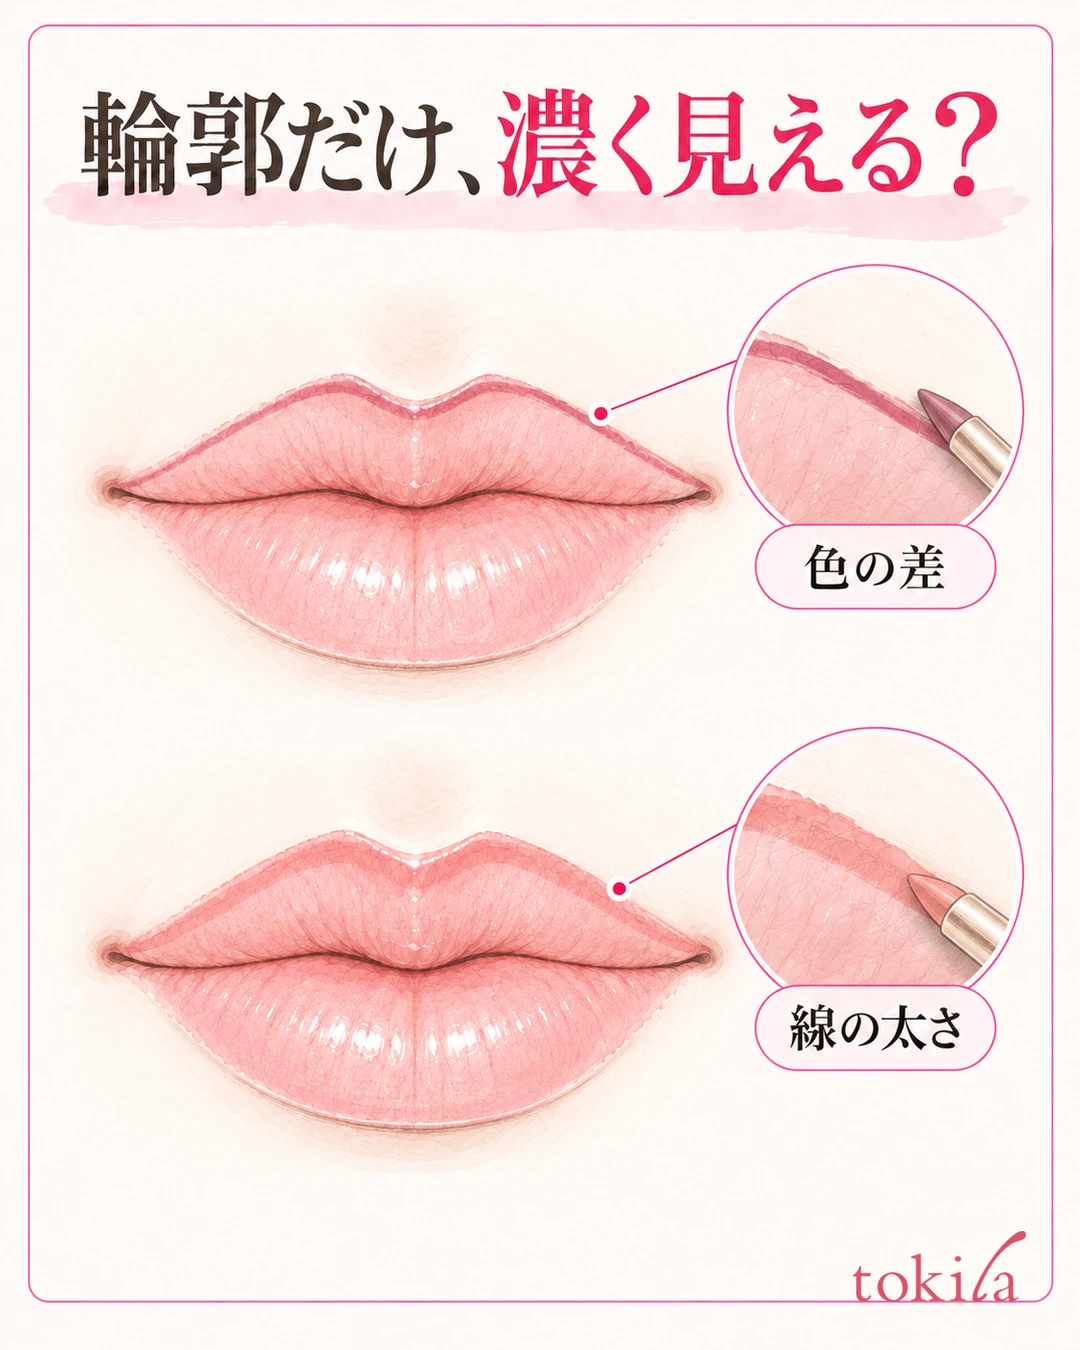
You outlined your lips with a lip liner, but after applying lipstick only the line stays dark. You wanted a defined mouth, yet it looks as if only the outer edge has been traced. When that happens, before layering lipstick more thickly, check the color, thickness and blend of the line with the inside separately.
This article is about how to rethink your approach when only the lip liner line stands out even though you want a natural blend. It covers situations where you match the liner and lipstick you already own without greatly changing the shape of your natural lip outline. Some makeup looks celebrate a sharp outline. Decide on the finish you want before making adjustments.
1. Separate color difference, line thickness and how the lipstick wears off
First, check whether the line stands out right after you draw the liner, only becomes noticeable once lipstick is layered on, or whether only the center has faded after a meal. Even when the problem looks the same, as "only the outline is dark," the adjustment differs between cases where you should revisit the color choice and cases where you should touch up worn-off lipstick.
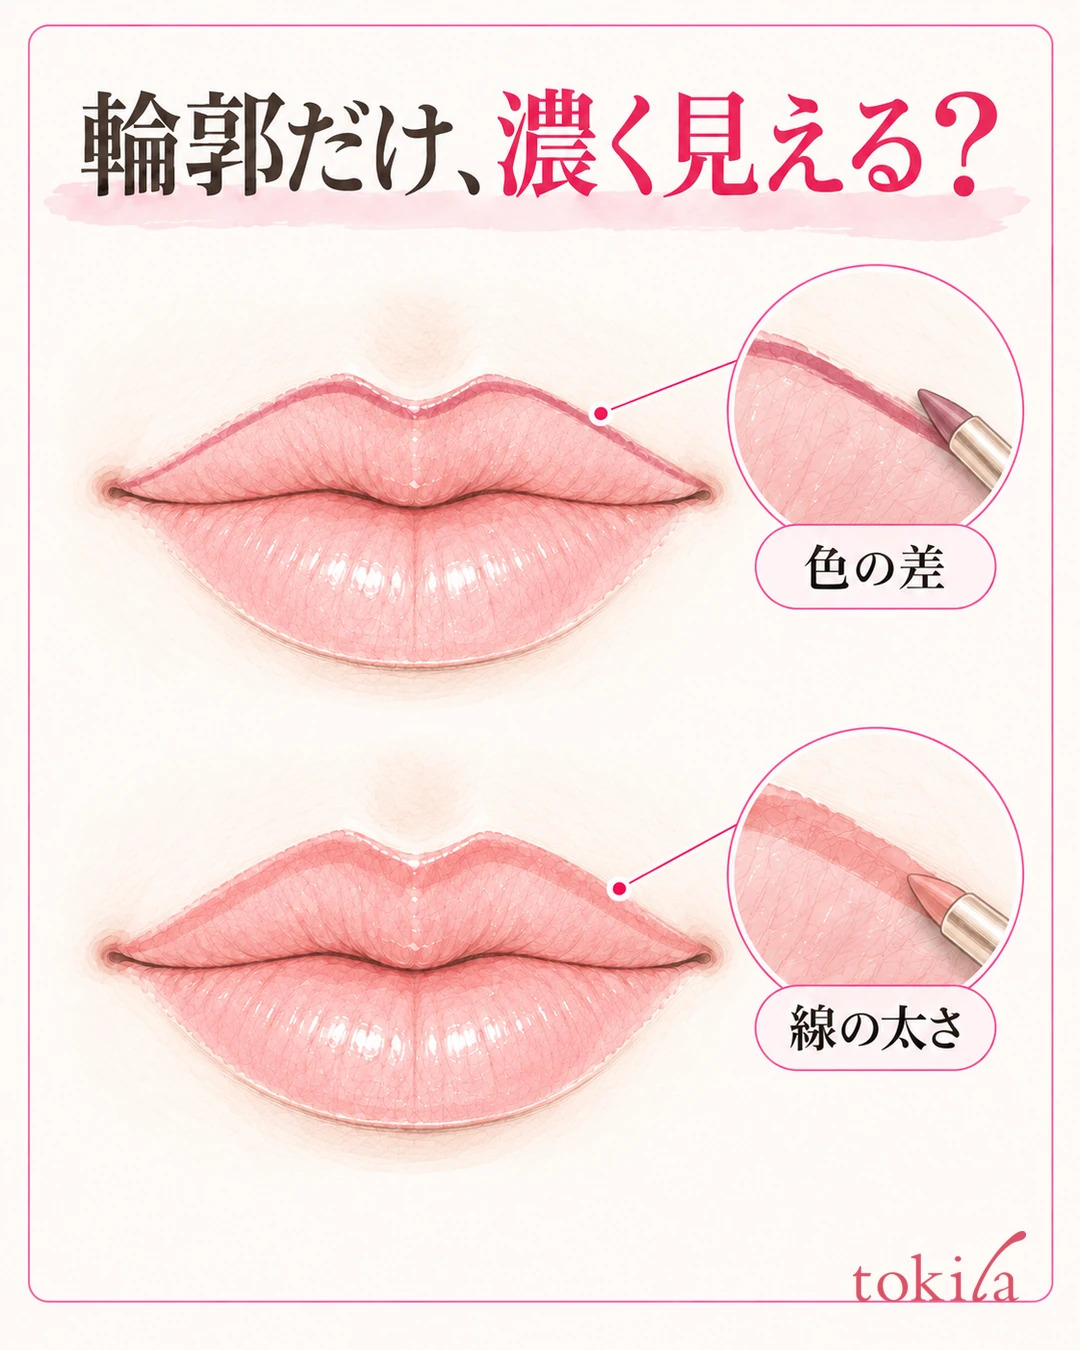
Using a mirror held close, look at the peak of the upper lip, the center of the lower lip, and the left and right corners of the mouth. Is the line darker than the lipstick, a different shade, or the same color but too wide? Instead of treating the whole outline as a single problem, decide on the smallest area that bothers you most. If only the corners are dark, adding more lipstick to the center is unlikely to solve it.
Next, step back to a distance where your whole face is visible. Check whether the line you see up close still looks separate from the lipstick from farther away. Shadows from the lighting and the dimension of the lips can also look dark, so match the light when comparing left and right. Also tell apart color that has gotten onto the skin outside the lips from the line on the lip outline itself.
If it blended in at first and only the center lost color after a meal, one option is to fix the worn-off area first and touch it up. Avoid layering more line onto the outline that remains. Lip color transfer and reapplication may also help. This article focuses on the case where the line stands out right after application.
On days when you enjoy the contrast between a dark outline and a soft center, you don't need to fix that contrast itself. Choose first between "I want to keep the line" and "I want it to blend naturally." Even when aiming for a natural finish, don't make filling the lips with a single flat color your only goal; judge the border you like across your whole face.
If your main concerns are patchy lipstick or color going outside the outline, see How to fix uneven or overflowing lip color. This article narrows down to how to connect the lipstick inside with the liner outside. If both bother you, tidy the color that has gone outside first, then check the line.
2. Match lipstick and liner by the color they make when layered
If you want a natural blend, start by considering a liner close to the color of your lipstick. This does not mean the same beige suits everyone. Choose based on the combination with the lipstick you already own.
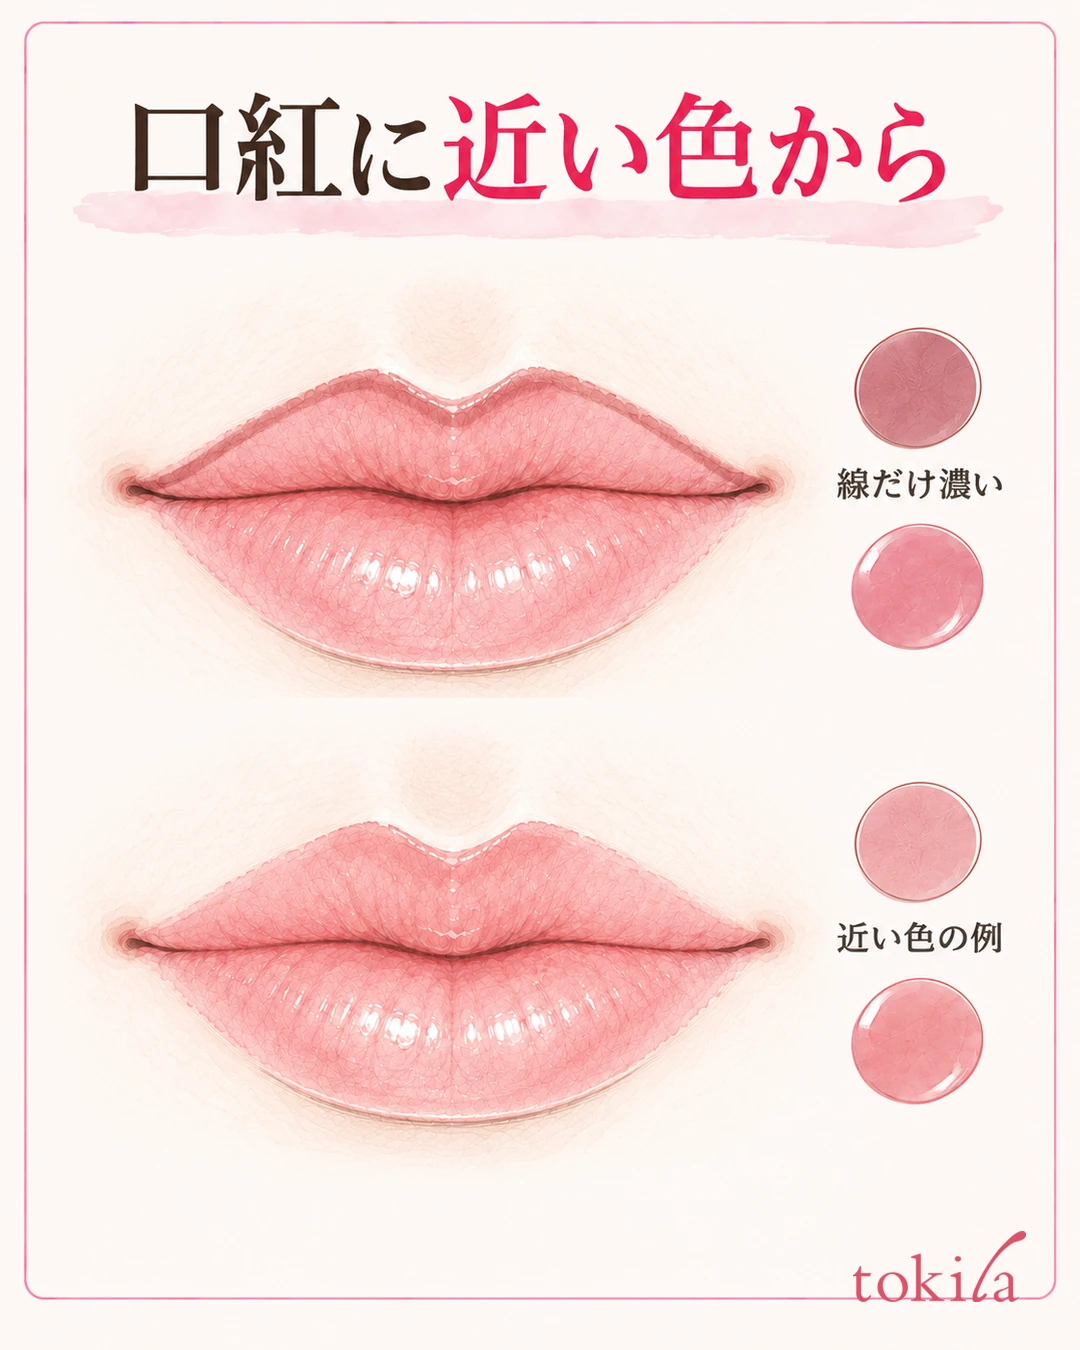
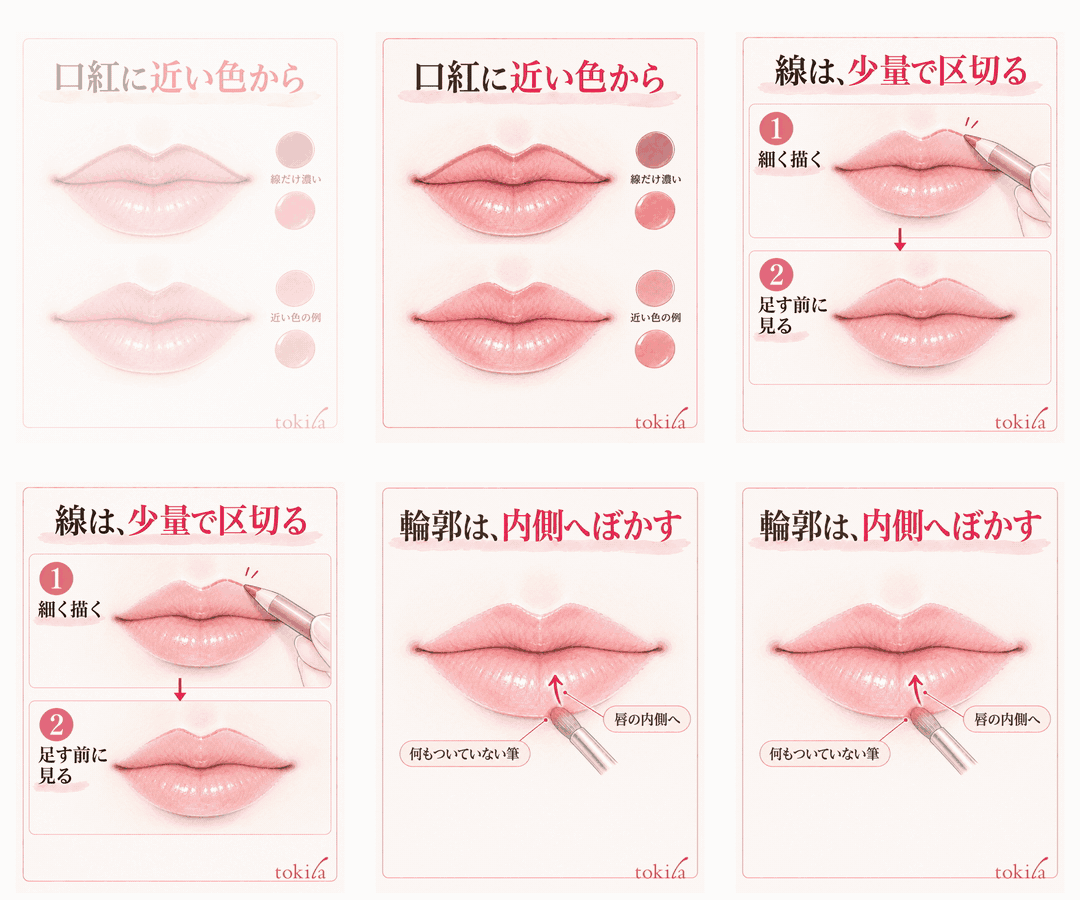
Use the way the lips look with lipstick actually applied as your reference, rather than just lining up the colors of the containers. A sheer lipstick lets your natural lip color show through, so the liner may look more opaque and darker. Even with the same color name, the pigment and finish are not necessarily the same, so don't assume the two will blend just because the names match.
To try your own combination, start with the lipstick you usually use and one liner. First draw a little, blend it inward, then layer the lipstick and see whether the line remains. When comparing, keep the lipstick color and amount, the light and the lip shape the same, and change only the liner color, which makes it easier to choose.
Even when the brightness is similar, the border may show if the lipstick leans toward a warm orange while the line leans toward a strongly bluish rose. Conversely, even when the shades are close, a line that is much darker will emphasize the outline. Look first at the difference in lightness, then at the shade, and finally at the amount of the line, changing as few items at a time as possible.
If the liner you have is dark, try drawing it thin with a small amount and blending it inward, in a small area. If that still doesn't get you closer to the finish you want, consider a different combination rather than layering lipstick many times to match. Before buying more, sort out the colors you can use today and the strength of the outline you want.
Avoid rubbing your lips hard and reapplying over and over each time you try a color. Check the product's directions for use and how to remove it, and take breaks according to the condition of your lips. Colors in photos or on screens change with light and display, so treat image colors as a way of thinking about comparison, not as proof of the actual color you will get when you buy.
3. Draw the outline thin and stop before adding more depth
Before drawing, check the tip of the liner and the brush. How far the lead extends, whether it needs sharpening, and whether a blending tool is attached differ by product. Don't extend the lead long and press it flat against a wide area, or go back and forth over the same place with force; get it into a state where it can draw a thin line as directed.
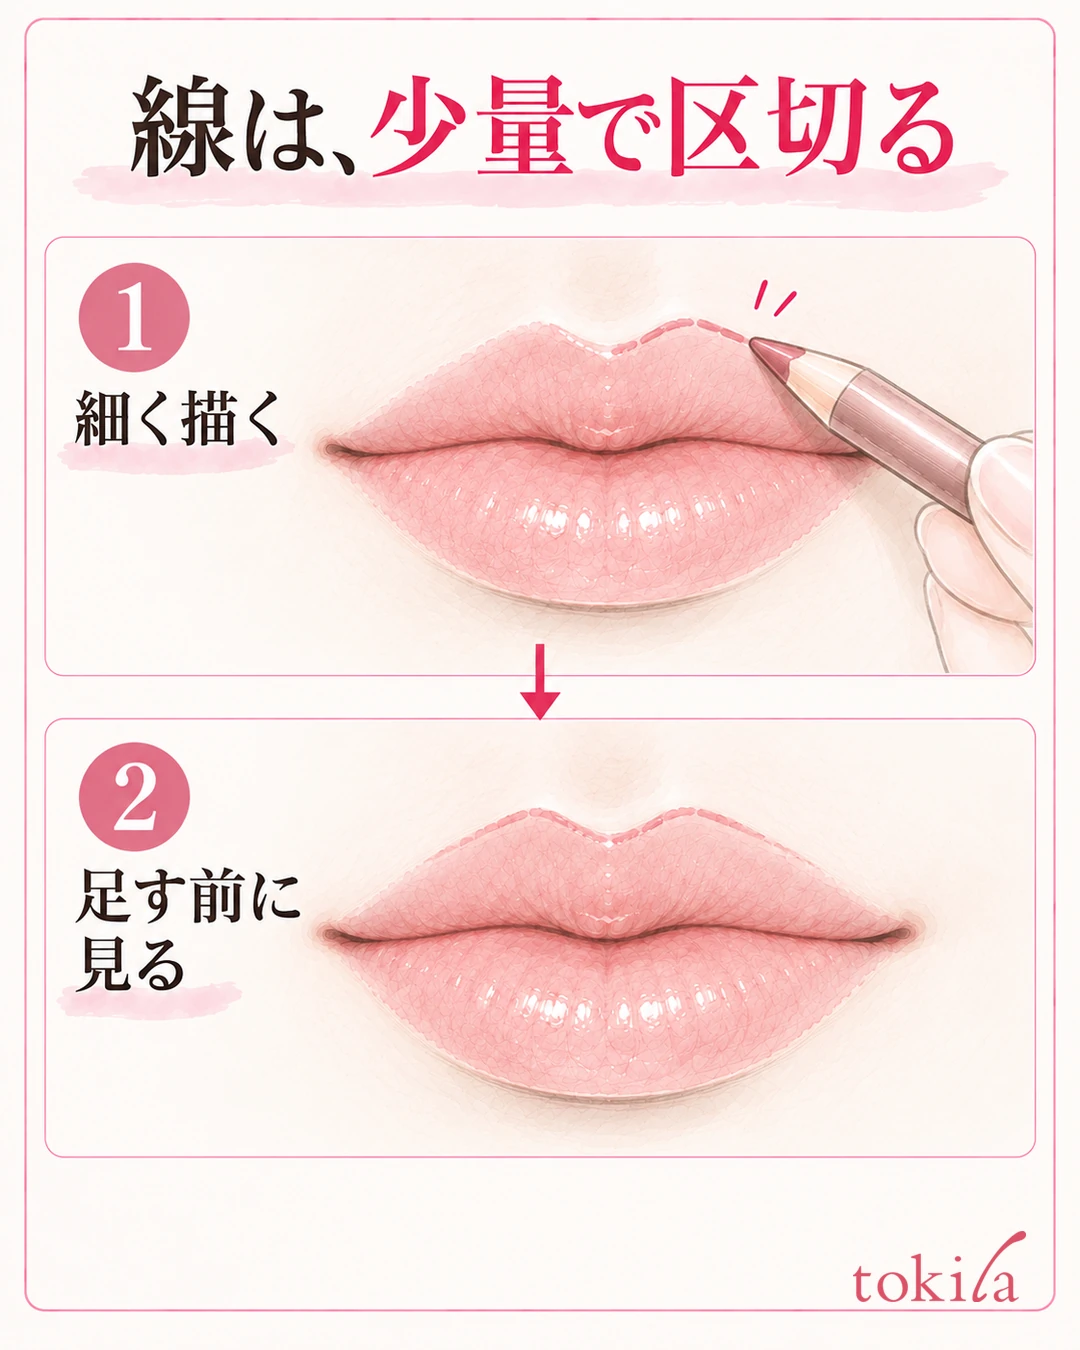
Don't fix this length for other products either; read the directions on the one you have. Do not assume that shortening the lead alone will resolve a color difference.
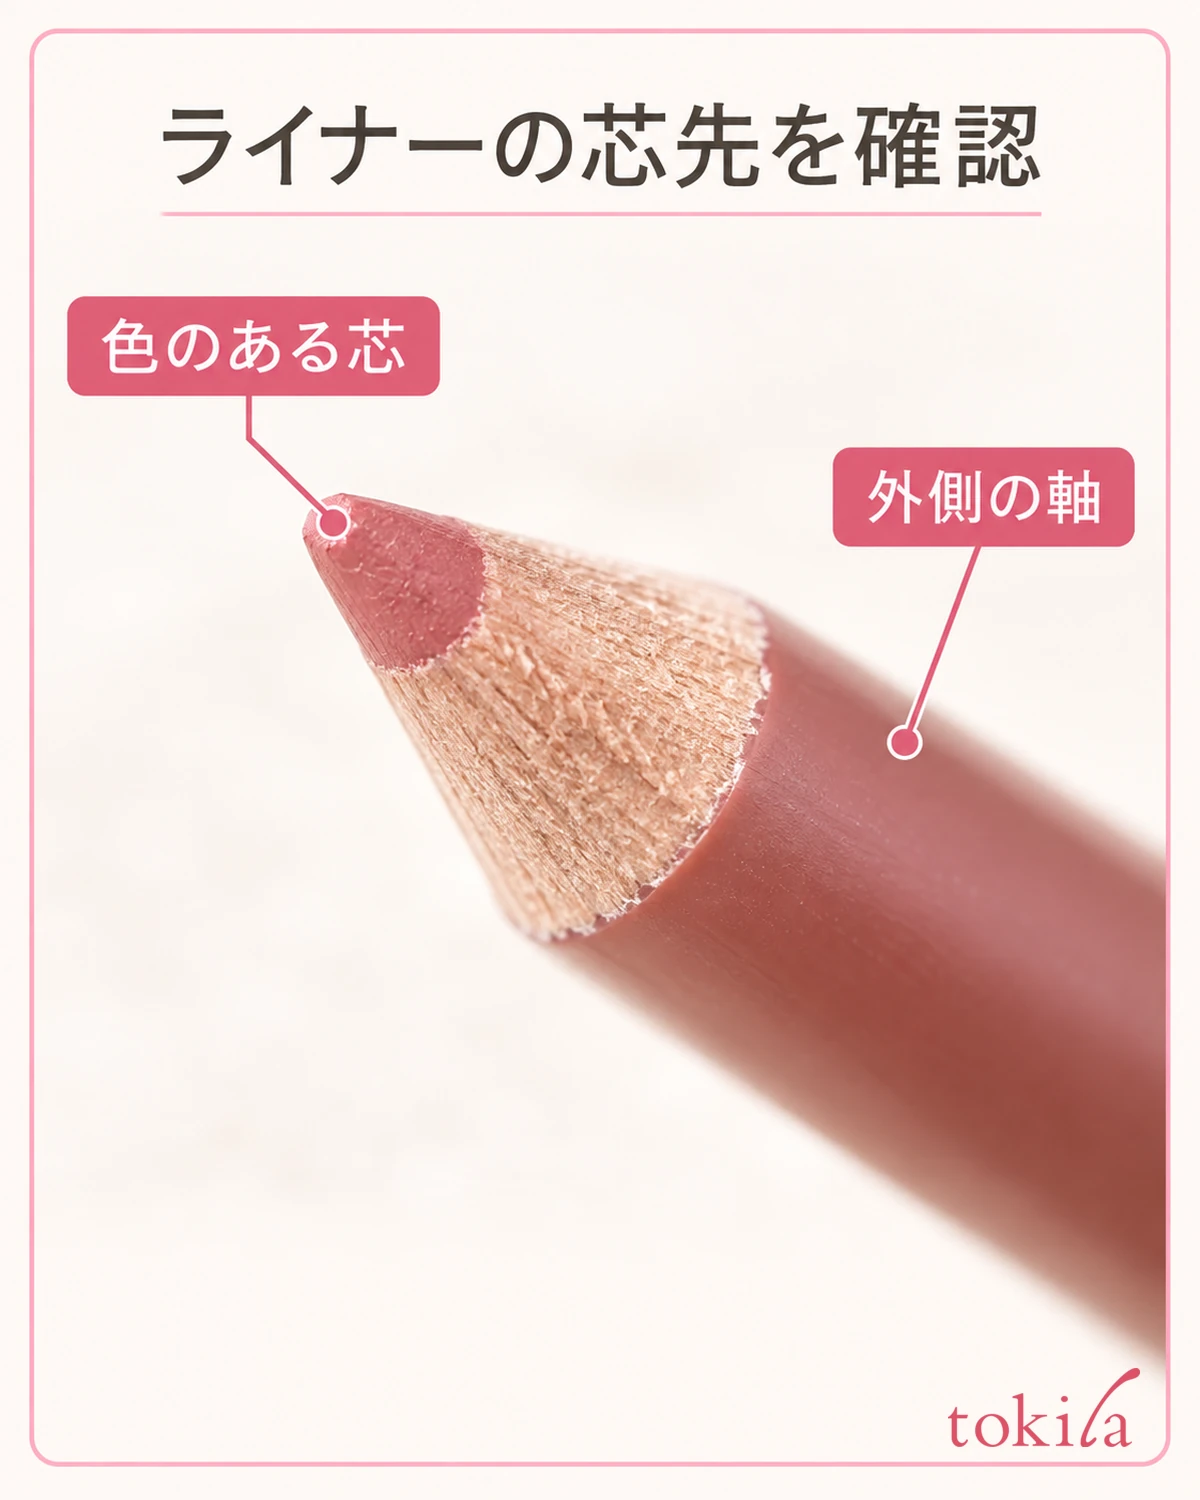
Close your lips lightly and check the position of your natural peak and corners. This article does not cover drawing well beyond your lips, but starts from tidying the original outline. Connect naturally from the peak of the upper lip to the corner, and work on the lower lip while watching its shape. Rather than building darkness with force, prioritize looking at where the line has been placed.
Stop at small sections where drawing is difficult, relax your mouth to a natural state and check. You do not need to finish the entire outline in one stroke. Separate connecting the line where it is lacking from going over the already drawn part many times to make it darker. At the corners in particular, check that the end of the line does not extend outward.
If the line has become thick, don't try to match it by adding to the other side to the same thickness. Choose between adjusting the side that bothered you first or redoing a small area. Even when the left and right shapes originally differ, use your natural, moving mouth as the reference rather than adding outward to make it perfectly symmetrical.
Stop once after drawing the liner and look at the width and depth of the line. Creating this pause makes it easier to decide the area to adjust than searching for the cause after layering lipstick. Prepare clean tools, and in the next step check whether you can blend the current line inward before adding new liner.
4. Blur the line inward with a clean brush
When you want a natural connection, blend the color from the line you drew toward the inside of the lips. If you use a brush that still holds dark lipstick, the blending step adds new color as well. Check the bristles and any leftover color first.
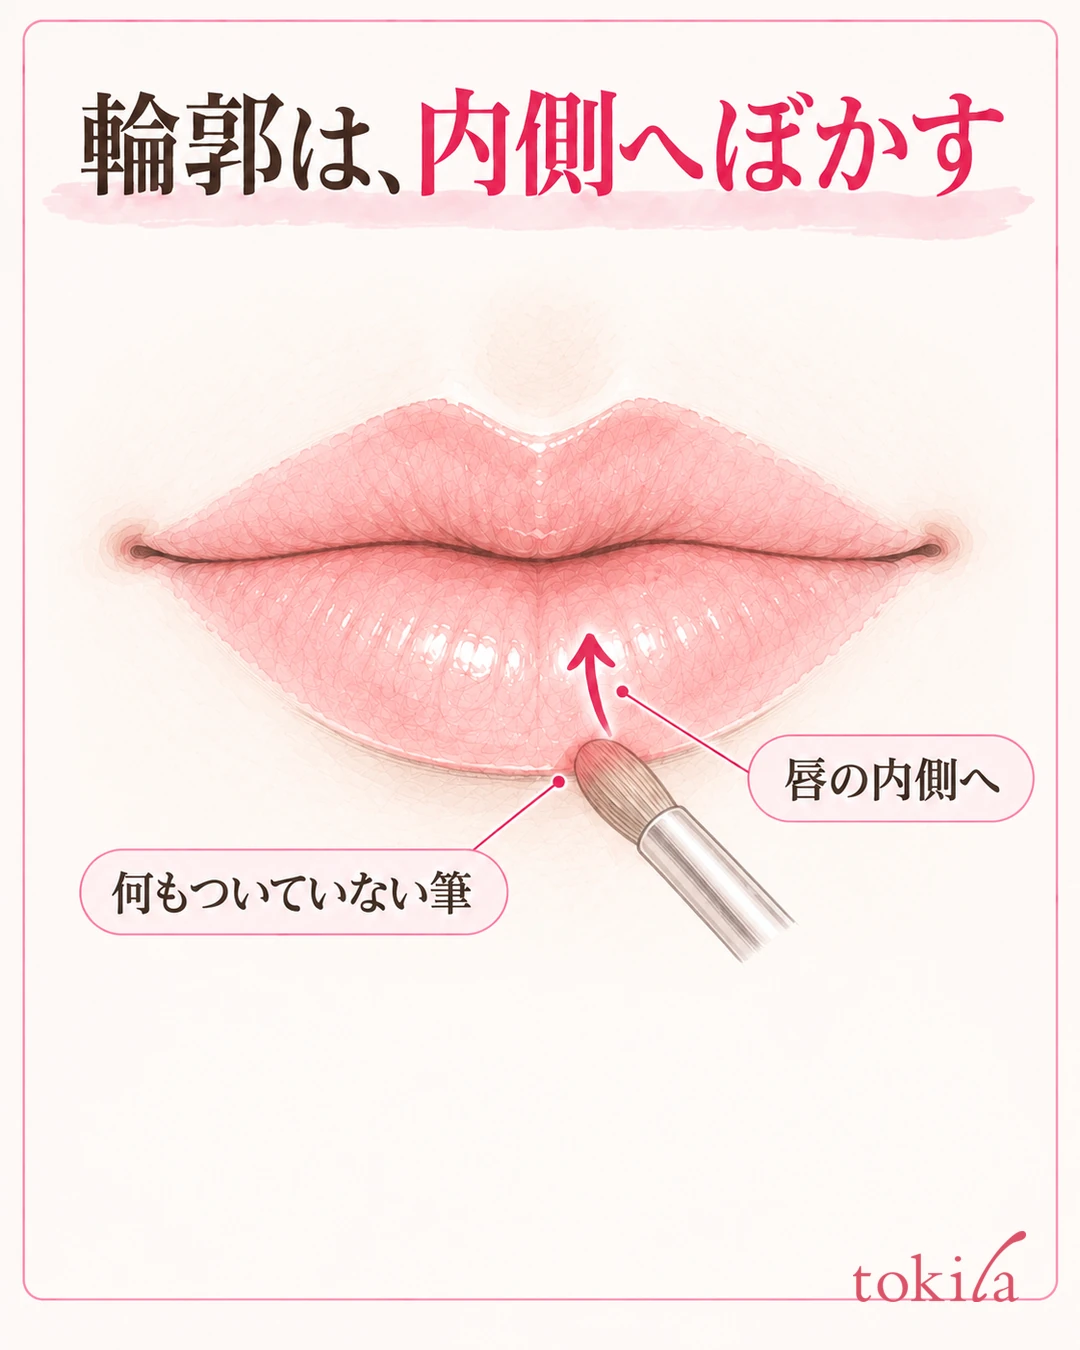
Tidy the bristle tip and touch it lightly just inside the outline. The movement is not one of pushing color outward onto the skin around the lips, but of connecting the line's color a little toward the center. On the lower lip, think of the direction from the line at the lower edge into the lips. On the upper lip too, don't spread it widely outward, and check that you haven't stained the skin around it.
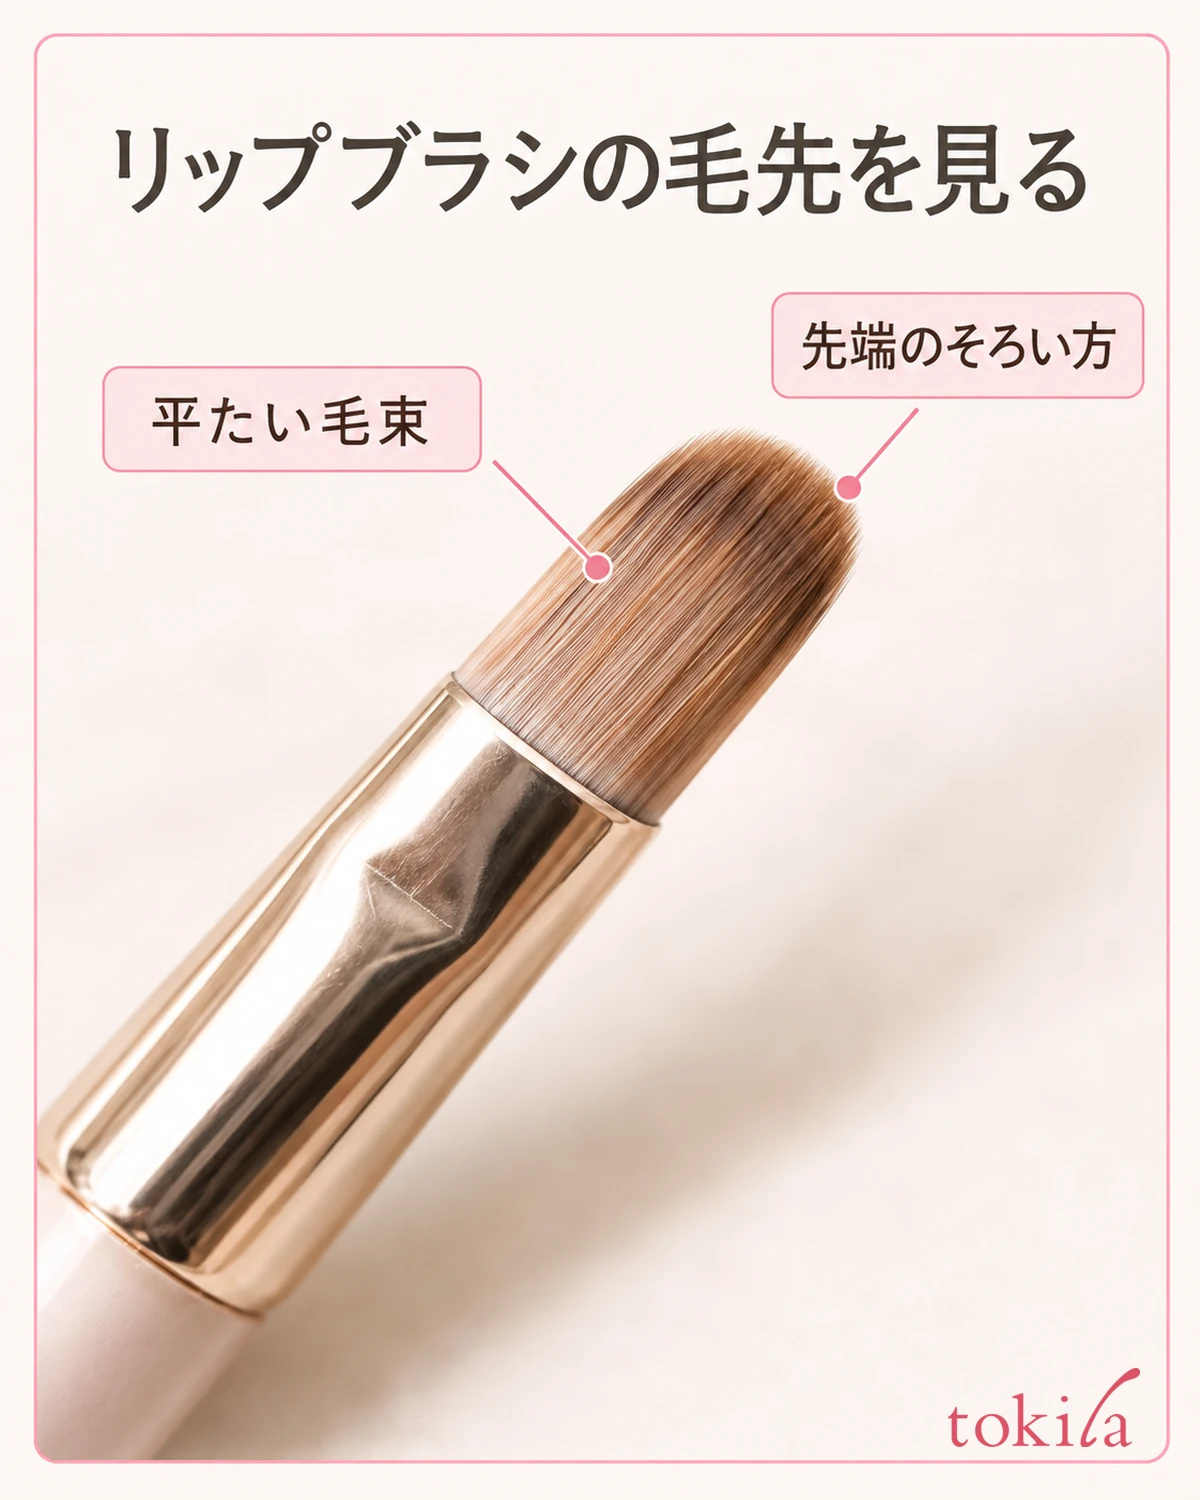
Lift the brush after one small movement and look at the difference between the line and the inside. Even when you want to keep a crisp outer shape, checking whether there is an abrupt color step just inside the line lets you choose your adjustment. Don't treat blurring as rubbing until the outline disappears; stop once you reach the border you want.
Next, layer lipstick thinly and see how far it blends with the liner. Distinguish the state of the colorless brush used for blending from the brush loaded with lipstick. Even if you use the same brush, separate the steps.
If the color no longer moves, as with a long-wearing liner, do not assume that rubbing hard will blend it. Check the product's directions for when you can blend and which tools to use. If you try to spread only the line after applying lipstick, the color inside may move too. If it is difficult to handle, switch to redoing part of it.
To avoid dragging color picked up on the brush to the other corner, check the working surface when it gets dirty. Follow the tool's instructions for care, and caring for makeup brushes may also help. Not assuming that a brush with mixed color is an empty one is the checkpoint for avoiding a darker line.
5. Fix remaining lines in parts, and decide the finish across your whole face
If the line still stands out after blending inward, look again at whether the remaining problem is thickness or a large color difference. When the cause is color difference, avoid continuing to blur outward and enlarging the area of the line. Narrow down the area you will fix this time, and judge whether redoing it is easier to handle than adding more.

For color that has gone outside the lips or areas where it has built up thickly, tidy them following the directions for the eye and lip makeup remover that suits the lipstick and liner you use. Use the tools and amount the product specifies, such as a clean cotton swab or cotton pad, and carry through to the aftercare steps. Do not drag the dark line toward the center of the lips and spread it.
If needed, return a thin line and lipstick to the tidied area in small amounts. Even if you removed one side, you do not need to redraw the entire outline. When restoring skin color outside the lips, check that the product can be used near the lips, and avoid trying to hide it only by layering foundation thickly.
Finally, open and close your mouth naturally and check that no line remains outside the corners and that only the center of the lips has not faded. At the distance of your whole face, also check the strength against your eyes and cheeks. Don't count it as a failure just because the line is visible in a close mirror; use whether it looks like the mouth you want from a distance as your finishing mark.
Narrow your next review to one point. If a dark line bothered you, look at the color; if it forms a band even in the same color, the amount drawn; if only the border is abrupt, blending inward. Briefly noting what you actually did, such as "kept adding line at the corners," helps you notice before layering on the same spot again. You don't need to change multiple products and tools at once.
The starting point for blending a lip liner naturally is to use a close color in a small amount, connect the inside of the line you drew, and then layer the lipstick. When a line stands out, review color, width and steps separately before making the lipstick darker. Stop when you reach an outline you like, and choose the adjustment that suits the combination you own.
Written by the tokila editorial team. We organized the judgments and adjustment steps you can review with the tools you already have.



