
Double eyelid tapes can look alike but are handled differently: some support the fold on one side only, some stick on both sides, and some are built into a handle. First check the type of product you have and any included tools, and read how to remove it before you apply it.
This article covers preparing a product you are using for the first time, checking where to apply it, taking it off the backing sheet, and what to review during use and when removing it. Width and application order are not the same for every product, so follow that product's instructions. It does not assume you need to change the shape of your eyelids; it is a check for a day when you have decided to use it.
1. Check the differences between one-sided, two-sided and handle-type tapes
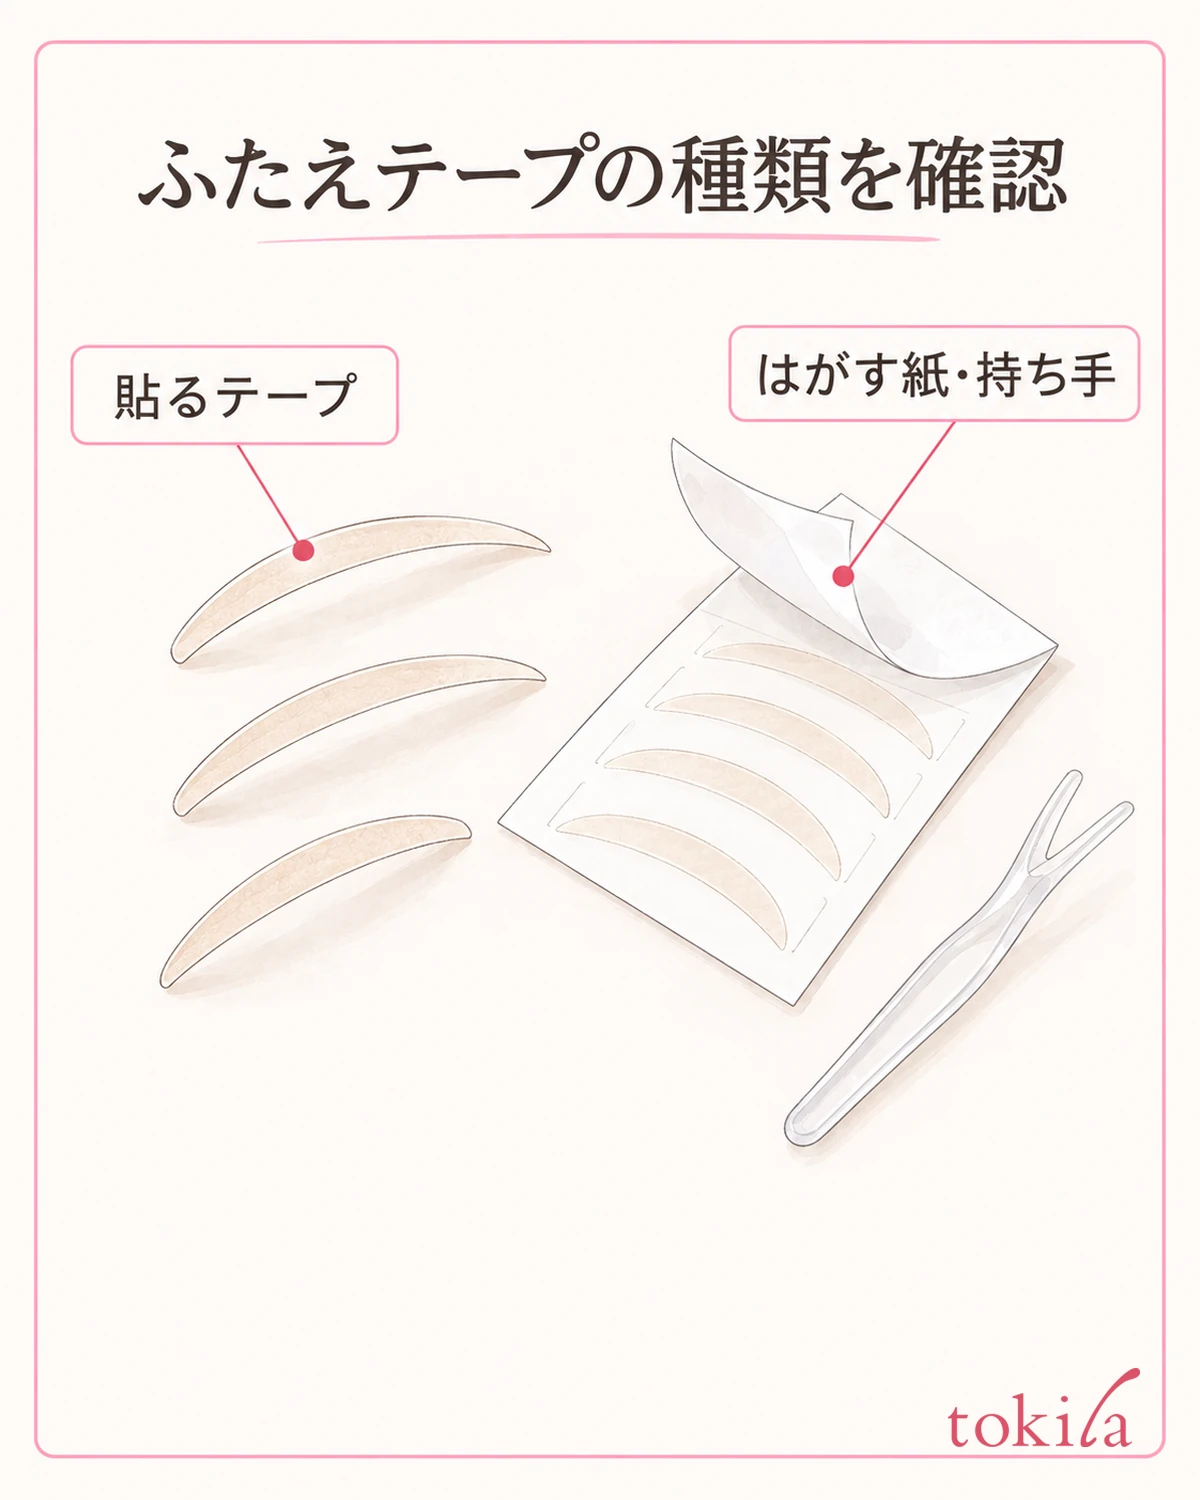
Look at the product name and directions on the package to confirm that it is a tape for eyelids. Types that you brush on to form a film, types where you stretch a fine fiber, and tapes you take out of a sheet each differ in preparation and in how they come off. Do not apply the steps of a different tool just because the label says "double eyelid."
Read which side of the tape is adhesive, how many release papers there are, and whether a handle remains when you attach it. These checks help you avoid trying to stick a one-sided tape like a two-sided one, or leaving a part on that should be removed. Transparent parts are easier to tell apart if you look at the overlap from the side.

The backing sheet, the release paper and the tape that goes on your skin each have a different role. Just because a layer is thin does not mean it all goes on your skin. Before lifting the first piece, compare the diagram in the instructions with what is in your hand, and decide where to hold it and which paper alone to peel off. Do not keep scratching at a layer you cannot identify with your fingernail.
If there is an included pusher or handle, check which side is used for what. Even among Y-shaped and V-shaped designs, the direction of use and the role of the tip are not necessarily the same. Do not make it standard practice to swap in ordinary tweezers or a pointed tool.
Keep the packaging or instructions, at least in a form from which you can check how to use the product. Even within the same series, if the shape or size differs, read the instructions that match the product you have. Finished photos online can serve as a reference for thinking about a target placement, but they are no substitute for checking the parts of your own product.
Even for a product you have used before, check whether it is disposable or reusable, and how to put it back after opening. Do not treat leftover visible stickiness as a sign that it is fine to reuse. Do not fold any remaining sheets, and keep them according to the storage method for your product.
2. Before applying, prepare your hands, a mirror and something to remove it with

Wash your hands and set up a stable place to put the tape and the included tools. Avoid places where small parts could roll away, and avoid doing this while walking; start in a posture where you can move both hands. Lay out what you will use first, so that you do not have to look for tools after taking a piece out of the backing sheet.
Place the mirror where you can see both your eyelid and your hands. If the mirror is so close that it hides the tip of the tool, adjust the distance or angle. Strong shadows on your face make it easy to lose track of where to apply, so check the position of your lighting as well. How to arrange your mirror is also covered in Where to Place Your Makeup Mirror.
Prepare your eyelids according to the instructions for that tape. Directions to balance the oil on your skin and directions to dampen it with water are different. Do not wet every product, and do not rub hard in the hope of increasing adhesion. For the order with skincare or eye makeup, also read the conditions given for that tape.
At the same time, check the cleansing product, tools and steps you can use for removal. Prepare what you need at hand so that you are not left wondering how to take it off after it is on. Whether a product is safe for the eye area and whether it is meant for removing the tape should each be confirmed by their own labels.
On days when your eyelids have cuts, swelling or irritation, do not keep touching them just to practice the application. Follow the product's precautions for the condition in which it can be used and for any advance checks. If redness, itching or other problems appear, stop using it rather than continuing with layered tape or strong fixing, and seek advice as needed.
If a patch test is recommended for first use, read the specified place, time and way to check. Do not assume that a different tape causing no problems means this one will not either. Also check the precautions in advance about how long to wear it and how to handle it before sleep.
3. Confirm the position, then take out one piece at a time

For a product that has a step for deciding the position, check it on the side shown by the included tool before taking out the tape. Rather than pressing hard into the eyelid, see whether you can open and close your eyes comfortably within the light touch the product describes. Do not point the tip of the tool toward your eyeball or poke at the edge of your eye.

You do not need to aim for a wide line all at once. The shape of your left and right eyelids and the position the tape supports are not necessarily the same, so check the position and the opening and closing for each eye as described in the instructions, instead of copying the measurement from one side to the other. Do not decide that a certain number of millimeters suits everyone.
Once the position is set, put the backing sheet on a stable surface and take out one piece from the specified edge or handle. If the sheet has cut lines, check those lines and the part you hold as you go. If the instructions say not to touch the adhesive side with your fingers, keep using the handle or included tool after you take the piece out.
If only the release paper does not come off and the tape lifts with it, stop for a moment. Review the side to peel and the order in the diagram, and do not pull out several pieces together. If a piece loses its shape or the surface that sticks gets dirty, check how the product says to handle it before trying to stretch it and use it anyway.
Follow the steps for your type regarding your line of sight when applying, how you support the eyelid and the part you press. Do not mix up the operation of a product where you tear off a handle with one where you pull out a stick. Do not change the shape by cutting or adding adhesive that the instructions do not mention; if you cannot handle it well, go back to the state before application and check.
4. Look at opening and closing and at leftover parts, and stop before layering

After applying, remove the included tool or handle as directed and look straight ahead with your usual expression. Check that the edge of the tape has not lifted unintentionally and that no part that should have been removed is left behind. Do not judge the result from the single moment when your eyes are wide open; look at it with a comfortable opening and closing too.
If your eyes are hard to close or feel tight or painful, do not try to press it in further with a tool to hold it. Separate the wish for a wider line from a state you can comfortably use today. Do not endure it for the sake of appearance; decide to remove it using the method for that product.
If the line looks different on only one side, do not add more tape right away. Check the points you can verify in order: the placement, a handle left behind, or a mix-up of backing sheets. If you layer several pieces without knowing the cause, it becomes hard to tell which piece was applied where.
Whether you can layer eyeshadow and in what order to finish are things to check in the tape's instructions. Layering powder or liquid will not necessarily fix a lifted edge. Also avoid covering up a condition that does not suit your skin with makeup and continuing to use it; think of how you handle the tape and the step of applying color as separate.
If you fix it partway through, do not pull the applied tape repeatedly to change its position; read the directions on removal and on handling a new piece. Do not make it your goal to perfectly match left and right while rubbing your eyelids. End the day's routine once it feels comfortable and you have put away the necessary parts.
If you notice a lifted edge while you are out, do not make adding adhesive over it your basic emergency fix. On days when you have nothing to remove it with, think about your plans before using it and you can avoid being caught off guard. In a place where you cannot do the fix safely, do not rush to bring small tools near your eyes.
5. When removing, follow the directions for loosening the adhesive, and check afterward too

Before removing, check once more the method specified for that product. Do not treat one that is removed by working in a cleansing product little by little the same as one with a different removal procedure. Do not switch to pulling the edge off quickly while dry or scraping it with a fingernail; prioritize not peeling it off by force.
If you use a cleansing product, follow the conditions for use around the eyes, the amount and the steps for working it in. Do not fix a length of time that the instructions do not mention, and do not assume that leaving it on longer makes it easier to remove. For a product whose directions say to start from a lifted part, do not pull on places that still resist; return the necessary steps to that part.
After removing the tape, check how you handle any adhesive that remains. Instead of rubbing it with your fingers until it rolls up, use the specified way of removing it. When you remove eye makeup at the same time, also check the order and whether to rinse for the products you are using, and do not mix in the steps for other cosmetics.
Put the used tape and the backing sheet away separately so you do not mix them up with the next piece. Store the included tools after caring for them in the way that suits them. Do not repeatedly touch an unused sheet with fingers that have touched adhesive, and return it according to the storage conditions on the package.
If you keep notes for next time, limit them to information that helps with the operation, such as the product name, parts you were unsure about, and the order before and after applying. Do not treat it as a guarantee that continued use will permanently change the shape of your eyelids. Do not use it as a reason to repeat a way of using it that did not suit you; review your use according to your condition.
Read the type, prepare for removal, check the specified position and parts, look at the opening and closing, and remove it as directed. If you follow this order for the product you own, you can sort out what to verify before simply imitating a finished photo. Do not rush to apply it; prepare so that the steps you can undo and the time after use are treated as a set.



