
You pick up your false eyelash tweezers, and the lashes drop when you relax your grip, or stay clamped even though you thought you let go. The first thing to check is whether your tool closes at the tip when squeezed, or opens when squeezed. Before changing your hold, confirm how it moves on a desk, away from your face.
This article explains what to check before using tweezers made specifically for strip false eyelashes. It is separate from tools for plucking natural lashes and from instruments used for eyelash extension treatments. Follow the instructions that came with your own items for placement and adhesive waiting times, and start from the principle of not testing near your eyes while you are unsure how the tool moves.
1. Check its intended use and how it opens and closes when squeezed
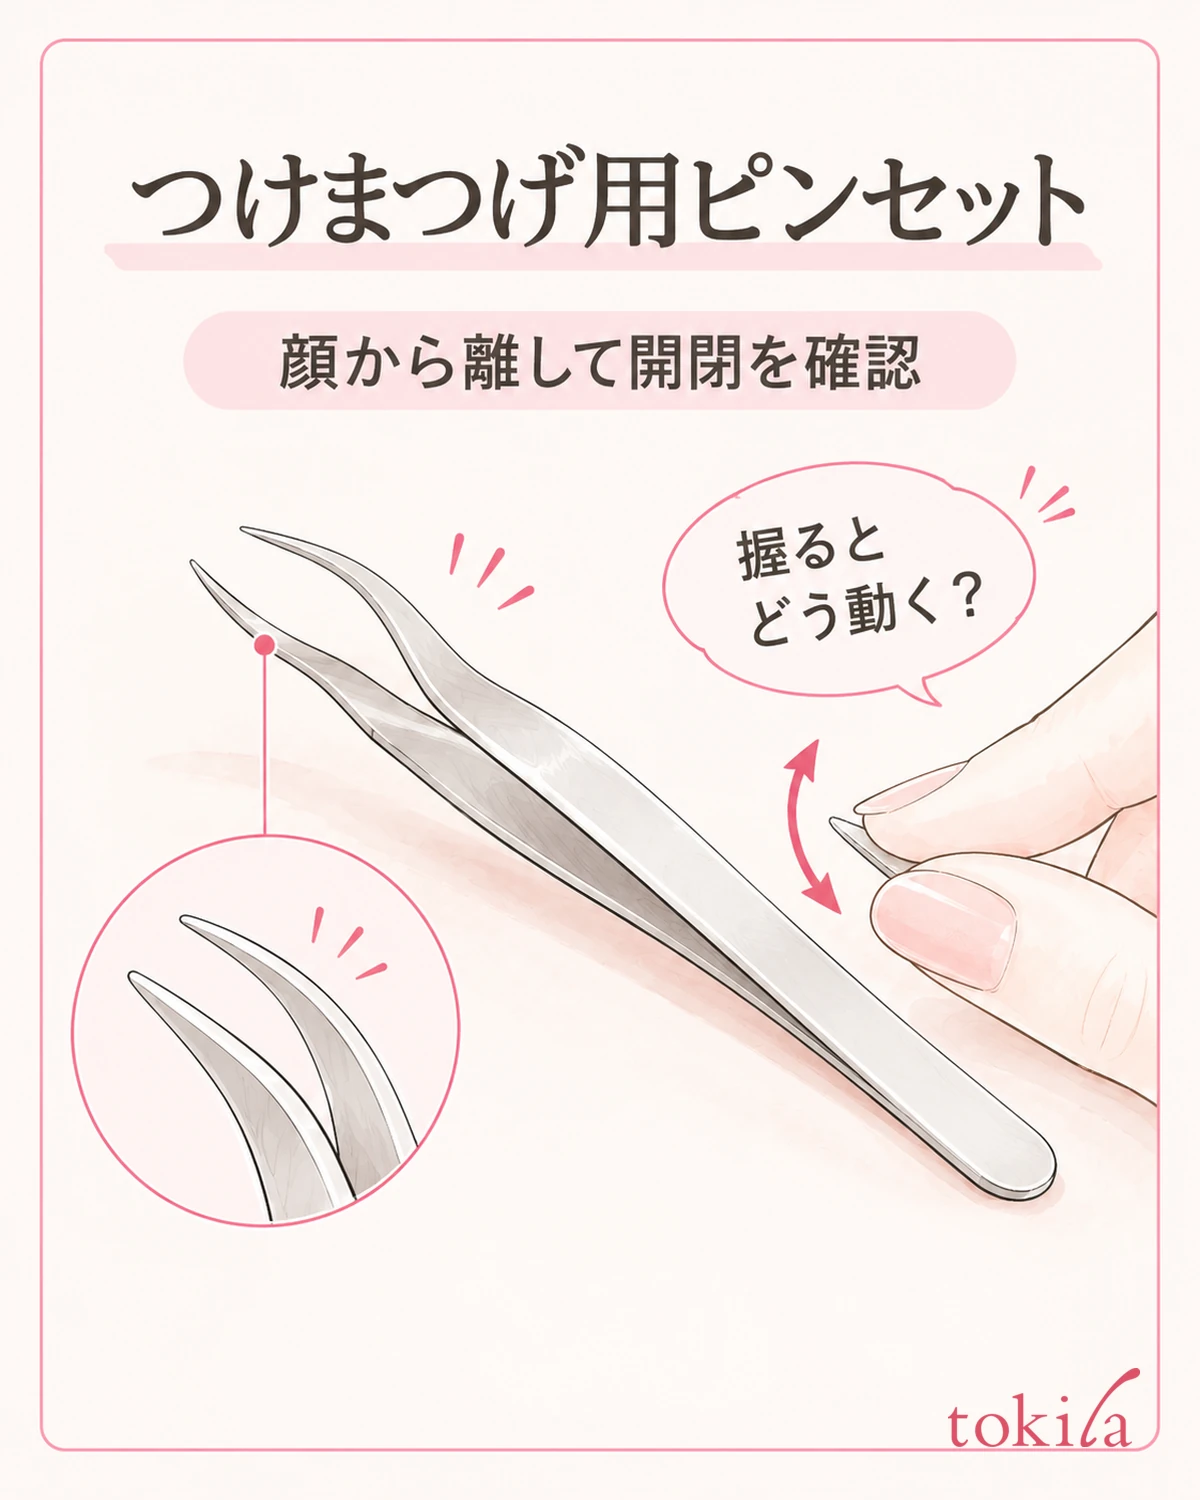
First, check the packaging or the markings on the tool to confirm it is meant for false eyelashes. Tools of similar shape, such as tweezers for hair removal, nail work, or arranging bunches of natural lashes, serve different purposes. Do not choose by the narrow tip alone; read which tasks the tool is meant for.
Before gripping any lashes, point the tip away from your face and gently move the handle on the desk. Some tools close at the tip when squeezed and open when you relax, like ordinary tweezers. Others are cross-grip types that open when squeezed and close when you relax.
What you are checking is the combination of handle movement and tip movement. Do not assume that squeezing will grip; look at the one you actually own. If you cannot tell how it moves even when you apply force, do not squeeze harder, and check again against the instructions and the orientation of the tool.
On tools where the crossing is visible, the two parts overlap partway and continue to the tip. Looking at the crossing and the place where your fingers rest separately makes it easier to see which part you are moving. However, do not decide the type from the look of the crossing alone; confirm it by the opening and closing described in the instructions.
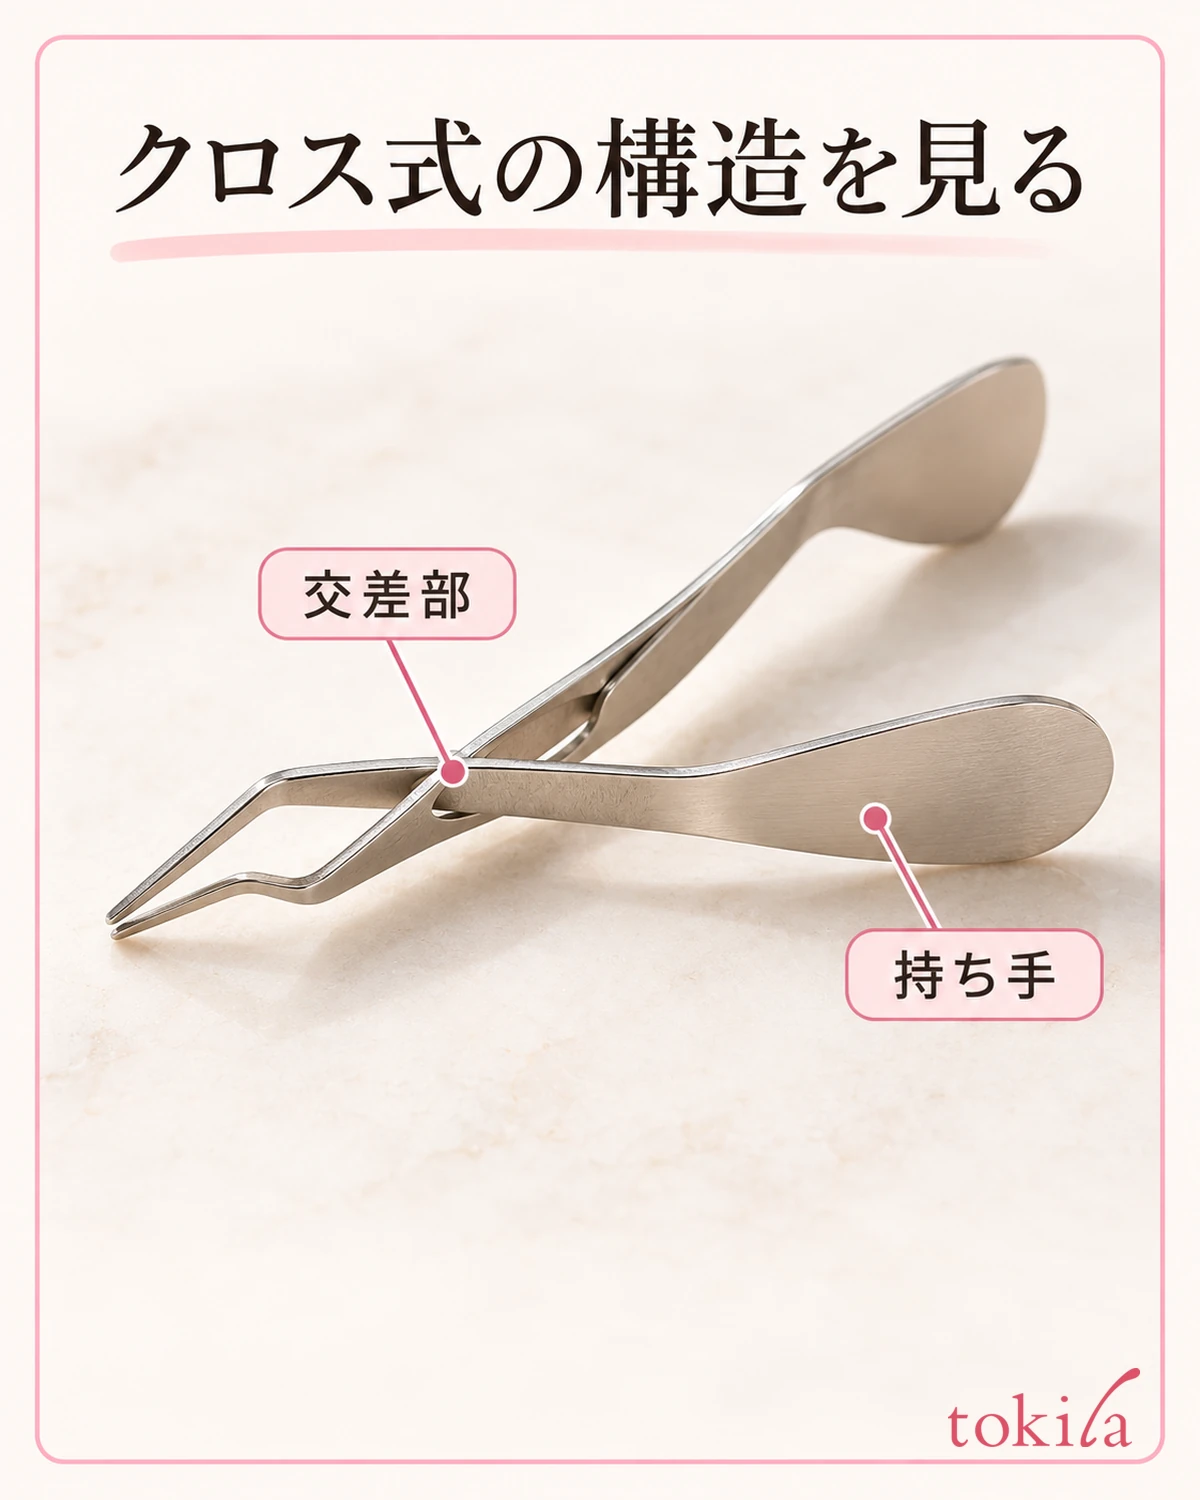
If you keep several pairs in the same pouch, do not take one out as if it were the usual one. When you switch hands or switch to a different pair, check how opening and closing work on that tool alone. It is important not to bring it close to your eyes and then try to match your usual movements.
While checking, do not press the tip against the pad of your finger to test the gripping strength. Just watch with your eyes whether the movement returns after you move it. If the movement catches even after you let go, or the parts shift, do not assume you can fix it by hand pressure; first reconsider whether it is in a usable condition.
2. Look at the tip surfaces and the overlap of the left and right sides in good light
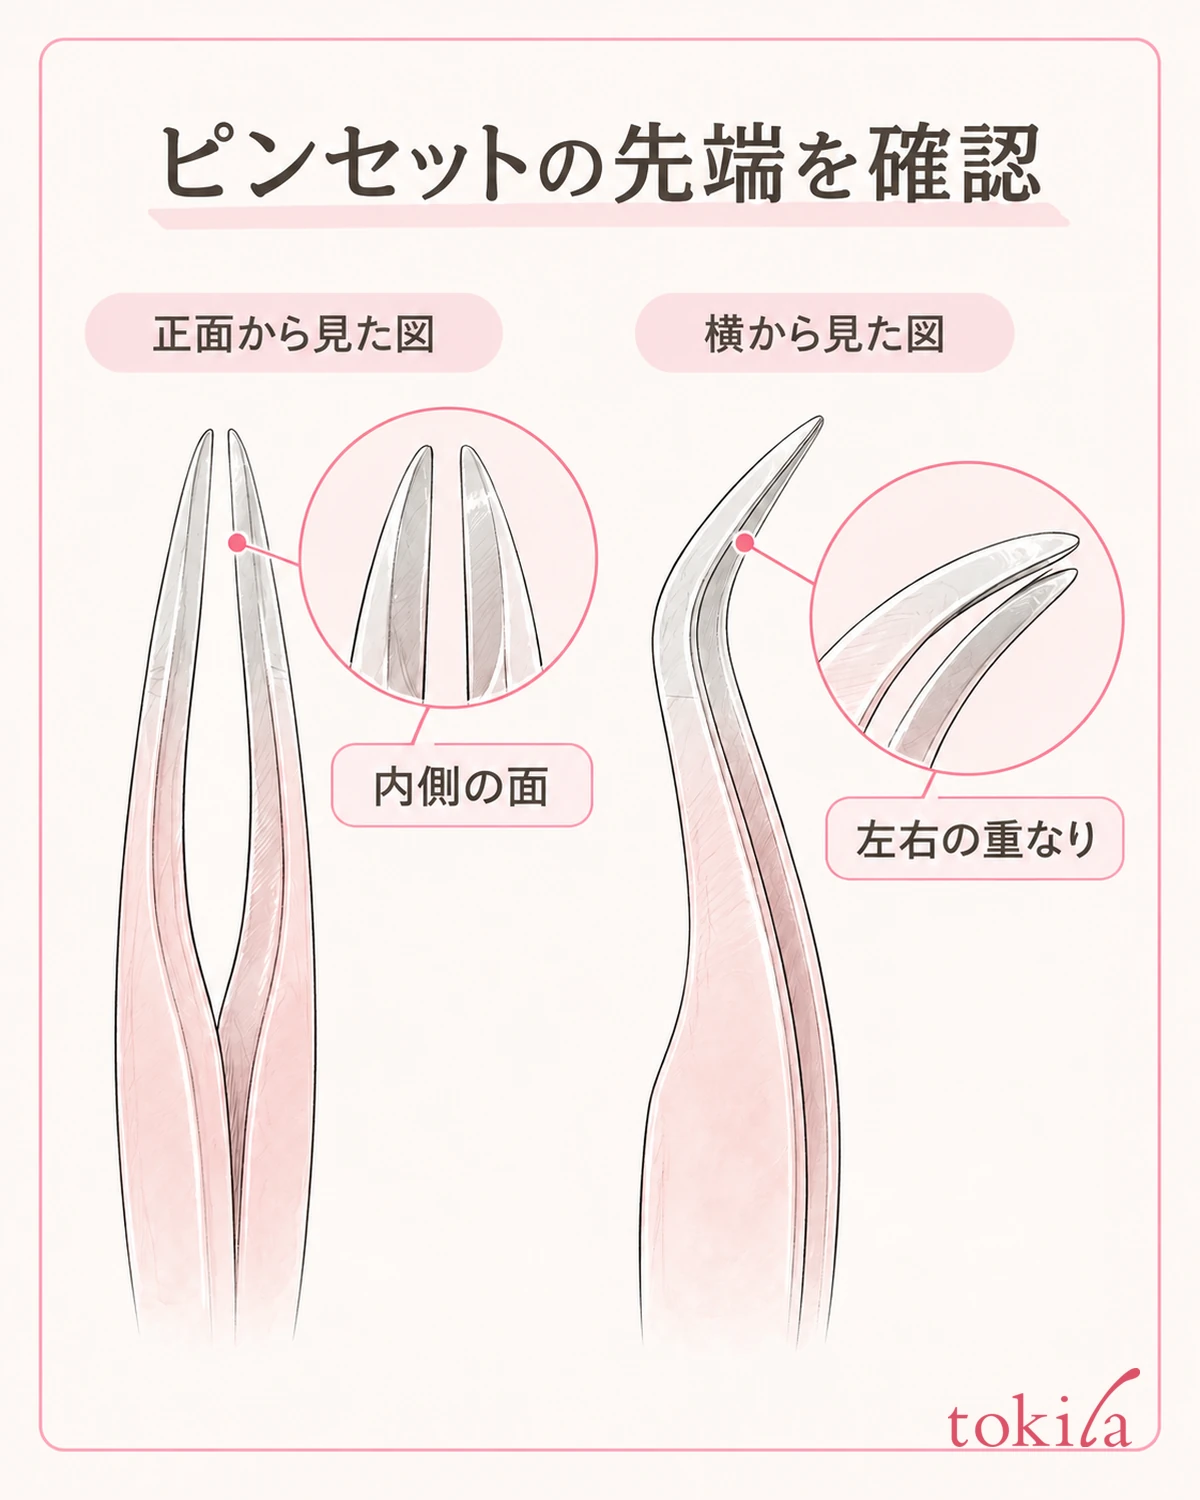
Look at the curve of the tip, the flat surface on the inside, and the position where the two tips meet. The curve is a clue to the orientation of the tool, and the inner surface is a clue to where the false lashes are gripped. Do not assume the gripping surface is clean just because you have looked at the outside of the tip.
Keep the tool away from your face and slowly turn it so you can see the tip from the side. When it is lightly closed, check whether only one side sticks out or whether the tips cross. This is not a pass/fail condition of perfect contact for every product; it is a check for deviations from the intended shape.
Also check whether lumps of adhesive or hairs remain on the inside. When the surface reflects strongly, it is easy to confuse light with white residue, so tilt it once toward the light and see whether the shape stays. Do not turn this into a step of scraping unseen areas with a fingernail or a needle.
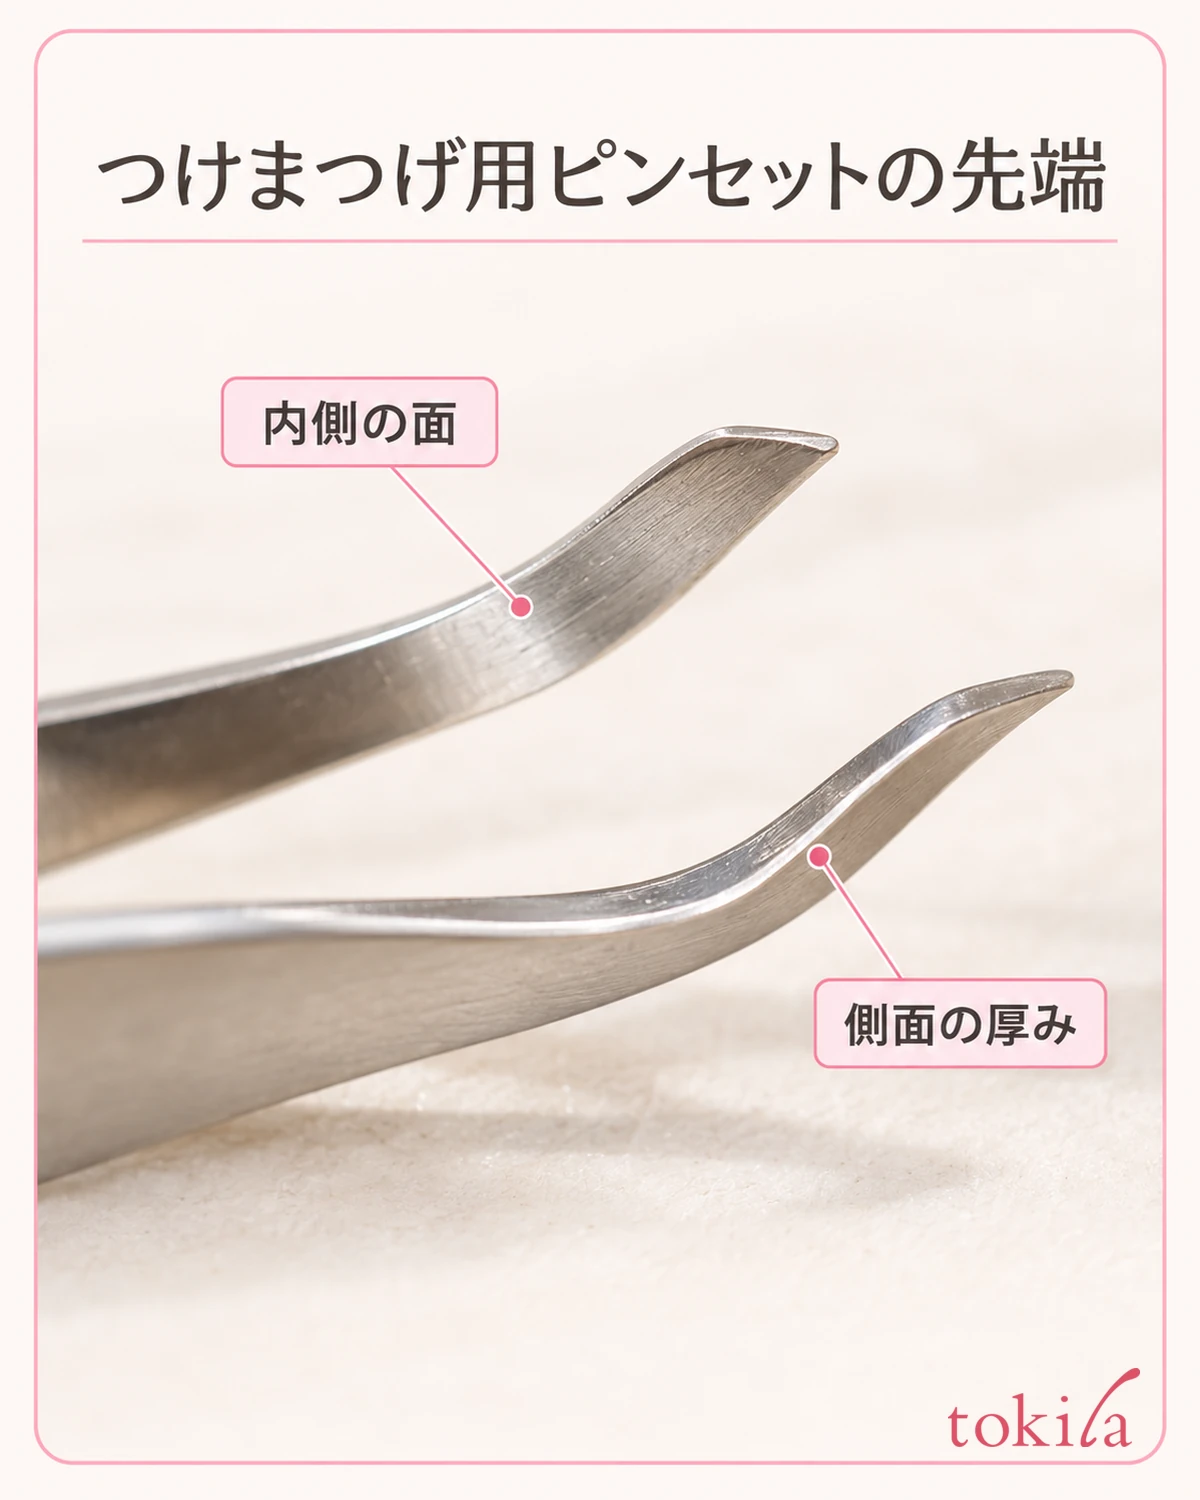
If the tip is deformed, chipped or rough, or the left and right sides catch when opening and closing, do not use it as it is. Even if it is metal, do not bend it back, file the tip, or try to fix it by clamping it with another tool. Even a small deformation makes it unclear whether it can still be handled as described.
For products with a protective cap, inspect the tool with the cap removed. Remove it as the product instructions specify, and do not pull it off by pressing the tip against the desk because it is stiff. Put the removed cap in a set place right next to you so it does not get mixed into the false eyelash tray while you work.
If you still cannot see the gripping surface after changing the light, do not judge its condition while using it in a mirror. Adjust the brightness and the distance of your hands, check again, and set aside any pair whose condition you cannot judge. It is better to finish this with the empty tool first, before you pick up the false lashes.
3. Before applying adhesive, check where to hold it and how to release
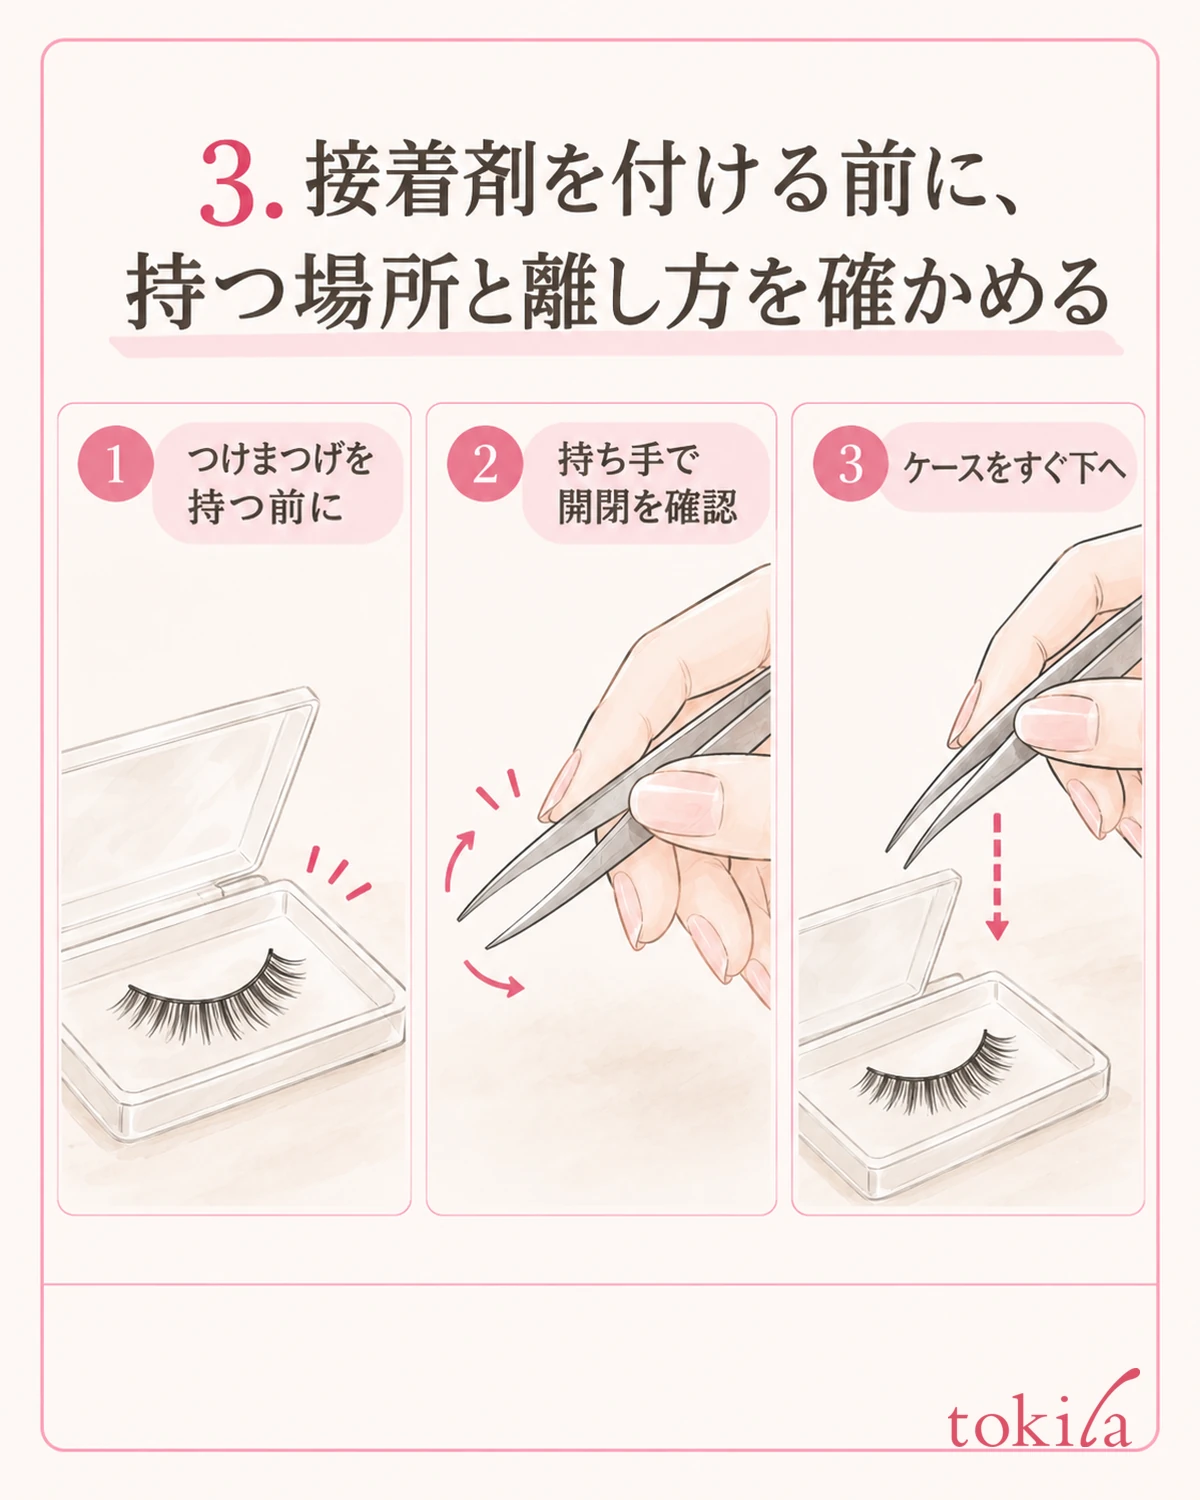
Support the handle described in the instructions with the grip specified, such as thumb and index finger. Do not hold it right at the tip so that your fingers hide the target, and do not grasp only the end of the handle so that it becomes unstable. Check on the desk that you can open and close it in a position where you can see the tip.
Before moving the tool, set a case right below where you can put the false lashes down once. It lets you put them down and then change direction, rather than turning your wrist sharply while still holding the lashes if you want to regrip. Keep the adhesive container closed, and separate this from practicing bringing it to your face.
For products where the tool can be used to remove lashes from the backing card, check the base area at the root that the instructions specify. Do not replace this with a method of pulling by grabbing a bunch of lash tips. If you do not know where to grip, first look at the direction of the card and the roots of the lashes.
After gripping, do not crush the shape with the tip, and check your hold right above the case. The hand motion for releasing is reversed depending on the type, so go back to the opening and closing you checked earlier. Before squeezing suddenly because it seems about to drop, remember what makes the pair you have now open.
If you need to adjust the width, see the steps for checking the width of false eyelashes before applying. Instead of repeating trial fits at your eyes every time you change your grip, keep the step of deciding width and left/right separate from checking how to hold the tweezers.
If you cannot see the target in your hand, or the direction changes every time you regrip, do not move on to the step of applying adhesive. Return the lashes to the case and check one thing: whether you were unsure about the lighting, the place to hold, or the opening and closing. If the shape of the tool itself does not suit your hand, getting used to it by force does not need to be that day's goal.
4. Keep the contact points of adhesive and tool separate, and do not carry them into places you cannot see
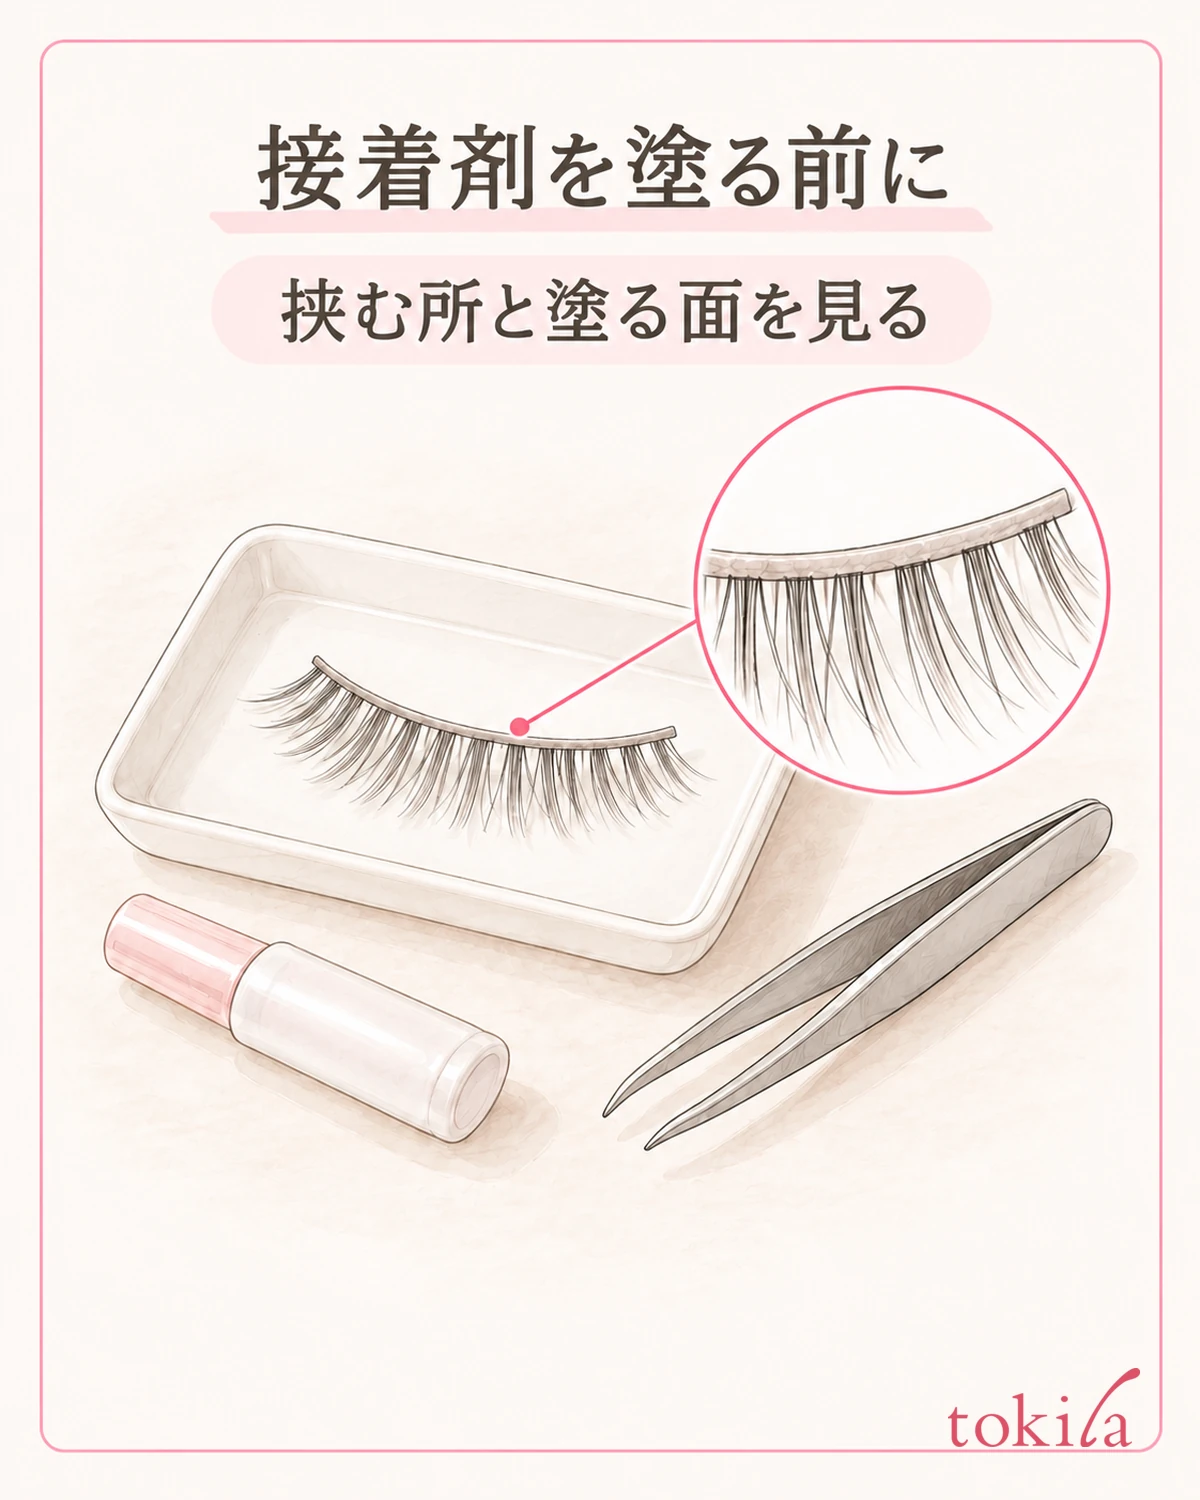
Once you have confirmed how the tool moves, read the instructions for the false lashes and adhesive. Sort out first where to grip and which surface to apply adhesive to. However convenient the tool is, it is no reason to use household adhesive or eyelash extension adhesive instead.
In your hands, away from your face, look at the gripping tip and the part of the band where adhesive is applied. If the tip hides the surface to be applied, do not force the liquid into the gap; check the specified way to hold it and set it down again. Applying adhesive widely over the lashes or dipping the tweezers in the adhesive is not treated as the basic operation.
If adhesive gets on the tool, do not try to solve it by pulling it away near your eyes; move the false lashes away from your face. Return to a place where you can set them down as specified, and check whether it got on the tool or on the band. Do not use a homemade method of adding another liquid on the spot to dissolve it.
For placement and waiting during application, the steps for checking false eyelashes before applying and lifted ends may also help. Keep to each product's instructions, and do not decide the order of application or the number of seconds to wait from the type of tweezers alone.
When bringing it close to your eyes, it is a prerequisite that you can see the tip and the band in the mirror. Do not point the tip at your eyeball or mucous membranes and push it in, and do not pinch skin or natural lashes together with the lashes. If it goes out of sight, release it before adding force, and review where you hold it away from your face.
Also do not switch to inserting the tip of the tweezers under the band to remove false lashes you have already applied. Treat difficulty removing them as a separate step, and check the removal method specified by the lashes and the adhesive. Do not assume that adding more tools lets you remove them the same way.
5. Check for residue, clean it, and put it away with the tip protected
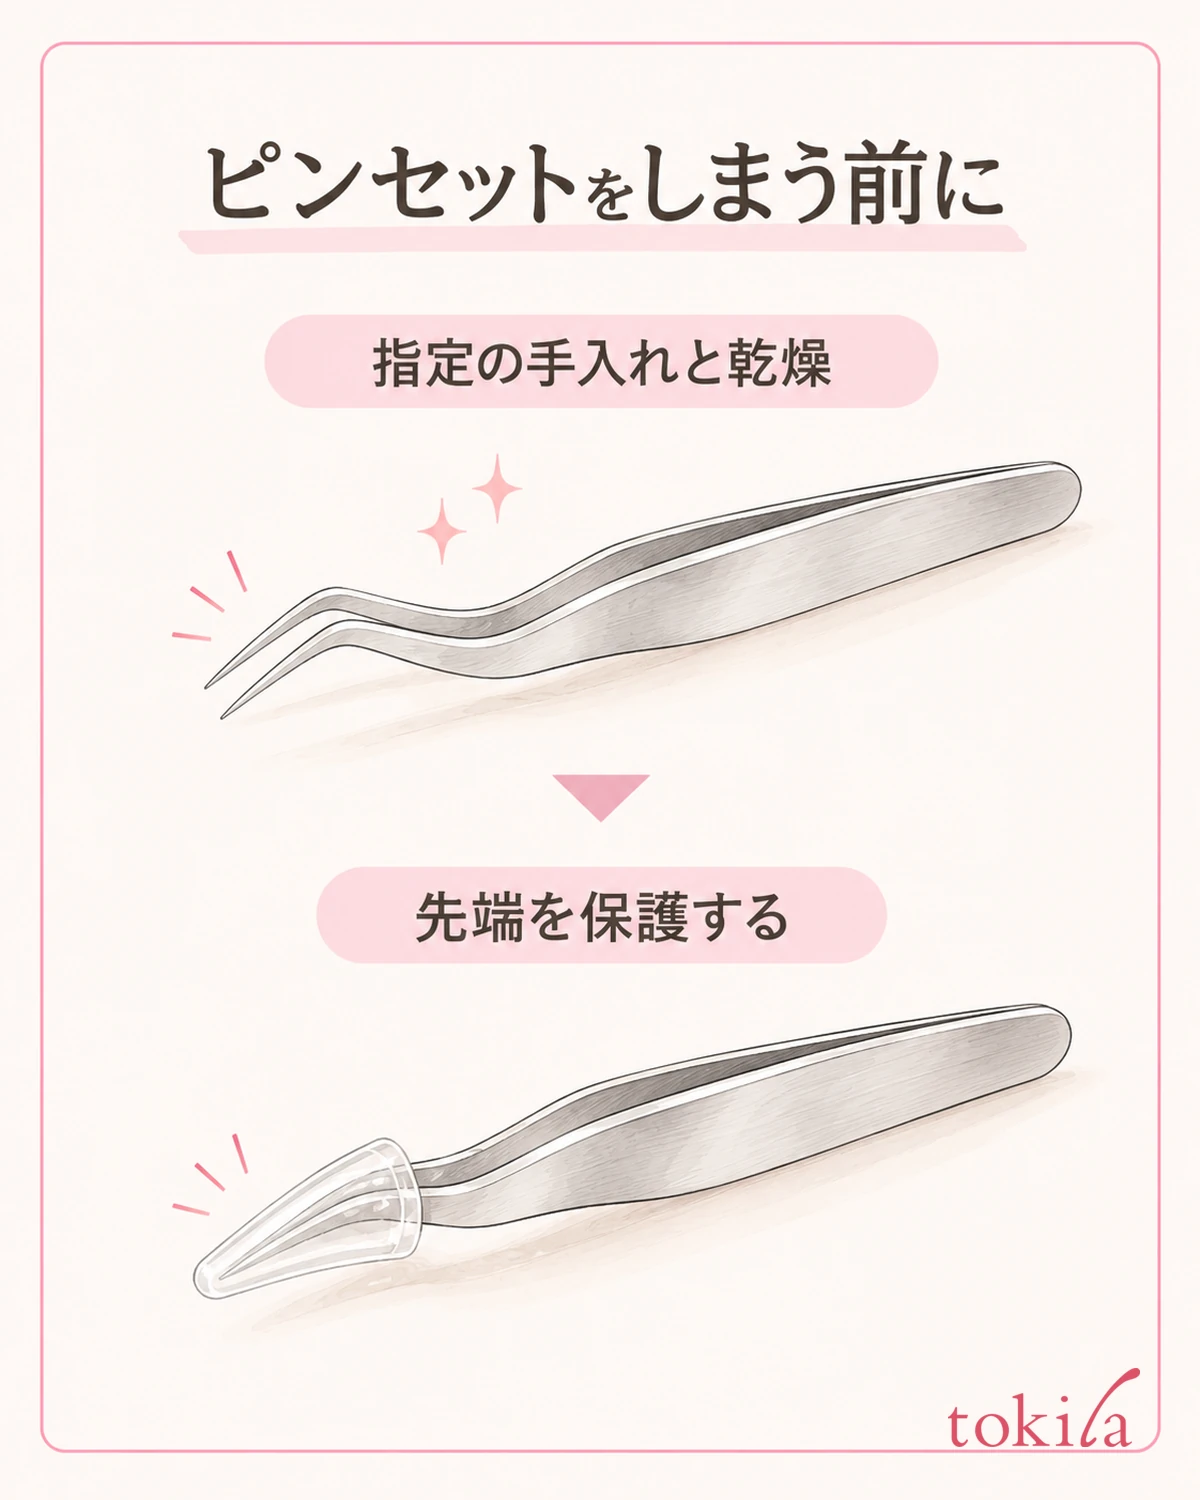
When you finish, place the false lashes in the designated spot, then inspect the tool. Look not only at the handle but also at the inside of the tip, the base of the curve, and, if there is a crossing structure, around it. Even if nothing seems attached, check the product instructions on whether care is needed.
Check whether it can be washed, whether it is wiped, and which cleaning agents can be used. Do not assume that "it is stainless steel, so any liquid is fine." Because surface finishes and parts vary, do not add steps that use alcohol, nail polish remover or boiling water on your own judgment.
Even when a lump of adhesive remains, do not move on to opening the tip fully and scraping it off, or pulling the two parts apart. Choose care that is confirmed in both the tool's and the adhesive's instructions, and if residue will not come off or the movement has changed, stop using it and check how to handle it.
After finishing the specified care and drying, store it in the direction indicated, in its protective cap or dedicated case if it has one. Do not cram it in with the tip pressed against other metal items, and keep it where you can check its shape when you take it out. If the cap does not fit, do not push it on by force.
The next time you use it, even if it is the same pair, check in short order its purpose, its opening and closing, and then the tip. Going back to the step where you stumbled makes the check more concrete, for example, reviewing the type if your hesitation was about the releasing motion, or the place you hold if the tip was hard to see.
False eyelash tweezers are not tools that become easier to use the harder they clamp. Check the movement with the empty tool, look at the target and contact points before using it, and do not go on when you cannot judge. In this order, get the handling of your own pair in good shape.



