
You reach for eyeshadow and the sponge on the applicator looks like it is lifting away from the handle. It feels as if only the tip is moving. In that case, before pressing it to your eyelid to find out, set the tool on a table and take a closer look. Fixing how the color goes on and spotting wear on a tool are separate tasks.
This article introduces the order for checking an eyeshadow applicator with a sponge-like tip before you use it. Construction differs by product: some are glued, and some take a replacement tip. Don't treat removal or washing as a method that applies to all of them; choose judgments that match the label of the one you own.
1. Look separately at the surface of the tip and the boundary where it meets the handle

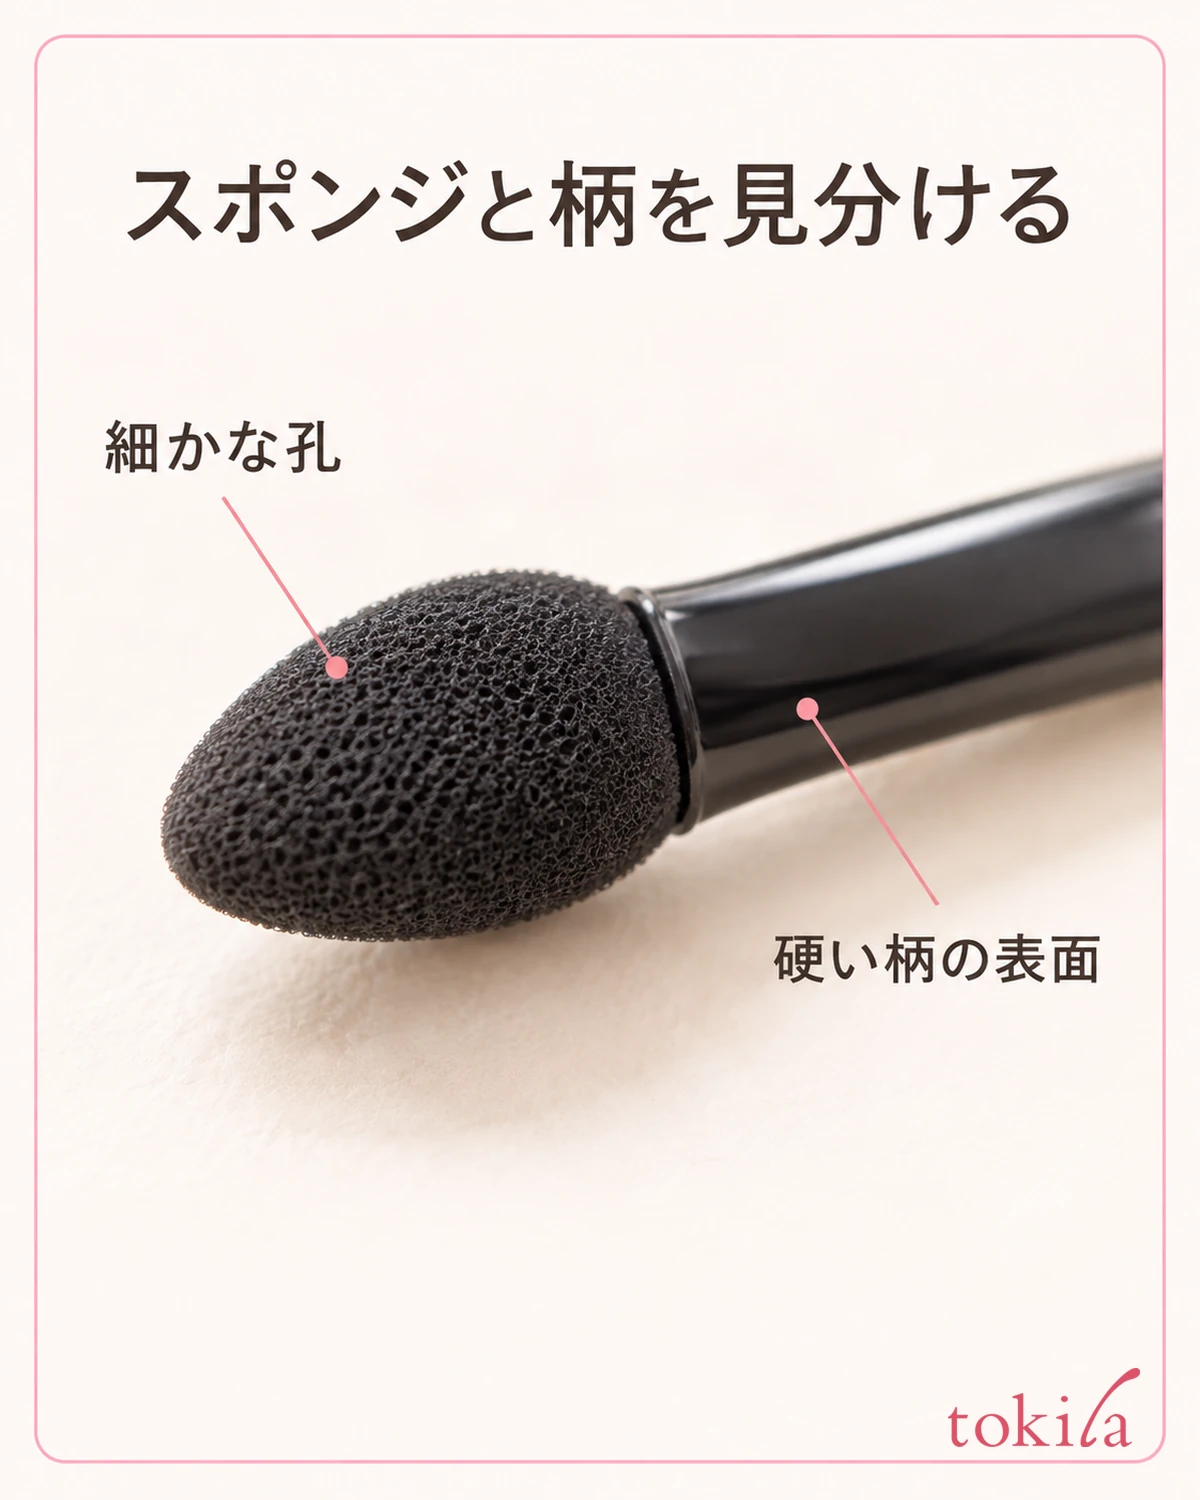
First, put a clean sheet of paper or a tray on a bright, flat spot. Keep the applicator away from your eyes, hold it by the handle and look at the whole thing, then move your eyes to the surface of the sponge, its sides, and the boundary where it meets the handle. Check separately whether powder color is simply left on it and whether the material is chipped or lifting.
Don't decide from the surface color alone that "it's dirty, so washing will fix it." Also look for small holes, tears, and parts that look ready to crumble and fall off. The roughness and shape of the material differ from product to product, so you don't have to conclude that it is worn out only because it looks different from another applicator. If you recorded its condition when you started using it, check for changes against that.
Next, look at the boundary between the base of the sponge and the handle from an angle. Tell apart whether it is a shadow made by how the light falls or whether the edge is actually peeling up. It is hard to see if you cover the boundary with a finger, so hold the handle a little way from the tip and observe it while changing its direction.
Don't add actions like pulling, twisting, or pushing the sponge in to test whether it is about to come off. You also don't need to judge parts you can't tell by sight by how they feel against your eyelid. If lifting or wobbling bothers you, stop using it for the time being.
If the applicator is thin on one end and thick on the other, look at the two ends separately. Don't assume that because one is in good shape the other is fine too; check the condition of the side you are about to use. Even when the powder color hides the boundary so you can't see it, avoid rubbing hard to expose it.
For the sides that are hard to see while it is lying down, change the direction of the handle and check. The key is to change the direction of the whole tool rather than pinching and turning the sponge itself. If you find a part that is coming off, don't wipe off the powder and try to use it to the end; set that tool aside away from where you work.
2. Check whether it is replaceable or fixed, using the packaging and what you own
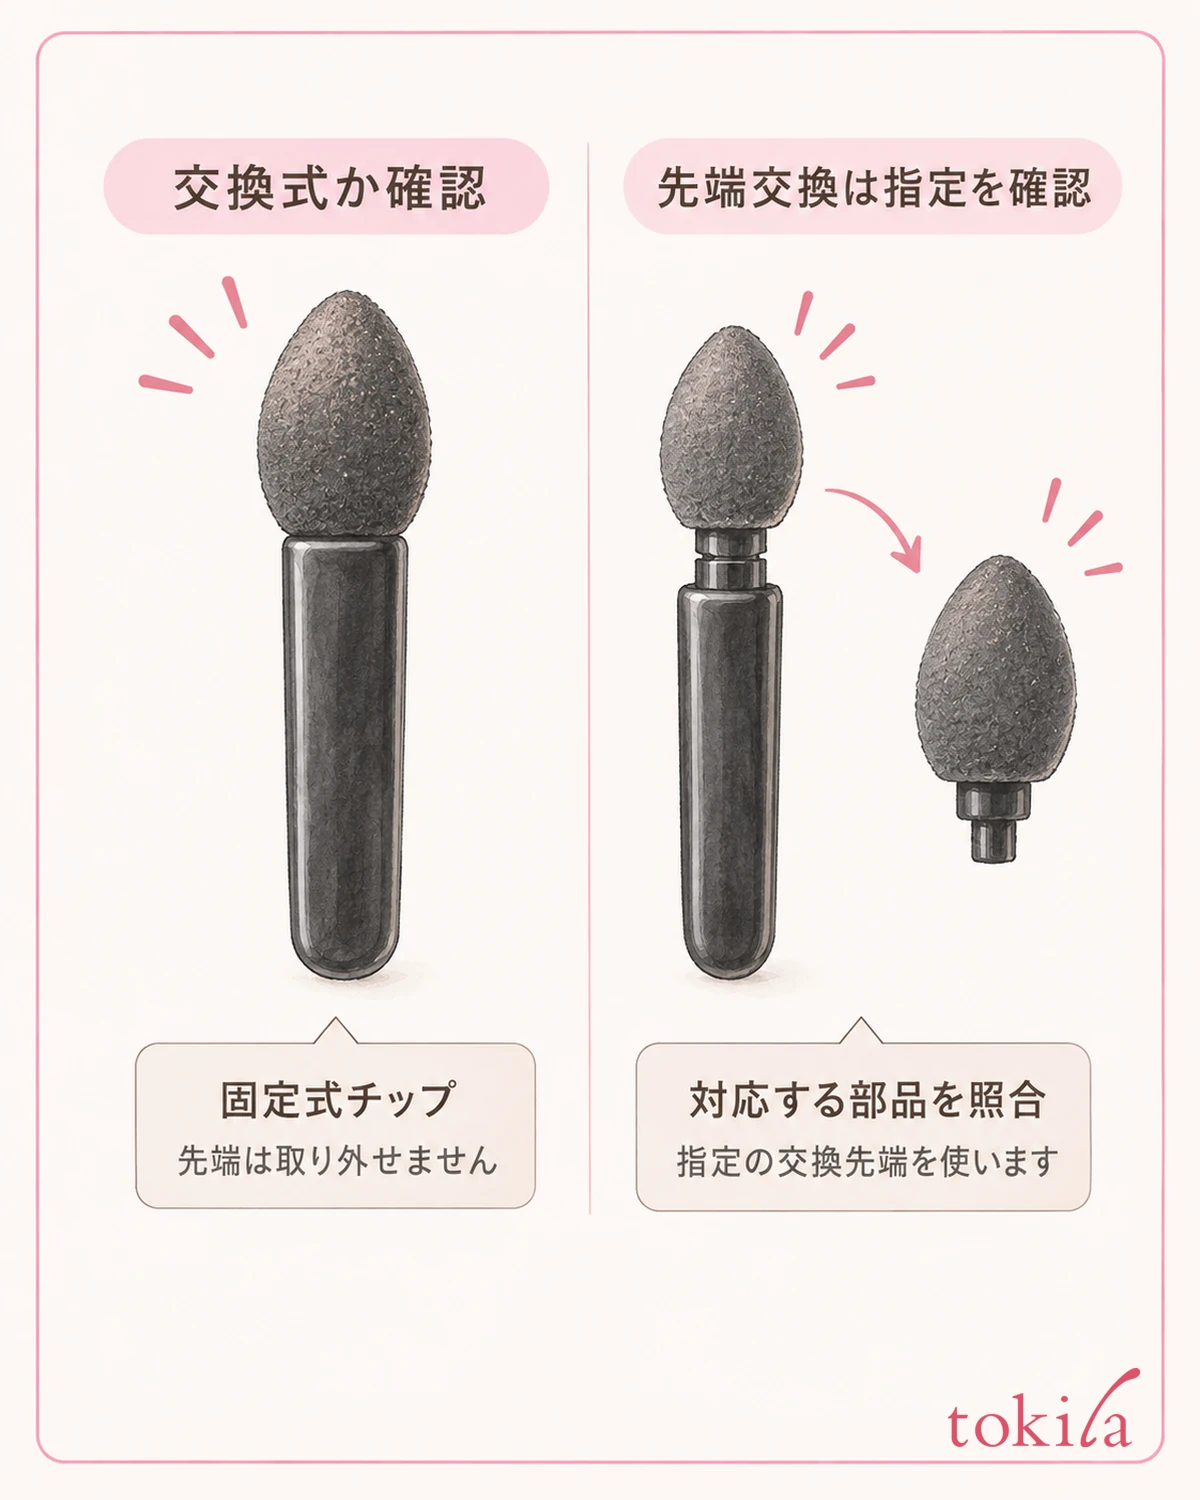
Once you have looked at the condition of the tip, check what kind of construction that applicator has. It is important not to confuse one that comes with instructions for replacing the tip with one where you replace the whole handle. A visible seam alone does not mean it is a detachable type.
If the packaging or the explanation from the time of purchase remains, read together the product name and part number, whether replacement parts exist, and how to attach them. Even when it says "refillable," it may refer to the eyeshadow contents. Check the refill of a cosmetic and the replacement of the applicator tip as separate conditions.
For a product that can use replacement tips, match the corresponding model number. Don't pair them just because the size is similar, the color is the same, or the shape looks like it would fit. Checking which product goes with which part before getting the part makes mix-ups easier to prevent than forcing a part to fit after you have it.
When a fixed-type tip has lifted, this article does not recommend re-gluing it with household adhesive. Also avoid pulling out a sponge that is not designated as removable and examining its inside. Even if it looks as if it is back to its original state, it cannot be confirmed to be in a condition fit for use around the eyes.
If you can't find instructions, don't go ahead with washing or taking it apart; first sort out the information that identifies the product. The name of the case and the name of the included applicator are not necessarily the same. Check your purchase records and don't keep using it while guessing at an unknown construction.
If you keep a record of part compatibility, leave the shape of the tip and the part number in the same photo or note. If you copy out only the attachment method, you might later mistake it for an explanation that also works for another applicator. Handle only products confirmed to be replaceable, in the order indicated for that product.
3. Separate leftover color from wear, and decide when to stop using it before washing
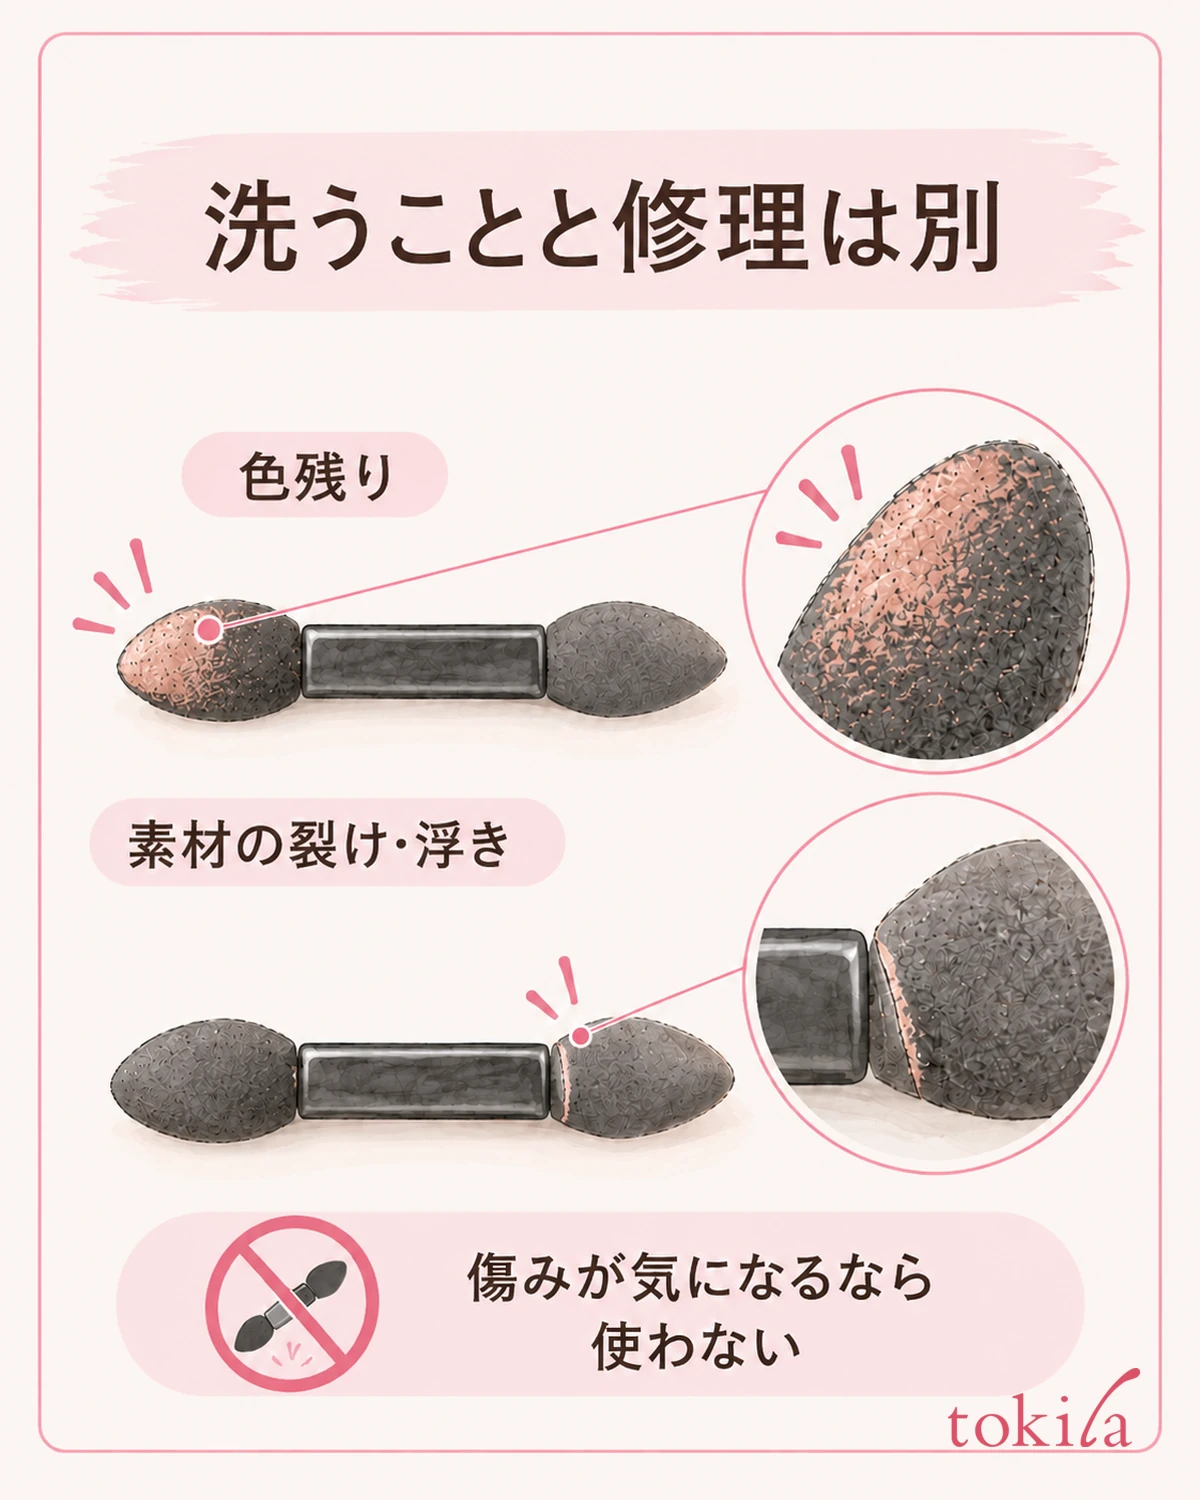
How you handle it afterward depends on whether the sponge simply has powder left on it or whether the surface or base is worn. Don't think that once the color fades, concerns about the joint disappear too. If the tip seems about to come off, the material is crumbling, or the handle or support is exposed, stop applying makeup and switch to a different tool.
If you wipe or wash it after use, check the instructions for both the applicator and the cleanser. An explanation meant for sponges cannot be applied to every applicator, including those with glued joints. Avoid dipping something in water just to see what happens when you have not confirmed that it can be washed.
Don't try to re-fix a tip that has already lifted by rubbing it while washing or squeezing it hard in a towel. Washing is a task that removes color and dirt, not one that repairs damage. Also don't add methods such as strong scrubbing, long soaking, or using solvents not listed on the label.
If you wash a product that can be washed, following its instructions, check the drying method as a set. Don't mix up a state that looks soft only while it is wet with changes that remain after it dries. However, don't judge that drying fixes the wear, and don't make it a test for using a tool suspected of being abnormal.
The order of everyday care is also laid out in caring for makeup brushes and sponges. The order of first checking whether it is in a state fit to use now, before choosing a cleaning method, is the same for applicators.
Also avoid scraping the surface with a nail or hard tool because dirt is hard to remove. If there are changes such as only part of the powder-picking surface being hard or the surface becoming rough, record its condition along with the leftover color. Don't decide whether to replace it by the number of washes alone; check the product's instructions and its current condition.
4. Choose a substitute tool after checking its use and cleanliness
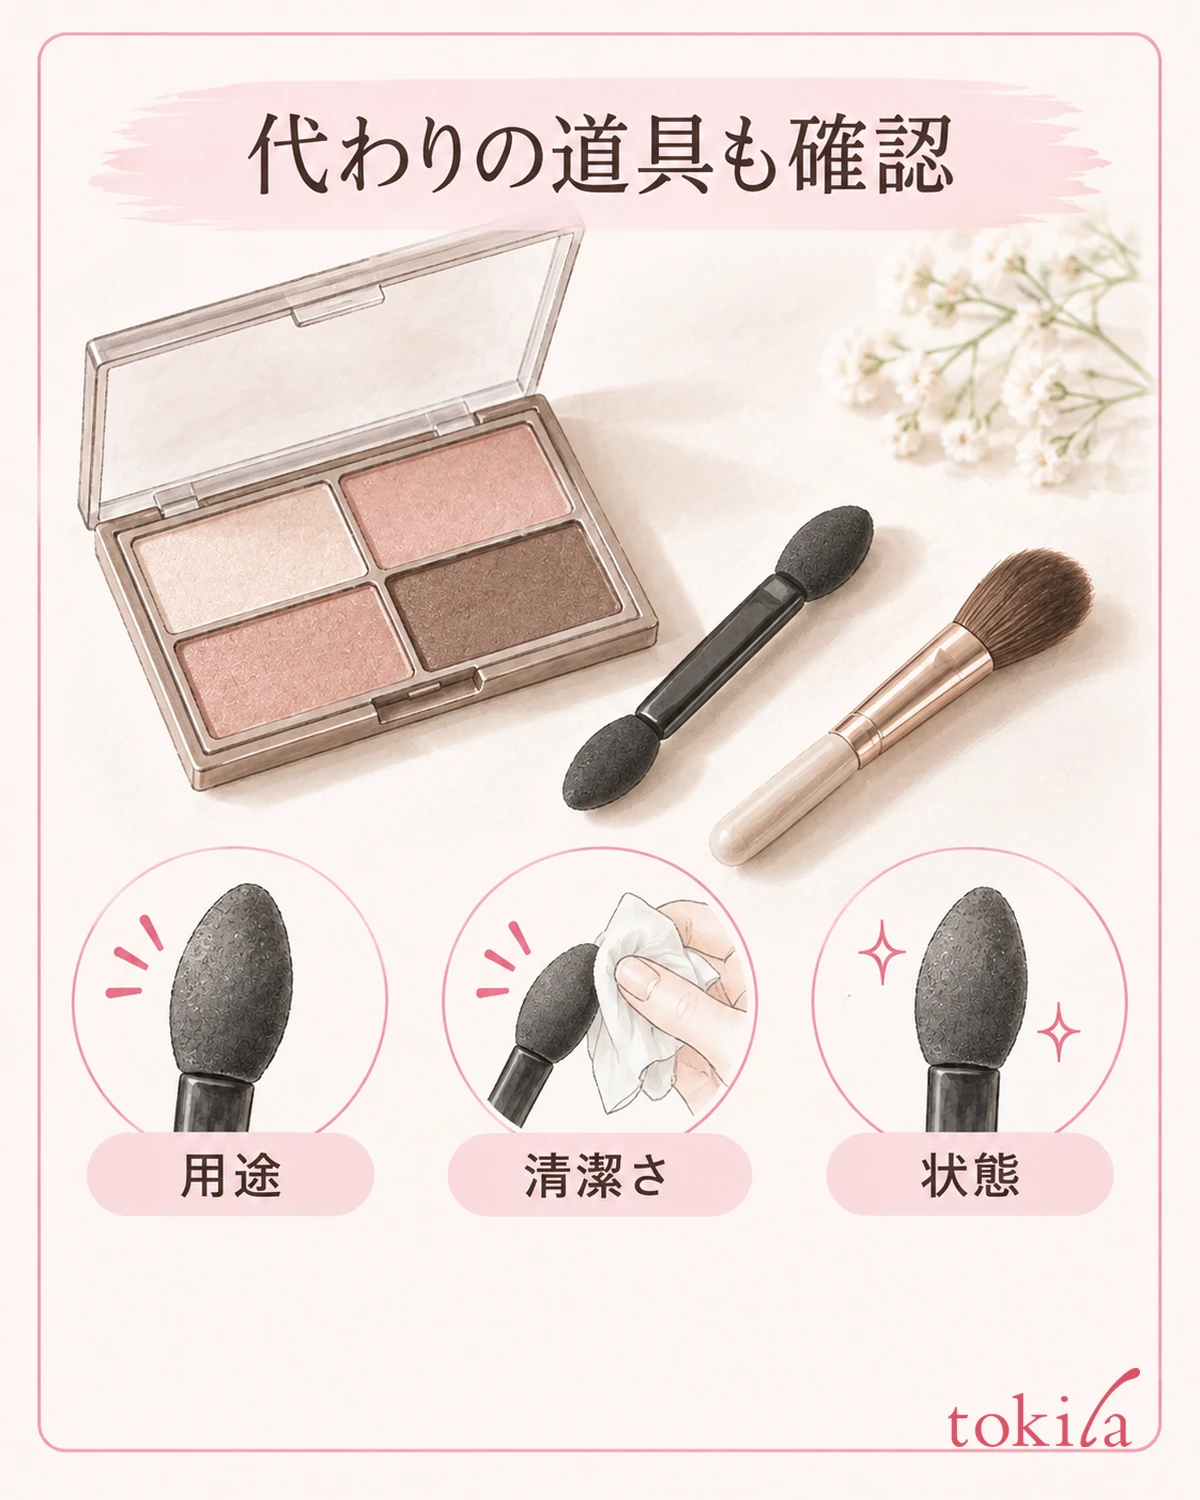
If you stop using the applicator, check how the eyeshadow is meant to be used before substituting something else you have on hand. Whether you can use a finger, a brush, or an applicator differs by product. Don't assume any tool will work the same just because it is the usual color.
If you have a spare applicator, look not only at the shape of its tip but also at its cleanliness and condition. If it was touching an old applicator in the case, has a lot of another color left on it, or has not finished drying, avoid choosing it simply because it is a "spare." Even if it is new, read the explanation on the packaging before using it.
Switching to a brush can change how the color is picked up and how it spreads. Before layering the same number of times as with your usual applicator to deepen the color, check with a small amount. When you pick up more, too, check which tool goes with which cosmetic, and don't put a worn tip back in the palette and keep using it.
You can also choose to skip applying that part rather than put finishing today's makeup first. You don't need to use a tool whose part that touches your eyes can't be checked by changing its direction or wrapping tape around it. Cutting the tip to reshape it is also not added here as a do-it-yourself repair.
If you feel irritation or pain when you use it, stop using it instead of repeatedly adjusting the color or changing tools. It is also important not to assume that wear on the tip is the only cause. If troubling symptoms continue, don't reuse it on your own judgment; please seek advice.
Even when only one side of a double-ended type is worn, don't decide on your own that you can use the other side. Rather than switching your grip while keeping material that might fall off, replacing it with another tool whose condition you can check avoids a situation where you apply while worrying about which end it was.
5. Before putting it back in the case, check where the tip touches
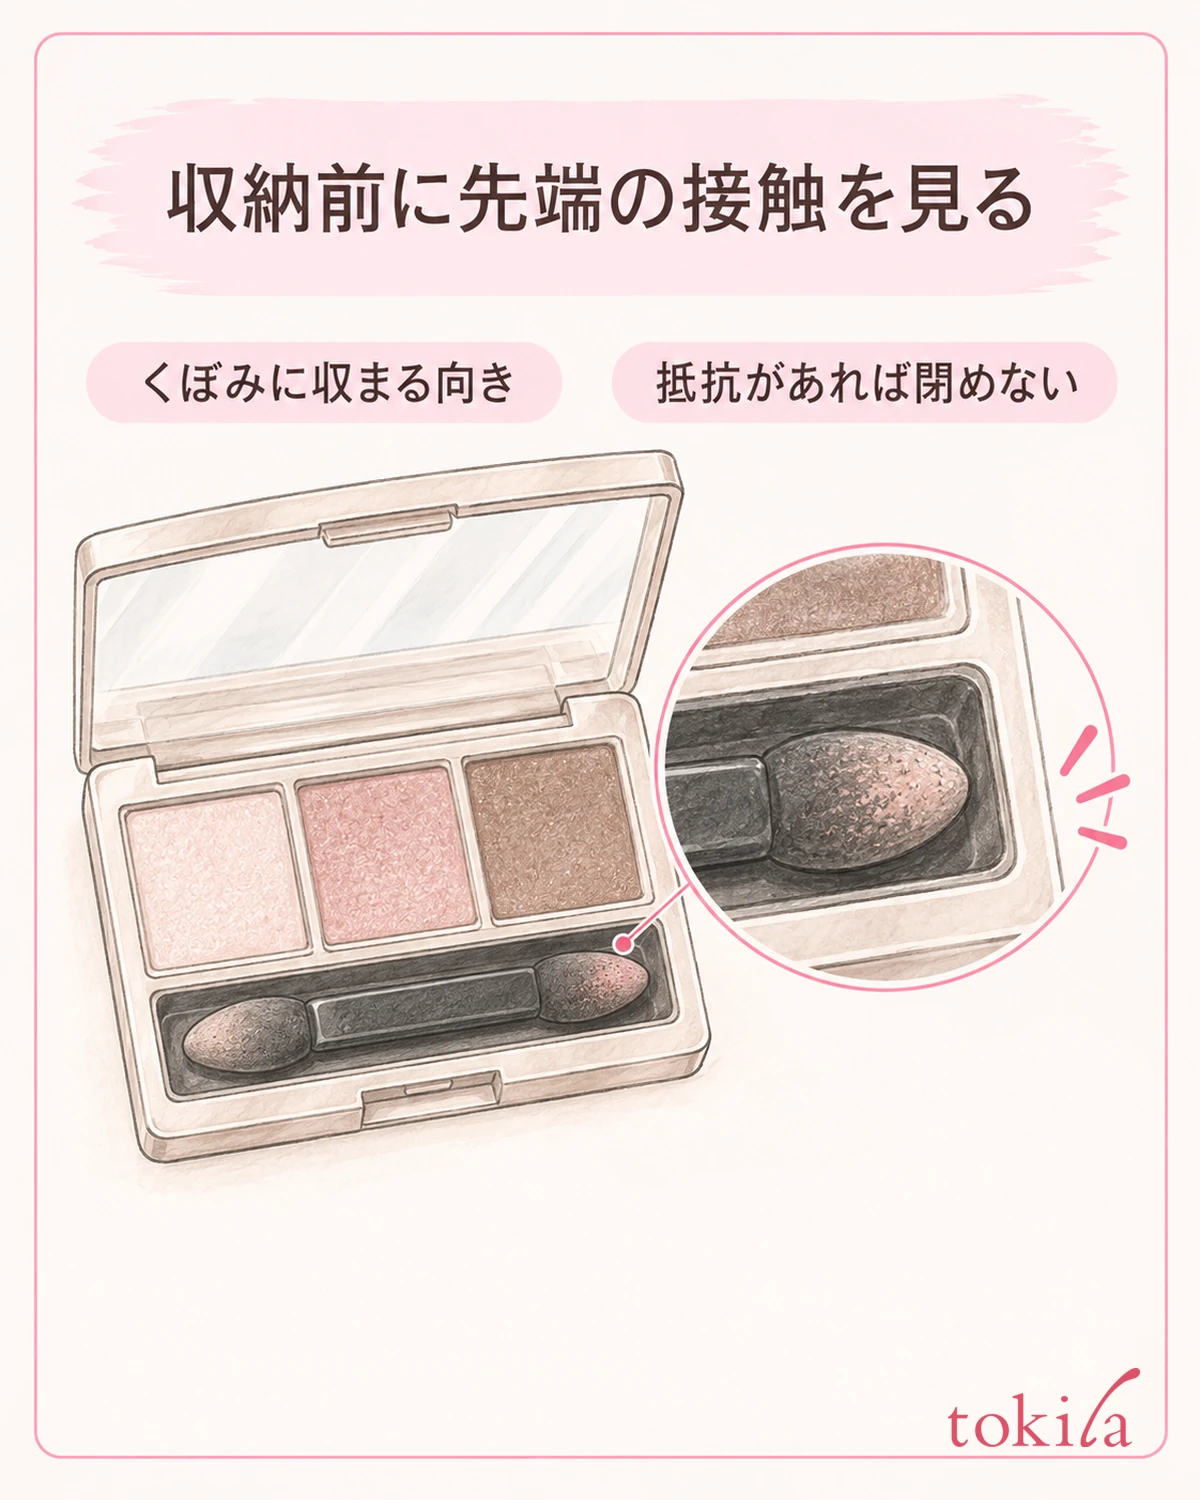
Once you have chosen an applicator you can use, review the direction and place in which you store it. First check that it fits into the recess of the case without strain. Even if it looks similar to the original applicator, a different length or tip thickness can mean it gets pressed when you close the lid. Don't push it in with force.
After you place the applicator, check whether the tip is riding up on a corner or the edge of the lid, and whether the handle is floating at an angle. If you feel resistance when closing the lid, open it once and check the position. Don't treat the fact that it closed as proof that it is the right size.
Store washed tools only after drying them thoroughly as the product instructs. Keep the place where you dry them separate from where you store them, and don't seal them while wet. Even if you keep an applicator you are worried about, set it apart from the spares you use, in a place where they won't get mixed up, to prevent picking it up by mistake.
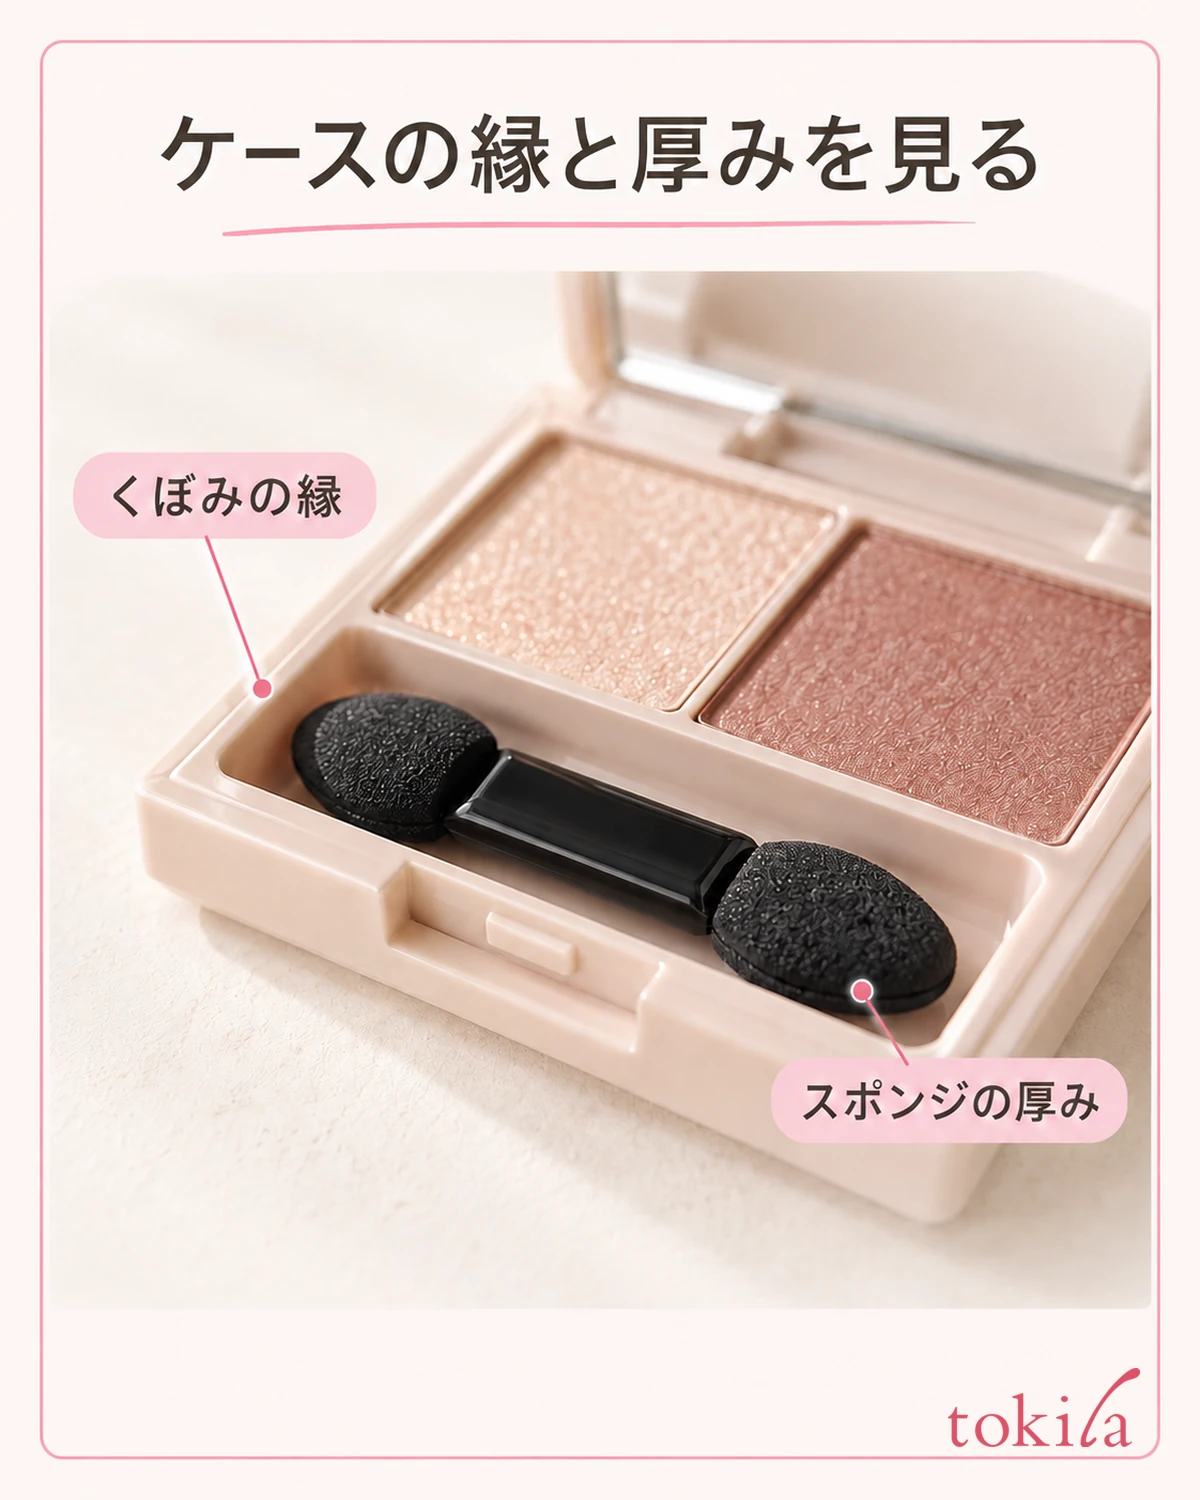
Next time you buy, check together the eyeshadow you use, whether the case is compatible, and whether the tip is replaceable. Look not only at the length but also at the shape of the thick side and the thin side. If you swap in a different product that looks similar, don't automatically carry over your previous care method; check the new instructions.
Finally, look back over four points: "the surface," "the boundary at the base," "the replacement instructions," and "contact during storage." Don't try to fix everything at once; start by taking any applicator suspected of being worn out of use and preparing one you can check. Rather than repairing a loose applicator and using it up, get things ready so that you can choose, without hesitation, the tool you will press to your eyes next.
If you carry it with you, check the way of storing that the case supports. If you cram several spares into a small gap, it becomes hard to tell where the tips are. Keep the tools you use separate from those waiting to be checked, and before closing the lid, tidy up once so that the area around the applicator is visible.



