
You want to set your nail brush down for a moment, but is it rolling, or is the bristle tip touching the table? A brush rest does not necessarily fit every brush just because it has grooves. Before you load any polish, check whether the handle of the brush you use matches the place that supports it.
This article covers nail brush rests that support a brush sideways during work. We separate their role from storage that stands brushes in holes and from caps that cover the brush tip, and explain everything from checking compatibility to how to place a brush and put it away, with five illustrations and two photos.
1. First Check Whether It Is a Tool for Temporary Resting and Which Brushes It Supports
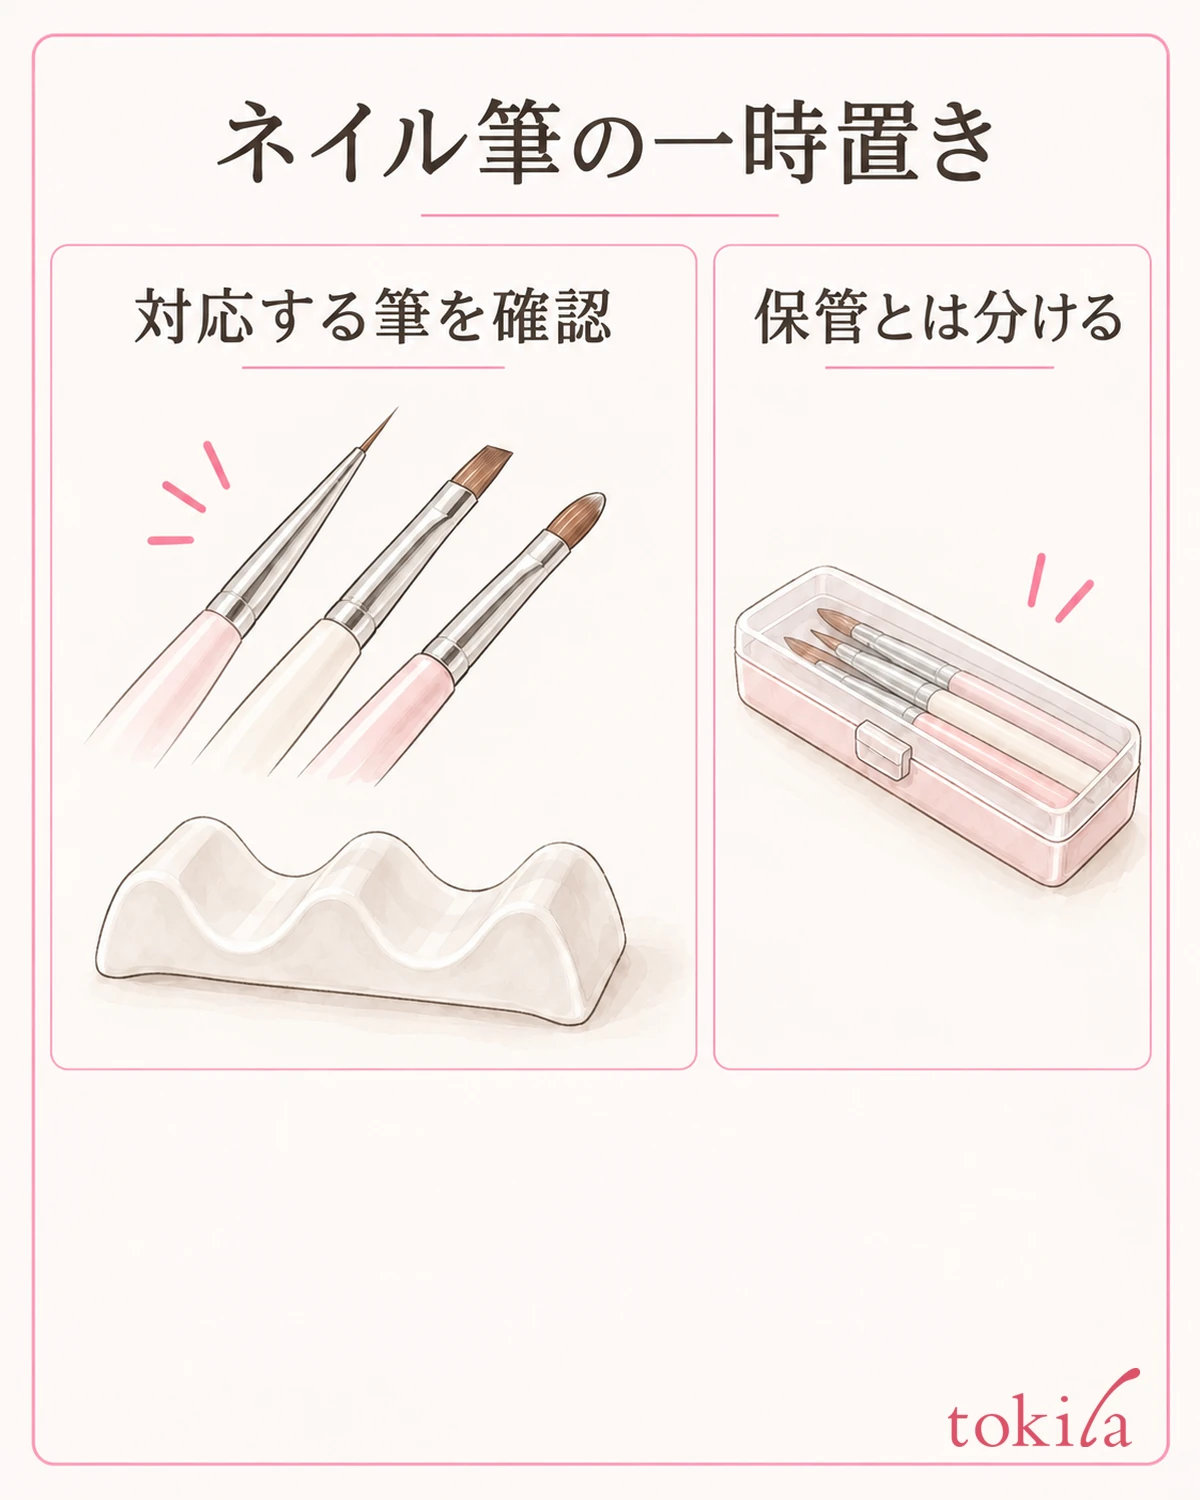
First, read the packaging or instructions to see what your tool is meant to support. A shape that rests a sideways brush across a groove, a shape that grips the handle and a shape in which you stand the brush in a hole are used differently. Do not treat a chopstick rest or a stationery stand that looks similar as the same thing.
Next, look at the guidance on the types of brushes it can hold, handle thickness and how many it can take. Even if there are five grooves, that does not mean it can hold five thick handles. If brushes touch each other or even one fits only at an angle, check compatibility rather than filling the empty spots.
What you compare here is not just the width of the bristle tip but the part of the handle that rests in the groove. With handles that taper toward the tip or smooth round handles, a slight change in where you place it can change how it settles. If a model number or compatible diameter is specified, use that as your basis for judgment.
Nail polish whose bottle cap and brush are one piece has a different structure from a standalone gel brush. Do not try to support a set that tips under the weight of the cap in the same way. Whether you may set a bottle-attached brush outside is also something to check in how the contents are used, and you do not need to keep it out for long just to use a brush rest.
Also separate the types of polish. How to handle things when you pause work is not the same for gel that cures under light and for nail polish that dries naturally. Think of a brush rest as not being a substitute for a lid that prevents drying or curing, and check that the brush and the contents match what is specified.
If you do not know the purpose or what it is compatible with, stop before loading any polish. Rather than forcing together what you happen to have, check with the brush's name and the part of the handle you want to place visible. Starting from one brush whose compatibility is confirmed, look at how it settles on the table.
2. Look at the Bottom of the Groove and the Handle Thickness, and Test-Place a Dry Brush
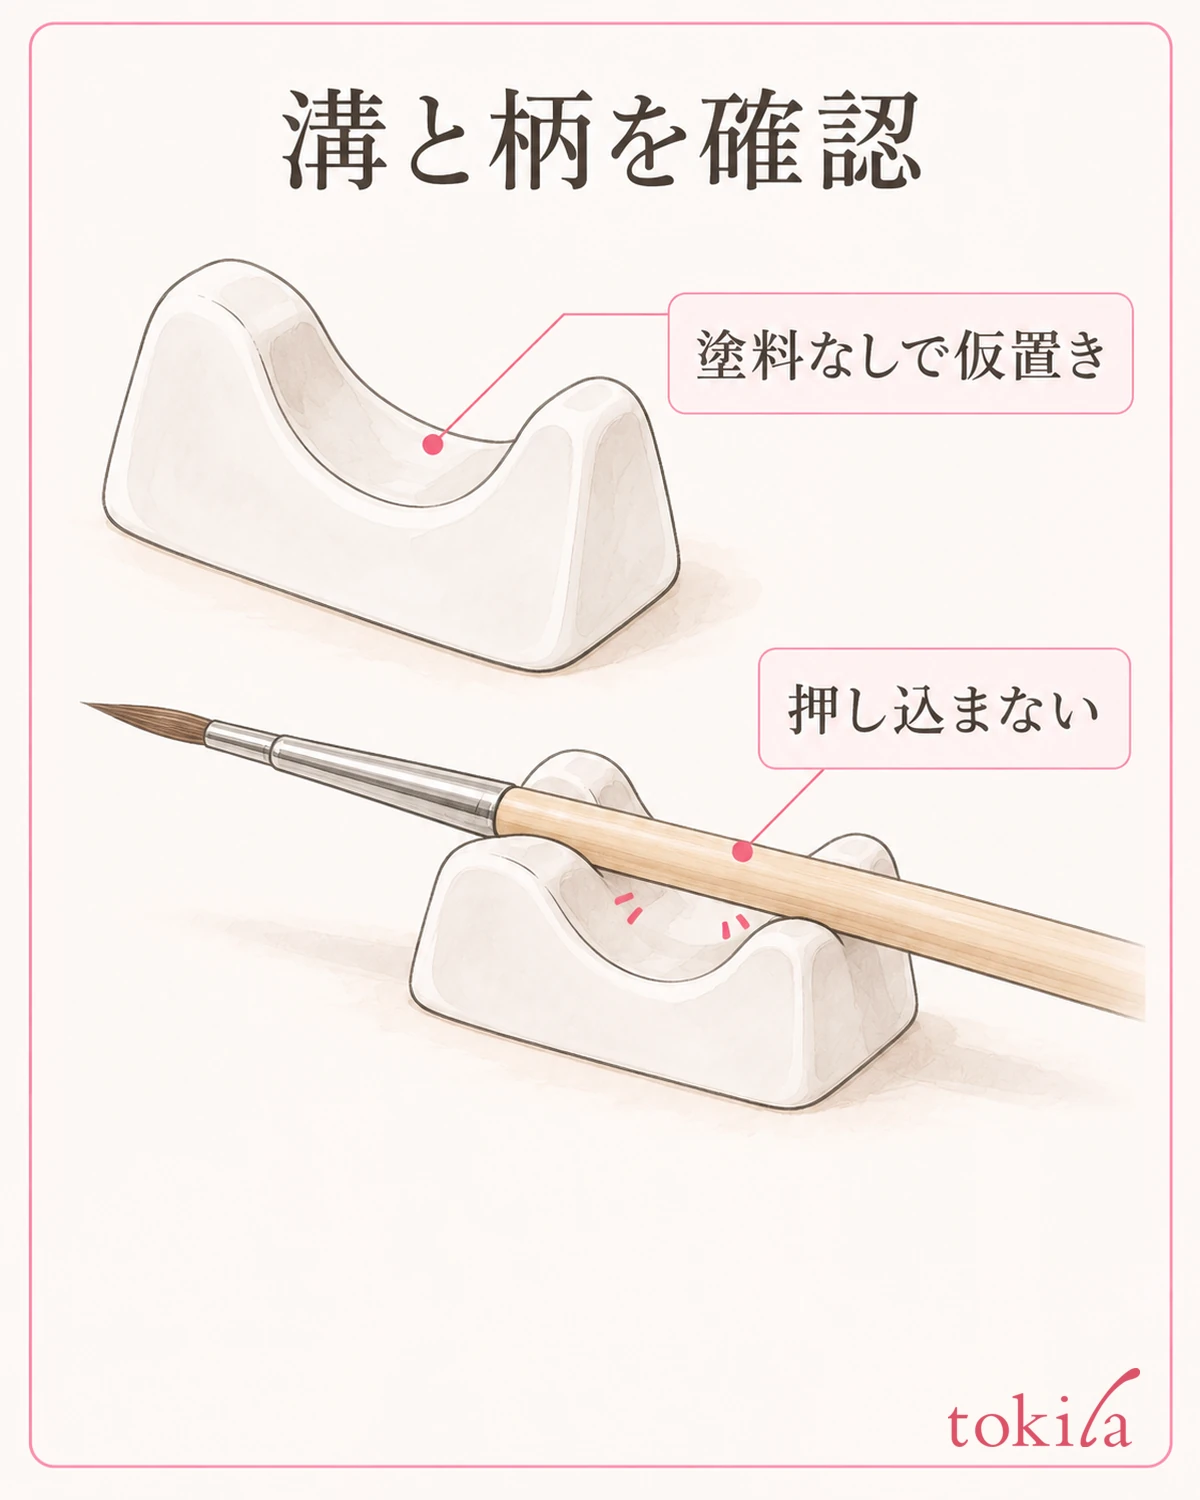
Set the brush rest on a flat surface and look for cracks, chips, large distortions and anything stuck on it. If there are lumps of polish in a groove, the handle will not sit on the bottom even if the visible width matches. Before scraping them off with a finger or nail, check a care method suited to the tool's material.
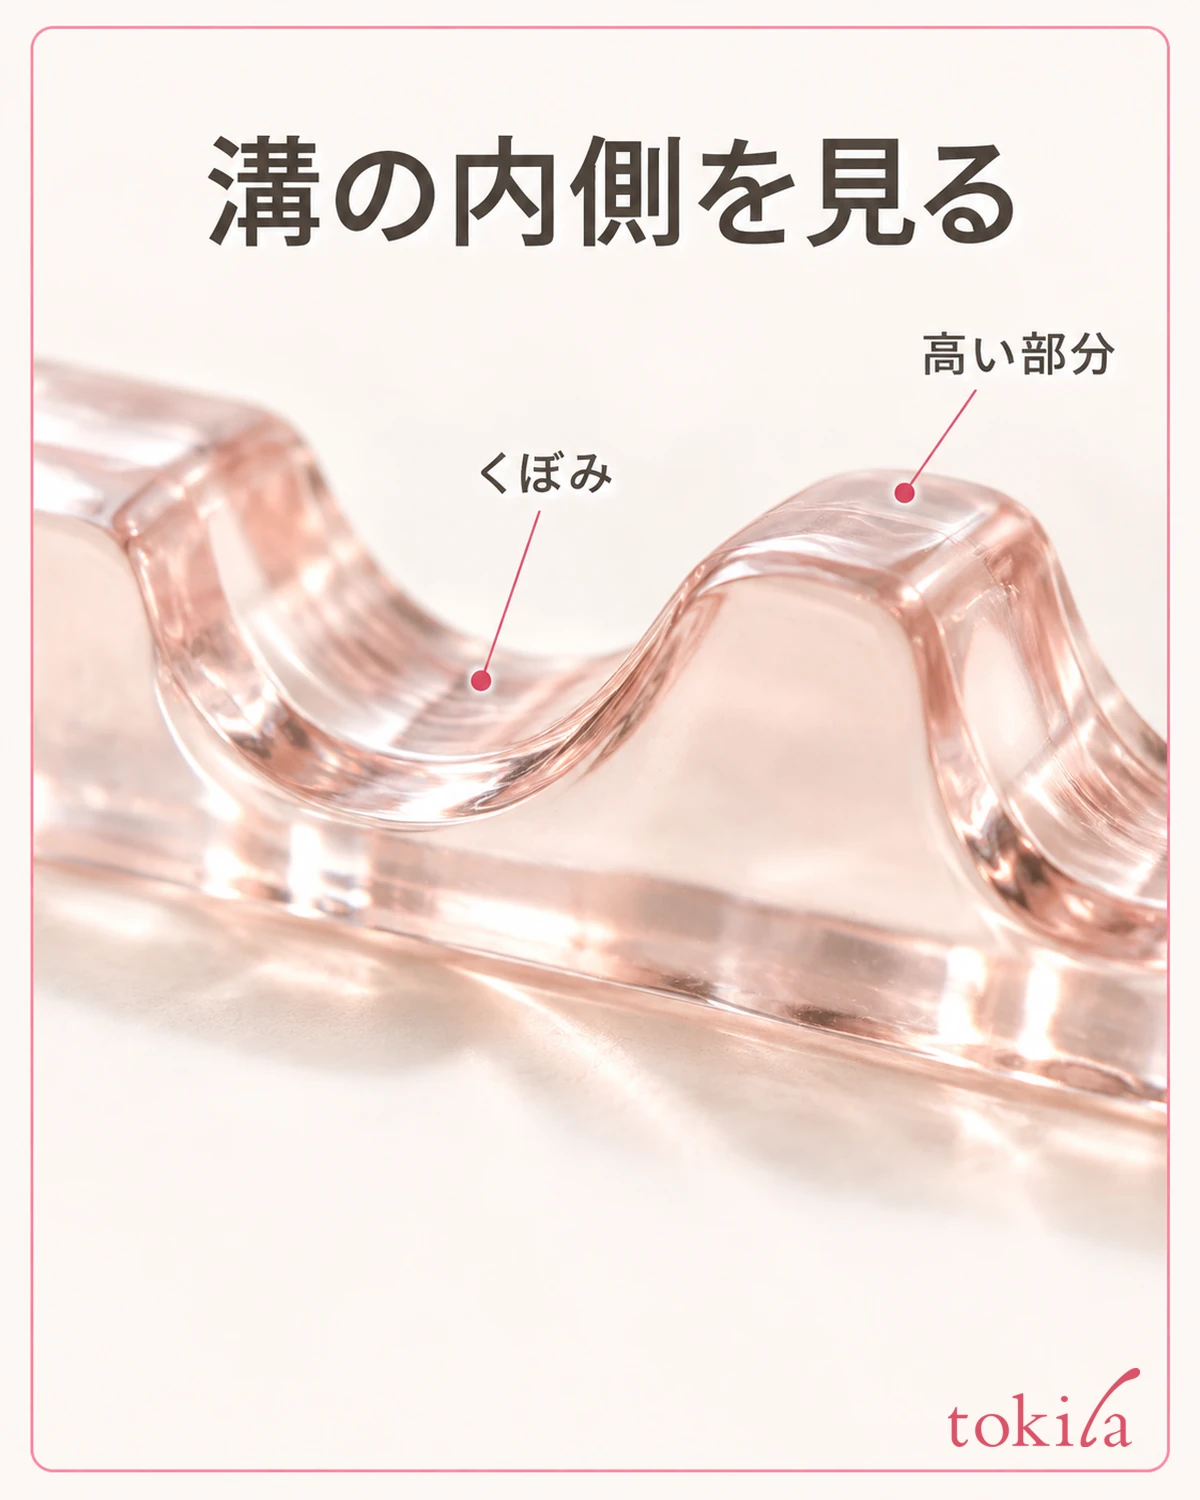
Next, tell apart the dipped parts of the groove from the high parts between them. Seen only from the side, the unevenness overlaps and is hard to read, so look at the inside from slightly above. For a product that has a designated fulcrum, check that place, and take care not to confuse the handle resting on top of the neighboring ridge with it settling into the groove.
Take one brush that has no polish on it yet and slowly set the designated supporting part on it. Do not push the handle wider to force it in, or turn it into a groove it does not fit. If the handle floats high or moves a lot from side to side, return the brush to your hand and review the compatibility.
In the trial placement, quietly watch the state after you take your hand off the handle. You do not need to shake the table to see whether it rolls or push the bristle tip with a finger. If the brush tilts naturally, check one by one, without polish, whether the table is flat and whether the supporting position matches the specification.
Even if it can be placed at a thin part of the handle, avoid an arrangement that puts undue force on the metal band or joint that holds the bristles. If the product designates where it supports, give priority to that designation. Do not rest the bristles in the groove to create a shape where the brush does not roll while you do not understand the instructions.
Once one fits, test-place the next one you need in a separate groove. If handles or bristle tips touch each other, reduce the number or check a different compatible way of placing them. Do not aim to use up every groove; leave room so that you can pick up brushes one at a time.
For which position on the handle you rested, rather than fixing a uniform length from the bristle tip, look together at the fulcrum of the item you have and the shape of the brush. Do not keep moving a tapered handle back and forth to search for a position where it happens to stay. Set aside any pair whose compatibility cannot be confirmed right there.
3. Support the Handle and Leave Space Between the Bristle Tip and the Table
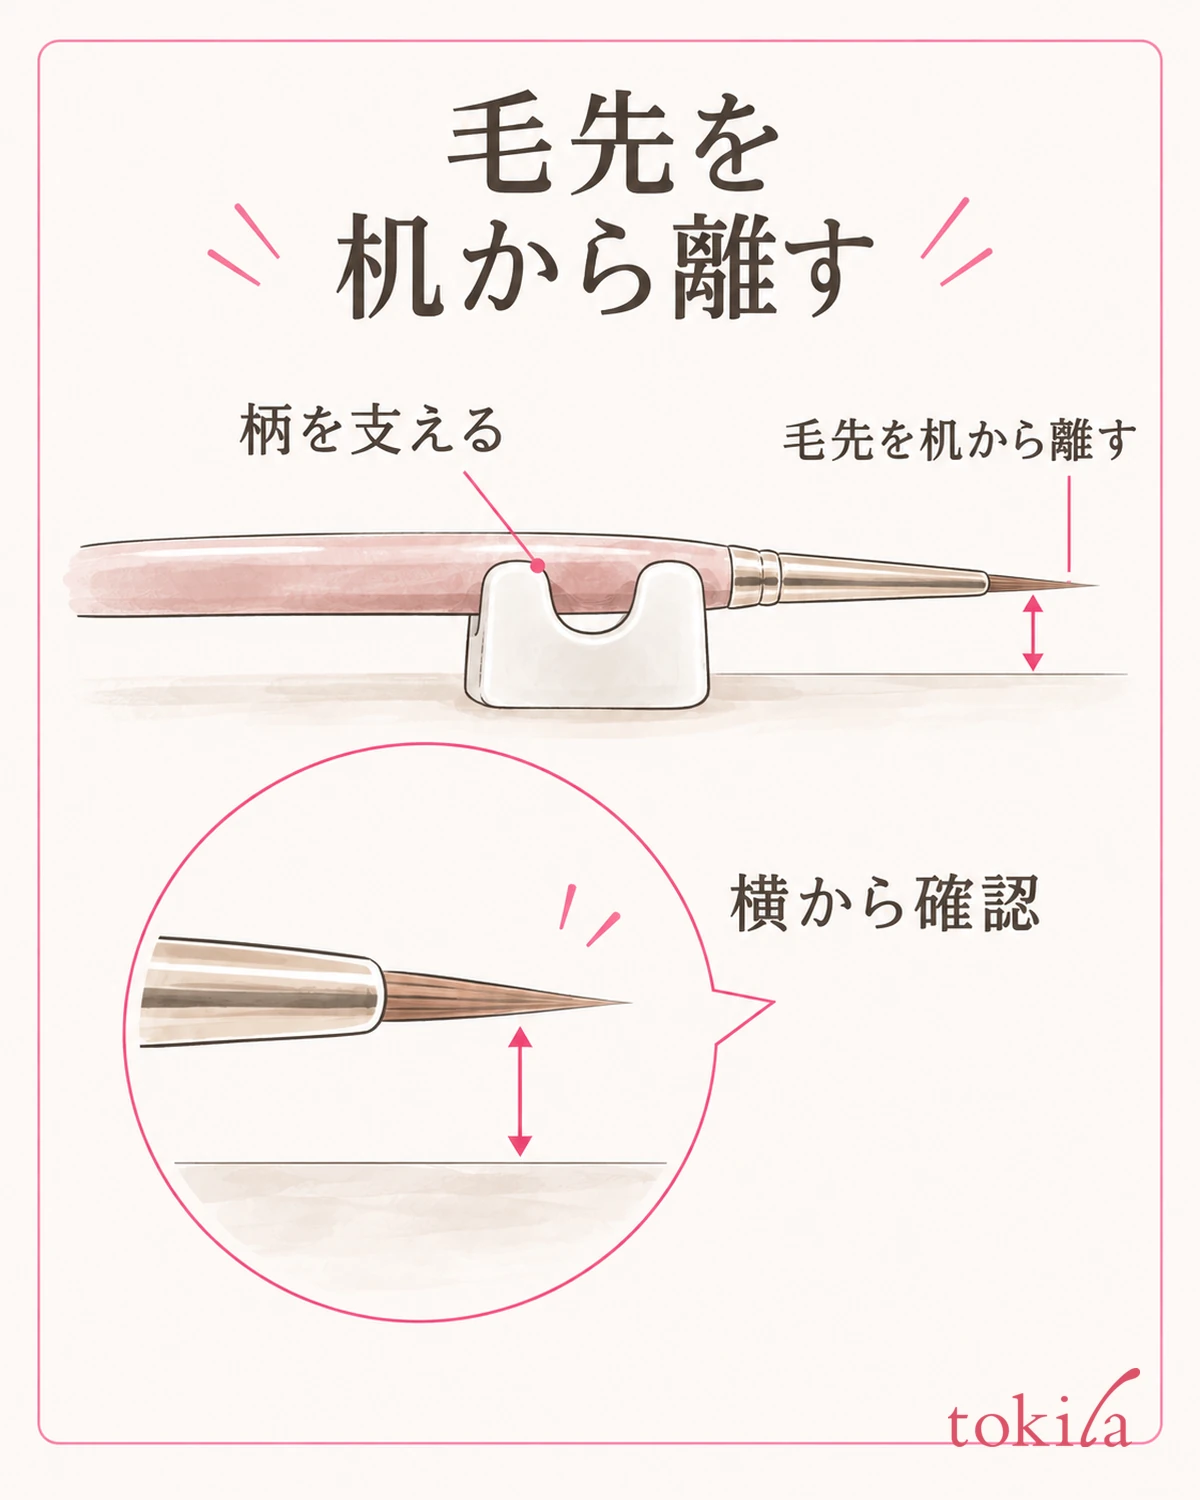
Once you have set the brush down, look at the bristle tip from the side. Even if the handle has stopped, the bristles may be hanging down and touching the table. Do not judge only by the height of the brush rest; follow the tips of the bristles with your eyes and check whether they are also touching other brushes or containers.
If the bristle tip touches, pick the brush up once and set it down again. Do not squash the bristles to match the height, or stack unstable small items under the brush rest. If it still touches even when you keep the designated fulcrum and orientation, you have to decide not to use that brush and brush rest as a pair.
For the motion of placing it, follow the guidance for the item you have, basically holding the handle and quietly returning it to the fulcrum from above. Do not slide it sideways from the bristle tip into the groove or push aside the neighboring brush. When picking it up too, lift the handle while watching that the bristles are not caught on anything.
Decide the direction of the brush to suit your dominant hand and your work surface. Do not treat right-facing or left-facing in the illustration as the correct answer in itself; check whether the arrangement keeps the hand that picks up the handle from crossing over an open polish container. Instead of reaching out with only your fingertips to grab it, move the brush rest to a position where you can move your wrist without strain.
Once polish is on the bristle tip, do not keep trying out ways to place it. If color gets onto the handle or seems about to drip from the tip, first go back to the contents and how to use the brush. The groove of a brush rest is not for wiping off the amount of liquid, and the rim is not for cleaning the bristles.
If you are worried about the brush's bristles splaying, do not try to restore the shape by pressing and holding them in place. For a bottle-attached brush, think of it as separate from checking the tip of the nail polish brush and the mouth of the bottle. Look separately at whether the resting tool fits and at the condition of the brush itself.
4. Check Where Your Hand Will Pass and the Distance from the Light

Place the brush rest inside a flat, stable work surface. Fix any arrangement where the body or the handle sticks out past the edge of the table, or where it rides up on paper or a cable, before you put any polish out. Check separately that the brush fits and that the brush rest itself does not tilt.
Look at the underside of the body too. Check that no dirt or foreign matter is caught on the surface that touches the table, and that the protrusions on the bottom make proper contact. If it slides, go back to the instructions for the surfaces it can be used on and how to fix it, rather than adding solvent or adhesive to the bottom.
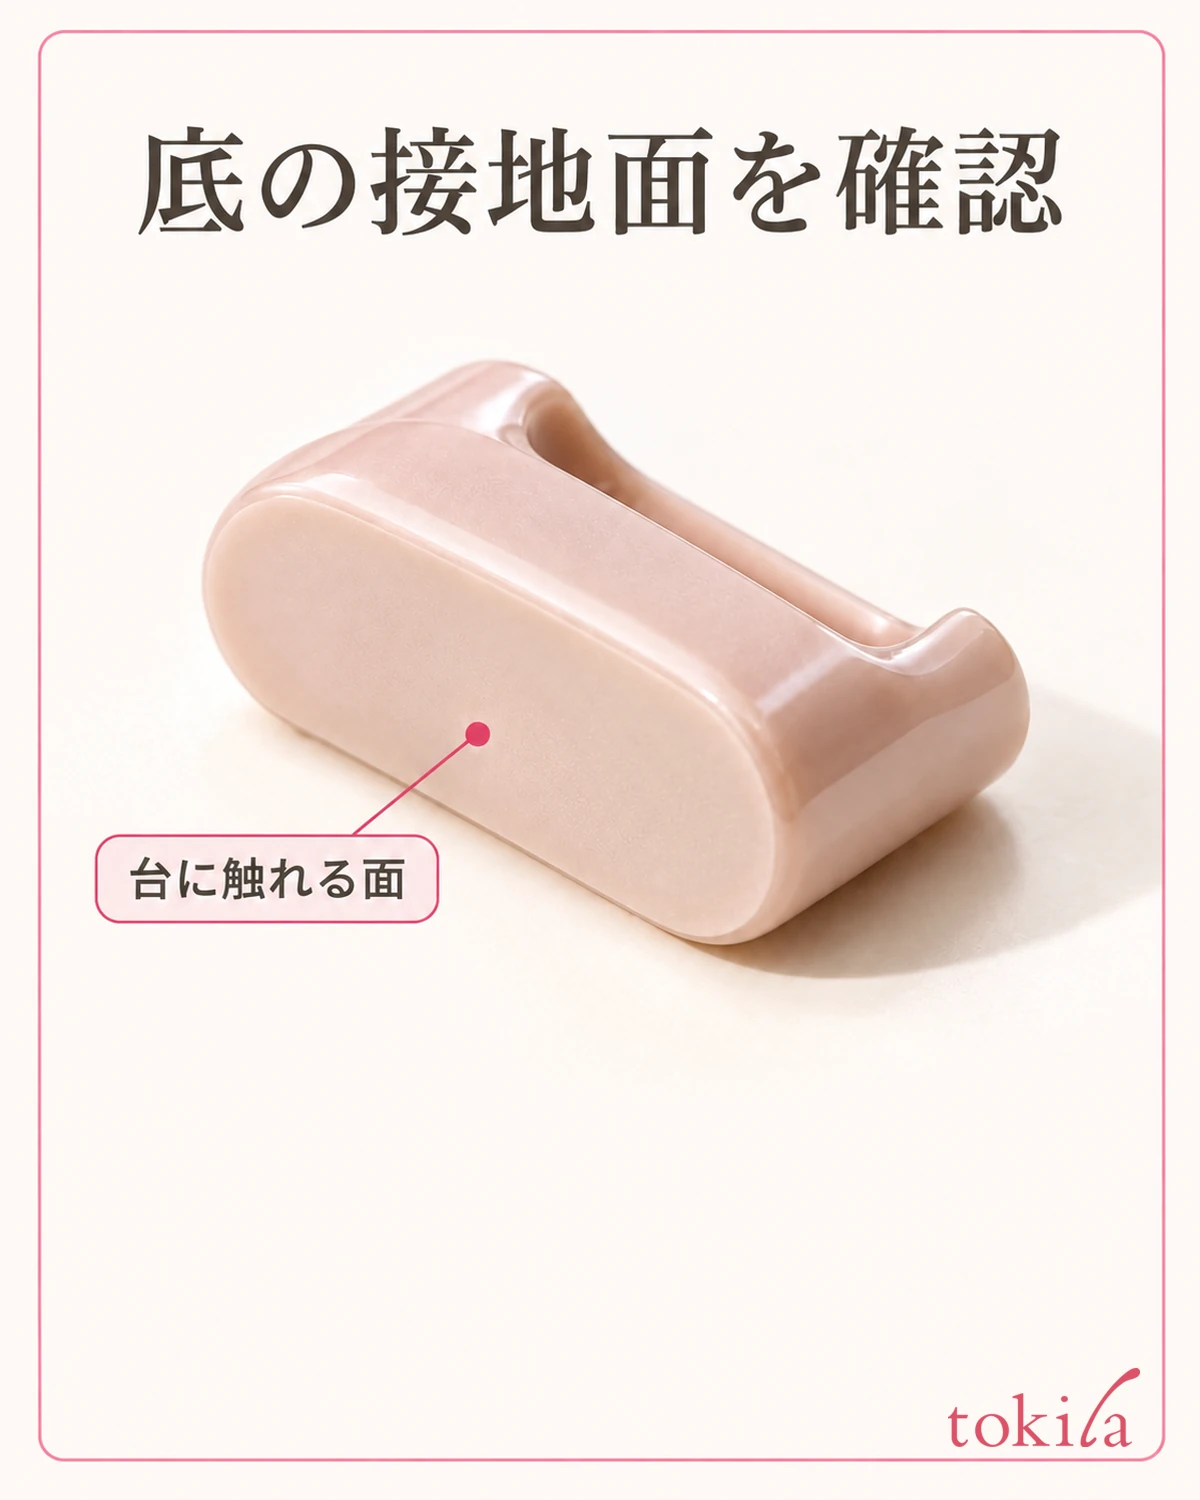
After that, with a practice tip, a container and your hand in place, run through once from taking the brush out to putting it back, using a brush with no polish. On a day with long sleeves, look at the cuffs too. If you need movements such as twisting your body a lot or reaching over a container, first adjust the direction and spacing of the tools.
For a brush with gel on it, avoid the vicinity of the curing lamp and places where sunlight falls, and follow how the gel and the brush indicate to handle light. Do not line brushes up at the entrance of the lamp because it is easy to set them there. Do not set a common distance such as "it is fine for all products if you keep it a certain number of centimeters away."
When you leave your seat during work, check in the guidance for the brush and the materials whether leaving it as a temporary rest is fine. Do not assume the shape of a brush rest alone can make up for light-blocking or protection if the break gets long. Treat the situations in which you would use a compatible cap separately from putting away a gel brush.
If you also use paper to place color on, do not let the brush rest become a weight that holds down the edge of the paper. Avoid an arrangement where the paper moves each time you pick up a brush, and decide a place for each role together with preparing the work surface with a paper palette, so that each has its own role.
Also keep the place where you put wipes and trash for cleaning up away from the place where you return clean brushes. If you look once not only at the hand that takes out a brush but also at how the hand moves to throw away used paper, you can reduce the times you have to move the brush rest partway.
5. Check Where Things Stuck On and Put the Brush and the Body Away Separately
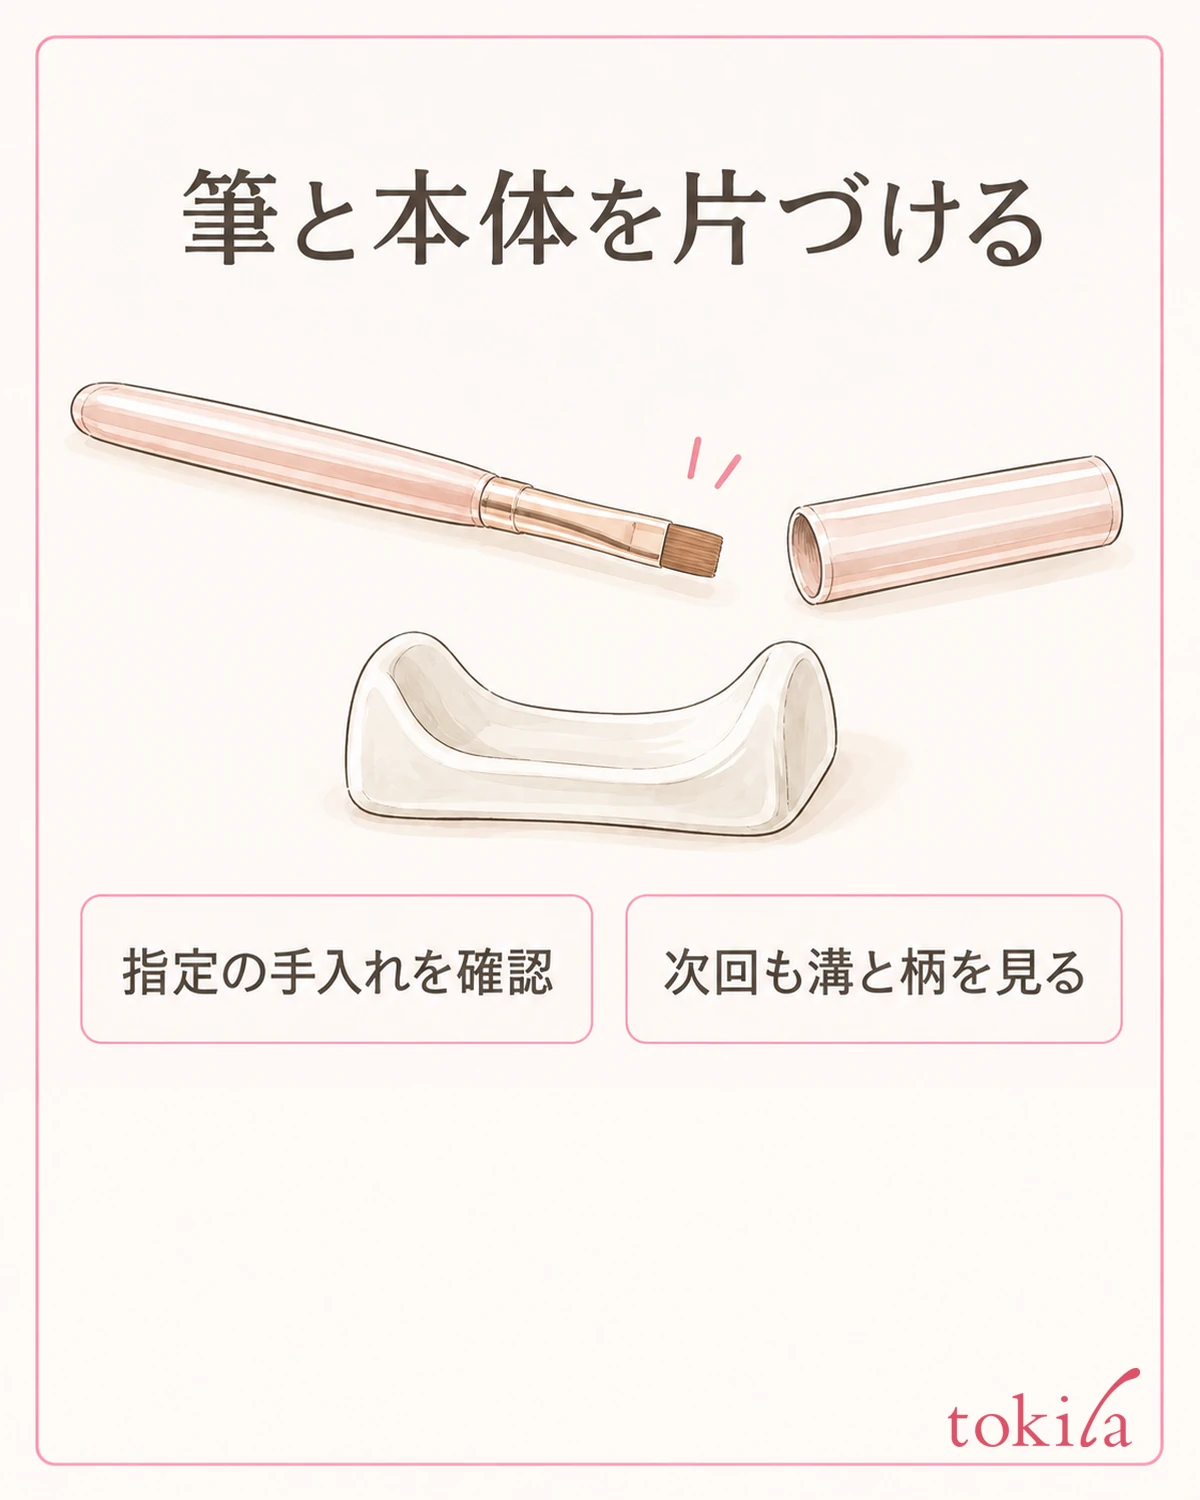
When you finish work, care for the brush by the specified method and move it to the corresponding storage. Do not treat the state of resting on the brush rest as long-term storage as is. If you put the used brushes away first and then look at the grooves and the bottom of the body, you can also reduce the motion of lifting the body while avoiding the bristle tips.
If something is stuck on the body, check a care method that suits both the material and the products you used. Do not assume that nail polish remover, gel cleaner or alcohol can be used on any brush rest. Even if it is clear, do not decide the material by appearance; use the labels and instructions as your clues.
The inside of the dips is hard to see, so change the orientation and separate deposits from chips. Do not add repairs that are not specified, such as scraping off lumps that will not come off with metal or soaking it in hot water. If there is deformation or a large scratch, check on replacement or continued use first, rather than putting the next brush on it as it is.
Follow the product's instructions for moisture and how to dry after care too. Look separately at a state in which something remains in the grooves and a state in which the surface merely looks clean. Before putting it away, check that care is done, and avoid a way of bundling things in which dirt transfers to unused brushes or other tools.
For notes to leave for next time, it is enough to write briefly where you actually had trouble, such as "a thin handle shifted to one side" or "at the edge of the table my sleeve caught on it." When you change the type of brush, do not fix the previous arrangement; check again from the correspondence between the new handle and the groove.
Finally, once you have confirmed the purpose as a temporary rest, a fulcrum that holds without strain, space where the bristle tip does not touch, and the light and your work path, you are ready. Rather than putting a brush that does not fit on again and again, starting work from a pair you have confirmed helps settle how you place things.



