
When you set the nail polish brush on your nail, the bristles spread out wide to the sides. One strand sticks out from the edge, and color lands outside the area you wanted to paint. When that happens, rather than trying to solve it with the dexterity of your fingertips alone, try reviewing the brush from the state where it is lifted away.
Here we deal with ordinary air-drying nail polish with the brush attached to the bottle's cap. We separate the brush's original width, how much it spreads when pressed, and the disorder left in the bristle tip, and go through how to take up the polish and how to return the brush to the bottle. This does not apply as is to the separate brushes for gel polish cured under a light, or to brush-pen type products.
1. Lift the brush from the nail, and separate its original width from any disorder in the bristle tip

First, stop the painting motion and lift the brush away from the nail. Check in a ventilated place with no open flame, where you can set the bottle down steadily. Without pinching the brush with your fingers or pulling at the bristles, hold the cap and look at the outline of the bristle tip.
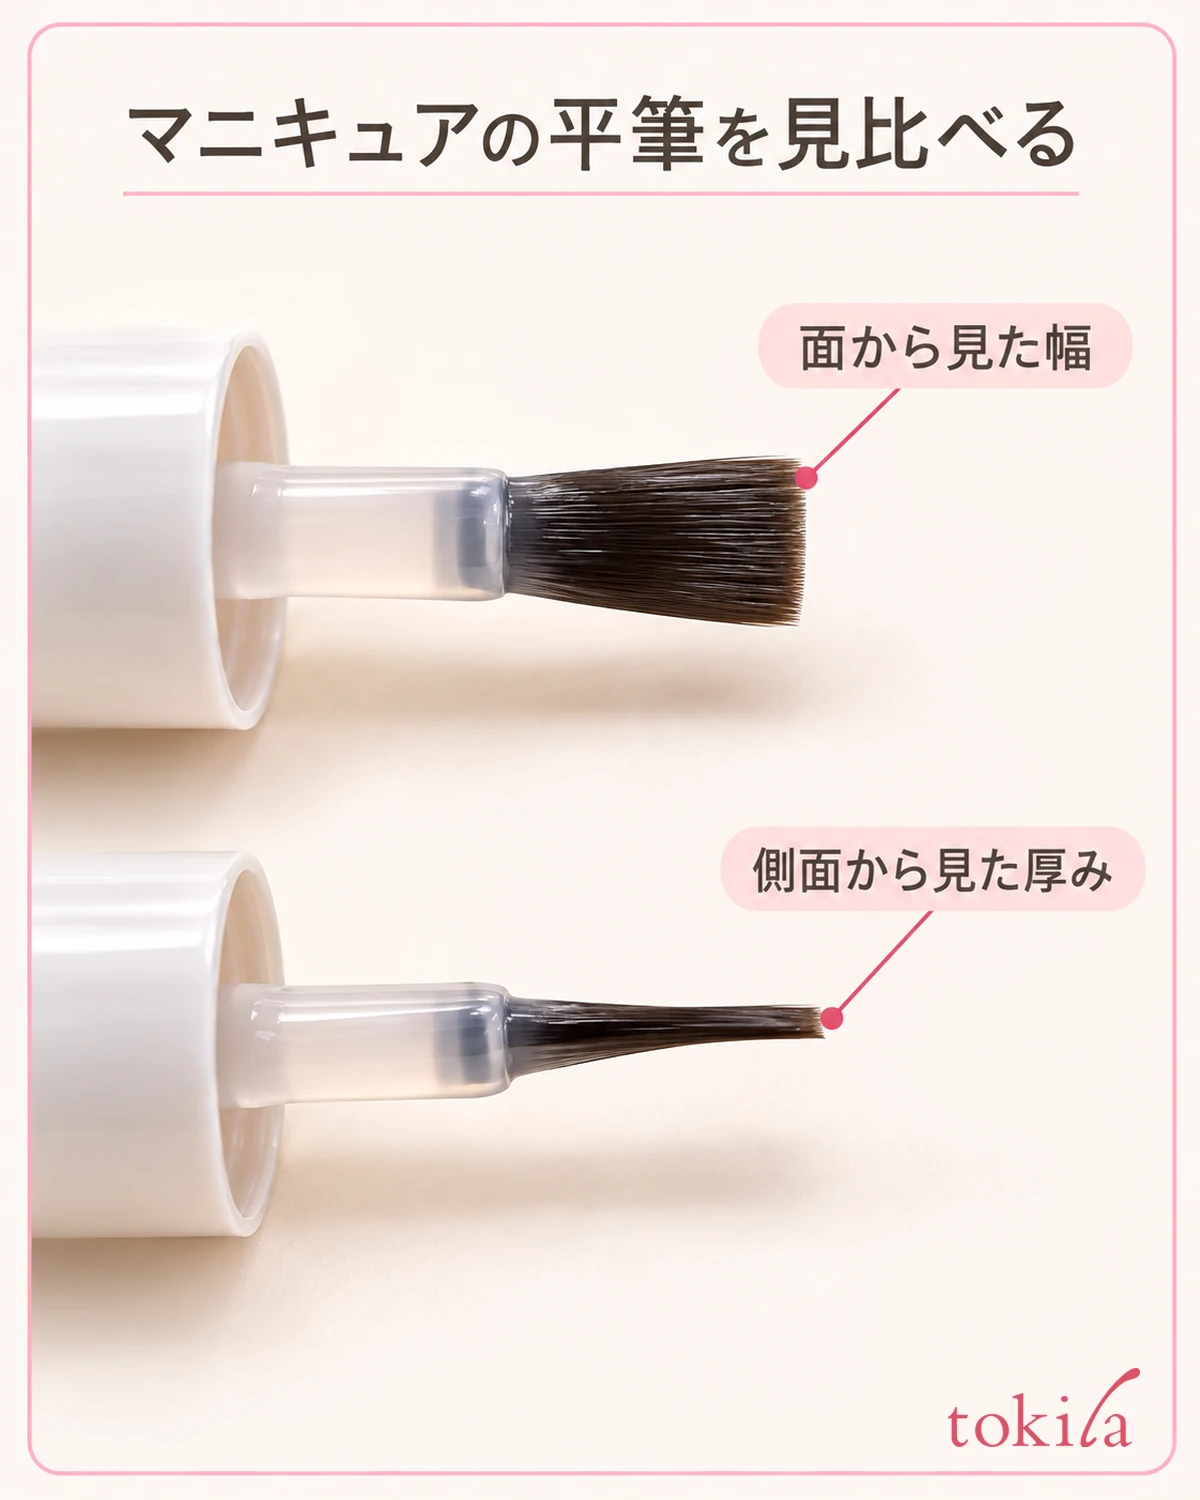
What you are looking at is whether it is a shape that was wide from the start, whether only one strand sticks out, and whether the bundle of bristles splits partway. A flat brush and a thin brush have different outlines. Do not treat the fine brush of another bottle as the right answer; compare against the shape of the one you own and its condition when you first started using it.
Separate the case where the brush fans open only when pressed against the nail and comes back together when lifted from the case where the bristles stay bent even after you lift it. The former gives a rough order of checking: begin by reviewing the force you paint with, and for the latter begin with the bristle tip and the container. We do not conclude the cause of deterioration from appearance alone.
Line up the viewing angle as well. A flat brush looks thin from the side and wide when its face is turned toward you, so do not judge that the bristles have spread just because you changed the direction. Compare the outline of the tip and the cohesion at the base while looking at the same brush face from the front. If you take photos, holding the cap in the same orientation makes the difference easier to see.
When polish has pooled in a round drop at the bristle tip, the outline of the bundle can be hard to see. Even so, you do not need to press the brush onto dry paper again and again to check. Adjust the amount of polish by following the product's directions, and do not leave the brush out for a long time to dry its tip.
If bristles keep falling out, the handle wobbles, or the cap or bottle has a crack, stop using it before you continue practicing how to apply. Do not add force thinking "a little more pressure and it will paint"; check whether it is in a state you can fix at hand.
2. Adjust the amount of polish and reduce the force that spreads the bristle tip too far
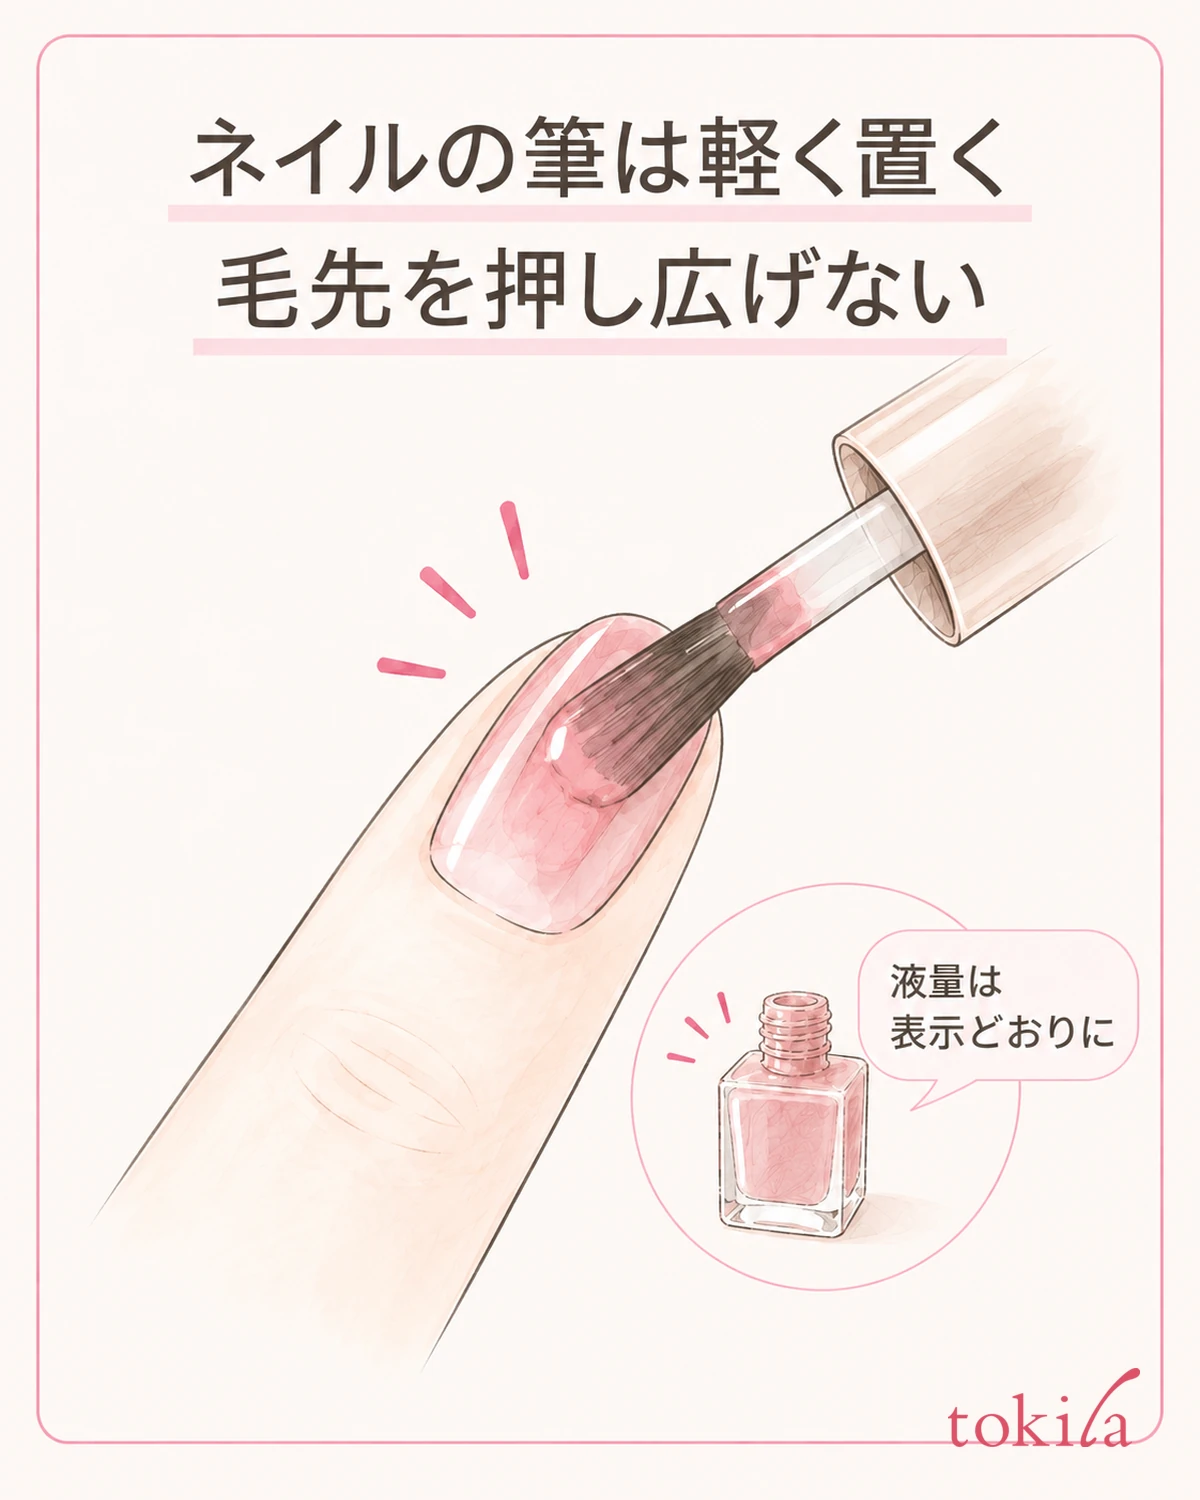
If the brush's shape has no major disorder and it spreads when set on the nail, next review the amount of polish and the force one at a time. If the directions say to adjust the amount at the mouth of the container, follow that method to adjust any excess polish. Whether to wipe one side or both, and how many times, cannot be fixed the same way for every product.
Avoid pressing the brush hard against the rim of the bottle and rubbing until the bristles curl back sharply. Adjusting the amount of polish and reshaping the brush into a thinner form are separate operations. Do not twist the bristle tip or turn the cap to forcibly gather the bundle; first, handle it with less force than usual.
Steady the hand you paint with and the hand that holds the brush, and gently set the brush on the visible center of the nail. Rather than trying to press the whole face of the brush wide, move it while watching the area the color goes onto. Even when the brush is wider than the nail, do not make it your goal to press it flat all the way to the edge.
The smaller the nail, the more the relationship between the brush width and the area you can paint matters as well. Do not press the thumb and the little finger in the same way; move it while watching the width the bristle tip touches. If color seems likely to wrap around to the side, lift the brush once and arrange the direction of your finger. The point to check is not to push the brush into places you cannot see and try to paint the sides of the nail all at once.
If there is so much polish that color drips even when you ease off, go back to the amount first. Conversely, if pressing hard because it goes on patchy only increases the spreading, check the polish left on the brush and the product's way of applying it. Do not change the amount of polish and the brush pressure greatly at the same time, so that you know which one you adjusted.
It is also important not to go back and forth many times over an area that is already half dry, just to check. When streaks and wrinkles increase on the surface, stop building up more color as it is. Keep to the drying conditions and choose the next step after you see the finish. If the way you rest your hand feels unsteady, also check how to support your hand when painting the nails of your dominant hand.
3. Check the buildup at the bottle mouth and how the cap closes
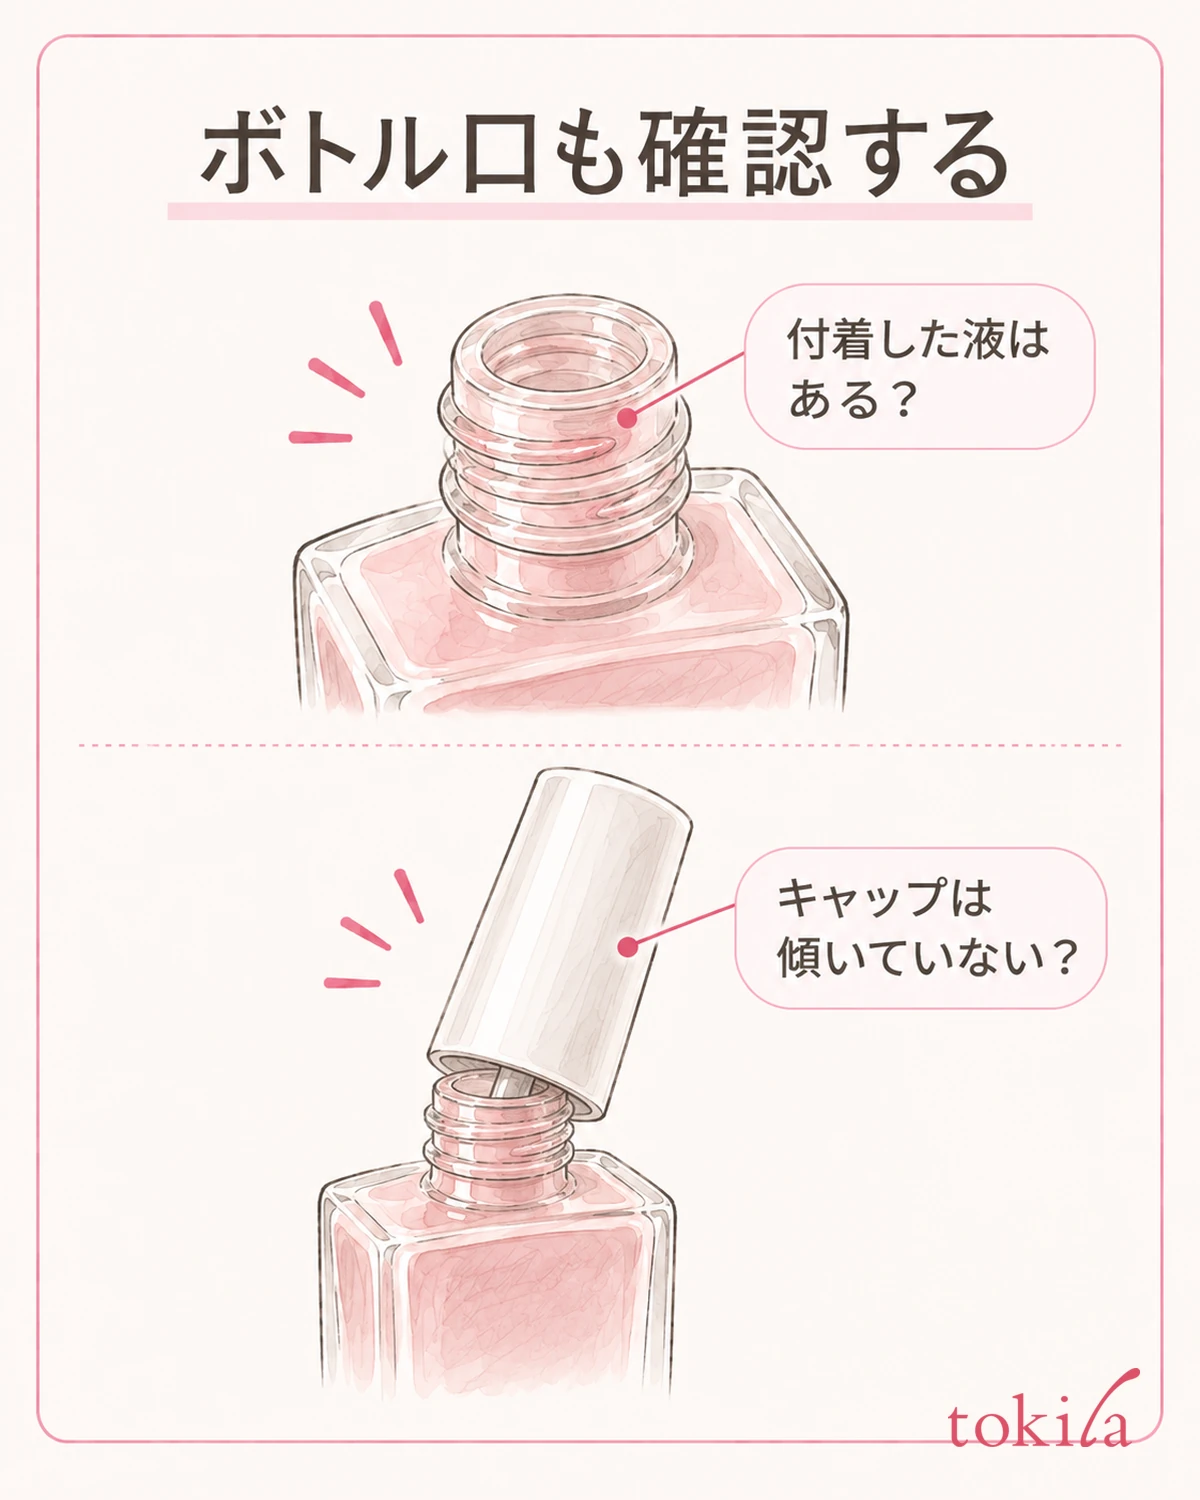
If the brush catches when you put it in and take it out, or the cap is harder to close than usual, look at the mouth of the container and the threaded part. Before forcing it to turn, check whether polish that clung there has hardened and whether bristles are caught outside the mouth.
With some products, nail polish stuck to the bottle mouth affects the connection between the brush and the cap. However, a part that has come off cannot always be put back the same way. If the brush has come out of the cap or the handle moves, do not push it in by force; check how to handle it for the container you own.
When you clean the mouth, use the tools and method specified for that product. Even if the directions say to wipe with a cotton pad moistened with the matching remover, treat that as a step for removing buildup on the outside of the container, and keep it separate from pouring liquid into the bottle. If you cannot confirm the directions, do not try one solvent after another from what you have on hand; hold off.
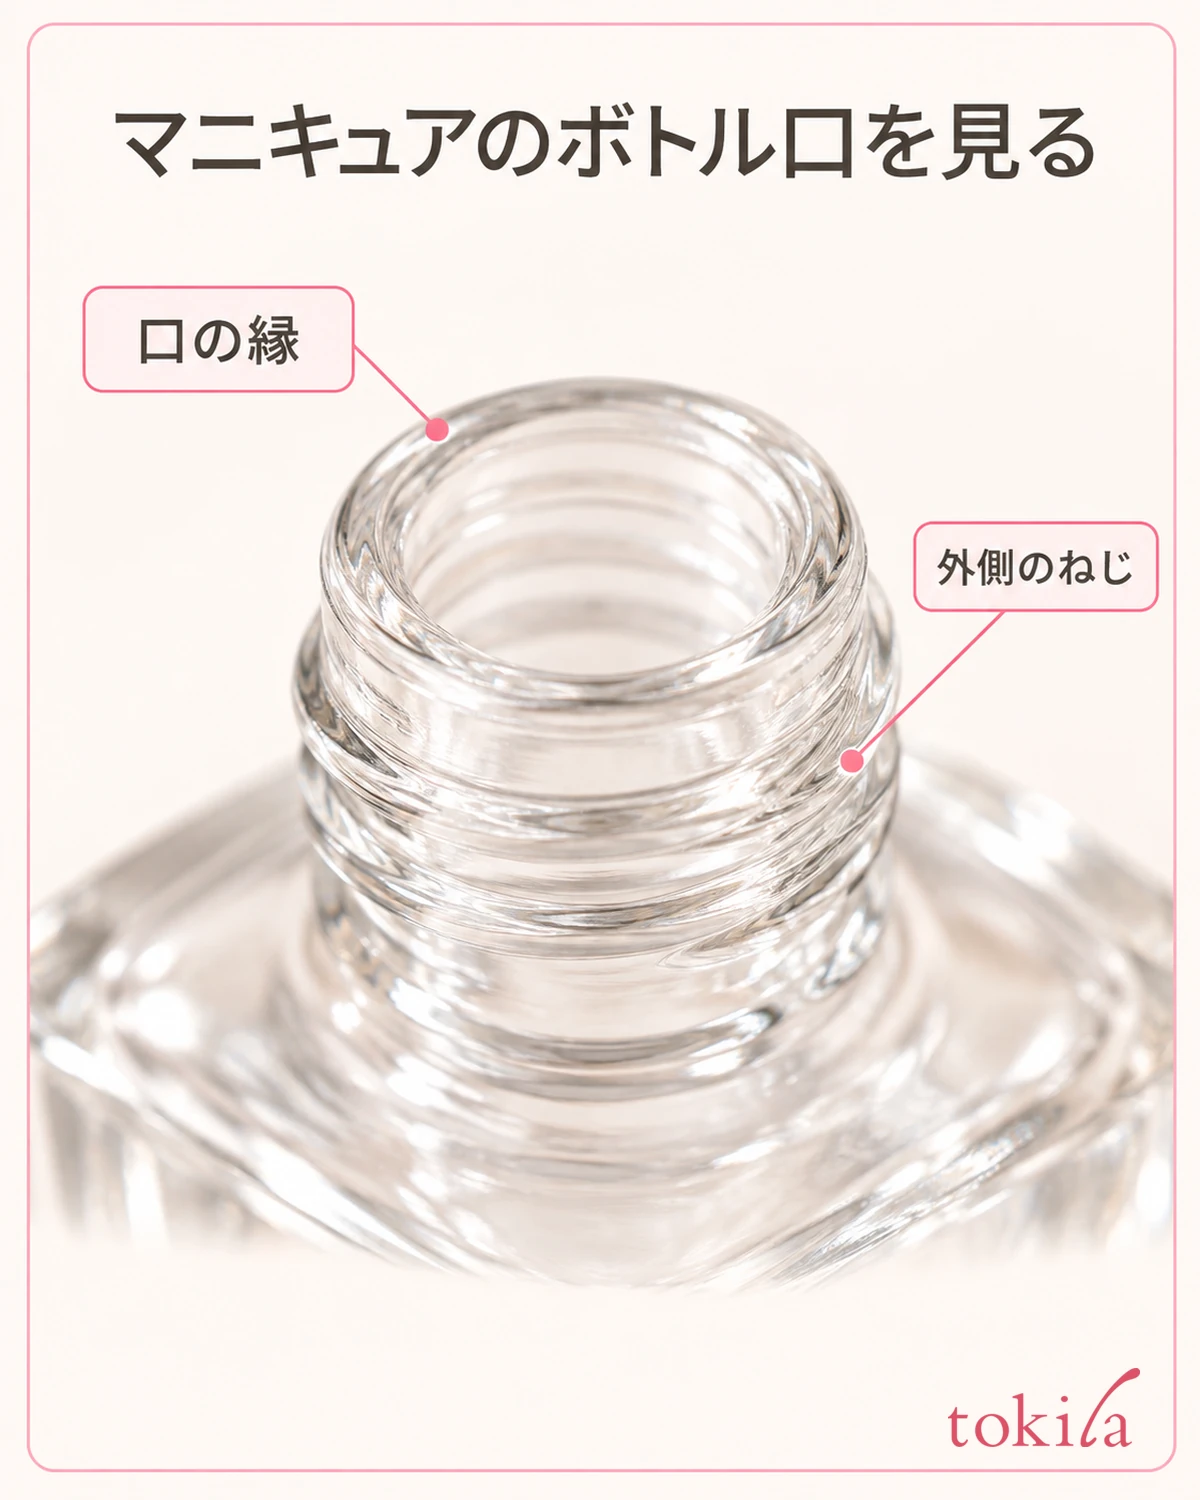
Being able to clean it and being able to take the container apart are separate things. Even if you find buildup at the mouth, you do not necessarily need to remove the inside of the cap or the part that holds the brush. Do not pry open a part that normally does not come off or add adhesive; treat visible buildup and an abnormality of a part separately.
Set the bottle on a stable surface and handle it while watching the area you are cleaning. We do not recommend scraping off hardened clumps with a blade, dropping them into the inside of the mouth, or scooping them out with another brush. If it looks likely to spill or a part looks likely to break, stop right there.
If the way it closes does not change even after cleaning, do not assume that tightening it harder will fix it. Check whether the cap is tilted or chipped, or whether the brush is pinched. For a container that leaks or is damaged, do not put it back in your pouch as is; stop using it and check how to handle it.
4. Before cutting or washing the bristle tip, check the conditions for replacing it
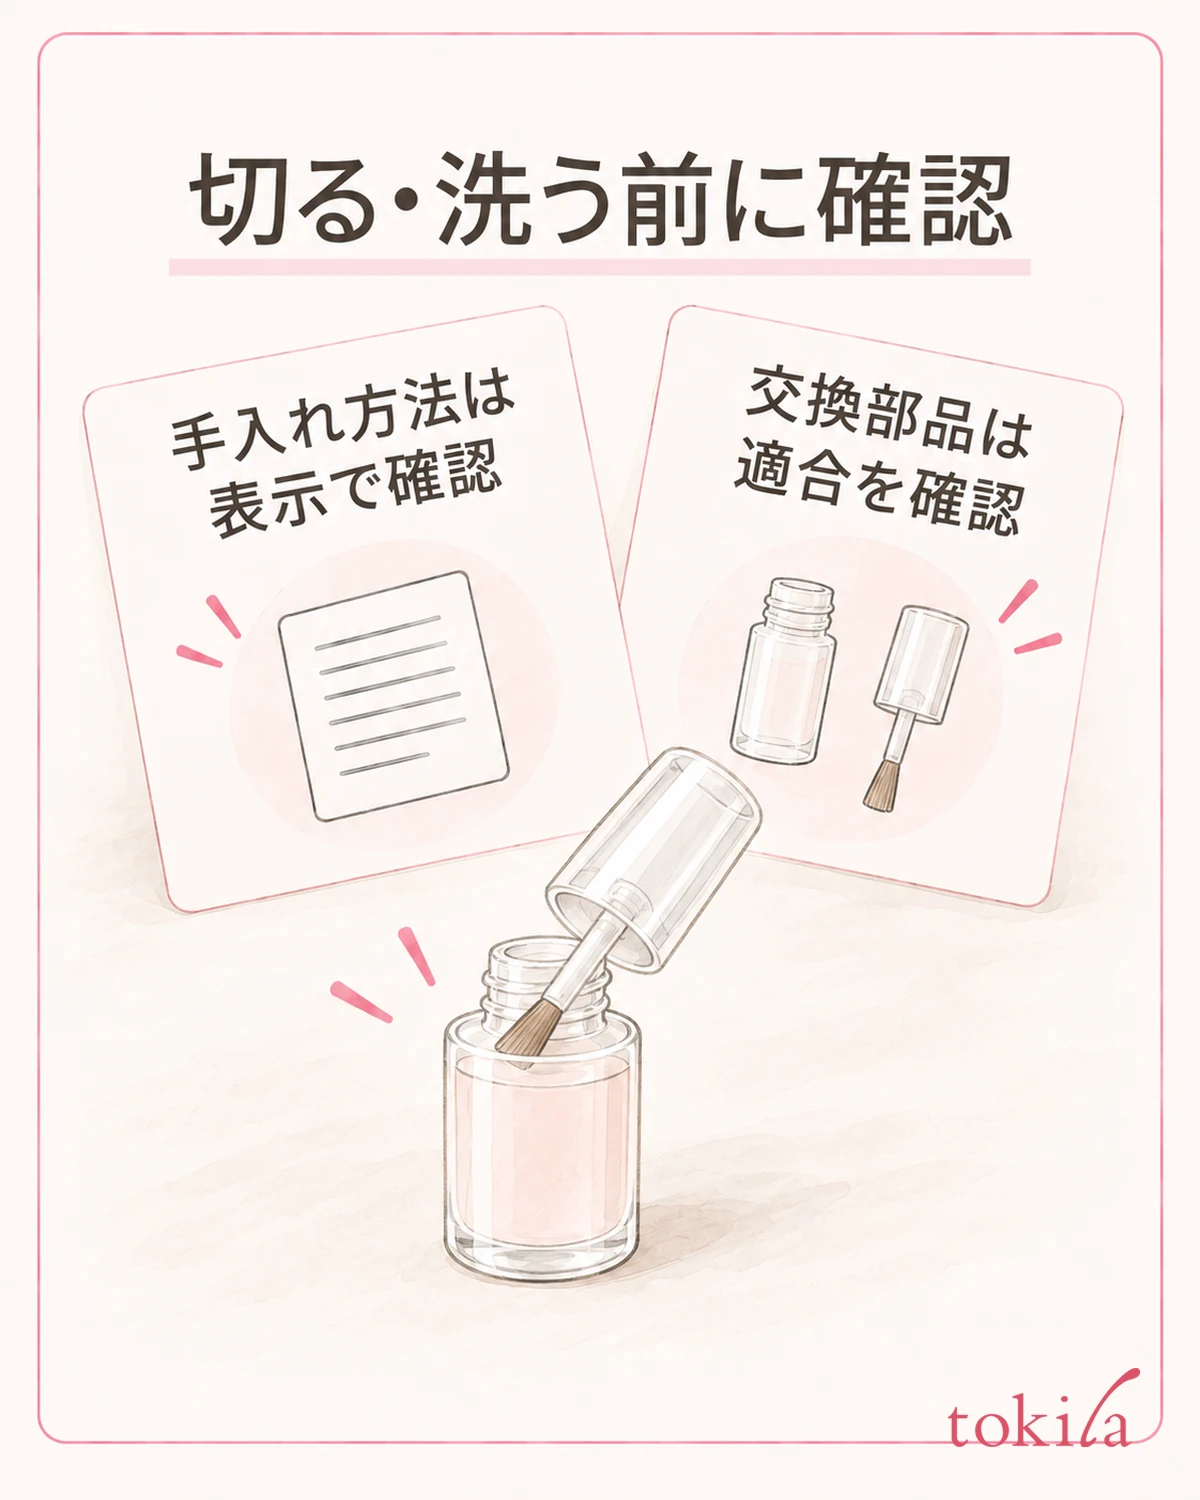
When a single bristle sticks out, it may look as though cutting it with scissors would fix it. However, we cannot recommend trimming the bristle tip yourself for every included brush. Before changing the shape, find out whether it is a product whose brush can be replaced, and whether you can confirm that a part is compatible.
Some containers come with a replacement brush, but a brush that looks similar in thickness does not always fit. Check the combination with that container, such as the connection to the cap, the length of the handle, and a shape that fits in the bottle. Do not choose to borrow the brush from another product and put it back in the original bottle to reuse.
Distinguish a remover used to take color off your nails from one that can be used to care for the included brush or the container. Do not assume that the whole brush may be dipped in it just because it can be used on nails. Do not try washing with water, washing with alcohol, or restoring the shape with heat unless the labeling allows it.
If the polish is thick and the brush does not hold together well, thinning it will not necessarily fix bent bristles. Use a thinner only when you can confirm the matching product and the specified amount, and do not substitute by adding remover or water to the contents. Look at the condition of the polish and the shape of the brush as separate problems.
Even when you consider replacing it, simply choosing a finer brush will not necessarily solve it. You need to choose a shape that matches your own nail width and the finish you want. If you first sort out whether this time's trouble was the width of the brush or the disorder of the bristle tip before choosing, you are less likely to carry the same trouble over to another tool.
If you cannot confirm the care or compatible parts, it still catches after replacement, or bristles keep falling out, choose not to keep painting with that brush. When you are unsure whether you can keep using it, do not force a repair; keeping photos that show its condition and the product labeling at hand will help you sort out later what to check.
5. Settle the return motion and storage, and check just one thing next time
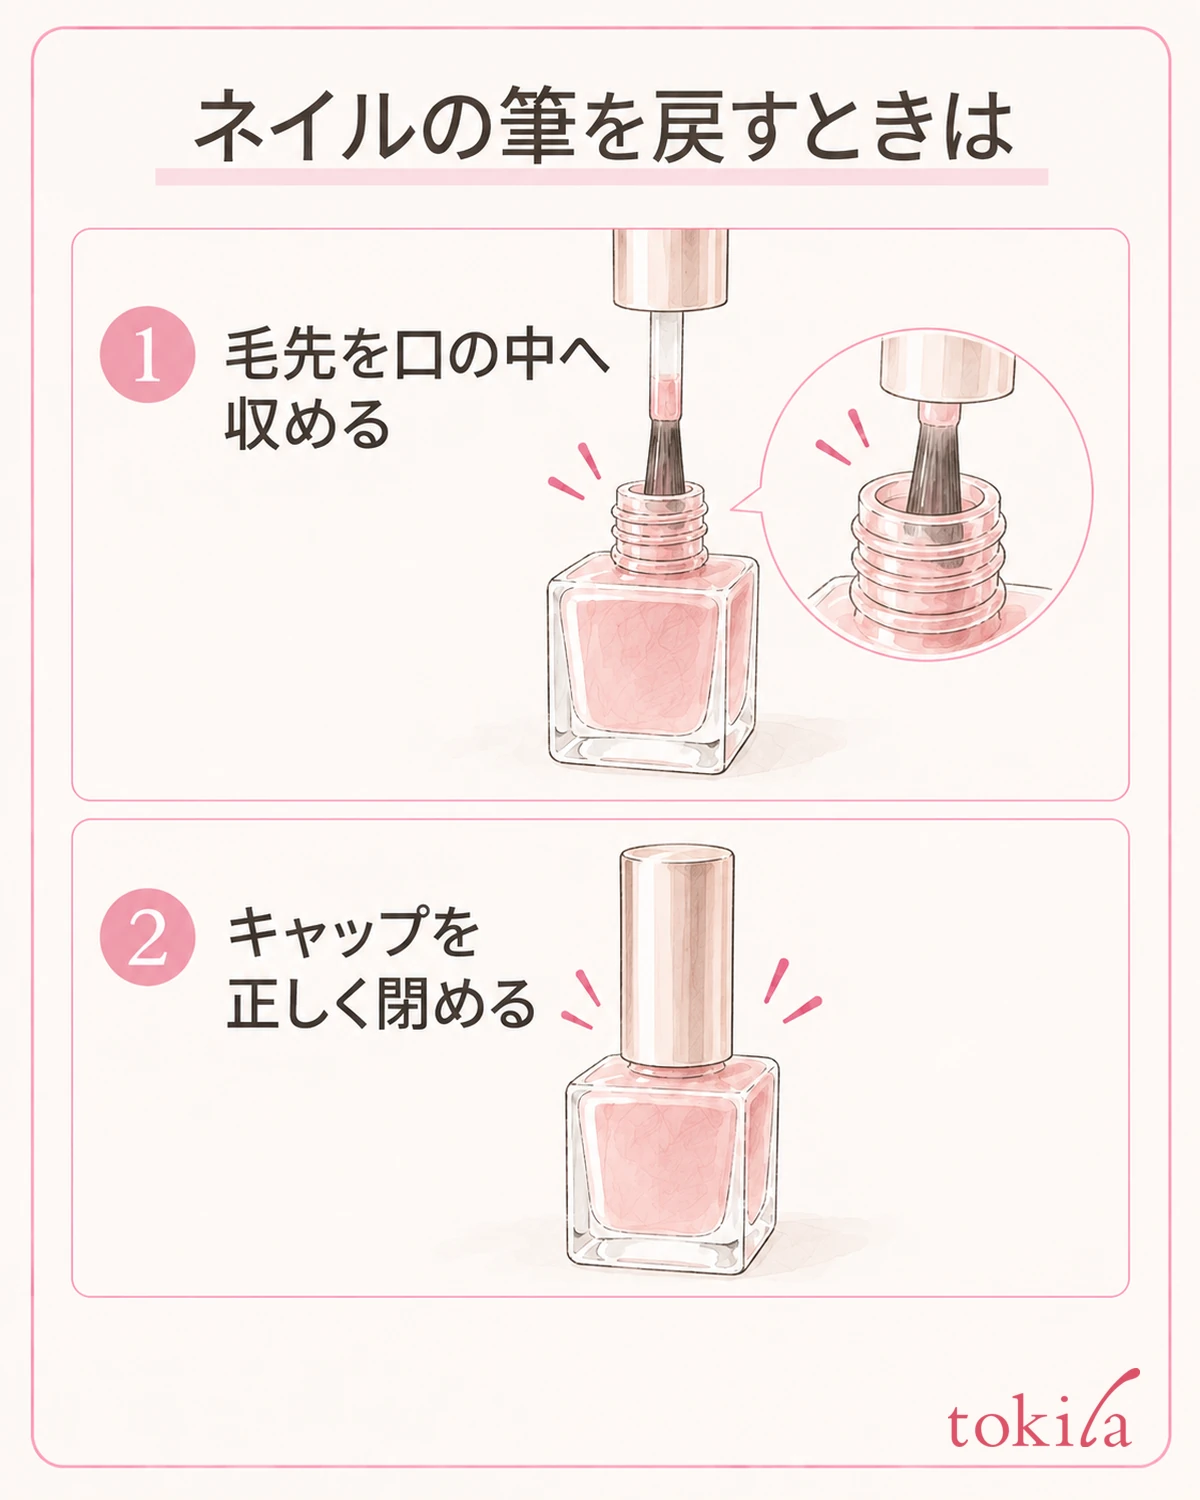
When you finish, do not push the brush hard into the mouth of the bottle; watch the bristle tip fit inside the mouth as you return it. Do not turn the cap while it is caught on the mouth; arrange the direction first. Tilting the bottle to put the brush in makes it easy to spill, so handle it with the bottle set down steadily.
Follow the product labeling for dealing with buildup at the mouth and for closing the cap. Even if it looks closed, check that it is not seated at an angle and that no bristles are pinched. Do not make tightening it hard the goal itself; return it to a state where it closes properly.
Match the storage place to the directions for the product you own as well. Do not decide on your own to switch to methods such as warming the bottle to fix the brush, putting it in direct sunlight, or putting it in the refrigerator. Avoid places where you worry about it falling or leaking and places within a child's reach, and store the container so that it is stable.
When you carry it with you, check before storing it that the cap is closed properly. Arrange it so the container is not made unstable by being pressed against other tools, and if you find a leak, separate it from the tools around it. Do not blame storage alone for why the brush bent; check both the next time you paint and the way you put it in and take it out.
Next time you use it, look at the one that bothered you last time out of "the bristle tip lifted from the nail," "how it spreads when set down lightly," and "catching when returning it to the bottle." Instead of changing everything at once, for example focus only on easing off the force and adjust the amount of polish as labeled, and the points you check are less likely to get mixed up.
Even once the brush's spreading settles down, you do not need to trace the part where color has gone past the edge of the nail again and again with that brush. When you take the color off and repaint, go to how to place and change the cotton pad when removing nail polish. Review the brush's shape, the amount of polish, and the handling of the container separately, and start again from a state where it paints without strain.



