
You try to close your bag before heading out, and the zipper stops partway. Before you yank the pull tab, work out whether the contents are straining the opening, the lining has been caught, or the hardware itself is damaged. If the cause differs, pulling the same way again will not fix it.
This article covers the openings of everyday bags: the order in which to stop and observe, and how to check the range in which the zipper moves without force. Bags with locks, special fasteners or waterproof construction should be handled according to the instructions for your own item. Repairs that involve bending metal parts with tools are not covered.
1. Stop pulling and look at the contents, the lining and the hardware
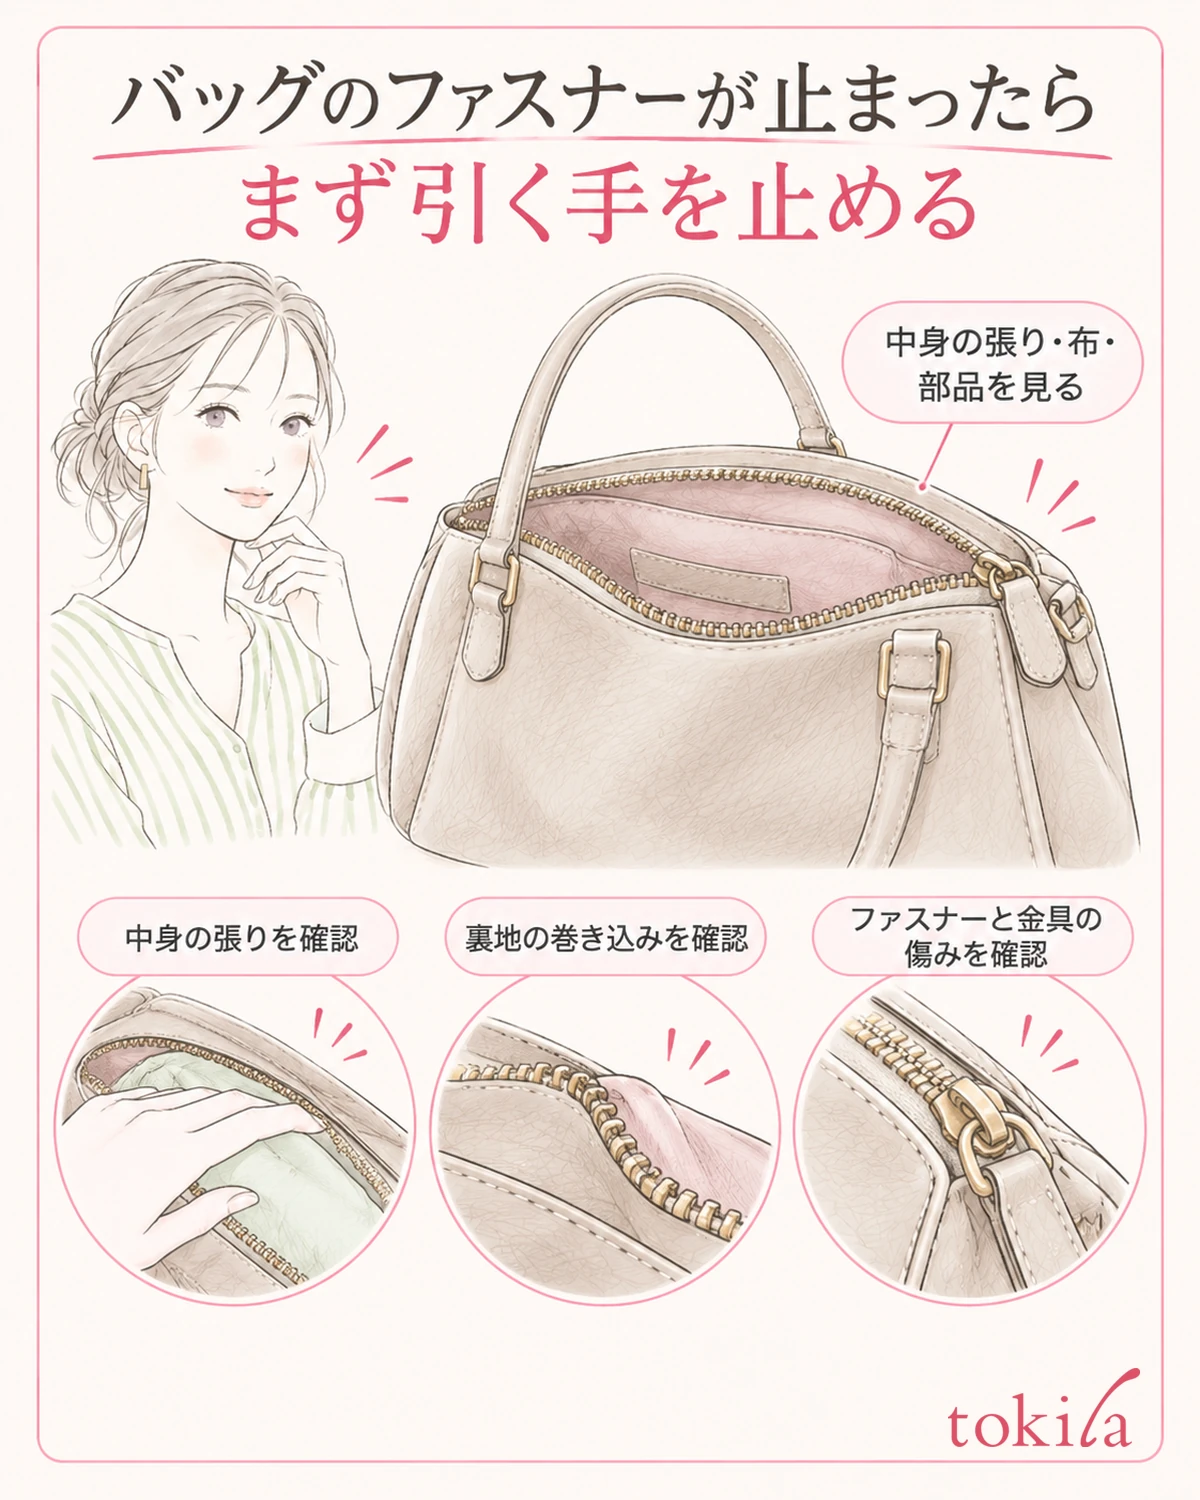
Take the bag off your shoulder and set it on a bright, stable surface. Support the body with one hand and take your fingers off the pull tab for now. Remember whether the zipper stopped while closing or while opening, so you are less likely to move it back in the wrong direction later.
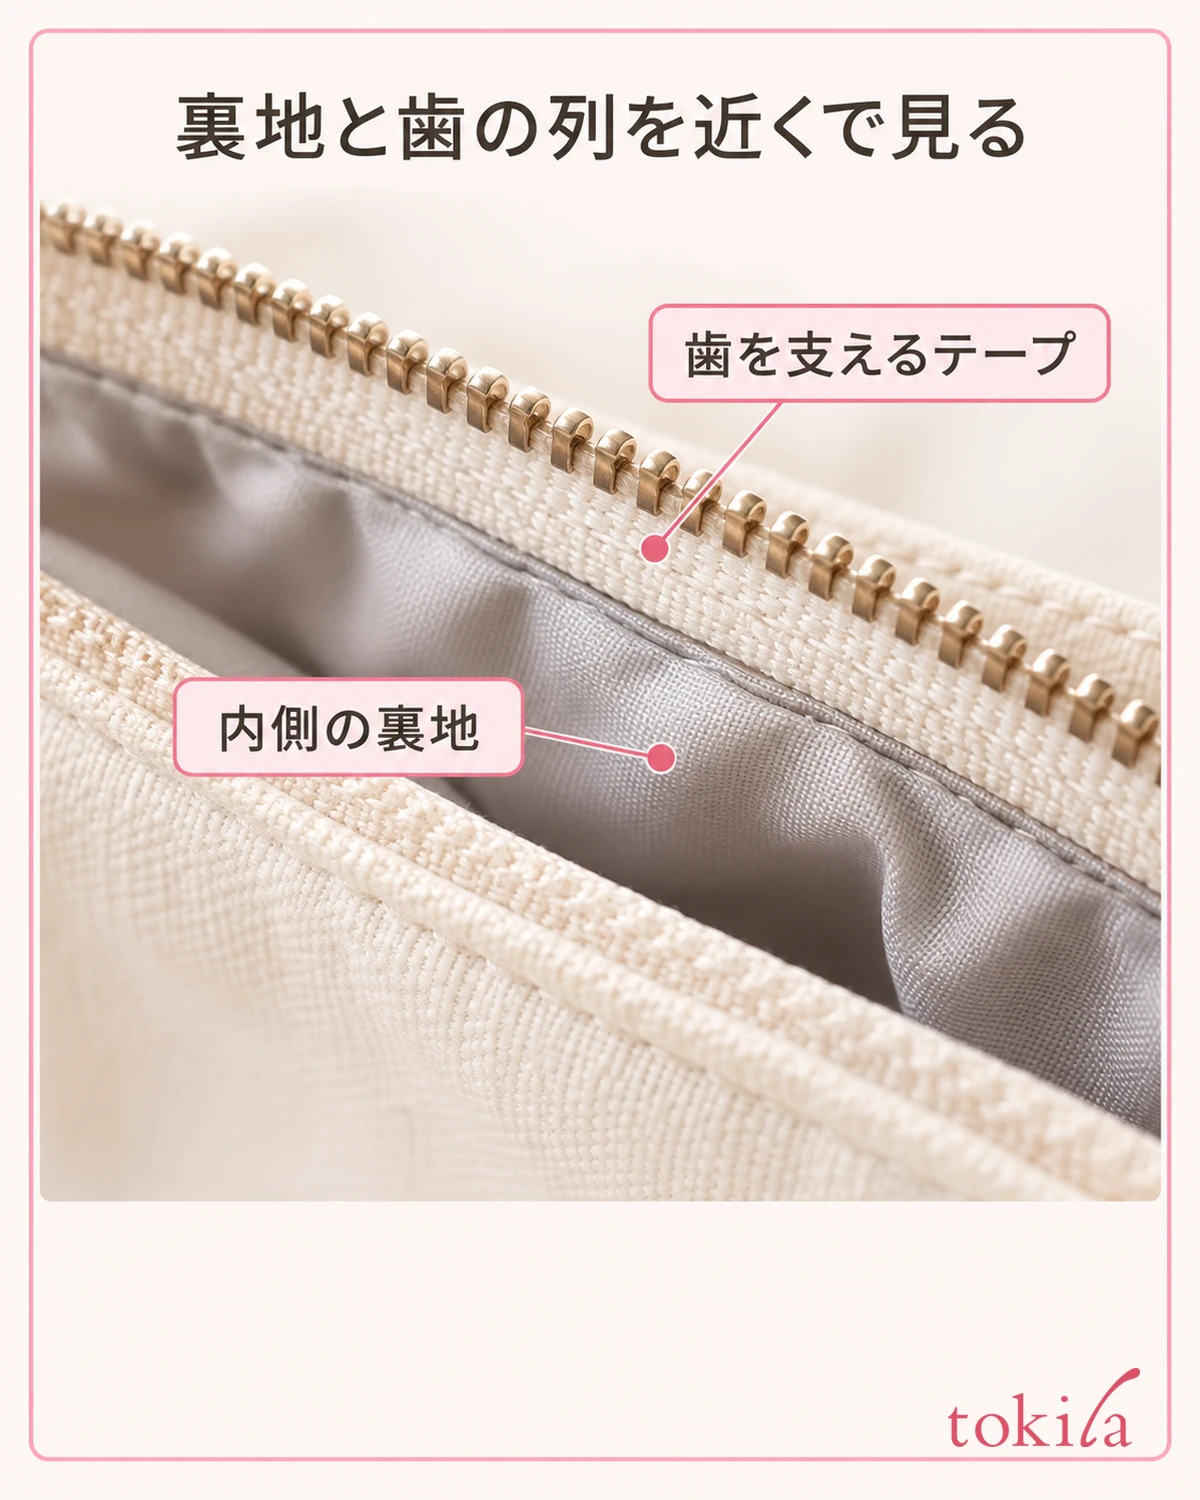
The pull tab is the part you hold with your fingers; the slider, at its base, is the part that joins and separates the teeth on the left and right. First look at the front and back of the slider and check whether lining or thread has slipped in between the rows of teeth. If you look only at the decoration on the pull tab, it is easy to miss something caught at the base.
Next, look at the opening of the bag. Are the contents bulging so that the two rows of teeth are far apart? Also look separately for a pouch corner pushing on the opening, a handle slipping inward, or a thin strap crossing the path of the zipper. Before you close it while pushing things in, check where each item is touching.
If you can see chipped teeth, a torn fabric tape, frayed stitching or a tilted slider, do not keep testing the zipper in daily use. Treat teeth that open up behind the slider after it has closed as something separate from simply having too much inside. Do not decide what needs repair from appearance alone; note where the zipper stopped.
It matters more to create a state in which you can see clearly than to feel around with your fingers. Open a dark lining slightly to check, but do not twist the stuck part or turn it inside out. If you can see sharp or broken items inside, do not try to take them out by feel.
Whether the zipper stops in the same place every time, or only on days when the bag is full, is also a clue. However, that difference alone does not tell you the hardware is fine. At this stage, it is enough to be able to check the strain on the opening, fabric caught in the zipper and visible damage separately.
2. If the opening is strained, reduce the contents and clear the zipper's path
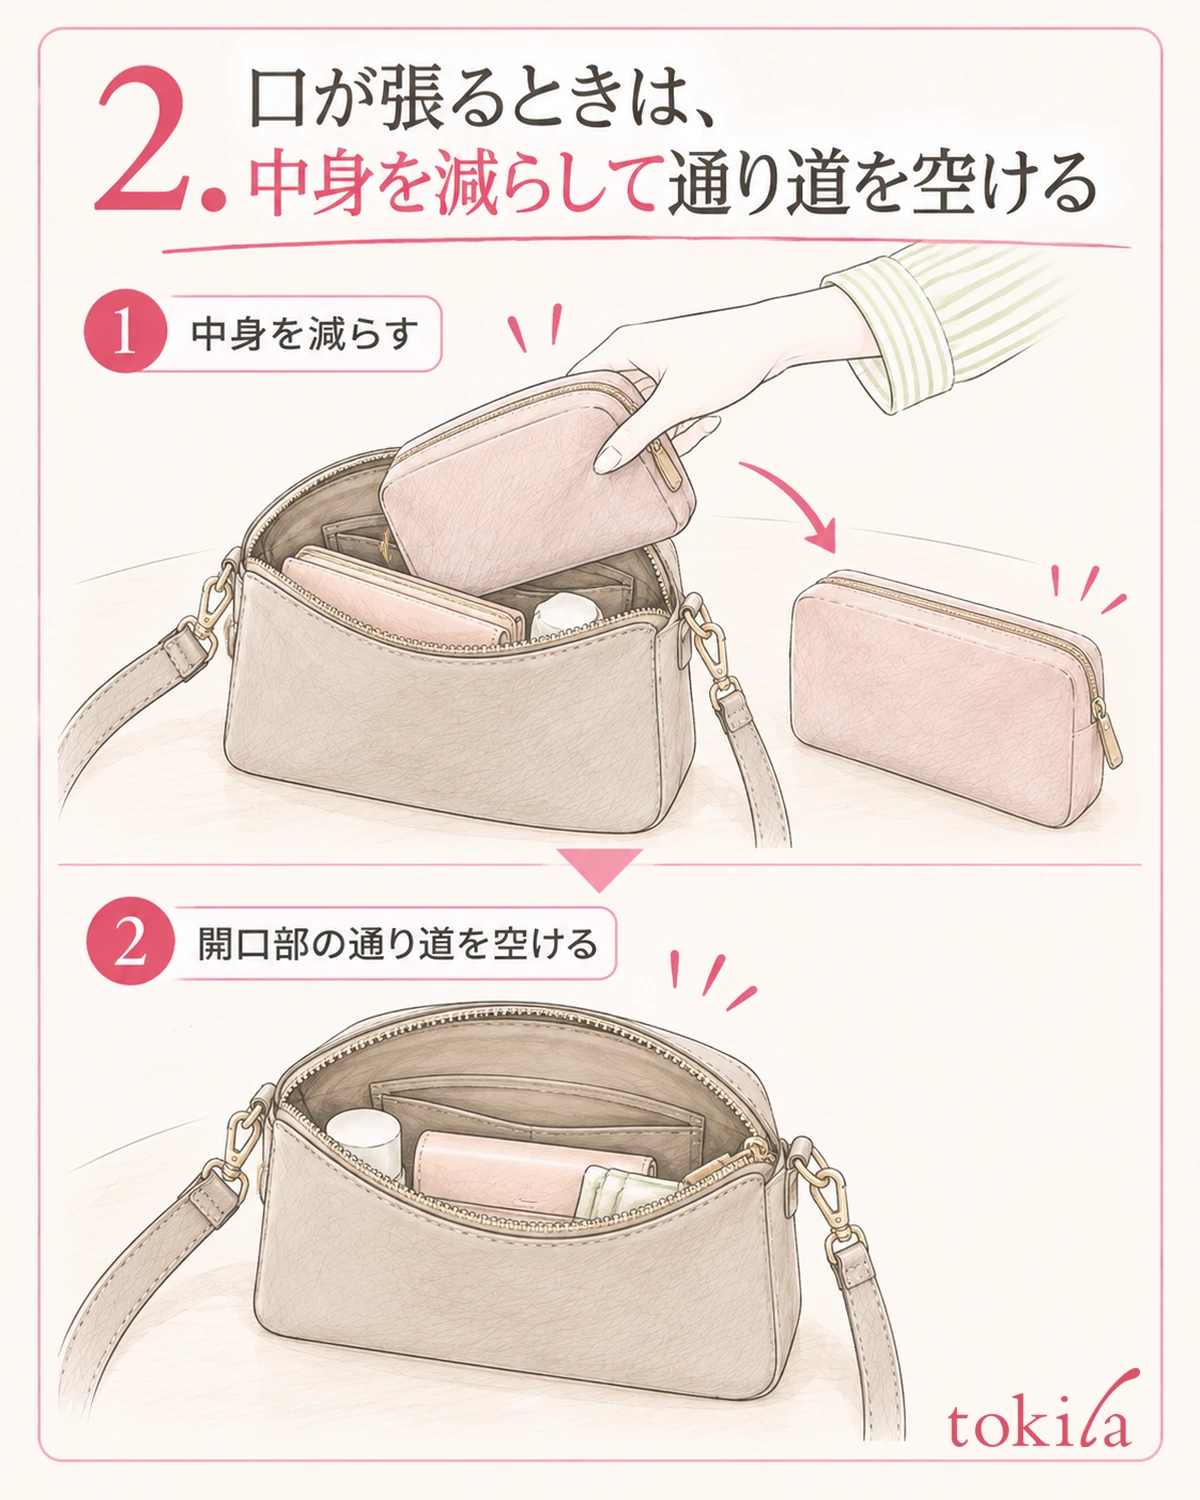
If the opening is being pulled apart to the left and right, first take out whatever items you can. Look not only at the one item on top, but also at hard cases pressing on the opening from the side and bottles standing upright inside. Do not use the force of moving the slider to press the contents down.
Once the bag is lighter, check whether the body returns to its natural shape. When bringing the two rows of teeth closer together, lightly support the fabric around the opening. Do not draw both sides together with the pull tab alone; create a position where the teeth can meet before you operate it. If you can only reach by squashing the bag hard, review the contents further.
If the corner of a pouch or a long wallet is near the zipper's path, repack it so that it sits lower than the opening. Keep thin cords and handles away from the line the slider travels along. Also check that nothing from an inner pocket is sticking up, and check one item at a time each time you repack.
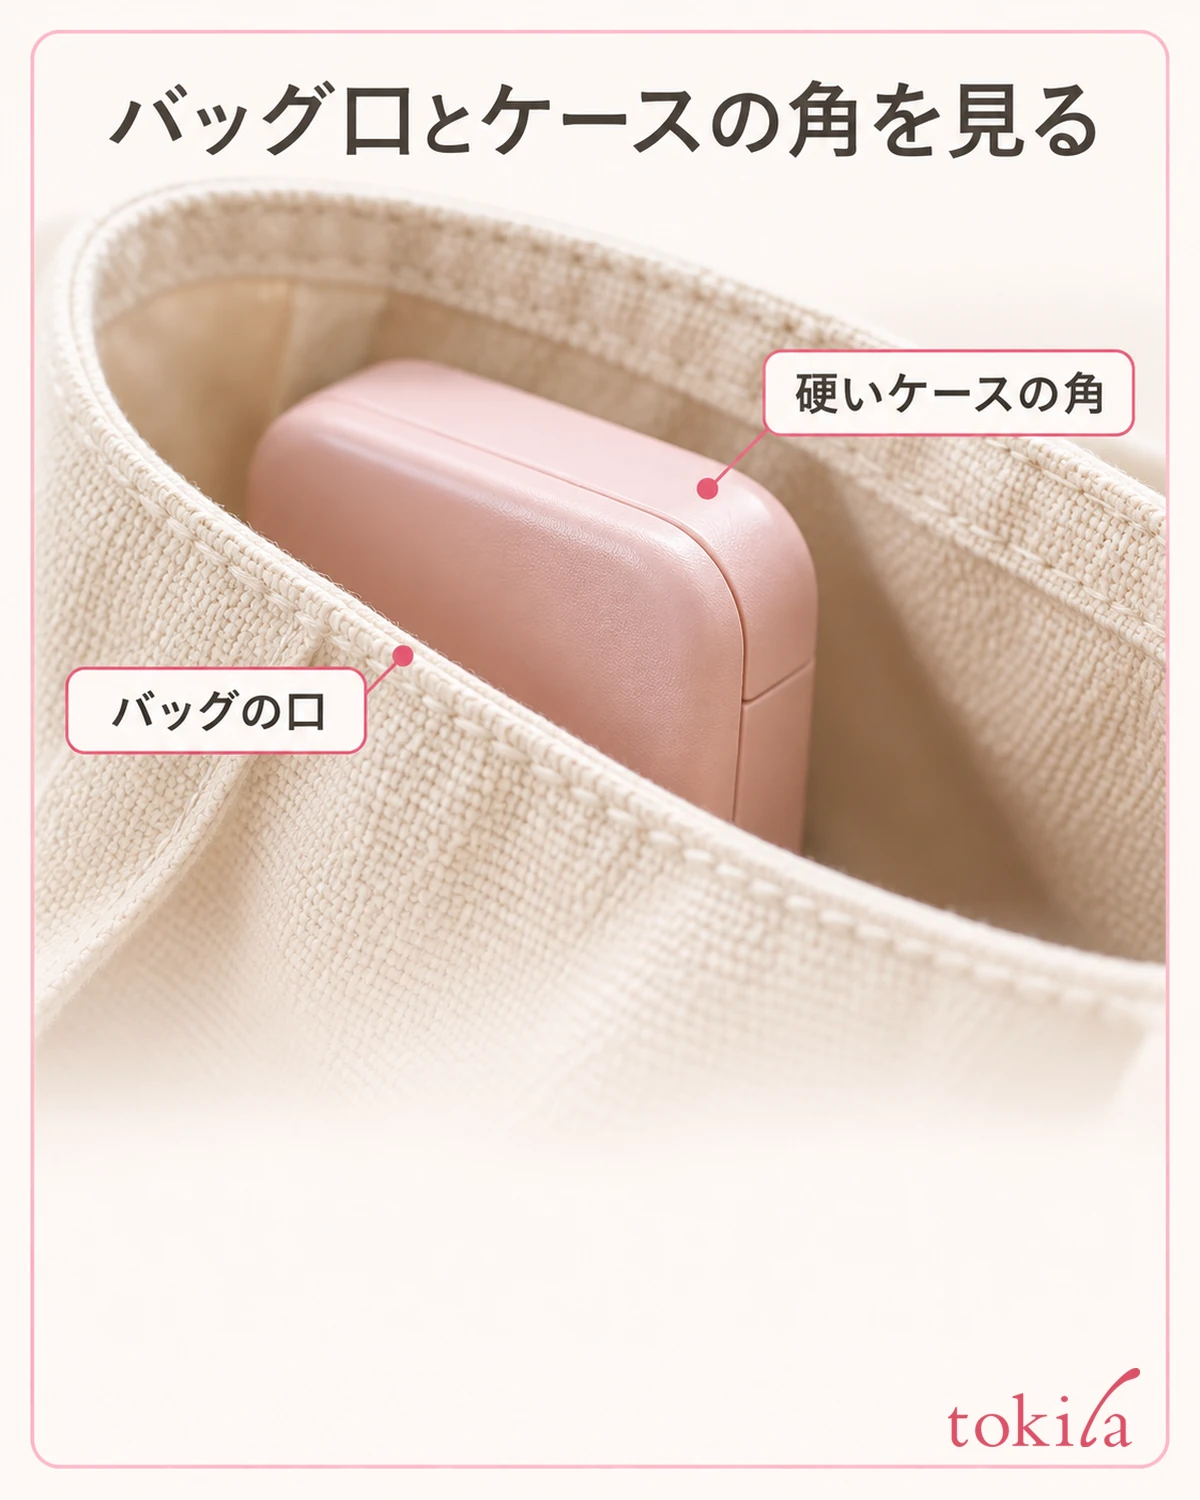
"One more thing fits" is not the same as "the zipper closes without force." Even if the contents seem to fit, a strained opening may mean the bag is overpacked. On days when you cannot reduce what you need to carry, you can decide to move things to another bag instead of pulling the opening hard to stretch its capacity.
While rearranging the contents, take care not to pull the lining up into the opening. If the zipper still stops in the same position after the bag is lighter, do not conclude that the contents were the only cause; go back to checking for caught fabric and damage. Before trying to work it in by moving it back and forth many times, look at where it stops.
If you carry cosmetics, check the container lids and how your tools are stored separately. Do the check for when powder spills in a makeup pouch after the bag opens and closes properly. There is no need to clean up powder and work on the zipper at the same time.
3. If fabric is caught, do not keep pulling in the direction it stopped
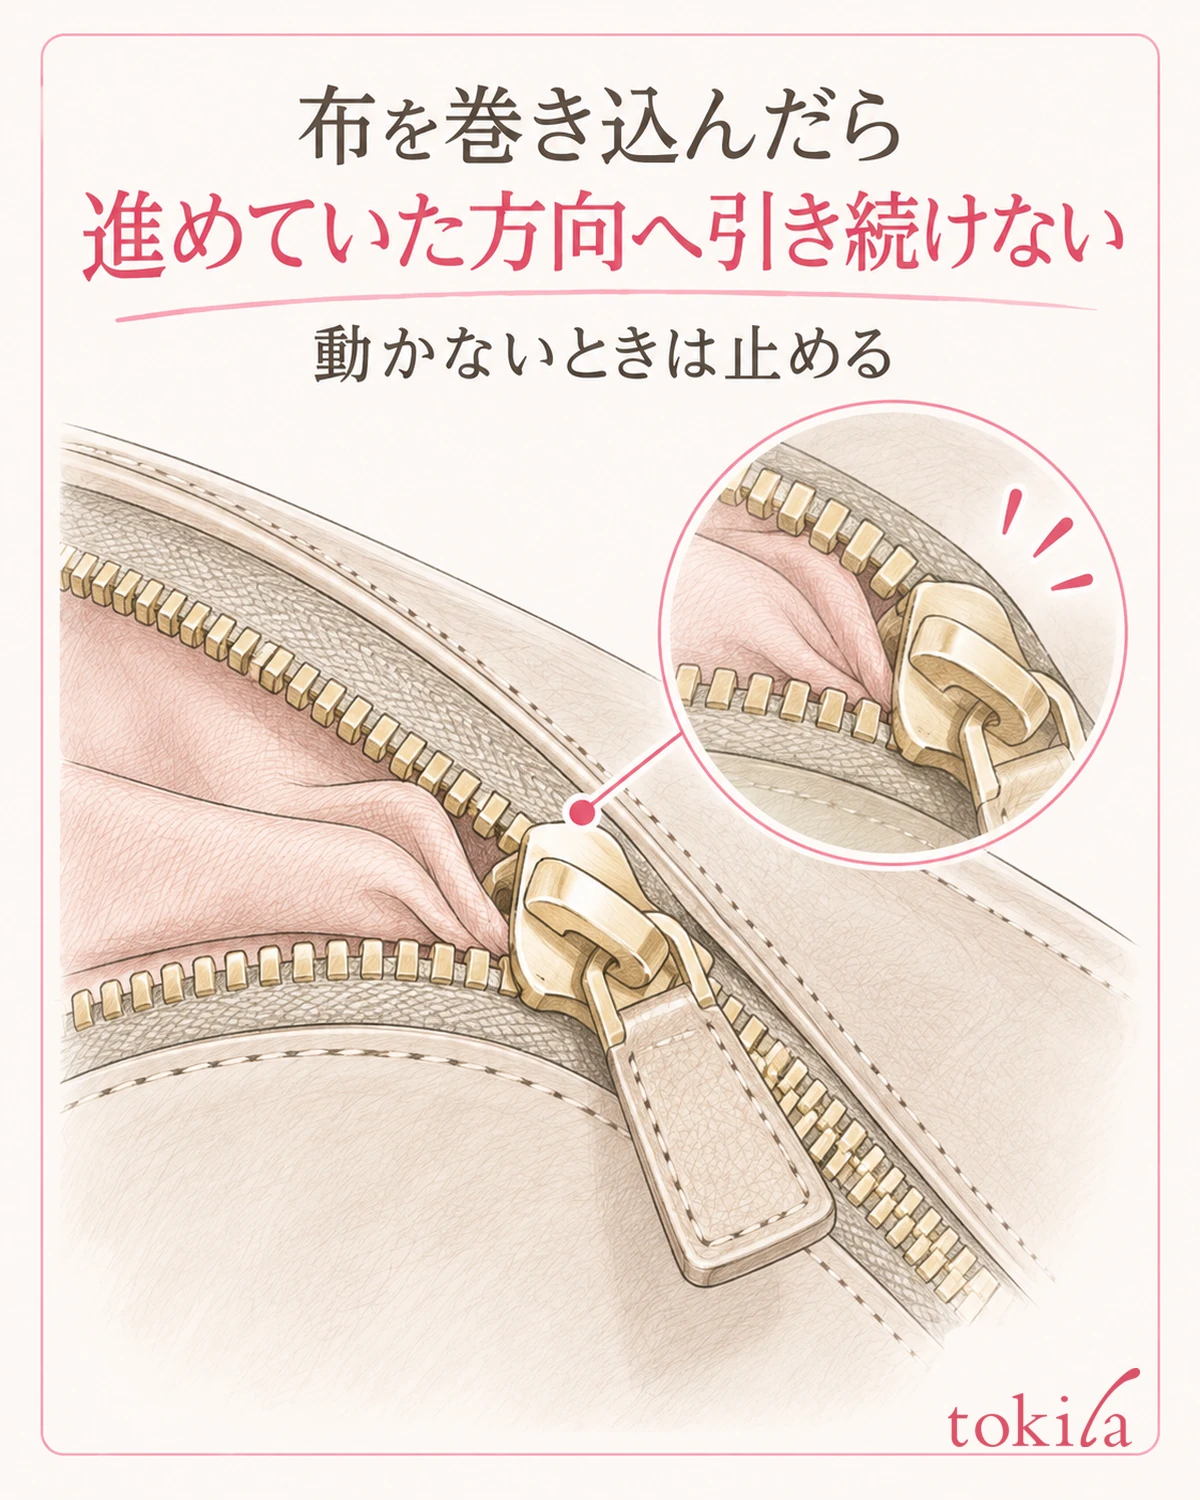
If lining or thread has slipped into the slider, do not keep pulling in the direction you were moving. First rest the weight of the bag on the surface and reduce the strain from the contents. Do not try to shake the pull tab from side to side to free fabric you cannot see.
If the catch is slight and you can see both the fabric and the hardware, lightly support the fabric near the slider with your fingers. If it stopped while closing, move it very slowly toward the opening direction; if it stopped while opening, move it toward the closing direction, and see whether the fabric comes free. Do not make any prying motion against the teeth or the hardware.
When moving it back, also avoid pulling so hard that you would tear the fabric. If the fabric has no room to escape and the slider will not move, stop there. Do not set a uniform rule such as a certain number of attempts or a certain distance; treat signs such as growing resistance, stretching fabric or pulled thread as your cue to stop.
When a thin thread is wrapped around the zipper, also avoid snipping the visible thread with scissors right away, because you cannot tell whether it is a sewing thread or a thread that is safe to unravel. Do not go on to pushing a needle, pin or screwdriver in to widen the gap, or to crushing the metal with pliers.
Once the fabric comes free, check that spot for holes, tears or fraying. Also check that no fabric remains in the row of teeth, and do not start opening and closing again with the same fabric still caught. Even a small flaw can cause it to snag again if you keep using the bag, so do not assume it is undamaged.
A fully jammed zipper, or a structure whose inside you cannot see, may be beyond what you can free yourself. If you cannot get out something you need, sort out the purchase information and the condition of the bag at hand before tearing the opening open. On a day when you are in a hurry, consider whether you can leave with other belongings, and pause the work.
4. If it still moves stiffly, do not add chemicals or tools first
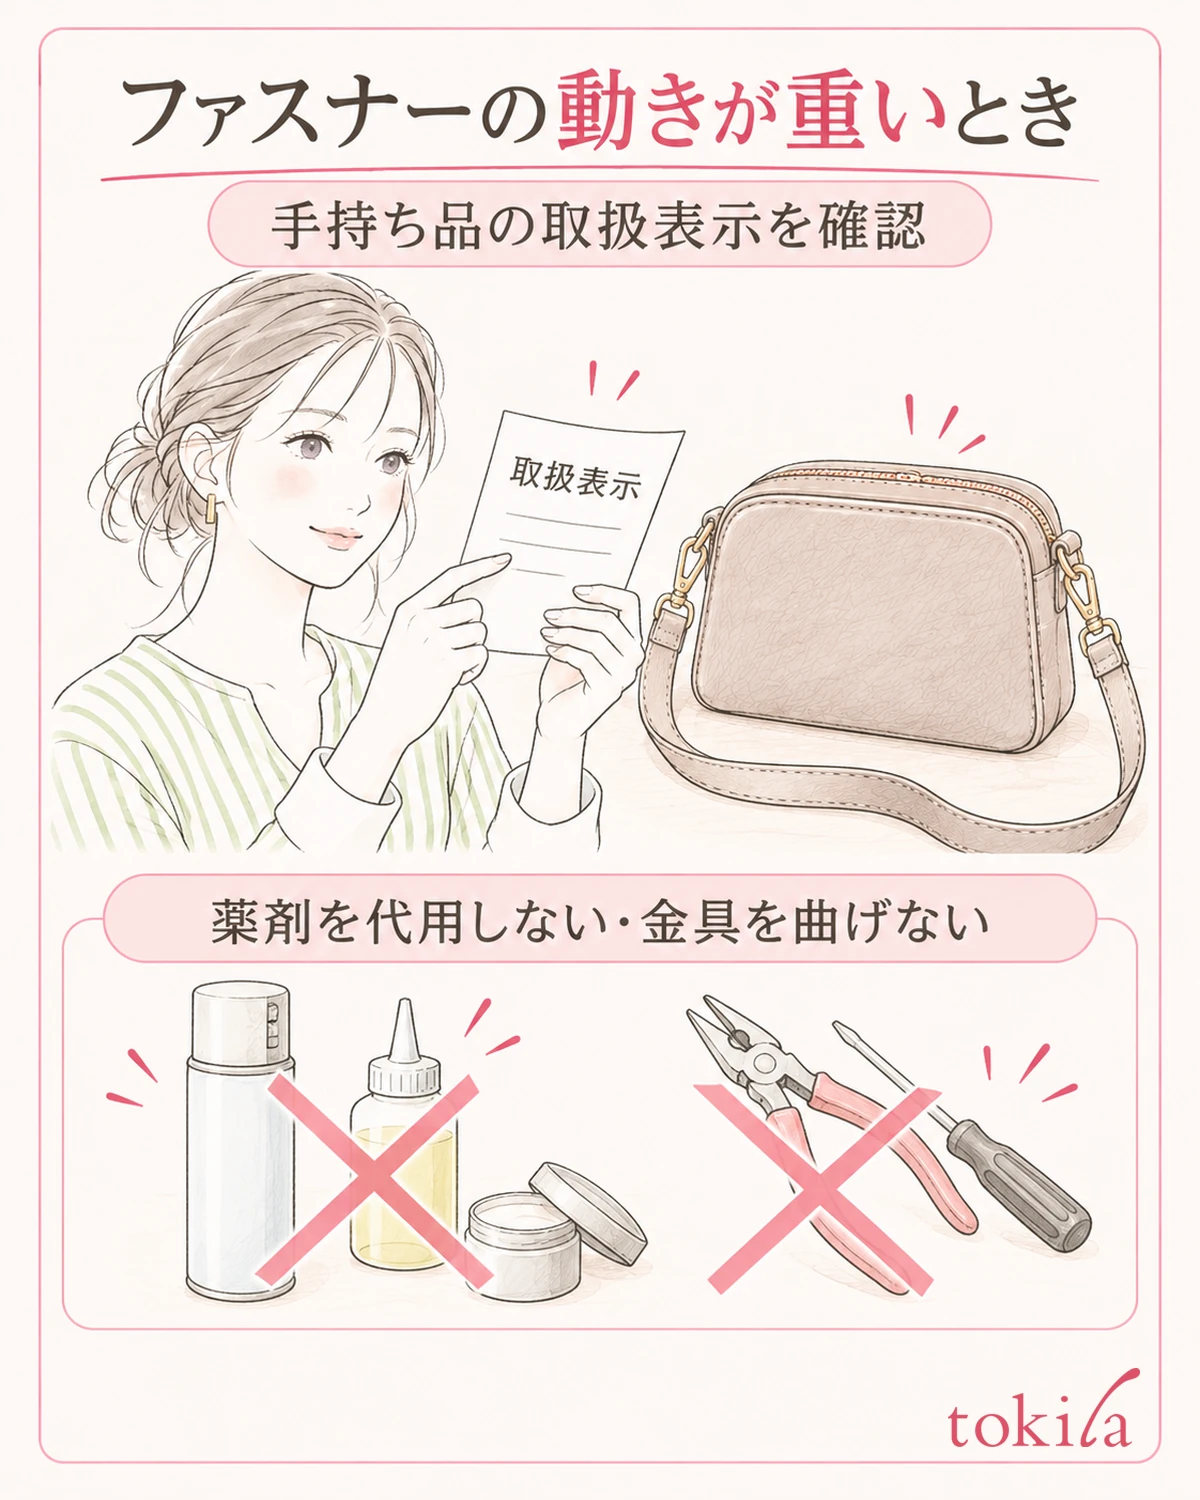
If you have reduced the contents and see no fabric caught but the zipper still moves stiffly, check the care label or the included instructions for your item before opening and closing it repeatedly. Even parts that look like metal are surrounded by leather, fabric, resin or other materials. Do not decide which care product you can use by looking at just one part.
Some items specify a care method for smoothing the movement, but that method cannot be applied to every bag. Do not apply whatever you have at hand as a substitute, such as cosmetic oil, hand cream or cooking oil. Also avoid adding anything when you do not know the amount or where to apply it.
Even when you can see powder or fine debris, check the care that suits the material before digging between the teeth with something pointed or rinsing it with water. Removing surface dirt is different from repairing wear or deformation inside. Do not judge that the part has been restored just because wiping has made it look tidy.
If a tooth is missing, the tape is torn, or the base of the pull tab is bent, do not improvise any modification to keep using it as it is. Attaching another ring to the pull tab and pulling hard does not solve the cause of the stiff movement either. This is the stage at which to have someone look at whether replacement or repair is needed.
To make it easier to explain when you ask for advice, take photos of the whole bag, of the position where the zipper stopped and of the area around the hardware. Briefly note since when it has happened, in which direction of opening or closing, and whether it still happens after reducing the contents. Organize this while the bag keeps its current form, not after taking it apart to fix it.
If you are concerned about the direction of the shoulder strap, handle it separately with how to rehang a twisted shoulder strap. If you adjust the opening and the strap at the same time, it becomes harder to tell where the force was applied.
5. Before using it again, check how it closes and where the lining sits
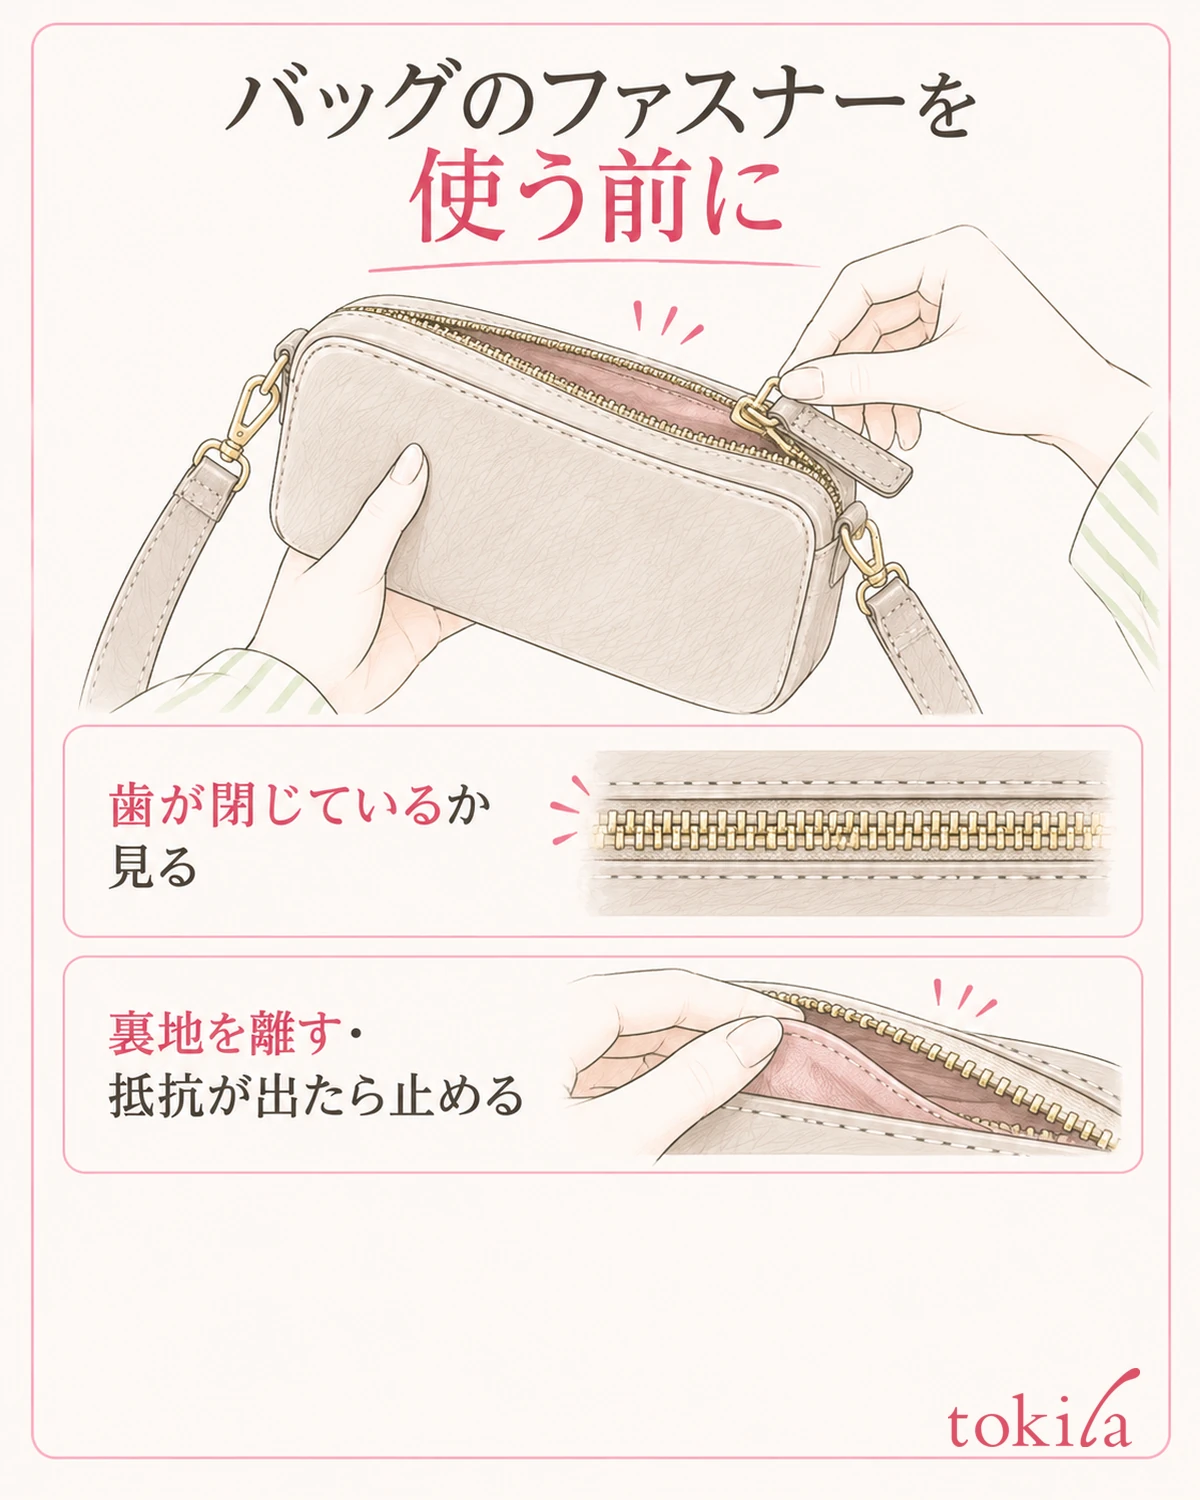
If you have repositioned the contents, a slight catch has come free and you see no damage, check the zipper slowly while leaving the bag on the surface. Support the body, hold the pull tab and move it in the direction that follows the row of teeth. Do not twist the pull tab sideways or pull it up hard at an angle.
When closing, look to see whether the lining or thin cords have drifted back into the path. Check not only in front of the slider but also whether the teeth behind it, after it has passed, are properly closed. Do not judge that the whole zipper is closed just because the slider reached the end.
There is no need to run it back and forth quickly many times to check. If resistance appears again partway, see whether it is the same spot and stop. If the zipper opens behind the slider after closing, a part tilts, or fabric is pulled, hold off on deciding to keep using the bag.
When putting your belongings back, do not pack everything you took out at once; start with what you need. Look at whether any hard corners sit near the opening and whether an inner pocket is bulging. If the opening stays strained even after it closes, review how you pack or the size of the bag.
Tie what you change next time to the cause you saw this time, such as moving the pouch that was pressing on the opening to a lower position or keeping a thin strap away from the opening. Rather than changing care products and the amount of luggage at the same time without knowing the cause, recording what was happening makes it easier to check again.
When a zipper stops, observation before pulling harder is the starting point. Reduce the contents, check for caught fabric, and stop if there is damage. Separate these steps in this order, confirm that the zipper opens and closes without force, and then return to normal use.



