When painting one hand during an at-home manicure, you may wonder where to rest your fingers. If you are choosing a small finger rest, look beyond its appearance and height to the supporting surface and how it works with your usual table.
This article explains how to compare the intended use, top, underside, and position of a nail finger rest that supports your own fingers. Rather than assuming a new tool will always change the result, start with the equipment you have and check your setup before opening the polish.
1. Distinguish a finger support from a stand for holding nail tips
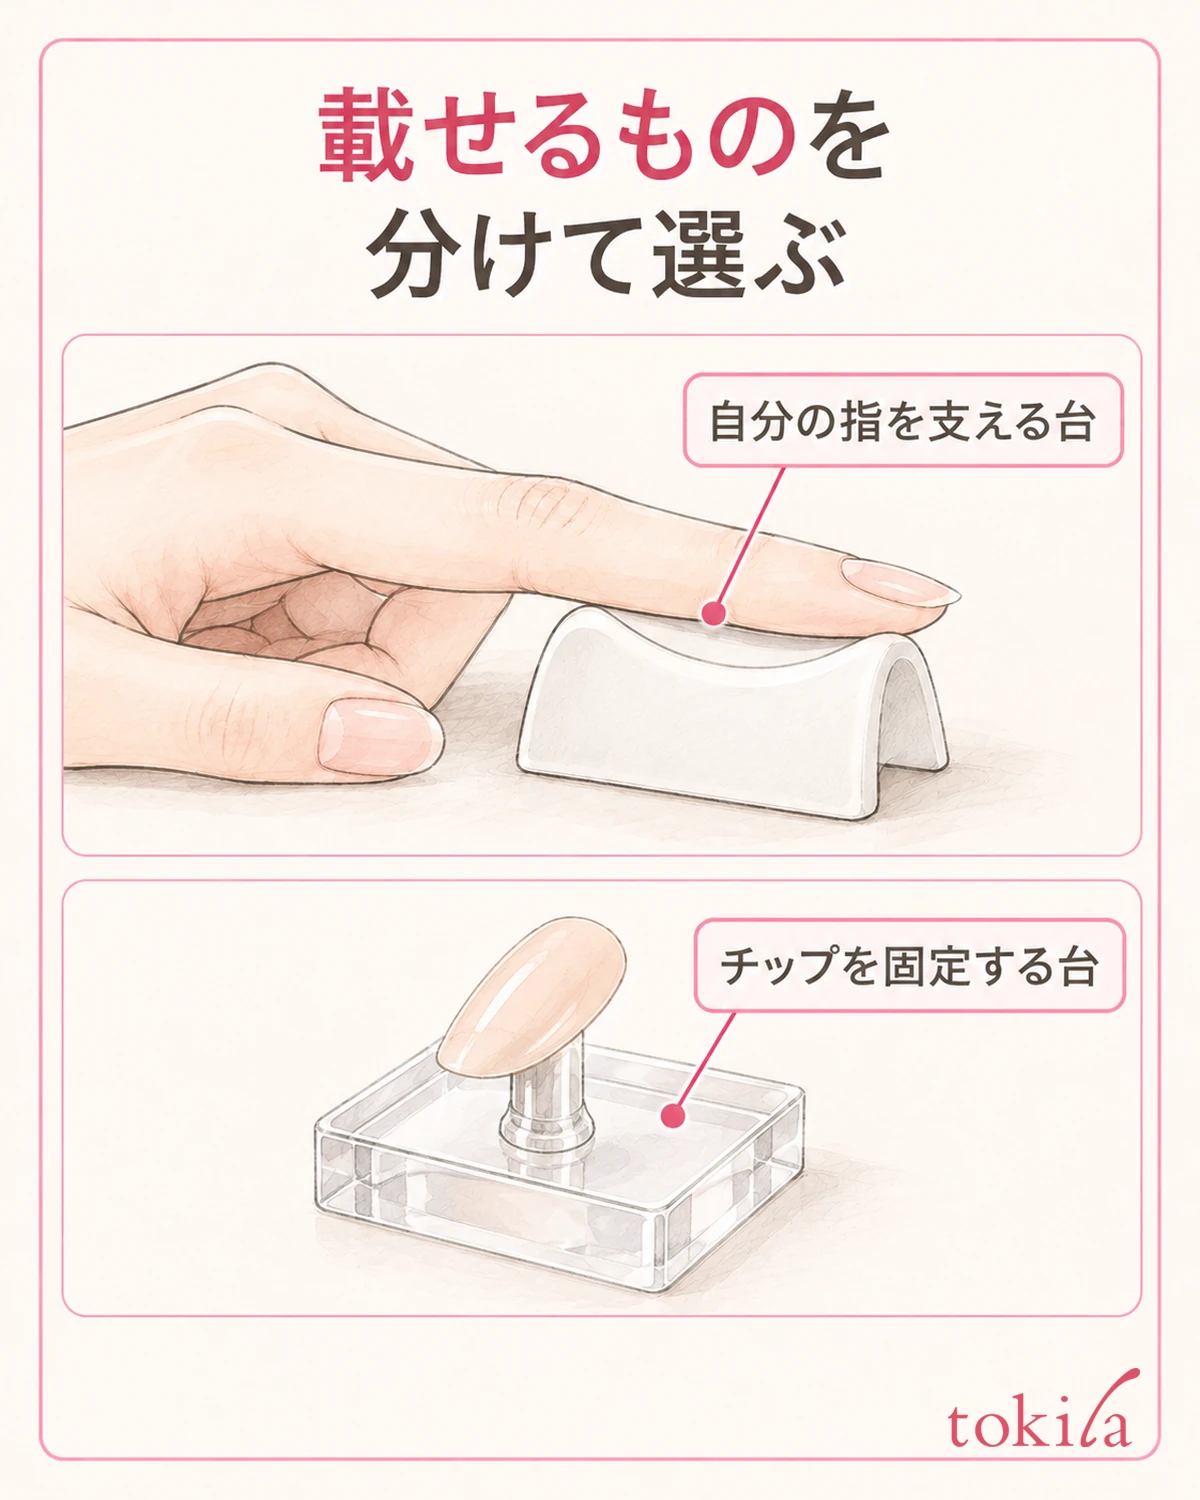
First, check what the tool is designed to hold. A finger rest that supports your own finger serves a different purpose from a stand that secures detached nail tips while you work on them. Even if a product is called a stand, use its description and shape to identify whether it holds a finger or a tip.
Some finger rests support one finger on a small top surface. An armrest designed to hold a wrist or forearm has different dimensions. Choosing a large item without deciding what you need to support may leave too little working space on your usual table.
Here, you are comparing a place for the finger being painted, rather than support for the hand holding the brush. Consider that hand separately. Resting one finger does not determine how both hands move, so first identify which hand you are having trouble with.
If the purpose is unclear, look for a picture showing a finger on the rest and a description of its top surface and intended use. You do not need to repurpose a decorative pedestal or practice model as a support for a real finger. Leave uncertain options on your list until you can check them before buying.
If your existing tool is a stand for making nail tips, do not force a finger into it or use mounting material to secure your skin. For removing finished tips, seewhat to check before removing nail tips from a stand. Here, focus on comparing rests where you can place a finger lightly.
Write down one current difficulty, such as having nowhere to put your little finger or holding the finger being painted up in the air. Naming the finger and situation makes the width and placement of the supporting surface easier to compare. Start by describing the support you need rather than adding more tools.
2. Compare the finger-supporting surface and the position of the nail
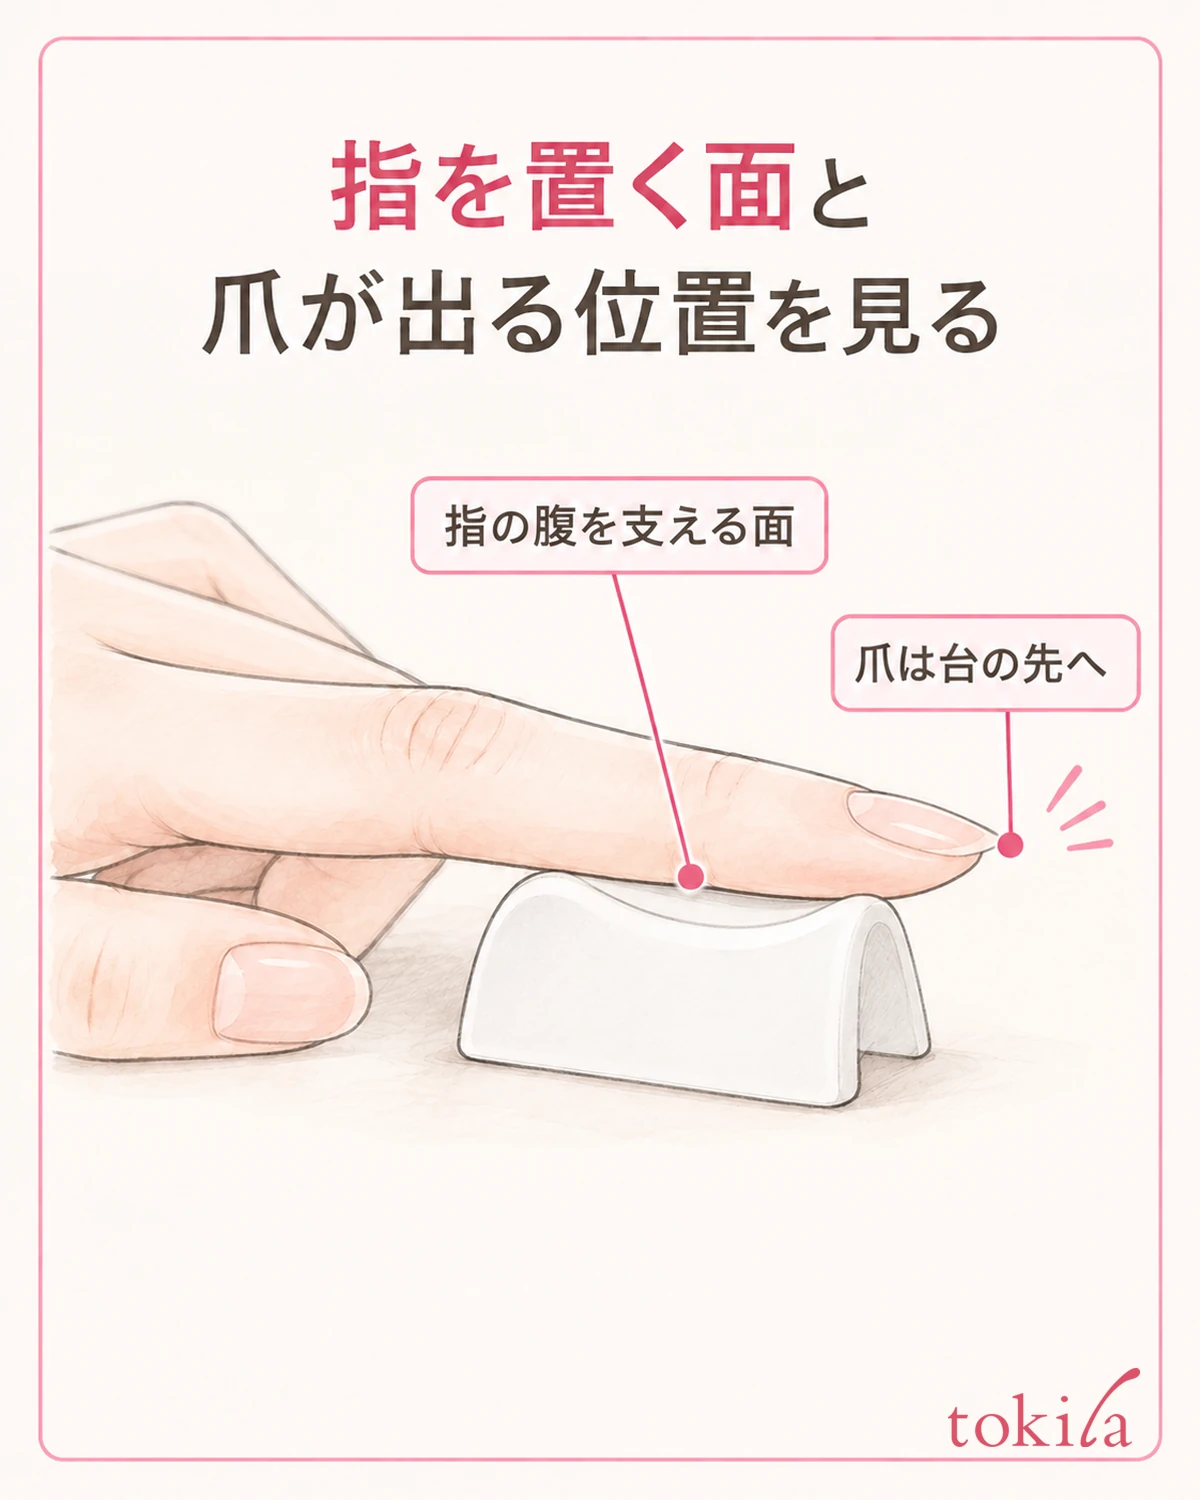
From above, consider the width, length, and hollow of the area your finger touches separately. A rounded hollow and a nearly flat top contact the finger differently. Rather than assuming a deeper hollow is better, consider whether the shape leaves the intended finger comfortable and unrestricted.
From the side, look at the edge of the top surface and the nail position. If the nail projects beyond the finger-supporting surface, check whether the edge sits under the nail tip. Treat the rest as a tool for positioning your finger according to its instructions, rather than supporting a painted nail directly on it.
An angled view shows how far the hollow extends and how rounded the edge is. A surface that appears flat in a front view may reveal a slope in light from the side. Take a moment to look at the shape of the rest before placing your finger on it.
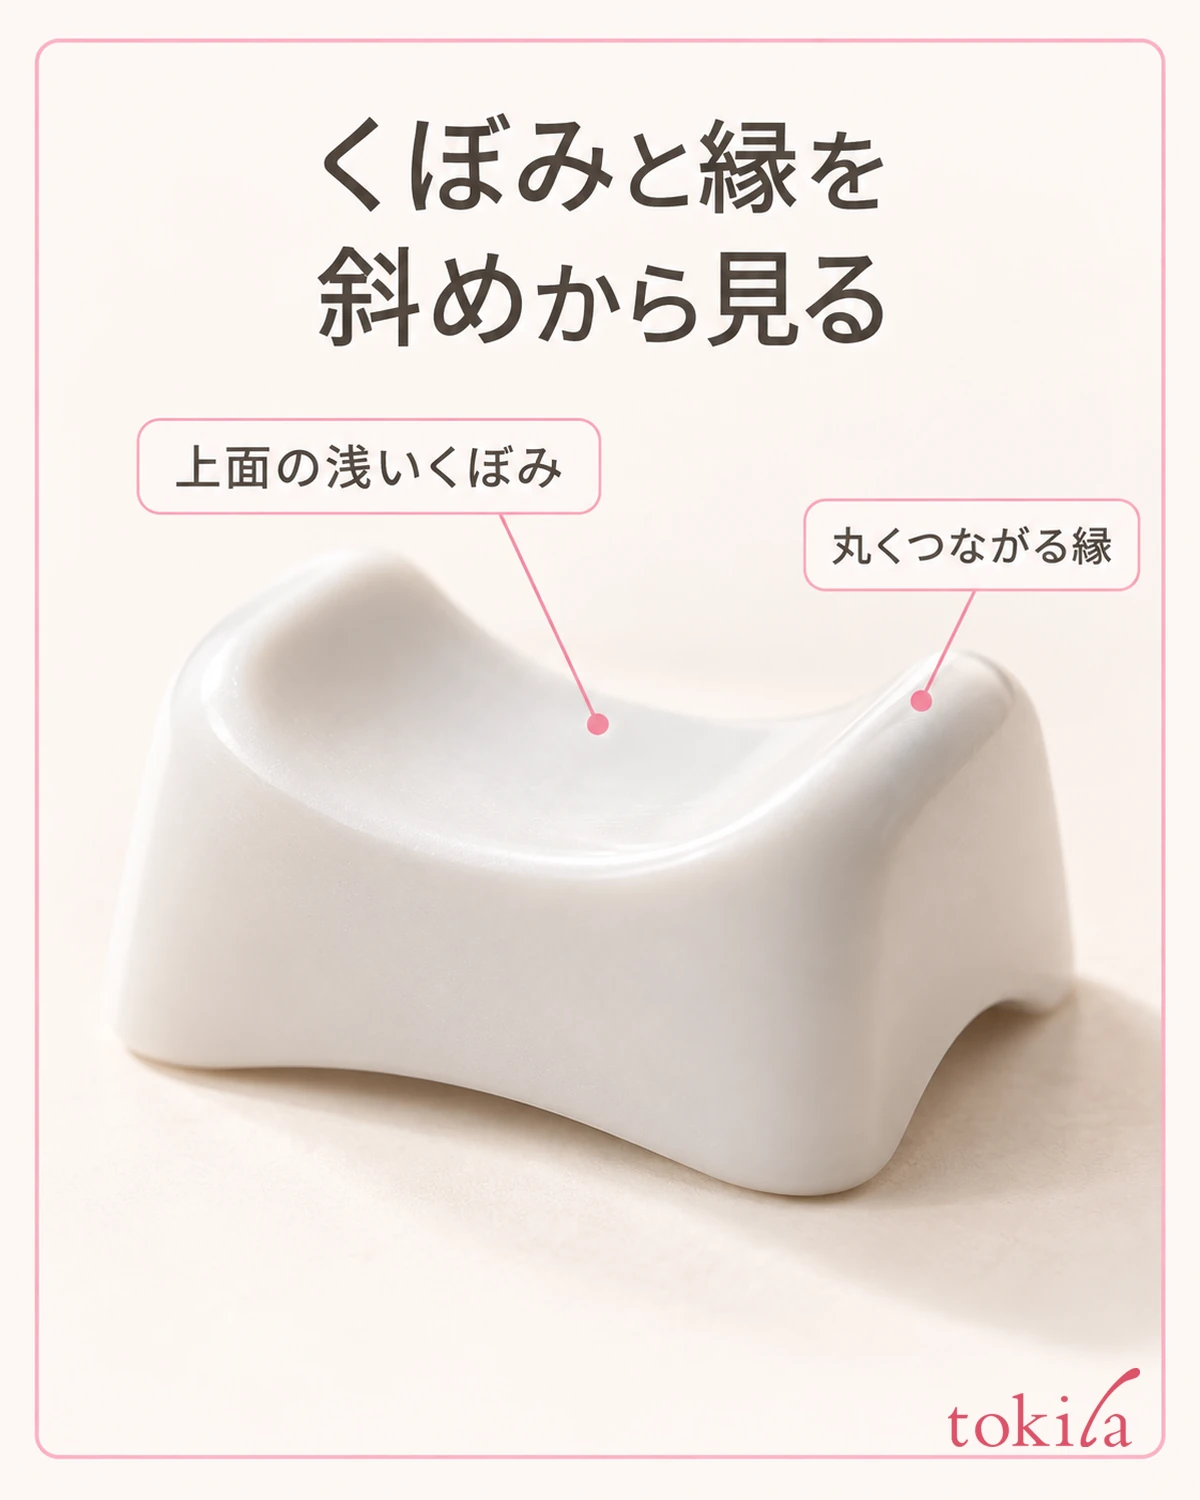
Also check the top for dirt, cracks, or sharp chips. Cleaning a surface that can be reused and deciding whether to keep using a damaged shape are separate issues. If the finger-contacting surface is damaged, put the rest aside before trying to conceal it with paper or fabric.
Your thumb and little finger may need different positions. A fit for one finger does not guarantee a fit for every finger. Even if the rest can be turned, consider whether you can lift your hand and reposition it without spreading your fingers forcibly or pressing a joint against the rest.
If product pictures include dimensions, distinguish the overall width from the width of the finger-supporting surface. A large base may have a small top. Do not infer precise dimensions from photographs where measurements are missing; confirm what you need to know before narrowing your options.
3. Check height together with your table and arm position
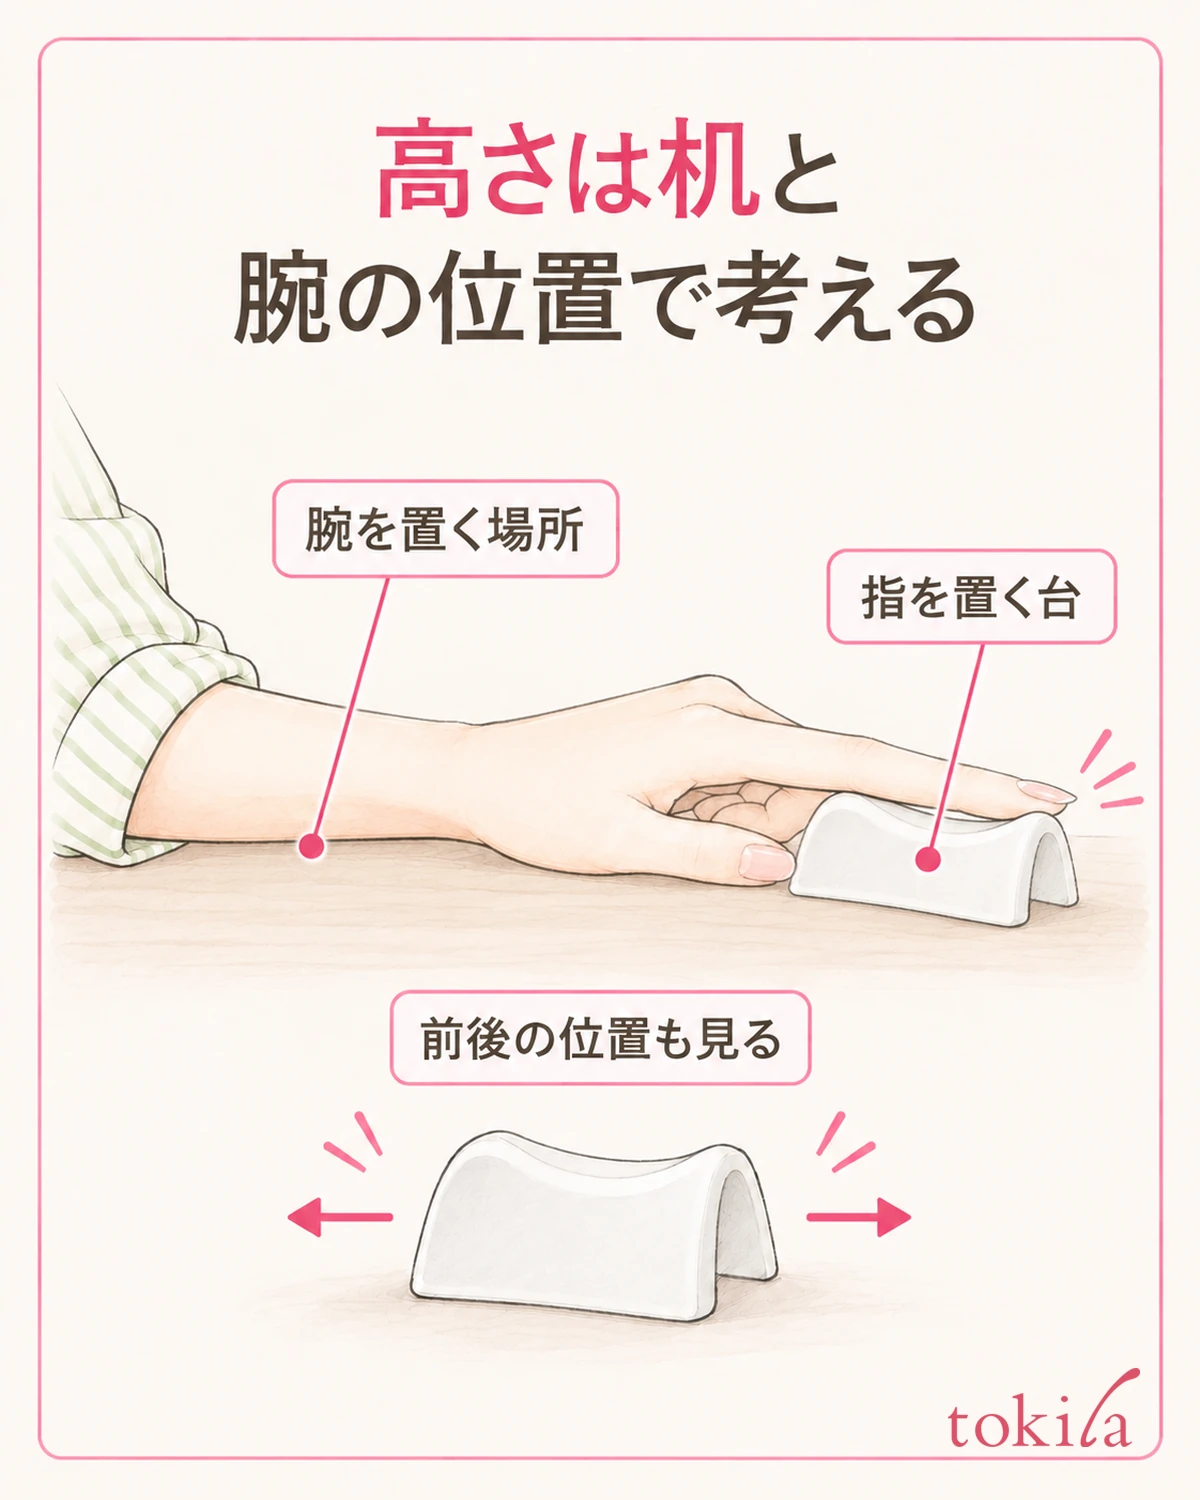
Height is not determined solely by the distance from the table to the top of the rest. Consider where your arm sits and where your fingertips extend when you are in your usual chair. A height that works at someone else’s table is not automatically your own standard.
Begin with bare hands and no polish. Check whether the rest is so far back that you have to reach, or so close that there is no room for your arm. Before changing the height, adjust its position forward or backward on the table a little at a time.
If you can view your position from the side, also check whether you are bending your wrist sharply to reach the finger. You do not need to match a fixed angle. If maintaining the position takes continued force, reconsider the positions of the rest and your arm before starting to paint.
Do not stack books or empty boxes to raise the rest. If the product has adjustable height, use the specified parts and fastening method. For a nonadjustable rest, consider whether it suits the intended situation together with your table and chair.
Your work surface needs space for closed bottles, a place to put the brush, and an area to separate used items as well as the rest itself. Leave room to bring your other hand back rather than crowding bottles next to the rest. Also check the route for switching hands without hitting other nails against objects.
Adjusting lighting and viewing distance is separate from choosing the height of the rest. Instead of lifting your finger closer whenever the nail looks dark, arrange a clear view of your hands before painting. Check each difficulty at your current table before replacing the rest.
4. Try the position before painting and distinguish what is moving
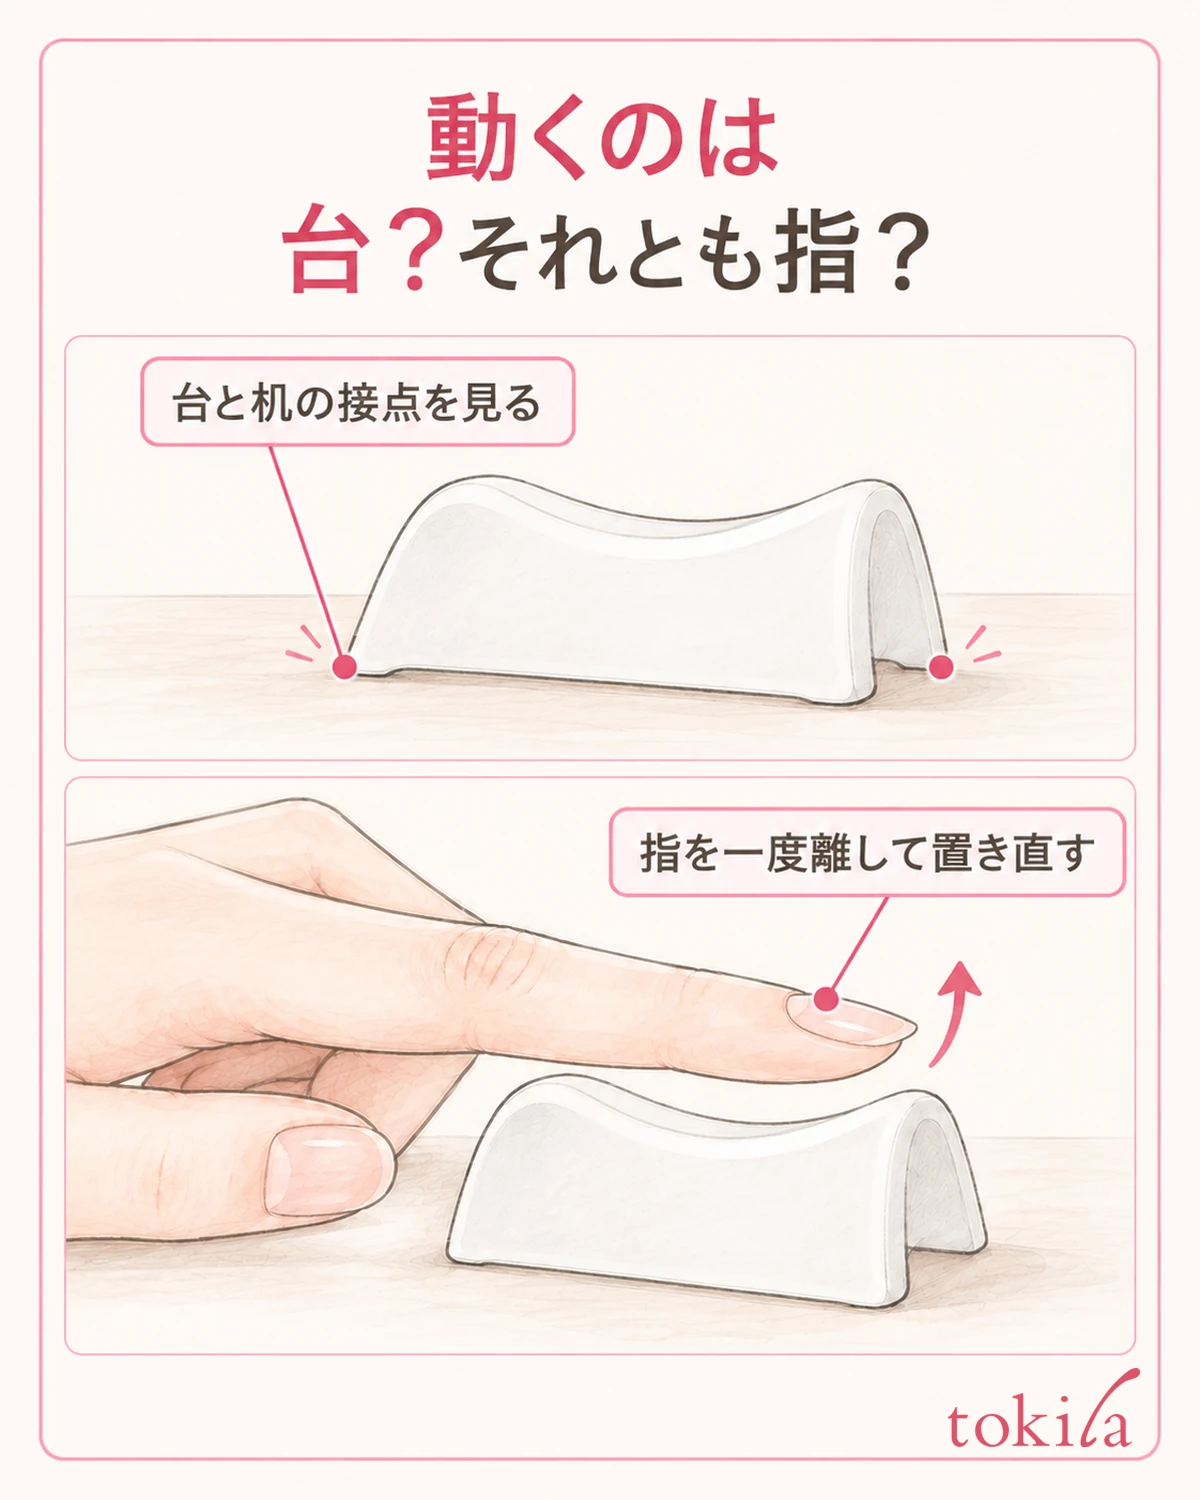
Check your positioning before dispensing polish. Lightly place your finger, lift it, and return it, noting whether the rest itself moves or only the finger slips. Holding it down firmly should not be your measure of a convenient resting position.
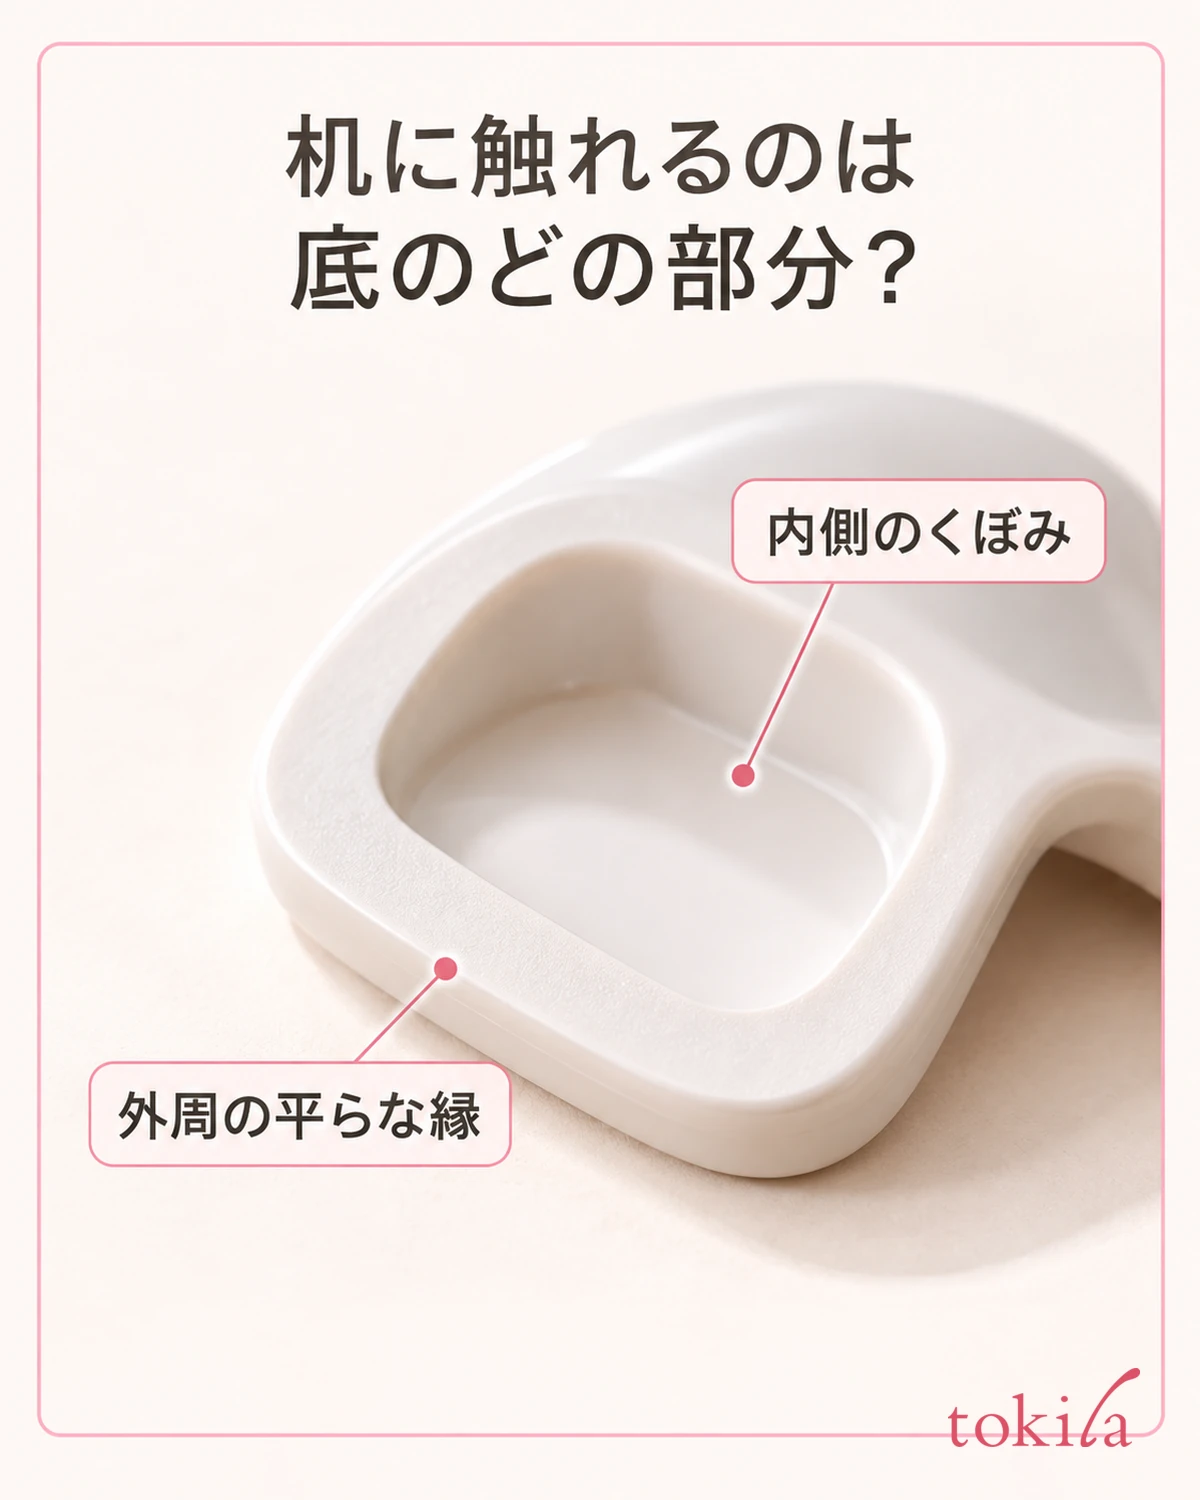
If the rest moves, first check where its underside meets the table. Look for a small object or edge of paper caught underneath, or water droplets or powder left on the table. Look at the underside from the side and do not treat a rest with feet the same as a flat-bottomed one.
The underside may have a raised rim, feet, or nonslip parts. Do not assume every differently colored part is rubber; check the material and structure in the product instructions. Before peeling off parts or adding adhesive, establish the conditions needed to use it in its original state.
If only the finger moves, review where it sits on top and the direction of your hand. Check whether you are bracing with just the fingertip to reach the nail farther out. Moving the rest closer or lifting and replacing the finger one change at a time makes the differences easier to understand.
When painting the nails on your dominant hand, the hand holding the brush also changes. After setting up the finger rest, seehow to support your hands when polish strays while painting your dominant handfor brush loading and movement. Avoid changing every aspect of support and application at once.
If you notice an awkward position after starting to paint, put the brush in its designated place before moving the rest. During preparation, plan how to reposition it so you can avoid gripping an edge with freshly painted nails or pulling the table while bottles are open.
5. Clean the contact surfaces and keep the setup consistent next time
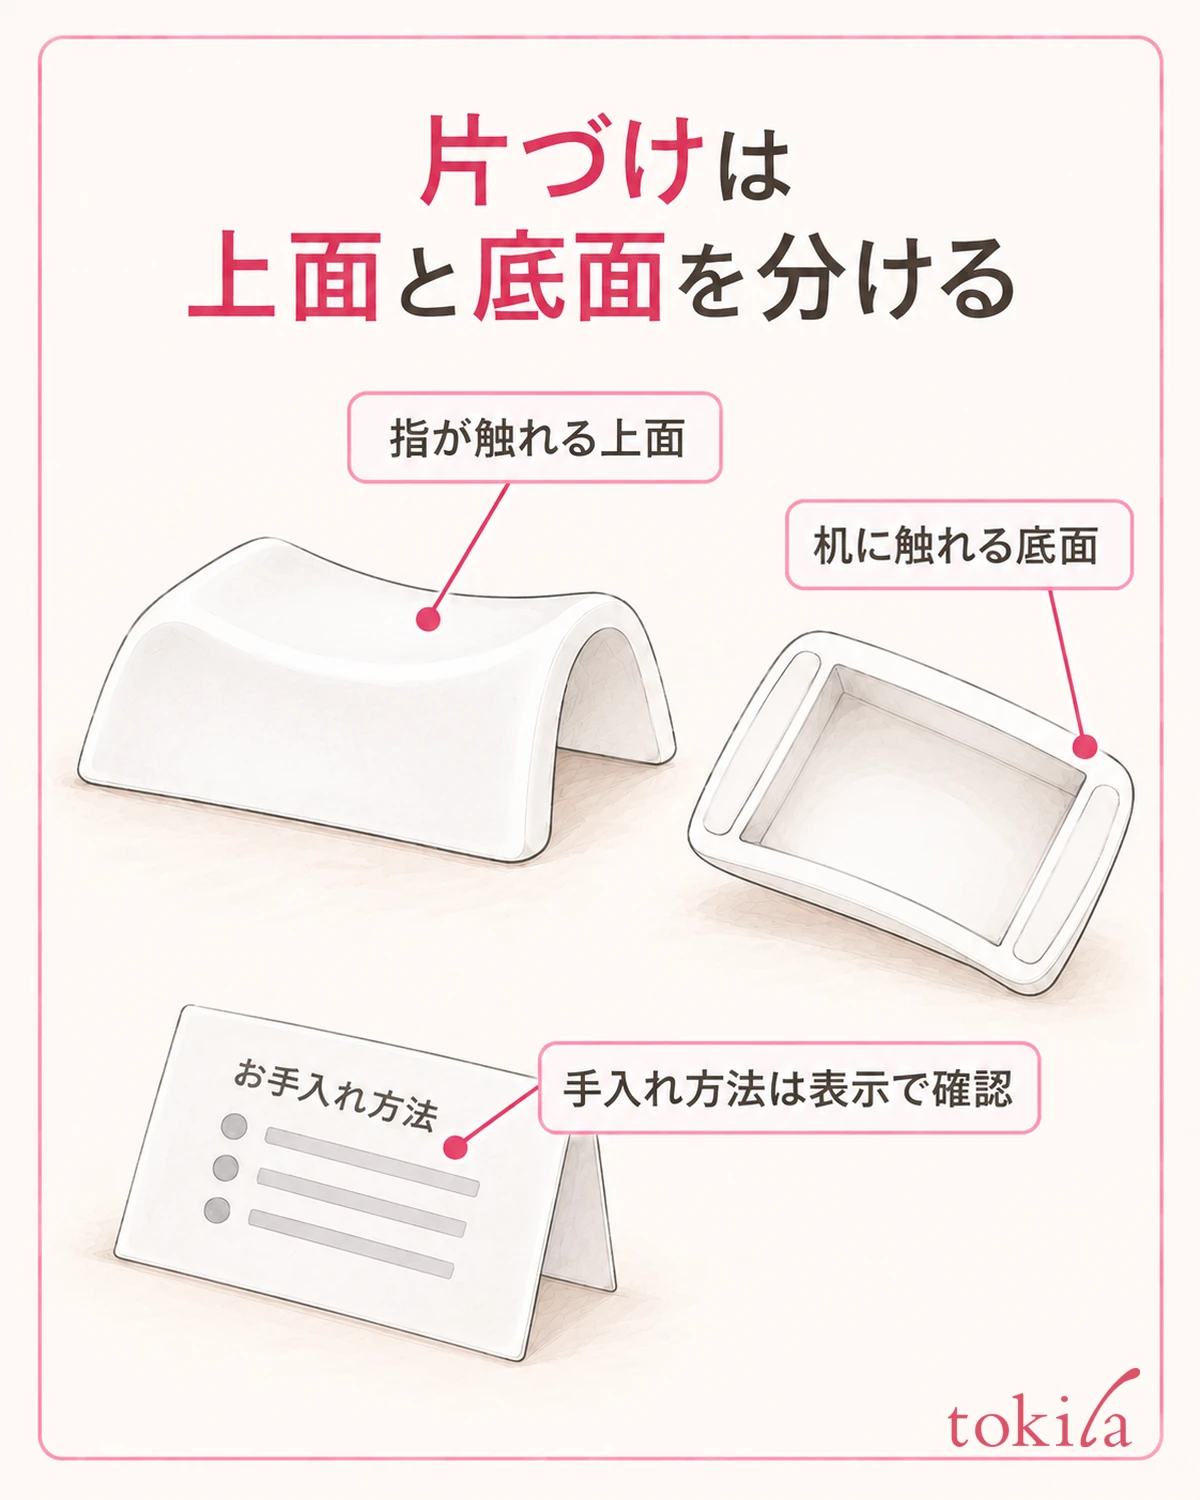
After use, inspect the finger-contacting top and table-contacting underside separately. Check the product’s care instructions so visible dirt is not carried over to the next session. Even if the material looks like smooth plastic, do not judge its suitability for washing or cleaning chemicals by appearance.
A nail polish remover or cleaner is not necessarily suitable for cleaning the rest. A liquid intended for polish and a liquid suitable for a tool’s surface are different things. If residue does not come off with the specified method, check the care conditions instead of scraping hard or trying other liquids in succession.
Even if parts are removable, handle only the parts covered by the instructions. After cleaning the hollow and bottom edge, check the reassembly direction and that all parts are present. If you wash a washable rest, finish the specified drying process rather than sealing it in a bag or drawer while wet.
Store it where heavy items do not sit on the top and where chipped areas cannot catch your nails or skin when you take it out. Keeping the rest and bottles separate by purpose prepares you for next time better than stacking them. Keep the original instructions and model number associated with the rest as well.
Briefly record difficulties by finger and position, such as the rest sliding forward under your little finger or leaving no room for your arm when placed close to you. Separate your experience of using the rest from the quality of the manicure and choose one preparation step to change next time.
Choosing a finger rest takes more than matching height measurements. Identify what it supports, inspect the top and underside, and check the relationship between the table and your arm. Keep the conditions that let you prepare comfortably with the equipment you have and bring them into your usual manicure routine.