
You pick up your hair dryer before drying your hair and find white dust built up on the mesh at the back. You may wonder whether it is fine to pick it off with your fingers, or whether you can take off the cover and wash it. Even hair dryers that look alike do not have the same air intake or filter structure. First, turn it off and unplug it, and check what you may touch on the model you own.
Here, we go through cleaning the dust you can see on the surface of the air intake in five steps, from preparation to putting everything away. Cleaning the air outlet or any special small holes, and taking the inside apart for repair, are separate jobs. Before turning up the airflow to dry your hair faster, take a calm look at the condition of the tool you use every day.
1. Tell the air outlet and the air intake apart

First, confirm where the dust is this time. The side that points the airflow at your hair is the outlet, and the part that draws in air, such as on the opposite side, is the intake. On some models the intake is not at the back of the barrel but is placed on the handle or elsewhere. Do not decide from appearance alone; compare the body's model number against the parts diagram in your instruction manual.
You do not need to run it or cover the holes with your fingers to check. Turn the switch off, unplug the power plug, and look at the surface of the mesh in a bright place. Tell apart whether it is dust like small dots, a thin film connected together, or a hair lying across it. If you take a photo, use it to remember what the spot looked like before cleaning.
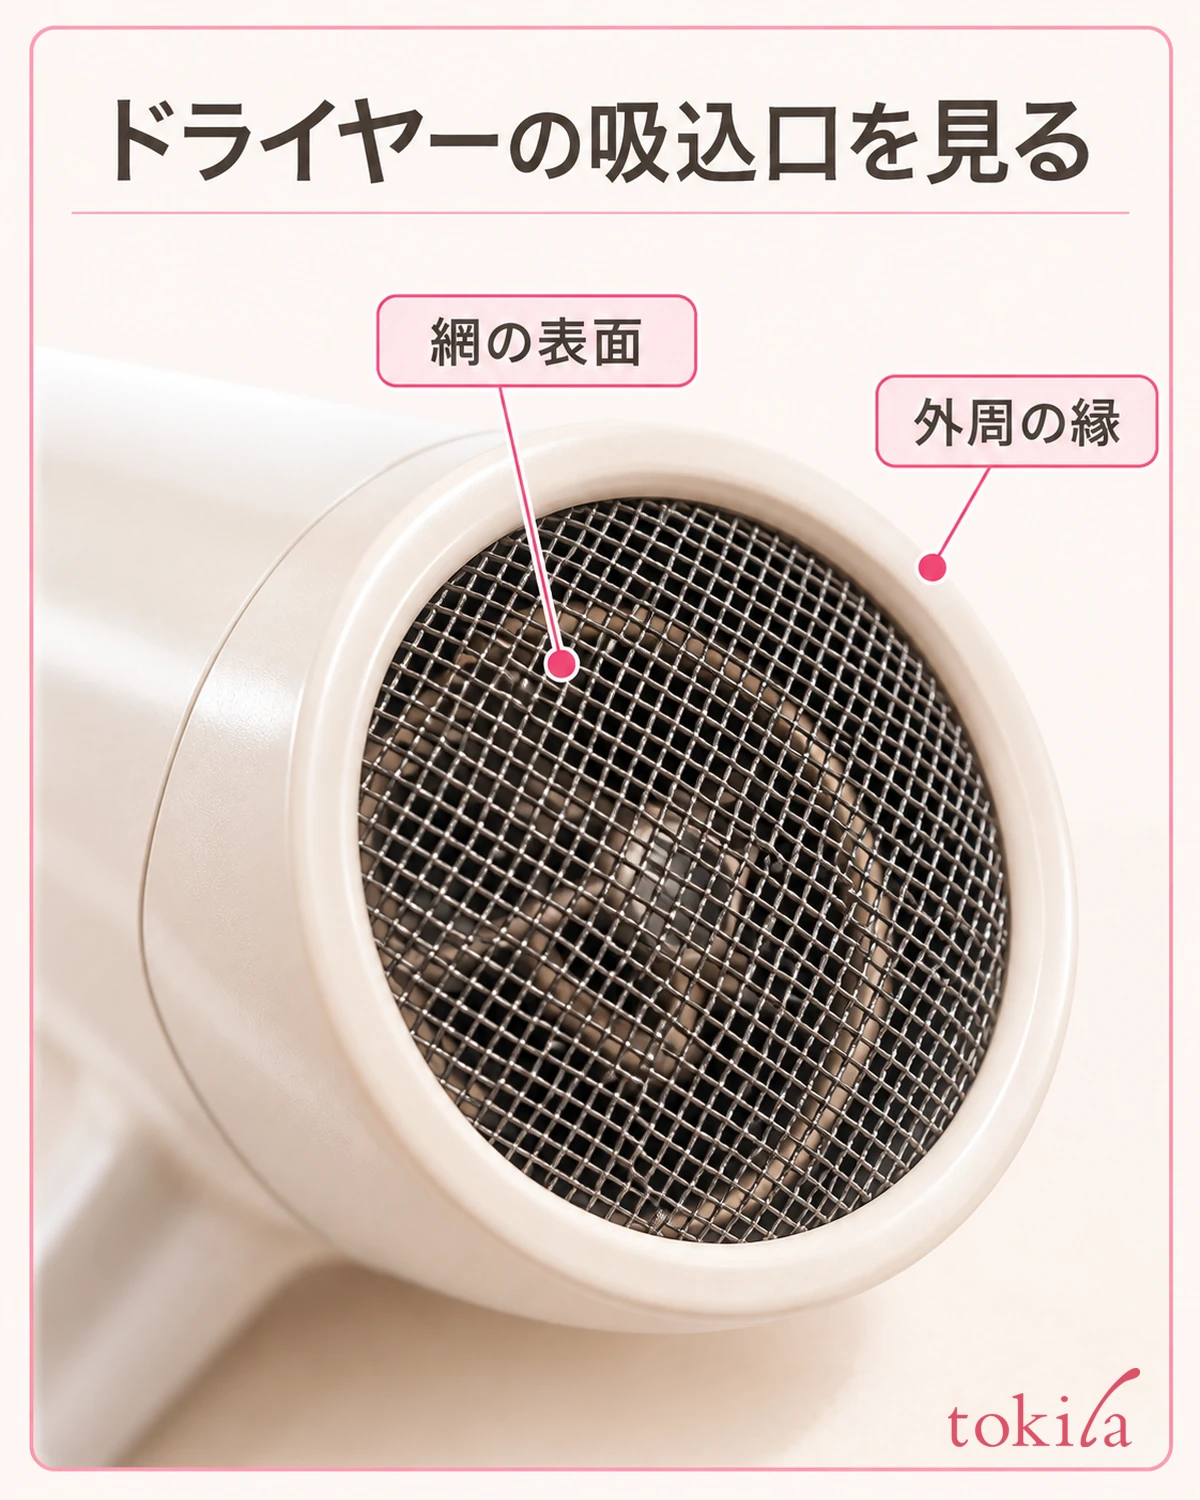
If there are several small holes, it is not necessarily fine to clean them all with the same brush. Do not rub places other than the intake along with it, such as a part that senses temperature or an outlet for a special function. If the part names in the manual do not match, leave that part out of this cleaning and go ahead only after you know what you may touch.
It is also important not to put the blame for weak airflow on dust alone. How strong the airflow feels also changes with the switch setting and the conditions in the room. Do not treat cleaning as a promise that it will fix a fault or definitely shorten drying time; think of it first as a job of removing visible dirt in the way the manual specifies.
If you share the instruction manual with family, also check that it is not mixed up with the manual for a different hair dryer. Even if the color or outer box looks similar, the cleaning method can differ if the model number is different. Match the model number you can read on the body to the front cover before opening the page on the air intake, and you will reduce mix-ups from copying the steps of another model.
2. Turn it off, unplug it, and wait for it to cool
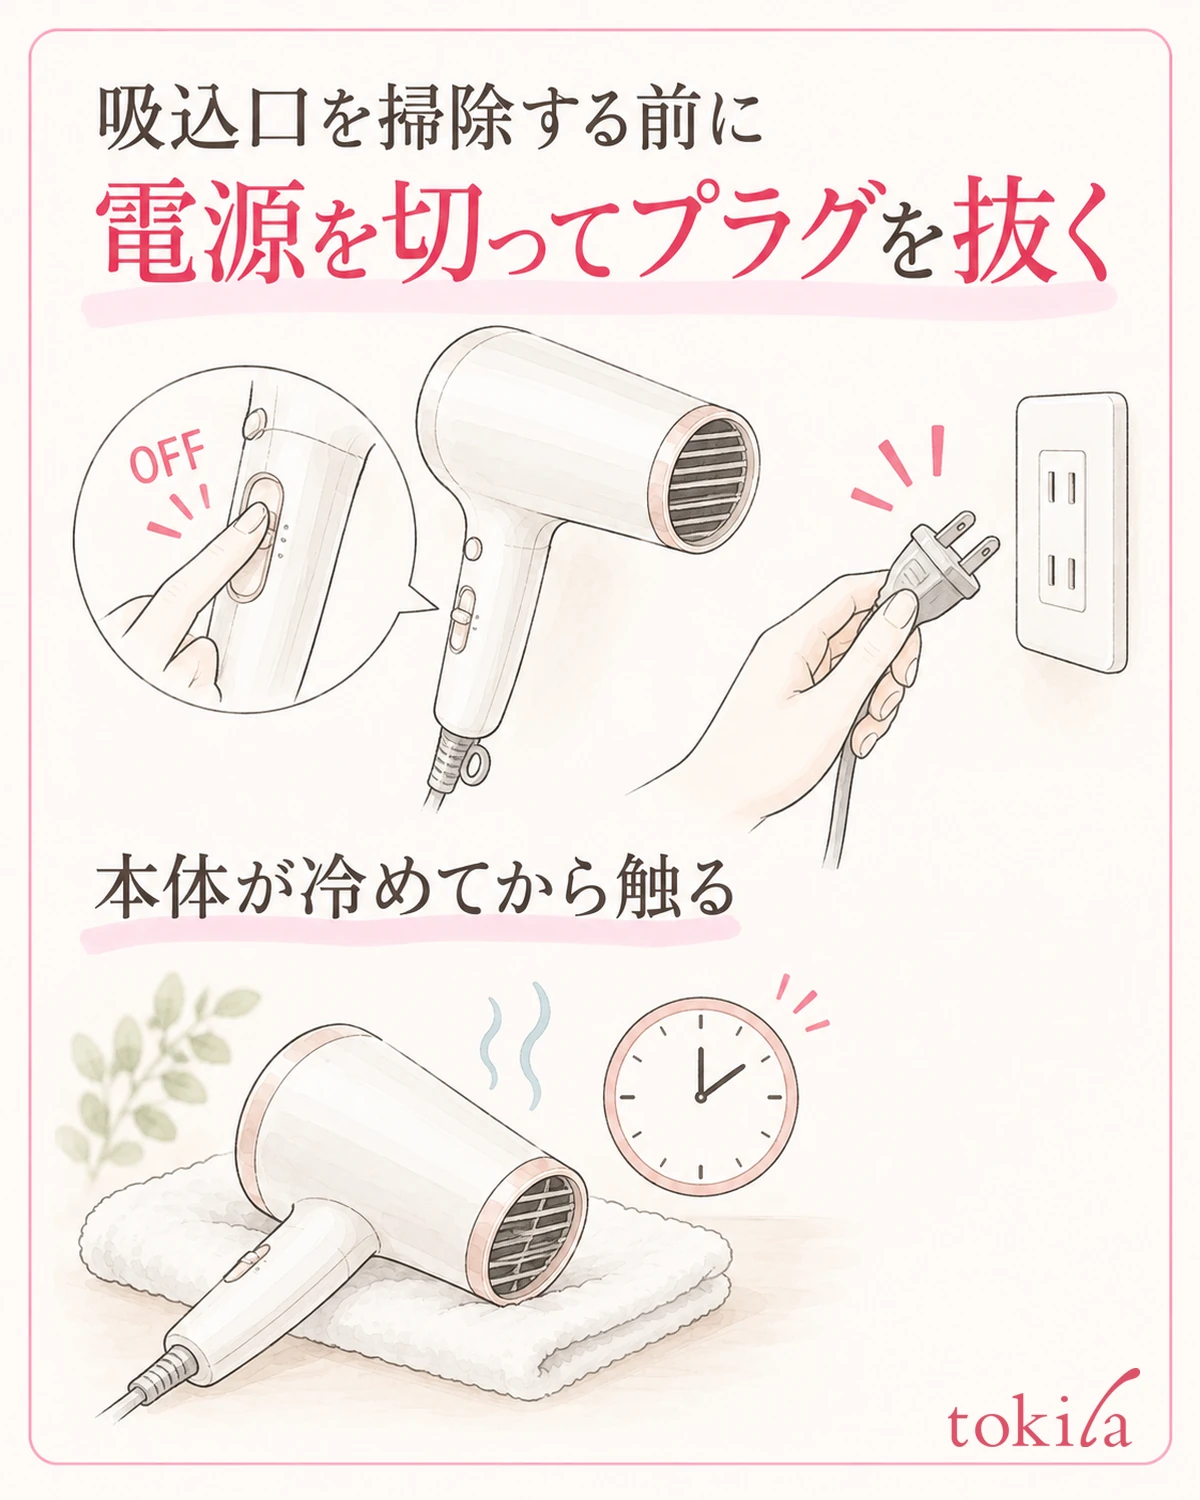
Prepare for cleaning the intake with the dryer stopped. Turn the switch OFF, and with dry hands hold the plug itself and pull it out of the outlet. Do not pull on the cord alone, and put the unplugged plug where you can see it. Do not start applying a brush with it still connected just because the switch is off.
If you have just used it, wait until the body has cooled before handling it. Rather than fixing a single number of minutes to wait, follow the instructions for your model and avoid touching hot parts. You do not need to pour water on it to cool it or set it in the sink. Place it on a stable, dry surface where the cord will not catch.
On the table, set out only a sheet of paper to catch the dust you remove and the tools you have confirmed in the manual that you may use. If a soft brush is specified, choose one that is dry and clean. Do not repurpose a brush that has cosmetics or hair styling products on it, or anything with a sharp tip such as a needle or hairpin, as a cleaning tool.
Even if you work in front of a mirror or in the bathroom area, stay away from splashes and damp cloths. A place where children and pets will not move the cord or small parts makes it easier to keep things as they are if you step away partway through. Do not start taking it apart before going to fetch tools; go on to the intake's surface only after the preparation is done.
Also look at the condition of the power cord and plug, as far as it naturally comes into view while you prepare. If you can see damage, such as a torn covering, do not give priority to cleaning the dirt and keep using it. Do not wrap tape around it to repair it yourself, or turn it on to check its condition; take it off your list of tools to use for now.
3. Check the "range you can take off" for the cover and filter
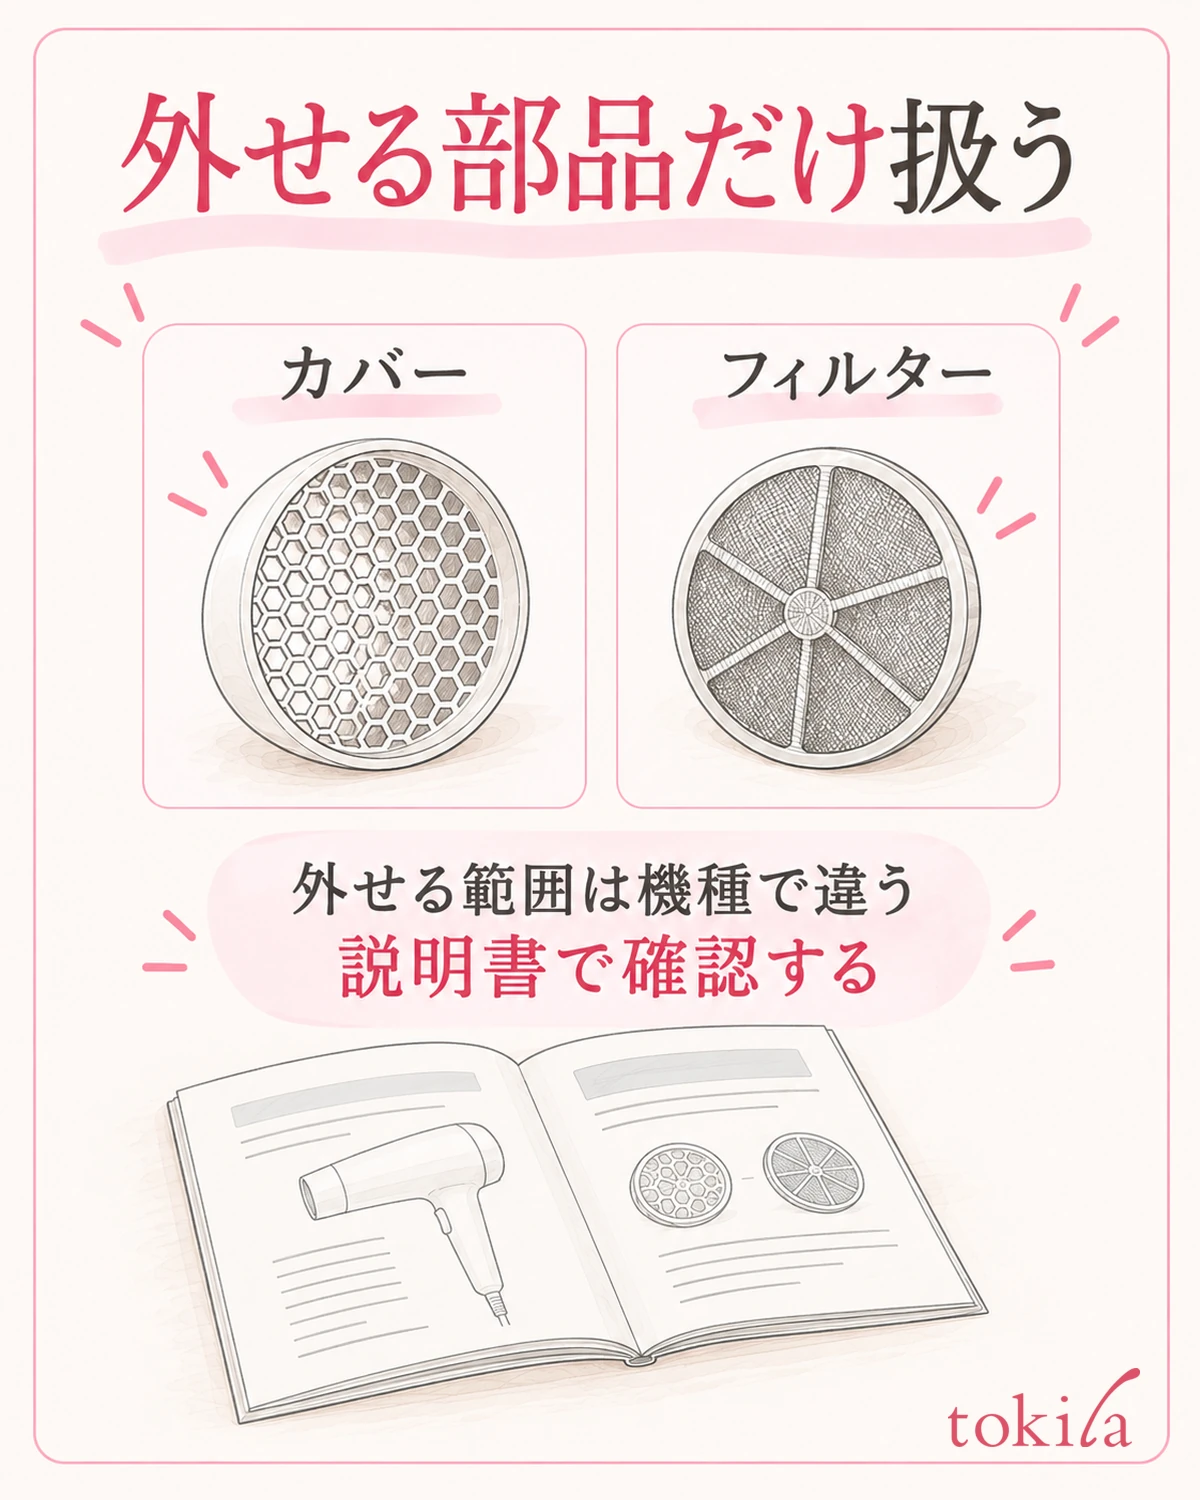
Even if the intake has a seam, that does not mean everything comes off from there. Some models let you remove only the cover, some let you remove the filter too, and some are cleaned from the outside. Check the name of the part to remove and how to do it in the manual. The key point is not to try to pull out even the inner mesh just because the cover turns.
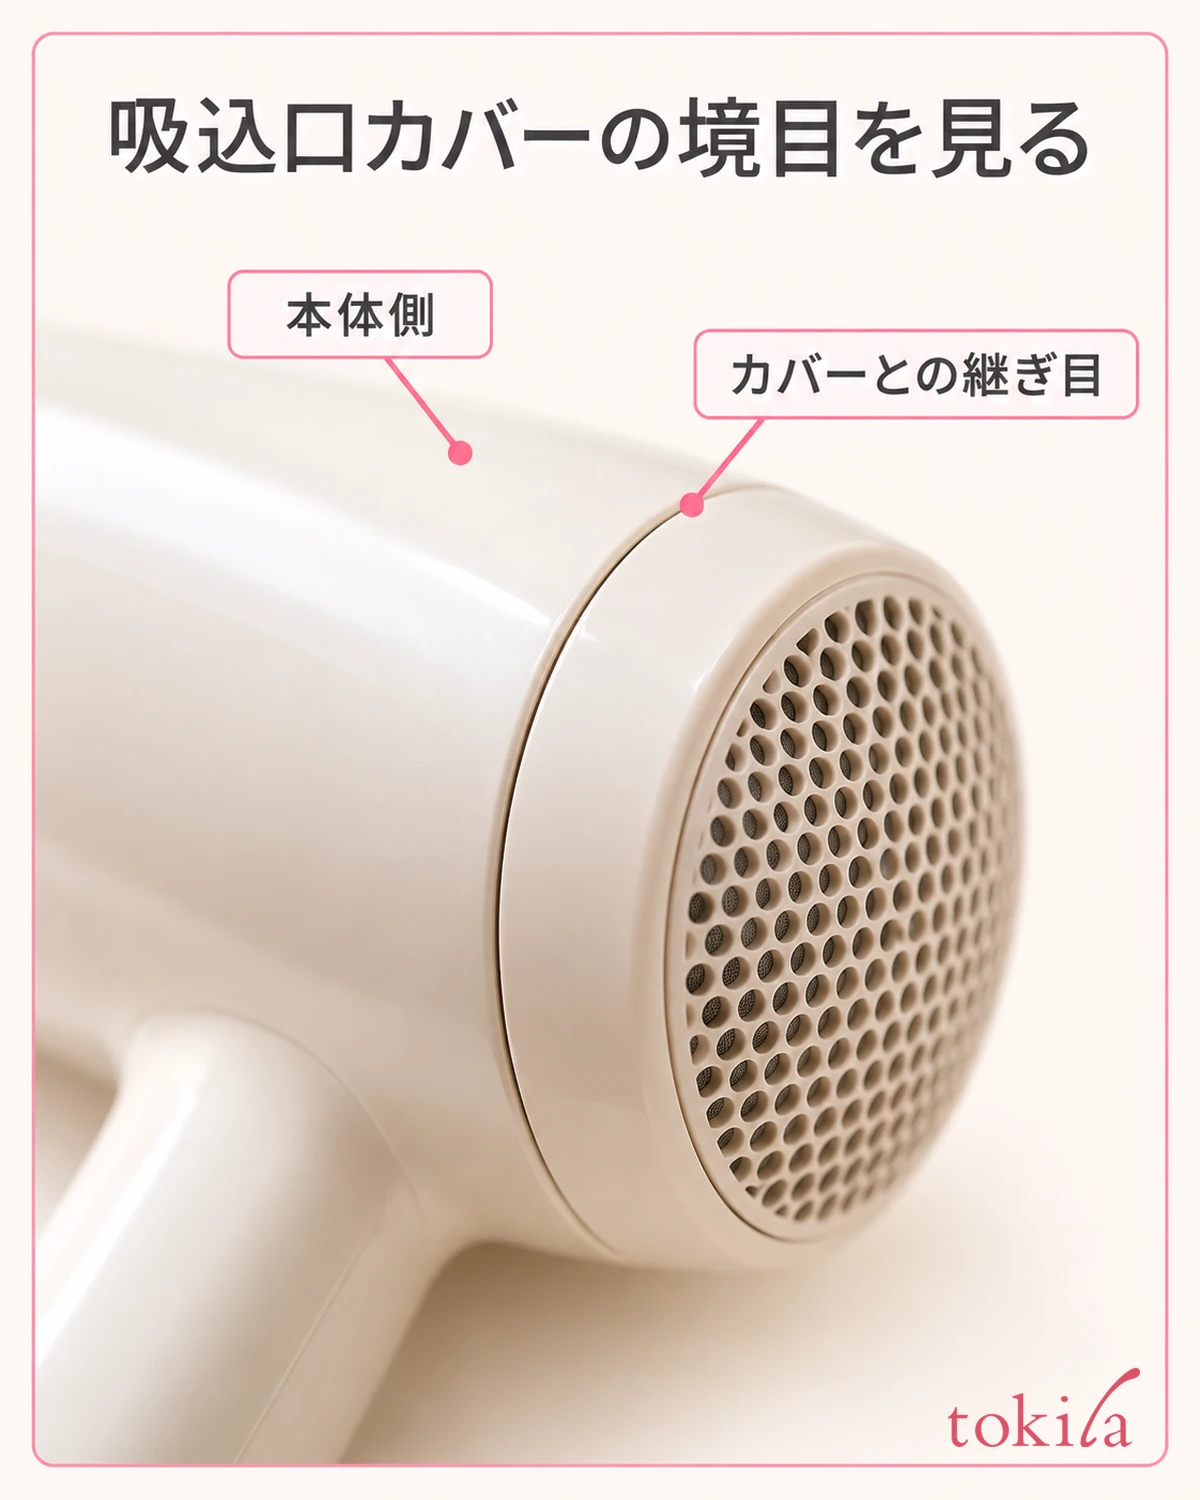
For a cover that you are allowed to remove, look at the direction and the marks and move it as specified. If it does not move, do not add force or push a fingernail or tool into the gap; stop for a moment and check the direction. Jobs that go on to taking it apart, such as removing screws or peeling off bonded parts, are not included in this surface cleaning.
Lay the parts you take off on the paper so you can tell front from back and the direction to reattach them. Even when there are similar small parts, do not stack them together; sorting them in the order you removed them makes it easier not to get lost when putting them back. If you take photos, take them before and just after removing the parts, so you can check them together with the manual's diagrams.
Whether a part can be washed with water is also decided part by part. Do not apply a note that the cover is washable to the body or the filter as well. Read the washing and drying instructions only if there is a part that can be washed. Rather than soaking it in water without knowing the instructions, keep to dry cleaning of the outside, and leave the parts you do not understand untouched for the day.
With a shared hair dryer, do not leave the removed parts as they are and walk away. If you stop work partway, keep it unplugged and gather things so that it is clear the parts are off and it cannot be used. Not putting a unit that is partway through cleaning back in its usual place is also one way to keep family members from starting to use it without noticing.
4. Gently remove the surface dust, without pushing it deeper
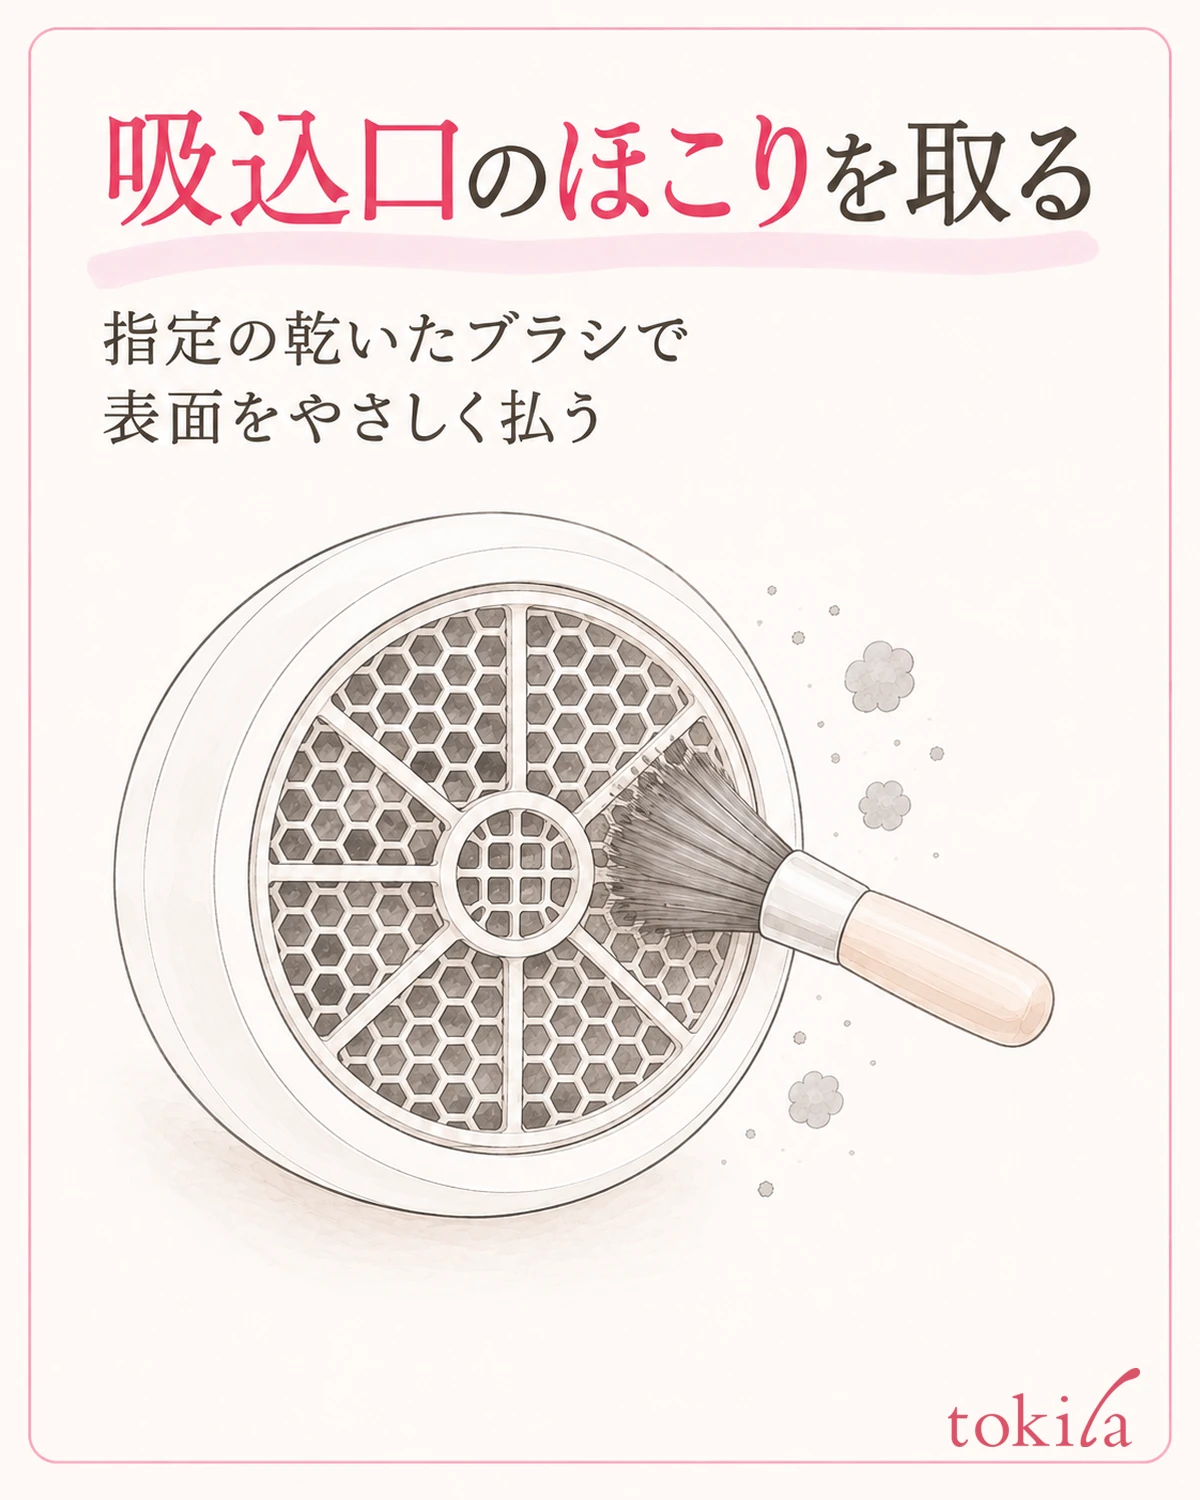
Lightly touch a tool you have confirmed you may use, such as a dry, soft brush, to the surface of the intake. Without pushing the bristles deep into the holes of the mesh, remove the dust from a small area at a time, thinking of moving the dust that clings there outward. Steady the body with one hand, and do not rub so hard that you dent the mesh.
When a hair is lying on the surface, do not pull it out by force if pulling would shift a part deeper inside. Separate what comes off easily on the surface from what has worked its way inside. If something catches, do not pull it out with a needle or push tweezers deeper in; stop the work at the range your hand can reach.
Even for models where you can use a vacuum cleaner, there are conditions such as not pressing the nozzle hard against the mesh. Check in the manual that it is allowed and how to hold it before choosing to use it. It is important not to decide that it is a method that works for every model, or to try to get the inside clean with strong suction. Before adding more tools, go back over the range that is specified.
If hardened dirt remains, do not add alcohol, nail polish remover, or detergent on your own judgment. The liquids you can use can differ between the body and the parts. This procedure also does not include rubbing the intake while it is powered on to blow the dust away. Even if dirt you cannot remove is left, do not reach into the inside; set it aside as something to check next.
After you brush one spot, drop the dust on the brush onto the paper before moving to the next area. Rather than keep wiping the whole thing with a dirty tool, this makes it easier to see how far you have gotten as you go. View the surface again under different light, and do not make removing even the dirt beyond the mesh the condition for finishing the job.
5. Put the parts back and check its condition before next use
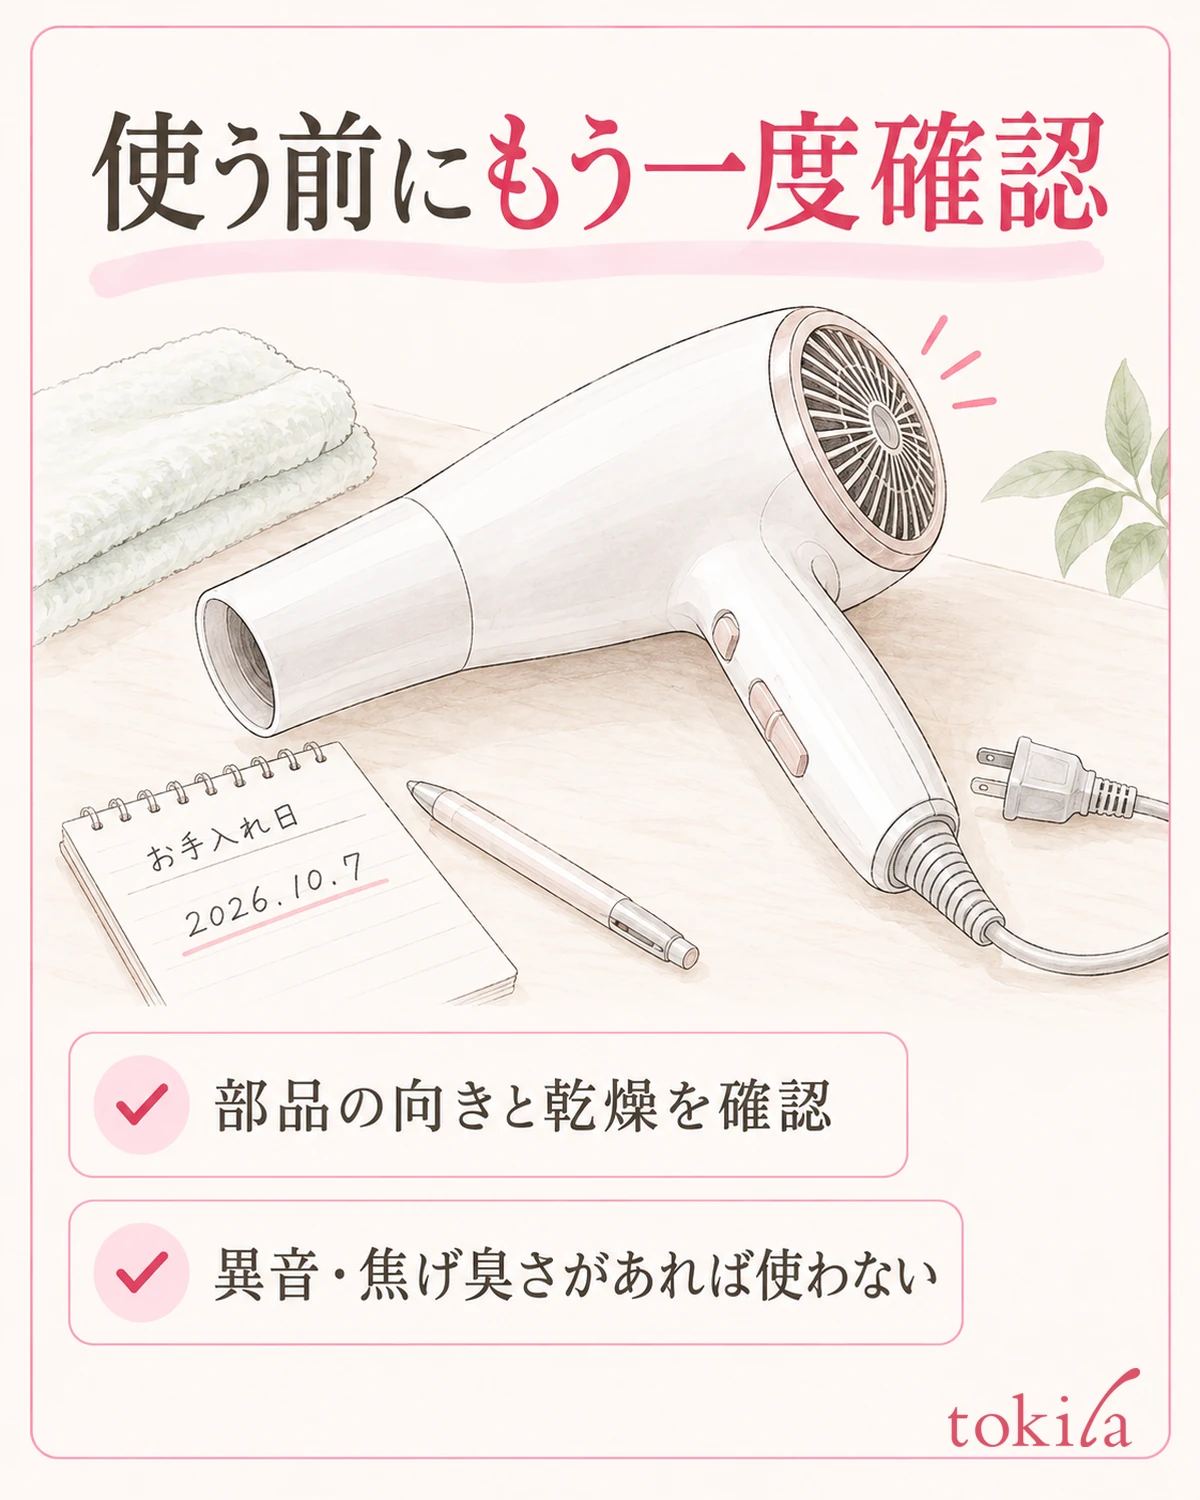
If you have removed any parts, line up the direction and the marks and reattach them following the manual's steps. Check that no single side of the cover is sticking up and that no hair or paper is caught in the gap. Do not apply force on the assumption that it will go in if you push; if it does not fit well, check the direction of the part again.
If you washed a part that you are allowed to wash with water, let it dry thoroughly as specified before putting it back. Do not wipe only the surface and assemble it right away, or concentrate heat on it with another hair dryer to speed up drying. If water may have gotten into the body, do not decide on your own that you can use it because it looks dry; stop using it.
When you put things away, throw away the dust on the paper and tidy the table and the cleaning tools. Do not wind the cord tightly around the body; follow the storage method for your model. Do not toss it in together with small metal items such as hairpins, and think of a place to keep it where the intake is less likely to touch dust again. Leaving a short note of the cleaning date makes it easier to compare its condition next time.
If, at the next use, there is anything unusual such as strange noises, a burning smell, or airflow cutting out, do not keep running it just to test the effect of cleaning; stop using it. Do not repair the inside yourself; treat it as something to have inspected. When there is no abnormality and the tool is ready, use it following the basics of drying your hair. Review the cleaning of tools for combing hair separately, in how to remove hair from a hairbrush.
Do not decide how often to clean by a fixed number of days alone; consider the guideline written for your model together with how much has actually built up. If dust built up faster than last time, you can use that as a chance to check whether it is touching cloth or hair when stored. Even if it looks to have little dirt, that does not mean you may skip the specified checks or care.



