
You fasten the cardigan buttons and only one side of the hem hangs lower. The line down the front slants, and you can't tell whether the buttons were put in the wrong holes or the garment is being pulled. When that happens, before you tug the hem downward, check how the buttons and holes are paired up.
This article covers ordinary front-opening cardigans that fasten by passing buttons through holes. It goes step by step through the pairing from top to bottom, how the fabric overlaps, and the ease after you put it on, and explains how to decide what to do when refastening changes nothing. The same approach should not be applied to snap-fastened cardigans, decorative buttons, or designs whose left and right lengths differ.
1. Look at the whole front to tell a mismatched button from pulling
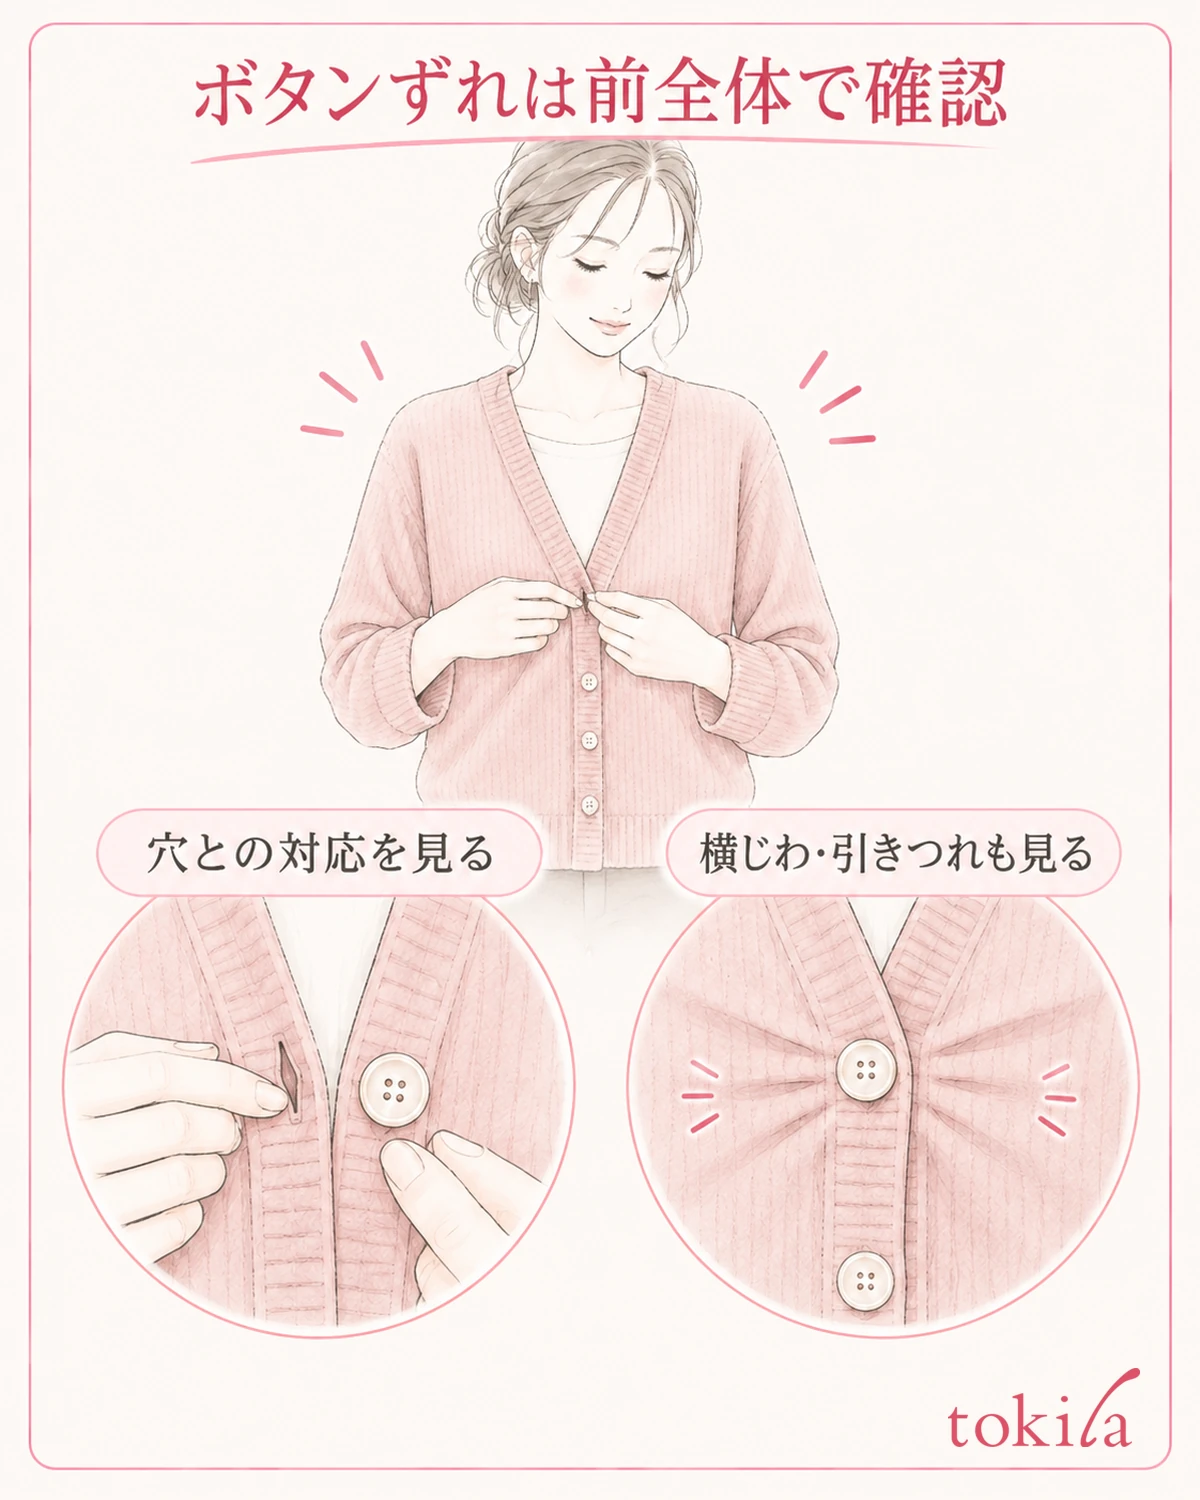
First let both arms hang naturally and look from the neckline to the hem in a mirror. Don't reach a conclusion from the height of one hem alone; check the line of fastened buttons, the left and right sides of the collar, and the wrinkles gathering from the sides toward the front, all together. If you are too close to the mirror to see the bottom edge, step back a little so the whole front is in view.
Clues that make you suspect a mismatch are an unused button or hole left over unnaturally on one side, and the pairing being off by one position between top and bottom. On the other hand, if the buttons are in the matching holes but sideways wrinkles appear around the chest or stomach, also review how the clothes underneath overlap and the ease when worn. Don't decide from appearance alone that the size or sewing is defective.
Sometimes a difference between the left and right hem is simply the original shape. A length that differs front to back, a slanted hem, an asymmetric front opening, or a design fastened only part of the way are not garments meant to have every edge at the same height. If it is a garment you are wearing for the first time, start by checking it against its shape before you put it on and any description you have.
What you are checking here is "where it looks different." Pick one spot that bothers you, such as only the lower part, only the area around a single button, or a slanted line across the whole front. If you keep pulling the left and right hems, it becomes hard to tell the original state from the state after your adjustments. Don't go on to stretching the fabric to make it match.
If a button thread seems loose, the edge of a hole is tearing, or the knit is snagging, stop refastening while wearing it. Fixing a simple mismatch and repairing a damaged part are different things. It leads to a better next decision to stop wearing it, within what you can take off without force, and to check its condition.
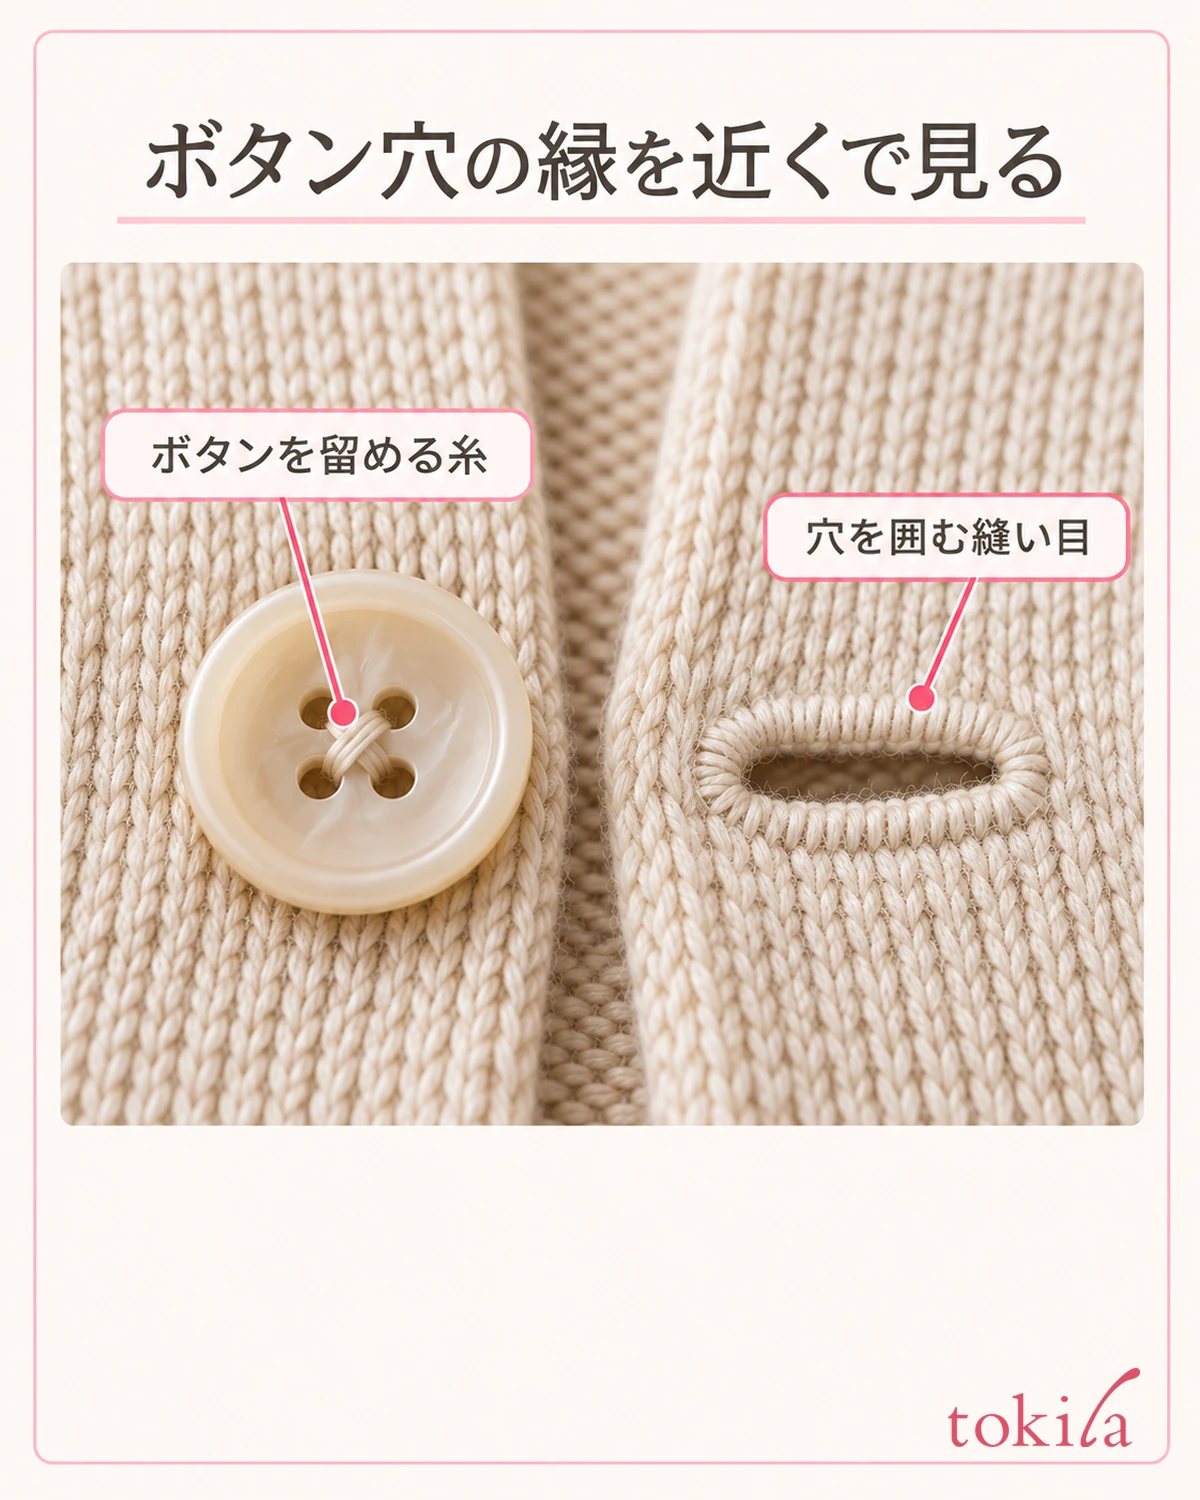
2. Take it off, lay it flat, and check how the buttons and holes pair up
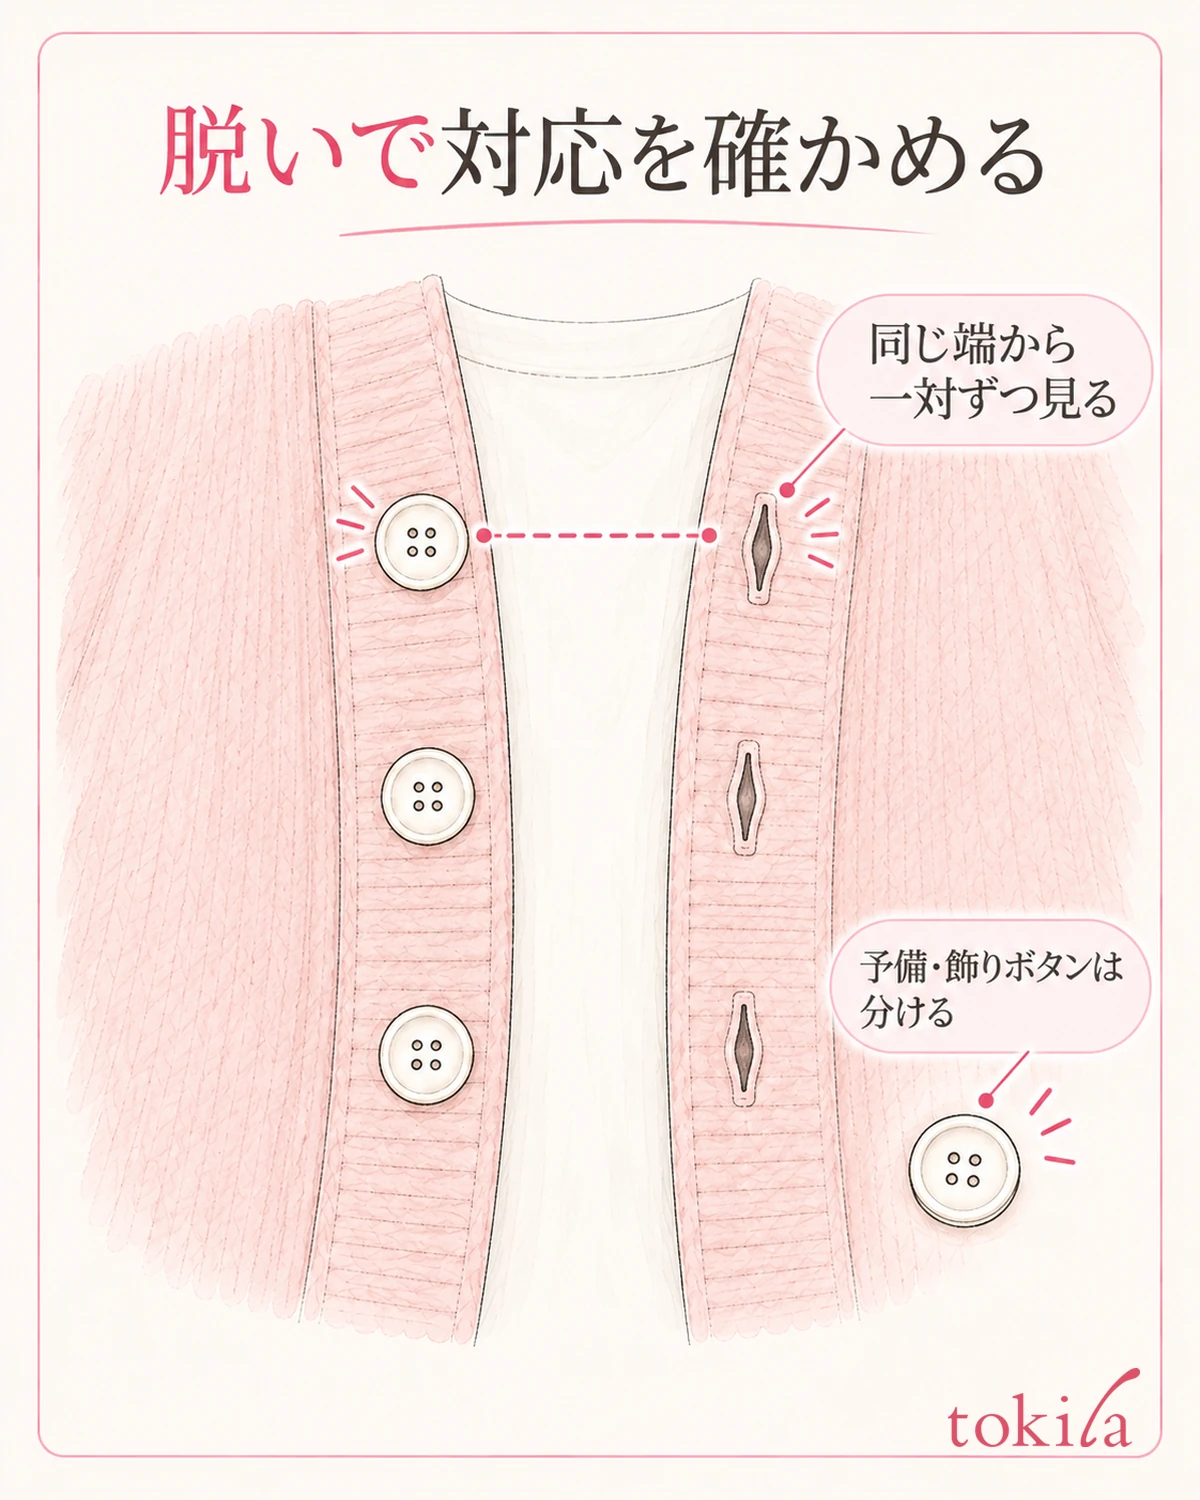
If it is hard to see the front while wearing it, take the cardigan off and lay it face up on a clean, flat surface. Spread the sleeves and body lightly and check that the edges of the front opening are not turned inside out. There is no need to pull the whole garment taut. In its naturally laid state, bring the left and right edges close together and look at them.
The band-like part running along the front opening is called the placket. Tell apart the side where the buttons are lined up and the side where the holes are lined up, and follow the buttons that are actually used to fasten, from the top. Spare buttons attached on the inside of the garment and buttons that are purely decorative are not included in the row you count for pairing. Which side, left or right, carries the buttons is not fixed in a uniform way.
If the garment has the same number of ordinary buttons top to bottom, start from the first button and first hole nearest the neckline and check them one pair at a time in order. The numbers don't have to be printed anywhere; this is just a way of counting so your eyes can follow the row. If you check from the hem instead, use the same end as the starting point on both sides and don't change counting direction partway.
At the stage of seeing whether a hole and a button come close to the same height, don't force them through yet. If you can't reach unless you pull the opposite edge hard to match just one pair, or if you can't tell the pairing in the middle of the row, look again at how the layers overlap and at the structure. Don't push the tip of a button into a hole you can't see, and don't widen the knit with a fingernail to make a hole.
For a garment whose numbers of buttons and holes differ, or one fastened differently from the usual, you can't judge simply by joining the first to the first from the top. There may be fasteners on the inside of the facing, or a decorative row. Don't fasten it until you have confirmed the pairing, and follow the structure of the garment you have. The illustration is a typical single-row example.
3. Fasten one pair as the starting point, then move on to the next pair in order
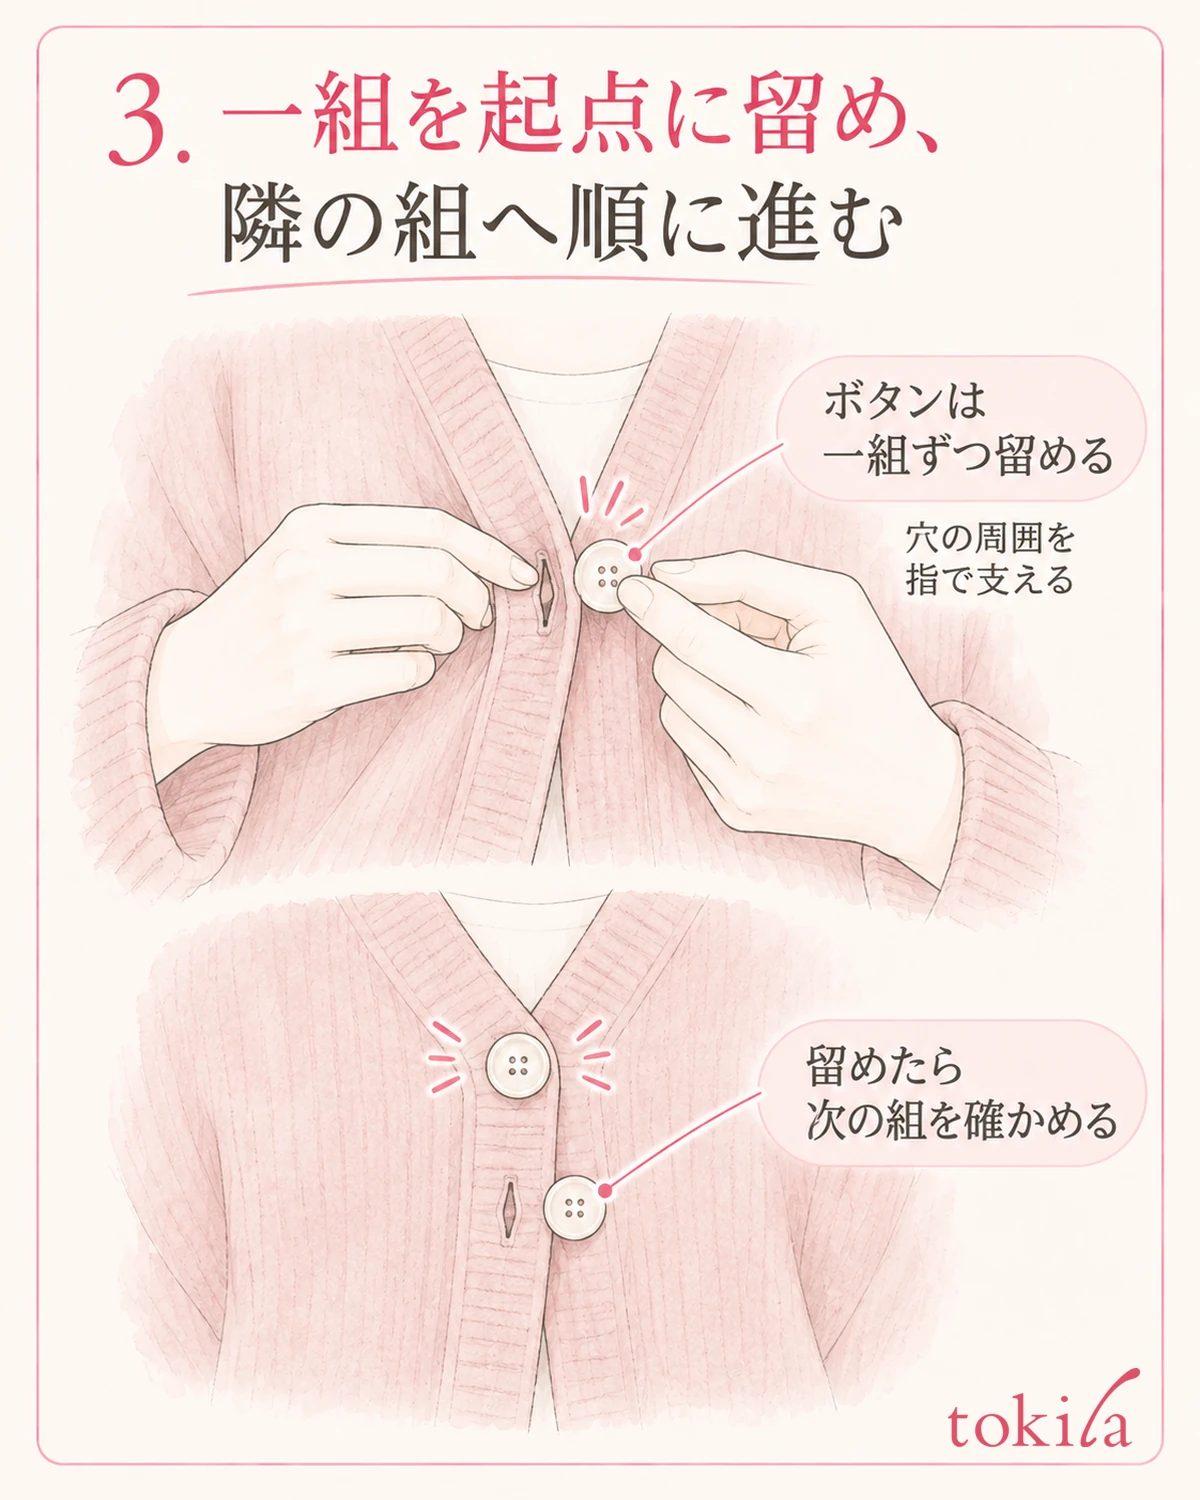
Once the pairing is confirmed, undo the buttons in the range that was mismatched. If several in a row are off, rather than pushing just the one that is off into the neighboring hole, it is easier to see how far they were fastened correctly if you undo that whole range and redo it. When undoing them too, support the area around the buttons and holes, and don't pull the two sides of the body apart left and right.
Decide on the first pair, support the fabric around the hole with one hand, and hold the button with the other. Pass the edge of the button through the entrance of the hole little by little, and slip it out along the shape of the hole. If it is stiff and won't go through, there is no need to force it with the momentum of pulling the garment. Check that the button isn't cracked and that no thread is caught.
After fastening one pair, look at how the placket overlaps, and then move on to the very next button and hole. Check the "one button, one hole" pairing every time, and follow with your eyes to see whether you skipped a hole. Rather than fastening several without looking, checking the next position after each pair makes it easier to notice a shift partway.
When you have fastened a few, stop once and see whether the fabric is twisted or caught. If the edge of the placket is folded in behind a button, undo the area around it and put the fabric back. Trying to pull out folded fabric while it is fastened puts force on the button thread and the hole, so the order is to undo the fasteners first and then fix it.
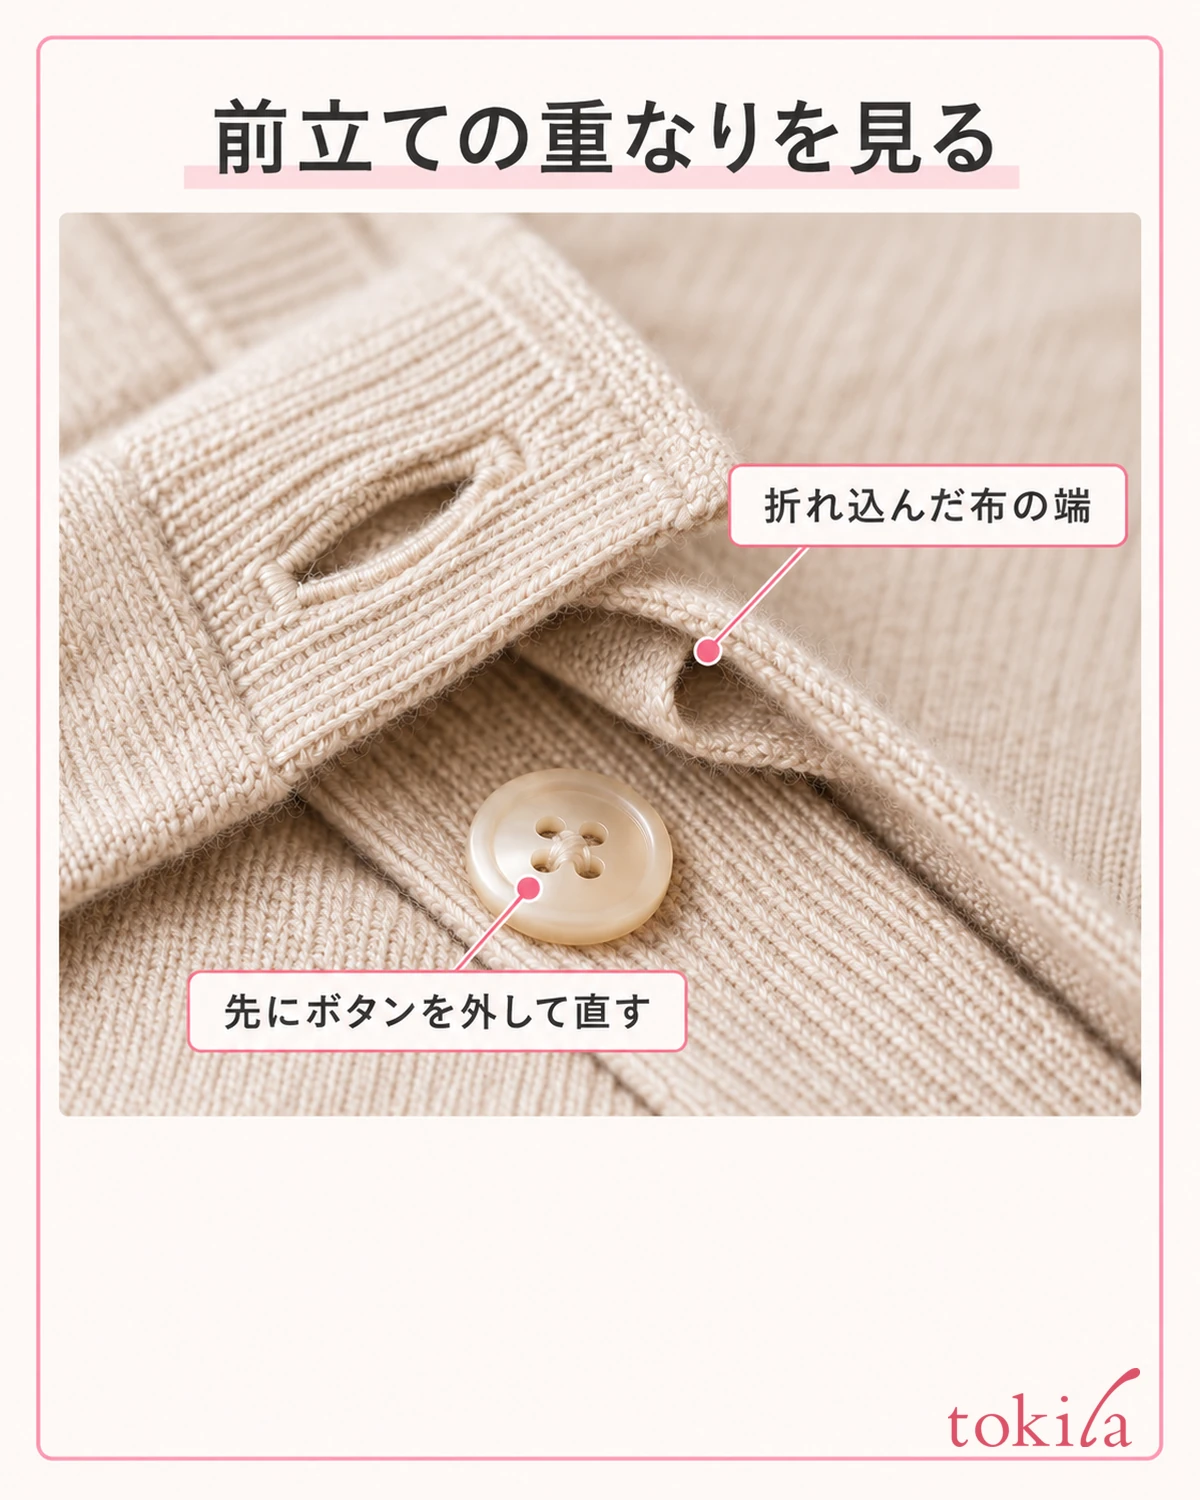
If it is hard to undo the whole thing when you are out, limit yourself to the point where you can confirm the pairing within the range you can see. The more you are in a hurry, the more you want to avoid adjusting by only pulling the hem. Move to a place where you can safely refasten it and, if necessary, take it off once and start over. This does not mean you must always fasten every button; it is a procedure for choosing the right pairs of the buttons you do fasten.
4. After putting it on, recheck the placket, the hem, and the clothes underneath
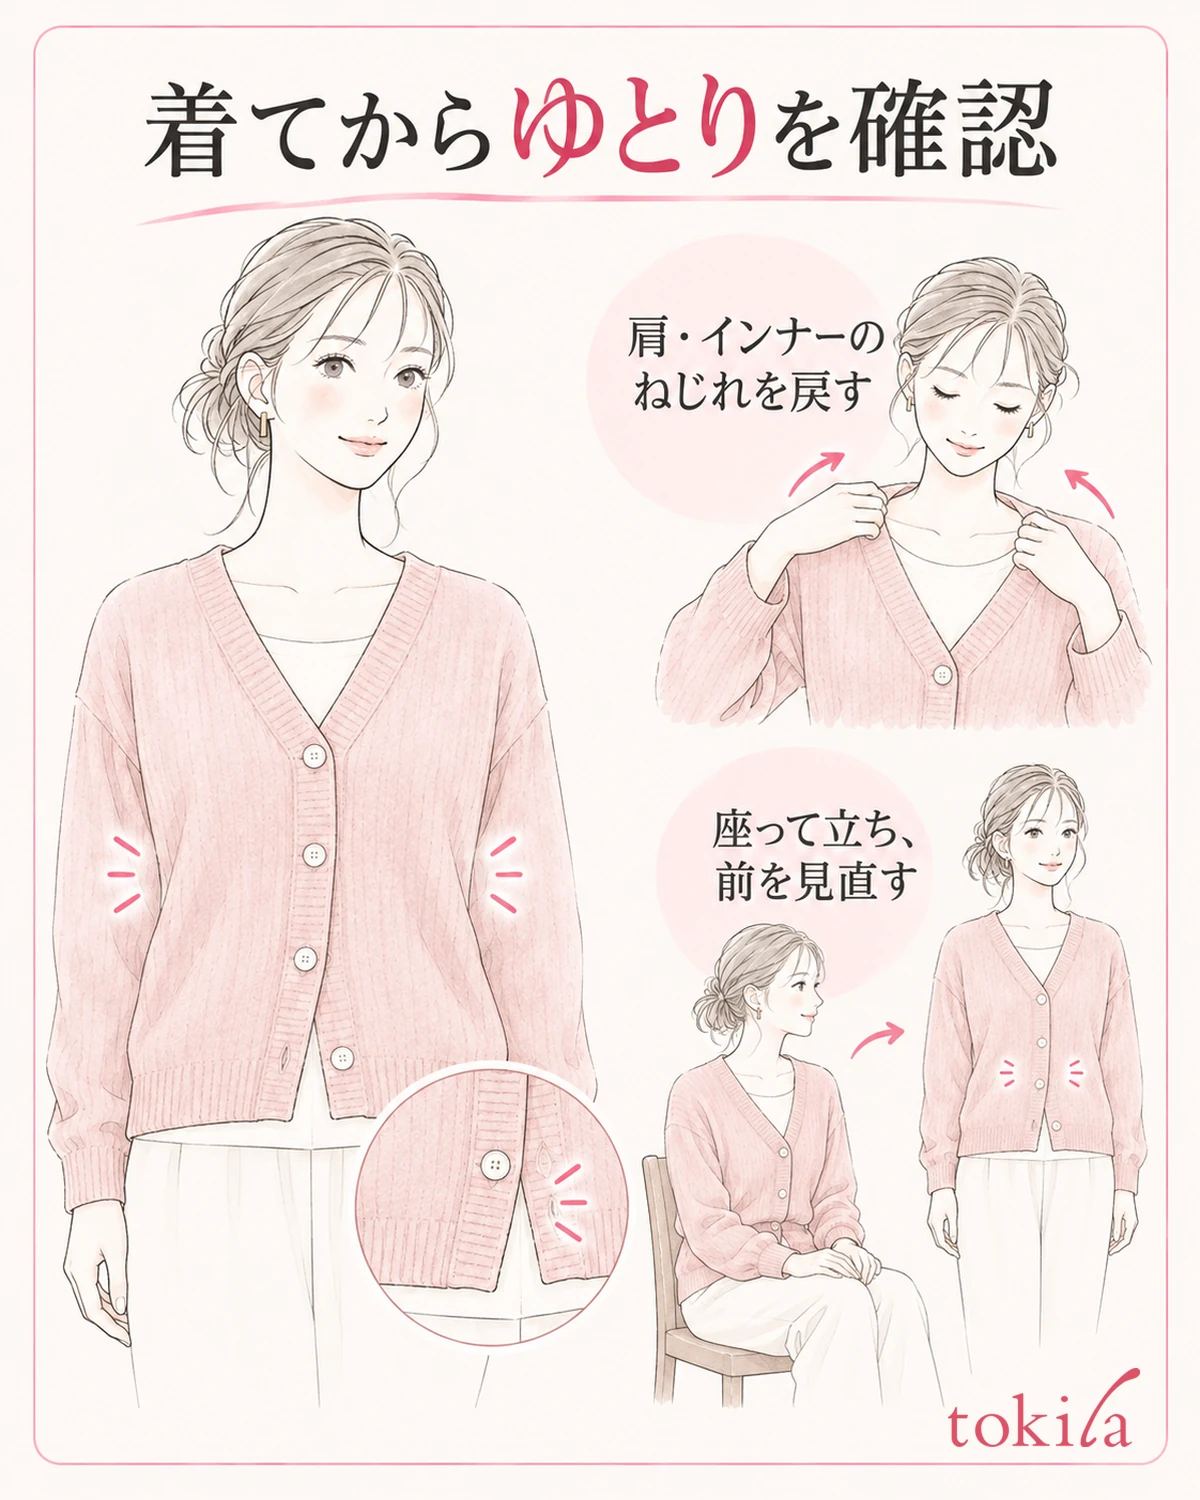
Once you have refastened it, put it on and first settle it naturally on your shoulders. Check that one shoulder hasn't slipped backward and that the fabric on the back isn't folded on the inside, and undo any twisting from passing your arms through the sleeves. If you look at the front line after that, you are less likely to confuse a mismatched button with the whole garment having rotated while you put it on.
If the hem or sleeves of your inner layer are bunched up in one place, open the cardigan a little and smooth the fabric underneath back flat. Before fixing the inside, don't try to close the front by pulling on the outer buttons. How to adjust a shirt tucked into your bottoms is explained in detail in Reviewing shirt hems and fabric ease.
Next, look at the neckline, the row of fastened buttons, and the hem as one continuous line. Even if the pairing is correct, if the gaps between buttons open wide, sideways wrinkles gather, or it feels tight when you move, don't try to tidy it by fastening more buttons; review your current layers and how you are wearing it. Depending on the shape of the garment, wearing it open as a layer or changing the thickness of the inner layer are also options.
Undoing one button may change how it looks, but don't turn that into a fixed rule such as "always leave the bottom one open." The shape changes with the collar, the length, and the spacing of the buttons. Check that the open part does not get in the way of movement and that it is comfortable to wear, and choose a way of fastening that suits the one you have.
Finally, sit in a chair, stand up, and check once more. This is to see where the fabric at the front shifts after everyday movements, not just in a still view from the front. Don't judge a mismatch only because the hem moved when you raised your arms; look at whether the pairing of buttons and holes is kept and whether there is any tightness or local pulling.
5. If it still shifts after refastening, don't stretch it; record its condition
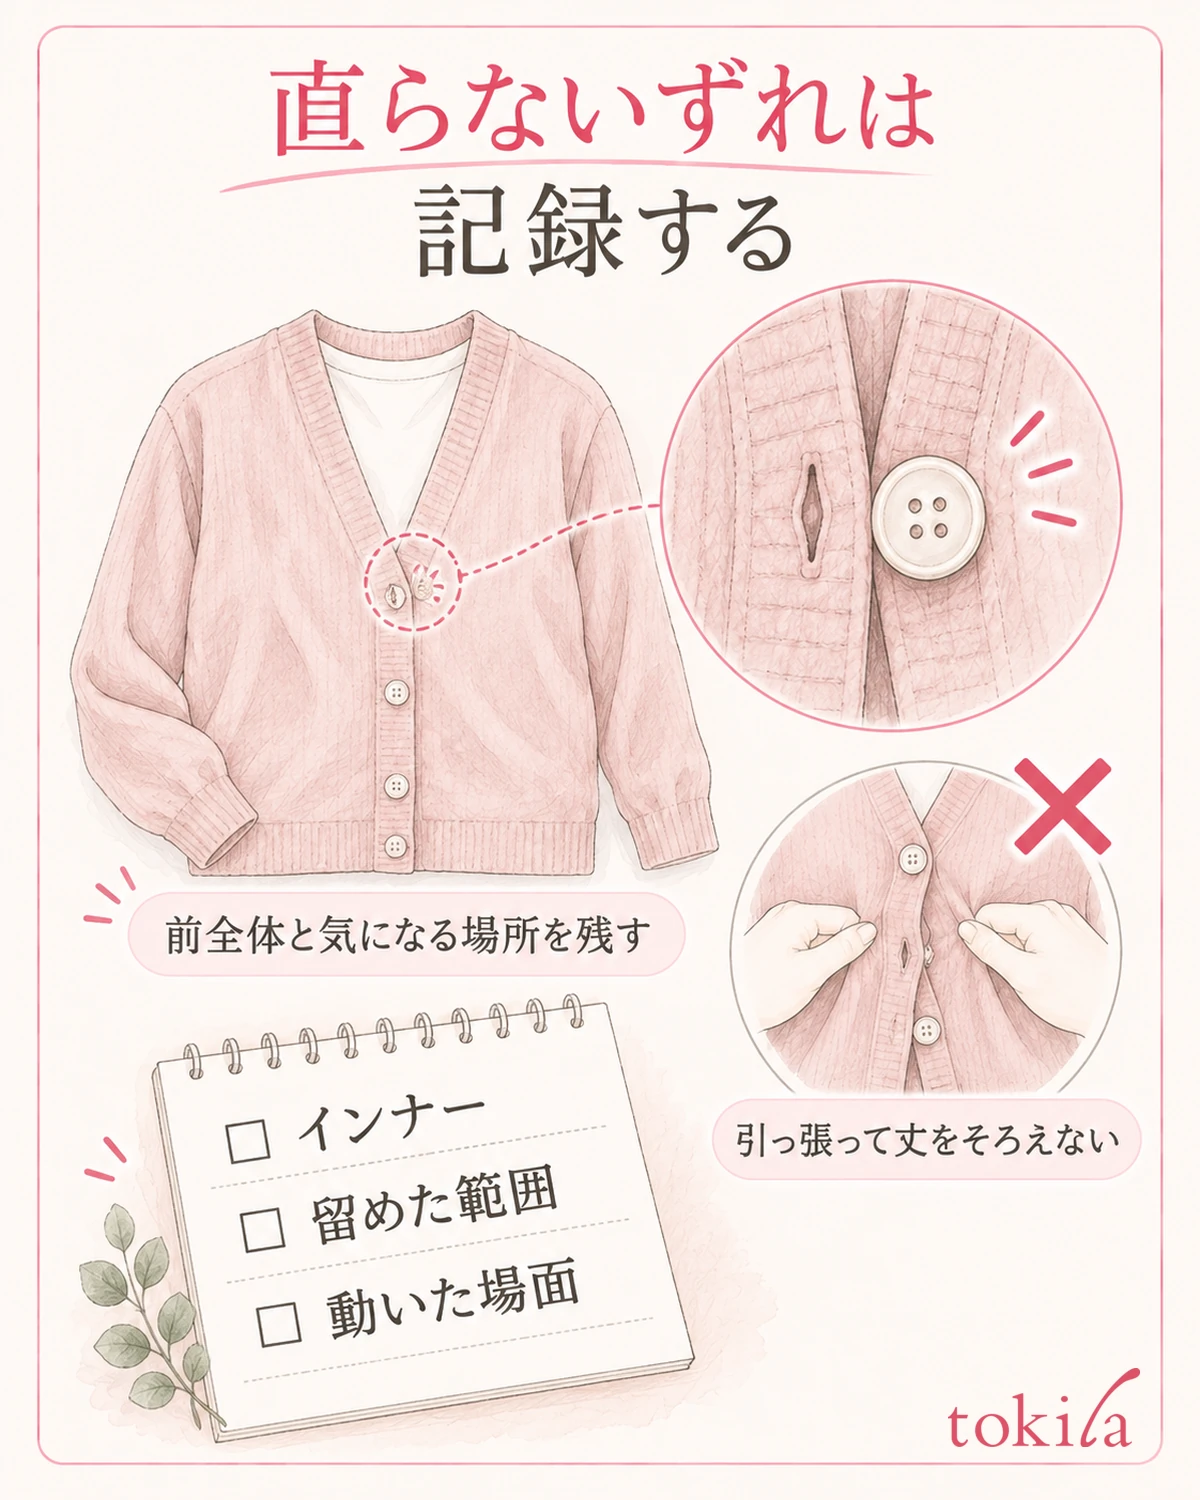
If the pairing is right when it is taken off and laid out, but the front is pulled when you wear it, first change one wearing condition and look again. For example, swap a thick inner layer for a thin one, or change the range you fasten. If you change several conditions at once, it becomes hard to tell what made the difference in how it looks. Check what you changed and where it changed.
If only one part of the placket ripples even when the cardigan is taken off and laid out naturally, if a button thread is fraying, or if the edge of a hole is damaged, it may not be fixed by the order of fastening alone. Don't go on to treatments such as pulling the hem to even out the length, cutting a hole wider, or cutting a thread on your own judgment. Hold off wearing it and check the damage and the specifications.
Keep separate from checking for mismatched buttons any work that uses water or heat to restore the shape. You can't decide that steam is fine because it is knitwear, or that the same temperature is fine because the material name is the same. If care is needed, first read that garment's care label and precautions. Don't extend the dry-state refastening introduced here into methods of washing or repair.
For consulting someone or for checking next time, recording the whole front with the garment laid flat and the area around the pair that bothers you makes it easier to explain the location. If it changes only when worn, also add which inner layer you wore, how far you fastened it, and in which situation, standing or sitting, it bothered you. This record is not for pinning down the cause from a photo alone; it is to avoid mistaking the condition.
After wearing it, store it in a way that suits the shape of the garment and its care label. If the shoulder marks from storage bother you, you can also check Folding and hanging knitwear for storage. If you notice the front shifting, look at the whole, check the pairing, fasten one pair at a time, and look again after moving. In this order, go back to checking before you use strong force.



