
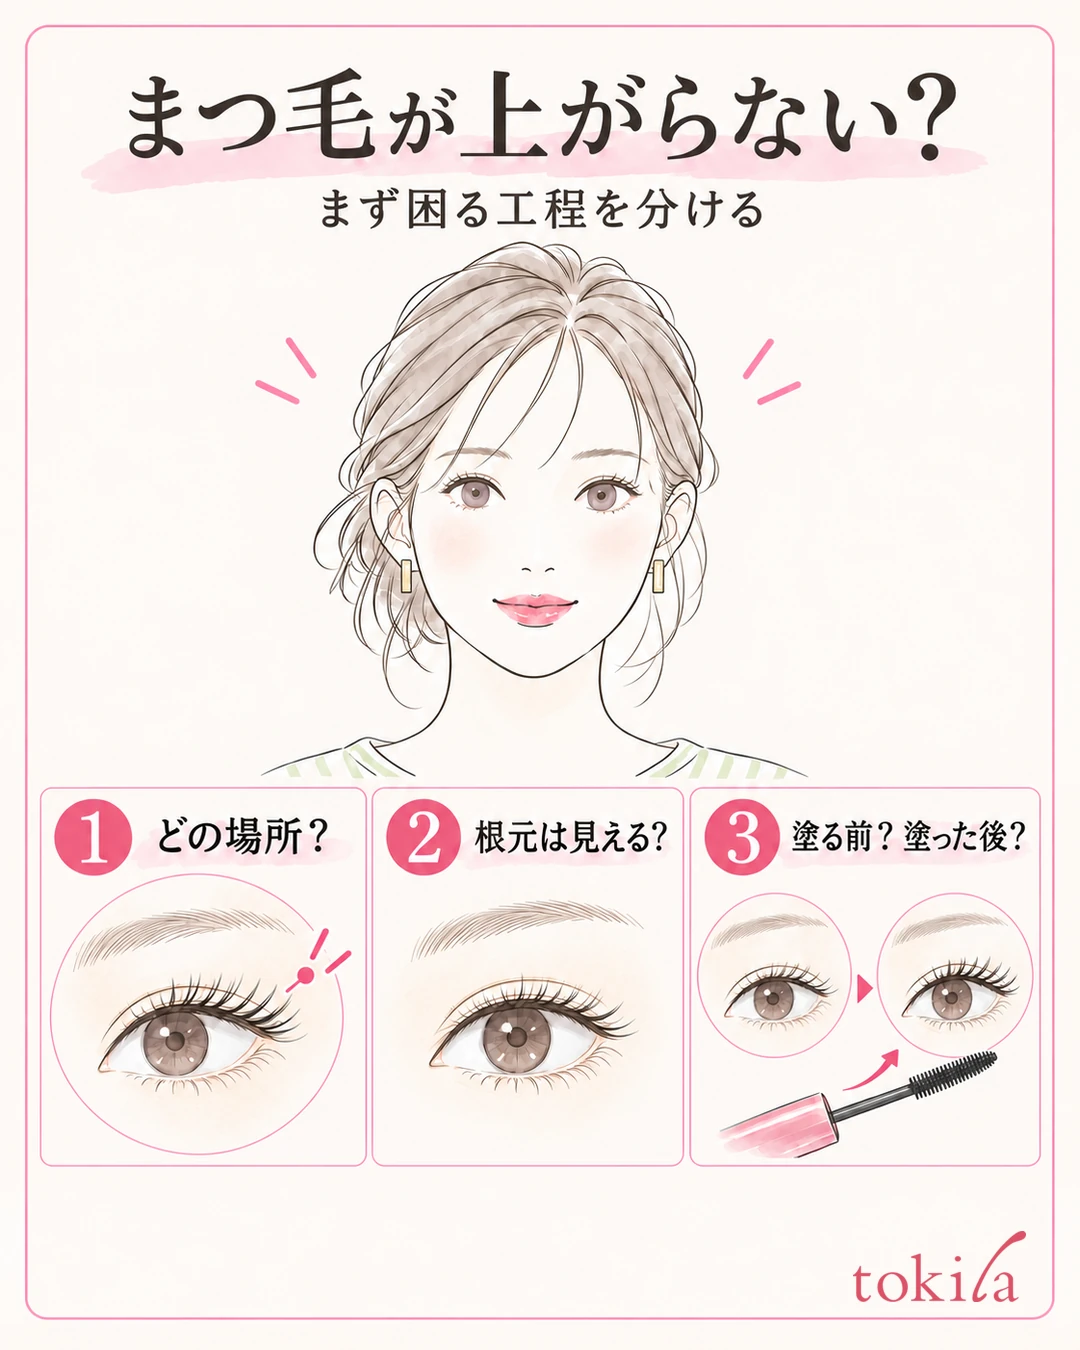
If your eyelash curler will not lift your lashes, or only the middle lifts while the ends stay down, check the condition of the tool and where you are clamping before squeezing harder. The basics are to clamp lightly with the mirror positioned so you can see the roots, then ease off the pressure as you move to the middle and the tips.
This article explains how to inspect an ordinary metal eyelash curler before use, and the steps for checking when you curl your upper lashes. Ease of handling varies with lash length and eyelid shape, so follow the instructions for the product you have.
1. Separate Where Lashes Won't Lift from When They Drop
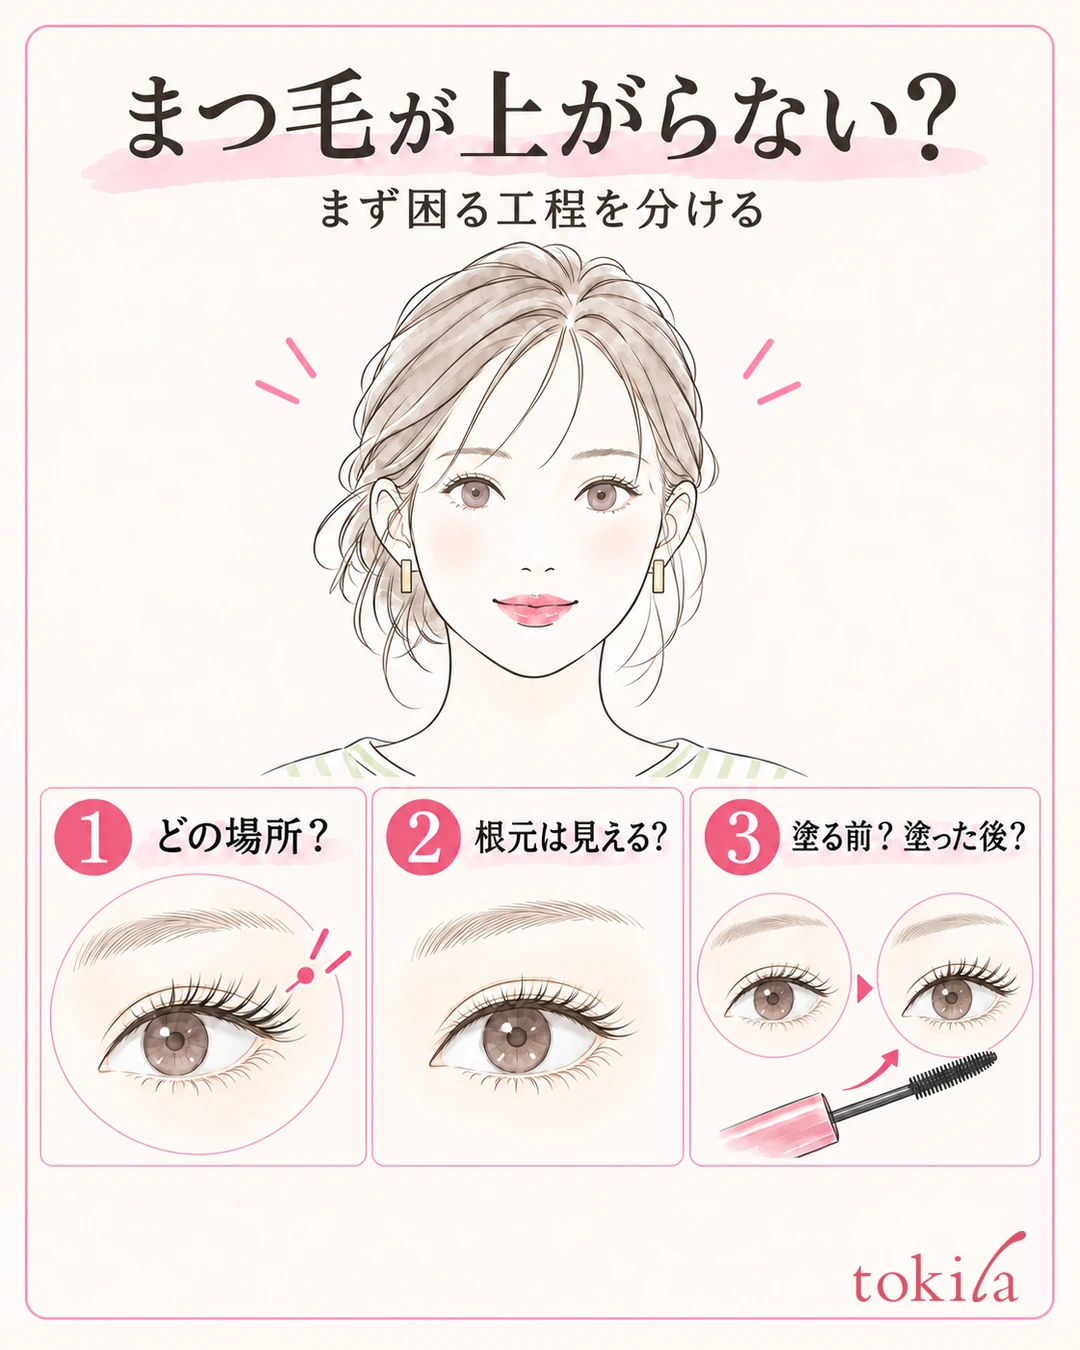
Before squeezing the curler over and over, find out where you are having trouble. Are you not catching the lashes in the first place, do the roots not lift even when clamped, or do the lashes drop after lifting once? Similar results can call for different steps to be reviewed. Do not make adding force your first response.
Look at your eyes up close in the mirror and check the center, the inner corner side, and the outer corner side separately. If the center lifts but only the ends stay down, look at the range where the curler catches the lashes and how the frame fits. If the whole lash line is hard to clamp, check the mirror position and how the lash line looks. Ease of handling may also differ between your left and right eyes, so do not assume that clamping both sides the same number of times will even them out.
The roots may also be hard to see because the upper eyelid hides them. Rather than deciding the steps by the name of your eye shape, use the mirror to see where your lashes actually grow from. There is no need to push the tool into a spot you cannot see.
It helps to sort out your checks into before and after applying mascara. If your lashes won't lift even before applying, review the tool and where you clamp first. If they drop only after applying, also check the area where you layered product and how that product finishes. Repeatedly clamping lashes that already have product on them is not a common way to touch up.
After looking up close, turn your face back to its usual position and look at both eyes together. If you bring your face too close to the mirror, you tend to judge the overall angle by looking only at the tips of the lashes. Rather than aiming only for a big lift, deciding on a range that looks natural for today's makeup gives you a standard for when to stop.
Put one condition into words, such as "only the right outer corner stays down" or "the center drops after mascara." If your main problem is lashes clumping with product, see also how to apply mascara without clumps. Here we focus mainly on the step of catching the lashes with the curler.
2. Before Use, Check the Frame and the Rubber Pad
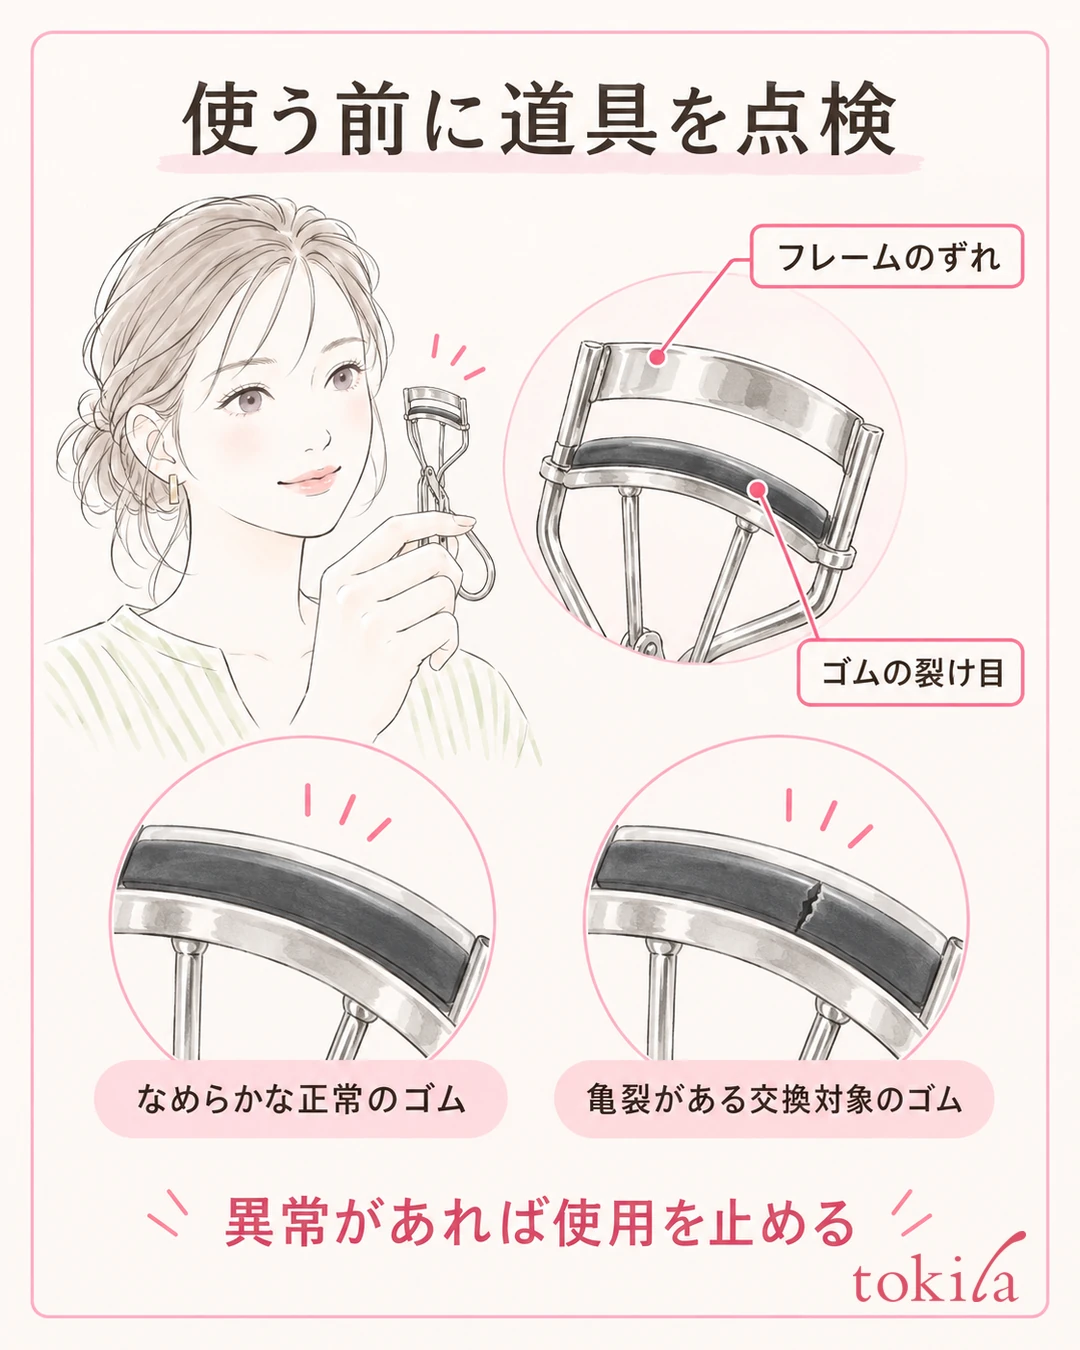
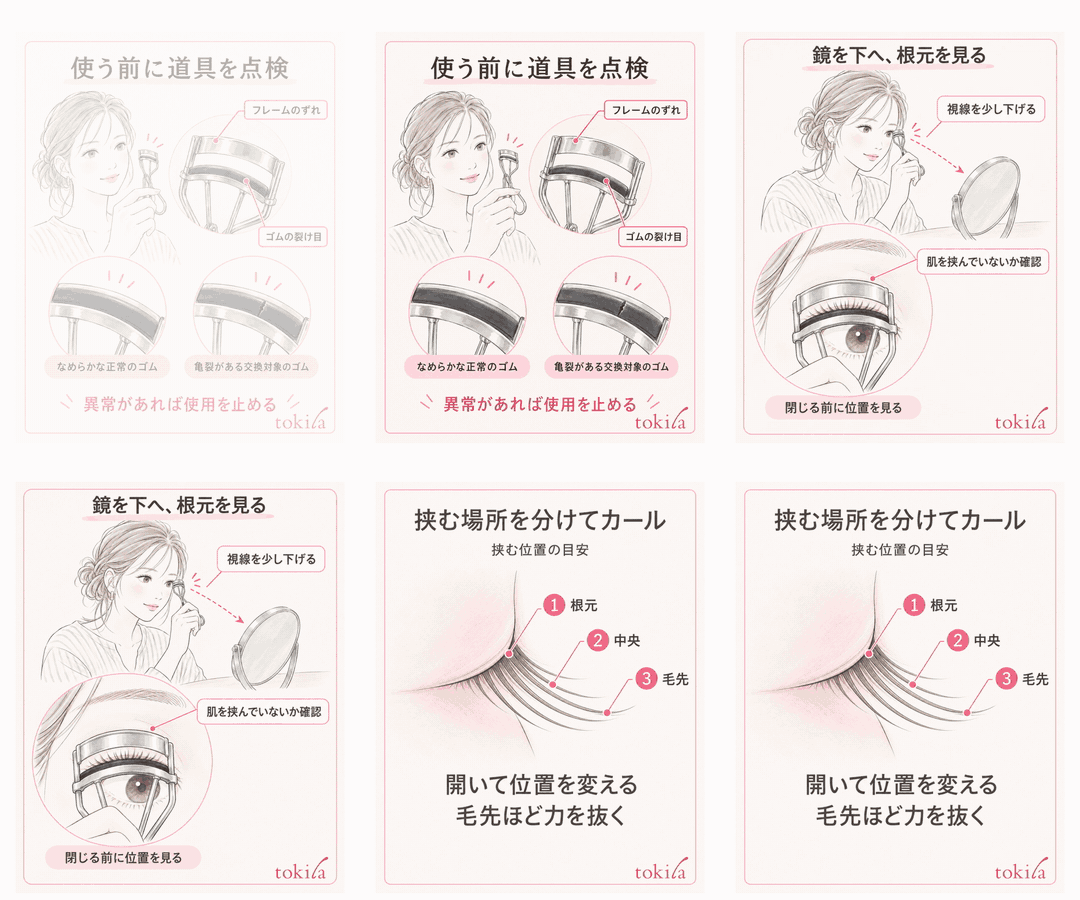
Check the tool while holding it away from your eyes. See whether the upper frame lines up with the center of the rubber pad, whether the pad sits properly in the lower cradle, and whether the two sides are misaligned.
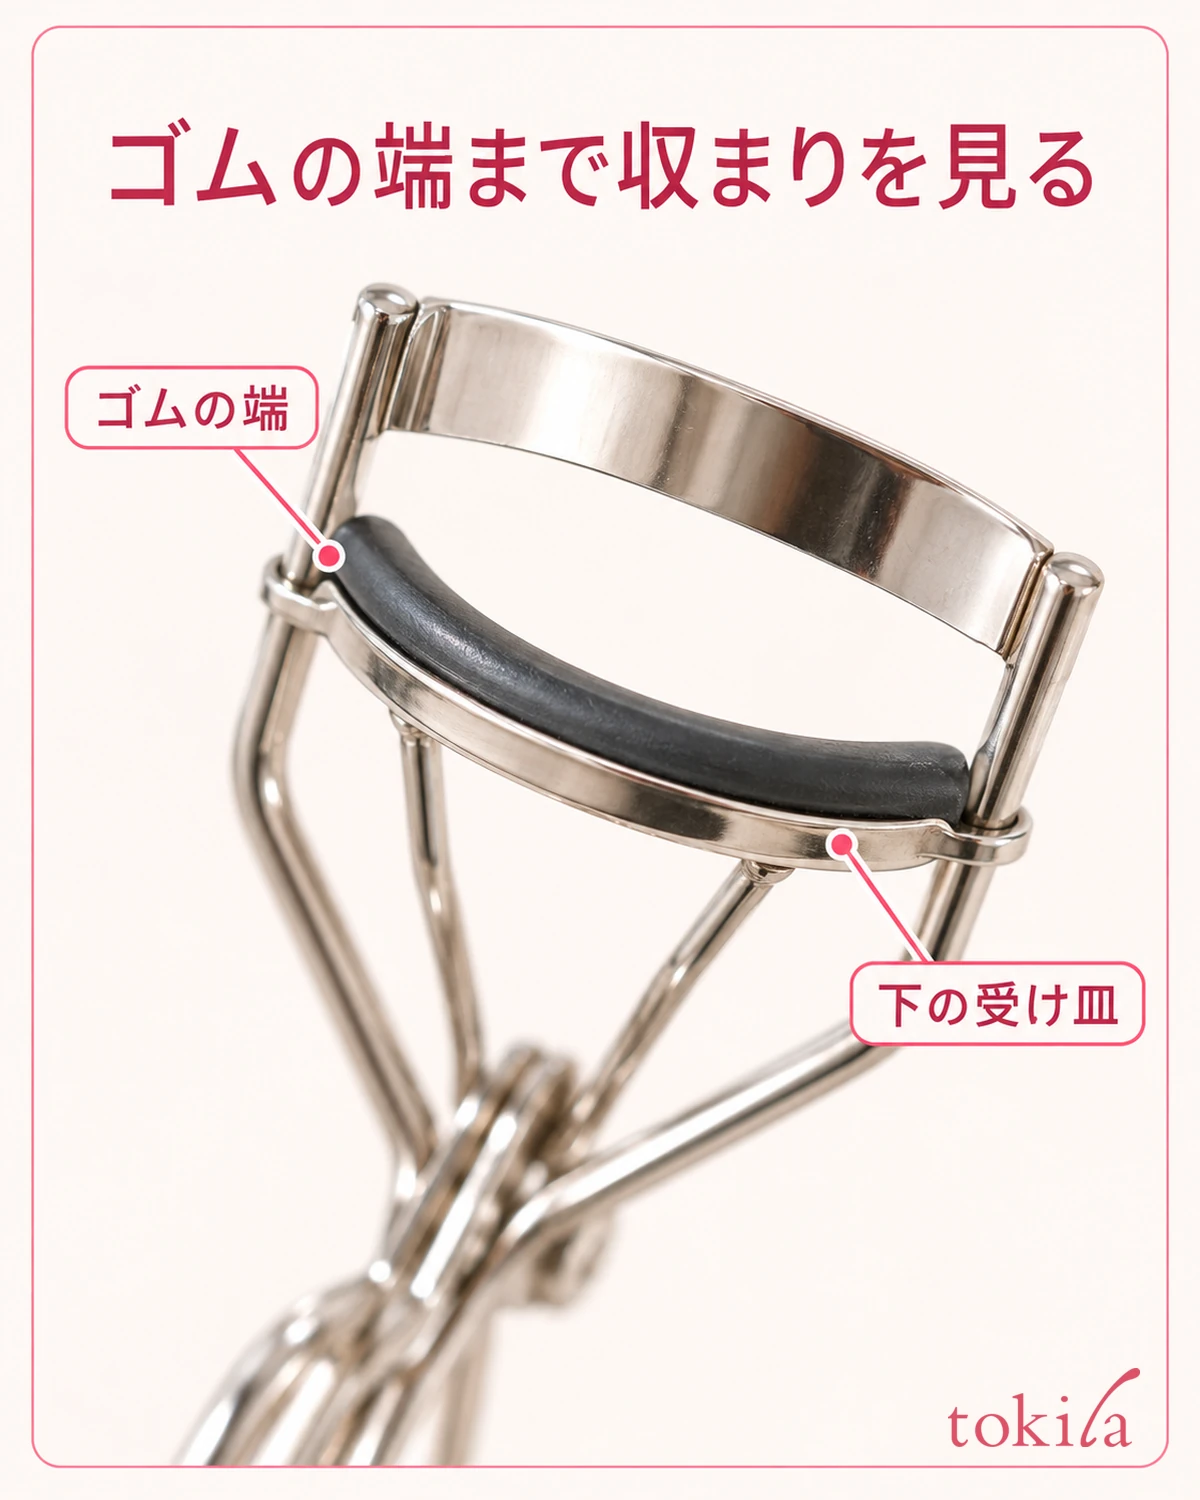
Also check whether the surface of the rubber has any splits or cracks. When the rubber is damaged, it is time to consider replacing it rather than pressing more times.
Choose a replacement pad that fits the body you have. Even if they look alike, the dimensions and fit are not necessarily the same. Even after replacing it, if an end lifts, it does not seat in the center, or it shifts when opening and closing, do not use it on your eyes as it is.
Check each product for when to replace the body itself. Do not apply a single period to all eyelash curlers; give priority to your own product's instructions and the damage you can see in front of you.
Wipe makeup residue off the frame with a tissue or dry cloth following the product's instructions. Make cleaning after use a habit so you do not use a dirty tool for your next makeup. Methods such as soaking the whole tool in water or bending the metal yourself are not common steps for care or adjustment.
Even if the curve does not seem to fit your eyes, it is important not to deform the frame to make it fit. When thinking about buying a new one, sort out whether you cannot clamp at the center or at the ends, and where it touches your eyelid, and refer to the shape descriptions and in-store advice. Sorting out why it is hard to use before choosing helps you avoid simply looking for a tool that clamps harder.
3. Place the Mirror Slightly Lower and Look at the Lash Line Before Clamping
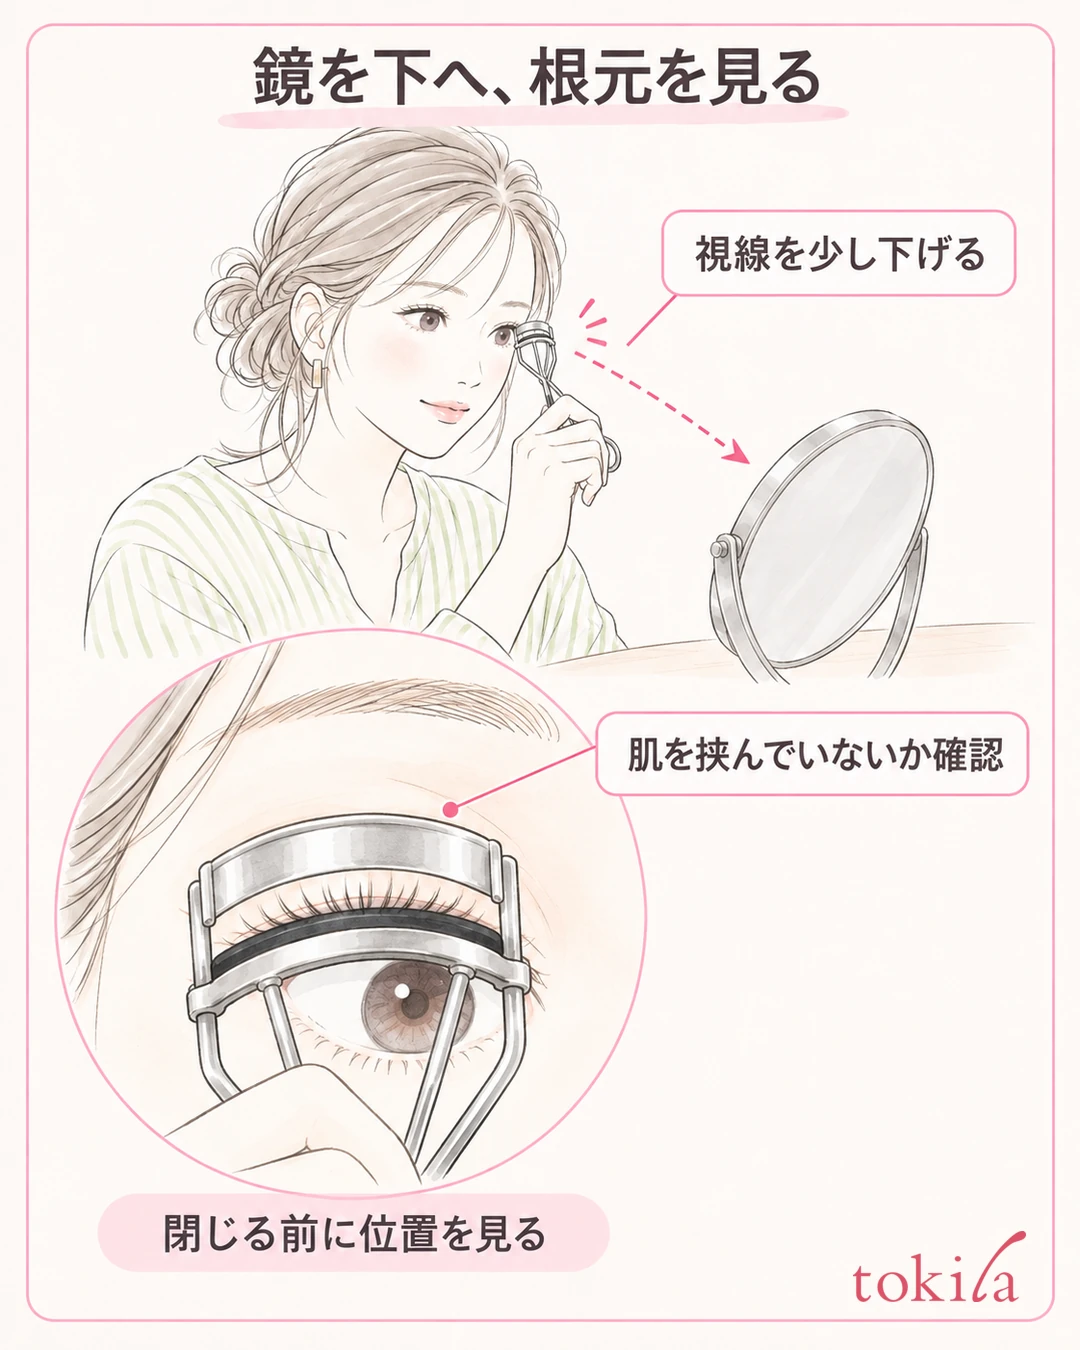
If nothing is wrong with the tool, steady your mirror and your hand. Placing the mirror slightly below your face and lowering your gaze a little makes it easier to see the base of your upper lashes. Rather than tilting your face far back, look for an angle where you can see the lashes and the frame. Do not rush in a dark place or somewhere that moves.
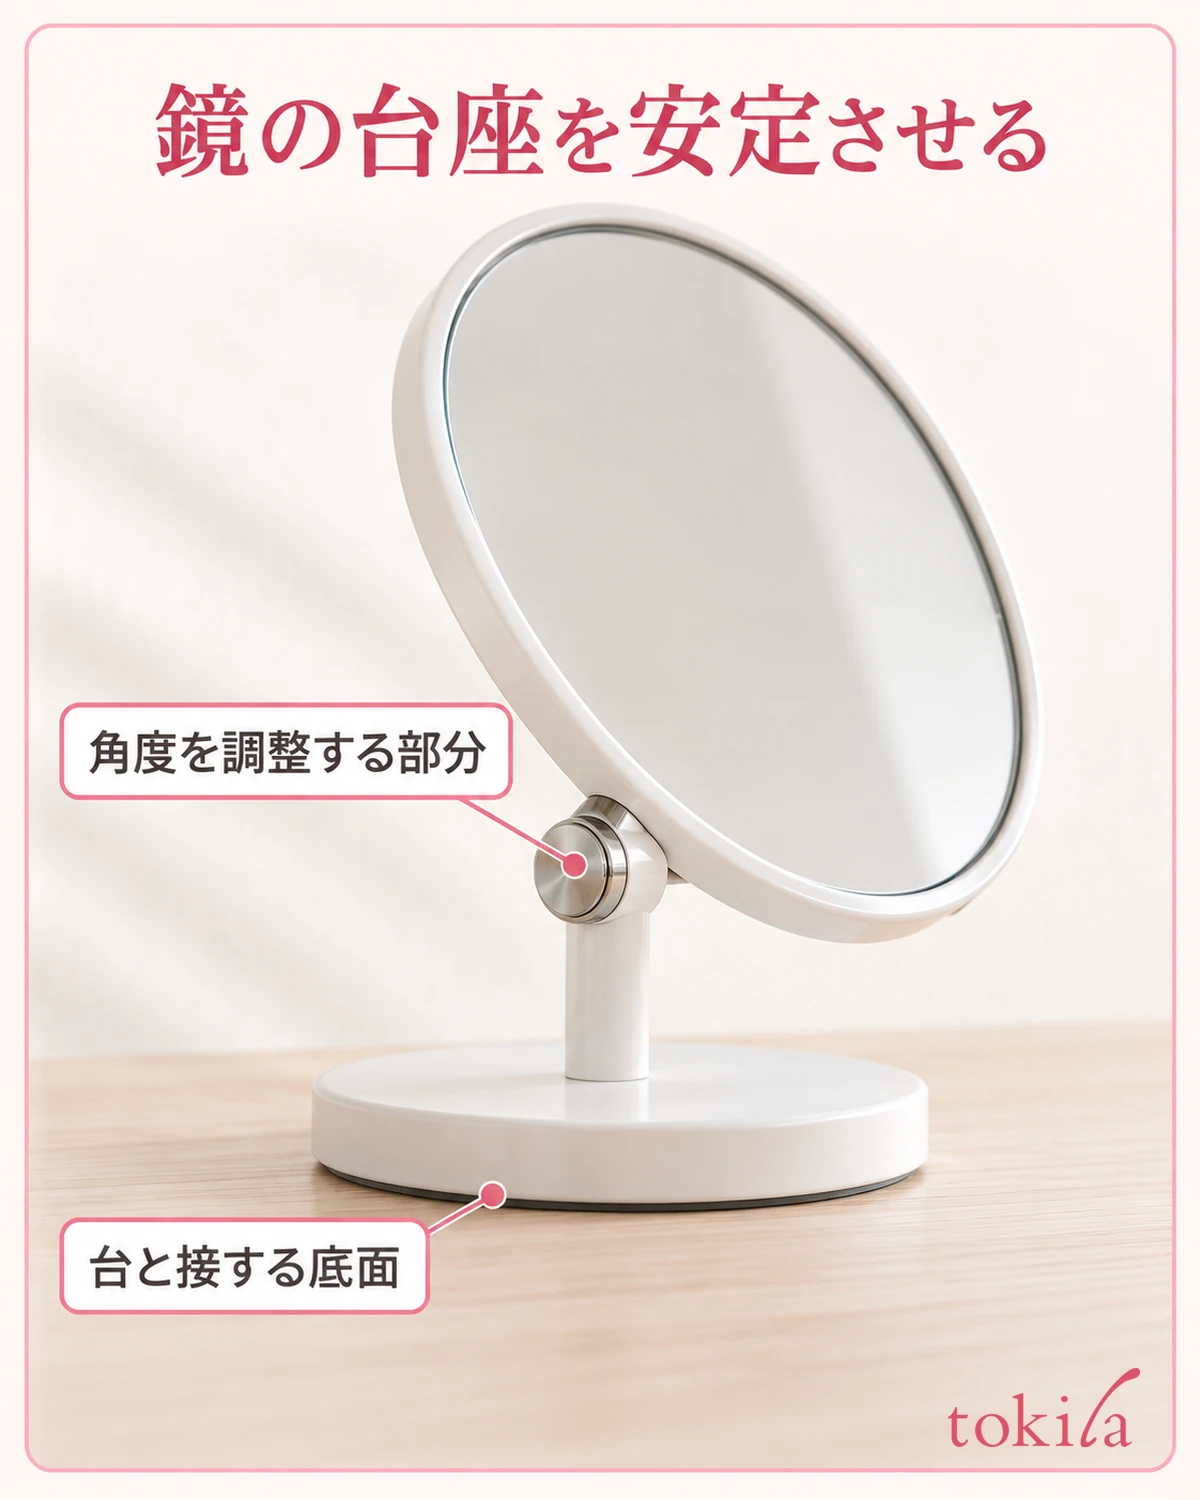
Open the curler and line up the underside of the upper frame with the base of your upper lashes. Before squeezing, check that the lashes sit on top of the rubber and that no eyelid skin has slipped in between. Getting close to the base of the lashes and pinching skin are different things. There is no need to move so close that it hurts.
If the roots are hidden by your eyelid, first change the angle of the mirror and check. See whether more of the lashes become visible and whether the lashes at the ends are slipping outward, and line it up in a position that does not strain you.
Once it is lined up, close it slowly and lightly. If it seems about to pinch your skin, it hurts, or you feel your lashes being pulled, open it right away and reposition. Do not pull outward while still squeezing, or shake the tool to pick up lashes. Letting go once and checking in the mirror makes it easier to decide the next step than squeezing without being able to see.
If only the inner or outer corner side stays down, open it once and look at the range it touches. Tell apart whether the ends are not reached when you line up at the center, or whether the eyelid might slip in when you move toward the ends. Even if a full-lash tool cannot clamp everything at once, there is no need to press it on at a forced angle.
If you use a tool for partial areas, check its dedicated instructions and the area it touches. A smaller tool is not necessarily easier to handle. If you have eyelash extensions or a lash perm, give priority to the instructions from your technician and the product, and do not apply these general steps as they are.
4. Divide Into Roots, Middle and Tips, and Ease Off Toward the Tips
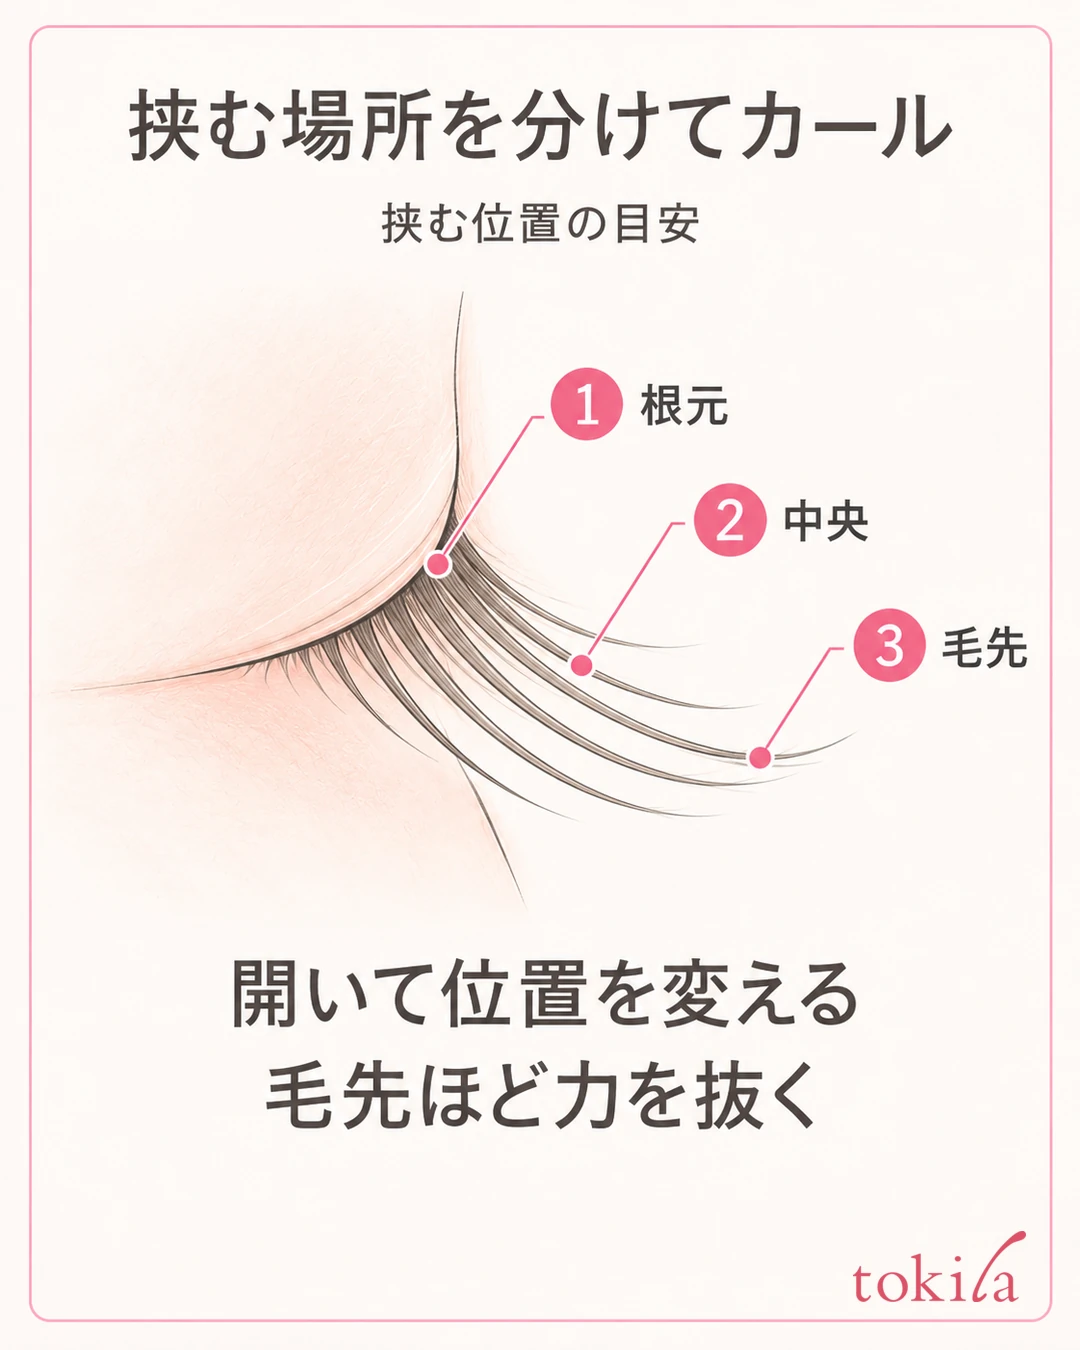
Once you have confirmed the position, rather than bending one spot sharply, build the curl by dividing the places into roots, middle, and then tips. The three positions in the diagram are a guide for where to look; they are not an instruction to divide everyone's lashes exactly into thirds.
First, clamp the roots slowly and lightly. When you move to the next position, open it to release the lashes, line it up again at the middle, and then close it. Do the same at the tips, opening to change position and easing off the pressure further. When looking at the diagram, the point to check is not to pull it out along the lashes while still clamped.
Adjust the angle of the curl little by little. If a sharp bend forms at the roots alone, continuing to clamp the same spot hard will not necessarily bring it back to a gentle shape. On that day, stop adding force, and review how you divide the places you clamp next time. If your lashes are short, the range you can move through is also smaller.
To keep the pressure even, you do not need to count long seconds while squeezing. Clamp lightly, let go once, and check which positions have lifted. Rather than adding the same number of clamps to all the lashes, look for places you missed and stop within the range you can handle comfortably.
If the difference between left and right bothers you, review how you apply the tool on the side that looks lower. Do not make lifting the other side even more the first response. The shape of the eyes and the way lashes grow can also differ between left and right, so look at your eyes in the same light and check whether it is a difference you actually care about.
Do not use the method of warming a metal eyelash curler with a lighter or hair dryer. A heated eyelash curler is a separate, dedicated device. Do not treat it as a substitute for applying heat to the tool you have, and if you use one, check that device's instructions.
5. If Lashes Drop After Mascara, Rethink the Amount You Layer
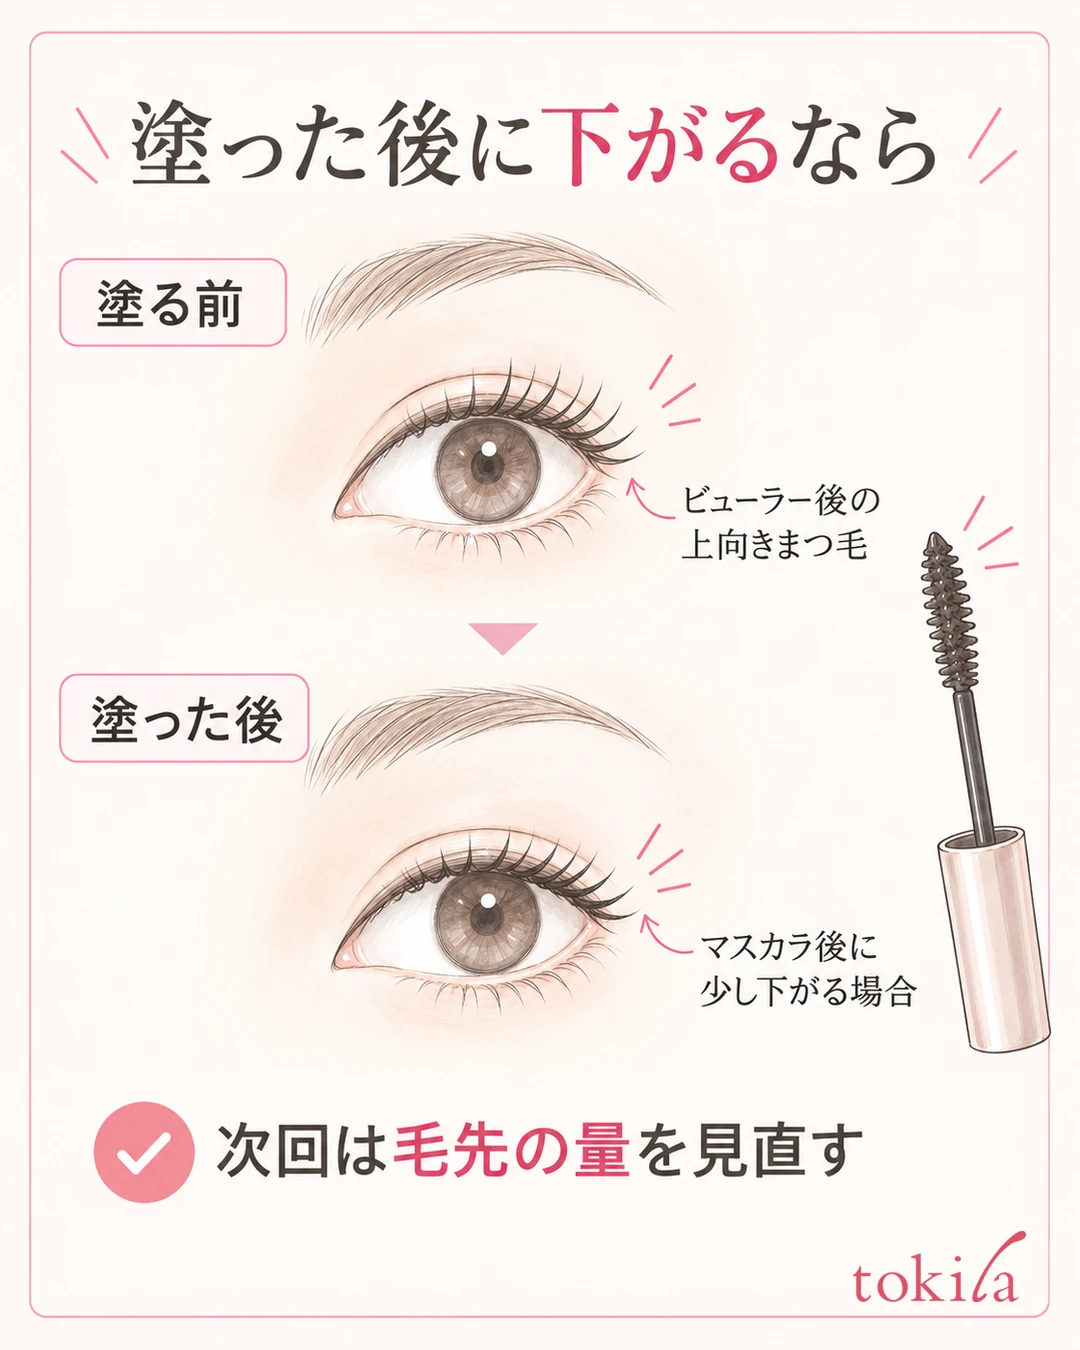
Compare right after curling with after applying mascara. If the lashes are lifted before applying but drop afterward, rethink not only the curler's pressure but also the amount of product layered on the tips and the characteristics of the mascara you use. Before continuing to add more product, check at which step things changed.
This does not mean you must not apply it to the tips. It is a point to consider when trying, following the instructions of the product you have, not to layer it thickly on the very tips from the start.
If you use a primer, check the order of layering and the drying time for each product. Primers meant to hold a curl are sometimes introduced, but not everyone necessarily needs to buy one more product. Review one thing, such as the amount of product or the area you apply to, with the tools you already have, and then consider the role that is missing.
Repeating the regular eyelash curler on lashes that already have mascara while you are out is not a basic way to touch up. Avoid pulling hard when lashes stick to the tool or you feel resistance. Judge from the product's instructions and the condition of the tool whether to remove and redo them, or to stop at neatening them up for today.
A one-line note for next time is enough. Link the place that gave you trouble with the condition you will change, such as "I can't clamp my right outer corner, so lower the mirror" or "they drop after applying, so reduce the amount layered on the tips." Rather than changing the mirror position, pressure, tool, and amount of product all at once, you can look back on which change made things easier to handle.
At the end, check both eyes and your whole face, and stop where it is needed. For the overall order, see the basic order of makeup. When the curler won't lift your lashes, the starting point is to review, in this order, the inspection of the tool, the mirror position where you can see the lash line, and where and how hard you clamp.



