
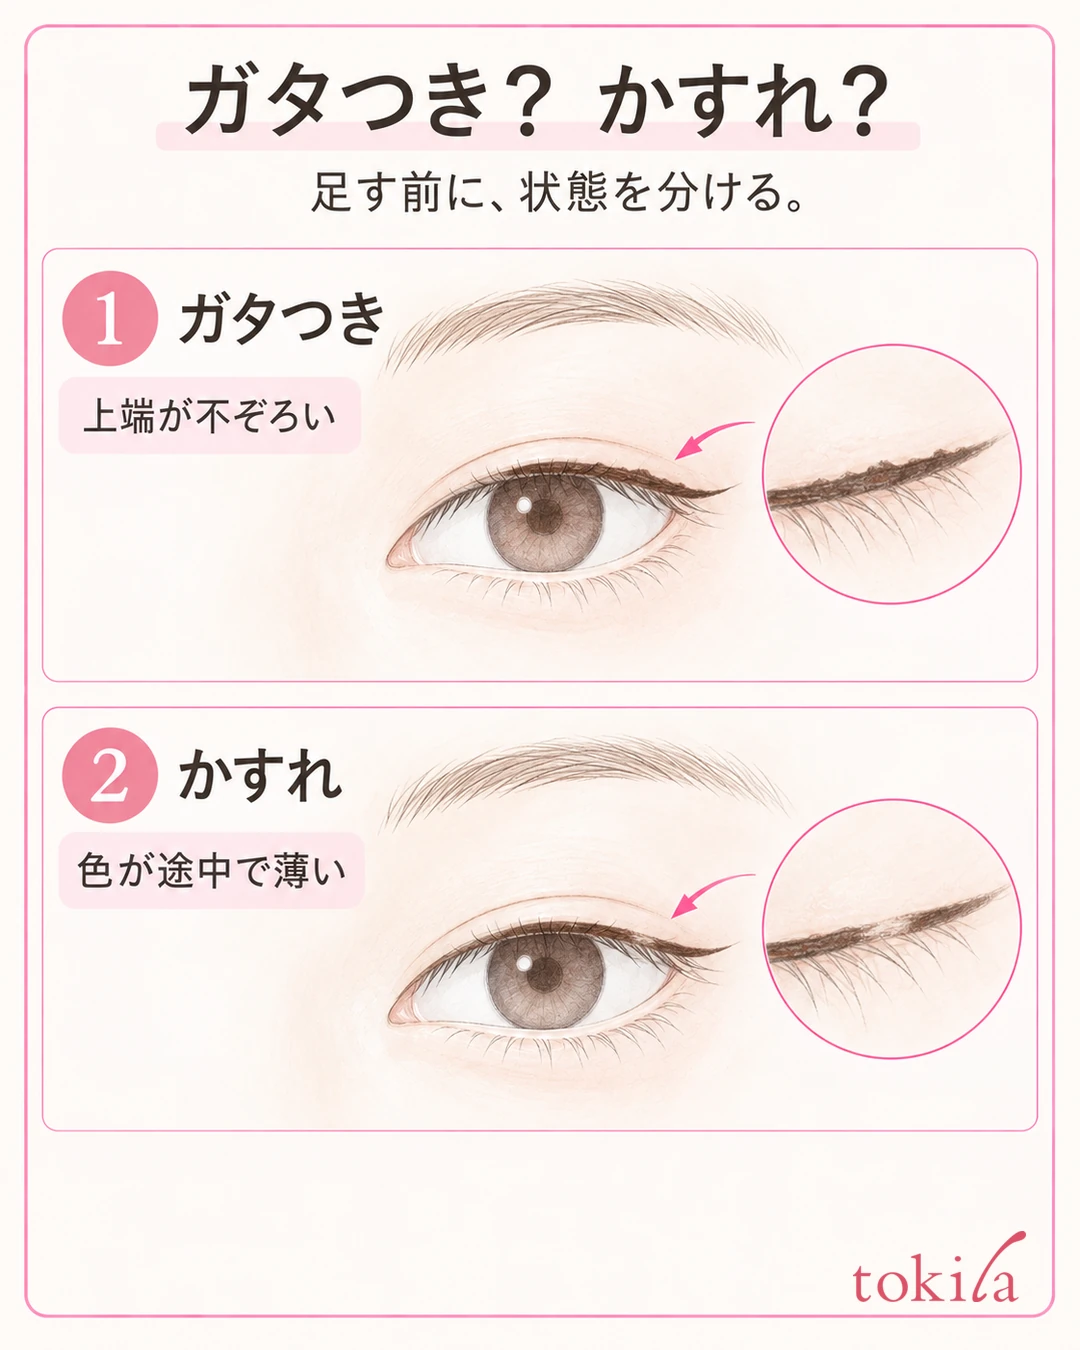
The top edge of your eyeliner looks wavy. As you reconnect the gaps, the line ends up thicker than planned. When that happens, before going over it again and again, check the shape of the line, how the color comes out of the tip, and how your hand is supported, one at a time.
This article focuses on jagged eyeliner drawn on the skin of the upper eyelid, and covers preparation before drawing, how to connect short sections, and how to touch up the parts that went wrong. It does not cover drawing on the mucous membrane; it puts the product's instructions and how your eyes look when open first.
1.Tell jaggedness, skipping and smudging apart
First, move the tool away from your face and look at the line you drew in the mirror. Is the color coming out but the top edge slightly wavy? Is the color fading thin in places? Or is the line spreading vaguely beyond its edge? They may look alike, but what to review first is different.
If the top edge of the line is uneven, look back at the moments your hand moved and whether you tried to draw a long distance in one go. If the color fades midway, the order to check is the product adhering to the tip and how the liquid flows. Do not settle on a single cause just from looking in the mirror.
If the line looks tidy right after drawing but the color transfers to your lower eyelid as time passes, your main concern is smudging. Check preparation and touch-ups for smudged eyeliner. This article deals with lines that do not come out even while you are drawing.
Look with both eyes naturally open and pick one spot that bothers you. Is it only the outer corner, the area above the iris, or the joins in the line? If you try to fix everything at once, you tend to thicken even the lines that could stay, so decide the range first: "I'll just tidy this part."
A magnifying mirror makes small steps look big. Check from a distance where your whole face fits too, and if it does not bother you at your usual viewing distance, there is no need to chase every tiny bump. The thickness and length of the line are a matter of preference, and not a condition that everyone should aim for the same shape.
Also decide beforehand whether you want a thinner finish today or a slightly emphasized outer corner. Rather than adding more while unsure of the shape, trying a short section of the upper eyelid first lets you judge the jaggedness and your preference for the finish separately. Not increasing the lower line at the same time is also a way to keep the adjustment narrow.
When observing, look at both sides under the same light. If you tilt your face on only one side, wrinkles and shadows can make the top edge of the line look different. Check the front once without holding the brush, and make sure the spot you want to fix really is the color of the line before moving on.
2.Set the mirror and elbow position, and check the condition of the tip

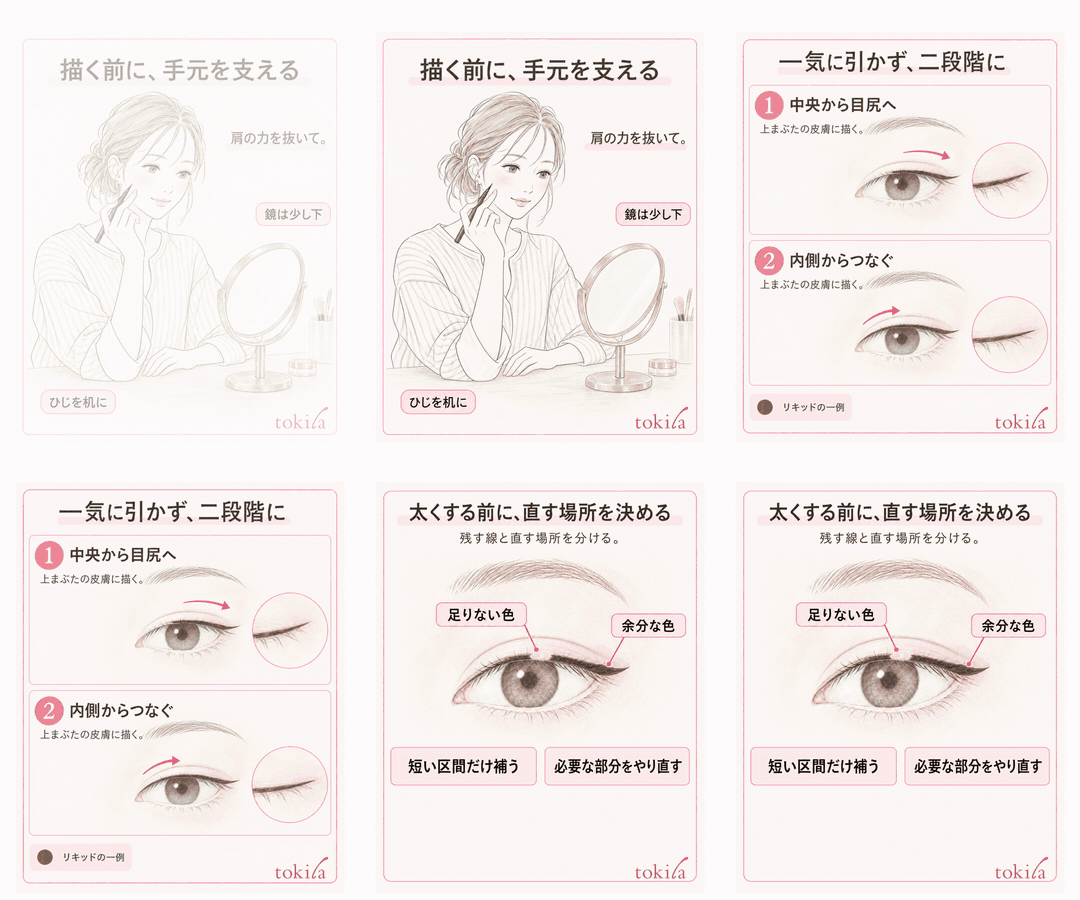
Adjust where you sit and your mirror so that you can see your face and the tip without strain. When drawing the upper line, one way is to place the mirror slightly lower and lower your gaze. Without bending your neck deeply or pressing your face against the mirror, look for an angle where you can see both the skin you are drawing on and the tip of the tool.
Rest your elbow on a stable desk and relax your shoulders. On days when it is hard to draw a thin line with your whole arm floating in the air, create support first.
Do not place the support where it pushes up the skin under your eye; place it on the outer side of your cheek. Keep your fingers clean, and do not pull your eye hard or use the tip of the brush as a pivot.
Next, check the tool before bringing it to your face. For a brush pen, see whether the tip is split and whether any previous eyeshadow is on it. For a pencil, check how to sharpen or twist it up, and its length, on the product label. Do not practice by pressing it hard against the skin just because it feels firm.
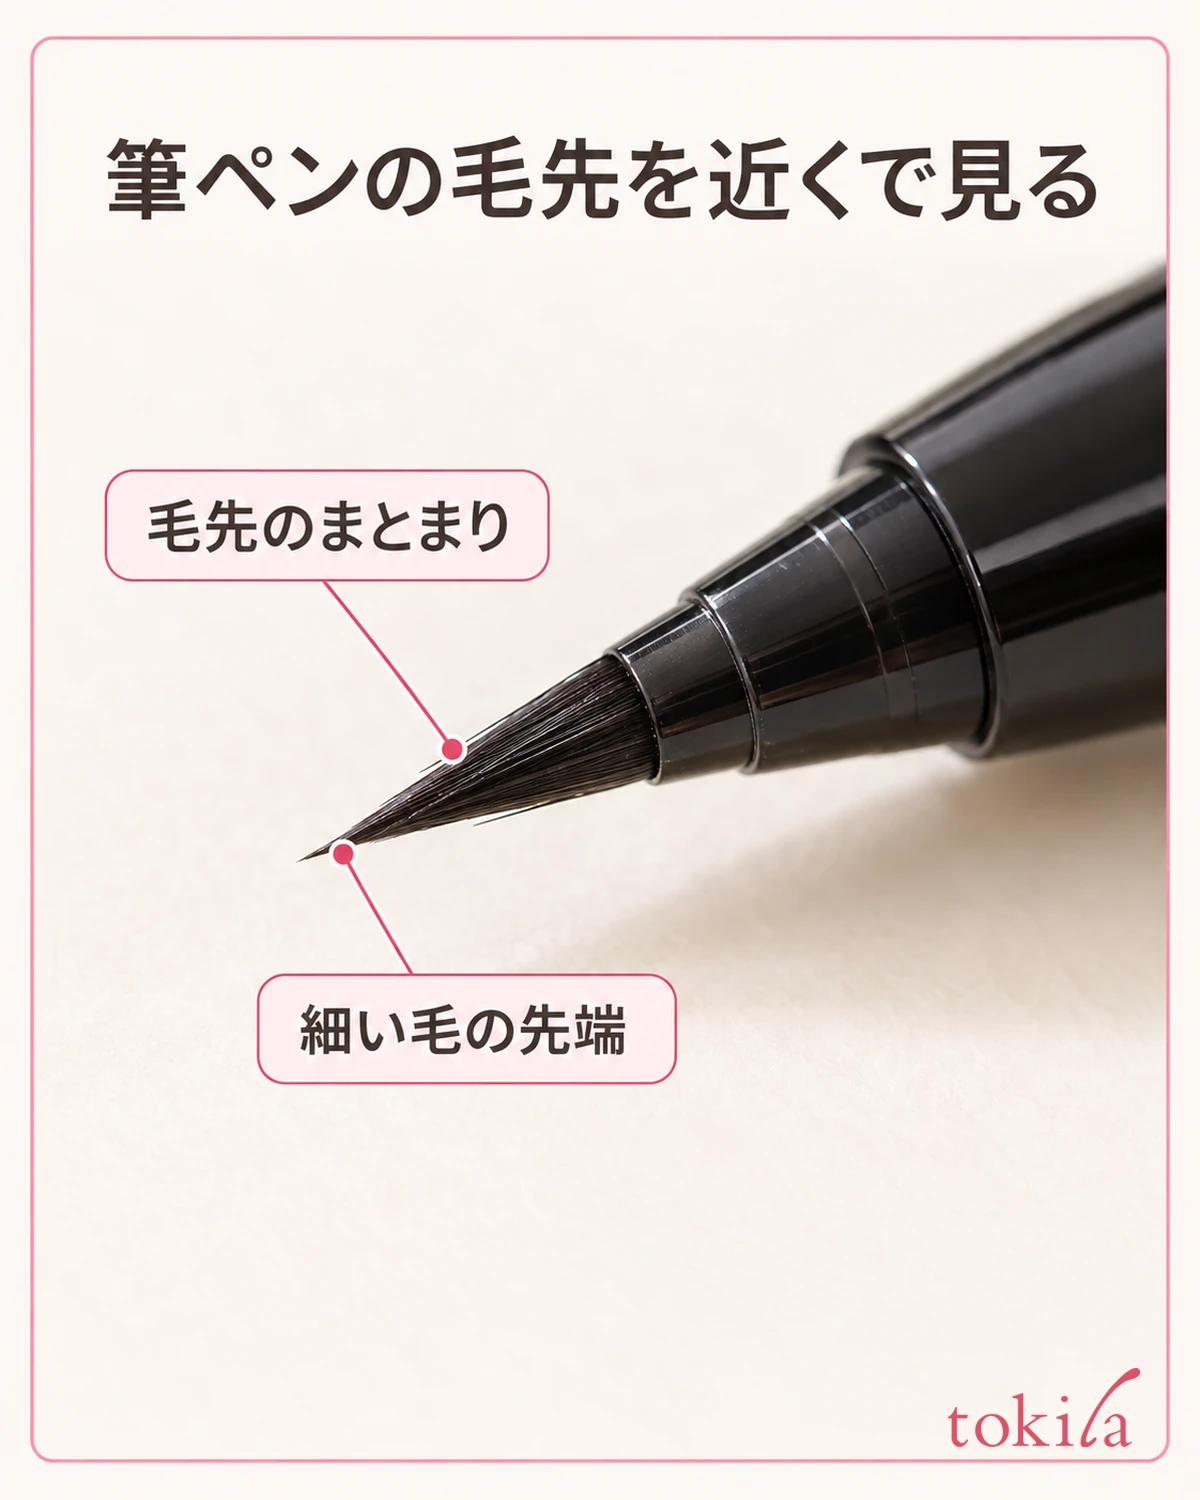
Before tracing a skipping line over your eye again and again, read the care and liquid-dispensing instructions for your product and sort it out away from your face.
If the line from a brush pen fades midway, reviewing the tip, the way the liquid comes out and storage of liquid eyeliner sums up the checks and care in line with product labels.
Whether you should shake it to bring the liquid out also differs by product. Do not apply the method of another product across the board; do not thin it with water or shake it hard, and follow the label of the product in question.
Where there is no desk, shorten the distance you draw and do not force yourself to finish a detailed shape. If you practice in the same place every time, also check that the mirror does not wobble and that your face is not too close when your elbow is resting, so it is easier to reproduce the posture.
3.Do not draw it all at once; connect sections that suit your type
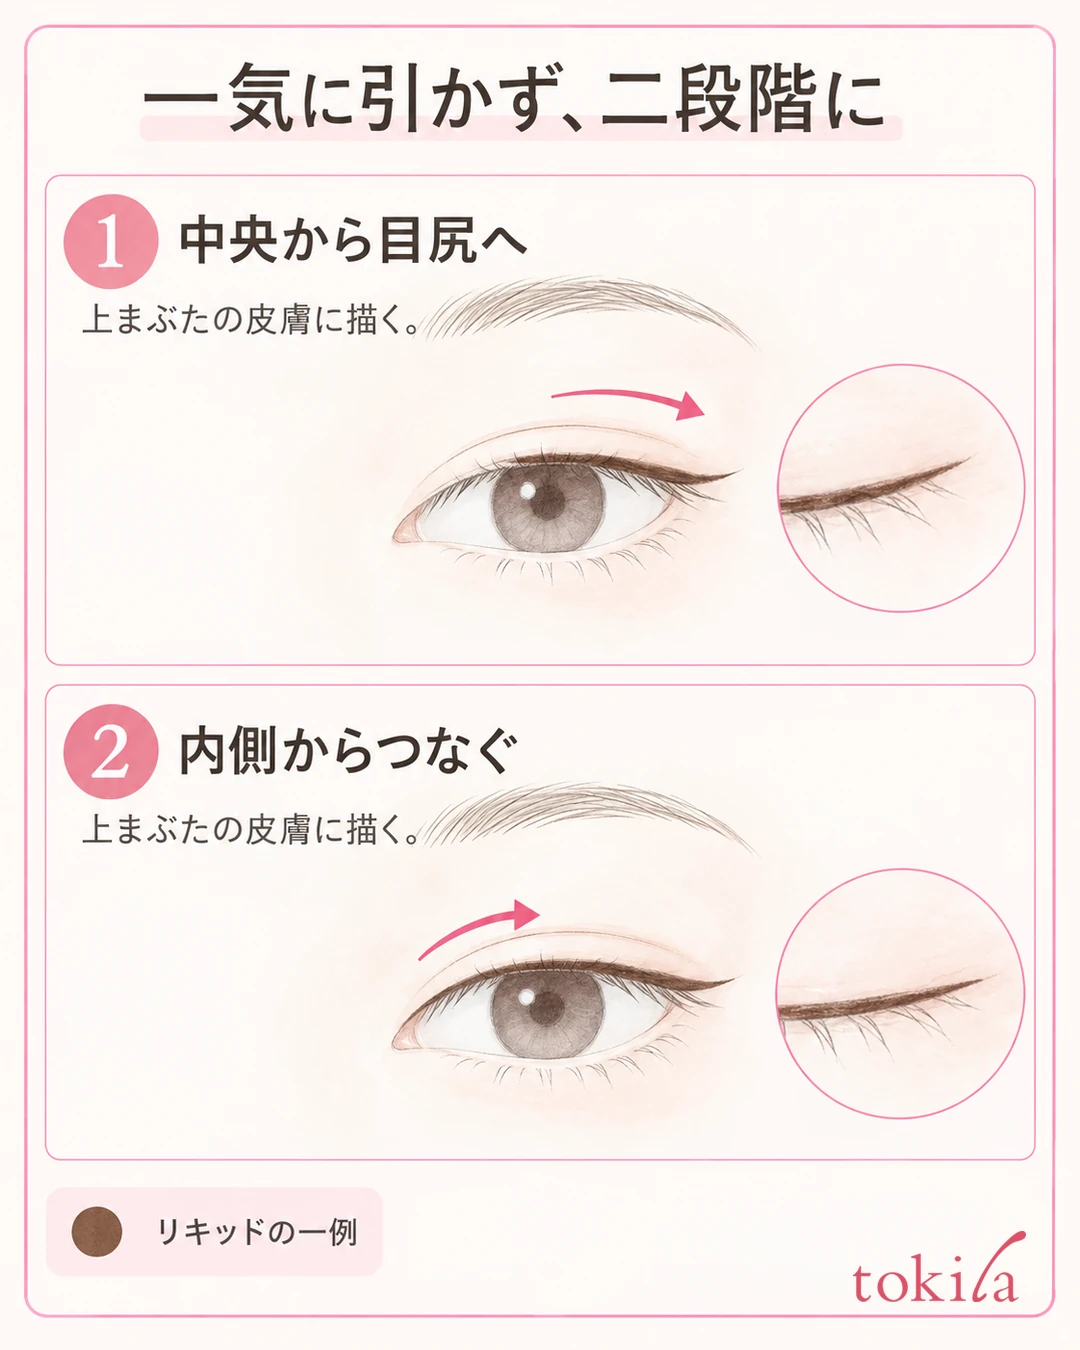
Once you are ready, draw outside the base of the upper eyelashes with the position of the tip visible. Do not go onto the inside of the eyelid or the mucous membrane, and do not point the tip into the eye. If a posture feels scary or hard to see in, do not carry on; set the mirror and support again.
With a pencil, advance little by little with the feeling of connecting short lines and dots. Touch once, move briefly, lift the tip away and review. Do not pull hard trying to finish one long line.
The "dots" here do not mean lining up large circles. It is a way of thinking for lightly touching the skin where a thin line is needed and connecting the short sections you can see. Rather than increasing pressure because no color is coming out, check the condition of the lead and the product's instructions. Do not push so hard that the lead breaks.
For liquid, there is a two-step method: first draw from the middle of the eye to the outer corner, then connect the inner section where needed. Do not force yourself to aim near the inner corner; try within the range where you can see the tip and draw calmly.
If only the join is faint, fill in the short section with no color. There is no need to go over a section that already has color from end to end. Before redrawing, check the guidance on drying and layering. Rubbing a wet line to tidy it can make the shape harder to follow.
Do not extend the outer corner long from the start; open your eyes naturally and look at the end point. The angle that is easy to draw with downcast eyes is not always the same as the shape seen from the front. Rather than copying the length in the diagram as is, draw one short line and check. Before chasing the length on the other side and making it thick, compare in the same posture.
If a small pool of color forms where you stop, do not use it as a starting point to thicken the whole line. Lift the brush, look at the extent of the pool, and tidy only the part you need. The point is to think separately about the sections where you connect the line and the sections where you adjust the thickness.
4.Before filling in thickly, decide which line to keep and where to fix
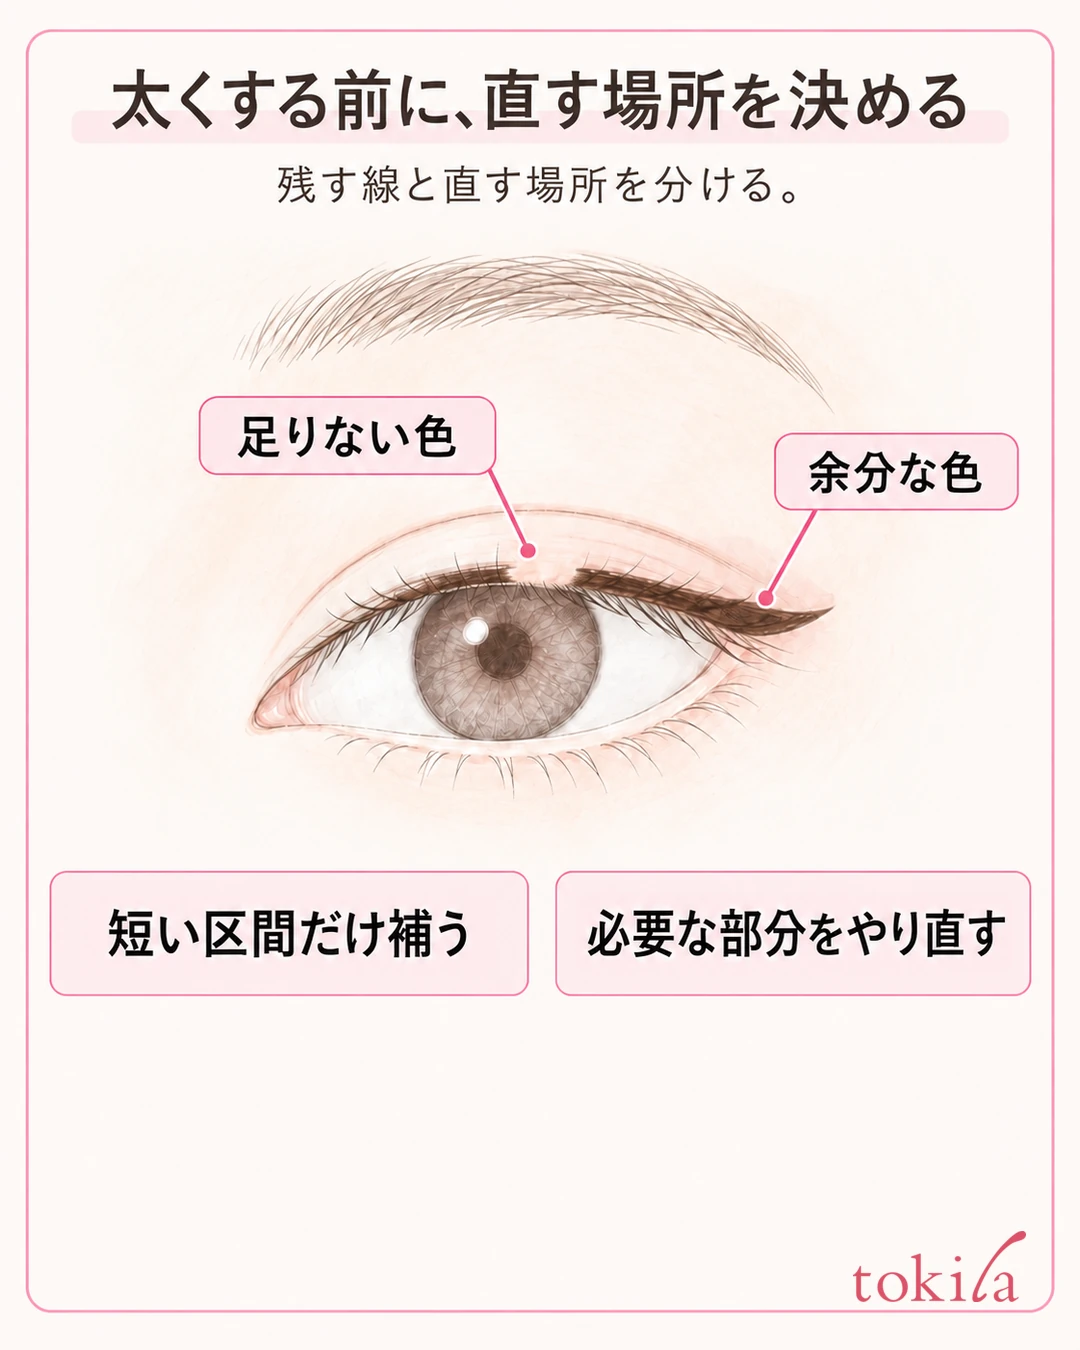
Even if you find a jagged part, filling in the whole dented top edge can make the entire line thicker. First look at the line you want to keep, and choose whether a little extra color is enough or whether you should remove the part that stuck out. If both are needed, tidy the excess color first and then add.
If you want to soften the outline of a thin pencil slightly, check whether the product is one that can be blended, or whether you need to work before it dries. There is the option of lightly blending the outside of the line with a tool the product recommends, such as an attached tip. Move only near the border, and do not spread the black color over the whole eyelid.
On days when you want to keep a crisp liquid line, or when it is already too wide, consider a partial redo rather than hiding it by blending. Use a remover that can be used around the eyes, with the amount and tool the product recommends, to tidy the excess color on the skin. Do not press a dry cotton swab and rub many times.
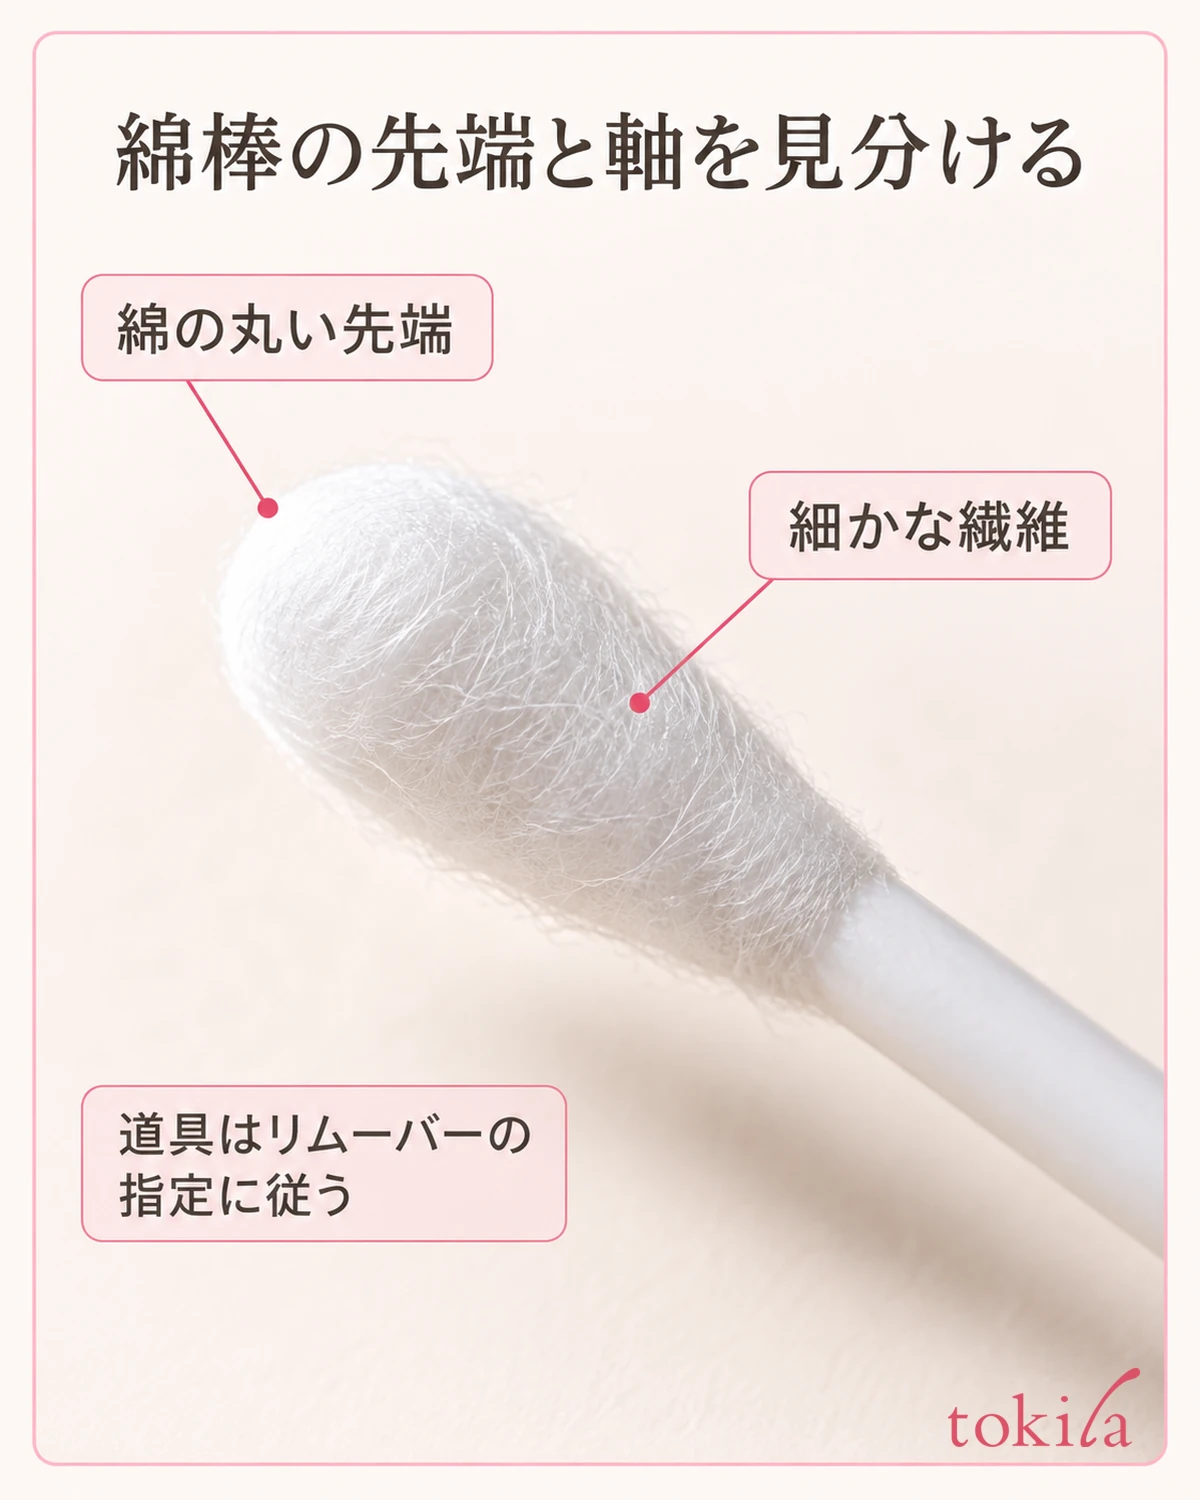
However, the tools suited to partial fixes and the handling afterward differ by product, so no number of repetitions or waiting time common to all products is set here.
For the area you removed, follow the remover's instructions after use, and restore the moisturizing and base you need. Where you removed sunscreen, add UV protection too, and do not redraw while the surface is still wet. Briefly fill in only the join with the line you kept, and see whether it fits within the original thickness.
If you feel strain on your skin from fixing it repeatedly, color remains over a wide area, or you cannot see the position of the tip, stop instead of sticking to small fixes.
5.Open your eyes and check both sides, then choose one condition to change next time

Finally, bring the mirror back in front of your face, open your eyes naturally and look at both sides. Check not only the top edge of the line but also where the outer corner ends, how it connects with your lashes, and the intensity on your whole face. Rather than making left and right perfectly the same shape with your eyes downcast, use how they look from your usual angle as the guide.
If the shapes of your left and right eyelids differ, the visible area differs even when you draw the same width. Do not force the other side to match the side that shows more line; decide based on where you want to make a statement today. If both eyes have the color they need and are close to the impression you want, you may stop adding any more.
What you change next time is one of the elbow support position, the section you draw, or the care of the tip, whichever relates to the step that gave you trouble this time. For example, if "my hand moved at the outer corner," adjust the support; if "the color faded midway," check the tool. Rather than changing everything at once, it becomes easier to recall how the ease of drawing changed.
If the crisp outline of liquid is hard to handle, trying a pencil that can be blended is also an option. However, switching does not always guarantee success. Before buying more, check whether you can draw the thin sections with what you have, and whether you are using it with the tip in the right condition.
On days you add eyeshadow, the range and blending of two colors is also a useful reference. Do not try to complete the depth with the line alone; finish the rest of your eye makeup first and then look at the whole. If you also want to fix your base while out, see makeup touch-ups to match how it breaks down.
On days when jaggedness bothers you, stop adding, sort out the condition, and after setting your hand and tip, go on to short sections. For the parts that went wrong, do not keep filling them in thickly; decide the line to keep and the place to fix. Making it a set that ends with checking with open eyes makes it easier to choose how much to add and when to stop.



