
You applied glitter nail polish, and the glitter has clumped on one nail while the next has mostly just polish. As you keep brushing over it to move the glitter around, has the surface even become bumpy? Start by looking separately at unevenness in the color of the polish and at how the sparkling particles are gathering.
This article covers air-drying glitter polish. Gels cured under a light, loose glitter powder sold separately, and decorations attached with adhesive are not covered. After checking the mixing, application and layering instructions for the product you have, we sort out how far to add more and when to stop.
1. Look at the polish color and the way the glitter gathers separately
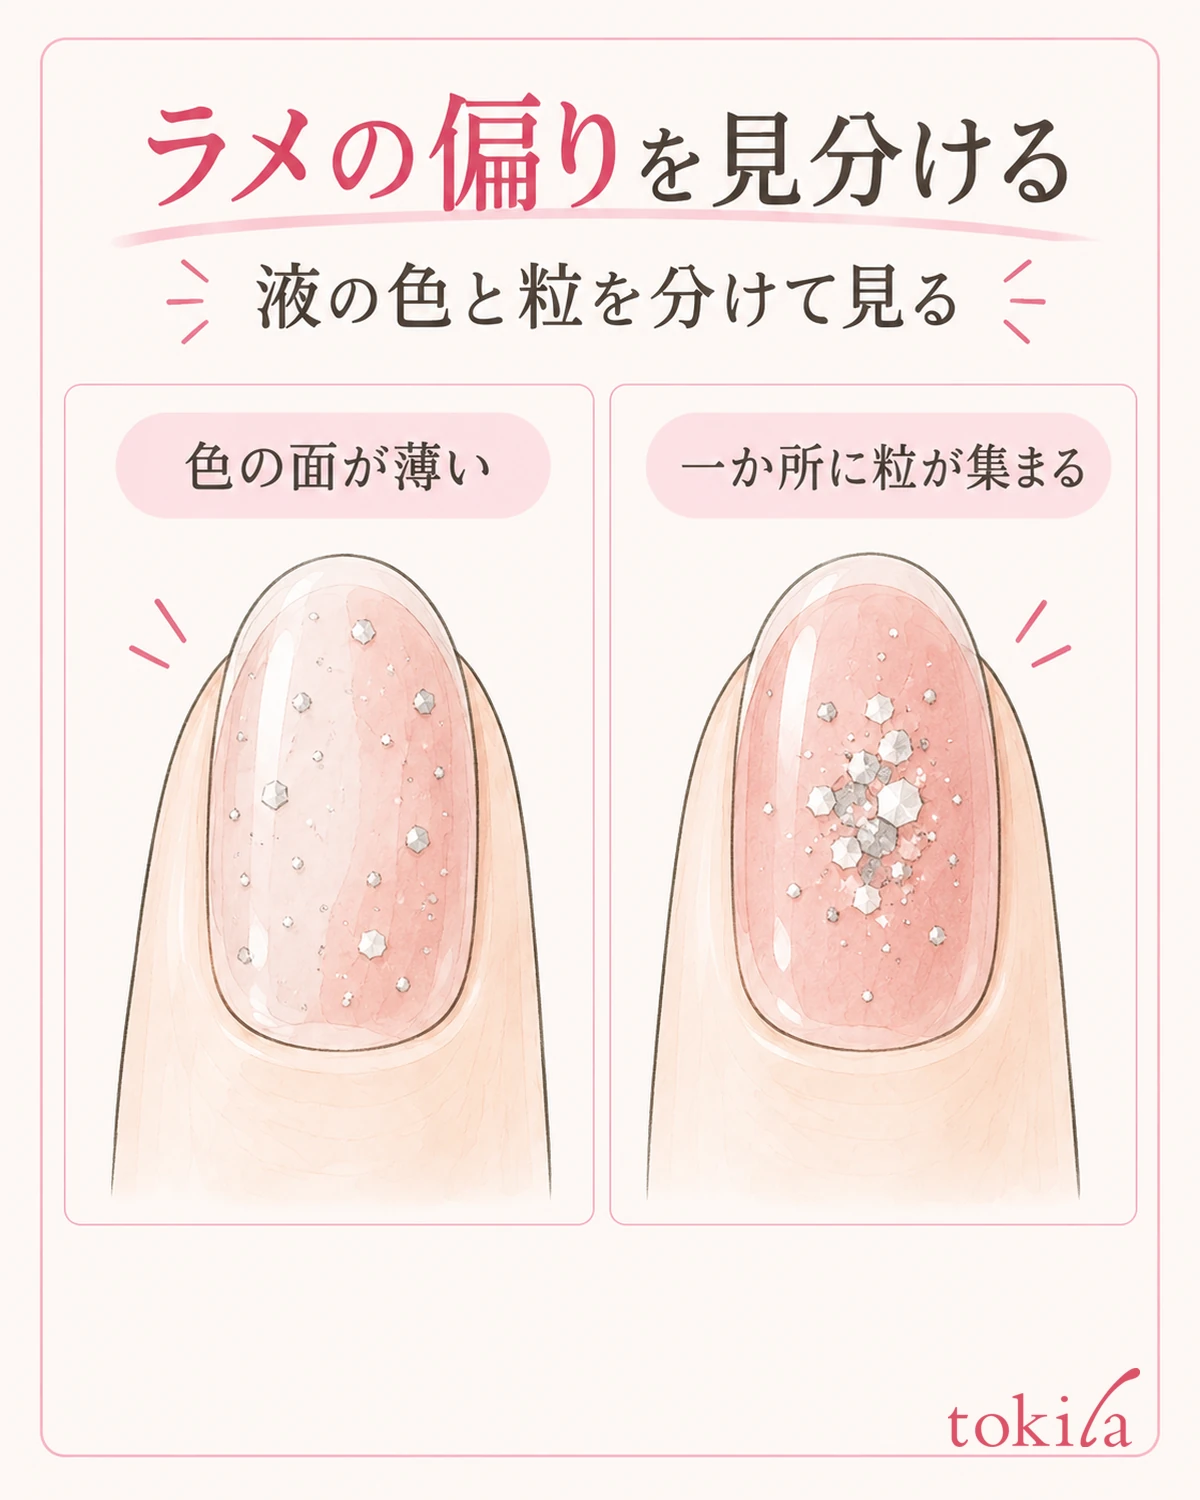
Rest your hand on a stable surface and look at your nails facing the same direction. First, check whether the color layer is thin, whether only the sparkling particles are sparse, or whether particles are piled up in just one spot. If you lump color and glitter together as "unevenness," you are more likely to add polish to places that do not need it.
With a type that has large particles in a nearly clear polish, your natural nail or the color underneath may show through where there are no particles. Rather than deciding that all of this is a defect or a missed spot, check what kind of finish your color is meant to give. Conversely, if a colored polish is thin in just one streak, look at the condition of the coat separately from the placement of the particles.
Tilt your finger slightly and see whether the sparkling spots move. If you can see particles piled in the same place, check their placement; white streaks that disappear when you change the angle should be told apart from reflections of light. Do not judge the number of particles only under strong lighting; return to the angle at which you normally look at your hands before deciding what to do next.
Make the comparison without lighting the left and right sides differently and without leaving only one nail wet. Do not touch nails that are still drying to check them; judge only by what you can see. If you bend one finger back too far to look at it, it will sparkle differently from the other fingers, so line them up in a comfortable orientation.
If you can put it into words, for example "few particles near the base, with large particles piled in the middle," you can think about whether you really need to repaint the whole nail. If it is only "not as sparkly as in the photo," the placement of the particles, the color underneath, and the light may all be different. Avoid setting a goal of layering until you match the number of particles in the photo.
When comparing finishes, you also do not need to space each particle at equal intervals. How you view unevenness depends on whether you want to enjoy a naturally scattered look or gather the glitter at the tips. First decide the design you want to keep, then review only the clusters that fall outside that range.
2. Check inside the bottle and the brush tip, and prepare as the product instructs
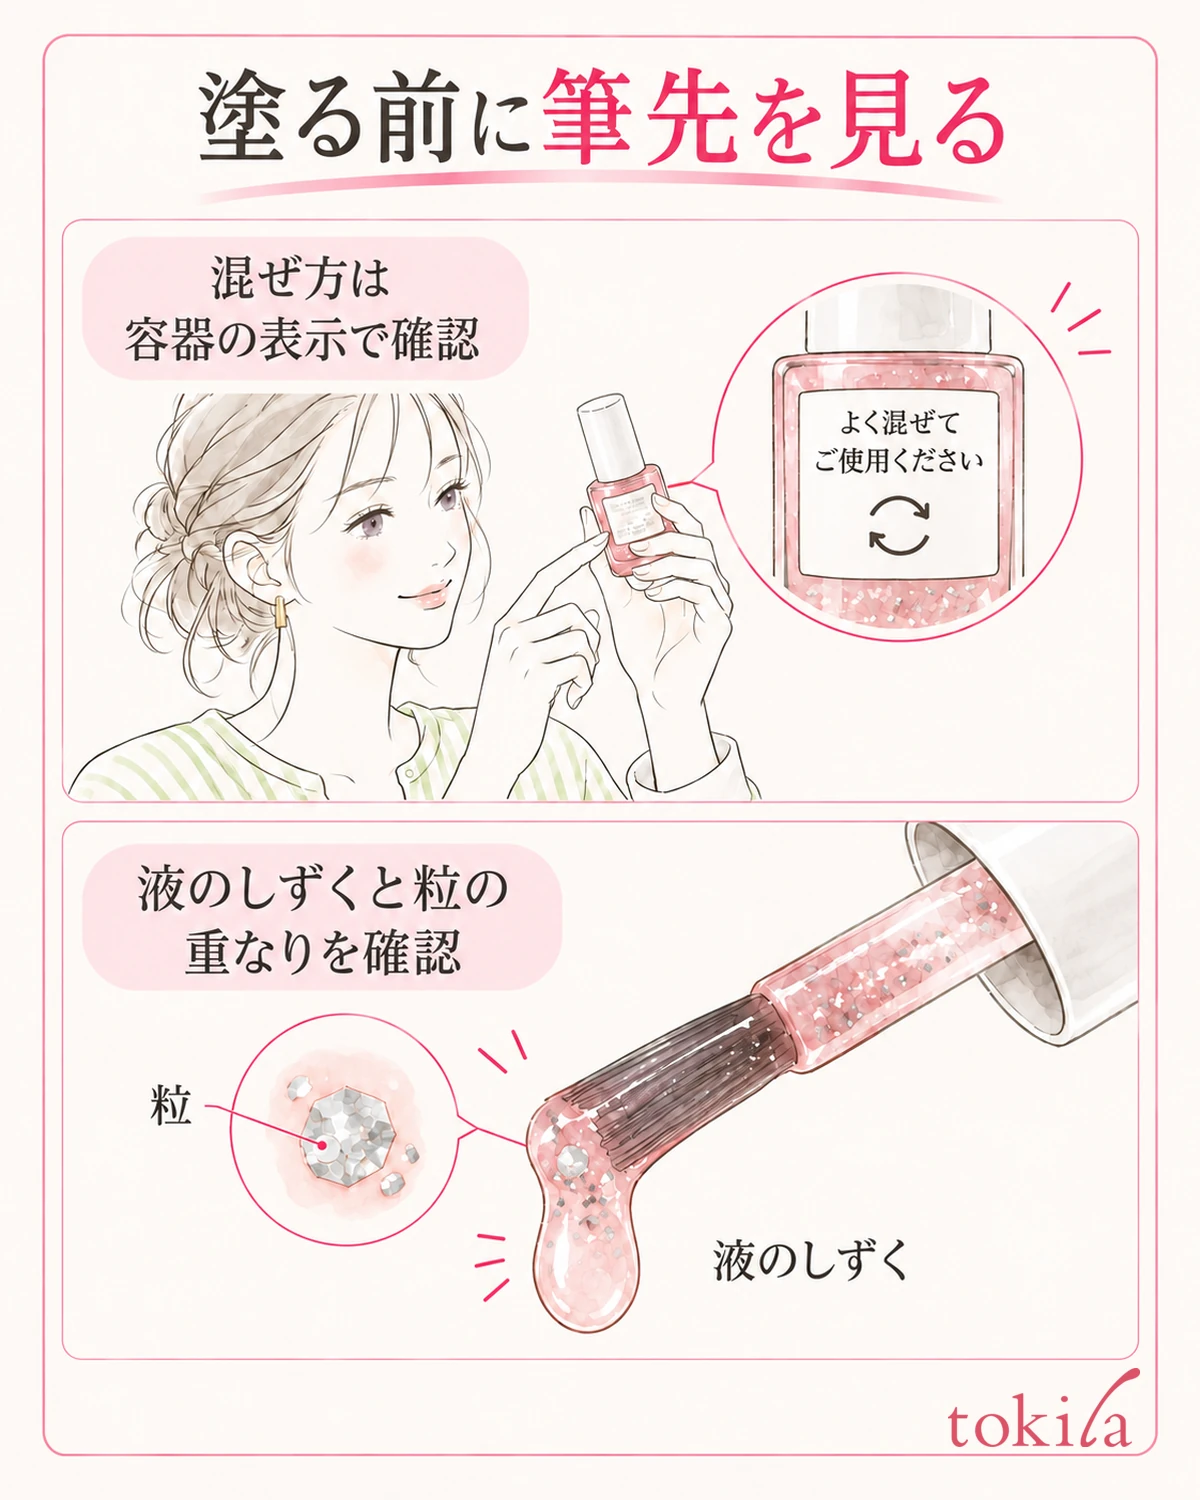
Before applying to your nail, look at the side and bottom of the closed bottle. If the particles seem to have collected at the bottom, check the label for how to mix before use. Do not treat shake-type and roll-type bottles the same, and do not decide the number of times or the waiting time on your own. Also avoid concluding the cause of deterioration just from looking at the outside of the bottle.
If, even after following the mixing instructions, the polish looks different from usual, the brush is hard to move, or it stringily pulls into threads, do not keep testing it on your nails as it is. Do not try to move the particles by adding remover, water, or another nail polish. Even when a dedicated thinner exists, follow the range in which its use with that product is permitted.
Slowly take out the brush and look at the polish and particles gathered at the tip. Check whether a large drop of polish is about to fall, whether particles are piled on one side, or whether there is so little polish that the whole brush is scratchy. Drying the brush too much in order to keep the particles makes it hard to apply, so it is important not to fix a uniform number of wipes.
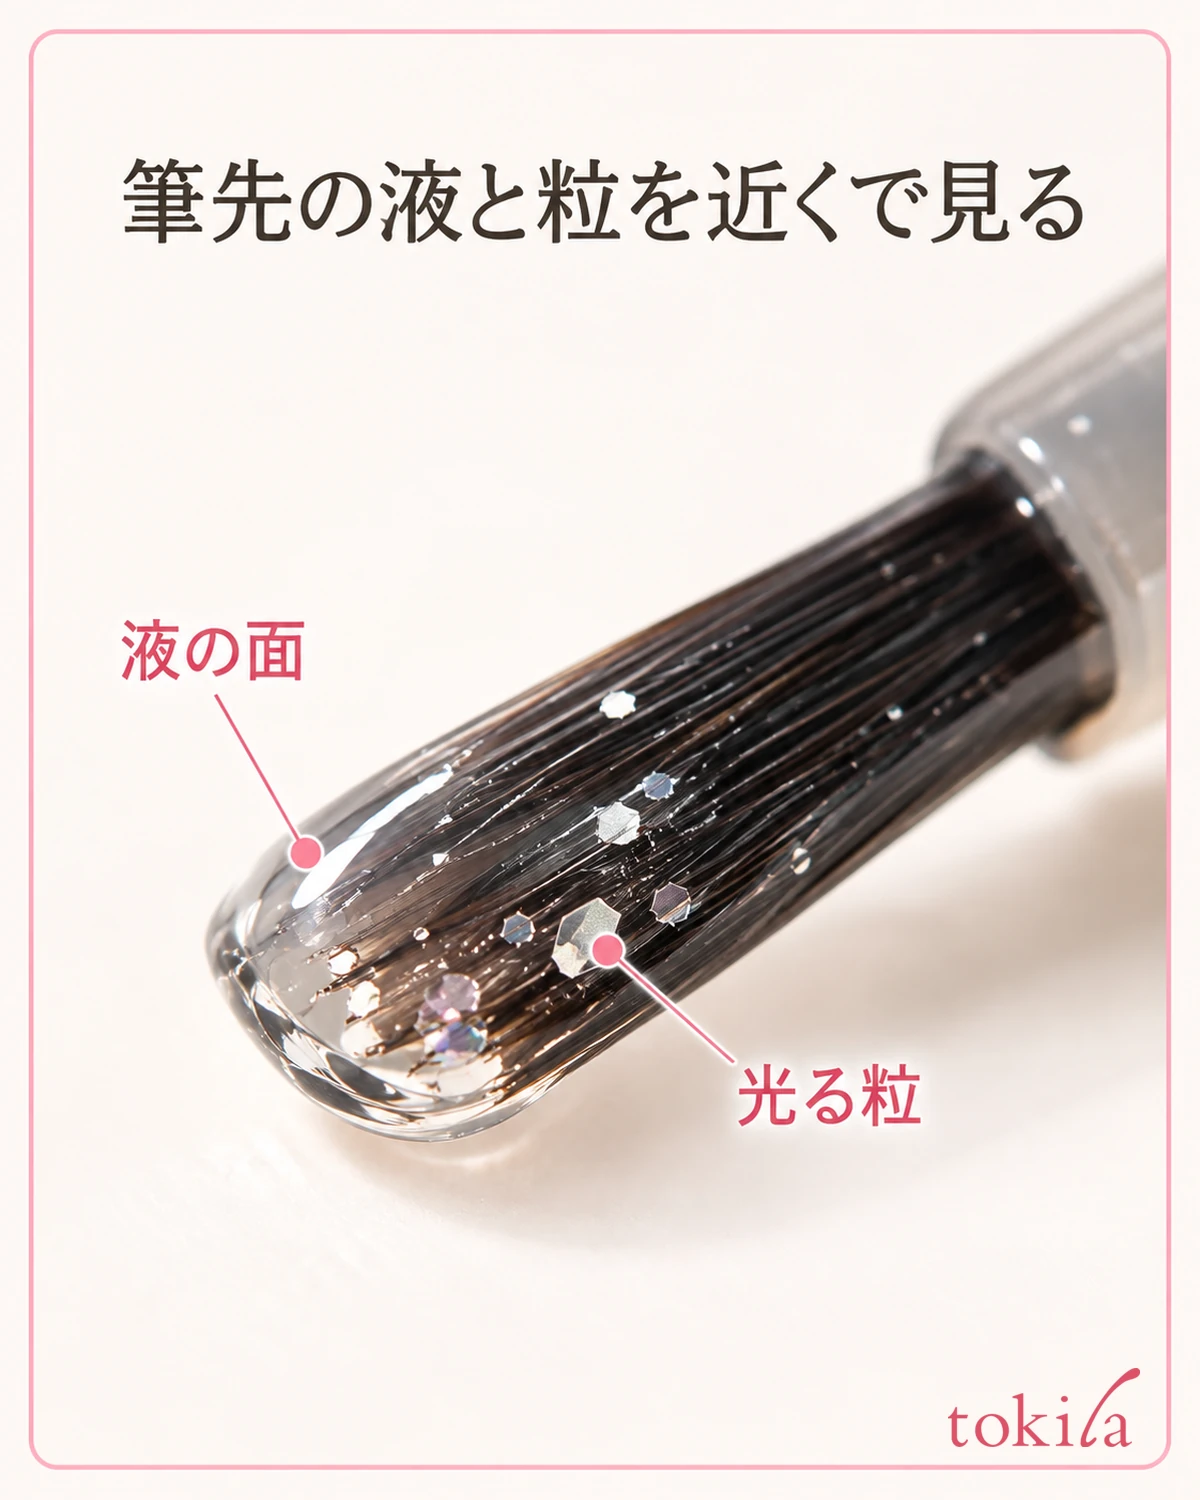
For colors with many particles, there may be individual instructions on adjusting the amount of polish or on how to move the brush to place the particles. Use such a method only when it is specified. We do not make it a universal step to wipe every glitter polish with the same force or to poke the bottom of the bottle with the brush to scoop up only the particles.
Lightly rest the wrist or the side of the hand on the table, not only for the hand you paint but also for the hand holding the brush. If the dominant-hand side is hard to paint, see also how to support your hand when painting your dominant hand's nails. You do not need to lift the bottle up near your face to see the brush tip.
Ventilate the work area according to the product's cautions and keep it away from fire. Put the open bottle where it will not tip over, and make sure there is room to move the finger being painted and the brush. If anything about the preparation is unclear, do not move on to all the fingers; start with one nail, in a state where you can check the label.
3. Decide where to place the particles, and check with one thin layer first
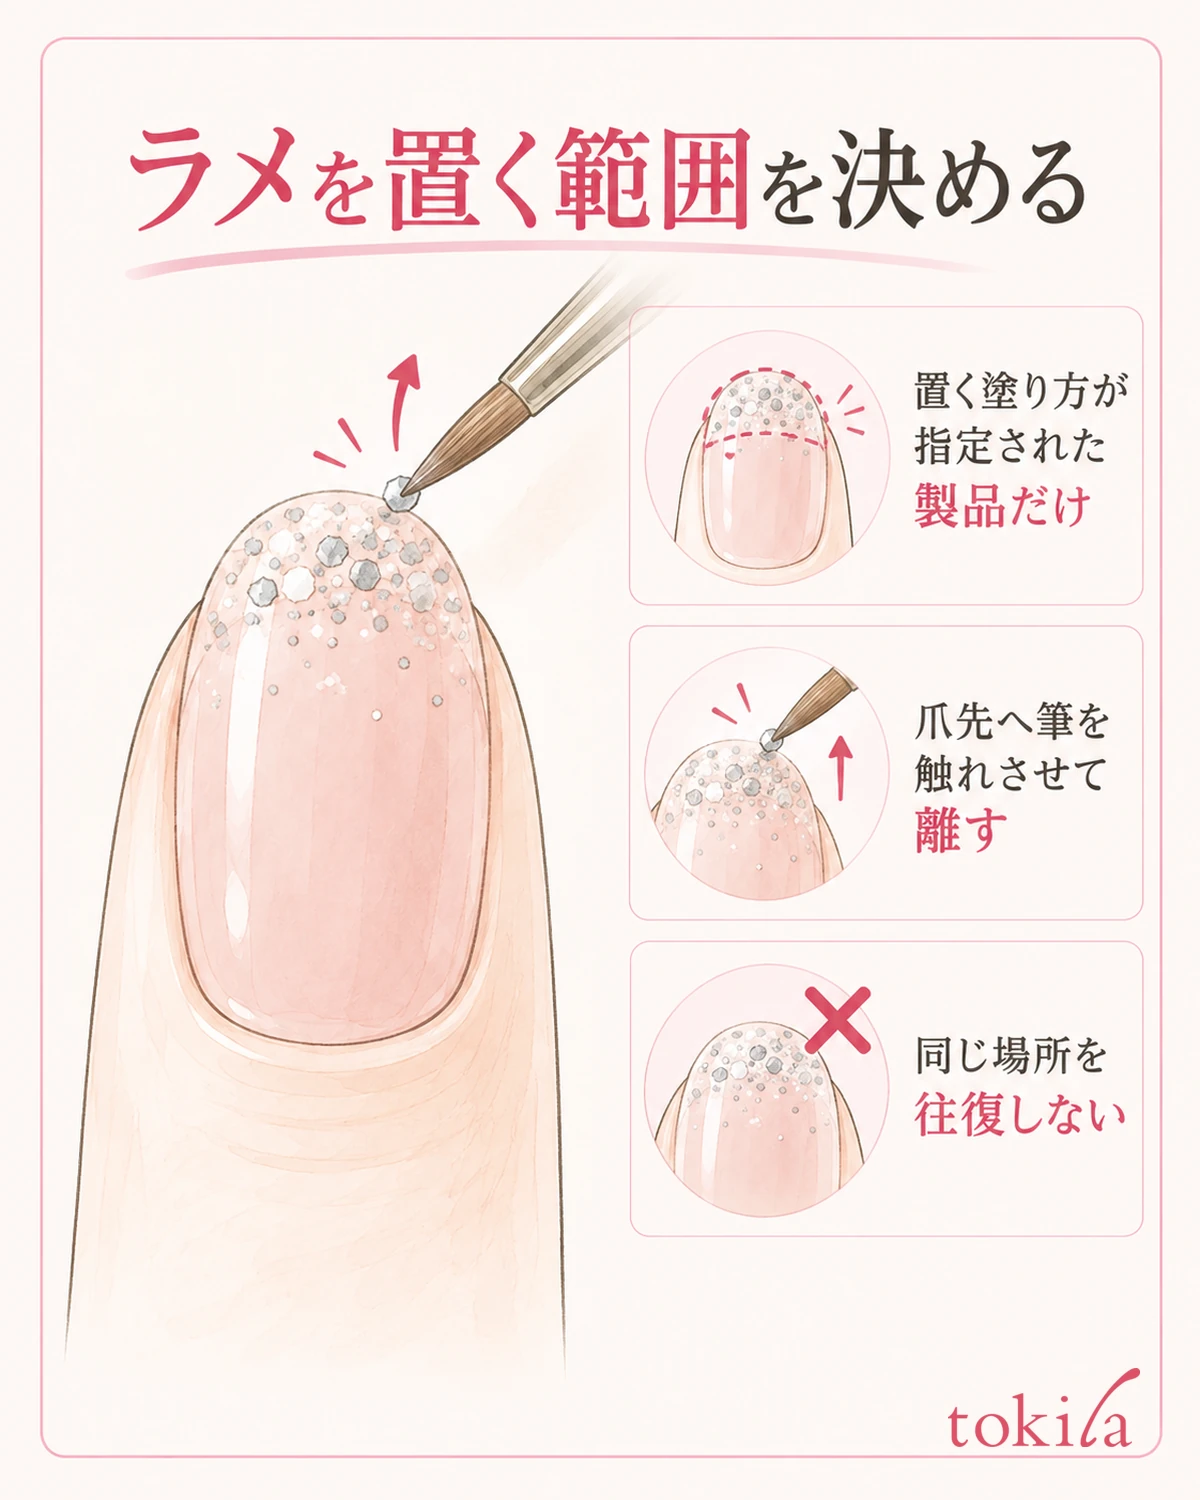
Before you paint, decide whether you want the glitter scattered all over or gathered at the tips. If you meant to do only the tips but chase the sparse areas down to the base, it becomes hard to return to the original area later. Choose one nail to use as a sample first, and check by eye the blank space you want to keep.
Prepare the base coat and the color underneath according to the instructions for combinations and drying. You do not necessarily have to apply white or a dark color to make the particles stand out. Changing the color underneath changes the whole impression, so separate whether you are adjusting only the placement of the particles now or changing the base next time.
For a product with a dabbing method for placing particles, lightly touch the brush tip to the target area, lift it right away, and check the position of the particles. Do not press the brush hard and spread it, or go back and forth over the same spot to chase the particles. Do not unconditionally replace the normal application method of a product with this dabbing method.
After painting one nail, move your hand slightly away and look before taking more polish. Even if there are fewer particles than you like, do not keep adding while the polish is still flowing or the surface is still moving. For a product that can be layered, after the specified drying time, consider adding a thin layer to the area that needs it.
Once your sample nail is decided, use the same design area as a guide for the other fingers. Nails differ in size, so you do not need to match the number of particles on every finger. If you keep the same idea of placement, such as leaving blank space in the center or focusing on the tips, it is easier to compare the whole set.
Transferring polish to a toothpick or sponge to paint narrow areas cannot be used with every product. Do not add tools whose compatibility you do not know, or any step that returns foreign material to the bottle; first stay within what can be handled with the included brush and the methods the product describes.
4. Do not drag the gathered particles; choose between adding more and repainting
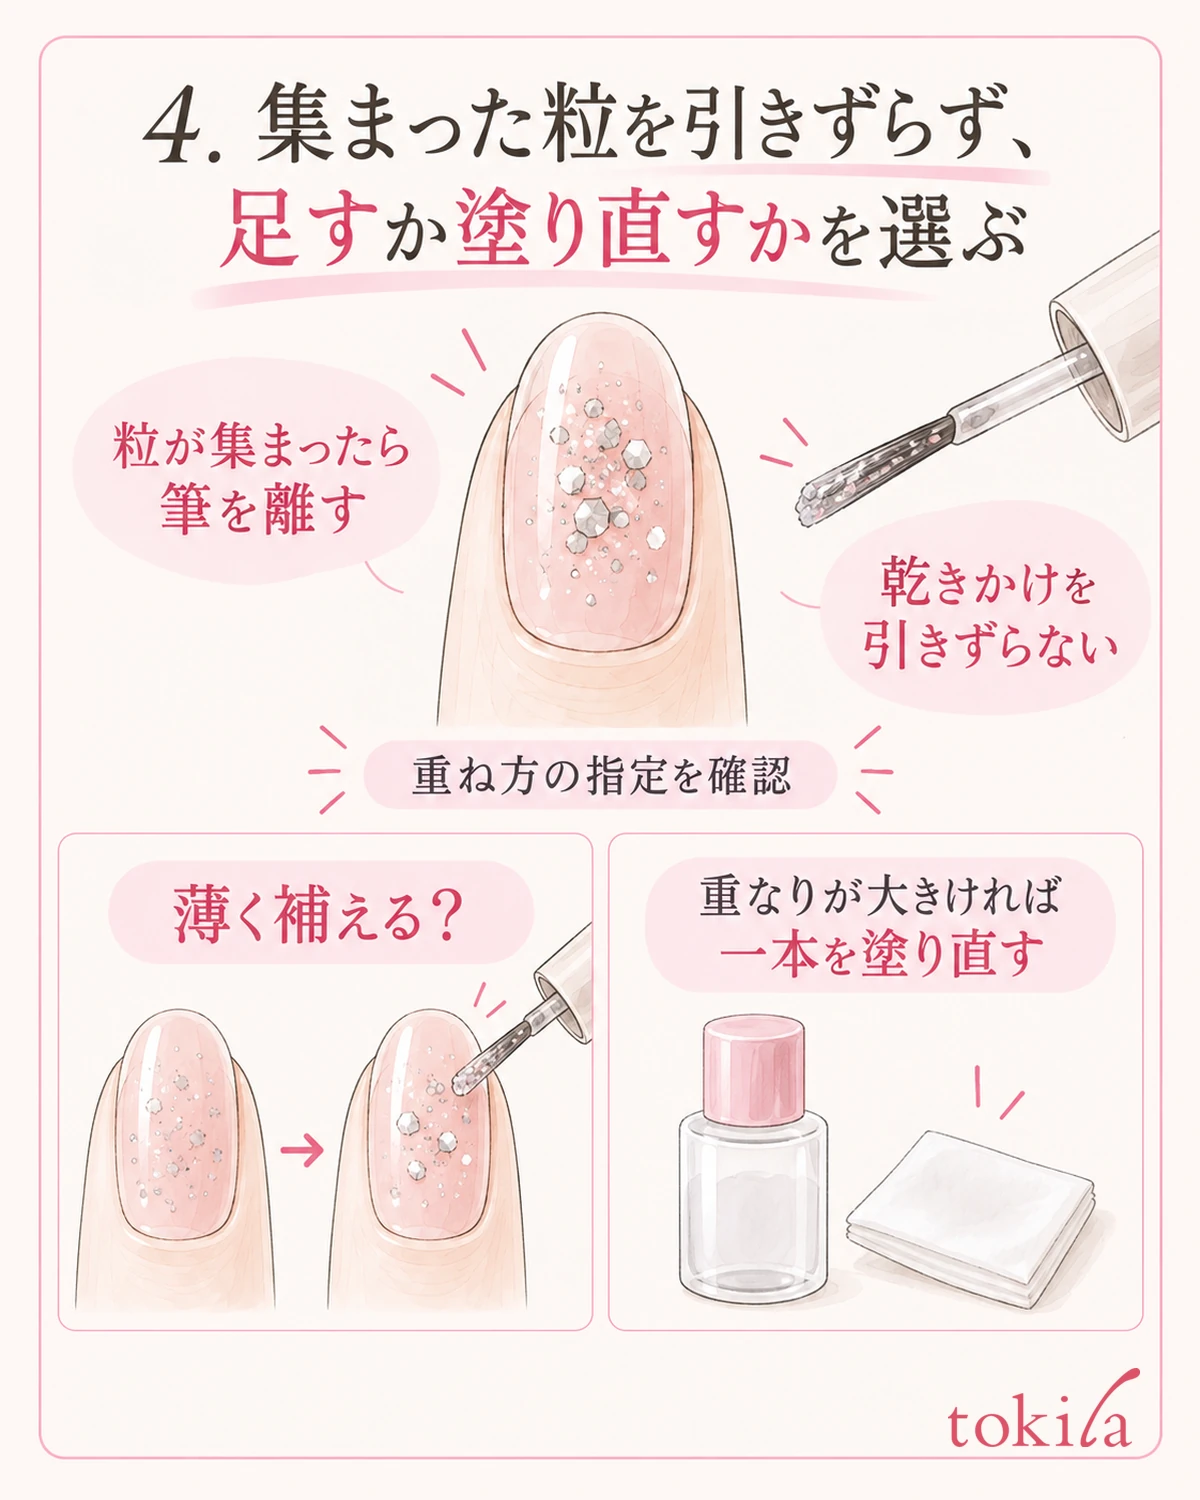
When particles have gathered in one spot, first lift the brush away. If you brush over a surface that is starting to dry, not only the particles but also the color underneath can move. Do not assume you can always even things out while the polish is soft; judge from the product's directions whether it is still okay to keep touching it.
If adding to an area with few particles will not make it too thick and the conditions for layering are met, one option is to add a thin layer only where needed. However, do not add even more polish to a part where particles have already piled up in order to match the overall density to that spot. You also do not need to add the same thickness to every finger.
If large particles are piled up and strongly raised, if it went onto a wider area than planned, or if even the color underneath has become wrinkled, it can sometimes be easier to think about the result if you remove that one nail and start over. Avoid scraping off particles with a fingernail or hard tool, or pulling at a coat that is starting to dry with tweezers.
When removing it, check for a remover that is compatible with polish and how to use it. Glitter does not always come off in one pass the way colored polish does. Rather than increasing how many times you rub hard, check how to place the cotton when removing nail polish, and avoid using a soiled side of the cotton repeatedly.
If the unevenness is not noticeable, you can also finish there for the day. Treat uneven particles separately from particles sticking to the skin or large raised bumps that catch on things. If you feel pain, redness or the like, stop adjusting the look, and do not continue applying or removing while you feel irritation.
5. After drying, look under the same light and decide the next step
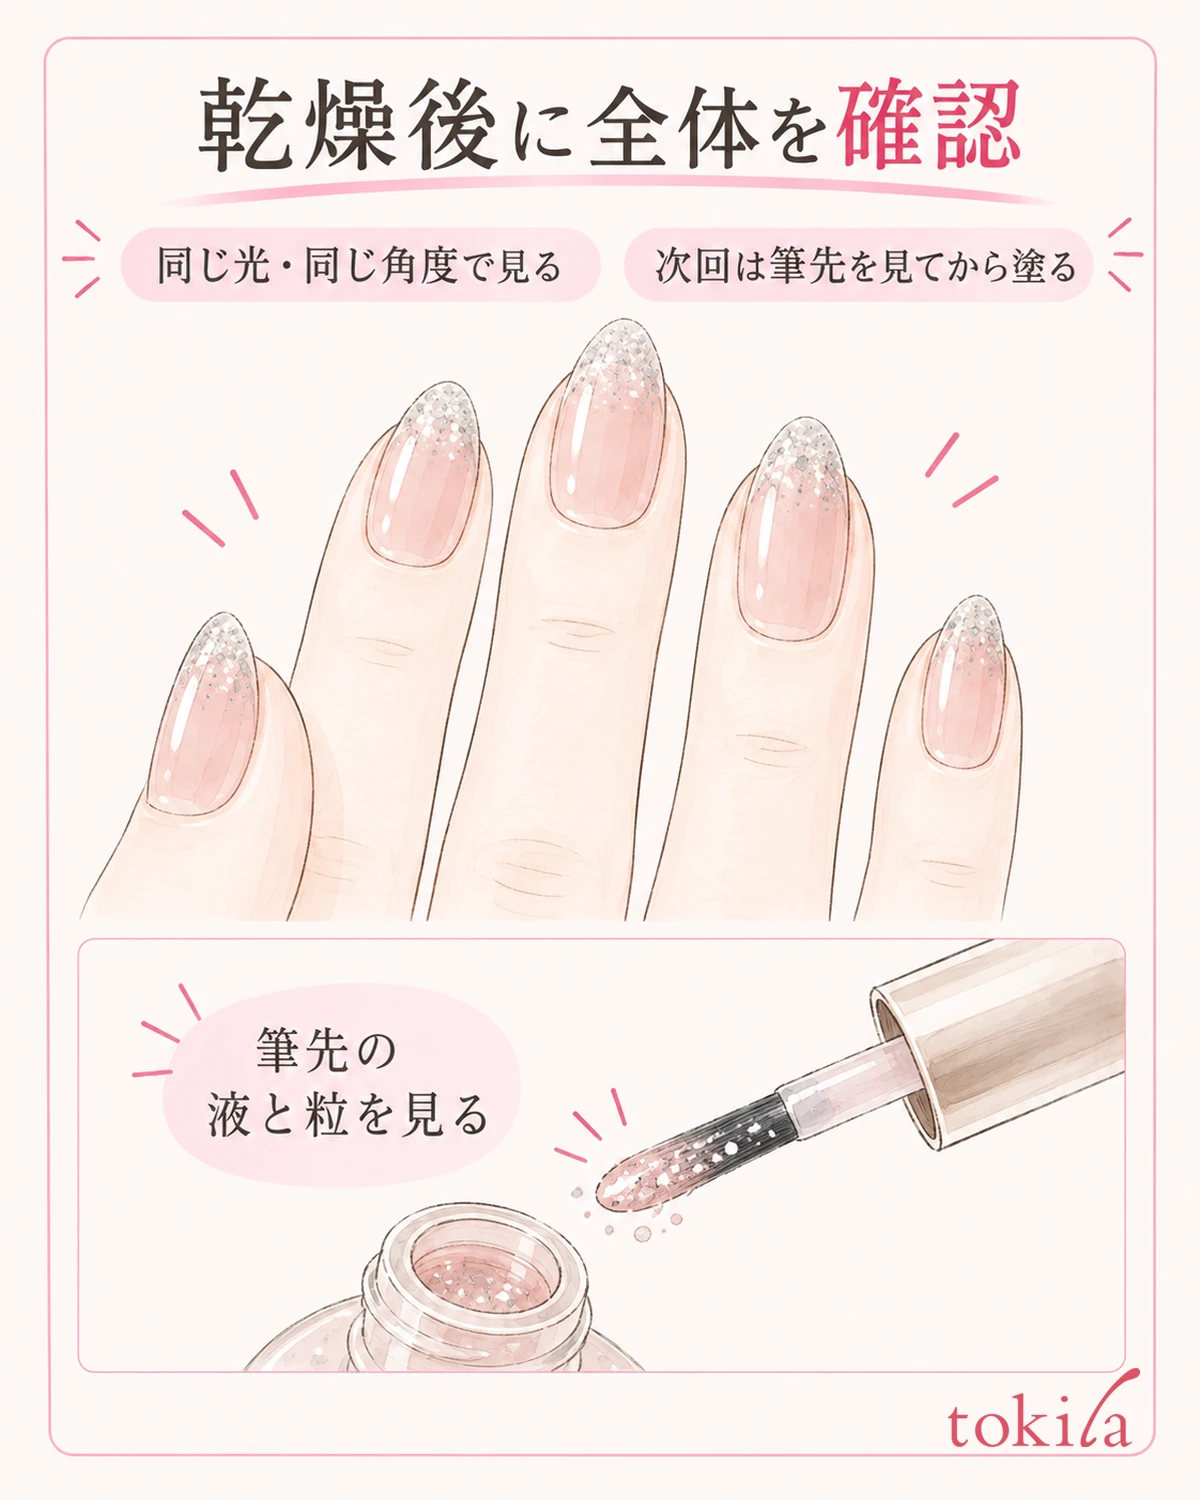
If you use a top coat, follow the compatible combinations and the timing for layering. Do not make it a goal to apply it thickly until every bump from the particles is filled. After finishing, do not treat a dry surface as the same as being fully dry inside; wait according to the product's conditions.
After drying, look at the overlapping of the particles up close, and then move your hand slightly away and look at the whole. Rather than focusing only on one small blank spot, check whether a similar area sparkles on both hands and whether the blank space you like has been kept. Choose the day's finish, including the sparkle when you change the angle.
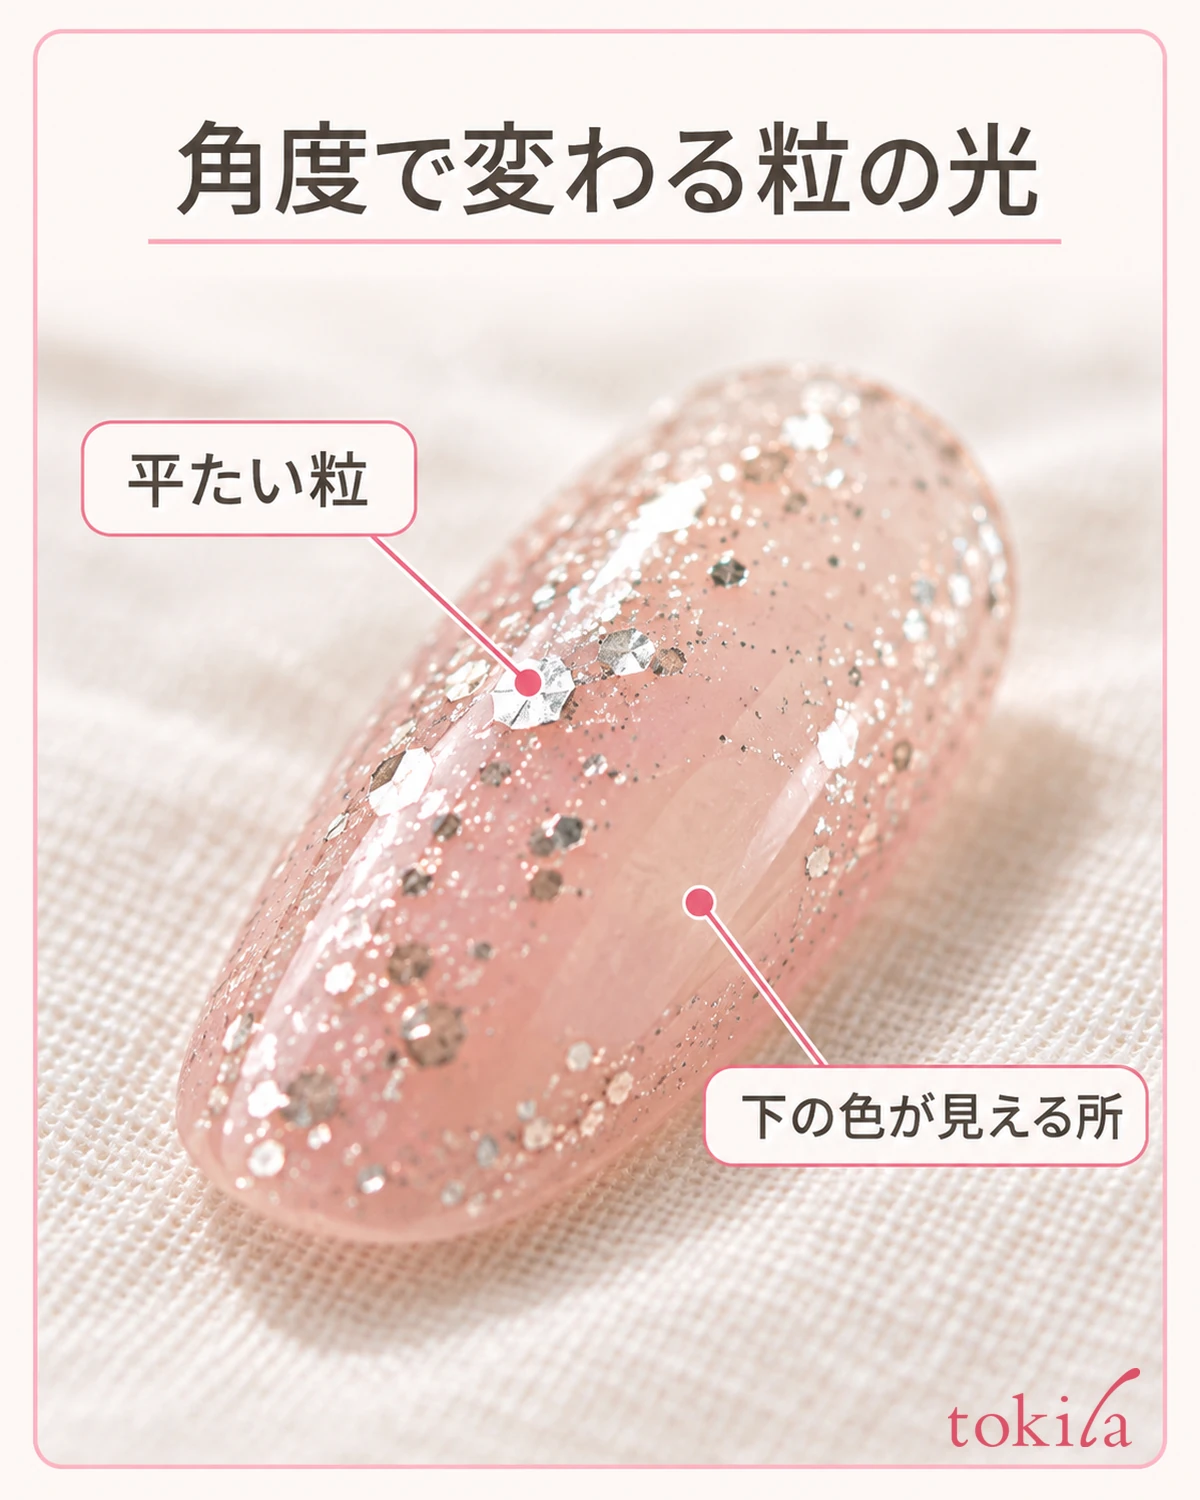
For notes for next time, besides the color number, write words that show where you looked and how you moved the brush, such as "only the first nail had fewer particles" or "they gathered where I went back and forth with the brush." If you keep a photo, the difference can look larger just because of light reflection, so adding a short note of what you noticed in person makes it easier to look back.
Next, choose one concrete action: check the preparation before use as the label says, look at the drop on the brush tip before painting, or lift the brush away once you have placed the glitter at the tip. Rather than changing the base color, the brush and the painted area all at once, this makes it easier to sort out the differences from last time. This is a way to proceed with practice, not a method that guarantees results.
Glitter placement can be enjoyed without turning it into a job of lining up each particle at equal intervals. Look at the polish color and the particles separately, decide the area to place them, and lift the brush away to check before adding more. Instead of chasing the current finish with thick layers, try deciding which action you want to adjust with the next nail.



