
When you hold false eyelashes up to your eyes, the ends may stick out or feel cramped at the inner corner. Before you cut off both ends, look separately at the length of the hairs and the width of the band that holds them together. Whether the strip is simply too long or the tips are what stand out changes where you should look again.
This article covers fitting the width of band-style false eyelashes for the upper lashes before you glue them on. The steps are to check the type of product and which side is left or right, check the position without glue, and cut away from your face only when necessary. Do not apply the same steps to partial lashes, lower lashes, or glue-free types; follow the labeling on the product you have.
1. Check the length of the hair tips and the width of the band separately

First, look at the shape with the false eyelashes still in their case. The thin strip at the base where the hairs are lined up is the band, and each hair extending from it is a lash. The width adjusted in this article is the length of the band from end to end. It is not the same as trimming the tips into a straight line. If only the length of the tips bothers you, shortening the band will not necessarily give the look you want.
Check the markings on the pouch or backing card: upper or lower, full-length or outer-corner, and left or right. Full-length types are designed to cover a wide area of the eye, and outer-corner types to fit part of the outer side. Do not push a lash toward the inner corner because it seems too short, or use it for a different purpose because it seems too long; first understand the position it was designed for.
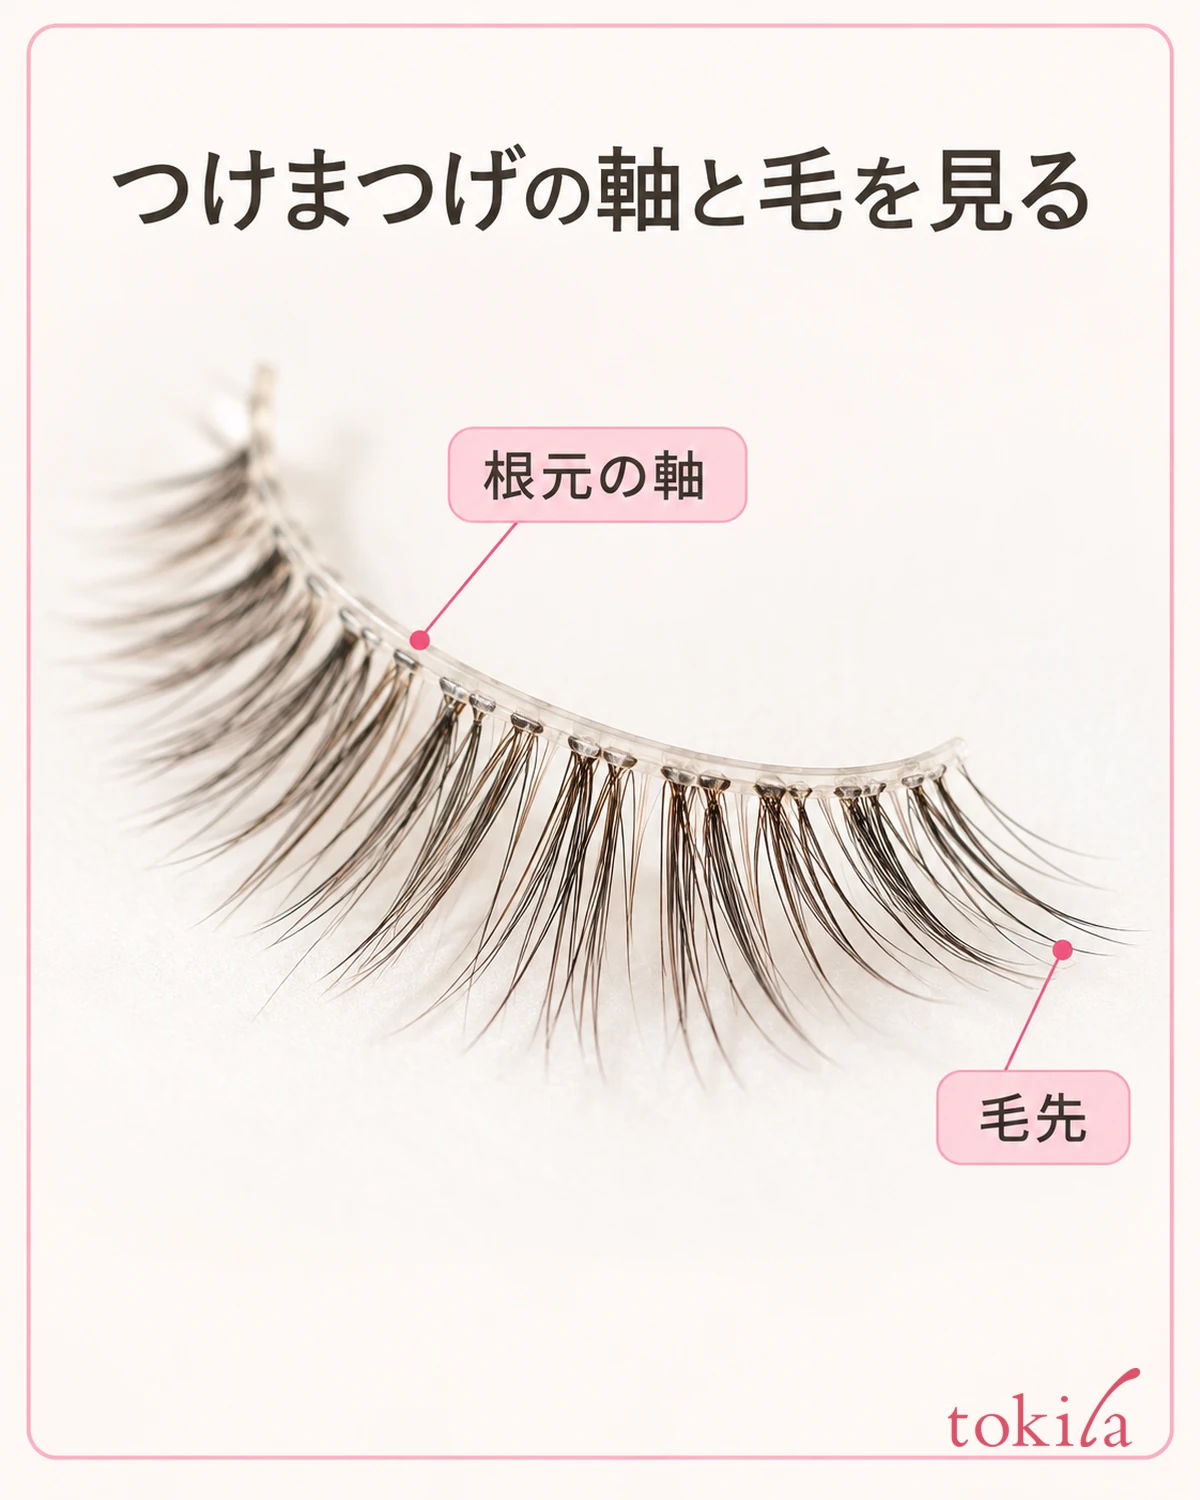
Next, look at the length and density of the hairs on the inner and outer sides. Some look the same at both ends, while others get longer toward one end. If you mix up left and right or the direction, longer hairs may gather at the inner corner and feel more cramped than the width of the band alone would suggest. Fix the direction first, then decide whether cutting is needed.
When comparing shapes, place the left and right in the case facing the same direction. If only one is turned over, it is hard to compare the curve of the band and the spread of the hairs. Keep any marks that tell left from right on the case, and do not write directly on the hairs or band with a pen.
Also decide whether you want to keep the long hairs at the outer corner or give the whole eye a more subdued look. Even if you shorten the same width, the pattern of hairs that remain differs depending on which end you cut. Do not settle on "either is fine" in advance; consider the cutting method shown on the product together with the design you want to keep.
If an end lifts after you have put the lashes on once, do not decide the cause from the width alone. Other checks are also needed, such as whether the band is deformed or dirty and how the lashes were attached. Separating the step of checking the width before gluing from the step of fixing lifting after gluing makes it easier to avoid cutting too much.
2. Remove them carefully from the backing card and set left and right apart
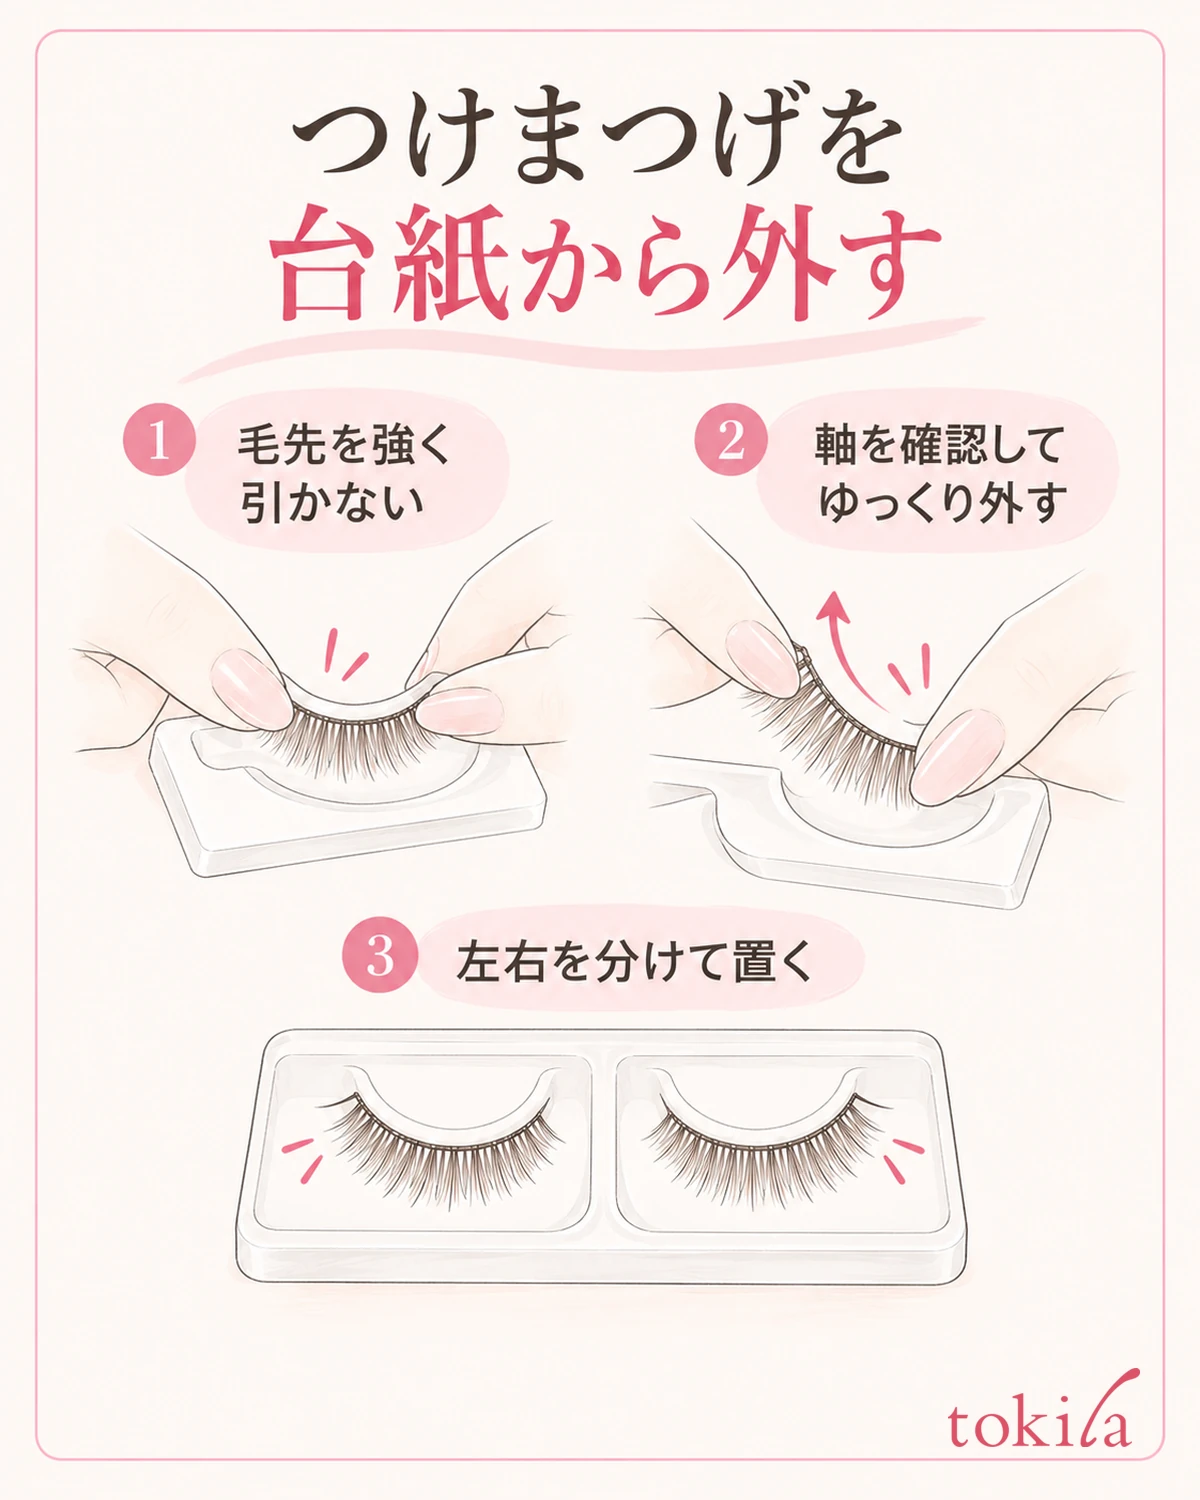
Prepare clean, dry hands and a bright desk where you can see small details. False eyelashes are tiny and hard to find if dropped, so work with the case right below them. Use scissors only after you have decided the width and where to cut. Do not start by holding them in one hand and bringing them close to your eyes.
Check the backing card or product labeling for how to remove them. If you pull on just one bunch of hair tips, the force concentrates there and the hairs may bend or come out. Check the band at the base, hold it as directed, and lift it away from the card a little at a time. If you use a tool, do not pinch the hairs hard; reconsider where you handle them and how much force you use.
Do not assume that the adhesive that holds the lashes to the card is the same as the adhesive for wearing them on your eyes. If the product specifies a way to remove leftover adhesive, tidy it up that way. Do not add treatments that are not in the instructions, such as scraping the band hard with a fingernail or forcing it to stretch.
Set the removed lashes down so that you can return them to their left and right positions in the original case. The width of your two eyes and the positions that are easy to match are not necessarily the same. Rather than checking the length on one side and cutting the same amount from the other, prepare to fit each one separately.
If the band is broken, hairs are missing, or dirt is noticeable, do not plan on cutting to fix it and then using it. Cutting does not necessarily remove the damage, so first judge whether it is in a usable condition. If you can no longer tell the shape just from taking it off the card, do not hurry it to your face; check the direction again first.
3. Without glue, check the position one eye at a time
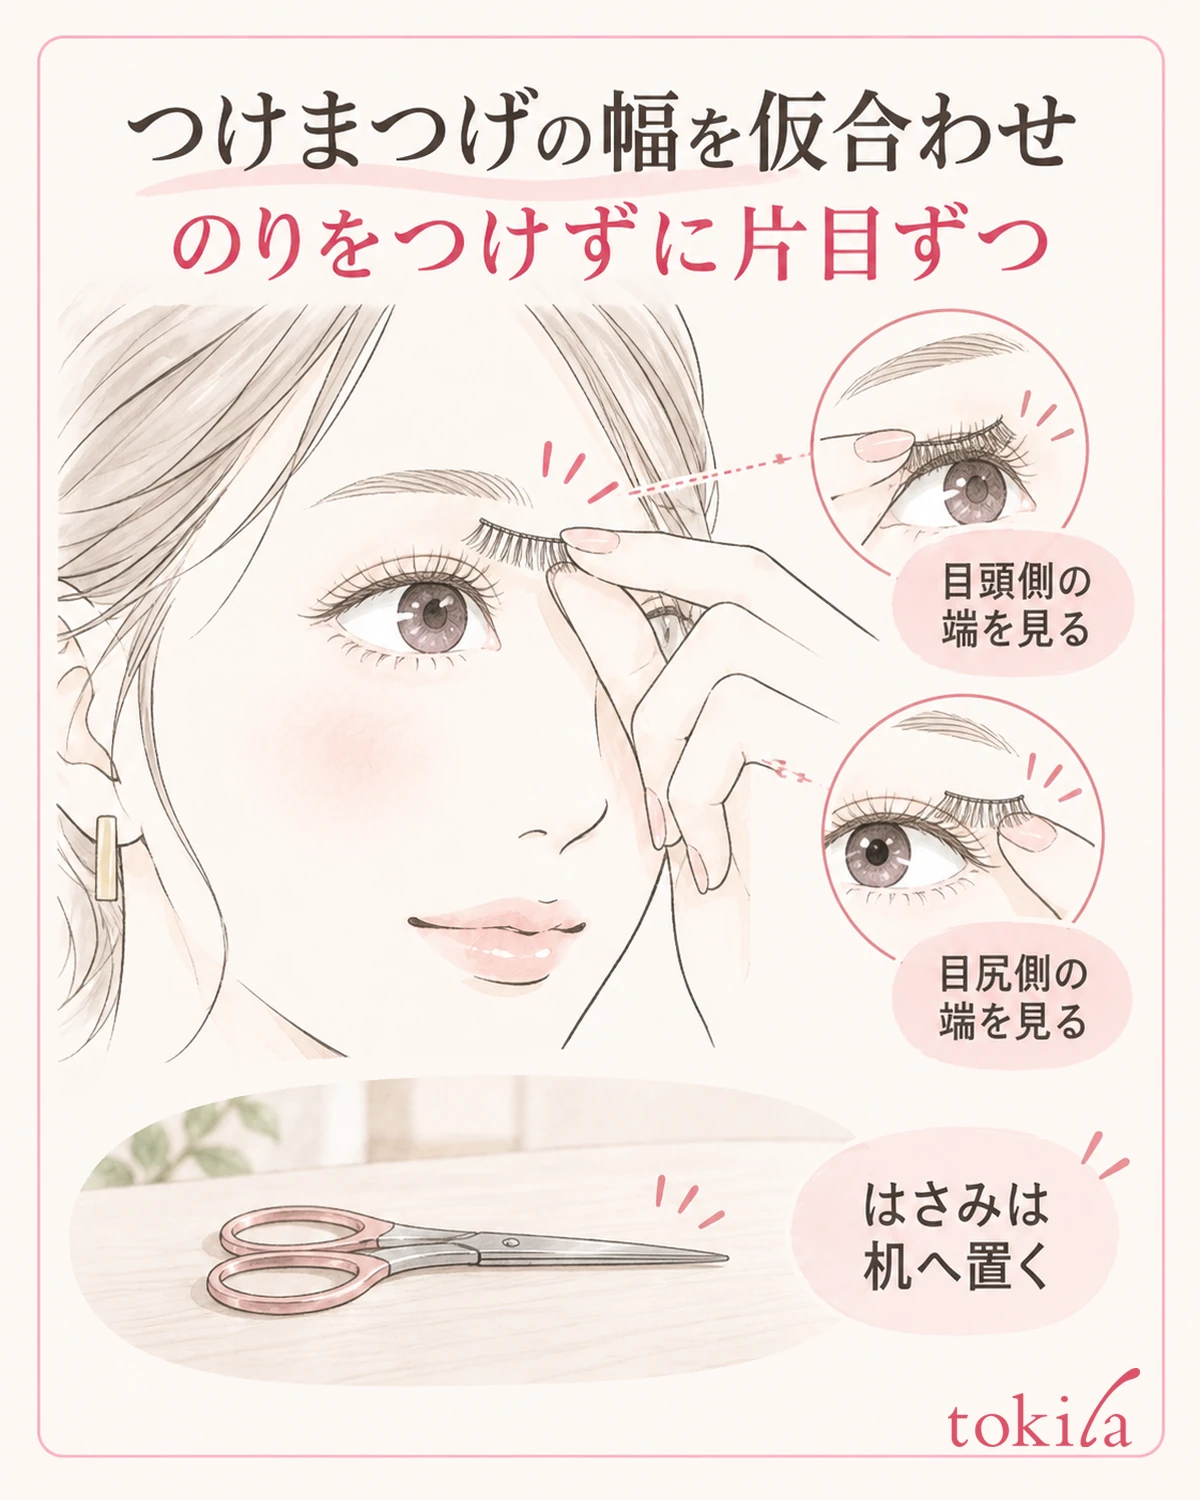
A trial fit is a check to see where the band starts and ends before you glue it. Place the mirror in a stable spot at an angle where you can see both your eyes and your hands. Leave the scissors on the desk and handle only the false eyelashes. How you hold any tool you bring close to your face should also follow the product's instructions.
Confirm left and right and inner and outer, then gently bring the lash close to the position the product intends. Where to start at the inner corner and how far to cover the outer corner differ depending on whether the lash is full-length or partial. Do not treat every product as one that must cover the eye from end to end, or leave a fixed number of millimeters gap in every case.
Once you have decided where one side starts, check whether the other end extends past the position you planned. At this point, separate whether it is just the hair tips spreading sideways or the band itself that is long. Do not press it against your eye to make it fit; once you have confirmed the position of the end, take it away. Do not let it touch the mucous membrane or the eyeball.
Even on the same side, the way the end looks changes when you tilt your face. Return to facing front once and look again at the overall impression, including the spread of the hairs, and at the range where the band fits. If it feels cramped the moment you change your gaze, or the end touches and feels uncomfortable, check the position and whether the product suits you again before you glue it in place.
Check the other eye in the same order. The key is not to use what was left over on one eye as the answer for the other side. If it is hard to keep a stable position with only the trial fit, do not keep repeating it; you could also consider one designed for a shorter range. You do not have to cut and use up the lashes you already have.
4. If you need to cut, do it away from your face, a little at a time
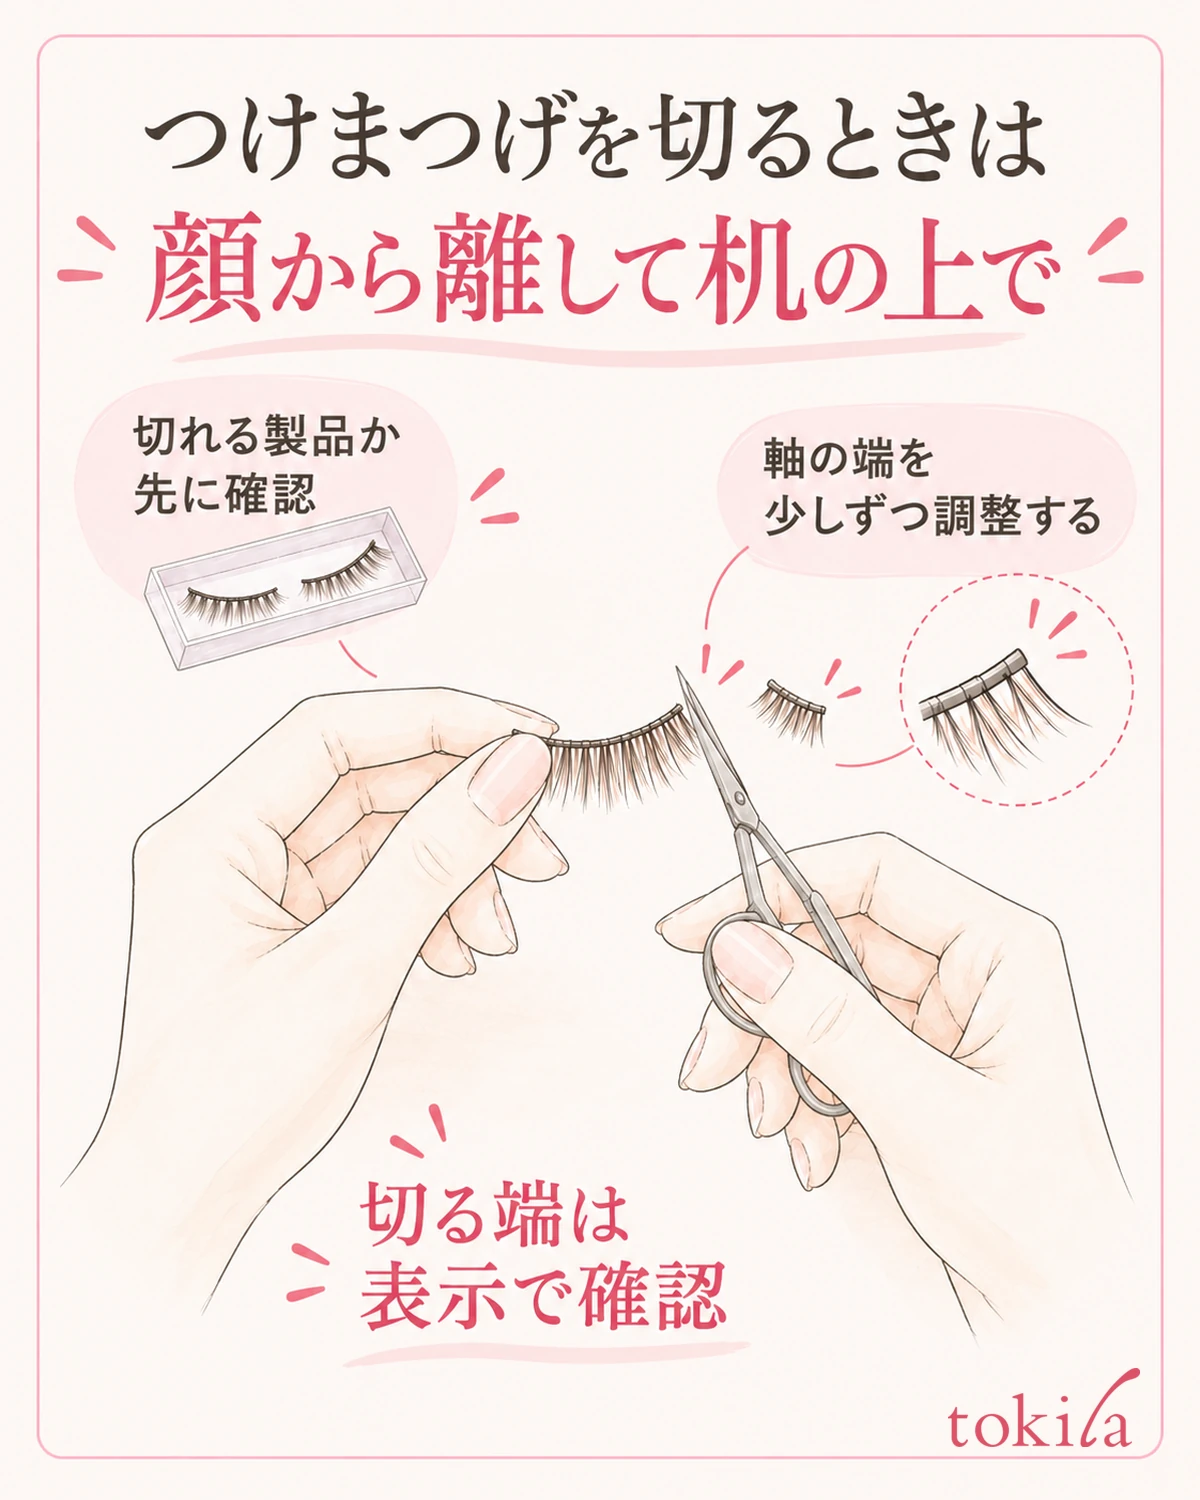
Check whether the product can be cut and which end the instructions say to cut. Even if the width is too long, do not make it a rule to cut the same length from both ends first. Cutting the inner side or the outer side changes the pattern of the hairs, so choose the range to keep while looking at the labeling and the design. It is better to stop here than to cut when you cannot decide.
When you cut, take the false eyelashes completely away from your eyes and work on a desk. Prepare a tool that lets you handle fine detail without strain, such as small, clean scissors. Do not cut while holding them against your eye, while holding a hand mirror, or while wearing them. Do not adjust the width with the blade close to your face.
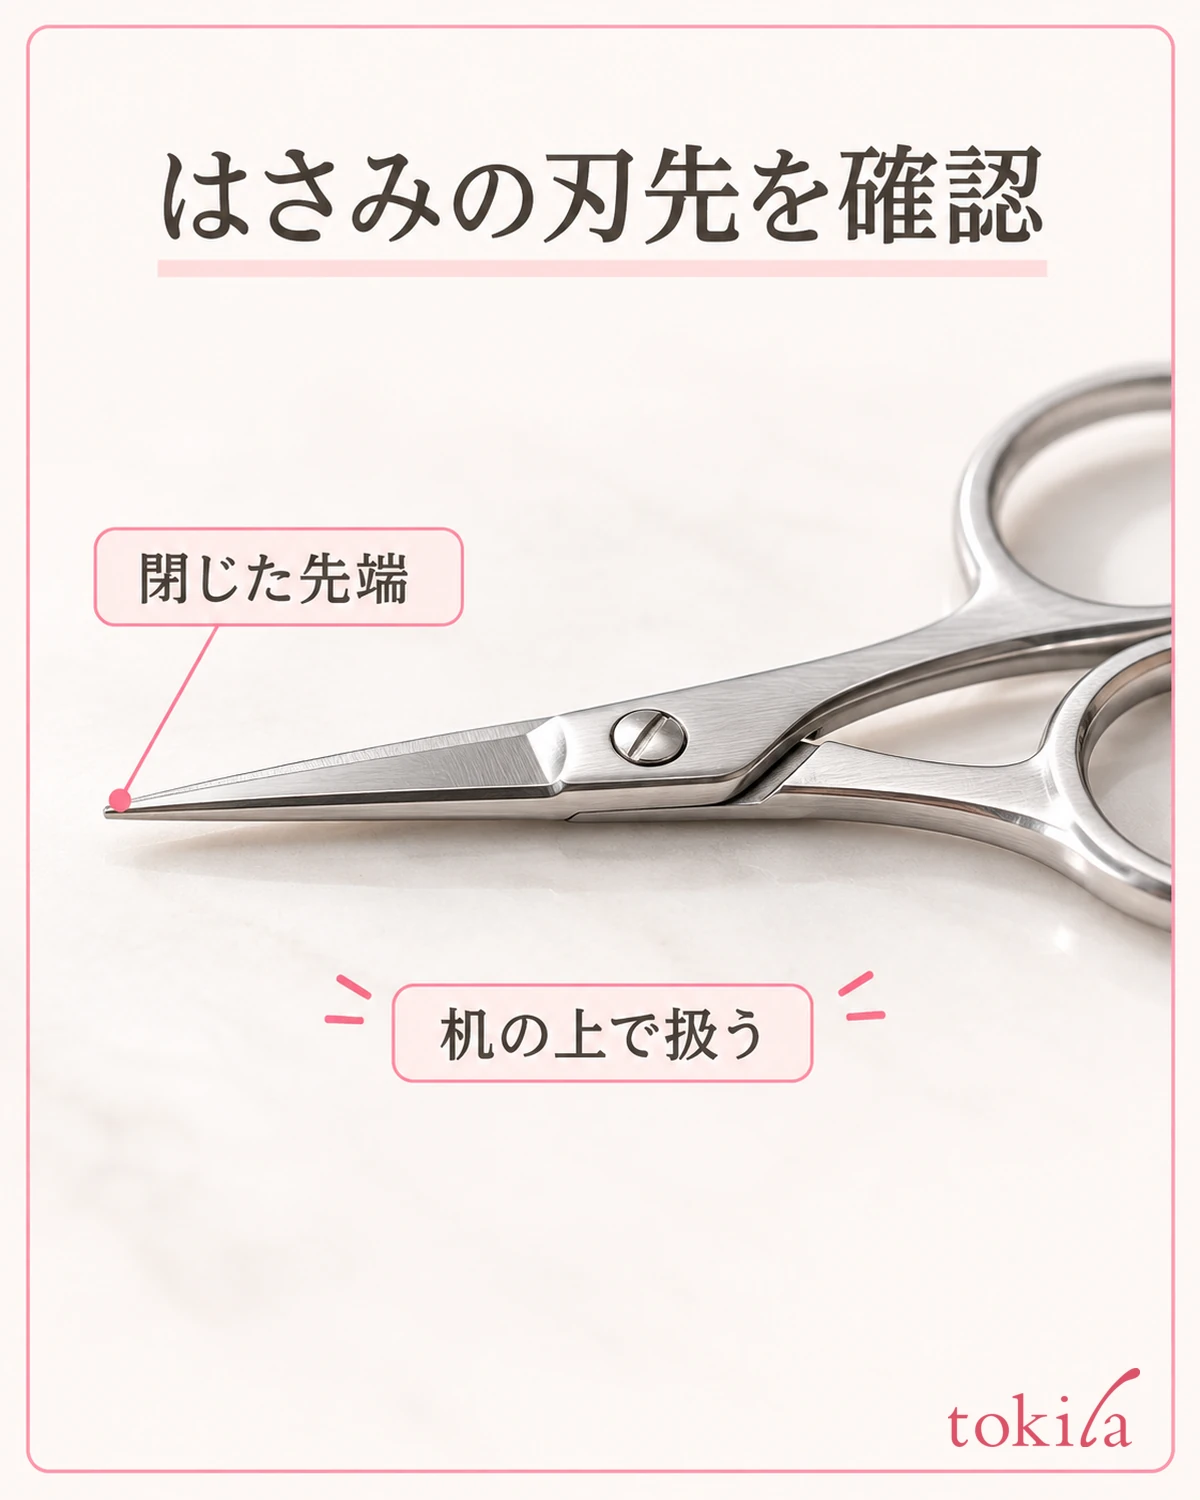
Hold the band in a direction where you can see it, so that you do not lose track of which side you are cutting off and which you are keeping. Rather than trimming the hair tips into a horizontal line, adjust the end of the band as needed to shorten the width. Do not cut into the middle of the strip needlessly; check a cutting position that suits the product's structure and instructions before you move the blade.
Right before you cut, check again whether you are holding the right-eye piece or the left-eye piece. Do not stack the left and right and cut them together; when you finish one, return it to its designated place before moving on to the next. Do not cut where it is too dark to tell the fine hairs from the end of the band; first sort out the lighting and your work surface.
Rather than cutting a large amount at once, trim a small amount, put the scissors down, and check the width again. There is no fixed number of millimeters that works for everyone. A band that has been cut cannot be restored to its original length, so what matters is not cutting more times but telling how much is excess before you cut.
Clear the trimmings from the desk and the case, and check the condition of the ends. If the band has split, hairs have come out in clumps, or the shape falls apart every time you handle it, do not use it as it is. Also do not make stretching a piece that is too short by pulling it toward the longer side, or adding on another offcut, your basic way to fix the width.
5. Check again after cutting, and change the shape on days it does not fit
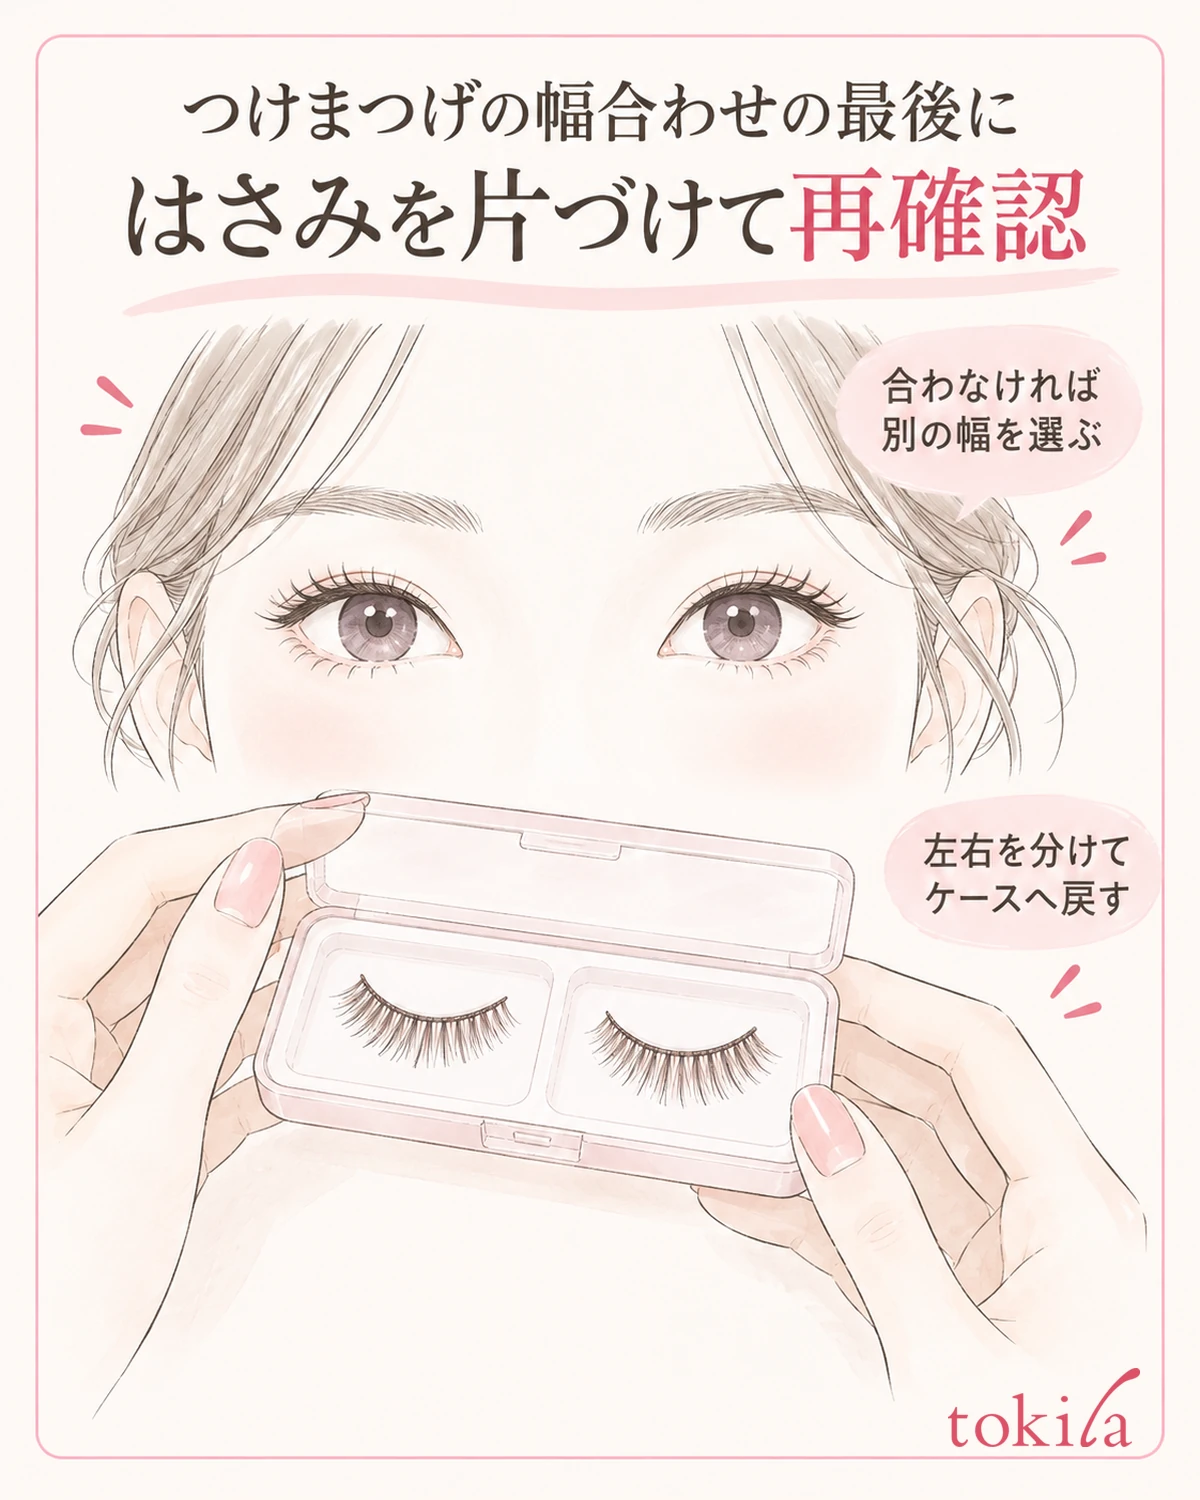
After putting the scissors away, try the lashes against your eye once more without glue. See whether the band fits within the start and end you decided on at first, and whether the pattern of hairs you wanted to keep has been preserved. Look not only at the width but also check that the inner and outer directions are not reversed. Using the same mirror position as before cutting makes the differences easier to follow.
Next, look at both eyes together. Making the bands the same length is not the same as looking natural across the whole face. Do not try to erase every difference in your eyelids or the direction of your lashes with cutting alone. Rather than keep shortening just one side, go back to your original goal: which area do you want to add to today?
If the width fits, there is no need to cut any more. Check separately the end of the band seen up close and the impression of the hair tips seen from the front, and stop where it suits today's goal. If you keep cutting every time you notice a slight difference between left and right, you will drift away from the original design.
If you have made it too short, do not force it to look like the original full-length finish. Whether it can be used as a partial lash is also something you judge by checking the product's design and instructions. Rather than layering offcuts to fill a gap or shifting it toward the inner corner to line up the end, choosing a different width or design may be easier to handle.
Even when the width fits, the stiffness or curve of the band may be hard to work with. Rather than trying to solve it only by how much you cut, change one condition you choose by: from full-length to outer-corner, or from a lash with more volume to a more subdued one. When you actually put them on, check the labeling for the amount, waiting time and position for both the false eyelashes and the dedicated adhesive.
On days when you already have pain, itching or redness before wearing them, do not decide to continue using them while fitting the width. If something unusual appears while you are wearing them, do not keep pressing and repositioning them; stop using them. A fitting width does not guarantee that irritation will not occur.
After use, remove them in the way specified by the product and care for them; if they can be reused, store left and right separately in the original case. For next time, it is enough to leave a one-line note on where you worked, such as "right: checked the excess on the outer side." For the overall order of makeup, you can also check the basic flow for base, brows and eyes. Proceed with direction, trial fit, adjustment away from your face, and rechecking as one set.



