
When you hold a nail sticker up to your nail, one side fits but the other side overlaps the skin. When you switch to a smaller one, the edge of your nail now looks too exposed. When that happens, before you stick it on and then pull it, take a look at the width of the sticker and the shape of your nail separately.
Here we explain, mainly for full-coverage nail stickers that cover the whole nail, how to choose before peeling one off the backing sheet. They are handled differently from small stickers that decorate only part of the nail and from three-dimensional nail tips. Cutting, stretching, and using a light differ from product to product, so go on while checking the label of the product you have.
1. First, Check the Type of Sticker and How Much It Can Be Adjusted

The first thing to look at is the directions on the package. Check what steps are needed through to the finish, such as "just stick on," "cure with a light," or "file the tip to shape." Even if they look alike, a soft film, a semi-cured gel, and a hard tip are not the same thing. Don't apply an operation you saw in a video about another product directly to the one you have.
When you want to adjust the width, look for whether you may cut it with scissors, whether it can be stretched, and at what stage to adjust it. Even if there is an explanation about trimming the extra length at the nail tip, that doesn't mean you can freely cut the width at the sides. If cutting the width isn't permitted, give priority to looking for another size on the sheet first.
Even when it says "smaller than the nail," match the guideline for margin to the product's specification. You don't need to decide on a number of millimeters common to all stickers. Conversely, take a look at the boundary between the nail surface and the surrounding skin, so that you don't cover the skin or cuticle in trying to fill a gap.
At this point, also gather the tools needed for finishing and removal. This is to avoid finding out after sticking it on that you have no light or remover. If you can't read the directions or don't know what tools are needed, don't rush to stick it on just to fit the size; check the label before you use it.
The diagrams in this article are schematic drawings for comparing width and position. They are not a pattern that fits everyone if cut to the same shape. For nails that are damaged or painful, or skin around the nail that is irritated, don't cover it with a sticker to hide it; refrain from using it.
2. Choose Candidates on the Backing Sheet and Compare the Left and Right Edges of the Nail
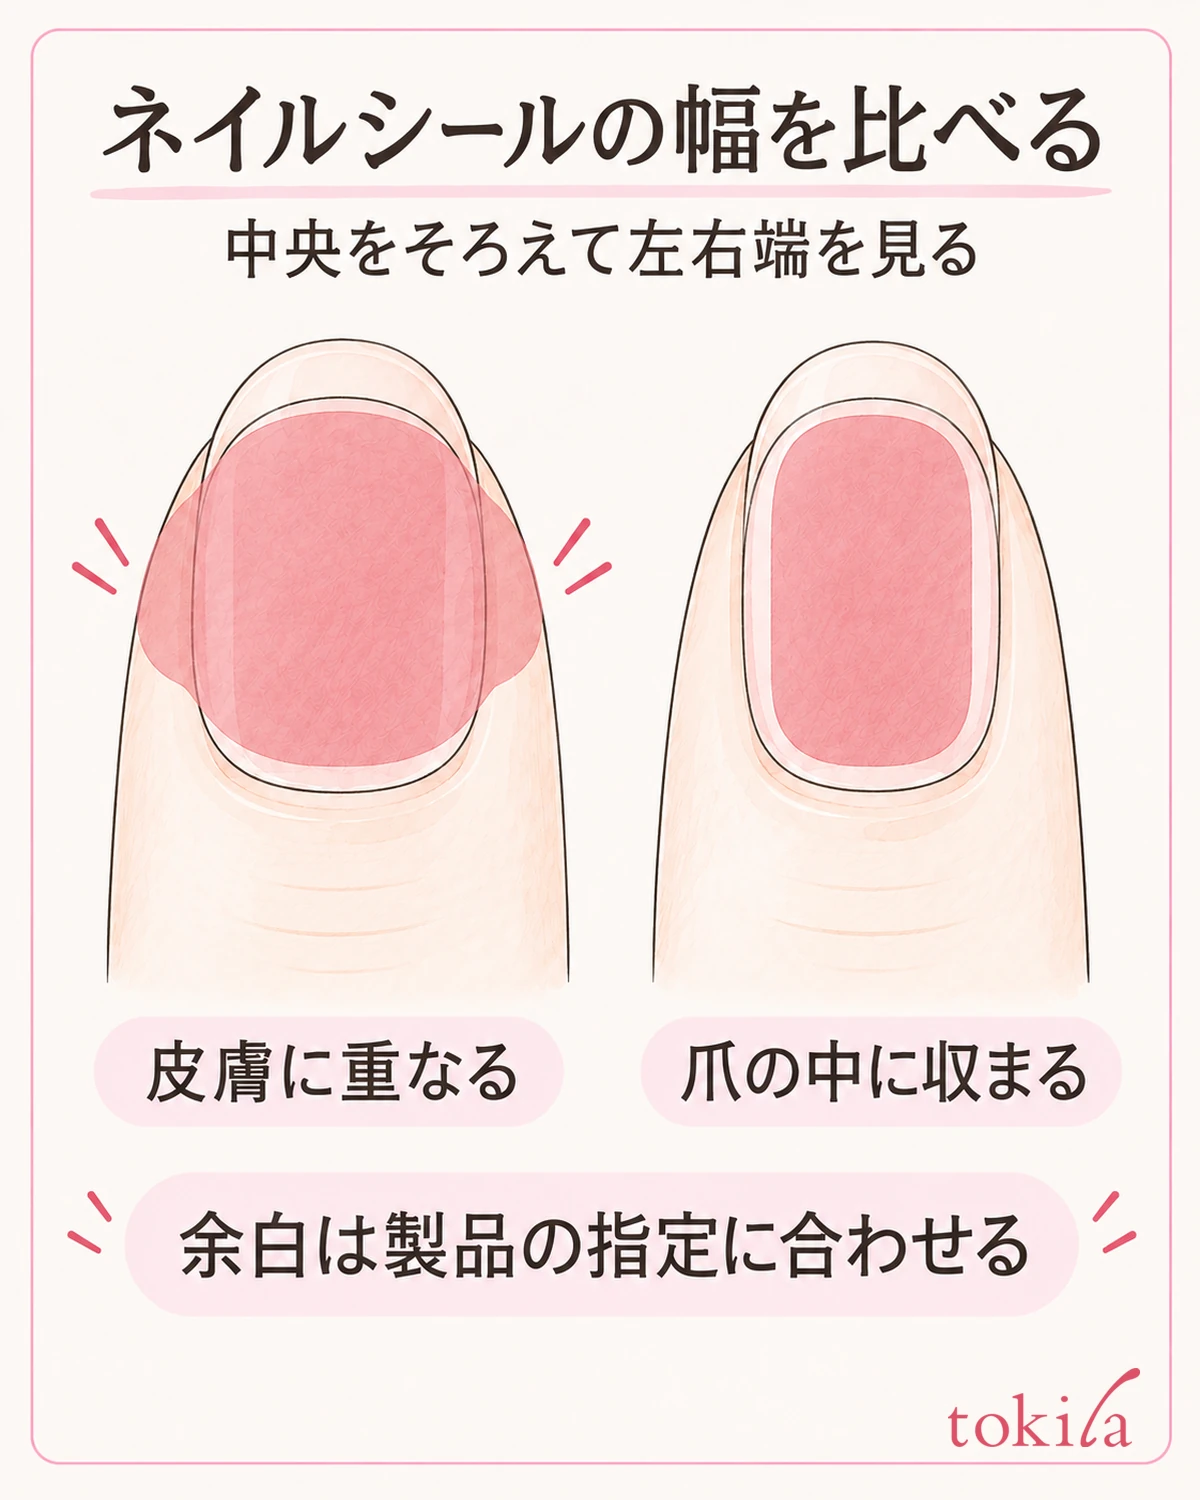
Put the sheet on a desk and pick about two sizes close to the width of your nail as candidates. If it is a product you can compare through a transparent backing sheet, bring it near your nail without peeling it off and look at the size. If it is hard to check through the backing, use the size chart on the package or the included fitting guide, and avoid trying it by sticking the adhesive side to your nail and peeling it off again and again.
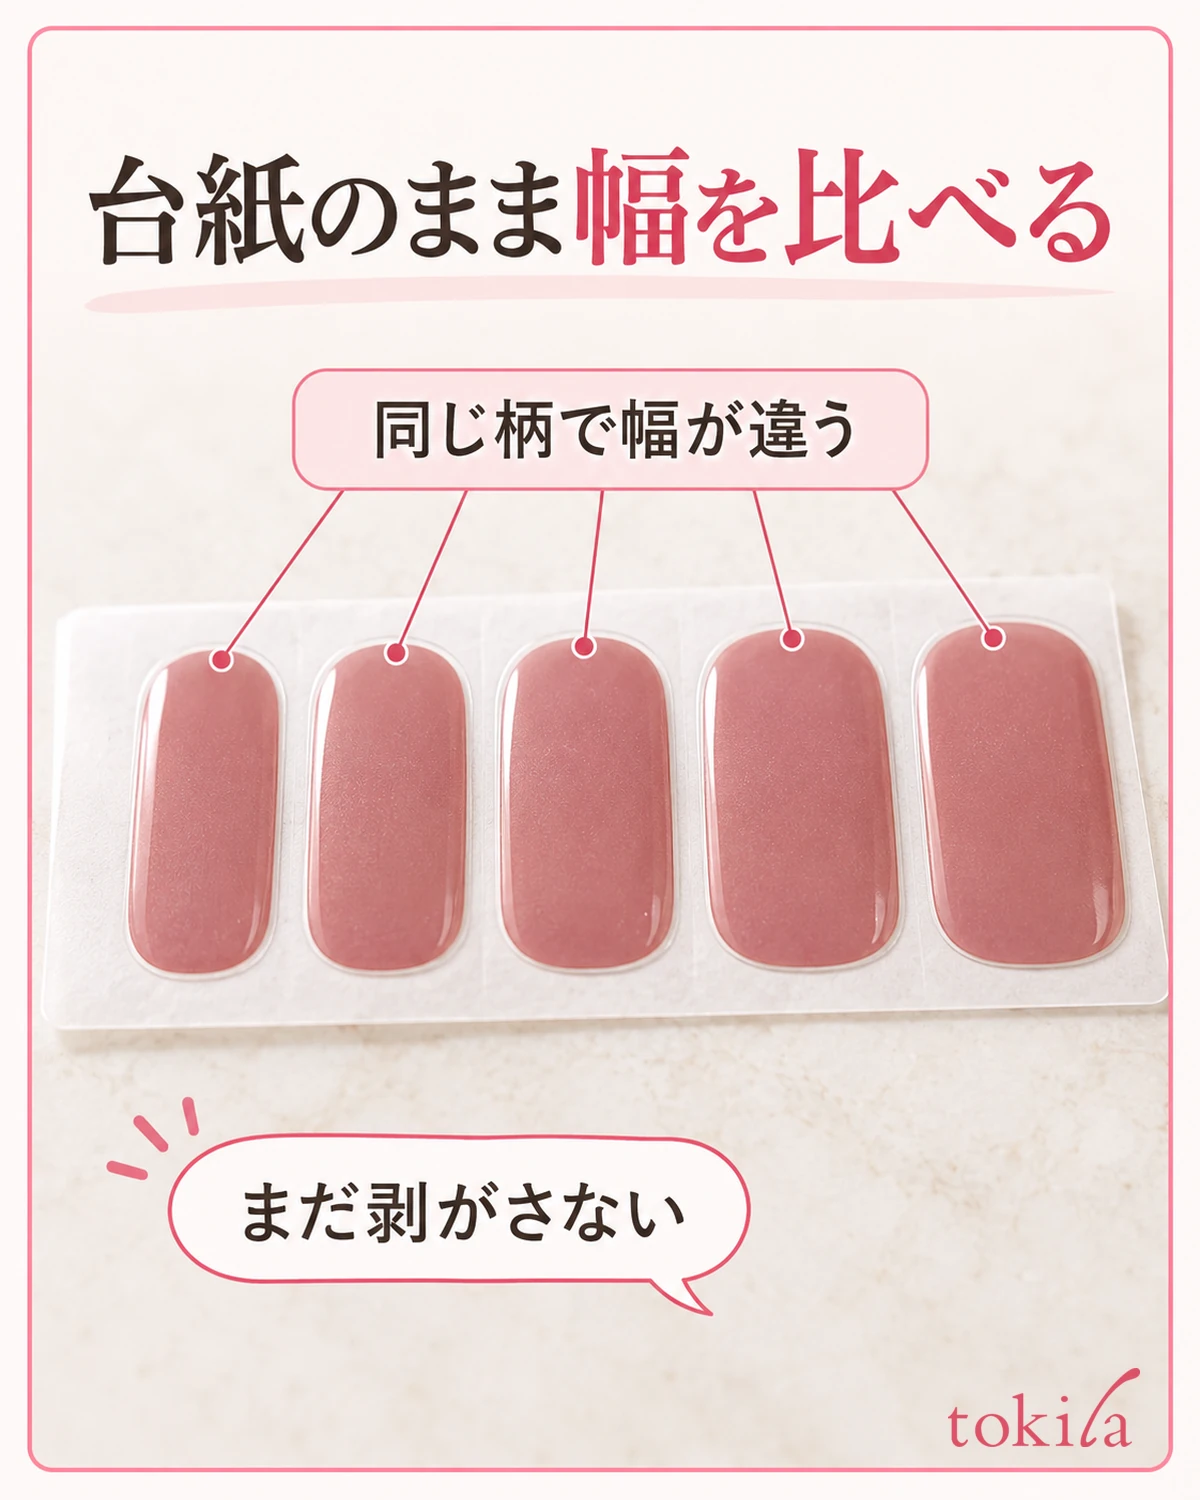
When you compare, rest your hand on the desk, in a position where you can see the tip of the finger in question. Don't decide it is "just right" by looking only at the center; move your eyes to the boundaries on the left and right of the nail. Even if you think you have centered the sticker, if only one edge reaches onto the skin, think separately about whether the width itself is too large or the position has shifted to one side.
First return the position to the center and compare, and if both edges still stick out, consider another size. If you shift it far to the opposite side to match one side, the root and the position of the design change too. Check how much of the left and right nail edges is visible, and keep the candidates that can secure the margin specified for the product.
If the edges are hard to see from the front, tilt your finger little by little to the left and right. A nail is rounded, and it is hard to judge how the sides fit from the width seen from above alone. Rather than pulling the sticker and pressing it on, check by changing the angle you view it from.
When a fine design or strong gloss hides the outline of the nail, change the angle of your finger a little to avoid reflections of the light. Don't take a shadow for the edge of the sticker; trace the outline on the sheet side and the boundary of the nail separately. Even if you can't measure the width in numbers, putting into words which edge overlaps where makes it easier to compare candidates.
Even for fingers with the same name on the left and right hands, the same sticker doesn't always fit. Don't decide the left hand using the number you chose for the right index finger; compare one finger at a time. If something chosen only for the design doesn't fit, it is easier to organize if you secure the sizes that are easy to use first and then combine designs from among them.
3. Even If the Width Fits, Check the Curve at the Root and the Direction
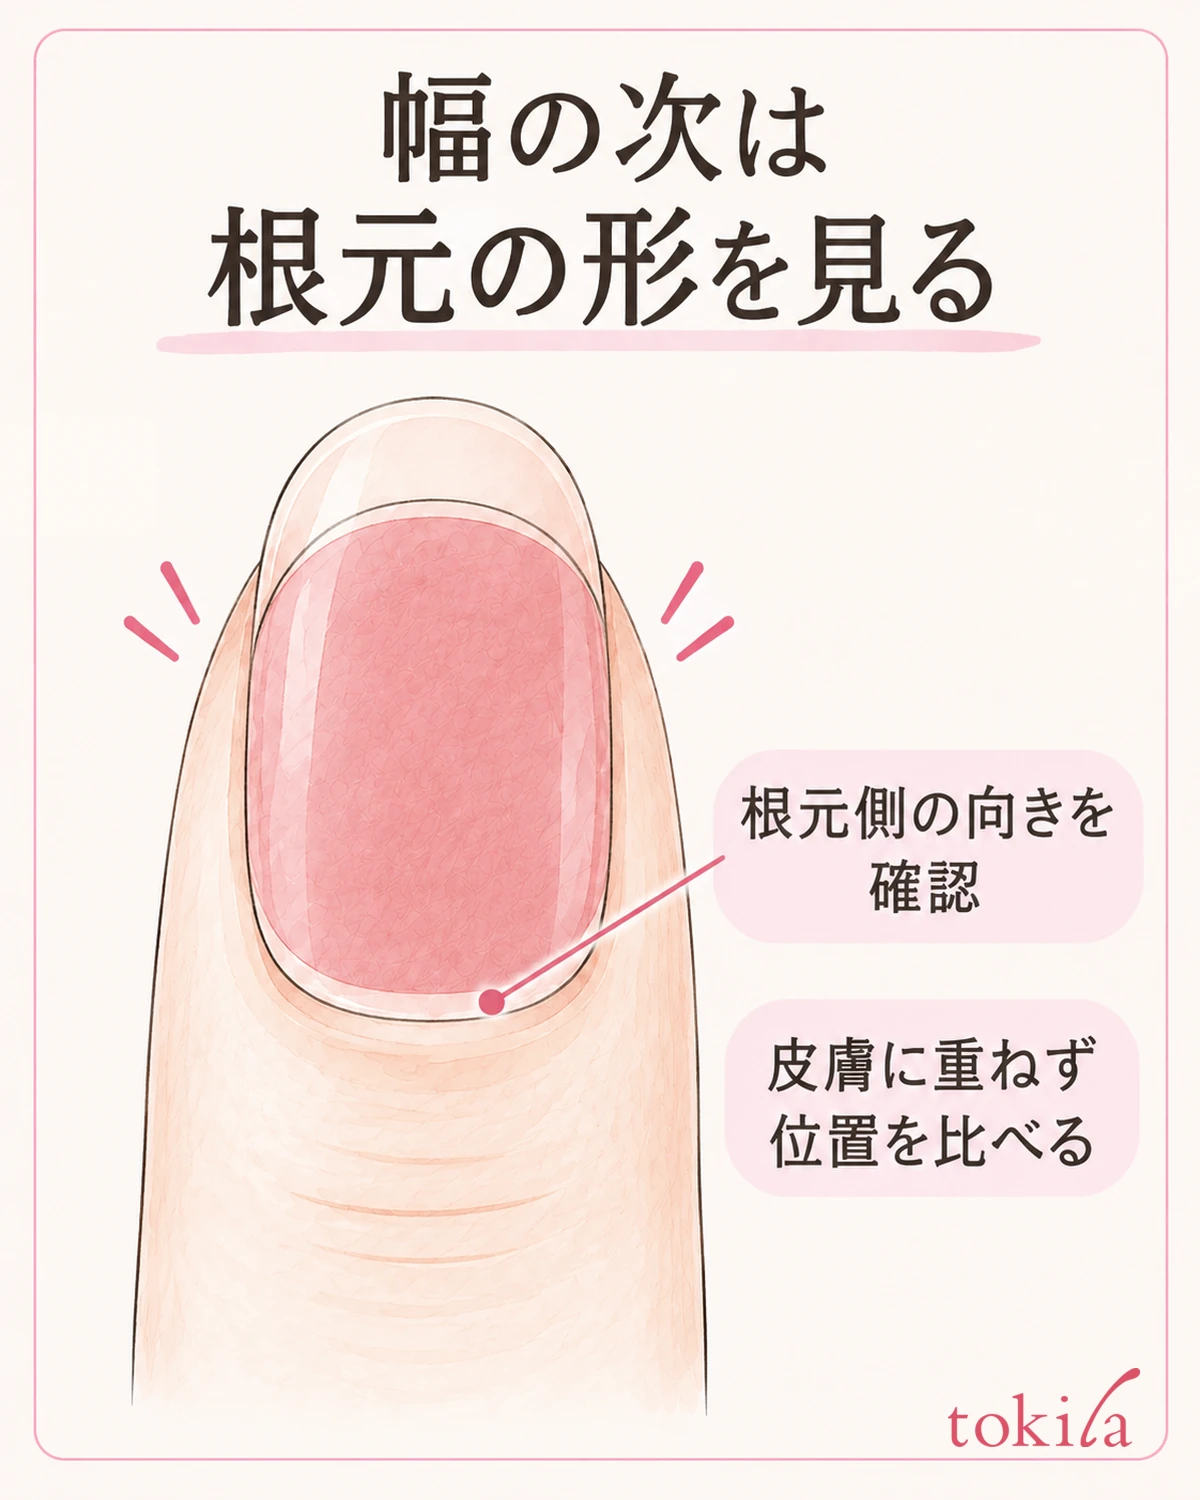
Once the candidates for width are chosen, next comes the root. Compare the shape of the nail's base with the curve of the root side of the sticker. If it fits in the middle but both sides ride onto the skin, the curve or the position where you place it may be off, not just the width. Before you cut off the extra right away, check where it overlaps.
Match the top and bottom of the sticker to the label as well. Even if the tip side and root side have similar shapes, it can't necessarily be used the other way around. Don't guess from the direction of the design or the layout on the sheet; check the root side using the arrow or the explanatory diagram. Flipping it top to bottom so that it appears to fit is only for when the product allows it.
When you compare on the backing sheet, roughly align the center line of the sticker with the direction of your finger and bring the root close to the base of the nail. Don't push only the center of the root deep in, or push it under the skin. If overlap appears on both sides of the curve, check whether it fits at a position a little further away, or whether the shape of another candidate fits.
"A little of the nail color shows at the root" and "the sticker overlaps the skin" are different things. If you treat all visible margin as a failure, you are more likely to choose a sticker that is too big. Give priority to the product's specification for the margin you need, and don't make it your goal to stick it tightly against the cuticle for looks.
If there is excess on only one side, return the direction of your finger and the direction of the sheet to the start and check again. Something you were looking at diagonally may be judged differently once you simply bring it back to the front. If you narrow it down to one condition to correct at a time among the width, the position of the center, and the shape of the root, it is easier to compare which candidate fits.
4. Cut or Stretch Only If the Product Specifies It
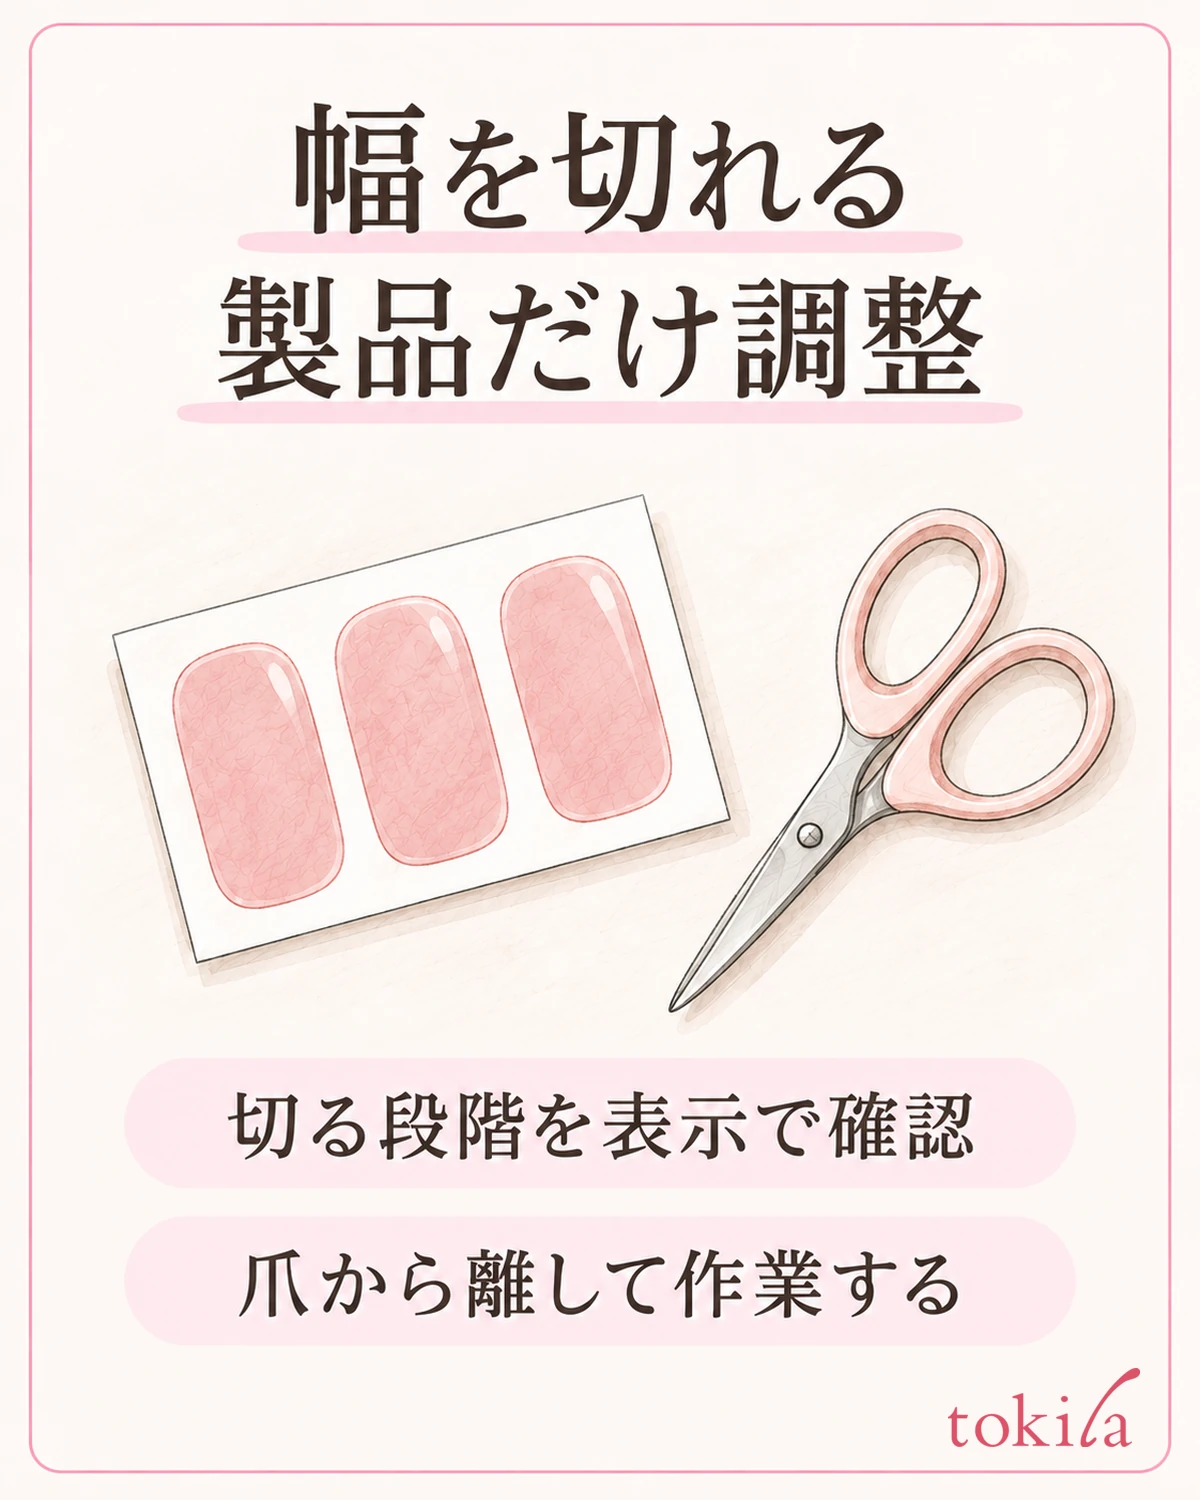
If all the candidates are too big, for a product that allows cutting the width, adjust it at the specified stage. Also check whether it is the type you cut while it is still on the backing sheet or the type you shape after peeling it off. Avoid methods such as inserting scissors close to the skin to trim the width while it is stuck on your nail.
If cutting on the backing sheet is specified, move the sheet away from your finger and handle it on a stable desk. You can't put a large cut back, so check the shape little by little within the range of the instructions. When you change the width, the shape of the edges and the position of the design change too, so after cutting, compare the left and right edges and the root again before sticking it on.
When it is too small, not every sticker can be stretched. Even for a product that allows stretching, conditions such as before curing may apply. If you can't confirm the conditions, don't pull it; choose another size. Don't switch on your own to methods such as layering two stickers to fill the width or adding another material into the gap.
Separate adjusting the width from the step of shaping the length of the nail tip after sticking it on. The direction in which to use the file, the order of tip treatment and curing, and the compatible light should follow the product's directions. Don't use the size matching in this article as a reason to increase the number of curings or skip a specified step.
If the sticker folds partway, dirt gets on the adhesive side, or the edge is greatly deformed, don't press it on and finish; check against the instructions whether it is in a usable state. Whether it can be reapplied also differs by product. Give priority to choosing a fitting candidate again over forcing yourself to use it up.
5. If Nothing Fits, Keep Information for Choosing Again
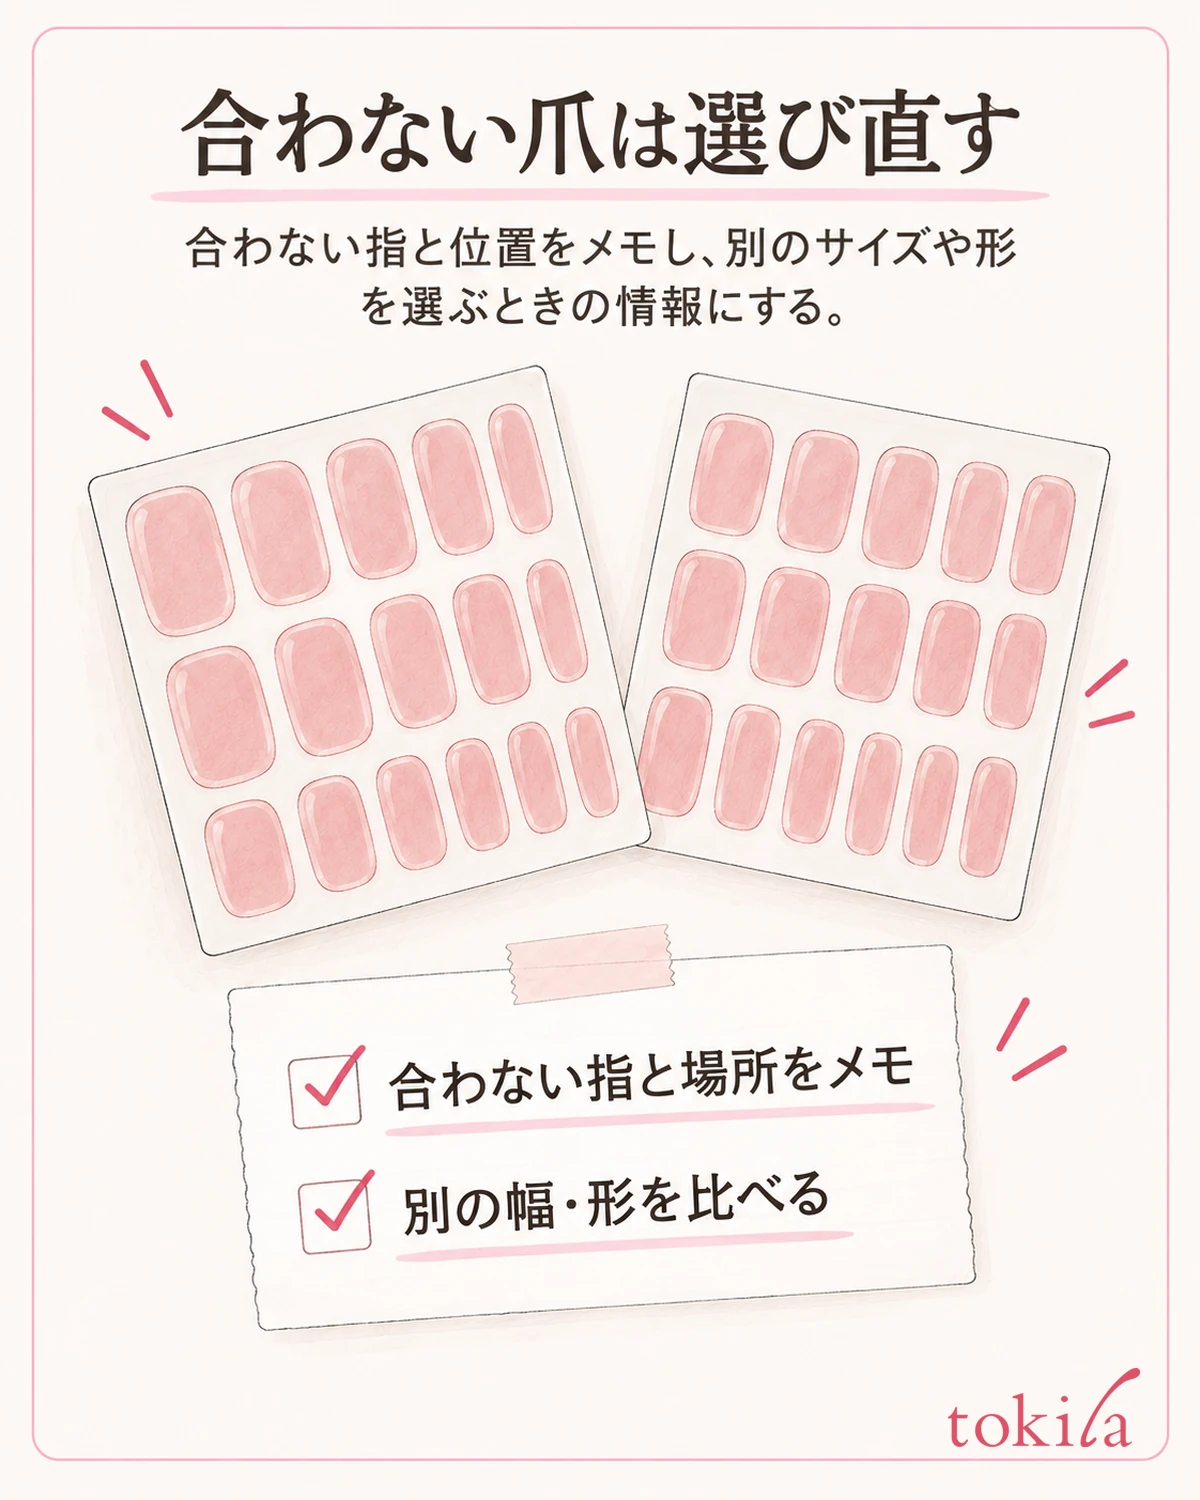
There are cases where one sheet doesn't fit all ten nails. You don't have to push the skin aside because the width falls short, or file your nails hard to match the sticker. For a product where adjustment isn't permitted, or a sticker whose shape is very different, consider another size range or shape for that nail.
A simple note is enough for choosing next time. Leave the troublesome finger and place, such as "the right thumb falls short at the edge even at the maximum width," "the left ring finger doesn't overlap the skin with the next smaller candidate," or "the curve of the root doesn't fit rather than the width." If the product has size numbers, record them as well, but don't assume the same number on another product is the same size.
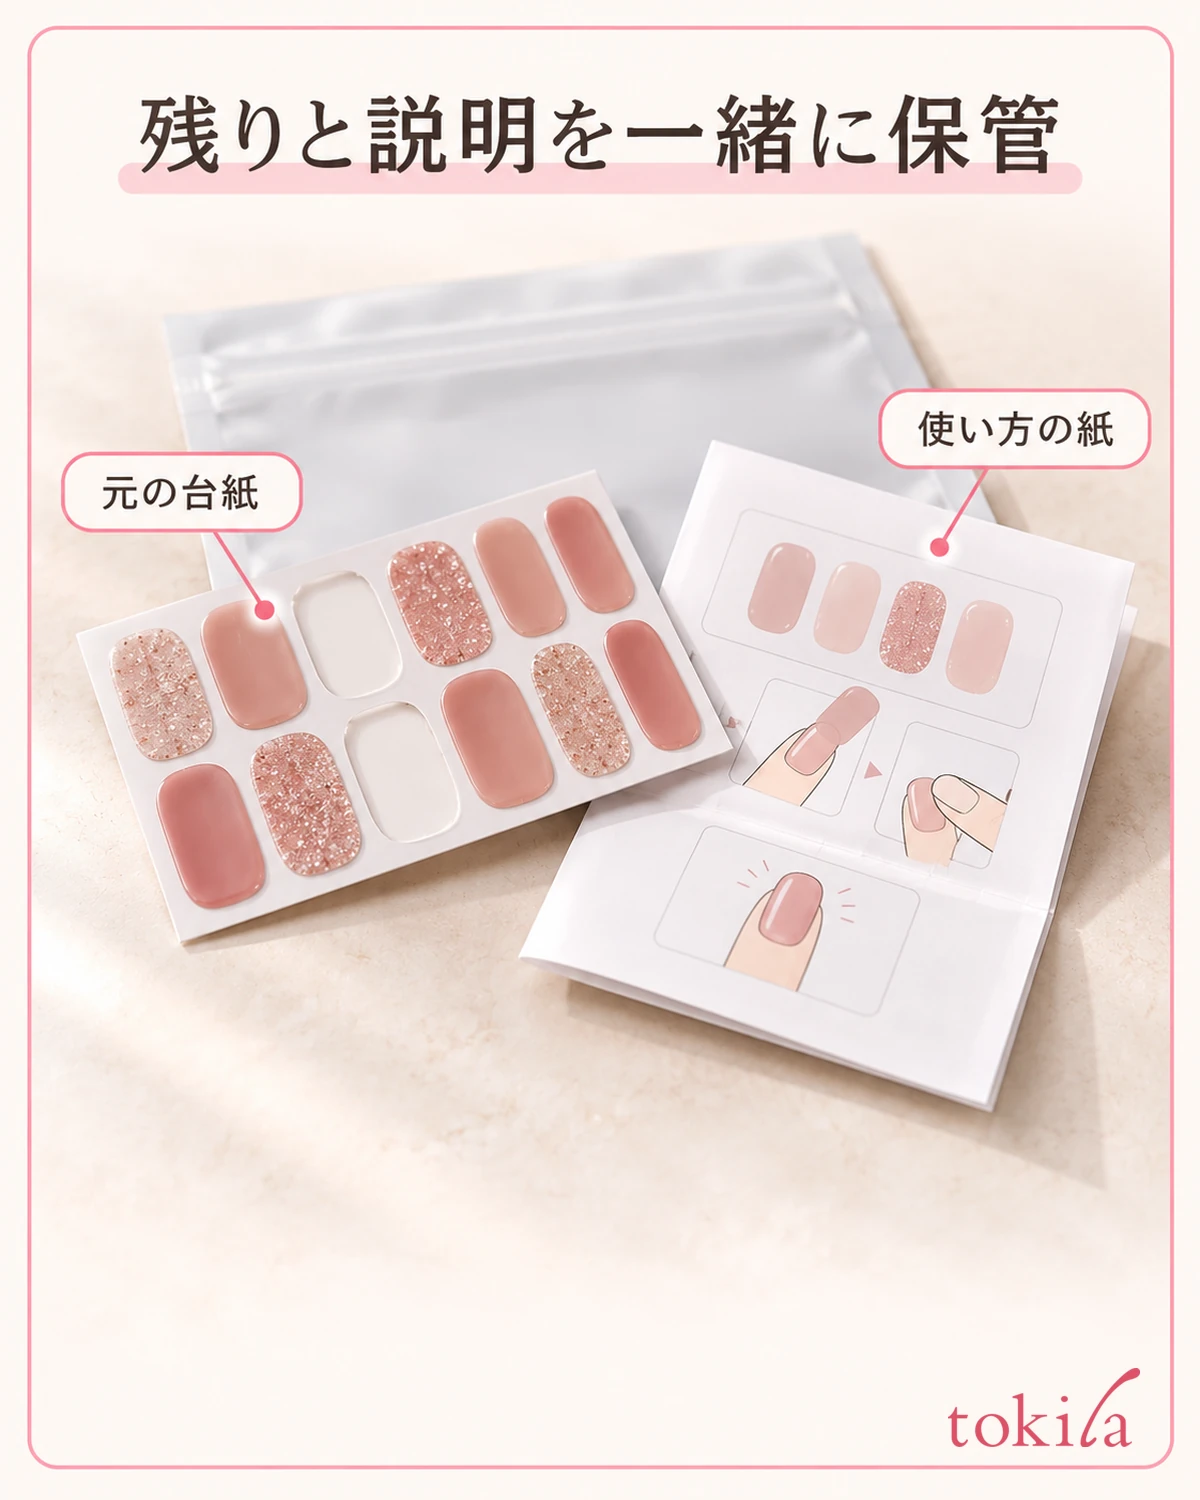
When making the note, you don't need to write numbers on the adhesive side. Write the product name and the finger position in the margin of the backing sheet or on a separate piece of paper. If you store several products mixed together, you can no longer match them to the explanations on curing and removal, so keep the remaining sheets together with their original instructions.
When you check the supported widths before buying, look not only at the number of sheets or designs but also at whether the width of each size and the shape of the root are shown. If there are divisions such as for hands and for feet, or regular and larger, compare by matching the use and the dimensions. Don't decide that something fits based only on the impression from photos when there is no size information.
Return the remaining stickers to the bag or storage method that the product specifies. For types that cure, also check instructions for keeping them in their pre-use state, such as avoiding light. Next time, don't stick on a partly used sticker right away; recheck your nail and the surrounding skin, the condition of the sticker, and the tools you need.
If you want to switch to painted nails after choosing a size, how to support your hand when painting your dominant hand may also help. For checking the polish you have before using it, see how to check when the brush has spread. Don't start from "cover every nail without a gap"; choose by checking the conditions of the product you have and whether the shape fits each nail one at a time.



