
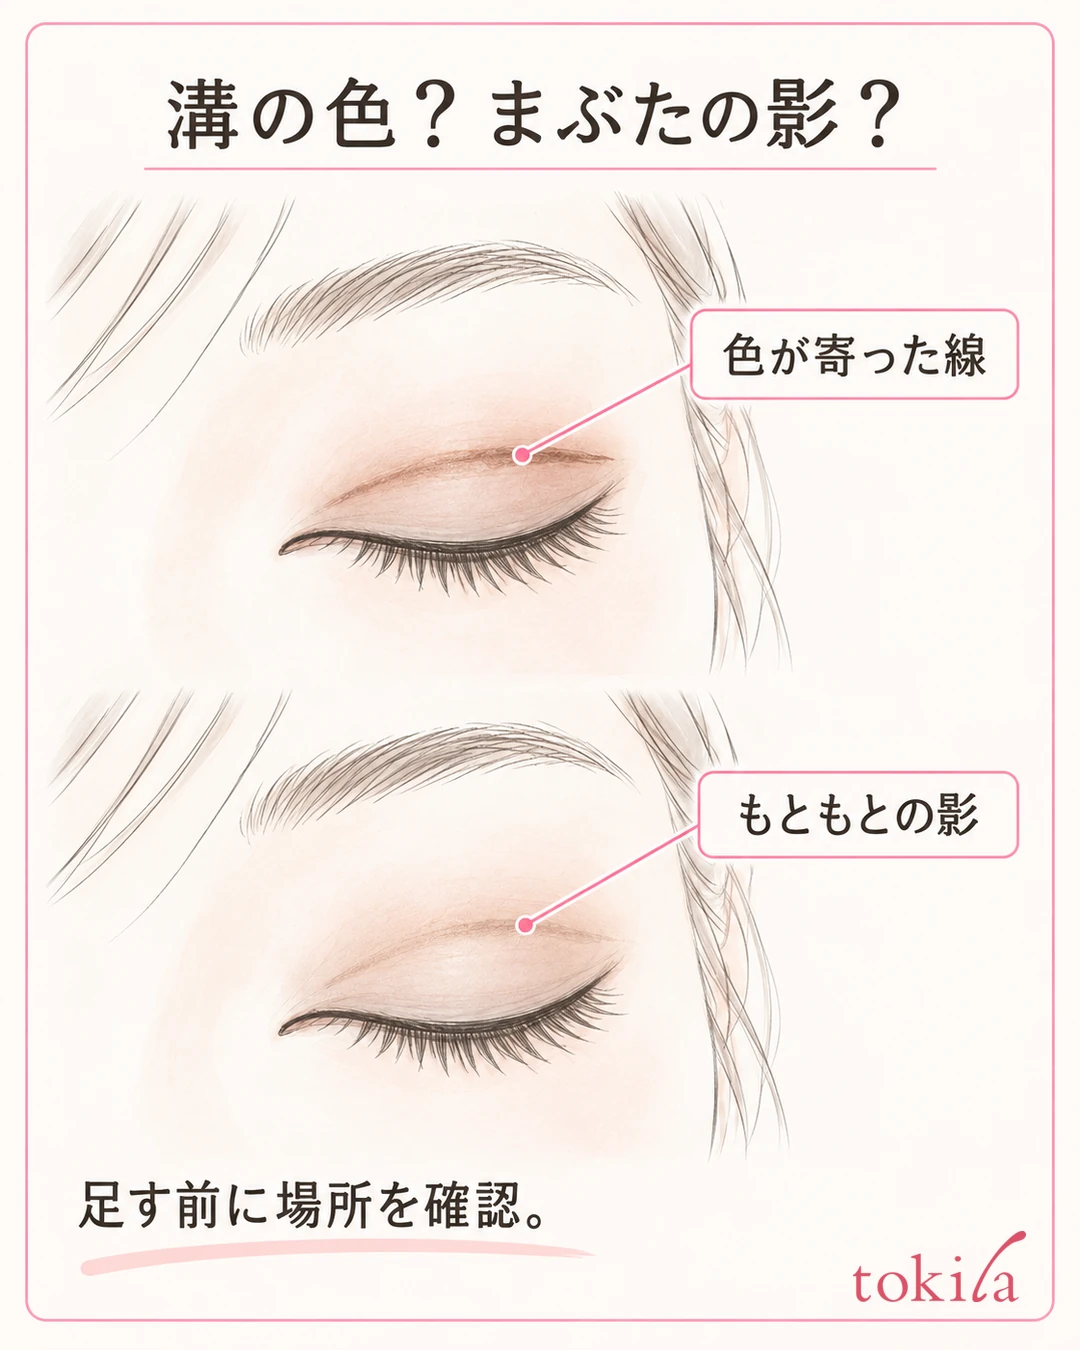
When eyeshadow collects in a line in your eyelid crease, check the base you apply before the color and the amount you layer, rather than adding more color on top. When you are out and about, first smooth the color that has gathered, then reapply a thin layer only where it is needed.
This article deals with eyeshadow that gathers unevenly on the upper eyelid. Ease of handling varies with eyelid shape and the products you use, so follow the manufacturer's instructions first and check gently without rubbing hard.
1. Tell Creased Color from Your Natural Shadow
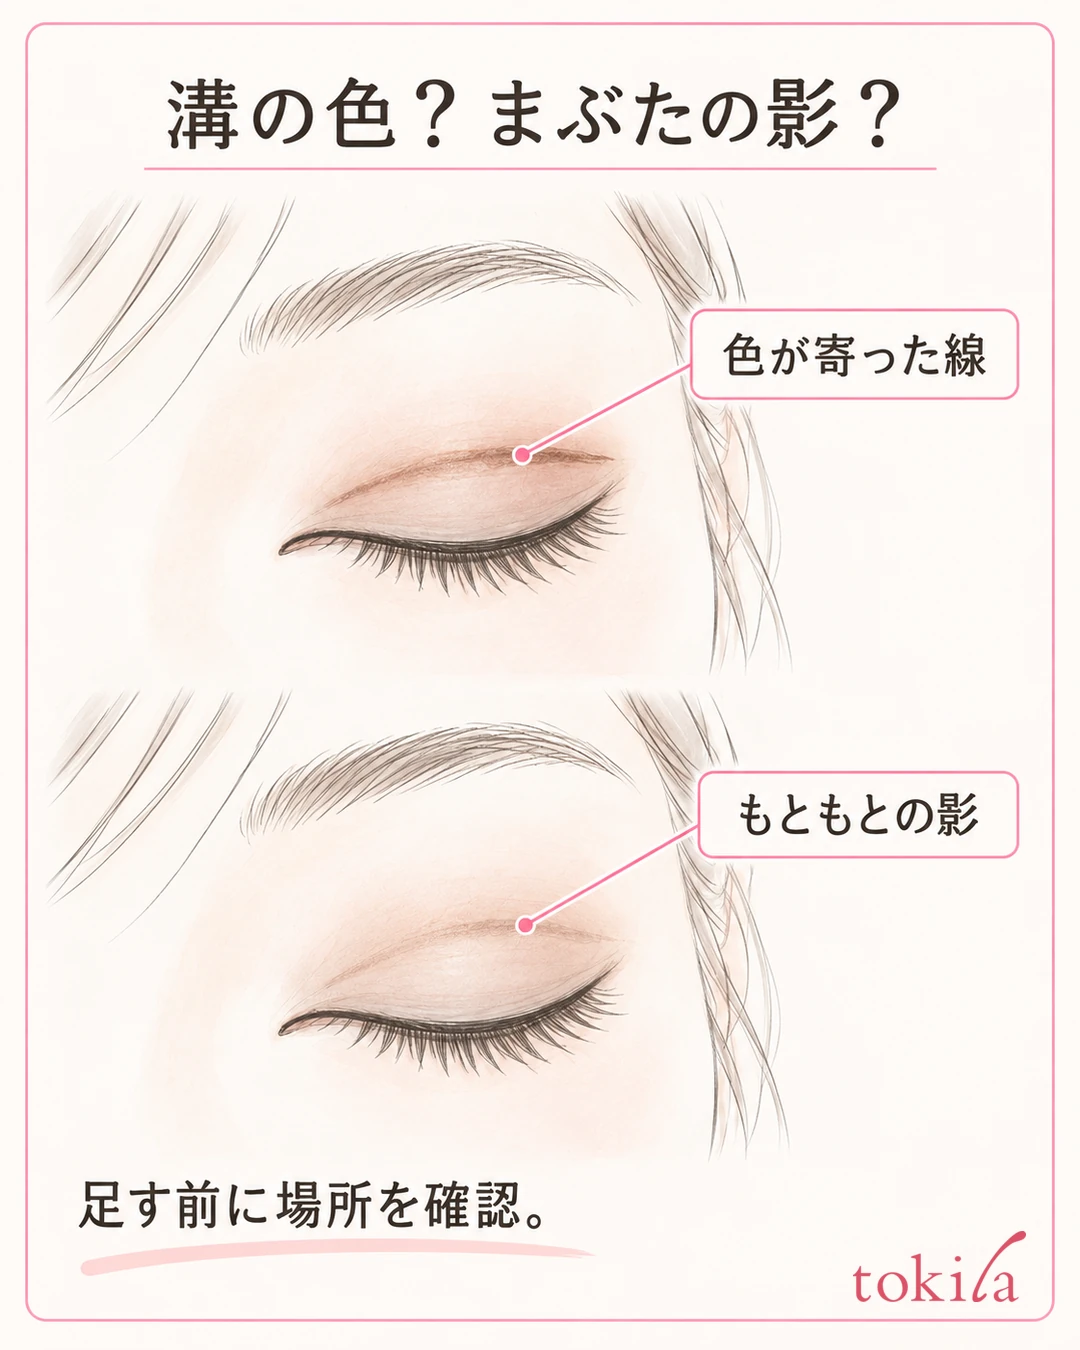
Over time a dark line forms on your upper eyelid, or color shifts when you blink. In that case, look at where the line appears before adding color. Whether it is eyeshadow gathered in the fold of your double eyelid, a shadow your eyelid had from the start, or eyeliner that has transferred below the eye, the place and method of fixing it will differ.
Place a mirror a little lower, lower your gaze slightly, and look at your upper eyelid. Do not raise your eyebrows high or pull your eyelid with your fingers; find an angle you can see comfortably. If color has gathered in the crease and looks thin above and below it, that is the case for revisiting how the eyeshadow is distributed. Do not judge only by how it looks with your eyes closed; check from the front as well.
Also separate whether the line was there right after you applied it or appeared after you went out. If it gathers from the start, check the base layered underneath and the amount of eyeshadow. If it changes later, along with your morning prep, remember which color and which area gathered. There is no need to judge the amount of oil or your skin type from appearance alone.
It does not necessarily gather the same way on both sides. If only one side bothers you, look at that eye's crease and the area you applied to. Before adding powder evenly to both sides to match them, narrowing down the small spot where color gathered is the starting point for avoiding a heavy look. Do not try to change the shape of your eyelid; focus on today's makeup unevenness.
Also match the lighting. If the light is strong on one side only, glitter or sheen can look like a dark line. Turn your face back to center, compare both sides in the same place, and then decide. If you can tell apart where it looks like a dark line and where color has actually gathered, you won't have to touch a wider area than necessary.
If your main concern is color transferring to the lower eyelid, see how to rethink smudging eyeliner. This article focuses on eyeshadow gathering in the crease of the upper eyelid and explains everything from prep before application to touch-ups.
2. Blend Skincare and Base, and Even Out Excess Surface Oil
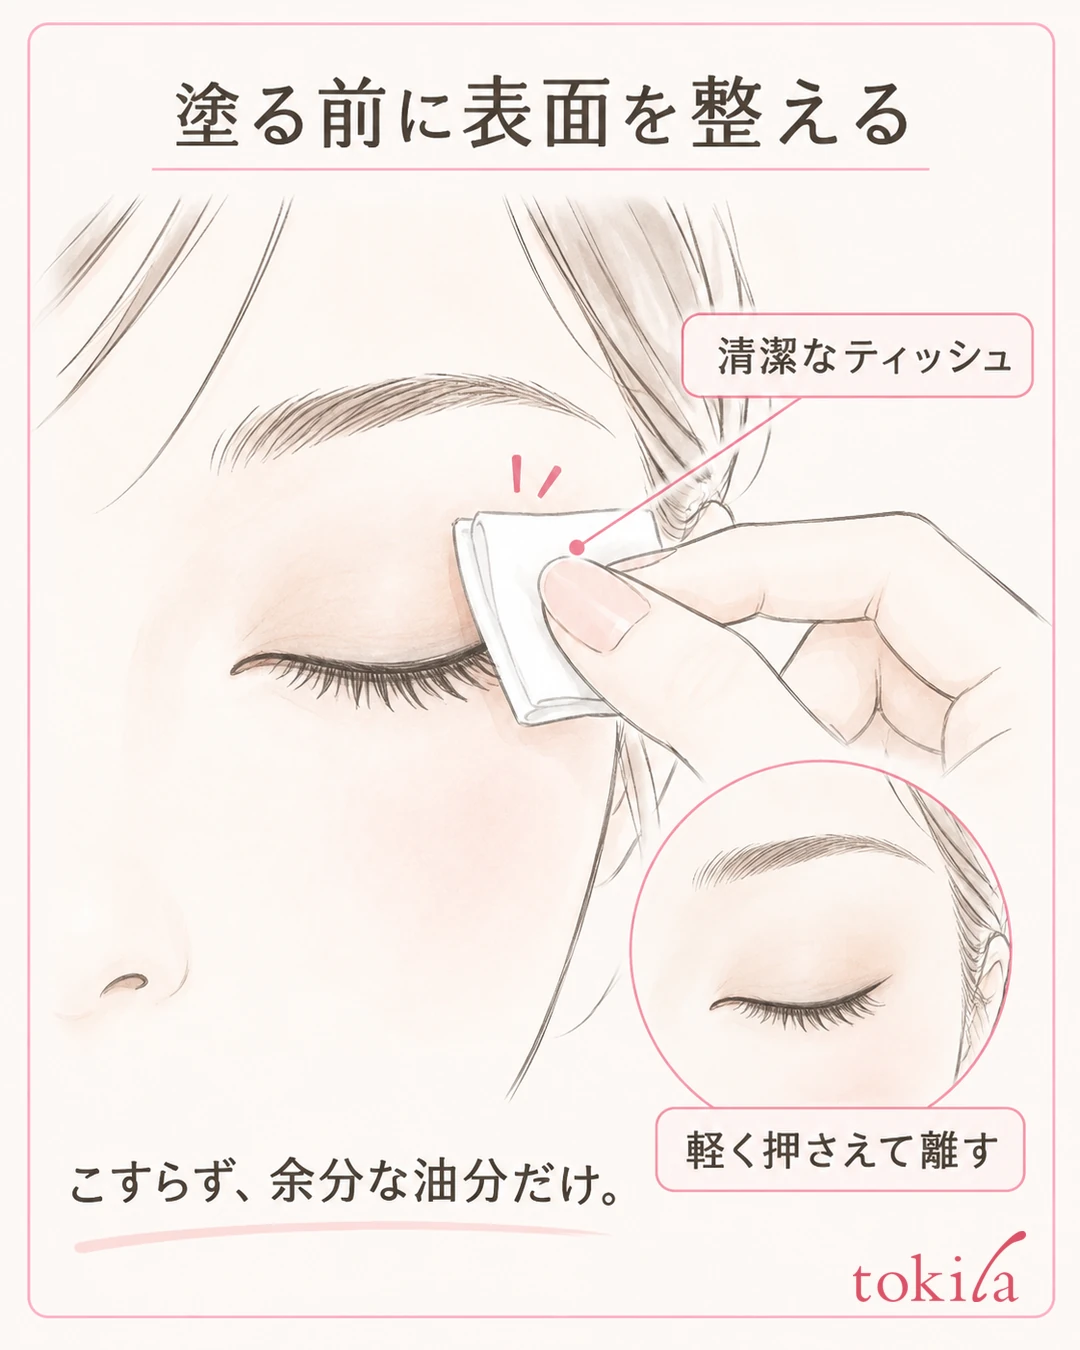
Before applying eyeshadow, check the surface of your eyelid. See whether emulsion, cream, or liquid foundation is left unblended, and whether base has gathered in the crease.
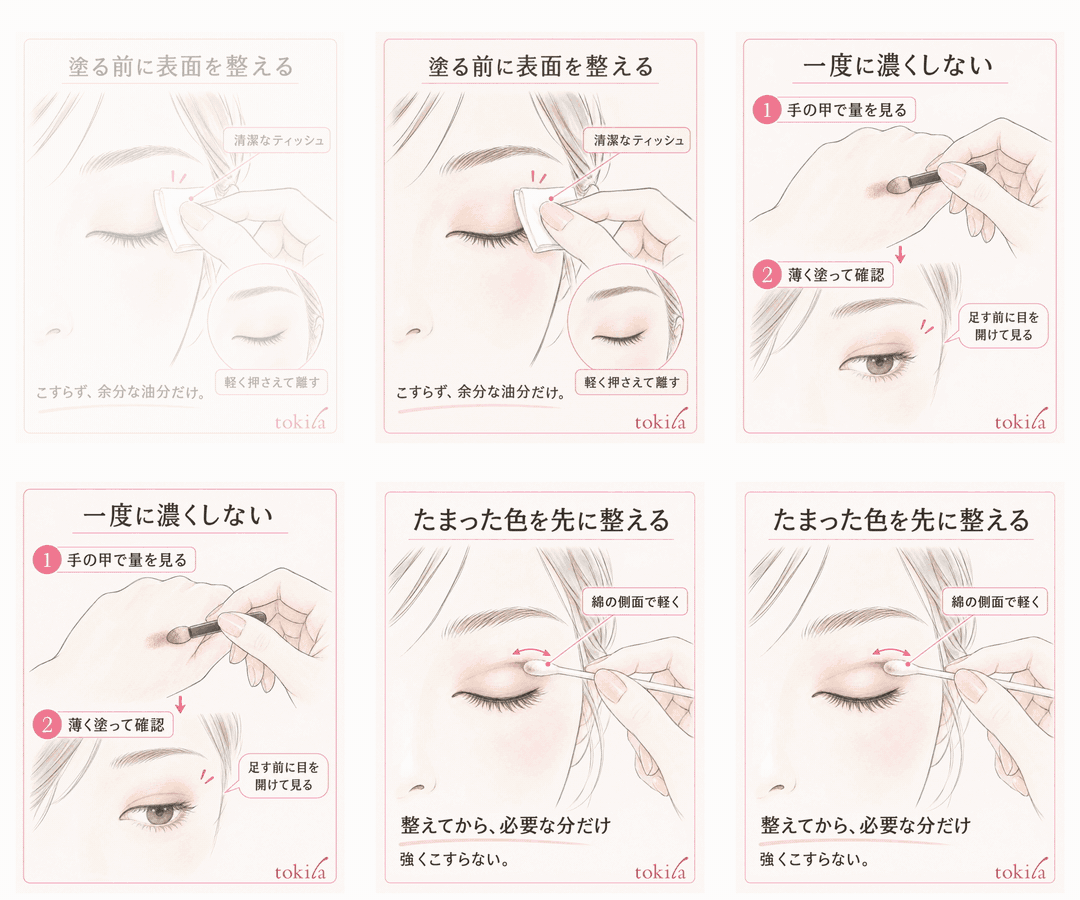
First blend products into your skin. If excess surface oil bothers you, fold a clean tissue small and press it gently on your upper eyelid. Do not rub, drag sideways, or press hard repeatedly. Close your eyes, keep the corner of the tissue pointed away from your eye, and aim to press lightly with the flat side and lift away.
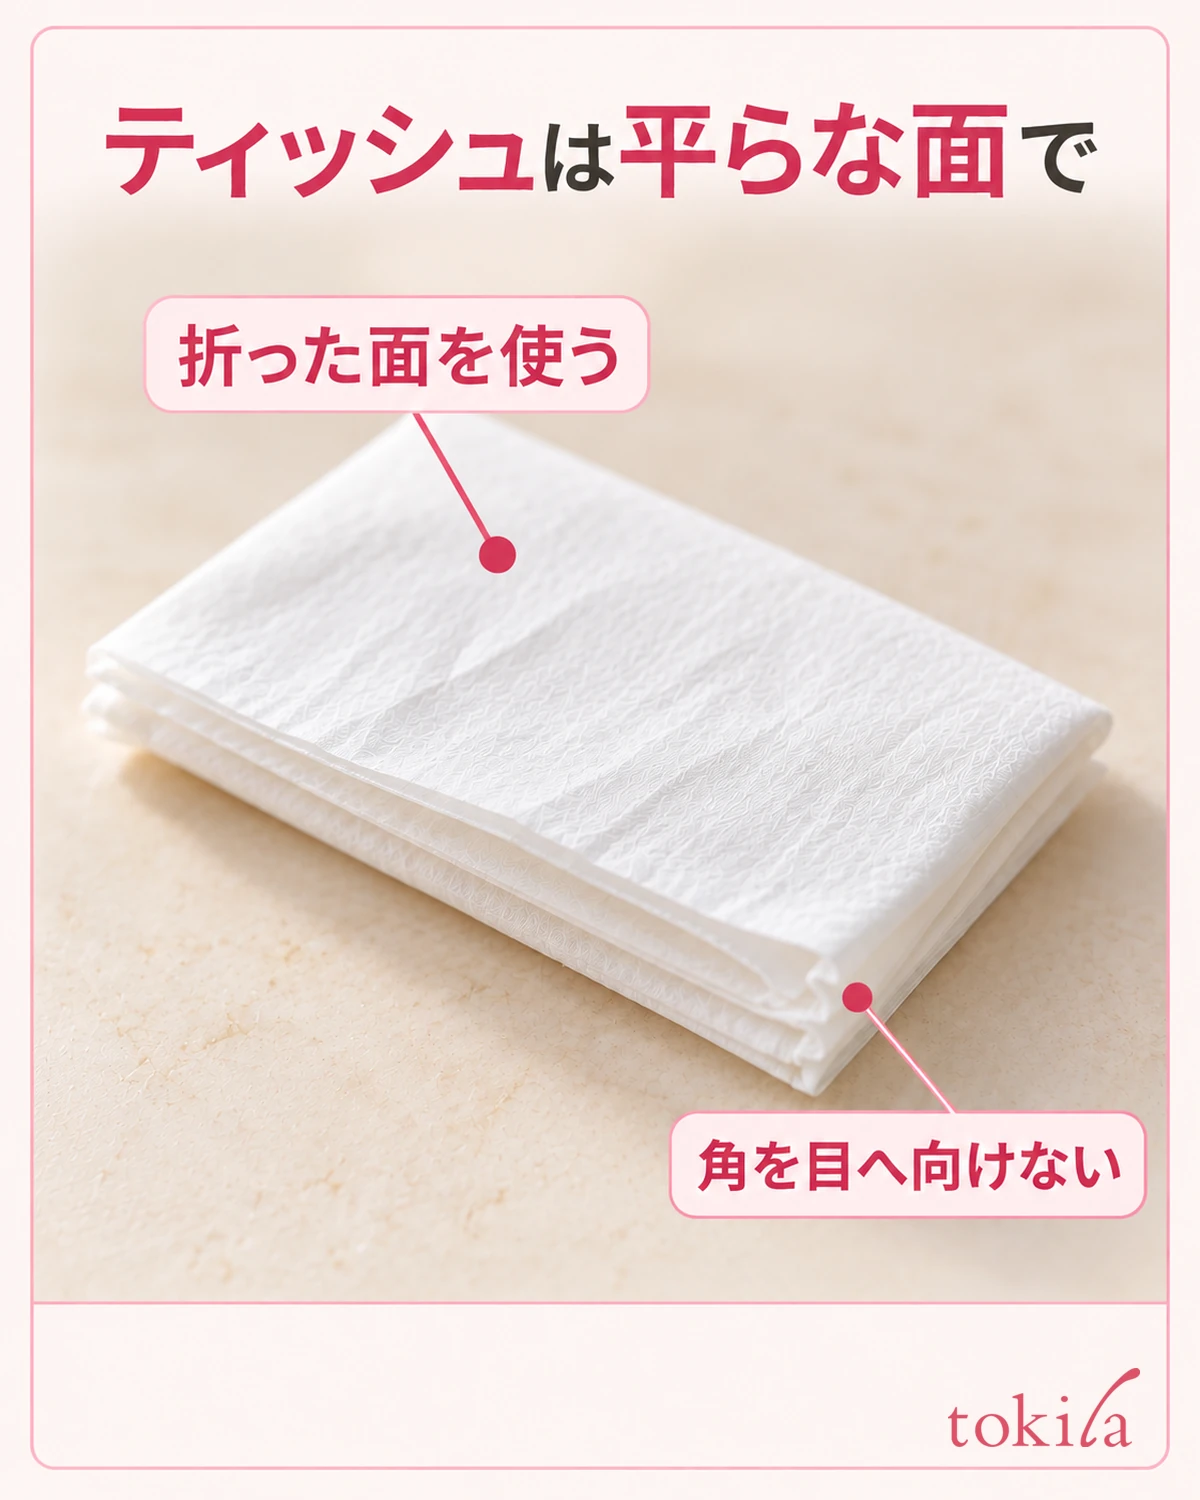
This is not a step to remove all the moisture you need. If your skin feels dry or tight, there is no need to keep blotting. Likewise, do not assume you should wipe off sunscreen right after applying it; follow the product's instructions first.
If foundation has gathered in the crease, do not simply cover it with new color; instead blend a thin layer of a product made for use around the eyes. Close your eyes, check the part that has gathered, and lightly smooth it with the pad of a clean finger or another tool the product recommends. You do not need to pull the skin or forcibly flatten the crease.
If you use powder, check that it is made for use around the eyes and at which stage it should be layered. Rather than building a thick layer of powder, keep it thin as directed by the products you have, and keep it out of your eyes.
After the prep, check whether any product on the surface is shifting, or whether a line has gathered in the crease. If it has turned powdery, do not keep adding oil and powder alternately; sort out the amount you have layered. If you are concerned about using too much powder itself, rethinking the amount of face powder may also help.
3. Adjust the Amount on Your Tool and Layer Thinly to Check
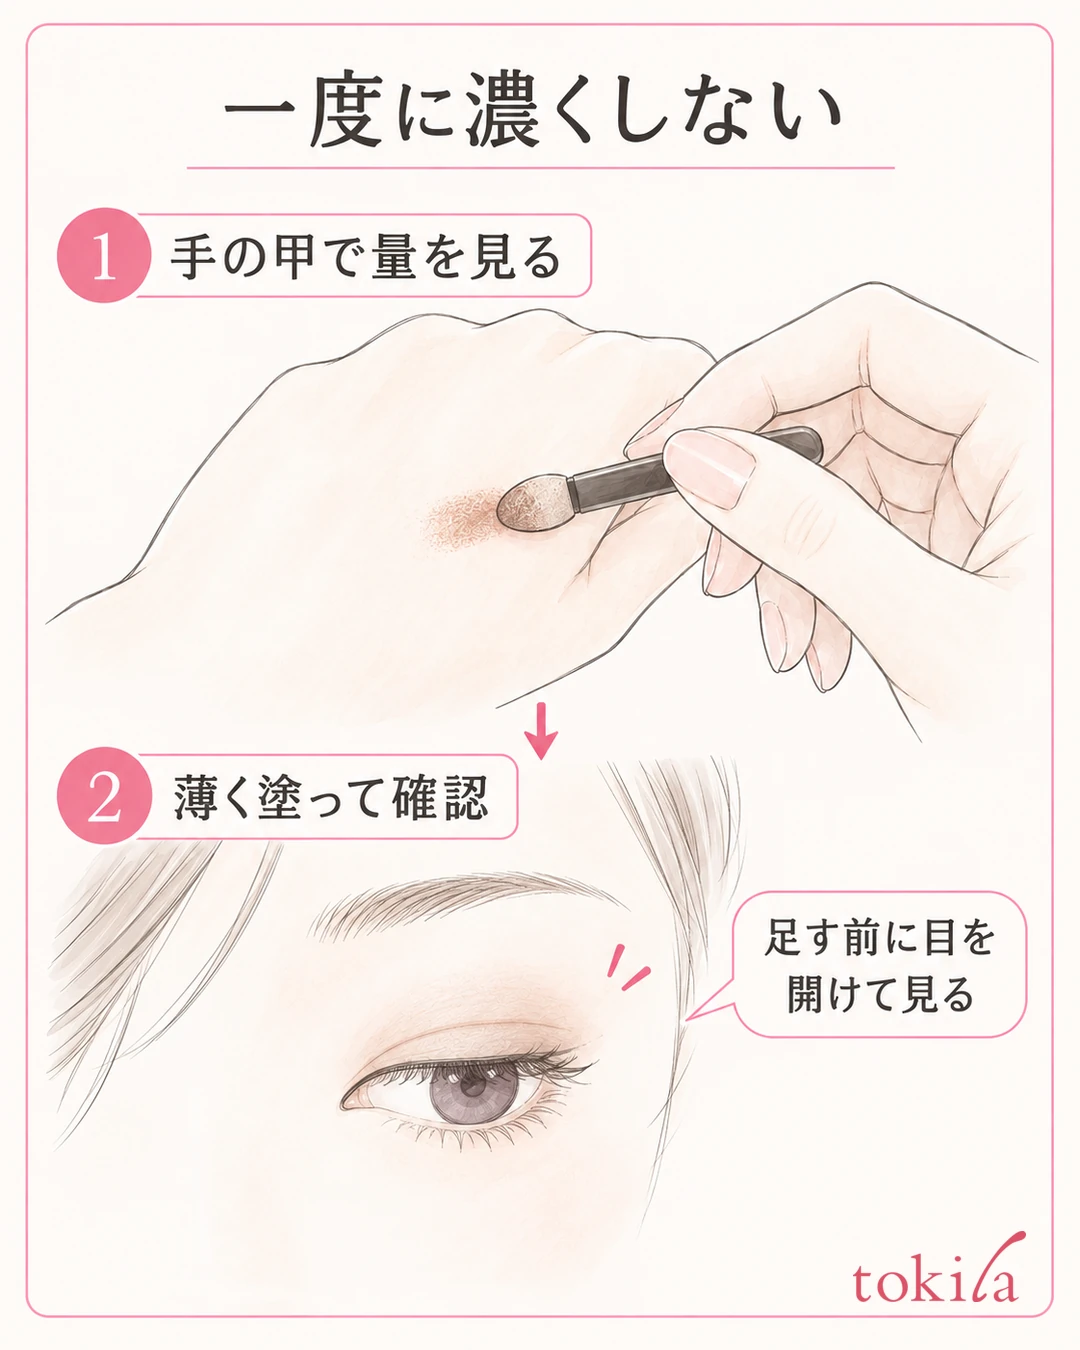
Once the base is ready, review the amount of eyeshadow. Rather than trying to finish with a deep color at once, pick up a small amount on your tool and check how the color shows before applying. Checking how it looks with a single layer first is the standard for deciding.
Placing it lightly on the back of a clean hand shows how much color comes out at first. What you check here is a guide to the amount; do not treat the color on the back of your hand as exactly the color on your eyelid. Do not take a tool with powder piled on it straight to your eye; adjust it in the way the product recommends.
Blend lightly onto the eyelid, then open your eyes once and look at the depth and area. Before adding to thin spots, check whether color has already gathered in the crease. Rather than layering thickly into the double-eyelid width again and again because you cannot see it, check what is visible with your eyes open and adjust only the area you need.
Think of tools for blending a large area and tools for placing color in a narrow spot separately. A brush for broad areas and a thin tip for near the lash line each handle a different range depending on their shape. However, changing tools alone will not necessarily prevent color from gathering in the crease. Look at the amount and the area together.
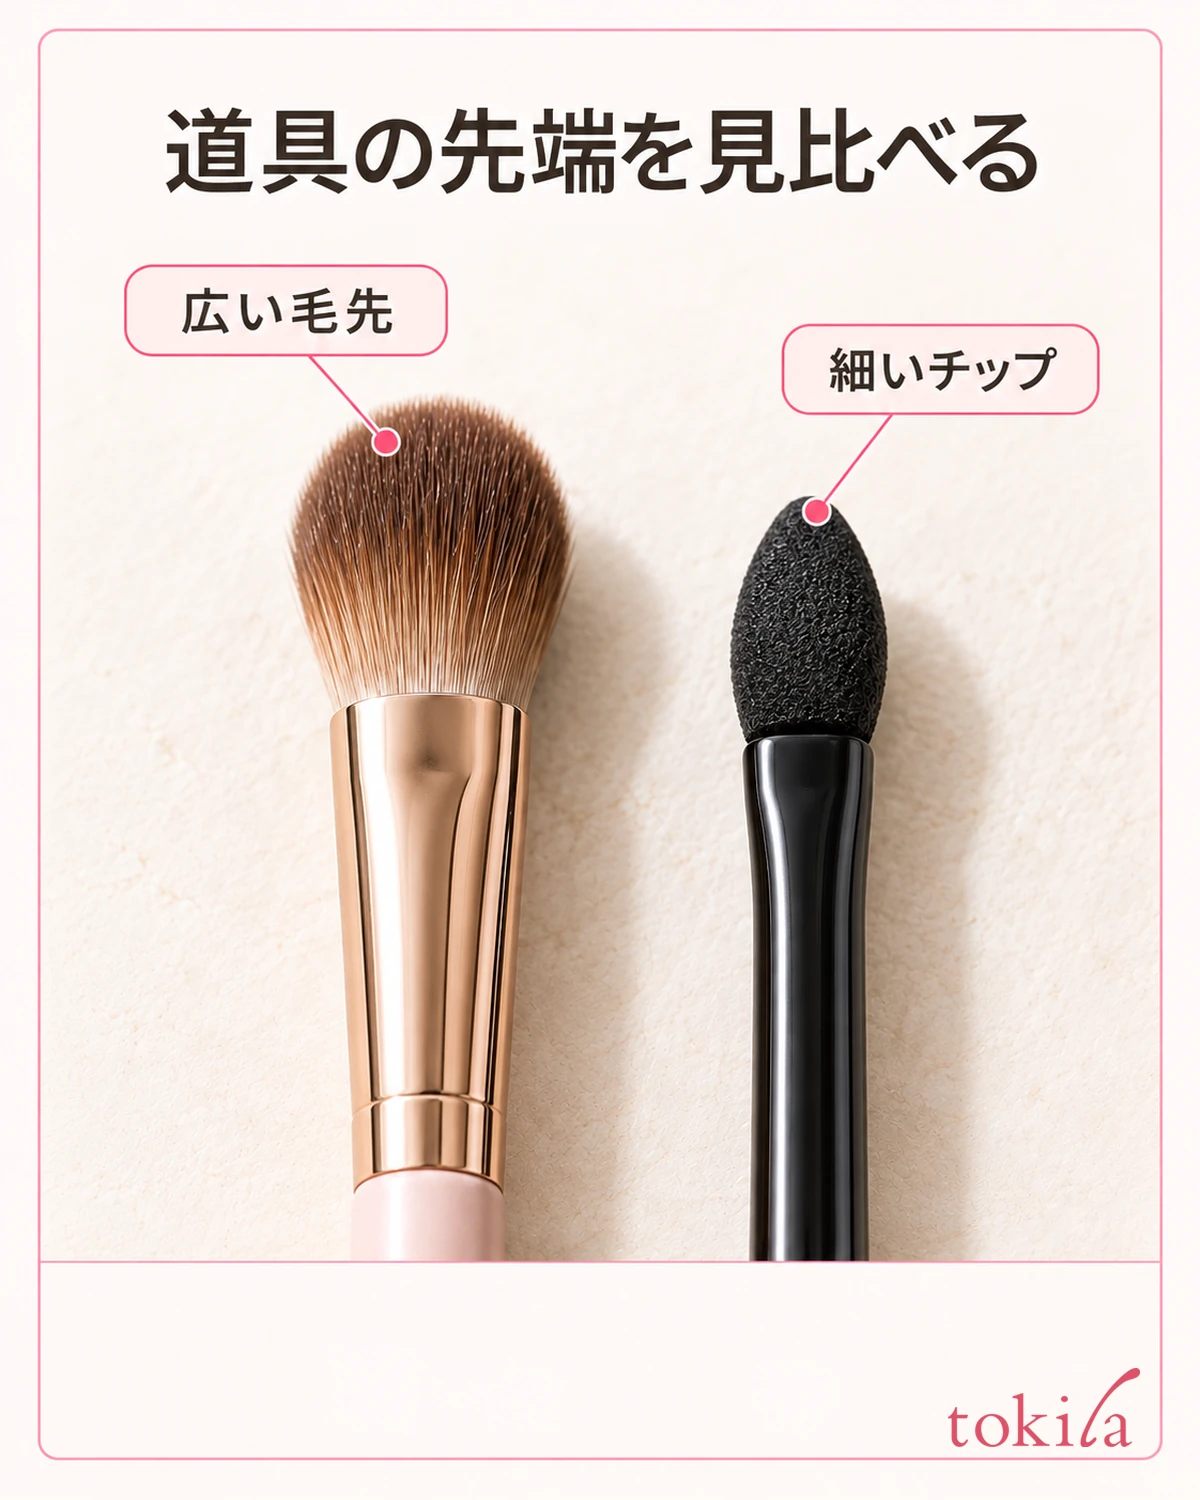
If you go back and forth over the same spot and pick up more each time the color thins, it becomes hard to tell where and how much you have layered. Once you have blended, step back from the mirror a little and judge whether it is enough. Stopping with only a light color today is also an option. Do not make doing the usual number of layers the condition for being finished.
Check for each product whether you can use a tip, finger, or brush, and do not wet on your own judgment a tool that has no instruction allowing it. You can check the range of the basic two colors and how to blend them in how to apply two eyeshadow colors.
4. Smooth Gathered Color First, and Add Only Where Needed
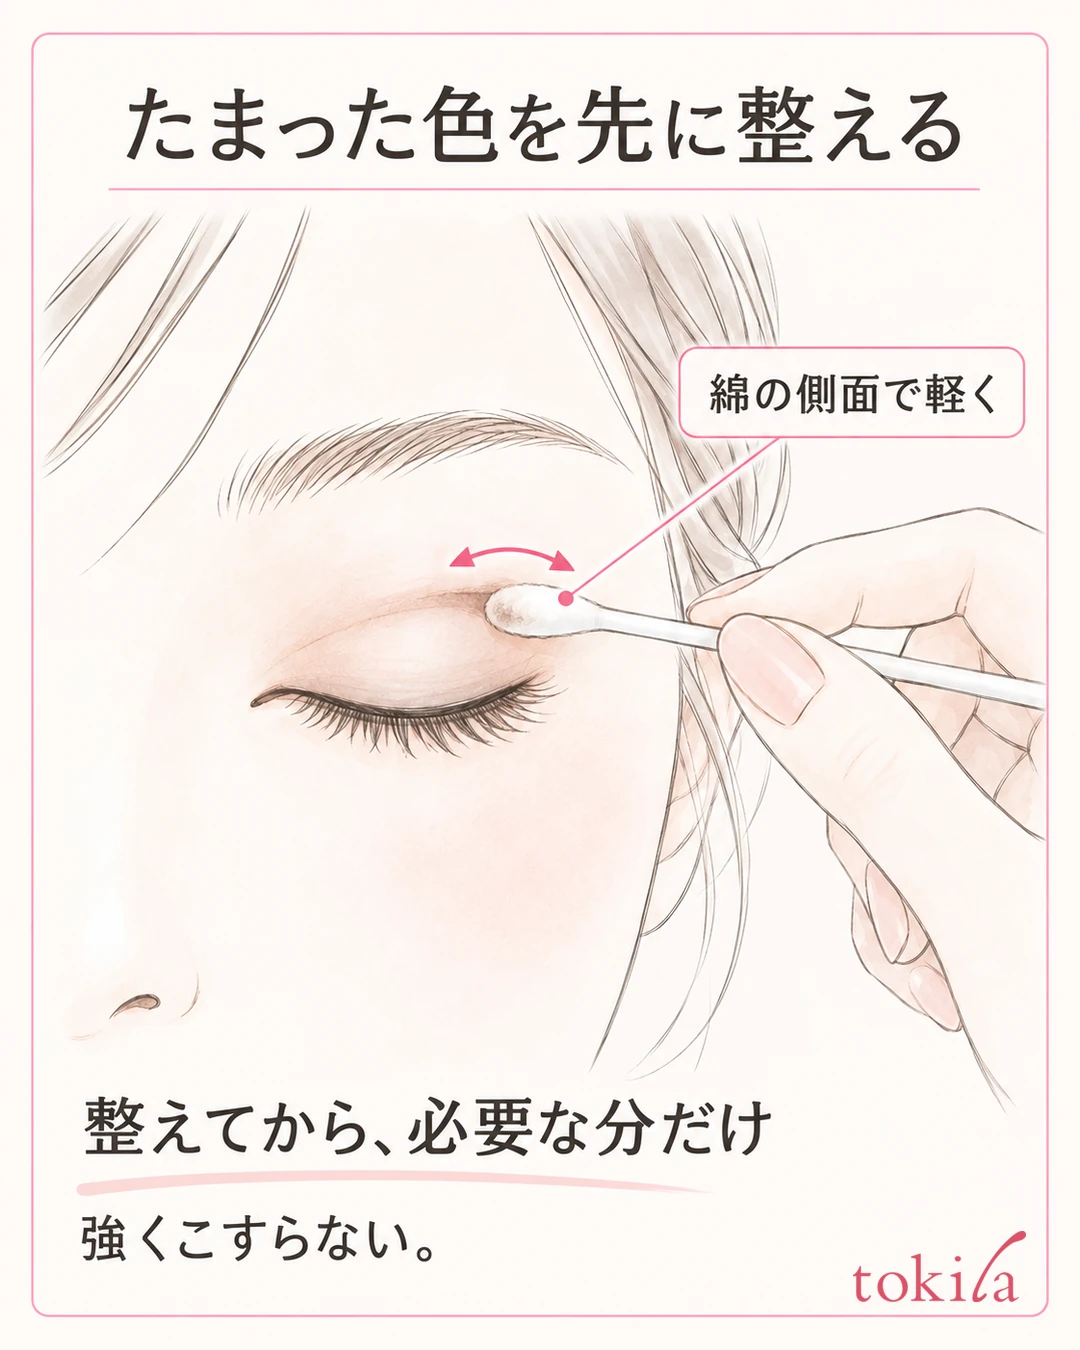
If color has gathered in the crease while you are out, smooth the gathered area before adding new color on top. Prepare a clean cotton swab or similar, position yourself at an angle where you can see in the mirror, and lightly trace the crease of the upper eyelid.
Use the soft side of the cotton, and do not push the tip in as if digging into the crease. With your eyes closed, lightly smooth only the color on the surface of the skin, taking care not to touch the base of your lashes or your eyeball. When the cotton gets dirty, switch to a clean side or a new swab so the transferred color does not stain other places.
Once you have smoothed it, open your eyes and see whether the line has become less noticeable. If the overall color remains and the depth looks natural, it is fine to stop there without adding anything. Treating fixing the gathering and returning to the morning's depth as separate goals helps you avoid deciding to layer many times.
If part of the color has faded and bothers you, add a small amount following the product's instructions and lightly blend only the edge. Do not reapply as if pressing color back into the original crease all at once. After adding, check both in a nearby mirror and across your whole face, and stop where the difference between the left and right does not bother you.
If it will not move without touching it hard, a wide area is patchy, or the base itself has broken down, consider removing and redoing that part rather than rubbing with a dry cotton swab. Use a remover made for the eye area in the way that product directs, and finish after you have prepared the needed area. Do not layer powder while liquid remains.
Keep your touch-up tools clean. Check how to use them so that a dirty tip does not go back into the palette, and so that you do not touch powder while cream is on the tool. If you feel pain or irritation, do not keep trying to correct the look; stop handling your makeup for the day. For the order of touch-ups for the whole face, see the order for touching up makeup.
5. Pick One Condition to Change Next Time, and Reconsider Texture and Compatibility

After fixing it, decide on one thing to try in your next makeup. Link the step that gave you trouble with a fix, such as "smooth the surface before applying," "use less on the tip," or "layer fewer times on the crease." If you change the base, amount, tool, and product all at once, it becomes hard to look back and tell which difference affected how easy it was to handle.
A short note is enough. Write down the colors you used, where you noticed a problem, and whether it was right after application or after going out. You do not need to time each session precisely, or treat the time it did not smudge as a guarantee of effect. Use it first as a record to help you sort out which step you get stuck at.
If it is still hard to handle after rethinking the amount and the prep, also check the texture. Even the same eyeshadow is used differently as a silky powder, a soft cream, or a base that clings. Do not conclude from type alone that cream always creases or that powder never gathers; look at the amount and the tool the product recommends.
When adding an eyeshadow base, check that it is made for the eye area, what can be layered on top, and the order in which to blend it thinly. Do not assume everyone needs to buy one more product. Sort out the amount of base you already have, and then consider the role you need. Even if you layer a dedicated base, if the product underneath is still gathered, it may only add steps.
If you can try before buying, check the texture and how it spreads following the product's instructions. Do not judge the finish around the eyes over a long time from the back of your hand alone; consult in-store advice and the manufacturer's instructions as well. Consider your color preference and how easy it is to adjust thinly as separate points to check.
At the end, look straight ahead with your usual expression, and check again with your gaze slightly lowered. You do not need to erase the shape of your double eyelid itself. If the colors around your eyes connect naturally and you can smooth any noticeable gathering to the extent needed, you can finish for the day. Blend the base, apply a little at a time, and smooth the gathered color first. Try this order with the products you have.



