
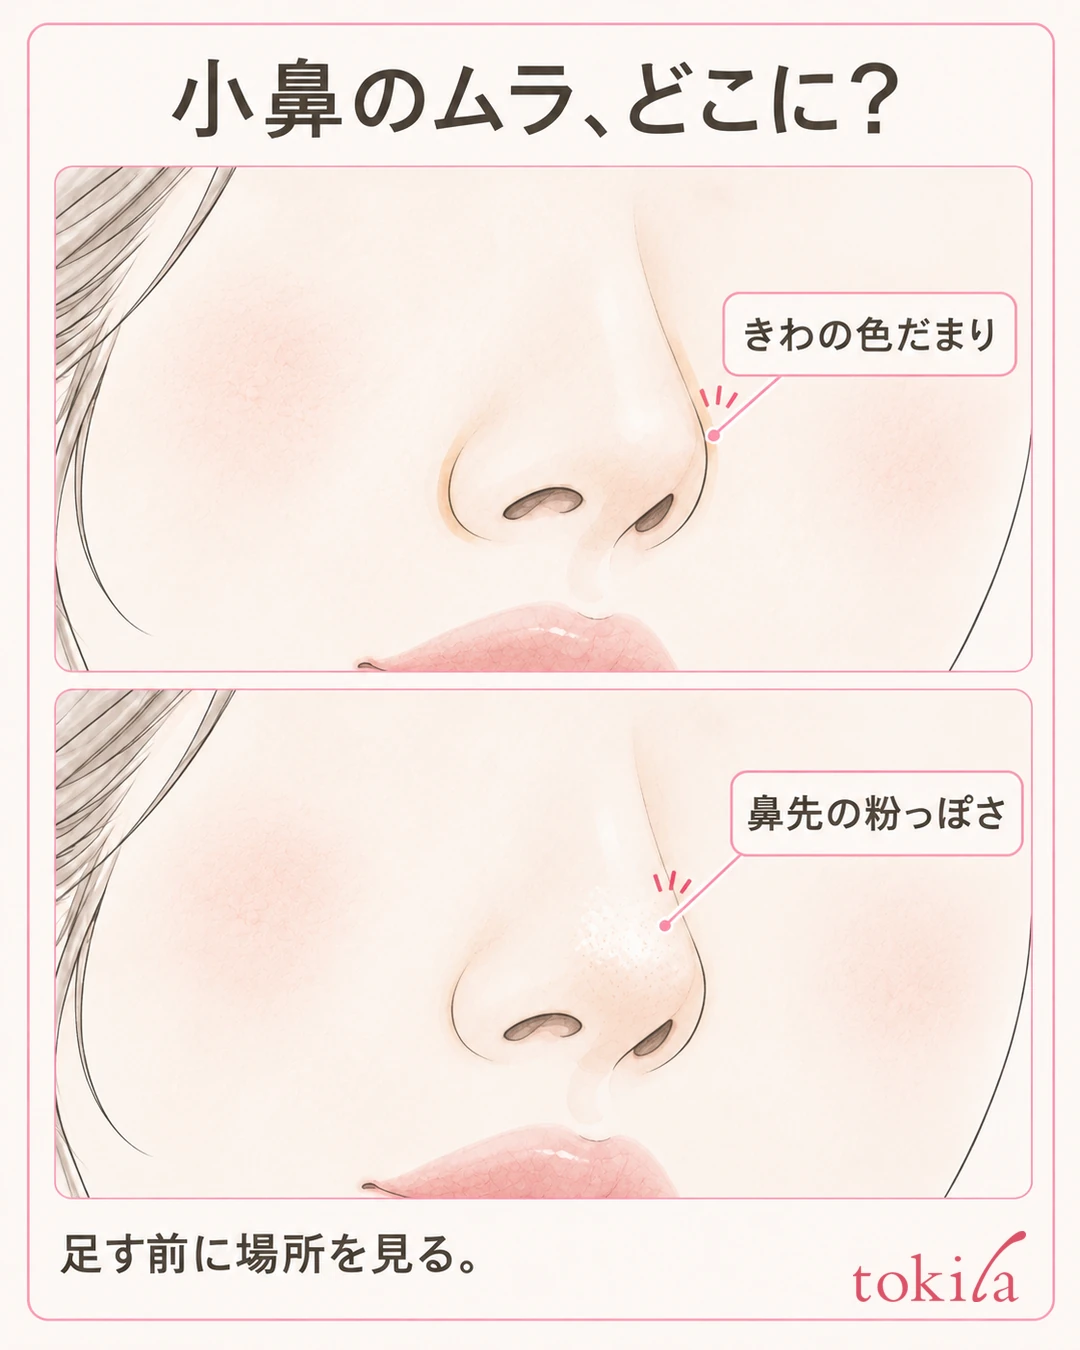
When foundation settles around the nostrils, check where the color has gathered and how much you applied before layering on more. In the morning, finish the sides of the nose with a small amount; when you are out, remove excess oil and the base that has shifted, then add product only where it is needed. That is the starting point.
The creases beside the nose are narrow and curved. This article uses diagrams to show how to tell foundation buildup from patchiness, how to apply your tools, and how to touch up. Follow the manufacturer's directions for the product you use, and adjust to your skin's condition.
1. Tell color buildup in the creases beside the nose apart from powdery dryness
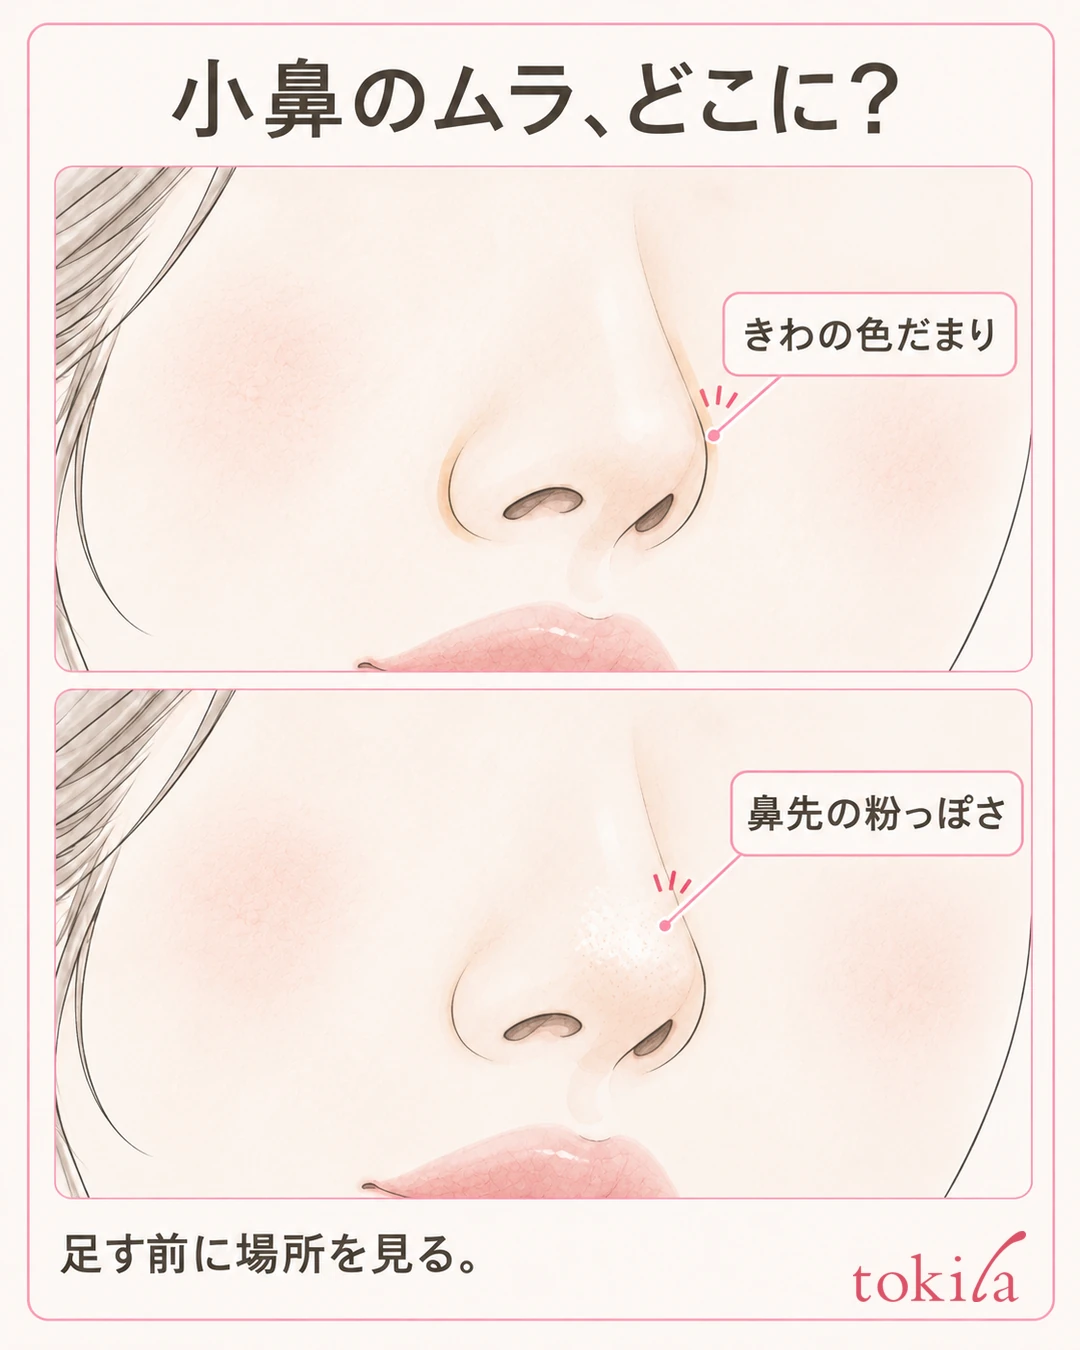
If a whitish line forms beside the nostril, or foundation gathers along the curve of the nose, first check the spot in a mirror. Is product collecting in the hollow where the side of the nose meets the cheek? Is the surface of the nose tip powdery? Is the redness you wanted to cover showing through? You may be tempted to call all of these "uneven," but sorting them out before adding anything makes it easier to choose the right fix.
Face forward, then turn slightly left and right to look at both sides of the nose. You do not need to lift your nose with a finger or pull on your skin. Use a close mirror to see where product has gathered, and a mirror at a little distance to see how it blends into the cheek. Do not assume that every natural shadow made by the light is a line of foundation.
If it stands out right after application, it is time to review the amount you picked up and how the sponge touched the skin. If it gathered after some time, also check for surface shine, sweat and marks from touching. However, you cannot pin down your skin type or the cause from appearance alone. Remember how it looked in the morning compared with now, and narrow down today's fix to a small area.
Adding more of the same powder to a powdery spot can make a thick layer stand out. On the other hand, where the color has faded, you can add a small amount after tidying up. Before layering over a line, ask yourself: "Has excess product gathered here?" and "Is color actually missing?" Do not make erasing every pore or area of redness the condition for a finished look.
For example, if there is a dark line only beside the nose and the color on your cheeks looks natural, there is no need to reapply to the whole face. If the nose tip is also white and powdery, adding color only to the line is unlikely to solve it. Decide where and how widely to touch first, and start by making use of the base that still sits naturally on the skin.
For how to choose a concealer for pores, see How to Use Concealer for Pores and Blemishes. This article focuses on foundation buildup and uneven application around the nose.
2. Blend in your base and prepare a clean surface of your tool
Before changing how you apply, check whether skincare or base is still sitting on the surface. If cream or base has pooled in the creases beside the nose, do not cover it with foundation; blend it thinly following the product's directions. The amount for the whole face is not the same as the amount you place on one spot at the nose. Take the amount your container recommends as a starting point, and avoid concentrating product in one small area.
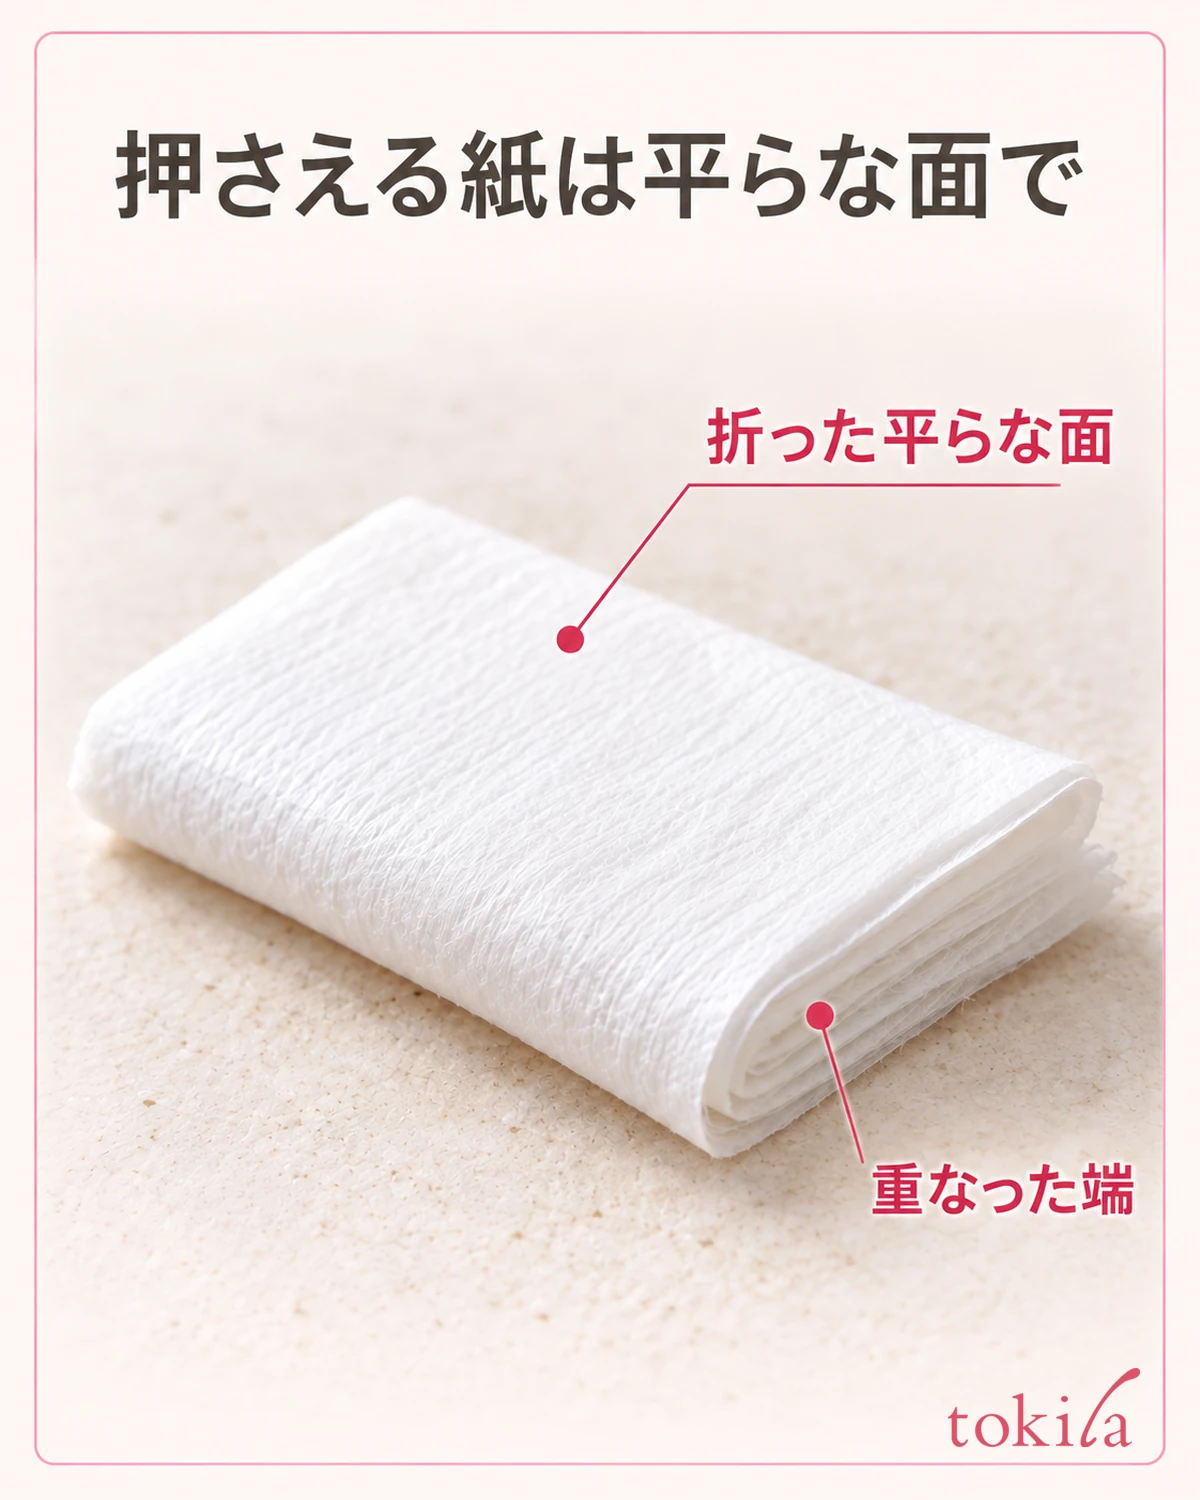
This is about tidying up excess on the surface, not a routine of wiping repeatedly to strip away needed moisture. Lightly press the flat side of a clean piece of tissue, then lift it off without rubbing sideways.
Do not assume you should wipe away sunscreen or base as soon as you put it on. Follow the directions for each, leave the time they require, and check the state after they have settled in. More base does not necessarily make foundation more even. If product gathers every time even when applied thinly, review the amount you layered first and the combination of products, one at a time.
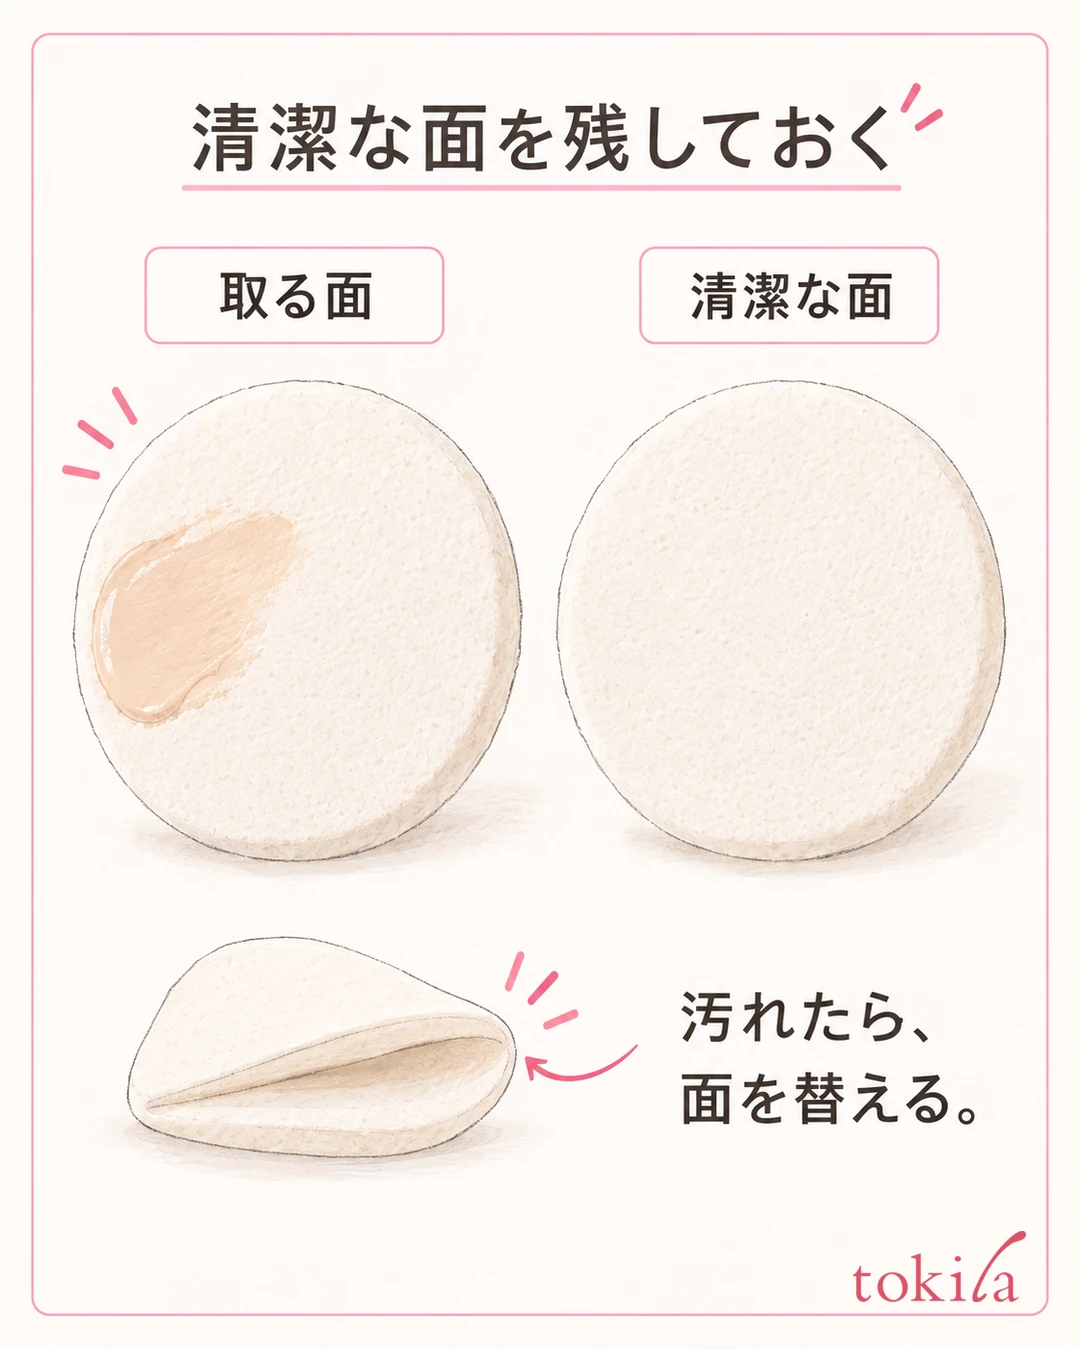
Prepare a sponge that suits your type of foundation and whose surface is clean. A surface with hardened previous makeup, or a worn one that crumbles, makes it hard to control today's amount. Even when you are out, keep a used side and a clean side distinguishable.
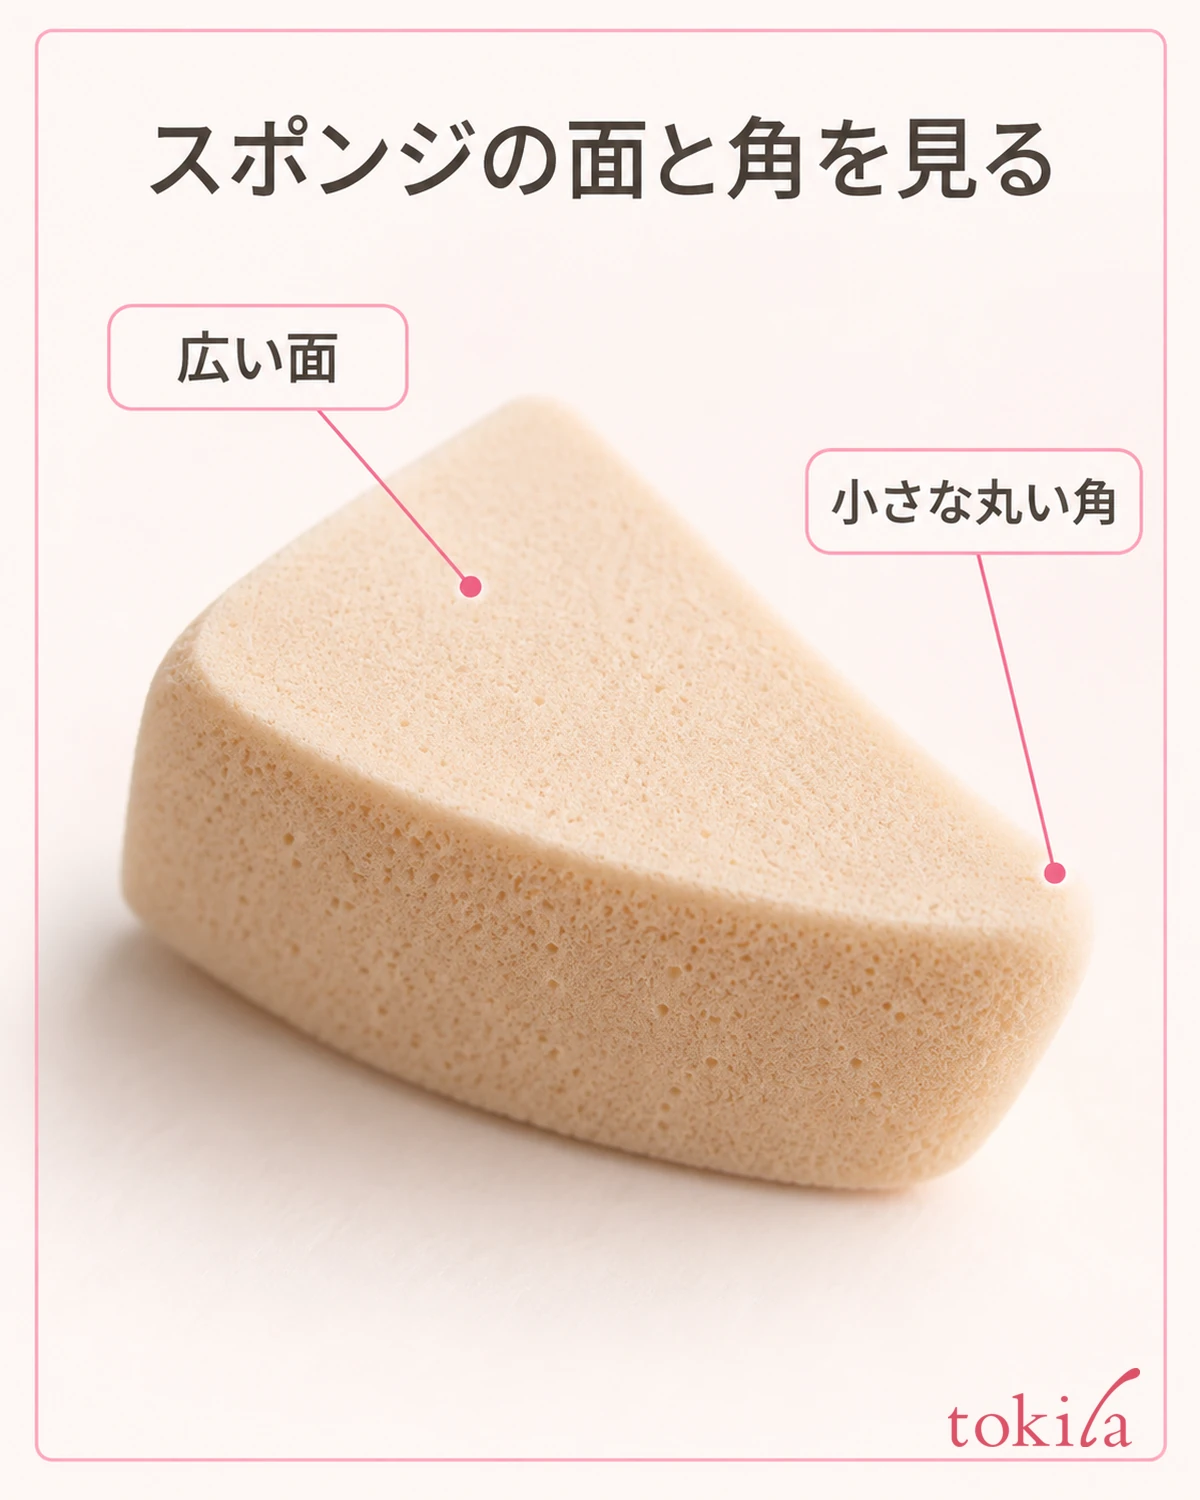
Whether a sponge can be used damp should be checked for both the sponge and the foundation. Do not make wetting it a standard step on your own just because it "gets softer." A puff that does not fold does not need to be forced in half. Choose a method that suits the tool you have, such as using its curved surface or a small corner.
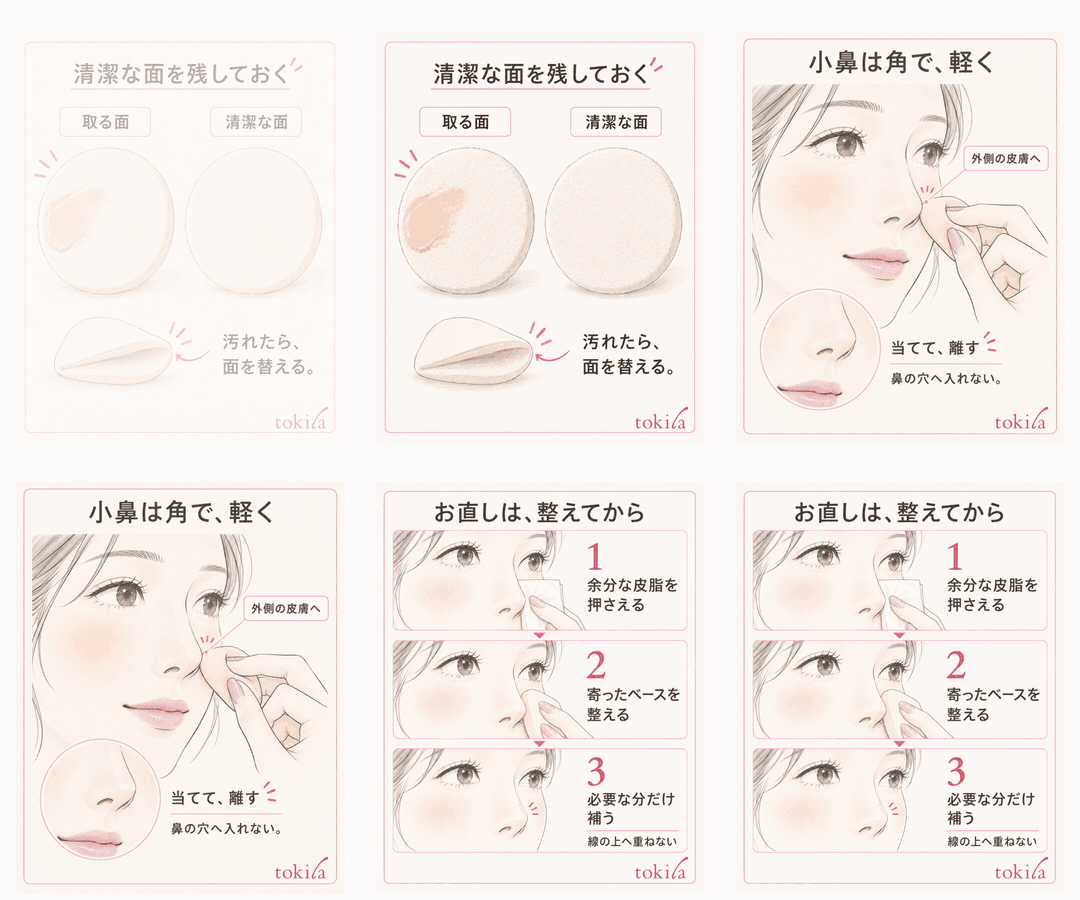
Once you are ready, separate the side you pick up product with from the side you use to finish. Keeping an untouched side makes it possible to tidy up excess without adding new color. If no clean side is left, you can also use a different sponge. For how to wash and dry them, see Caring for Your Tools.
3. Use a small amount around the nose and lightly touch with the sponge's corner
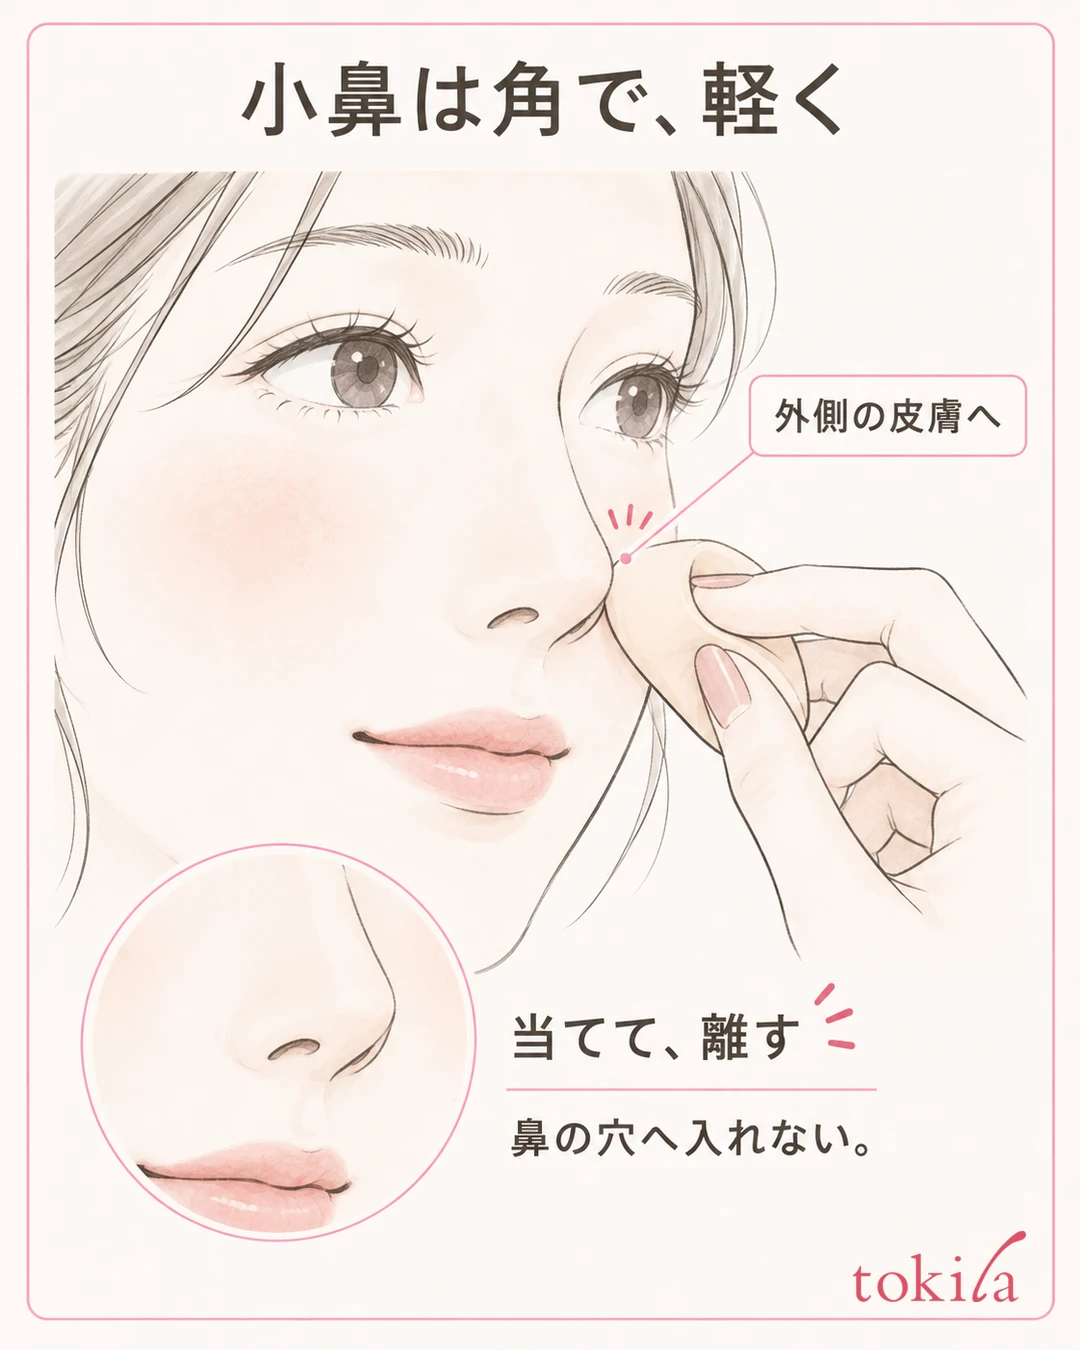
The sides of the nose are narrow and curved, so use a part of the tool that can touch a small area rather than going back and forth with the same large surface you use on the cheeks. With powder foundation, one method is to finish the larger areas first, then use what is left on the sponge for details such as the nose. Before picking up plenty of extra product just for the nose, see how it goes on with the amount you already have.
The idea is to finish thinly with what is left and add a little only where it is truly lacking. When you use liquid or cushion foundation, follow that product's order and tool instructions rather than applying the way you pick up powder. With any type, the thing to review is not placing everything at once in a narrow spot.
If the sponge can be folded, fold it in half to make a rounded corner and lightly touch it to the hollow on the outer side of the nose. This is not a motion that puts the tip inside the nostril. Work while watching in the mirror where you are touching the outer skin.
Keep the pressure light enough not to move the skin much. Do not push the sponge in to fill the hollow; touch, lift, and check how it has gone on. If the corner floats and is not making contact, change how you hold it or the angle rather than pressing harder. You do not have to pull your nose flat; making the contact area smaller makes it easier to handle.
After finishing one side, step back a little from the mirror before touching the same spot again. Check whether product is collecting in a line and whether the border with the cheek has suddenly become darker, then finish the other side only as much as needed. If the amount of color you want to cover differs between the left and right, you do not need to repeat the same number of times. Decide when to stop based on what you can see.
It is also important not to stack on foundation as if packing it into pores. If a color still bothers you after thin adjustment, consider a base or concealer suited to the purpose rather than making the entire foundation thick.
4. When you are out, tidy up the shifted base before adding more
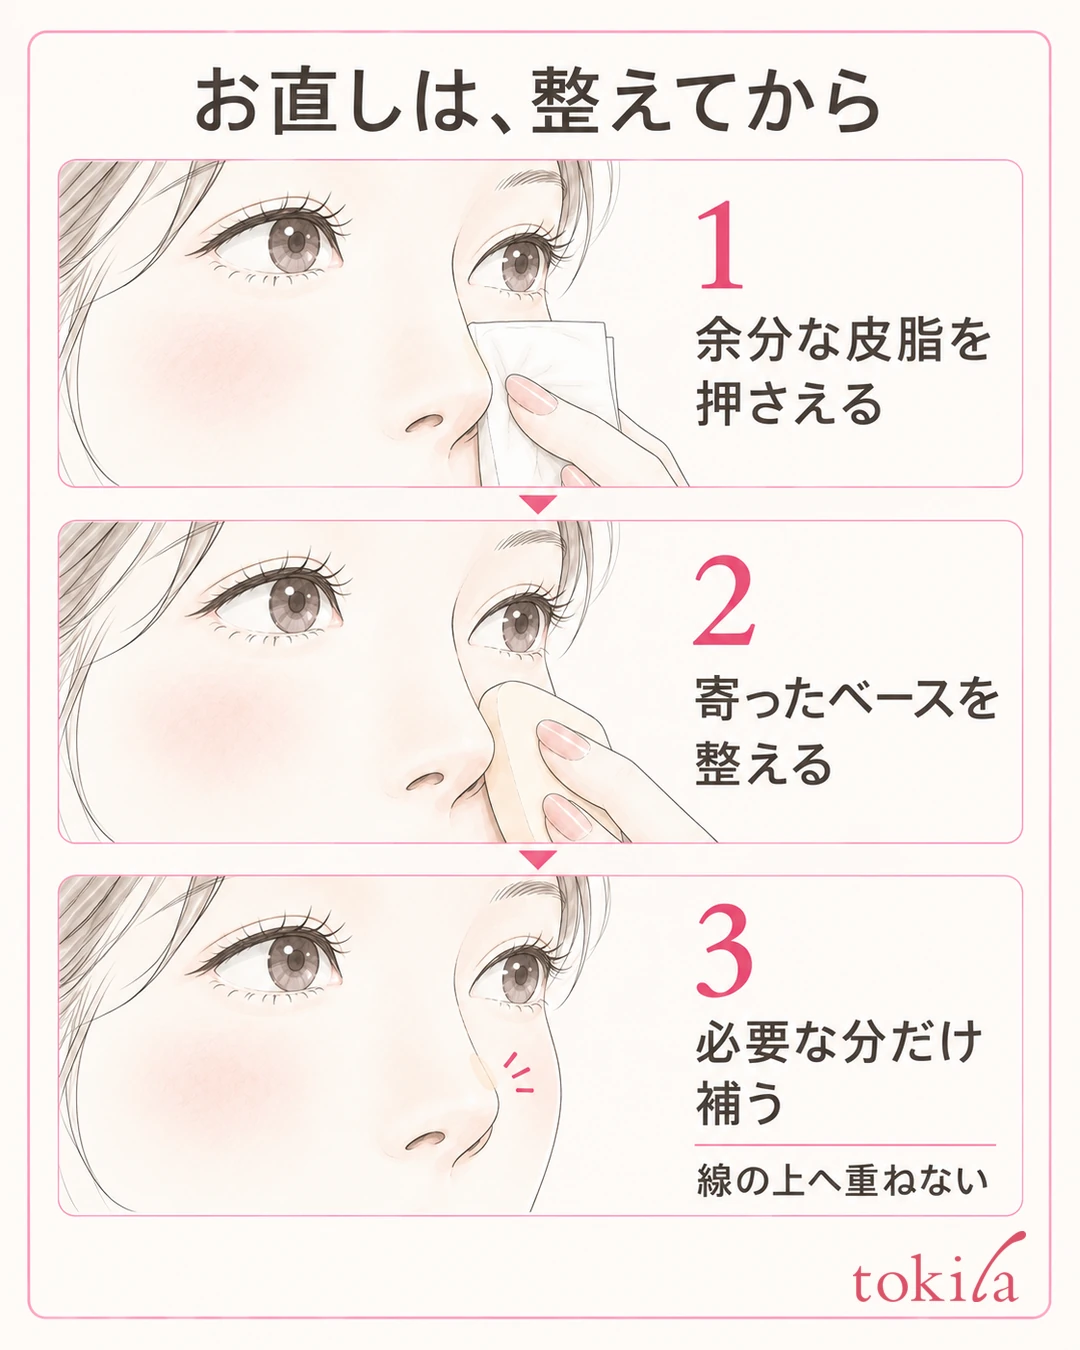
When foundation has gathered around the nose, tidy it up before adding fresh powder over that line. If shine or sweat bothers you, lightly blot with tissue or oil-blotting paper. Touch the paper beside the nose and lift it, without dragging it sideways. If your skin feels dry, there is no need to keep pressing repeatedly in search of shine.
Next, use the clean side of the sponge that has no product on it and blend the gathered area in small motions. Touch lightly and see whether the line gets fainter; do not make it a motion of vigorous back-and-forth rubbing.
If the color looks natural once you have tidied it up, you can finish without adding anything. Only if part of the side of the nose has lost its color and it bothers you, add a small amount of foundation or concealer. Following the product's directions, apply it thinly to a narrow area and blend the edges into the surroundings. Not adding the same amount to the whole face is the key to avoiding a heavy finish.
If the dry powder layer will not move, or if touching it makes a wider area patchy, do not keep rubbing with the sponge. Tidy up the necessary area following the directions of the cleanser you have, then check how to handle moisturizer, base and sunscreen afterward.
Avoid layering powder right away on skin where liquid remains after wiping or that is still dry. Check the area you removed, restore the foundation of your skin following the product's steps, and then finish with a small amount. If you may have wiped off sunscreen too, do not settle for putting back only the base; check the reapplication the product recommends.
When the touch-up sponge gets dirty, switch to another side. A state that will not come off without rubbing, or irritation, is not something to fix by force. For an order that suits how your whole face has worn, see The Order for Makeup Touch-Ups. After fixing the nose, check how it connects to the cheeks and end the touch-up there.
5. Look at both sides and your whole face, then decide the amount for next time

To finish, do not keep zooming in on the nose; look at your whole face from your usual distance. Check that there are no dark lines on either side of the nose and that the color blends naturally into the cheeks. Even if pores or skin texture visible up close remain, that is not necessarily a reason to add more foundation. Once you have tidied up the buildup that bothered you today, it is fine to stop there.
If one side still looks darker, turn your face in the same light and check again whether it is shadow or product. You do not need to add color to the opposite side to match just because you thinned the buildup on one side. Adjusting the noticeable spots in small steps, rather than trying to bring everything to the same density, makes it easier to manage how much you layer.
Next time you do your makeup, pick one step that bothered you and change it. For example, reduce the amount you pick up for the nose, change the angle of the sponge, or blend in your base before moving on, tying it to today's condition. If you change the product, tools and amount all at once, it becomes hard to tell which adjustment worked.
If you keep notes, short ones such as "it collected on the right side right after applying" or "it shifted on both sides in the afternoon" are enough. Use them not to guarantee how long your makeup lasts, but to sort out the steps you hesitate over. Next time, look at the same spot and check whether it was easier to finish thinly.
If it is still hard to manage after changing the amount and how you apply it, review the type of foundation and its combination with your base. Also consider separately whether only the nose looks off in color or the color does not suit your whole face.
If the color itself keeps bothering you, see How to Choose Your Foundation Color. For buildup around the nose, try this order with the products you already own: look at where it is before adding, finish with a thin base and a small amount, and when you are out, tidy up what has shifted first.



