
You put on false eyelashes, but only the outer corner comes loose, or the inner corner seems to lift when you blink. In that case, before adding more glue, use a mirror to tell whether it is the base band that is lifting or just the curl of the lash tips. Check, in order, the condition of the area where you attach them, how you handle the glue, and how the lashes fit.
This article covers strip lashes for the upper lashes that are applied temporarily with a dedicated adhesive. The same steps do not apply to eyelash extensions, long-wear lashes, or magnetic or adhesive-tape types. It organizes situations where the ends lift, from preparation before applying to deciding whether to reapply, in five figures.
1. Tell the curl of the lash tips apart from lifting of the base band
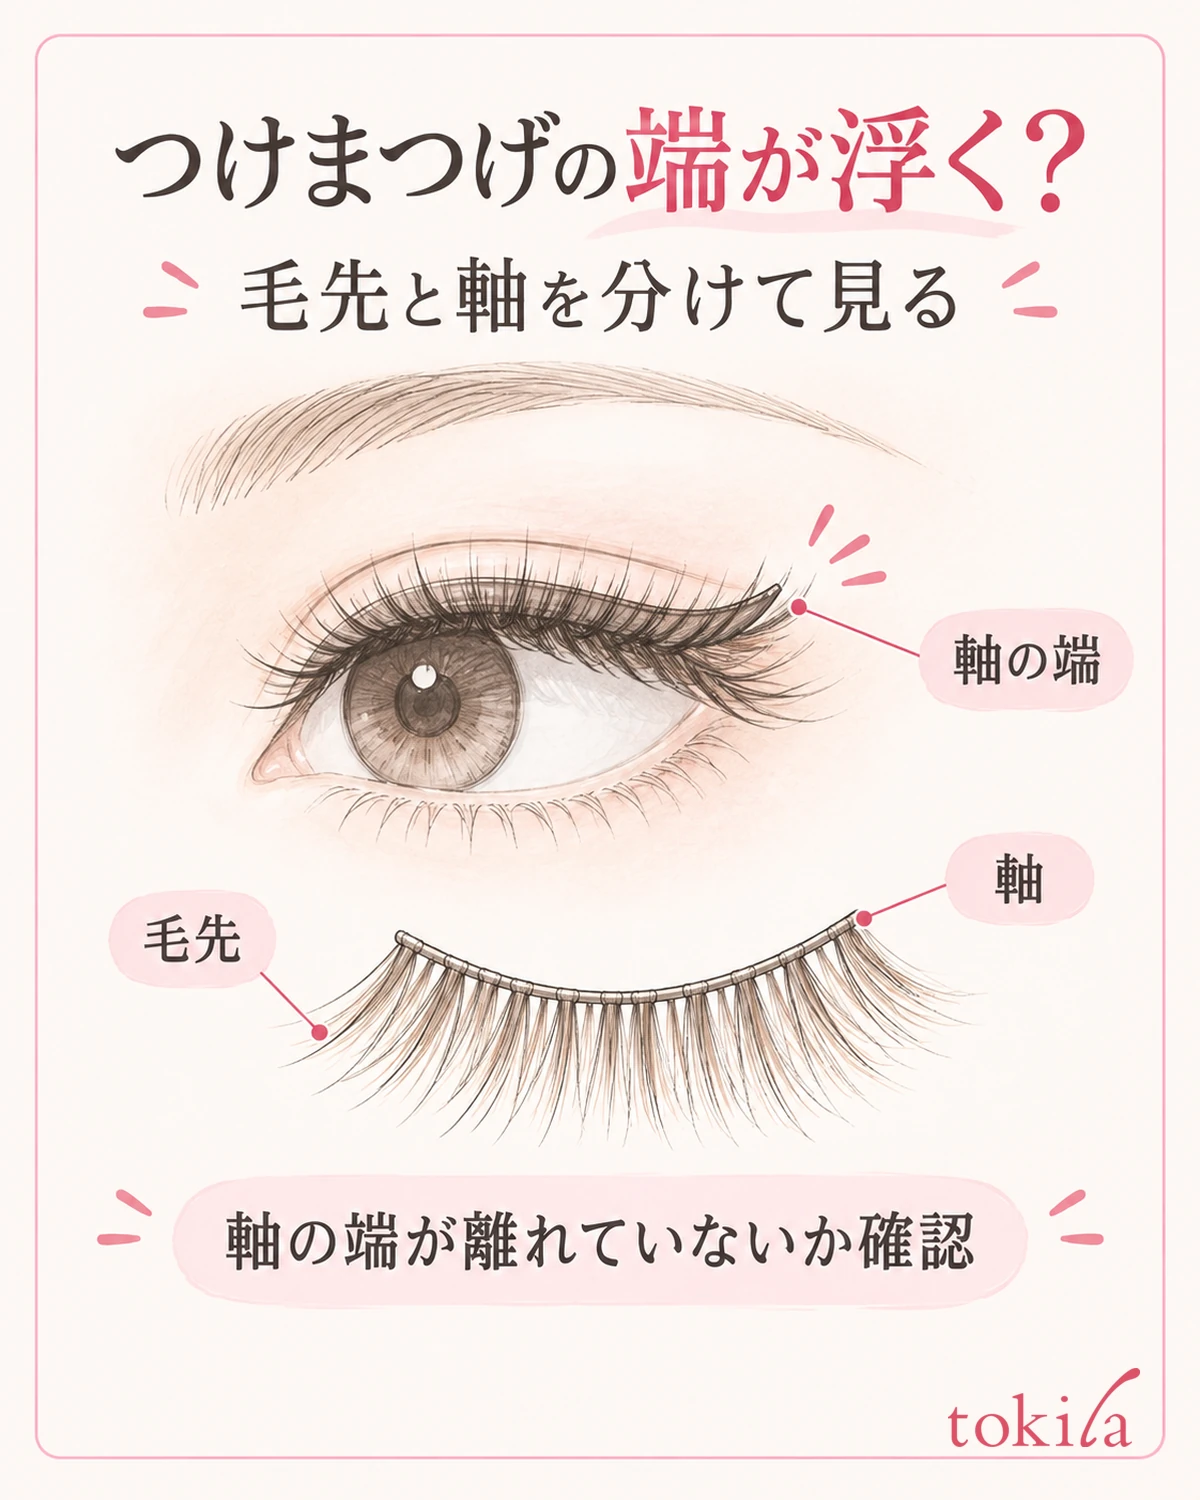
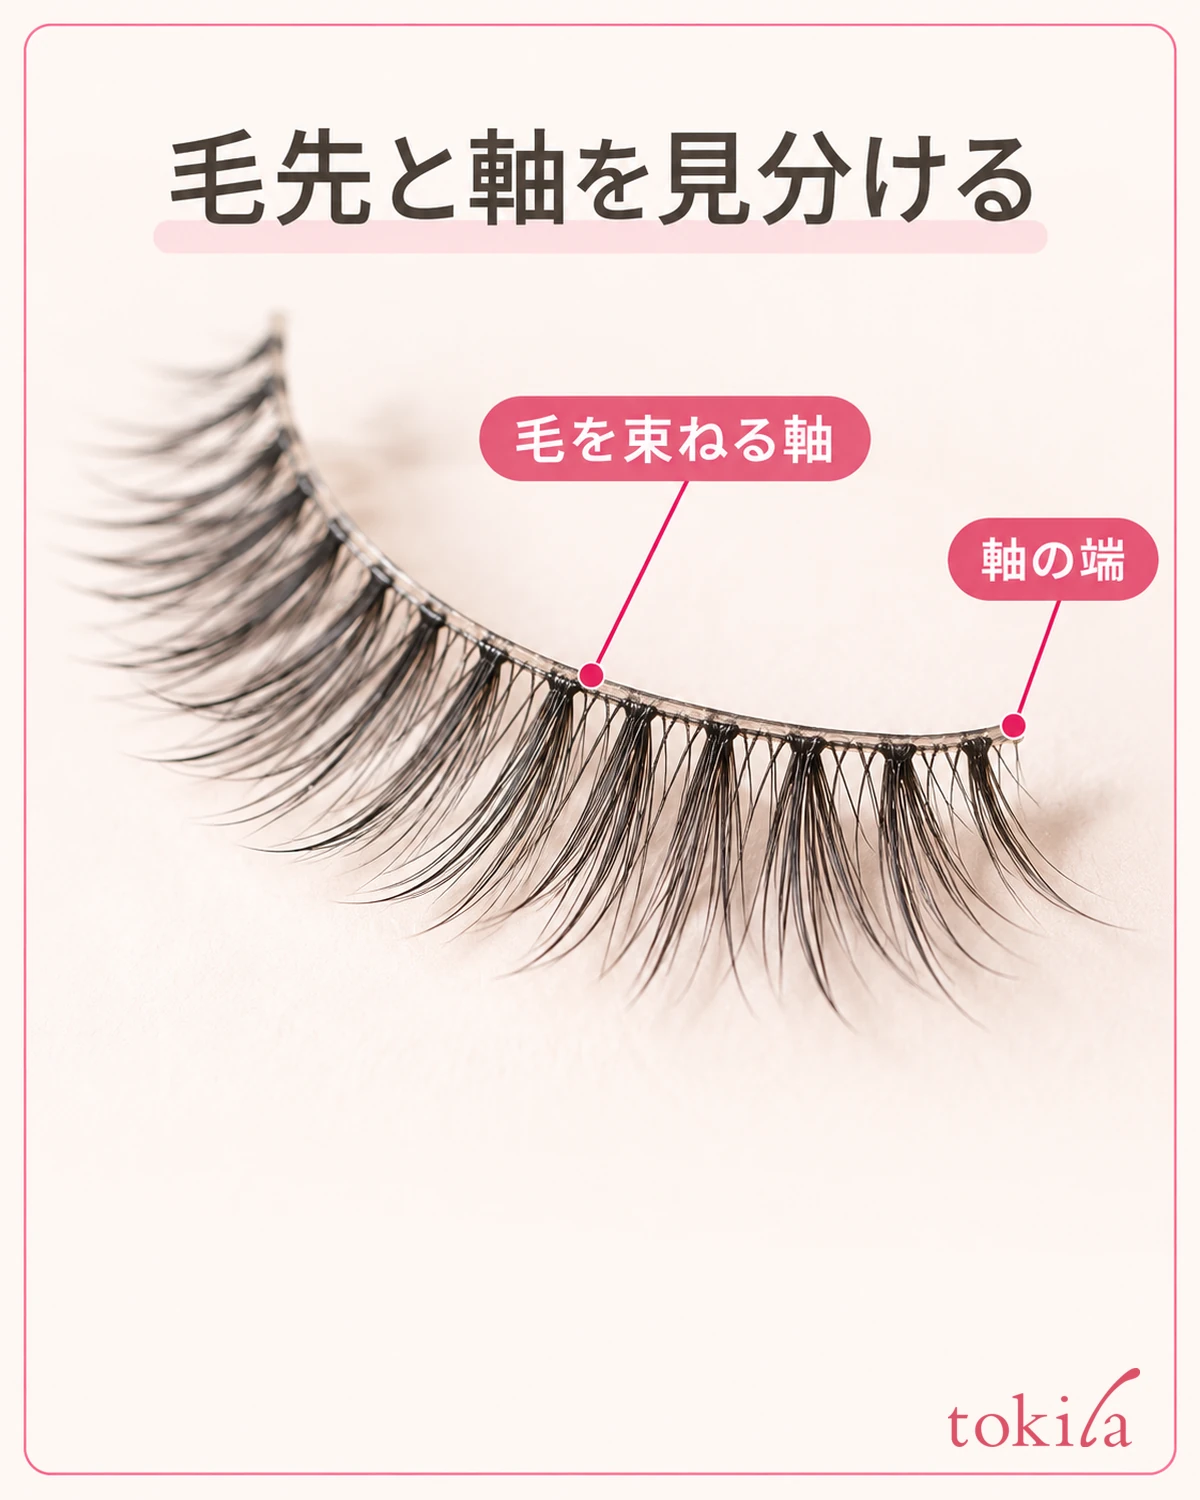
First, take your hand away from your eyes and steady a mirror in a bright place. The thin band that holds the lashes together is the band. Do not decide it is "coming off" just by looking at tips that curl upward; check whether there is a gap between the end of the band and the skin. Look both when your face is turned straight ahead and when you lightly look down.
It is easy to confuse the left and right of the mirror with your own, so if you take notes, use your own eyes as the reference. If you use photos, check whether they are mirrored. Do not assume that because one side lifted you should add the same amount of glue to the other side; look at the condition of both sides separately.
Also separate whether only the outer corner is coming away, the inner corner, or a wide area starting from the center. If pressing down one side makes the other side lift, that is a case to check the width and where you placed it, before reviewing only the glue at the ends. Do not pin the cause on a single thing based only on where it lifted.
Whether it lifted right after application or after some time has passed is also a clue. If right away, look back at the preparation before applying and the condition of the glue; if while you were out, look back at sweat and the situations in which something touched them. This is a way of organizing which step to look at next, and does not mean they definitely came off because you sweated.
While checking, do not tug at the lash tips to test the adhesion or probe under the band with your fingernail. If you feel the eyelid being pulled along or any pain, stop pressing it down to fix the look. On days when there is irritation, do not aim for reapplication; handle them following the product's cautions.
If the width is too long or the ends touch your eye area, do not bring scissors near while they are still on. For a trial fit after taking them off, see how to check the width and band of false eyelashes. This article focuses on the conditions for attaching them rather than repeating the step of trimming the width.
2. Check the moisture, oil, and powder on the area you attach to, before applying
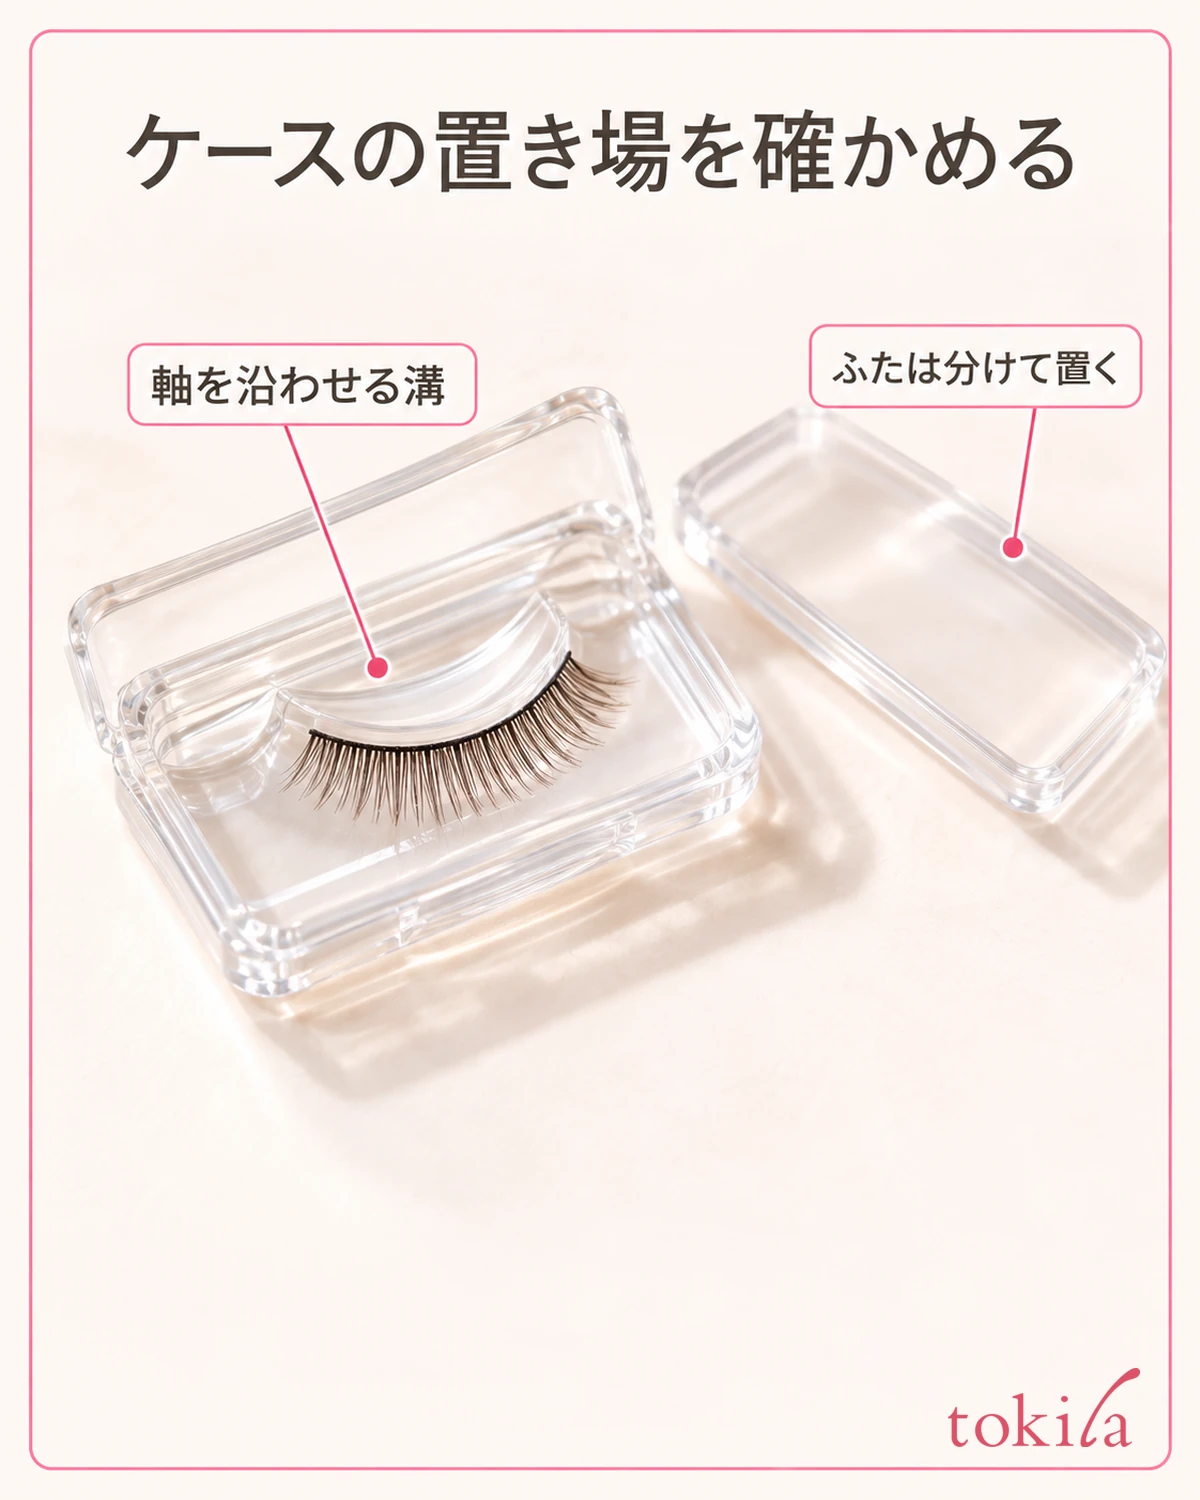
Whether you are reapplying or applying new ones, first clean your hands and gather the mirror and the case within reach. Rather than searching for tools while holding the glue, prepare a place where you can set the lashes down away from your face before you proceed. Place the backing card or packaging so that the instructions for the glue you are using today can be read.
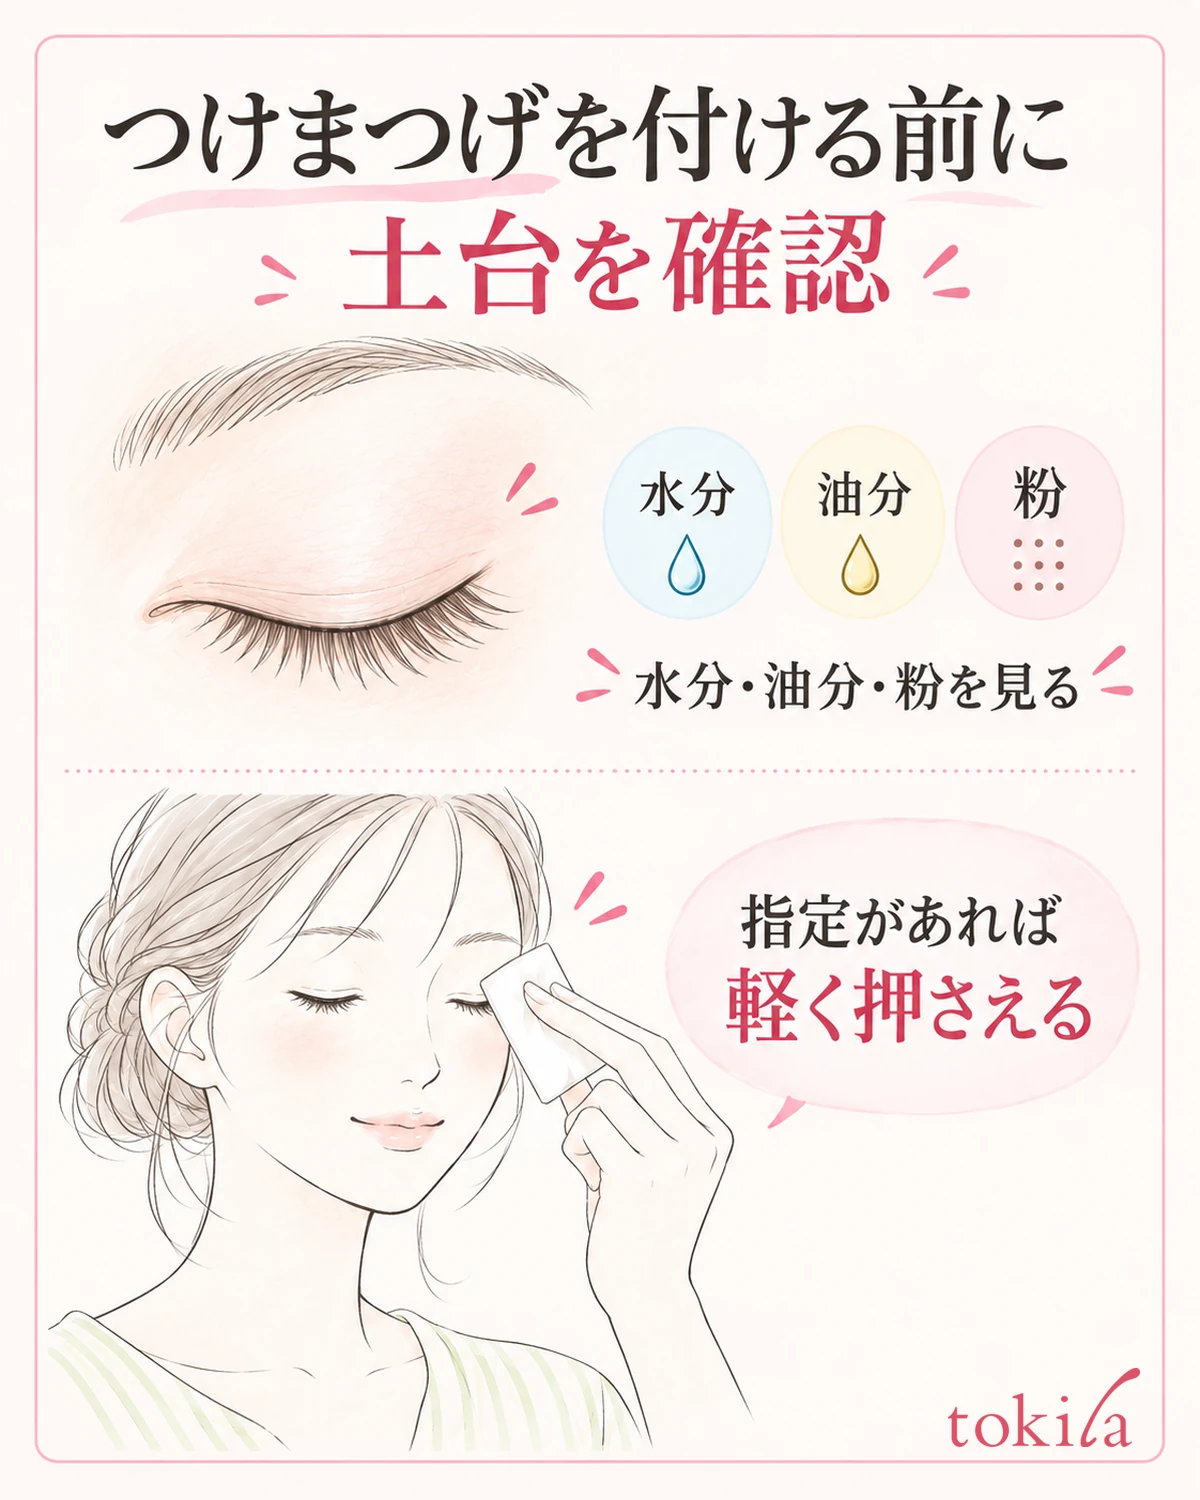
Look at whether moisture, oil, or powder such as eyeshadow remains on the skin where you plan to attach them. Moisture, oil, and powder can affect adhesion. However, this does not mean you should dry the skin out completely. It is not about removing all of your skincare; it is a step to check the area you will attach to.
If the product you have describes pressing with a cotton swab or tissue, lightly touch a clean one to the skin where you plan to attach, before the lashes are on. Do not get it into the eye or onto the mucous membrane, and do not keep rubbing back and forth. Keep this separate from forcing a cotton swab under a band that is already attached.
There is no need to add face powder here and cover even the surface to be attached with powder. The order of eye makeup and application should be decided by looking at how to use the lashes and the glue. If you have just layered other cosmetics, prepare the area following the instructions for what you have before moving on.
If your eyes are watering, or there is redness or itching, making it hard to continue applying, do not treat it as insufficient preparation and wipe repeatedly. Do not prioritize reapplying; check the product's cautions, including the decision to skip wearing them that day.
Also make sure the lashes you set on the desk do not touch dirty surfaces with their hairs or band. Do not put them back on a used tissue; place them in the designated case or similar. Do not stop after preparing only the skin; check the band and your work area together as a set before applying.
3. Decide the amount of glue and the waiting guideline from the label of the product you use
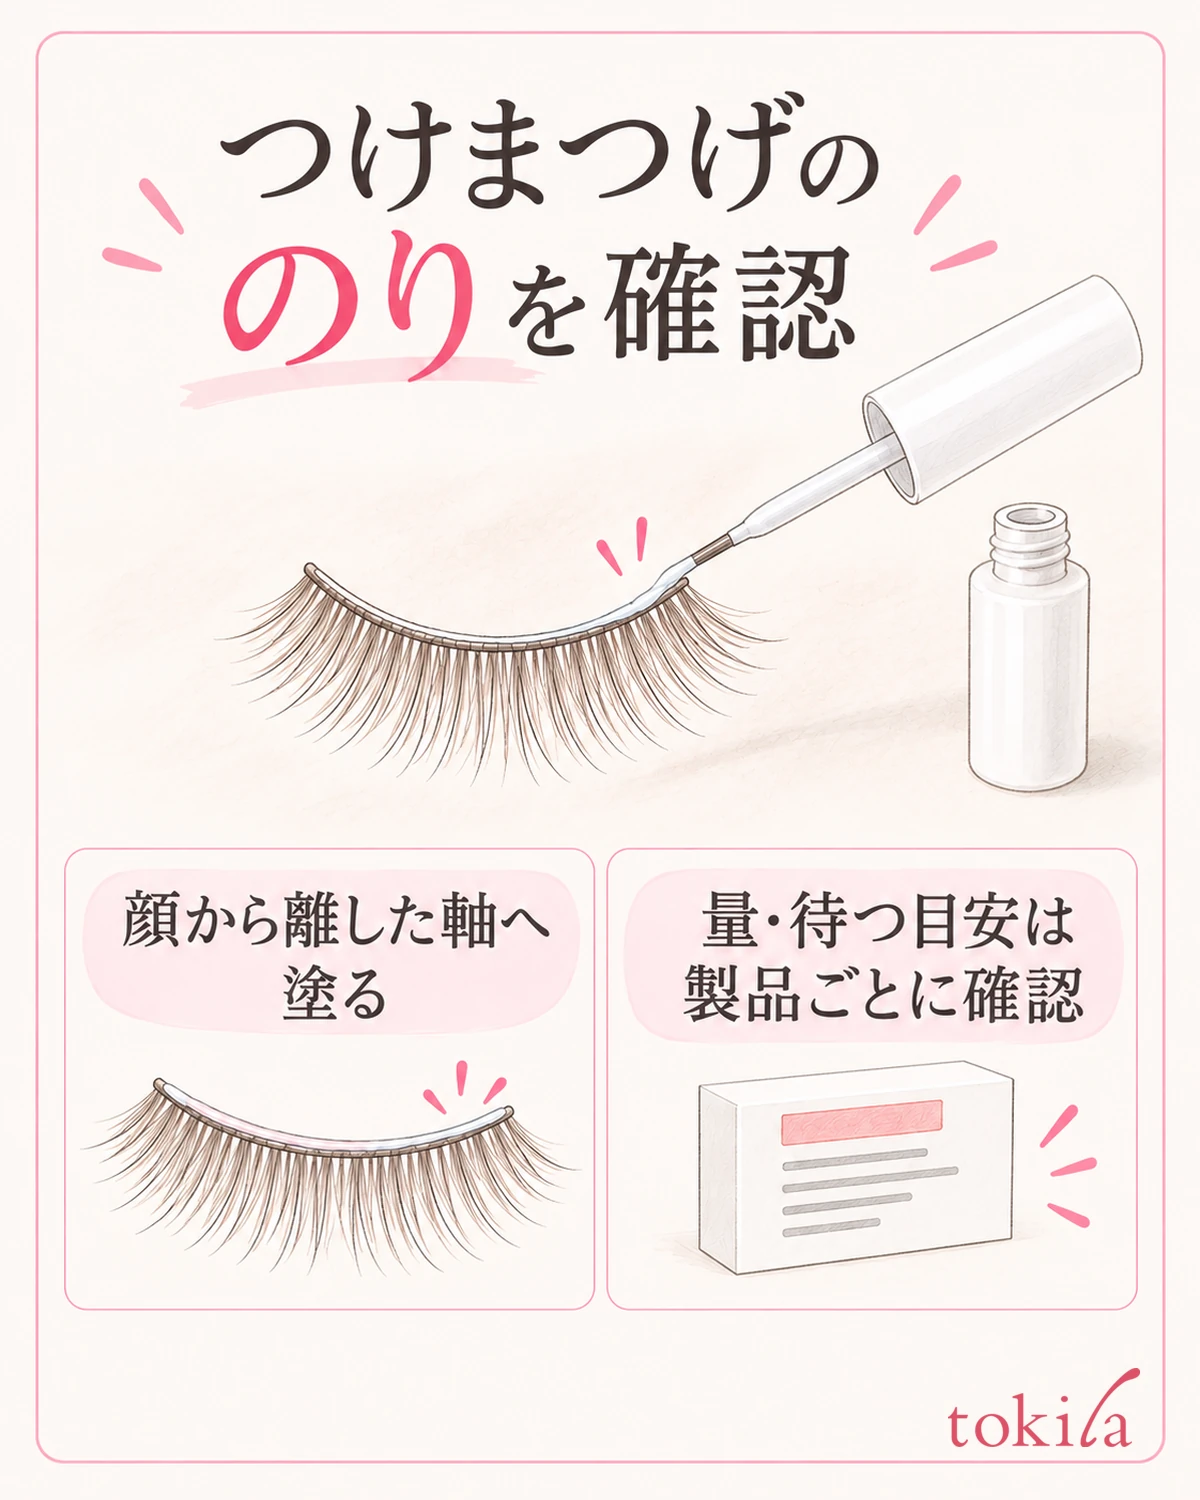
Choose an adhesive that is compatible with the lashes you are using today, and read where to apply it, how much, and how long to wait before applying. Do not substitute a household adhesive or one made for extensions. Even among products labeled "for false eyelashes," how to spread the glue and when to apply may not be the same.
Apply the glue to the specified part of the band while the lashes are held away from your face. Do not put a large amount on the lash tips, and do not squeeze it directly from a container pointed at your eyes. Hold the band at an angle where you can see where on it you applied the glue, and also check that the liquid is not pooling in a round blob in one spot.
Follow the specification of the product you have for the amount. Some spread it thinly and evenly, and some adjust the amount at the ends. Do not make a thick blob at both ends with every adhesive simply because your ends lifted once. Before changing the amount, review the original instructions and the range you applied it to.
Also do not borrow a number of seconds from another product for the waiting time. For products that use a color change as a guide, check the color and state that product indicates. Do not assume that "once the white disappears it's fine" applies to black or clear adhesives too; follow the waiting method and application timing on the label.
While waiting, do not blow on it or dry it quickly with a hair dryer or a hot object, and handle it with clean hands. If you touch it repeatedly with your fingers to test the tackiness, you will lose track of which parts you touched. Even if it looks too dry, do not add another adhesive or water on top to try to restore it.
If you cannot see the state of the glue you applied, adjust the orientation of your hands and the lighting before bringing it close to your face. Rather than holding a mirror in one hand and applying in a hurry, hold the band steadily and check the path by which you will carry it to your eye. Do not try to make up for poor visibility with the amount of glue.
Do not keep testing glue that has hardened in the container or that is in a different state than usual on your eye area. Check how to store it and in what condition it can be used, and if you cannot judge, stop using it. Deciding on one combination and checking it makes the steps easier to follow than layering glue each time you reapply.
4. Check where you place the band, and lightly secure it in the specified order
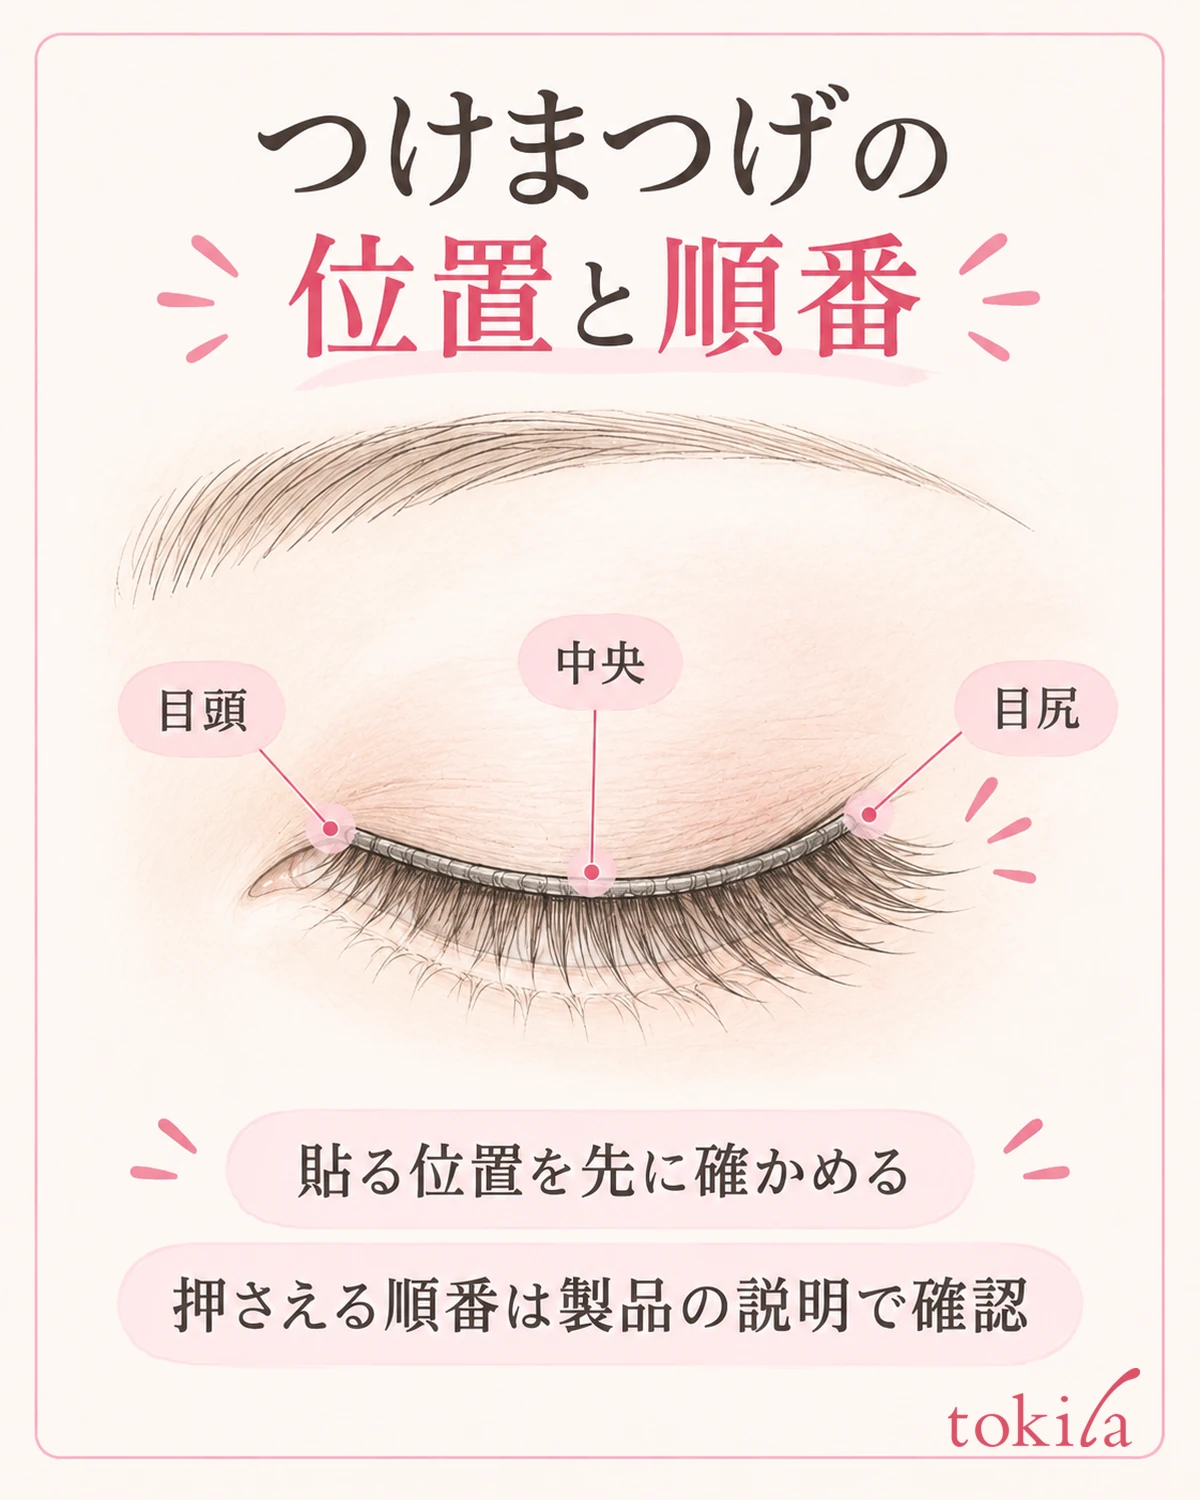
Before applying, adjust the angle of the mirror so that you can see the band and the outside of your upper lash line. This is not a step in which you attach them inside the eye or onto the mucous membrane. How far from the inner corner to start, and where to place the band, should be checked by the product's instructions and a trial fit on your own eyes.
When the glue reaches the specified state, carry the band using the grip described in the instructions. Even for a product where you set the position from the center, check in the instructions for what you have which end to press afterward. What matters is not to transfer the order of application directly from another product you remember.
When securing, lightly press while watching the position. Do not point a sharp-tipped tool at the eyeball or pinch the skin with your nails. If the band disappears behind the finger pressing it, take your hand away and check before adding force. Pressing hard does not necessarily make up for a difference in adhesion conditions.
If the ends spring back instead of following the skin, or you are left with extra at the ends when you keep the center position, do not keep pressing the same spot over and over. Go back to the stage of reviewing the width and where you place it once. While they are on, do not cut the band or push the ends in with the tip of the glue container.
Handle them after application as the label says as well. Do not immediately pull the lashes or keep touching them to check; check the position in the mirror. When you open your eyes naturally and when you lightly look down, see whether the ends touch your eye area. Rather than forcing the left and right to the same height, check the position where each band sits comfortably.
5. If lifting remains, do not keep layering; decide whether to remove them or reapply
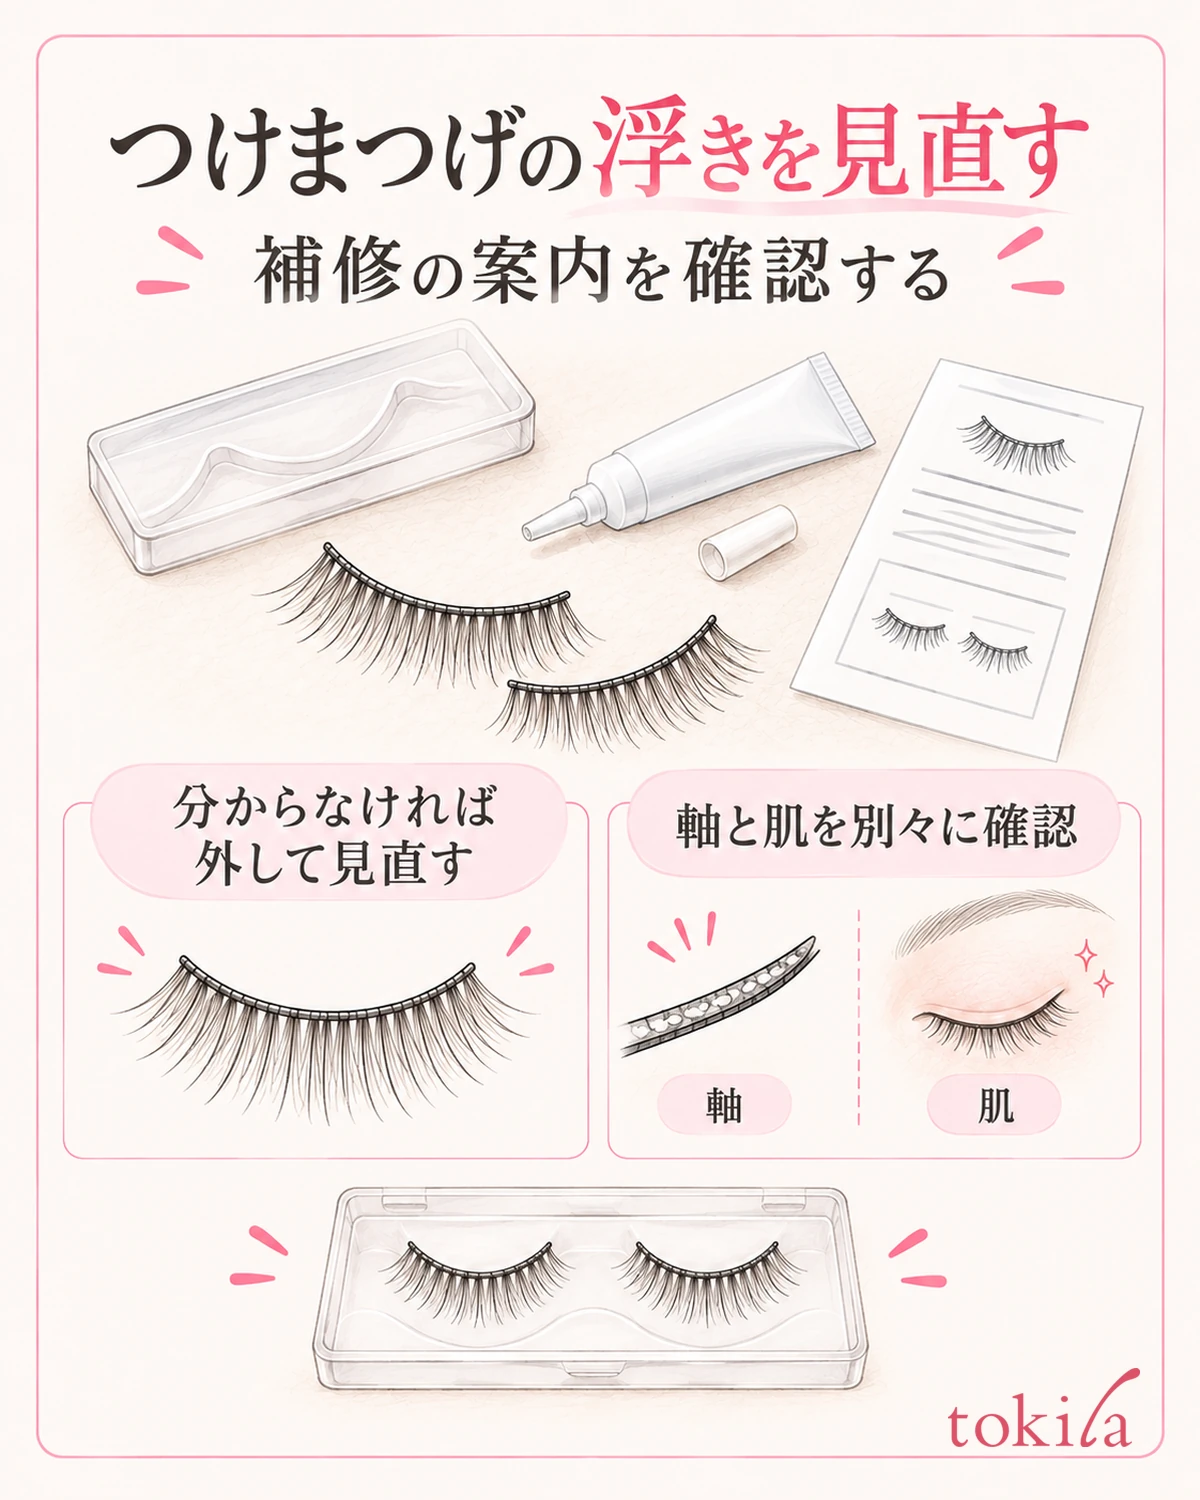
If the ends are still lifting after you apply them, first take your finger away and look at the area that is attached. Do not assume that you can always add more glue to just the lifted end. Whether you can repair them while they are on, or should take them off and reapply, is decided by how to use the adhesive and the lashes.
If you cannot confirm instructions for repair, do not pour glue into the gap between the skin and the band with the tip of the container. Rather than adding glue where you cannot see, choose the steps of removing them the specified way and then checking the band and the skin separately. If you meet resistance when removing them, also see preparation before removing false eyelashes and what to check when they are hard to remove.
If they are a product that can be reapplied, check how to handle the old adhesive and how to care for them. Do not go on to treatments of your own that damage the shape, such as scraping off lumps left on the band with your nails or pulling on the lashes to take off only the glue. If the band is bent, lashes are missing, or dirt remains, start by reviewing whether they can be reused.
If you are going to reapply, first check that there is nothing wrong with your skin and that the band is in a condition suitable for wearing, then return to the base, the glue, and the position in that order. There is no need to put them on and take them off repeatedly in the same condition to test the adhesion. For ones that need care or drying, do not skip those steps.
For next time, briefly note one thing: the condition you saw and what you changed, such as "only the outer corner lifted right away" or "I applied after smoothing the powder." Do not change the width, the glue, and the makeup order all at once, so that the record shows which step gave you trouble. Do not treat the result of a single attempt as a guarantee that they will attach the same way for anyone.
If you are finishing for the day, remove them the specified way, care for them, and put back in the case only those that can be reused. Take lifted ends as a signal to review the position of the band and the adhesion conditions, before pressing harder or adding more glue.



