
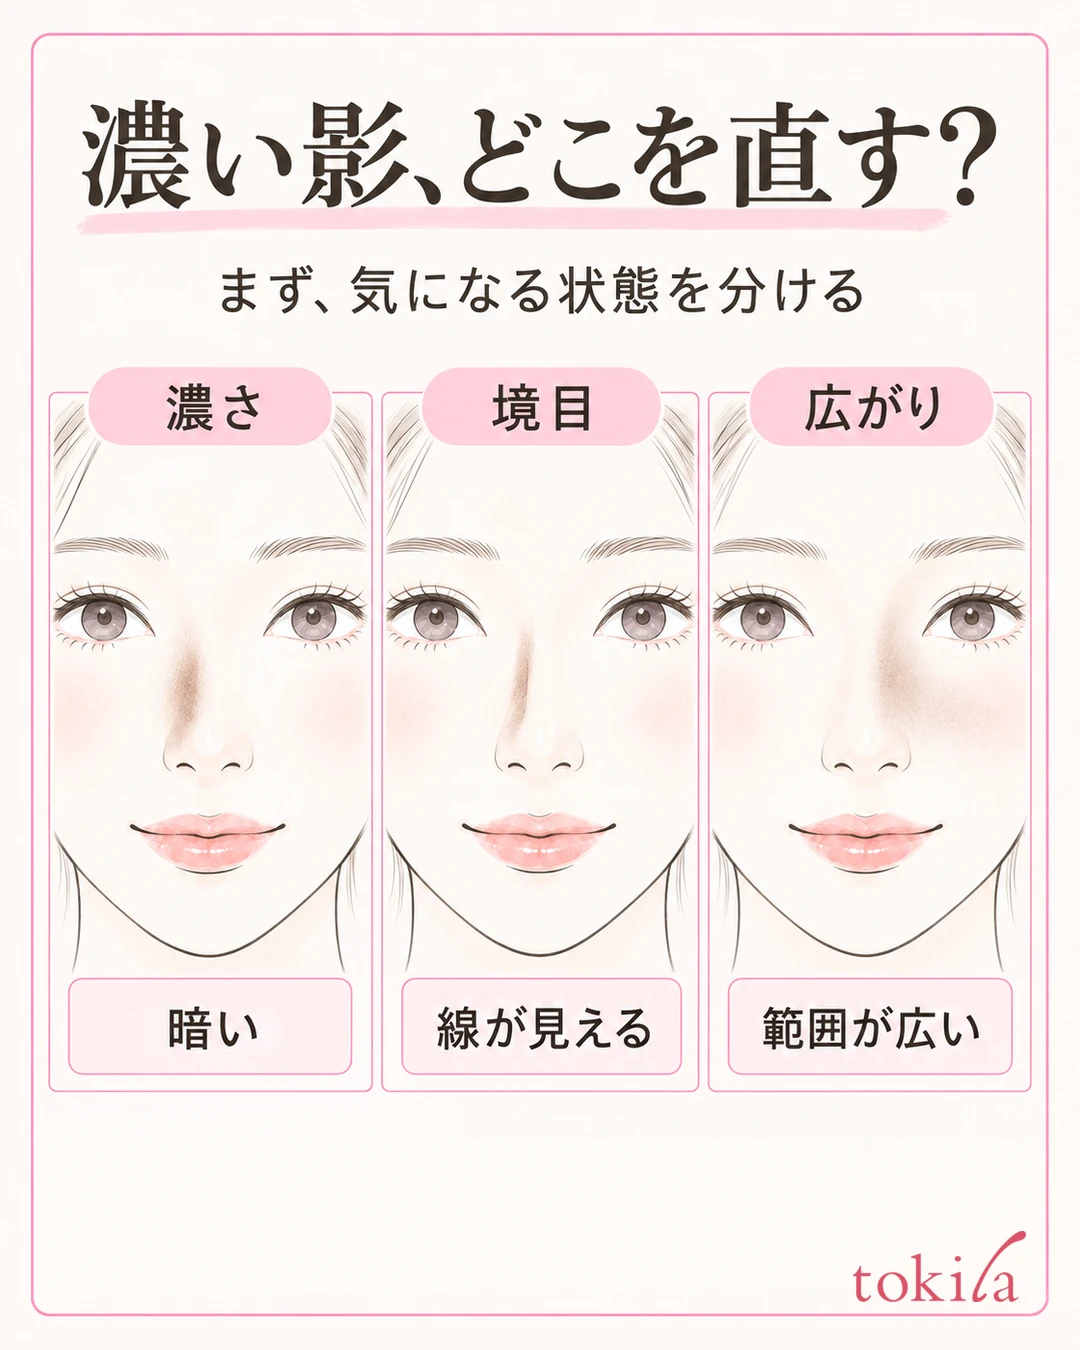
You applied nose shadow and a clear line stayed beside your nose. The more you blend, the more the color spreads, until the area around your nose looks dark. Before you add more powder or highlighter, work out whether what bothers you is the depth of color, the edge, or the range.
This article explains small fixes for when you have applied too much powder nose shadow, and how to review the amount and range next time. The steps put the use of the products you already own first, and they do not aim to change your features.
1. Check depth, edge and spread separately
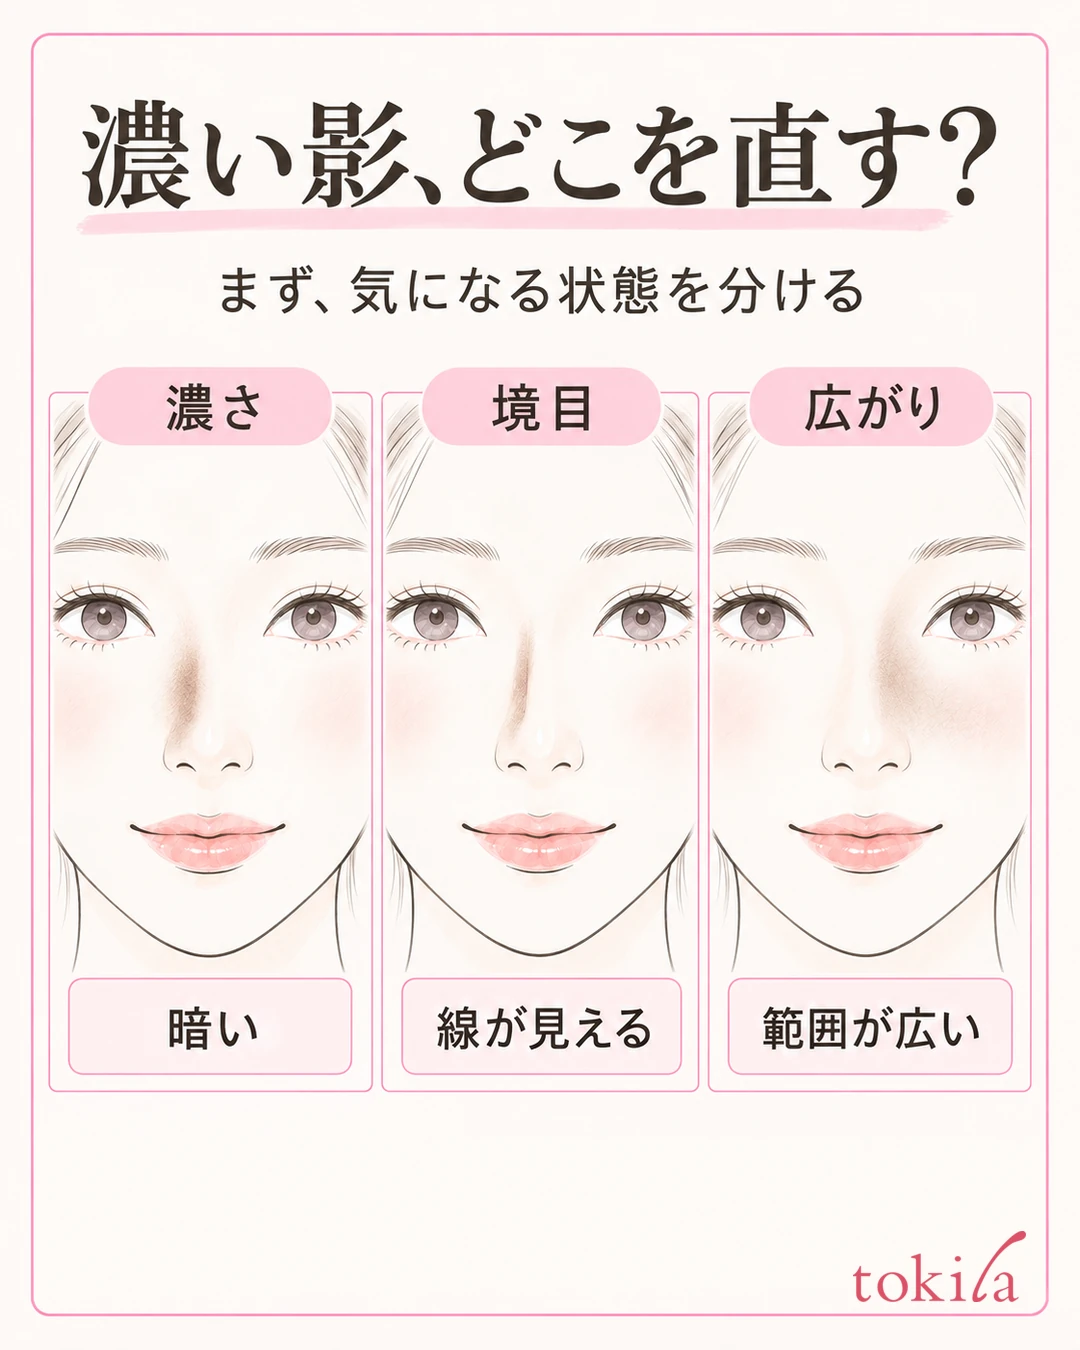
Stop layering nose shadow and first look in the mirror from a distance where you can see your whole face. Move into bright, frontal light, turn your face slightly, and check which spot bothers you. The starting point is not to try to erase, as if it were makeup color, the shadow made by lighting directly overhead.
Checking depth starts with remembering where you first placed the shadow. Separate the shadow of the natural hollow from makeup color that has spread outward, and decide where to fix by looking in the mirror, not by rubbing with your finger.
Is the color itself dark, is the edge of what you applied sharp, or has it spread past the intended position? These three determine your next move. If only the edge stands out, blend it; if the color is still strong, lighten that part or redo it. If the range is wide, the priority is not to spread it any further out.
For example, if you meant to apply a thin shade at the base of the nose but it looks like a single line, the first thing to look at is the end of that line. Even if the edge is soft, if the whole area looks dark, continuing to blend may not solve it. Avoid lumping "dark" and "the edge is visible" under the same word.
Instead of correcting your features to a uniform template, look at whether the color you added bothers you.
The left and right sides of the nose may differ in their natural shape and in how light hits them. If you keep adding to match the lighter side to the darker side, both colors tend to get stronger. If only one side bothers you, check the color you added on that side first, and do not try to even out everything, including the natural left-right difference.
This article focuses on powder nose shadow. Stick, cream and types that cling once dry differ in how long you can blend and in the order of use. Read the type of product you used first, and do not carry over the steps of rubbing off with a powder brush as they are.
2. Blend the edge in small motions without adding new color
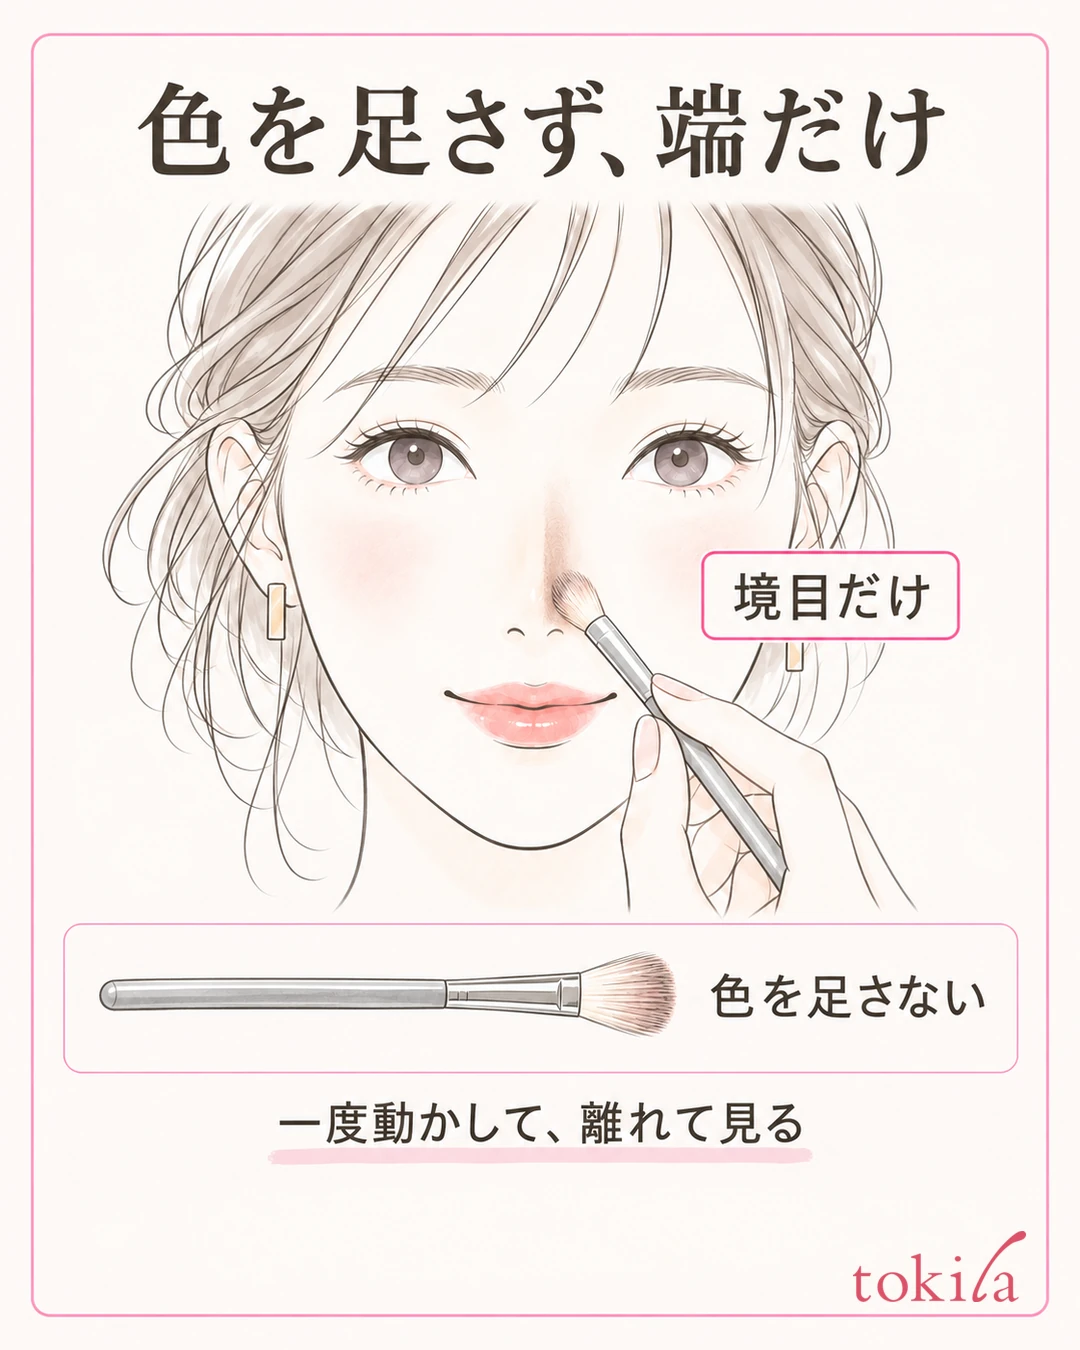
When the edge of the powder stands out, prepare a clean, small, soft brush that has not picked up any new color. The brush you used earlier may still hold powder, so going back and forth with it to lighten the color can make it darker. First check the bristle tips.
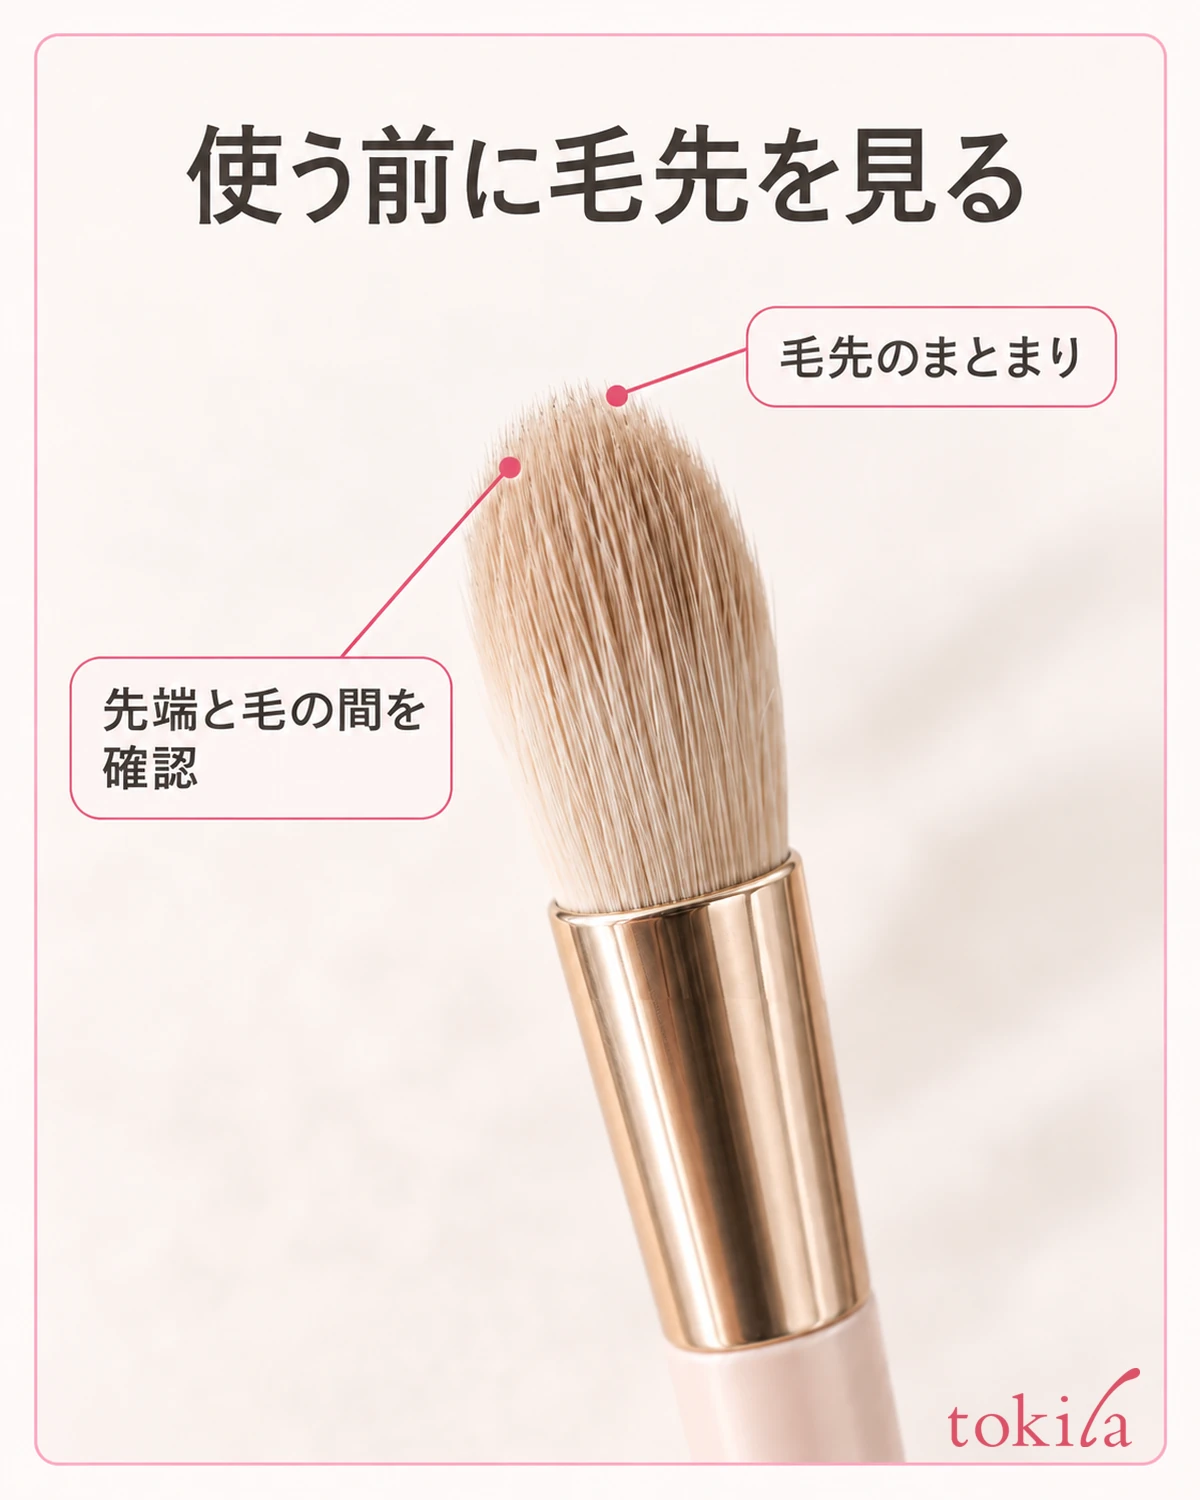
For the direction of movement, think in strokes short enough to stay within the edge of the color rather than one long pull in a single direction. Do not touch the left and right sides at the same time; fix the side that bothers you first and compare, and you will know what you did to which side.
Bring the mirror closer and lightly touch the bristle tips to the edge of the color that bothers you. Without pressing the bristles down hard, blend only the edge with short movements, then lift away and look. The key is to keep your movements around the area that is already there, not to sweep widely from beside the nose to the cheek.
After one light movement, step back to a distance where you can see your whole face. Check whether the edge is still visible and whether only the area of color has increased. If it has changed a little, watch it in the same area, but if nothing changes, do not increase the pressure or go back and forth many times.
The partial fixes in this article are options the editorial team organized based on that approach, and they are not the official touch-up method for every product.
The area near the inner corner of the eye is especially narrow, so check in the mirror where the brush can reach and where your eye is. Do not point the bristle tips toward the eyeball or mucous membranes, and keep the tool within the area of skin where it can be used. The smaller the spot, the more it does not follow that you may concentrate force just because the tip is fine.
If, after blending, the color spreads onto the cheek or the foundation underneath moves, stop there. Softening the edge and distributing the color thinly over the whole face are different things. Switch to the next partial fix, and do not touch clean areas with the same brush.
3. If darkness remains, choose a partial fix or start over
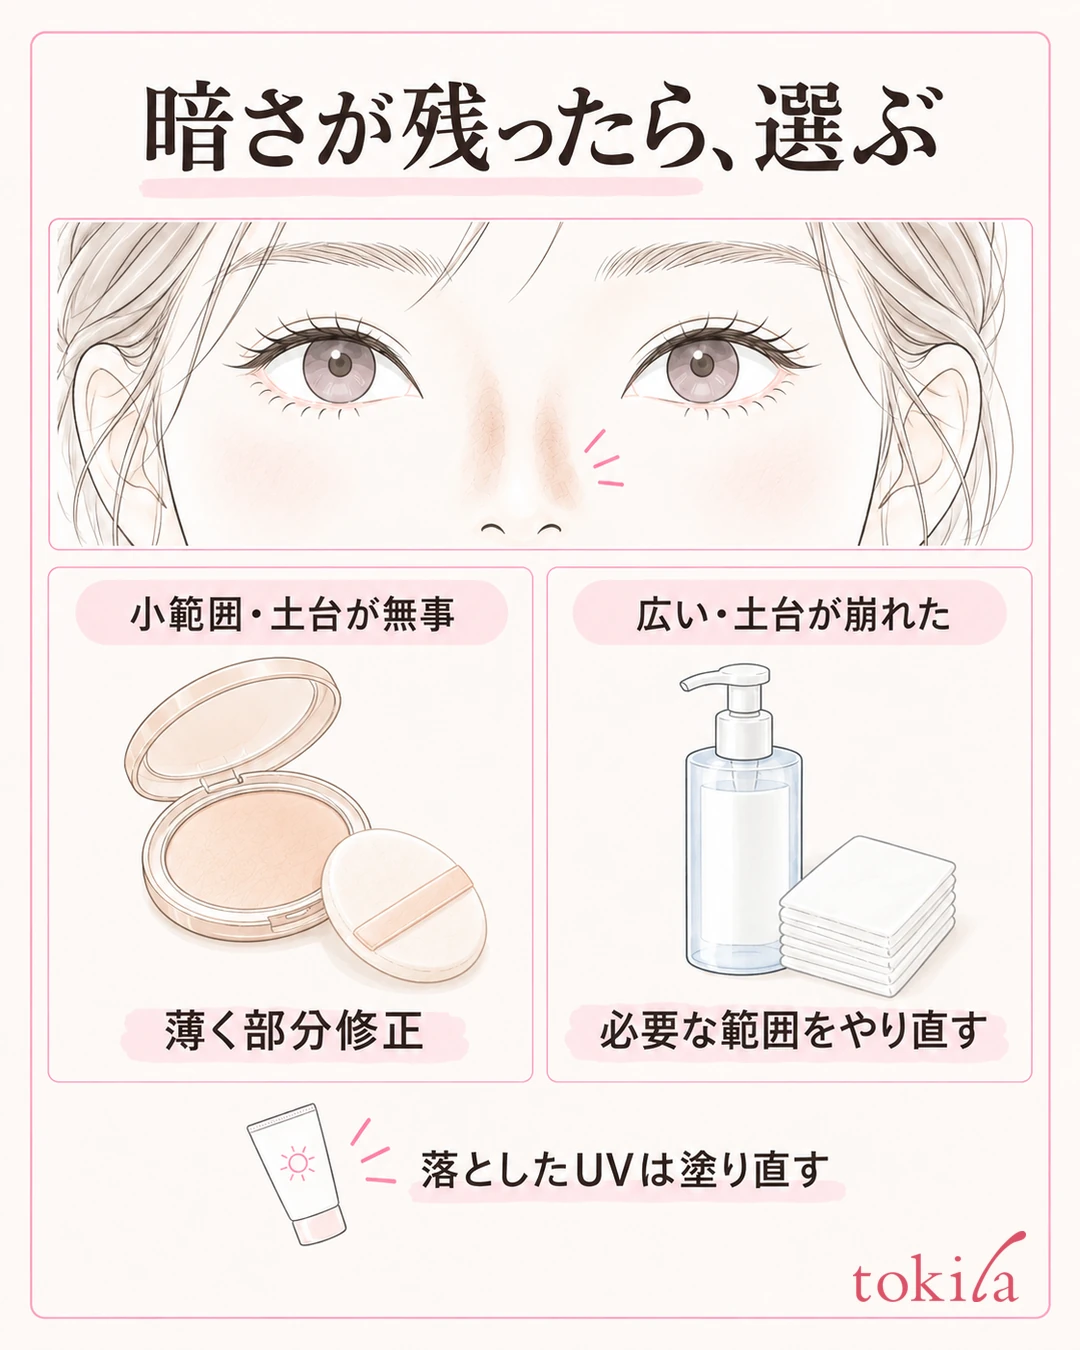
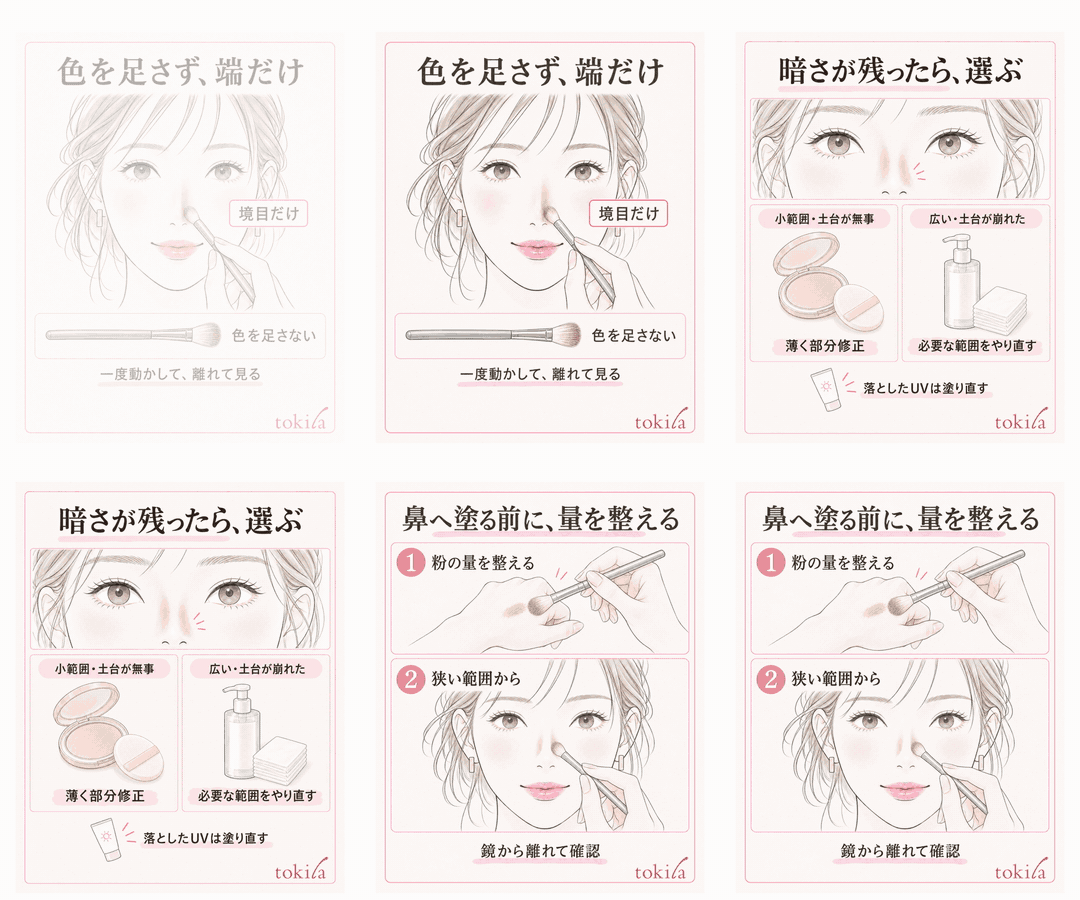
If the color is still strong after tidying the edge, look at the extent of the dark area before layering on a lot of highlighter to whiten it. Adding a light color on top can increase streaks of light and the thickness of powder, creating a different kind of discomfort from the original concern. First decide what you want to reduce.
For a small area where the base is not broken down, you can take a very small amount of foundation that suits your usual skin tone onto a clean sponge and lightly place it on the dark spot that bothers you. Layer thinly following the product's instructions, do not drag it sideways with force, and after applying, lift away and check the color.
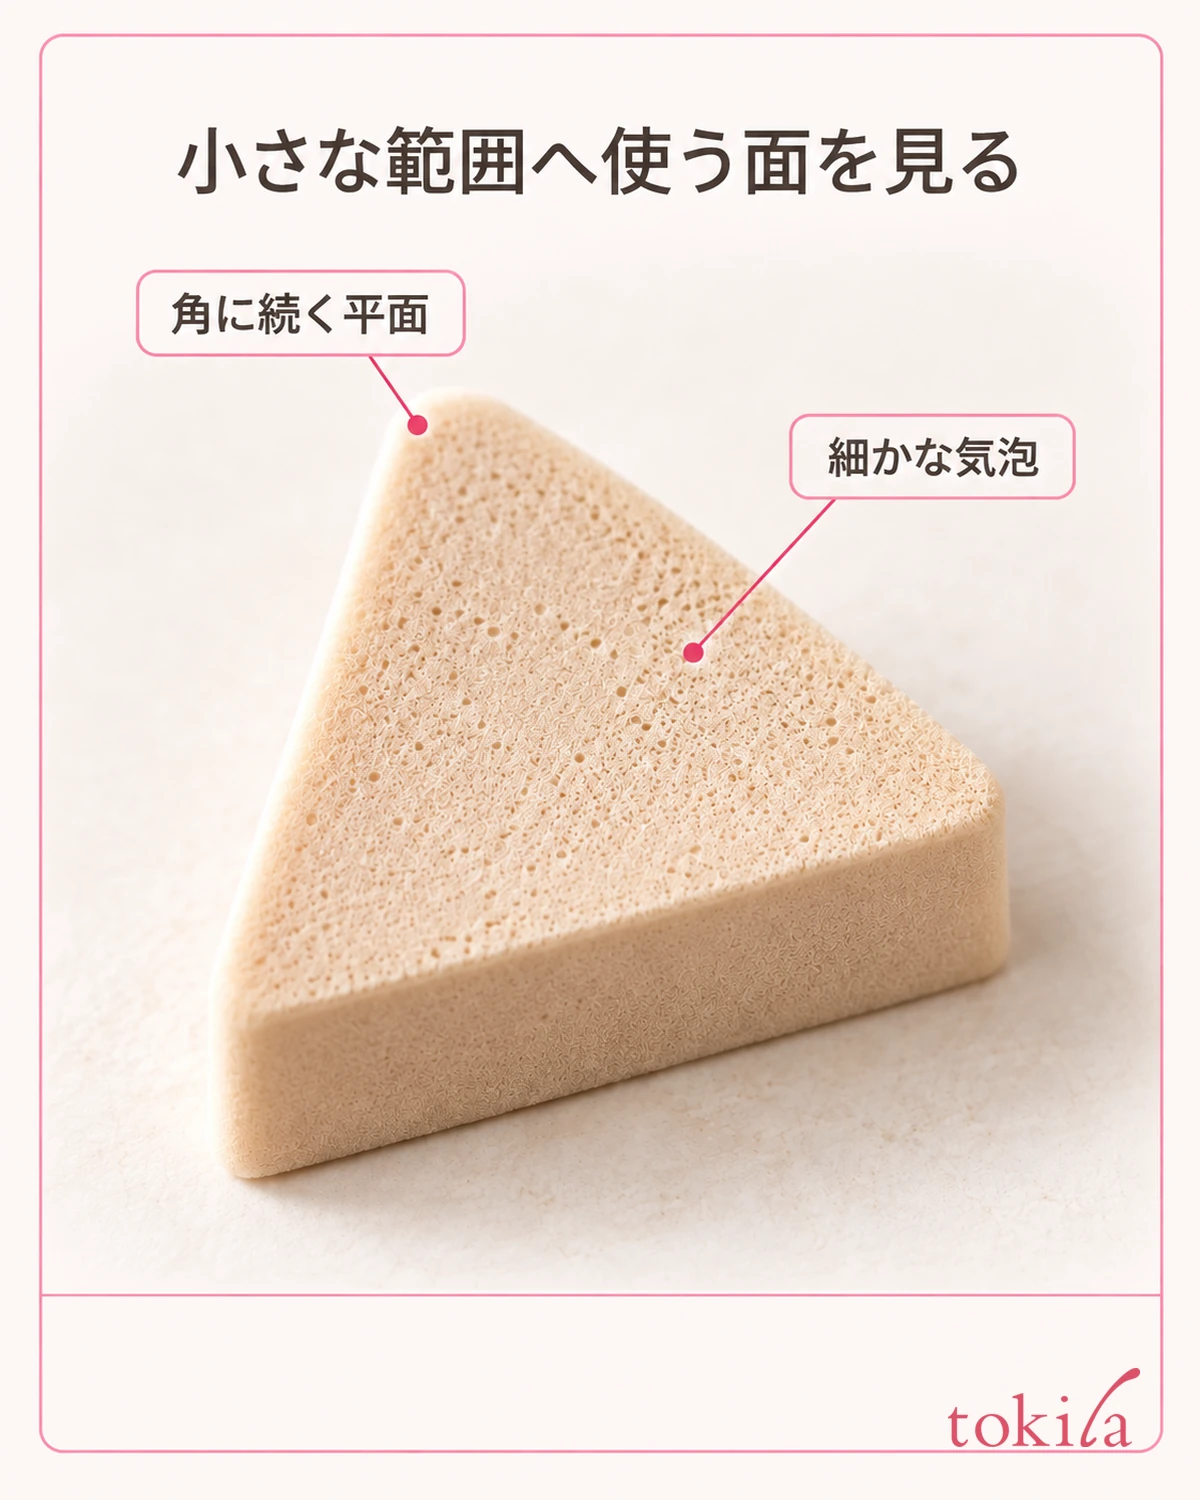
The idea is not to place thick white concealer but to bring the area closer to your usual base. This is an adjustment example organized by the editorial team, not a verified result that it will always lighten in one go. If it turns powdery, the colors mix and look muddy, or the film underneath shifts, do not keep layering.
If a wide area is dark, the color has dried and clings and will not move, or even the base has become patchy, redoing the necessary area with a removal method suited to the product may be easier to handle. Also check whether the cleanser can be used near the eyes, and follow the directions for use without rubbing hard.
After removing it, prepare the necessary skincare, sunscreen, primer and foundation in that product's order. Because the sunscreen film may also have come off, do not assume that UV protection has been kept just because the color has returned. Check the boundary with the surrounding area before finishing.
If you lack the tools when you are out, choose only the fixes you can make so that you do not run into trouble after enlarging the area you remove. If the base has also creased, see makeup touch-ups by how it breaks down; if you added too much light, see how to fix too much highlighter. Treat different concerns separately.
4. Next time, adjust the powder on the brush and build up from a narrow area
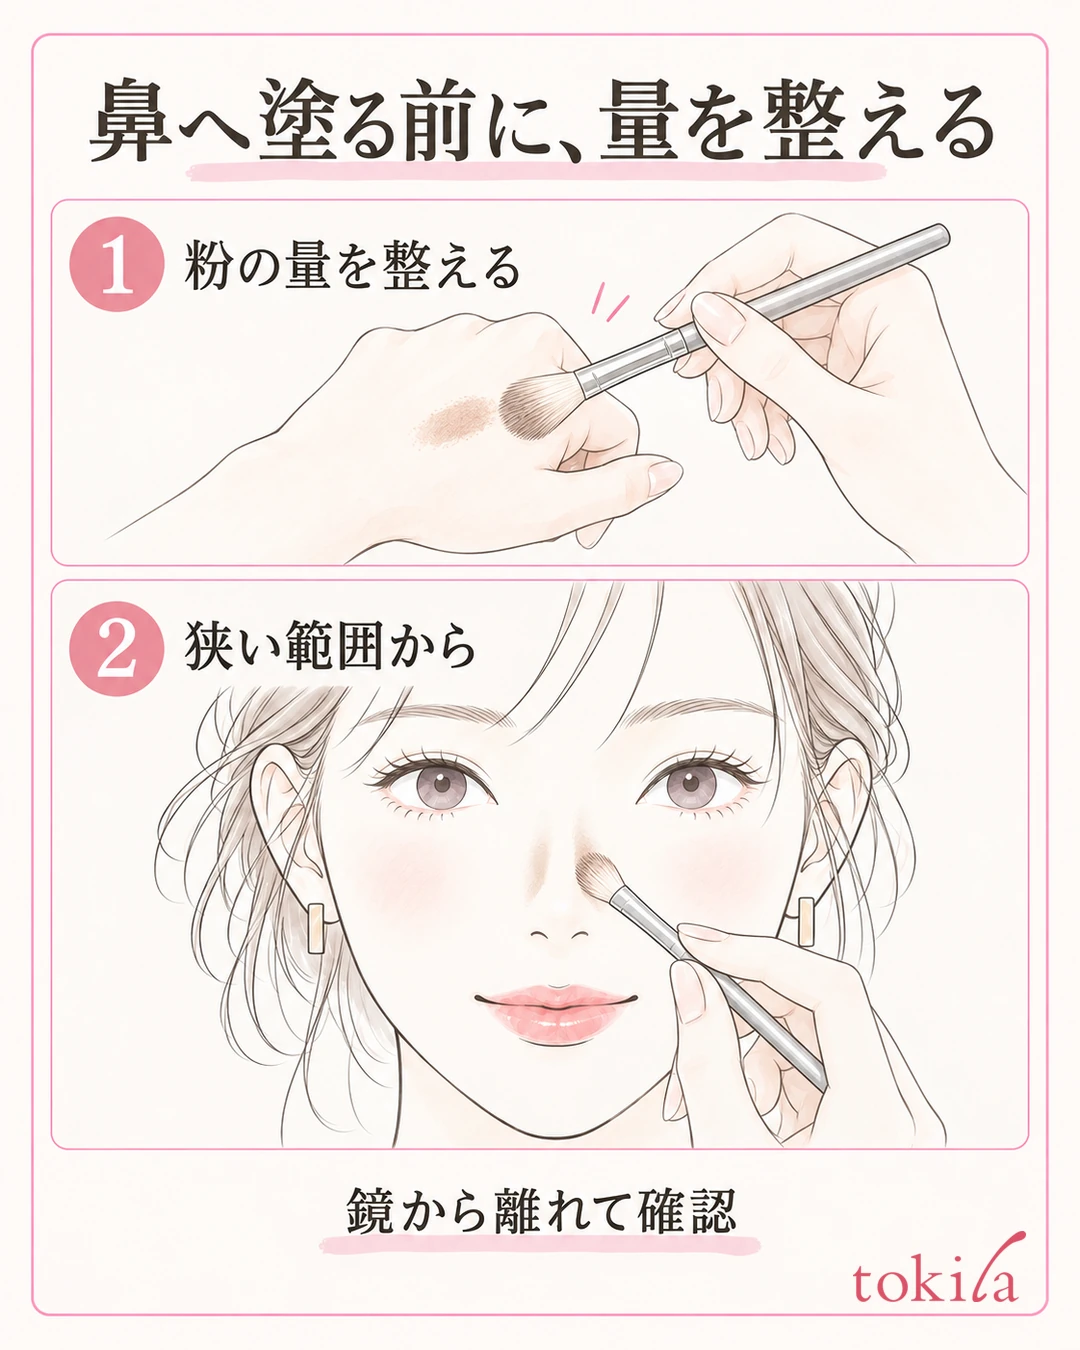
For your next makeup, check whether the product and tool are described as usable on the nose. After lightly touching the brush to the powder, adjust the excess amount by the method the manufacturer indicates before taking it straight to your nose. Rethink the habit of loading on a lot of powder and reducing it on your skin.
If you substitute eyebrow powder, also read whether use on the nose is stated. Do not take the amount that gives strong color on the brows as it is; choose a tool and amount that can be placed lightly on the nose.
Checking the color once on a clean spot such as the back of your hand lets you see how strong the first stroke is likely to be. However, the color will not look exactly the same on your hand as on your nose.
Decide the position from the product's description and the shading you want to add. First apply lightly to a necessary small area such as the base of the nose, and look from away from the mirror. Do not make drawing two long lines all the way to the tip of the nose in one go the basic step for everyone. Only for the places where you feel it is not enough, consider the next small amount.
Do not blend position and the direction of the tool into a single rule; check how to use the products you have and choose accordingly.
If the surface is still widely damp right after layering a thick base, do not put on a lot of powder right away; first let the earlier steps settle by the product's method. For the order in which to use powder, give priority to the container and official information. Do not add water or toner to the palette on your own to dilute the powder color.
Color choice is also one reason it looks dark. If a darkness far from your skin tone, or strong yellow or red undertones, bother you, check how it looks with a reduced amount before choosing again. Do not decide by personal color category alone; see whether it looks like a shadow that blends into your face and whether you can adjust it to be lighter.
If it is the shadow color along the face line rather than the nose that has become dark, also see reviewing the edge, amount and range of chin shading. It explains how to look at the connection between face and neck and separate partial correction from removing and redoing.
5. Decide when to stop by looking at the whole face, and leave one condition to review

Finally, go back from the magnifying mirror that shows only the nose to a distance where you can see the brows, eyes, cheeks and mouth. From the front and slightly from the side, check whether the edge of what you applied stands out, whether the color is strong on only one side, and whether the area around the nose has become broadly dark. Do not turn this into a check that grades the shape of your face itself.
The goal is whether the shading you added has reached the depth you want. Even if lightening it makes the shadow weaker than you first planned, you can finish there as long as it does not bother you across the whole face. There is no need to choose between removing everything and leaving a clear line.
When looking at photos, the impression also changes with camera correction, light and angle. Do not keep making fixes that increase the left-right difference based on a single photo; check in the mirror whether the same place bothers you. Avoid layering different colors again and again every time the lighting changes.
Start with one condition to change next time, from the amount you pick up, the range you apply to, or the color you choose. A short note such as "adjust the powder on the brush first" or "start from just the base of the nose" is enough. If you change everything at once, it becomes hard to look back and tell which adjustment suited you.
If color remains thick on your tools, care for them in a way that suits the material and the manufacturer's instructions. Let washed brushes dry fully before use, and if the bristle tips splay and you can no longer place color where you aim, inspect their condition. You can find details in caring for brushes and sponges.
When nose shadow is too dark, separate depth, edge and spread, and first tidy it in small motions without adding color. If darkness remains, choose a partial fix or redo it, and next time start with a small amount and a narrow area. Try treating the point where it no longer bothers you across the whole face as the finishing line.



