
You add mascara to your lower lashes, and only the area under your eyes looks black and heavy. You wanted to define each lash, but the short ones clumped together and got thick. When that happens, before layering more on your upper lashes to rebalance, look separately at the color of your lower lashes, the clumps of lashes, and the dots on your skin. Start by taking the brush away for a moment rather than adding more product.
This article focuses on adjusting lower lashes that look too heavy right after you apply mascara. Brushes and combs are used on different sides and moved differently, so follow the directions for the product you have. It is separate from mascara that smudges under the eyes as time passes. We will check, in order, the amount of product to start with, the lashes you touch, and when to remove and redo.
1. Tell apart lash darkness, clumps and dots on the skin
First, put the tool back in its container or hold it away from your eye area, and look at your lower lashes in a mirror. Do not try to fix everything the same way just because the area under your eyes looks strong. Check whether the lashes themselves have become black, whether several lashes look like one clump, or whether dots have landed on the skin of your lower lid.
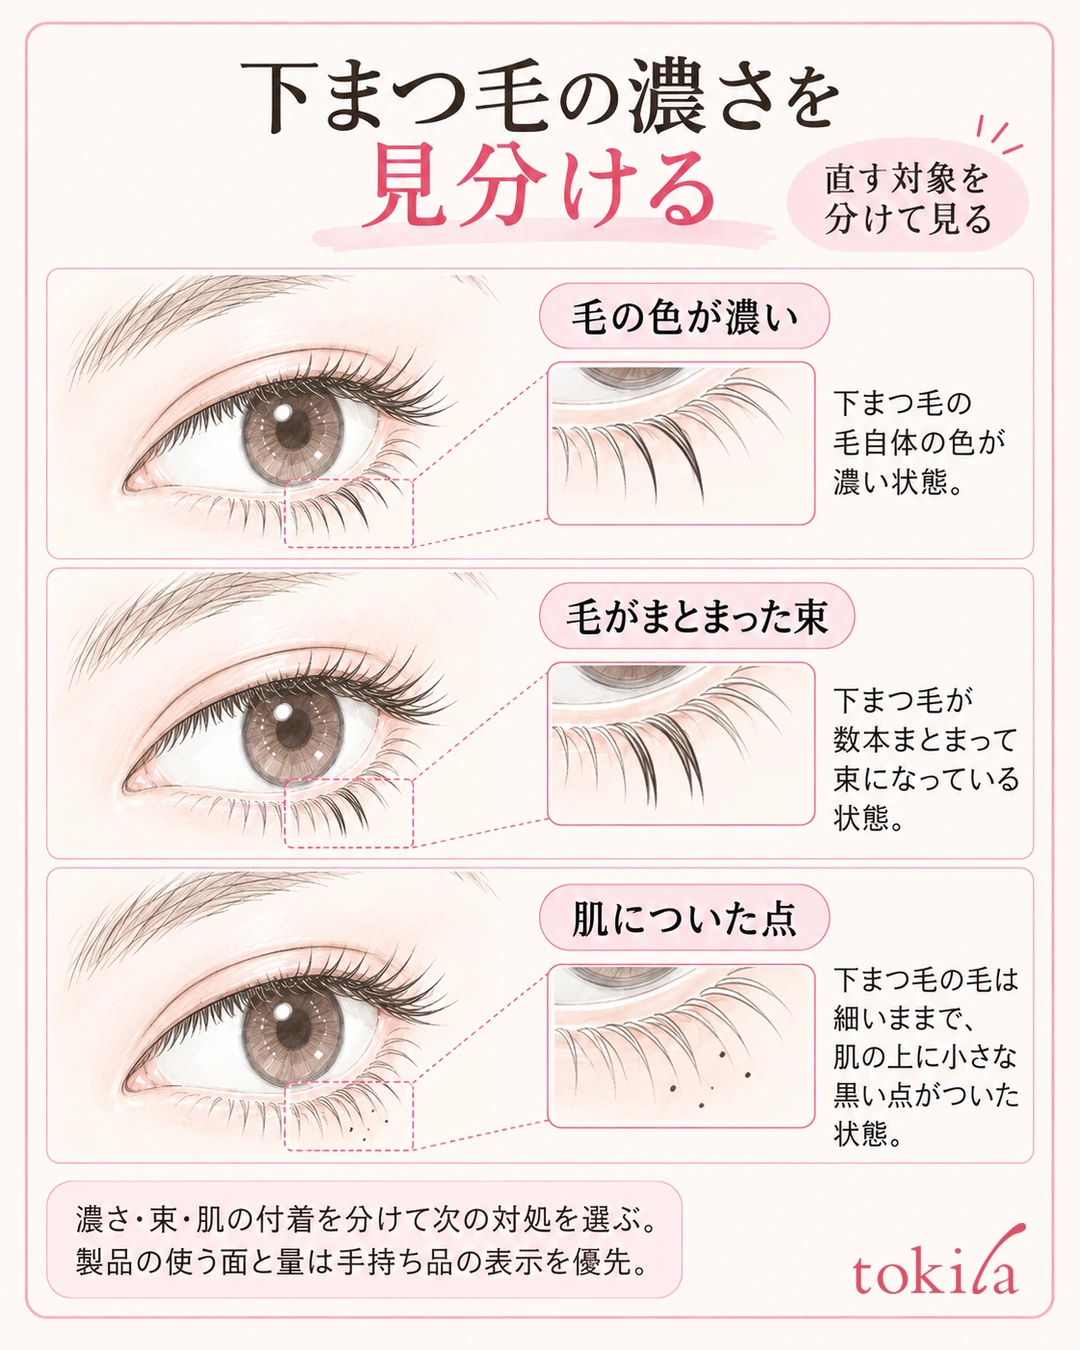
If the lashes are separate but still feel dark, it is time to review the color and how far the layers reach. If neighboring lashes are stuck together, check the amount of product and how you handle the clumps rather than simple color depth. A black dot away from the lashes is product on the skin, so running a comb through your lashes cannot remove that dot.
After looking in a close mirror, return to a distance where your whole face is reflected. When you magnify only your lower lashes, even a small color difference bothers you, and you may keep adding more. Look at both eyes with your usual expression and separate whether only the lower side looks strong or only a part of one side stands out, and it becomes easier to decide the area to fix.
The length and growth of lashes can also differ between the left and right. Do not aim for the same number of lashes or the same number of coats on both sides; choose one spot that bothers you on your whole face. Link the place and the condition, such as "a clump in the middle of the right lower lashes" or "a dot on the skin at the outer corner of the left eye."
If you pinch with your fingers while the product is still wet, the color spreads to other places more easily. While checking, do not touch, and read the layering and touch-up method specified by the product. You do not need to pull on your lashes to check whether they have dried.
If clumps are your main concern, go to how to apply mascara to prevent clumps; if dots on the skin are the main issue, go to rethinking mascara on the eyelids. This article mainly deals with deciding how much color to add to your lower lashes.
If eyeliner remains thick on the lower side, thinning only the mascara may not change the impression. Separate the base of the lashes from the line on the skin in the mirror, and decide what to adjust today. Before removing several items at once, check where the color is.
2. Check the amount of product and the side you use before taking it to the lower lashes
For the next application, look at the tool before you pick up fresh product for your lower lashes. If there is a large blob of product on the tip of the brush or a lot left between the teeth of the comb, do not push it onto the short lashes as it is; remove the excess by the method described for the product.
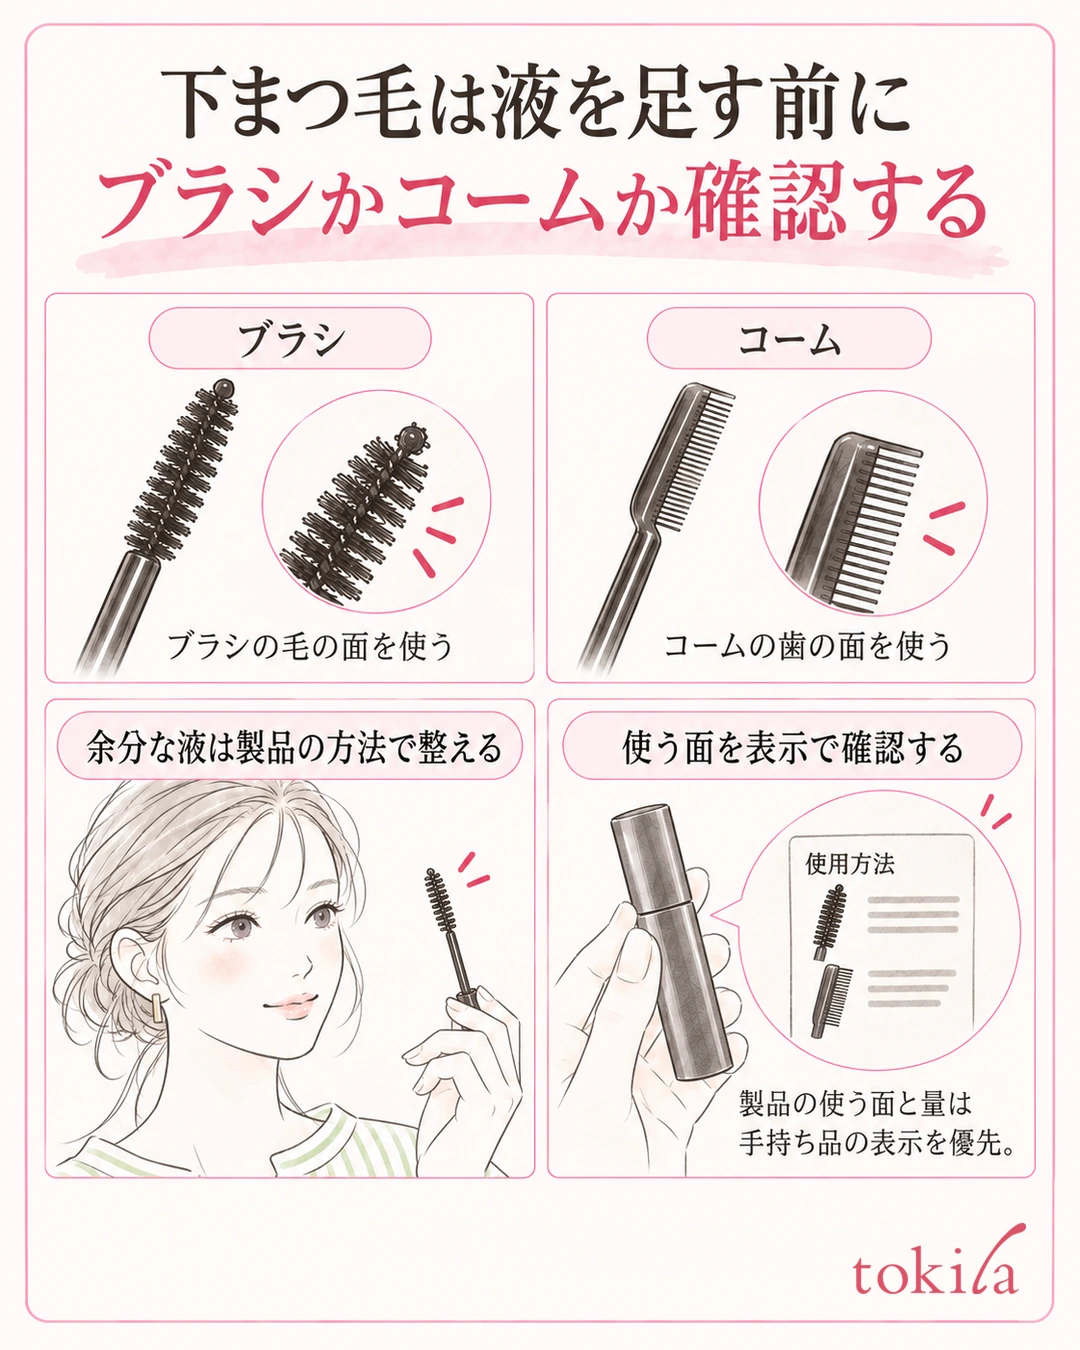
You do not need to standardize the order of handling lower lashes for every tool. First look at whether what you have is a comb type or a brush type that uses the tip.
If the product specifies tidying with a tissue, follow that guidance. Do not treat the options as all the same; check the shape of the container and the brush's precautions. Do not push a blob of product back into the container.
You do not need to move the brush up and down vigorously many times to try to get the same amount each time. Take it out slowly according to the directions and inspect it where the part you will use is visible. Do not choose to thin dried, hardened product with water or toner.
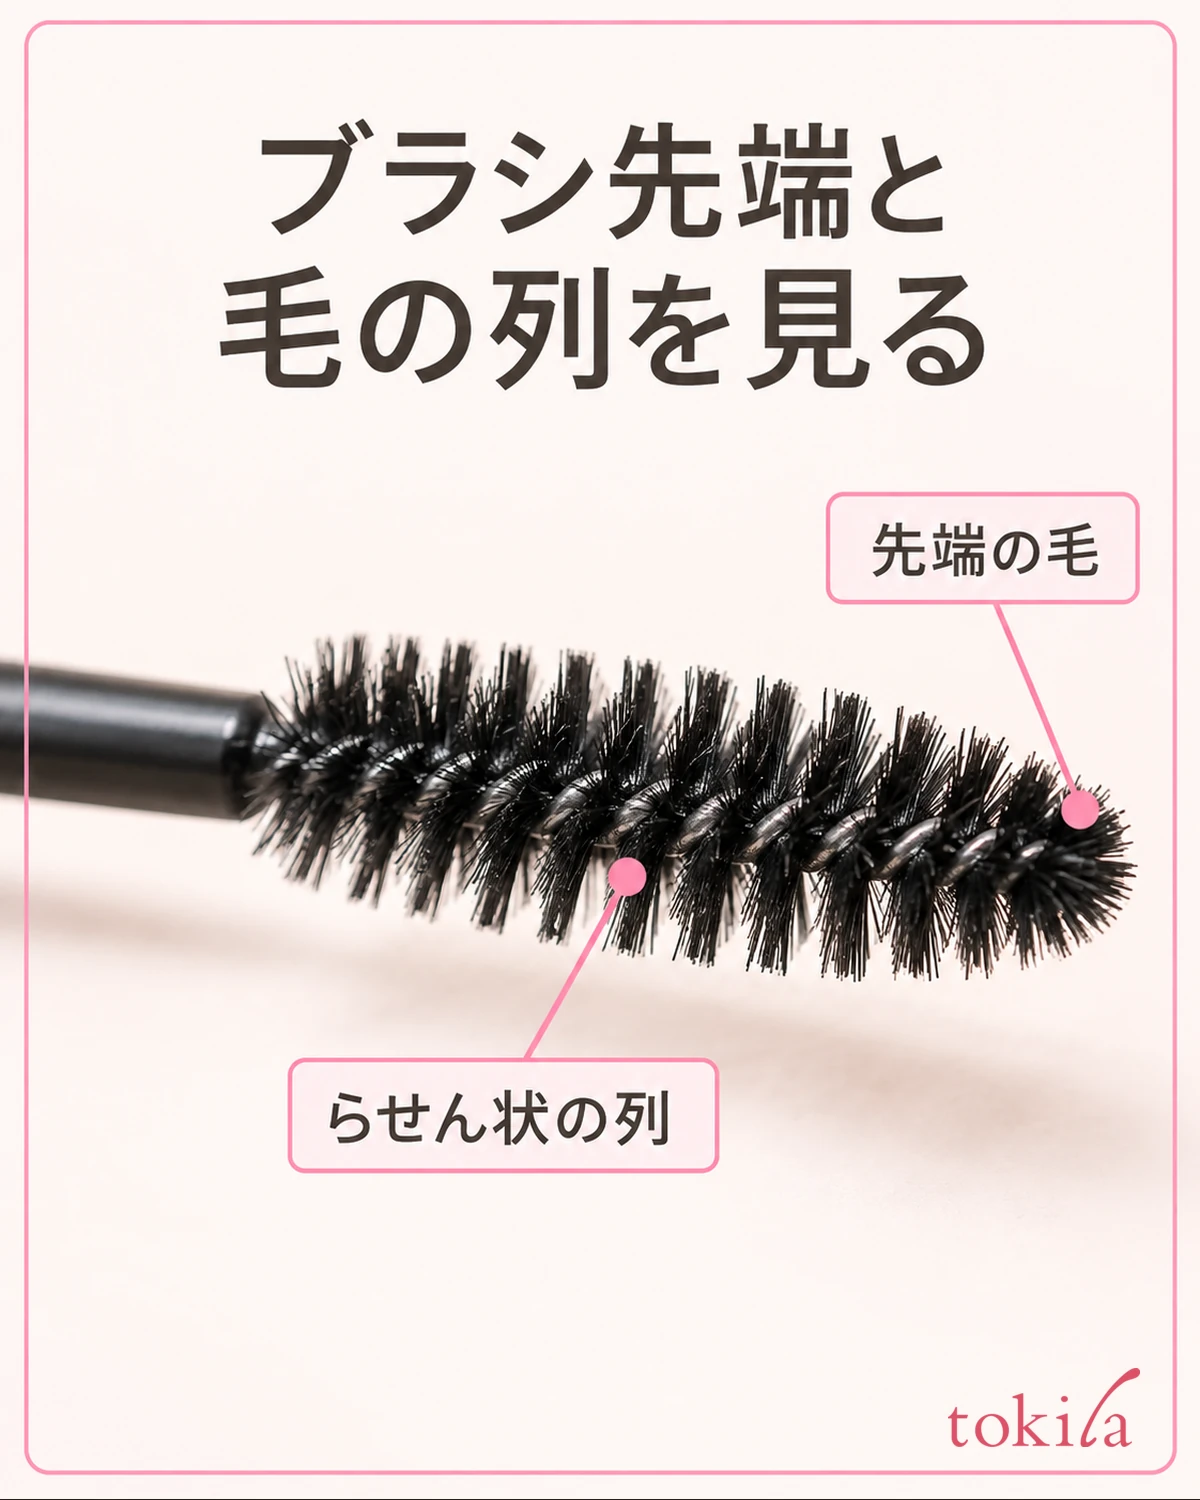
The shape of the tip differs from product to product. Do not force a large round tip, a thin tip and one that uses comb teeth into the same direction and the same motion.
Do not use a tool whose product is already starting to dry, or a bent brush, by pressing it against the eye area to adjust. Check how much is left, how well the cap closes, and the guidance on replacement. With a tool in usable condition, starting with a small amount of product for your lower lashes marks the end of this step.
3. Touch the lashes you can see in the mirror a little at a time, then pull away and check
Place the mirror at a distance where you can see your lower lashes and the position of the tip. Rather than forcing your eyes wide open, find a posture where you can check both the lashes and the tool.
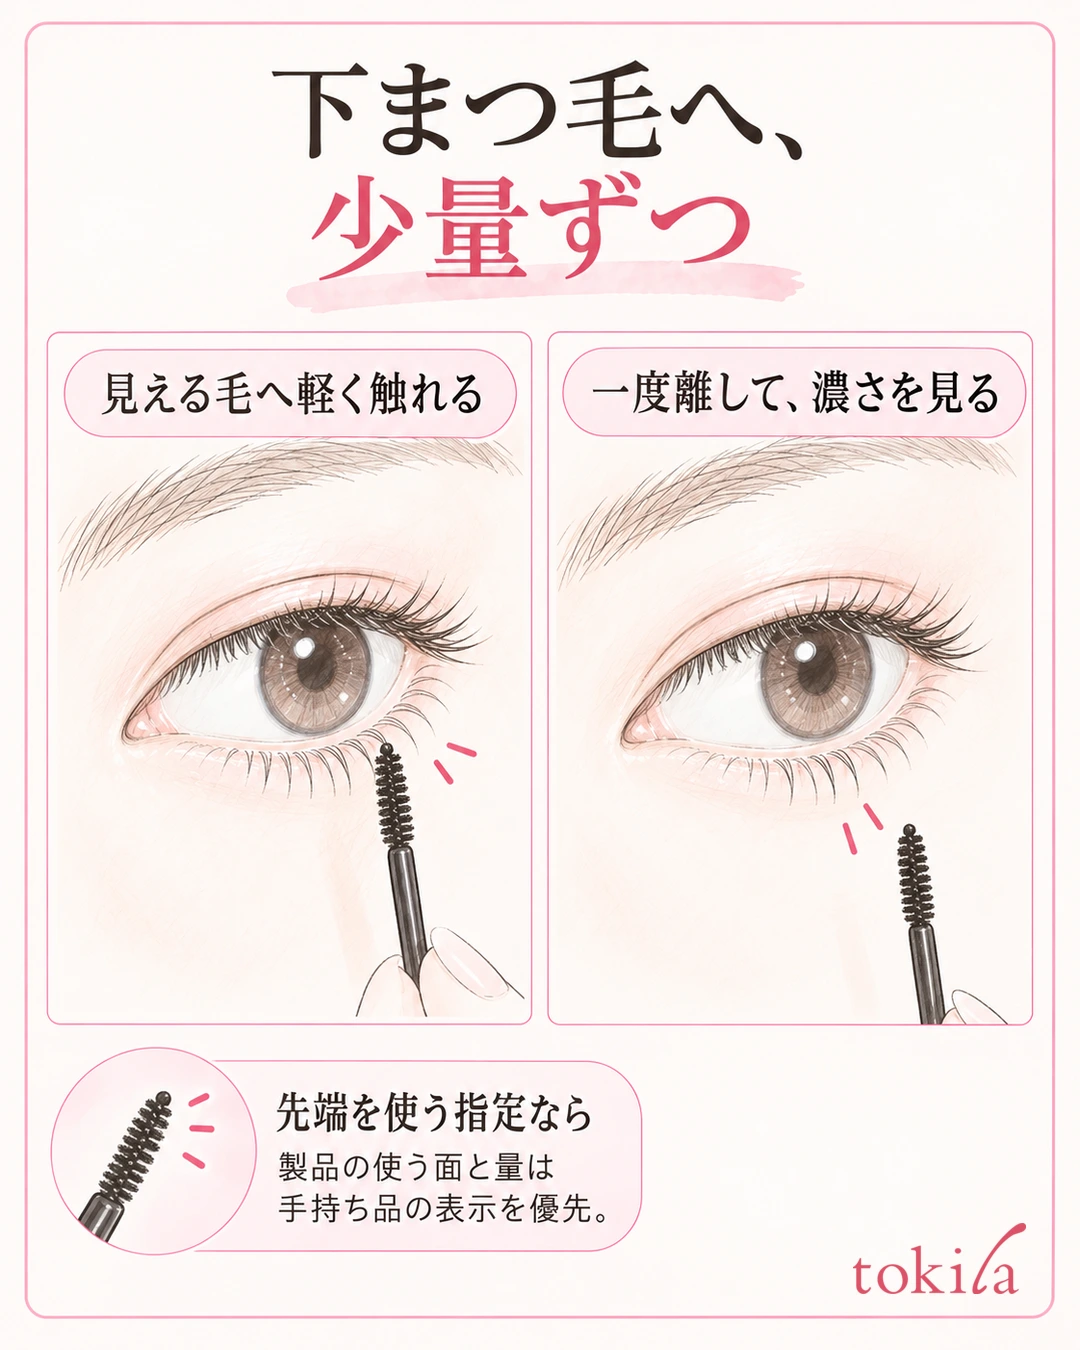
Some brush-type guides describe holding it upright and moving it a little from side to side. If your lower lashes are long, there is also guidance for holding it horizontally, so vertical is not the only correct way. If the product you have specifies using the tip, touch the lashes you can see with that side and start with a short stretch.
What you move is the lashes. Do not press the brush against the inside of the eye or the mucous membrane. Also avoid pressing hard on the skin to reach short lashes, or inserting the tip where you cannot see. Where it is hard to reach, pull away once and check the angle of the mirror and the side you are using.
After touching lightly, pull the tool away and look. Separate the lashes that have color from those that still feel lacking, and add only where needed. Do not make going back and forth the same number of times from the inner corner to the outer corner, or layering as thickly as the upper lashes, your finishing condition.
With a comb type, follow the product's method, such as combing with the tip pointing down. Do not replace a brush's instructions with a comb and swing it widely from side to side. If the teeth seem about to hit the skin, you feel resistance, or you cannot see the tip, decide first to stop adding more.
After applying to one eye, look at both eyes once before moving to the other side. If a small amount has colored the short lashes, there is no need to go back to the container and increase the product. Even on days you prefer a defined finish, the method of checking the depth step by step and stopping does not change.
It is fine to skip the lower lashes on some days, or to apply a small amount only at the outer corner. Applying to the whole lower line and partial use call for different amounts of product and different areas to check. Rather than forcing yourself to pick up short lashes to even out the left and right, stop within the range you can touch.
4. Do not pull dried clumps; decide the area to fix and redo it
If it looks too heavy after applying, first stop adding new product. Check whether you can tidy it with a dedicated comb before it dries, or whether the product specifies not to touch it after layering. When you want to lighten the depth, layering more wet mascara does not reduce the amount of product.
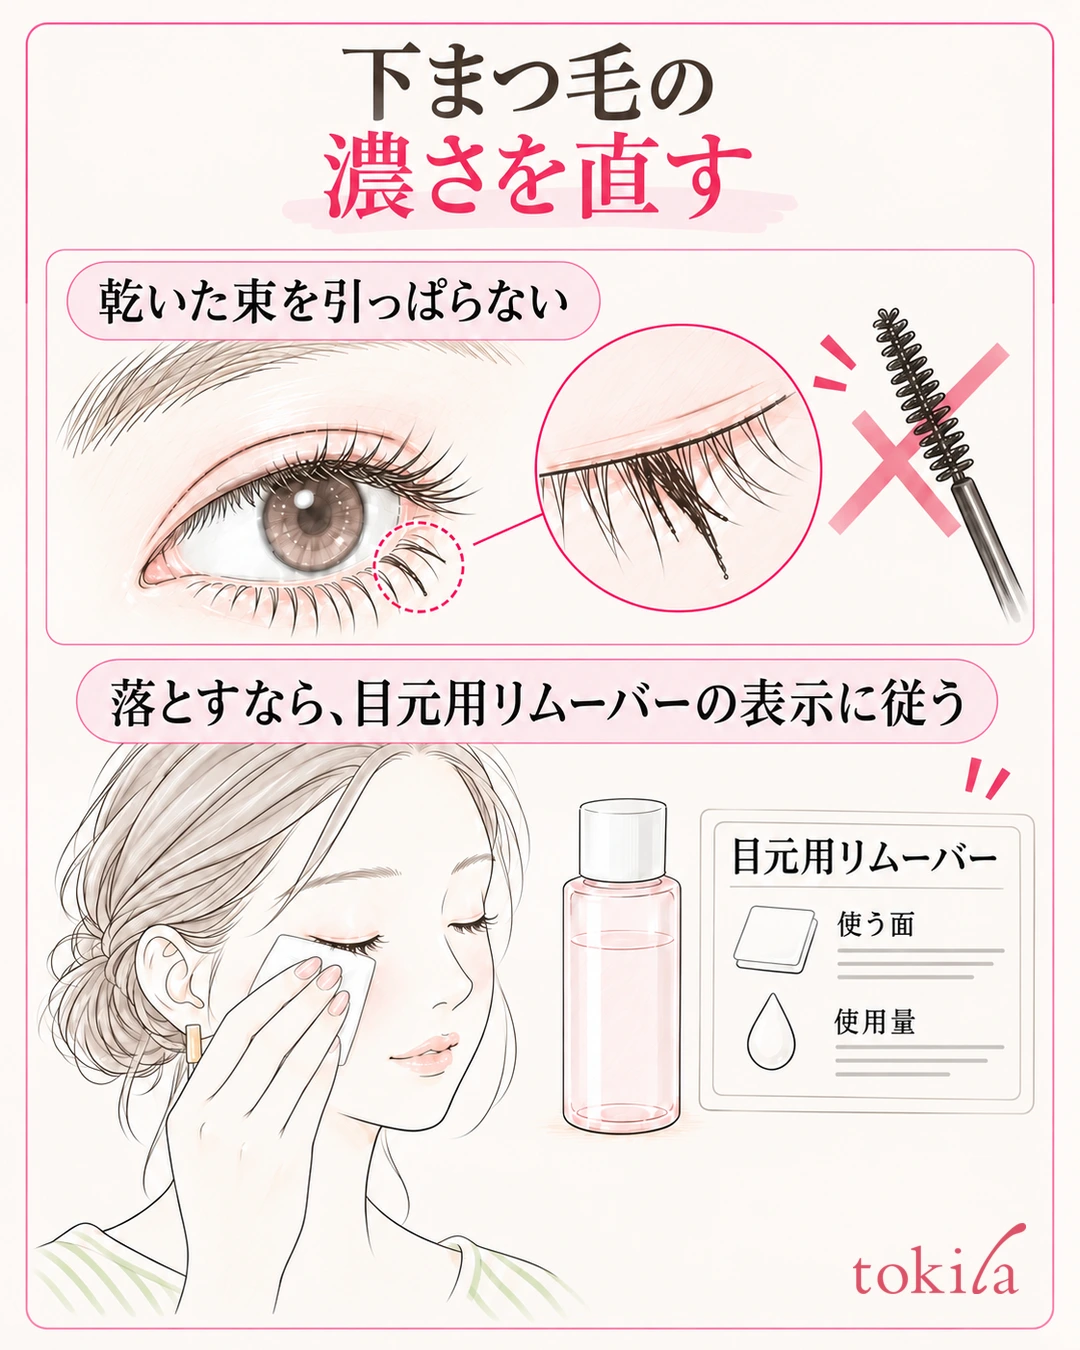
Do not pull hardened clumps with your fingers, separate them with a fingernail or a sharp object, or run a dry comb through them forcefully. When the lashes resist, do not keep trying to even out the shape; consider whether to remove and redo, or to finish today without adding anything.
If you remove part of your lower lashes, use a remover that is safe for the eye area, in the amount, with the tool and with the blending method specified by that product. Even with dedicated products, whether to shake first, how long to leave it on and which direction to wipe are not always the same. If cotton or a swab is specified, prepare clean ones, and do not try to scrape it off with force.
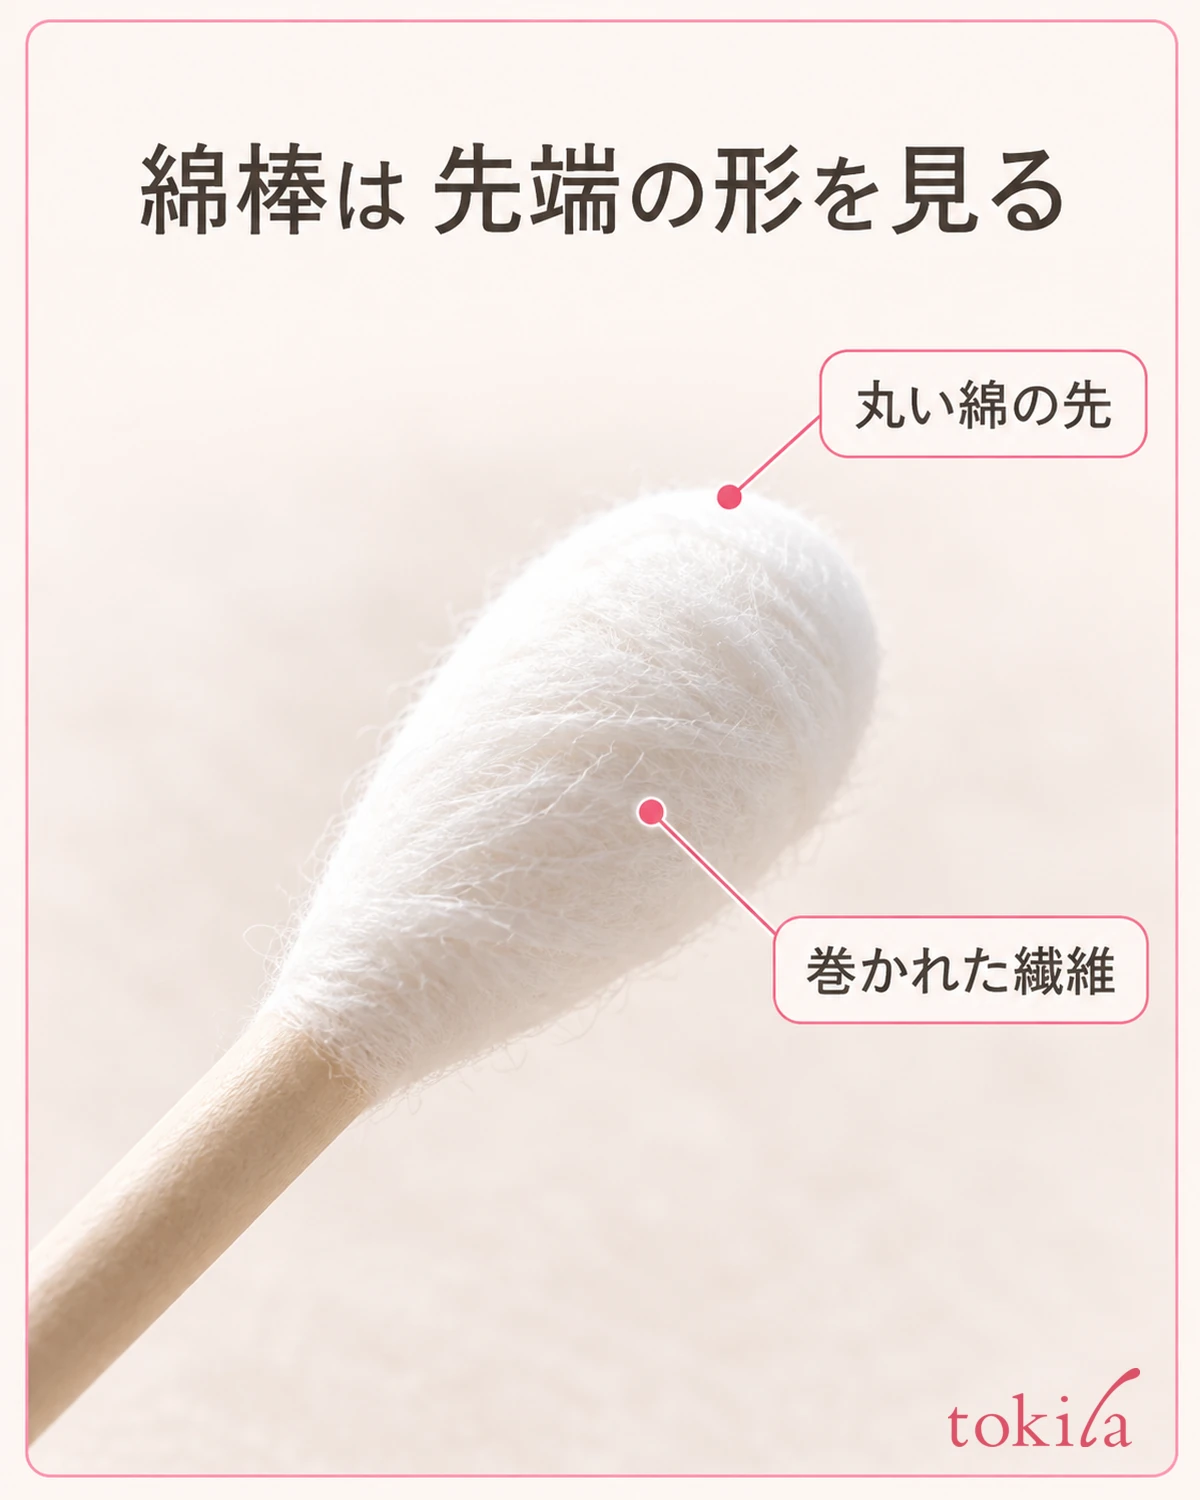
Treat dots on the skin separately from product on the lashes. However, first check whether the remover you use is suitable for the eye area and the instructions of the product you have, and do not assume any emulsion or oil will do.
After removing, look in the mirror to see whether the product has spread to the surroundings and whether it has removed the base you needed. If a follow-up step is specified after the remover, complete it, and do not hurry to draw again on a wet surface. If the area to redo is growing, there are times when it is better to redo that part of the eye makeup once than to repeat small corrections.
On days when you have pain or discomfort, do not keep working to even out the finish. You can finish your makeup without emphasizing the lower lashes. If you are unsure how to remove waterproof products, also see how to remove them by checking the labeling and the follow-up steps.
When you apply to the lower lashes again after redoing, also start from the first thin state. Do not try to make up for what you removed all at once; go back to the order of touching, pulling away and looking. If any color remains, check whether you need to layer more product there before adding it all over.
5. Decide when to stop using both eyes and your whole face, and review the amount for next time
Finally, look at both eyes together with a natural expression. Check in order the clumps, the dots on the skin, and the depth that stands out only on the lower side, and stop adding once you have tidied what bothers you. Do not make the first adjustment matching the other side by making it darker just because you applied one side heavily.
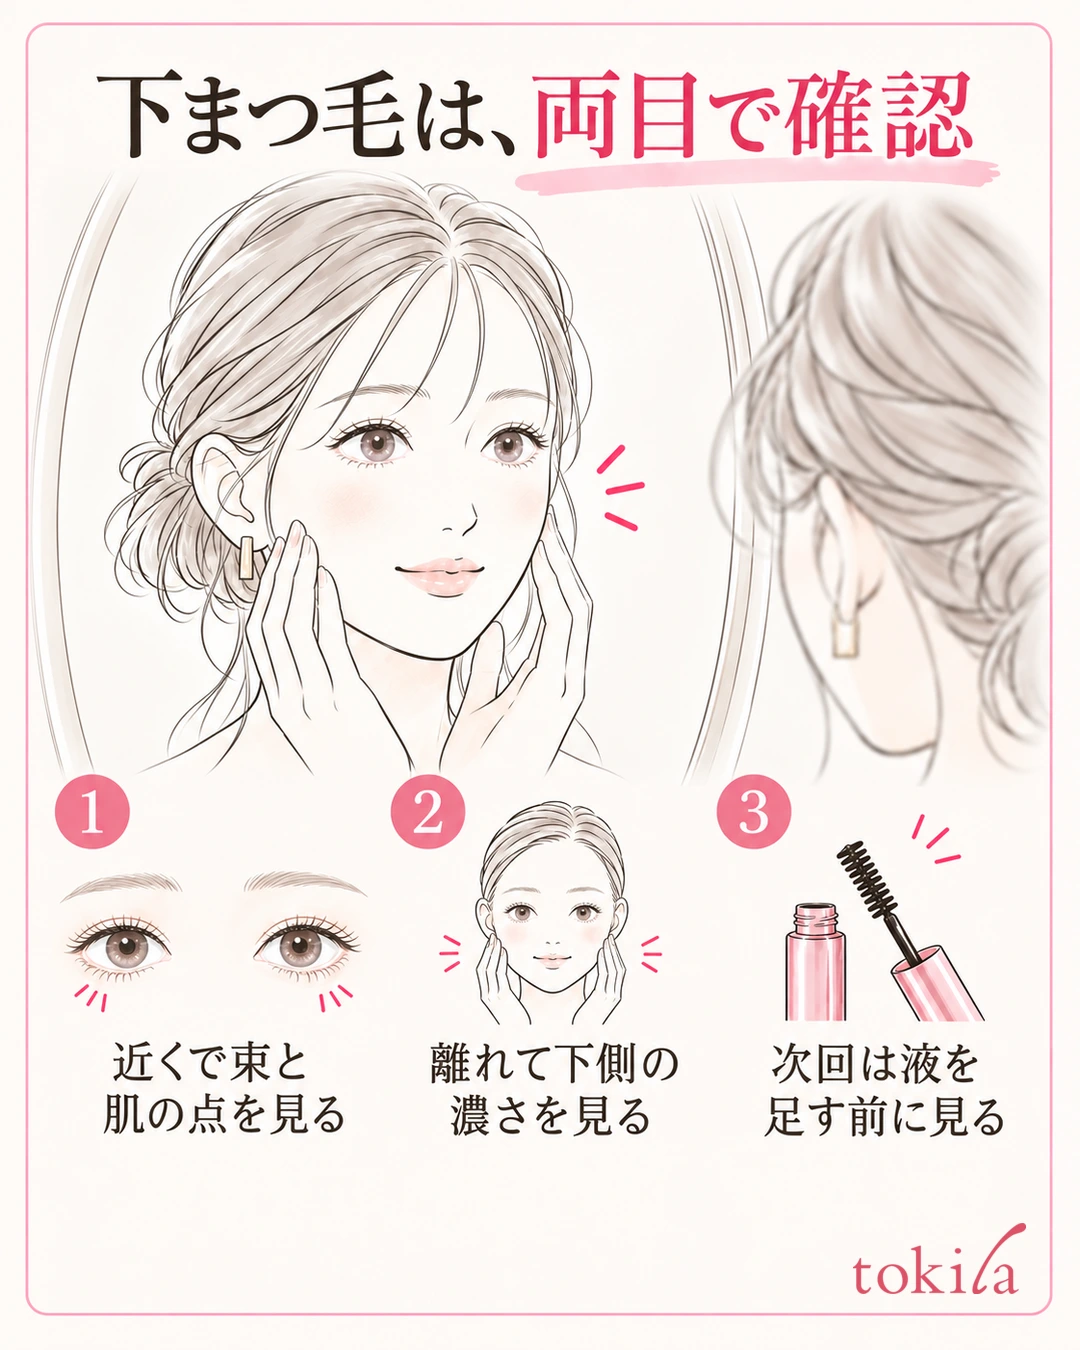
If the lower lashes alone still look strong in a mirror at a distance, keep the option of finishing lightly today. Switching from black to another color is an option, but changing the color does not necessarily solve the amount of product or its sticking to the skin. First check how you layer the product you have and the area you apply to.
For next time, make just one note: "look before picking up product for the lower lashes again." If you change the color, tool, amount of product and mirror all at once from the start, it becomes hard to trace why it became easier to handle. If the first amount was too much, choose the amount; if you could not see the tip, choose the mirror, matching today's trouble spot.
When you finish, wipe the product from the rim of the container as the product's guidance says, and close the cap firmly. Do not put a dirty tool straight into your pouch, or move on to the next makeup step with it left open. Review how the product comes out next time, including storage.
When thinning your lower lashes, first look at the lashes and the skin separately. Check the tool's labeling, touch the lashes you can see with a small amount of product, and then pull away. Do not pull hard on the over-dark parts, and if needed, remove and redo by the specified method. In this order, you can sort out, step by step, the cycle in which the more you add, the stronger the area under your eyes gets.



