
Your cheeks look too intense after applying blush, or what you meant to blend has spread over a wider area. When that happens, before adding another color on top of the dark spot, look separately at how strong the color is, where its edge is, and the condition of the base underneath. For powder blush, work in this order: lightly tidy it with a clean brush that has no fresh powder on it, and only if needed, thinly touch up the base.
This article explains how to fix powder blush that has been applied too heavily, and how to adjust the amount next time. Cream and liquid blushes do not necessarily respond to the same method, so follow the product's directions first and think in terms of partial fixes rather than spreading the color further.
1. Tell apart the intensity, the edge and a disturbed base
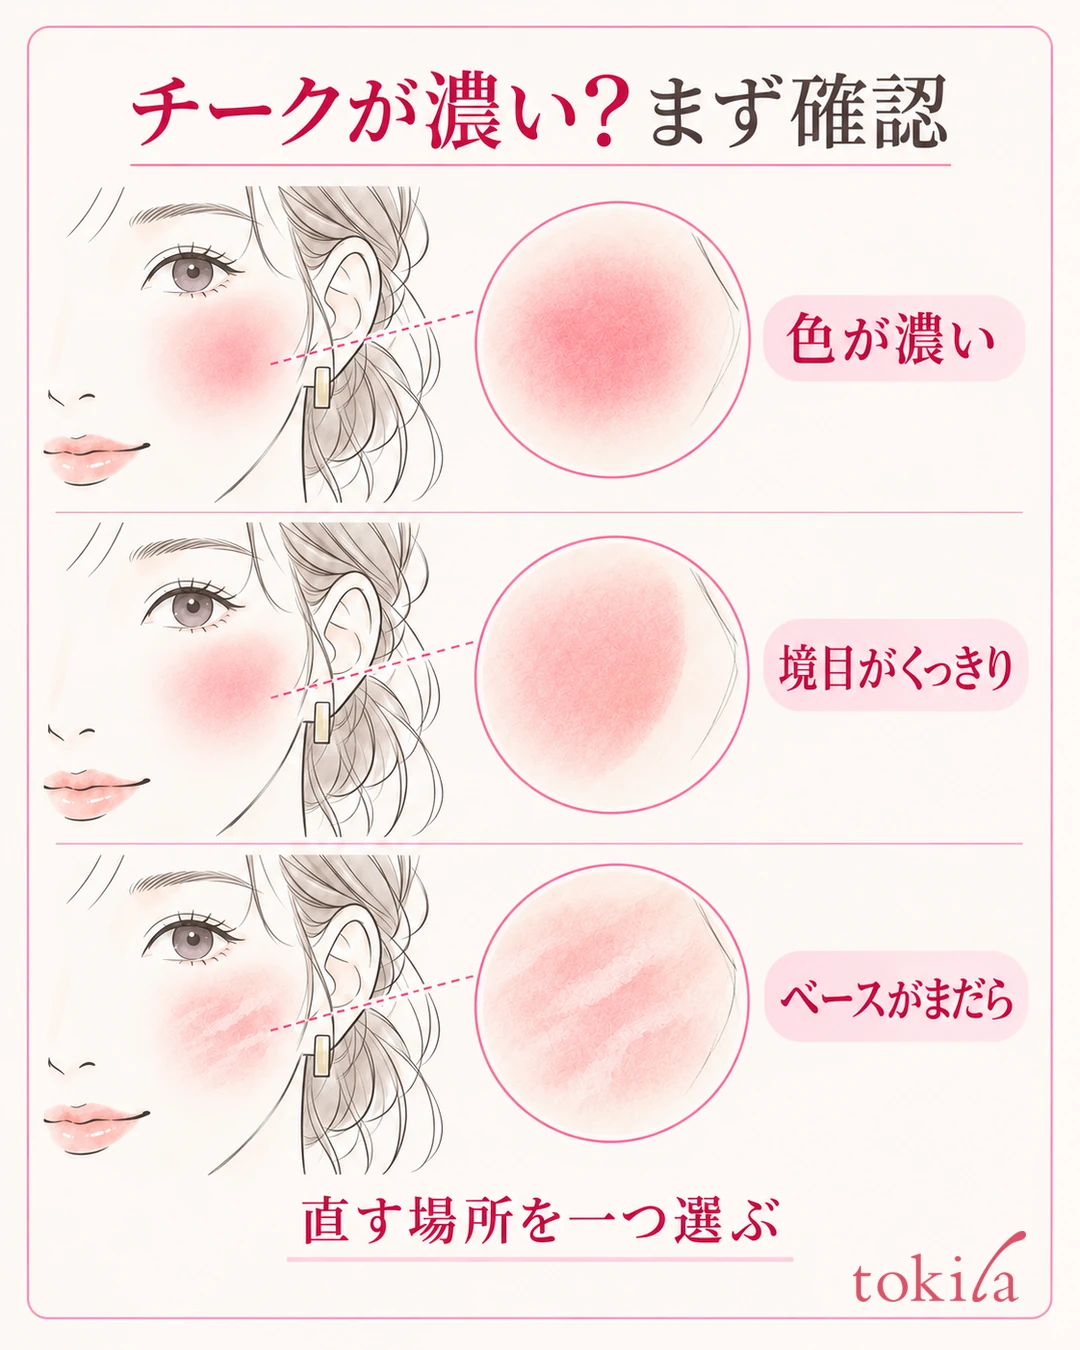
Step back a little from the mirror and look at both cheeks together with your eyes and mouth. Then move closer to the cheek that bothers you and check which is the main problem: "the color at the center is strong," "only the outer edge stands out," or "the foundation underneath has become patchy." Narrowing down why it looks too dark makes it easier to decide where to touch and which tool to use.
If the color at the center is strong, think back on whether you layered it in the same spot several times, even if you meant to add only a little. Simply spreading the color outward can make the color of the whole cheek stand out. Consider this order: first lightly tidy the dark area, and only if it still looks strong, adjust with a thin base.
If the edge is sharp, don't try to erase the color at the center; look at where the blush switches over to the surrounding skin. If softening the outer edge a little is enough to make it look calmer, there is no need to layer fresh powder on the center. Rather than trying to make the height and width of the left and right sides exactly the same shape, check which cheek looks stronger across the whole face.
If there are streaks or patches within the color, look not only at the blush's intensity but also at whether the base underneath has shifted. The steps just before also give clues, such as having rubbed with the brush over and over as if polishing, or having layered powder over a base that had not yet settled. If you add more blush to hide the patches, you tend to end up having to fix both the color and the base.
Check under the same light. Facing only one side toward a window or tilting the mirror can make you mistake a difference in light for a left-right difference in blush. After looking straight ahead, turn your face a little to each side to check the sides too, then return to the original position. If you use a photo, don't judge the intensity from an image with skin-smoothing or color filters applied.
If the issue is less the intensity of the cheek alone than how it goes with your lip color, matching lip and cheek colors may help. For now, focus first on adjusting the amount and edge of the blush you have.
2. Lightly blend powder blush without adding new color
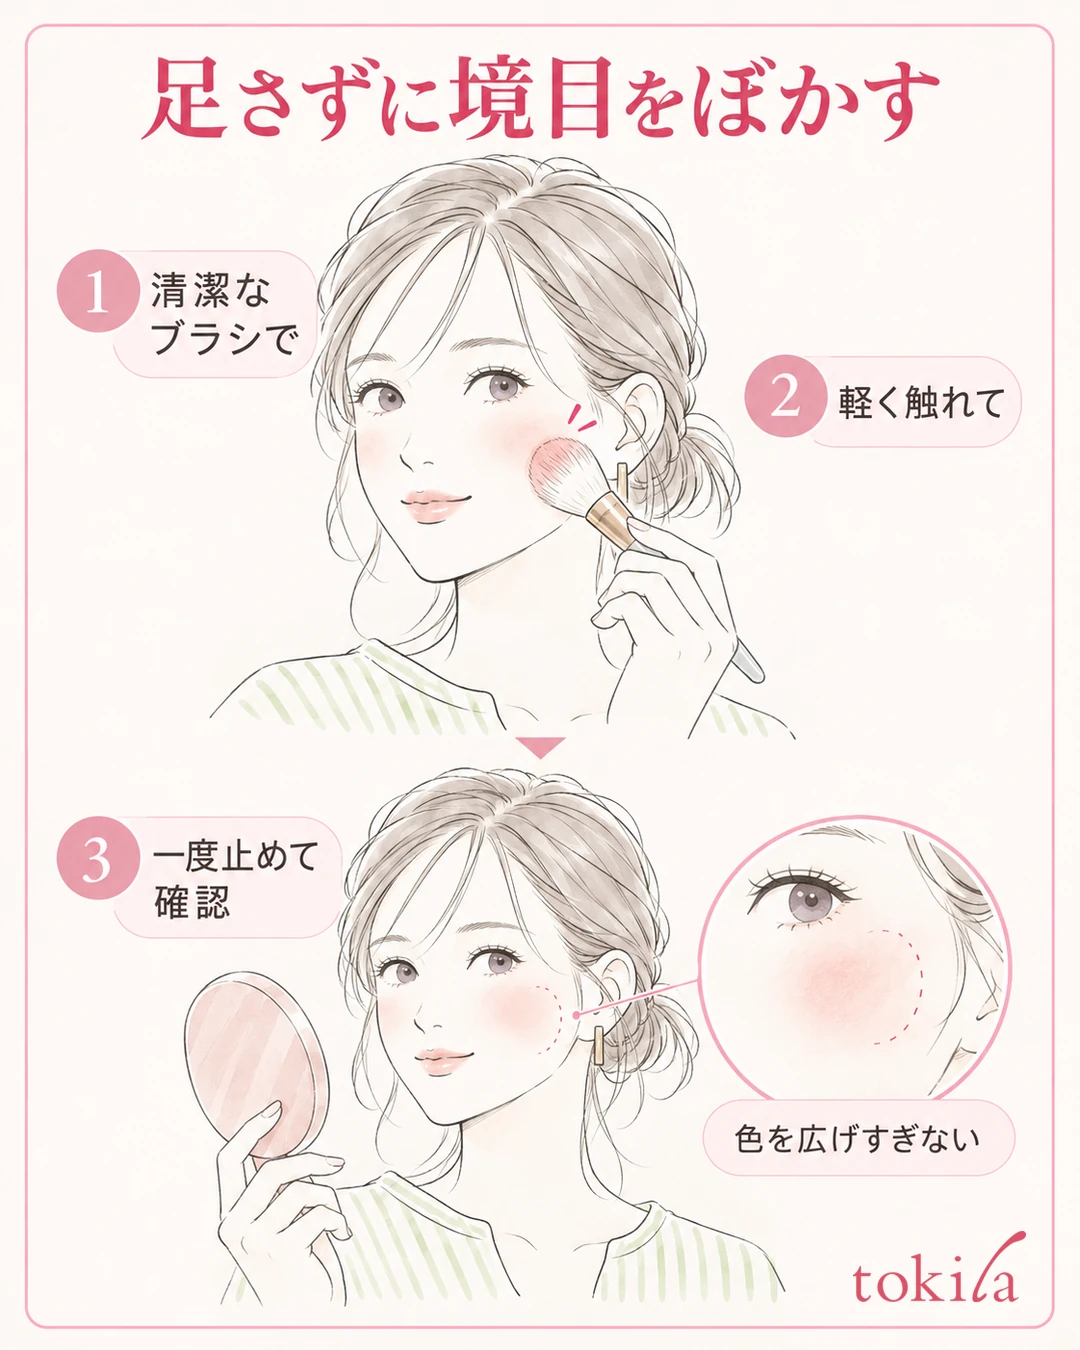
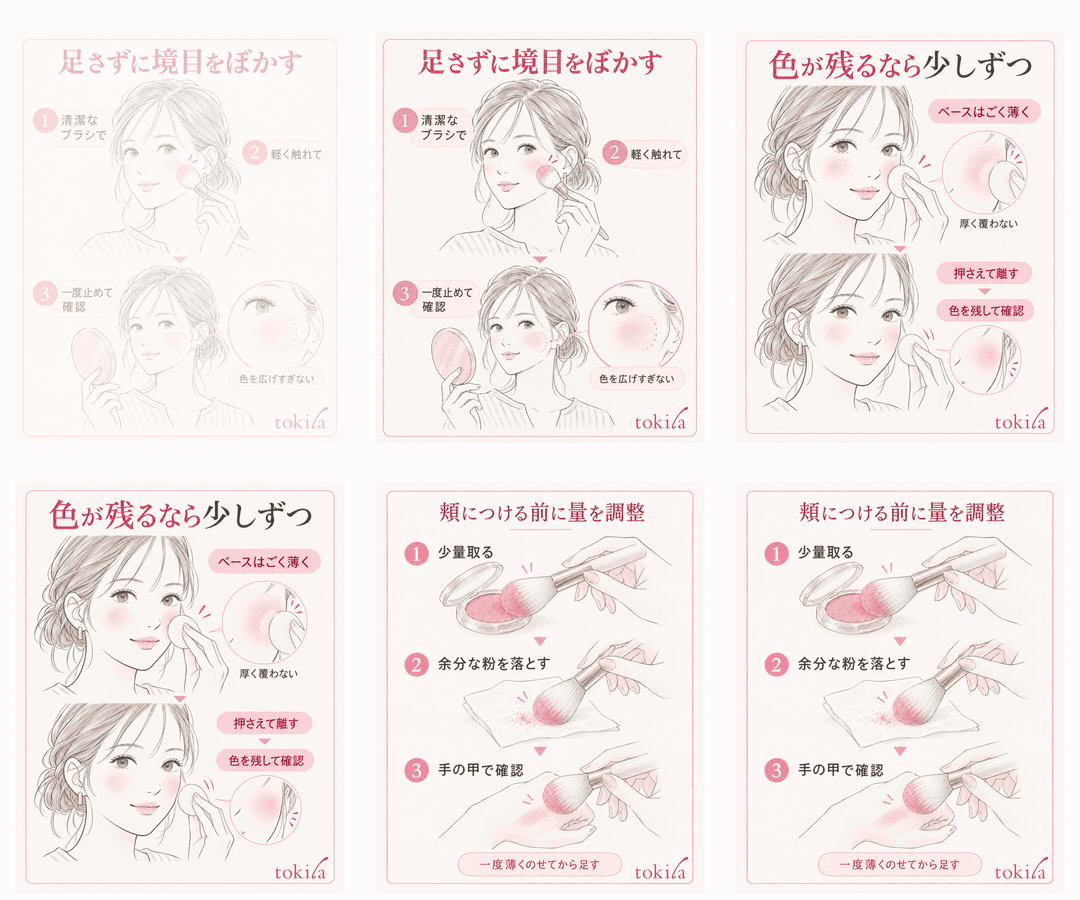
When the color or edge of powder blush is strong, prepare a clean, soft brush that has not picked up any fresh blush. If powder remains on the brush you usually use to apply color, using it as is may add color.
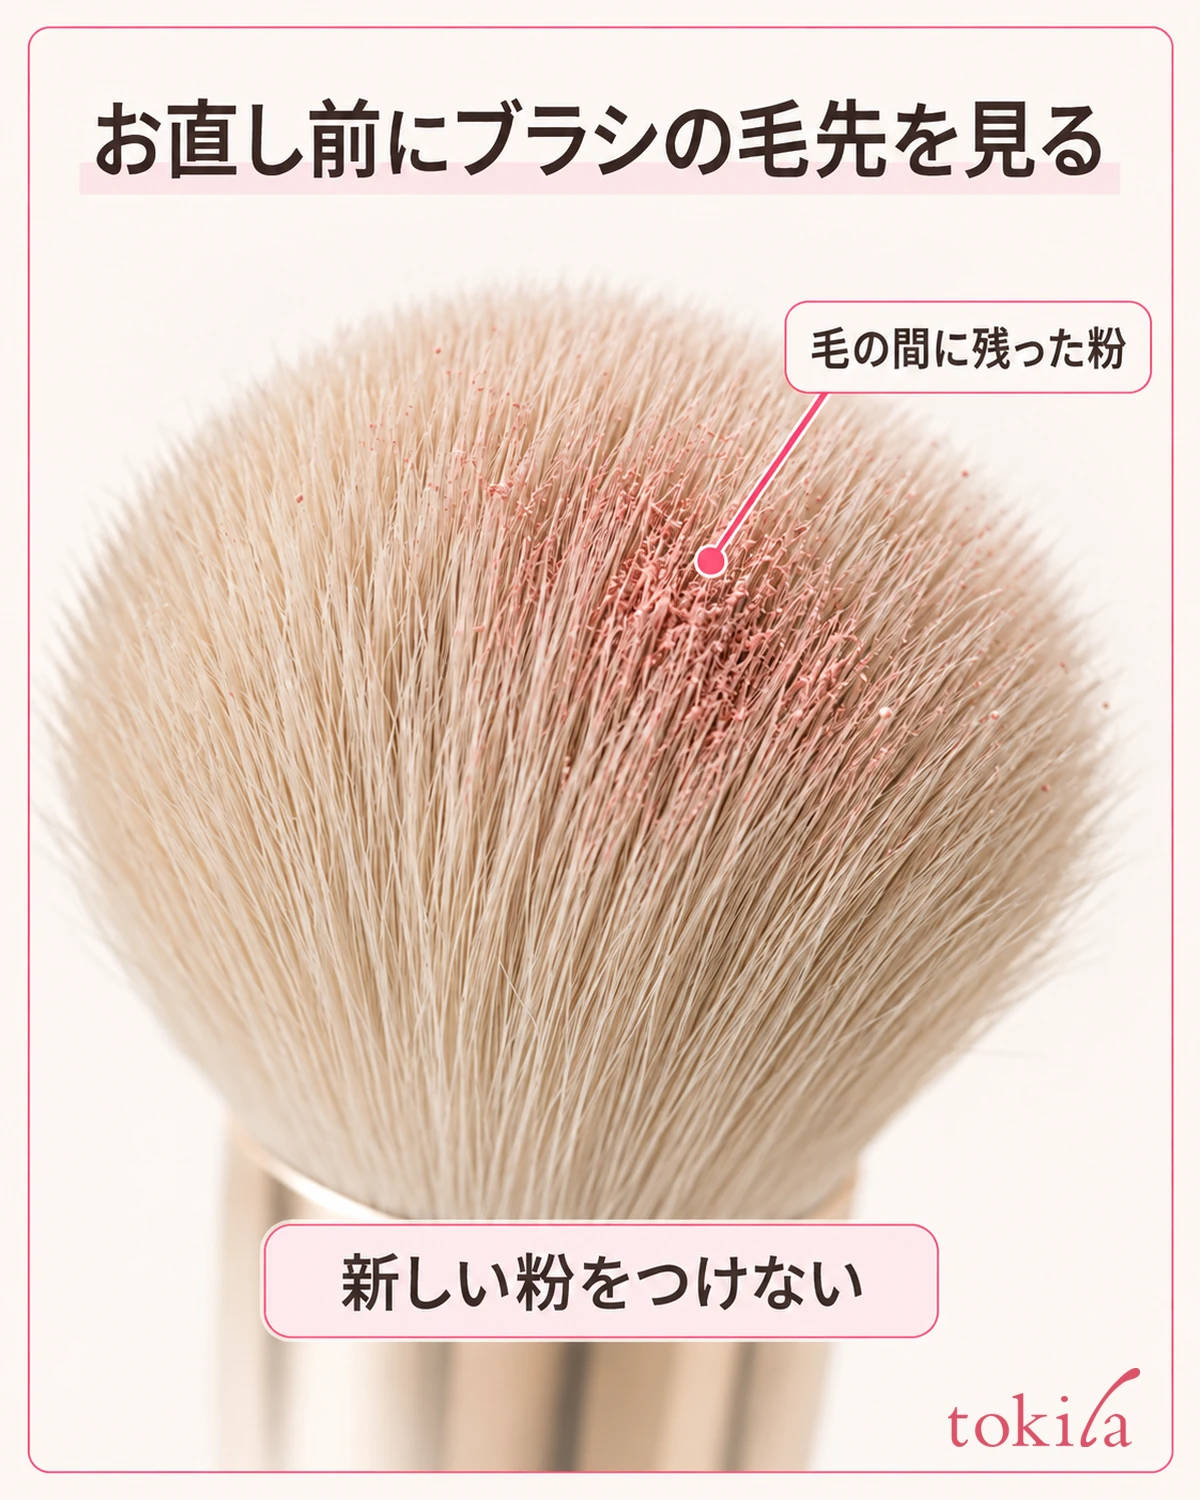
Without pressing hard on the skin, let the bristle tips softly touch the surface that bothers you. Before making many large passes, stop once, step back from the mirror and check how the color has changed.
If only the edge bothers you, lightly touch near the outer rim and blend in a small area. Be mindful of where you move the brush so you don't carry color to the sides of the nose, under the eyes or around the mouth. Don't decide to "blend widely to make it lighter"; the key is not to needlessly increase the area the color covers.
If the intensity at the center also bothers you, lightly sweep off the dark area and then check. There is no need to press harder to lift powder, or to stand the bristle tips up and rub again and again. If a change appears, such as the base underneath thinning or streaks forming, stop working that spot with the brush and switch to the partial correction described next.
Gently touch a clean surface of the brush and lift it away, then see how it looks without dragging it sideways. Here too, don't load a lot of fresh powder from the start; first see how the color already on your skin changes.
For cream and liquid blushes, don't apply this powder-sweeping step as is. Rather than forcing set-in color to move with a brush, tidy a small area with the fingers, sponge or other tool specified. If set color won't move, decide whether to partially remove it and start over rather than increasing the number of rubs.
3. If the color stays strong, adjust little by little with a thin base
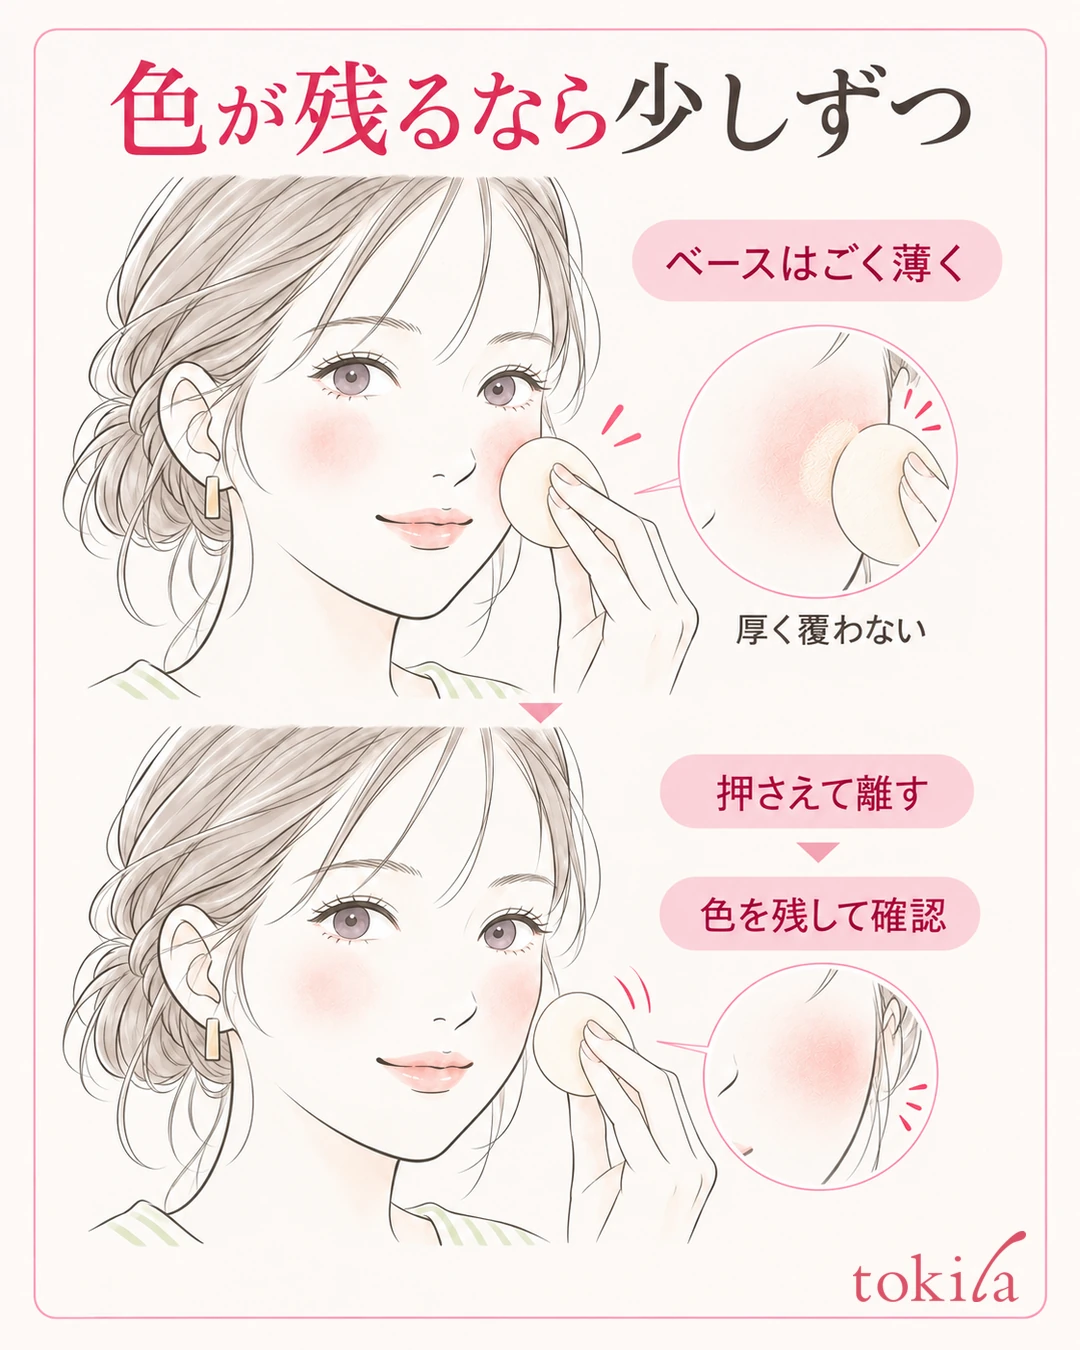
If the powder blush color still looks strong after a light touch-up, consider using a foundation that suits your usual skin tone in a very thin layer. Rather than covering the whole cheek, layer a small amount only on the spots that look strong and adjust while keeping the color. Keep to what you can comfortably do with the base and tools you have.
Take a small amount on a clean sponge or similar, press lightly on the dark area, and lift. After touching once, check, and add only to the places that still bother you. Dragging across the skin moves the blush's range and the base underneath as well, so it is important not to try to redo a wide surface all at once. Follow the foundation's directions for the tools and how to layer.
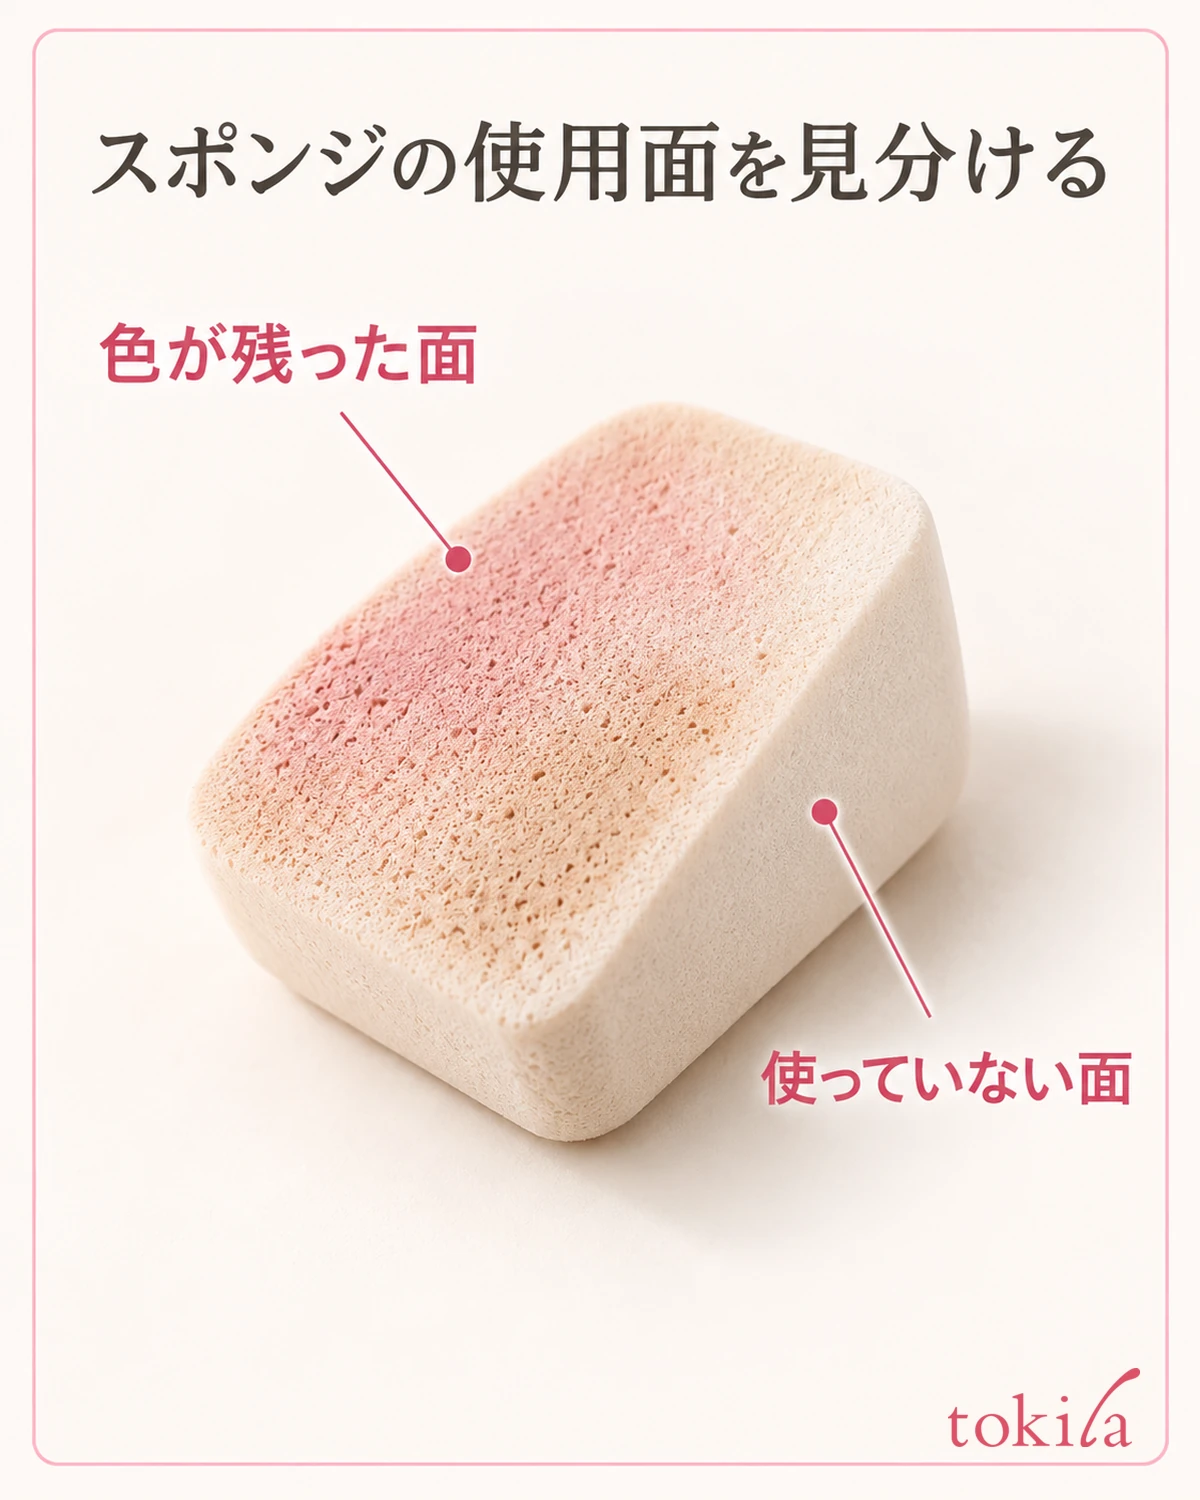
The aim here is not to hide the blush completely. Once the color on your cheeks has calmed down a little and the transition to the surrounding skin looks blended, stop there. Covering it strongly with a white base or filling in the dark spot thickly with concealer can change the texture or brightness of just that area.
You can also lightly blend with face powder, but avoid layering it repeatedly over a powdery spot. If you use it, try a thin layer once and then check. If the skin looks whiter the more powder you add, also refer to how to tell when you've applied too much face powder and stop layering to hide the color.
If streaks or patches stand out and a thin touch-up doesn't even them out, it may be easier to remove the blush and base from just that area and rebuild. Follow the directions for the makeup remover you have and work on a small area. After removing, settle the oil and moisture left on the skin, then put back the needed base and blush thinly.
If you have limited tools when out, don't try to redo your whole face; stop at tidying the cheek that bothers you most. If a disturbed base is the main concern, makeup touch-ups for shine, creasing and dryness lets you check the order that suits your skin's condition.
4. Next time, adjust the amount on the brush and layer thinly
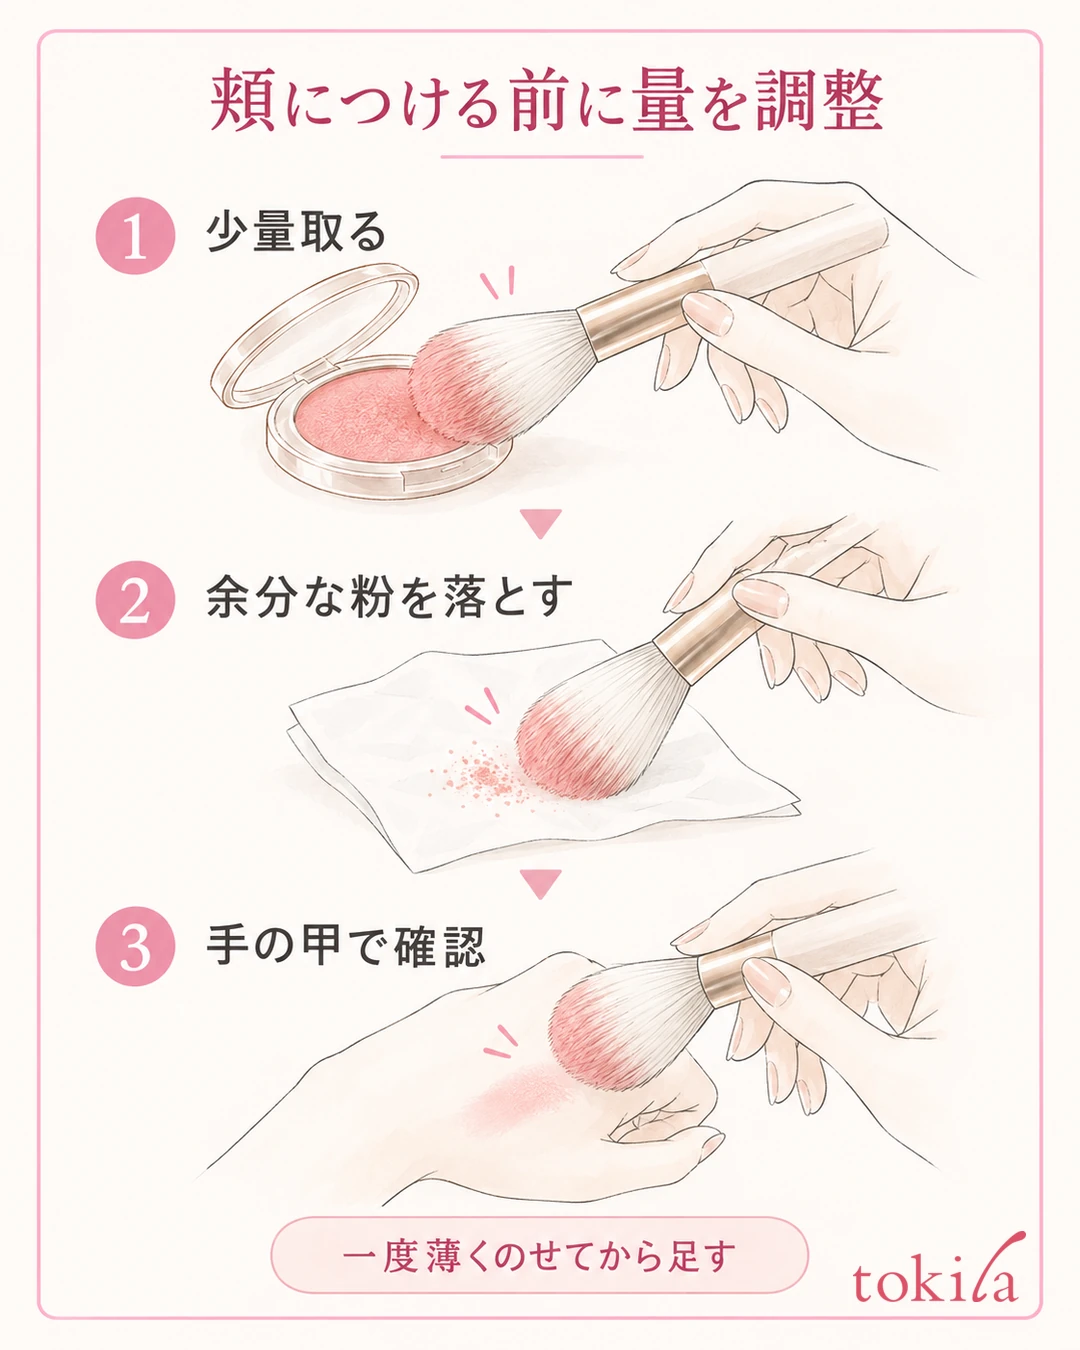
To prevent applying too much next time, adjust the amount of powder on the brush before touching your cheeks. Take a small amount on the brush specified for the product and check that the powder isn't clumped in one spot on the bristles. The included brush and a large brush you already own pick up powder differently, so don't decide the amount just by "taking it the same number of times as always."
Lightly touch the brush to a clean tissue to drop off excess powder. Rather than tapping it hard against the edge of the case, adjust quietly, a little at a time.
Next, check how the color shows on the back of a clean hand. The back of the hand is a clue to the amount on the brush, not a guarantee of the finished color on your cheeks. Even on a face with the base finished, apply thinly at first and check.
On the skin, apply color to the area you decided on with light pressure. Even if the color seems hard to see, don't immediately load the brush again; step back from the mirror a little. Only if it's not enough, make the same preparation, add a small amount, and stop after each application. Just because one side has become darker, you don't need to build up the lighter side to the same depth. Adjusting the darker side is also an option.
There is no way to say how many grams or how many brush strokes is right for everyone. It changes with the product's color payoff, how it picks up powder, and the brush's bristle volume and size. On days you use a new product or a freshly washed tool, don't take a lot by your old sense; adjust from the directions for use and how it actually applies.
5. Check the finish on the whole face and choose one condition to revisit
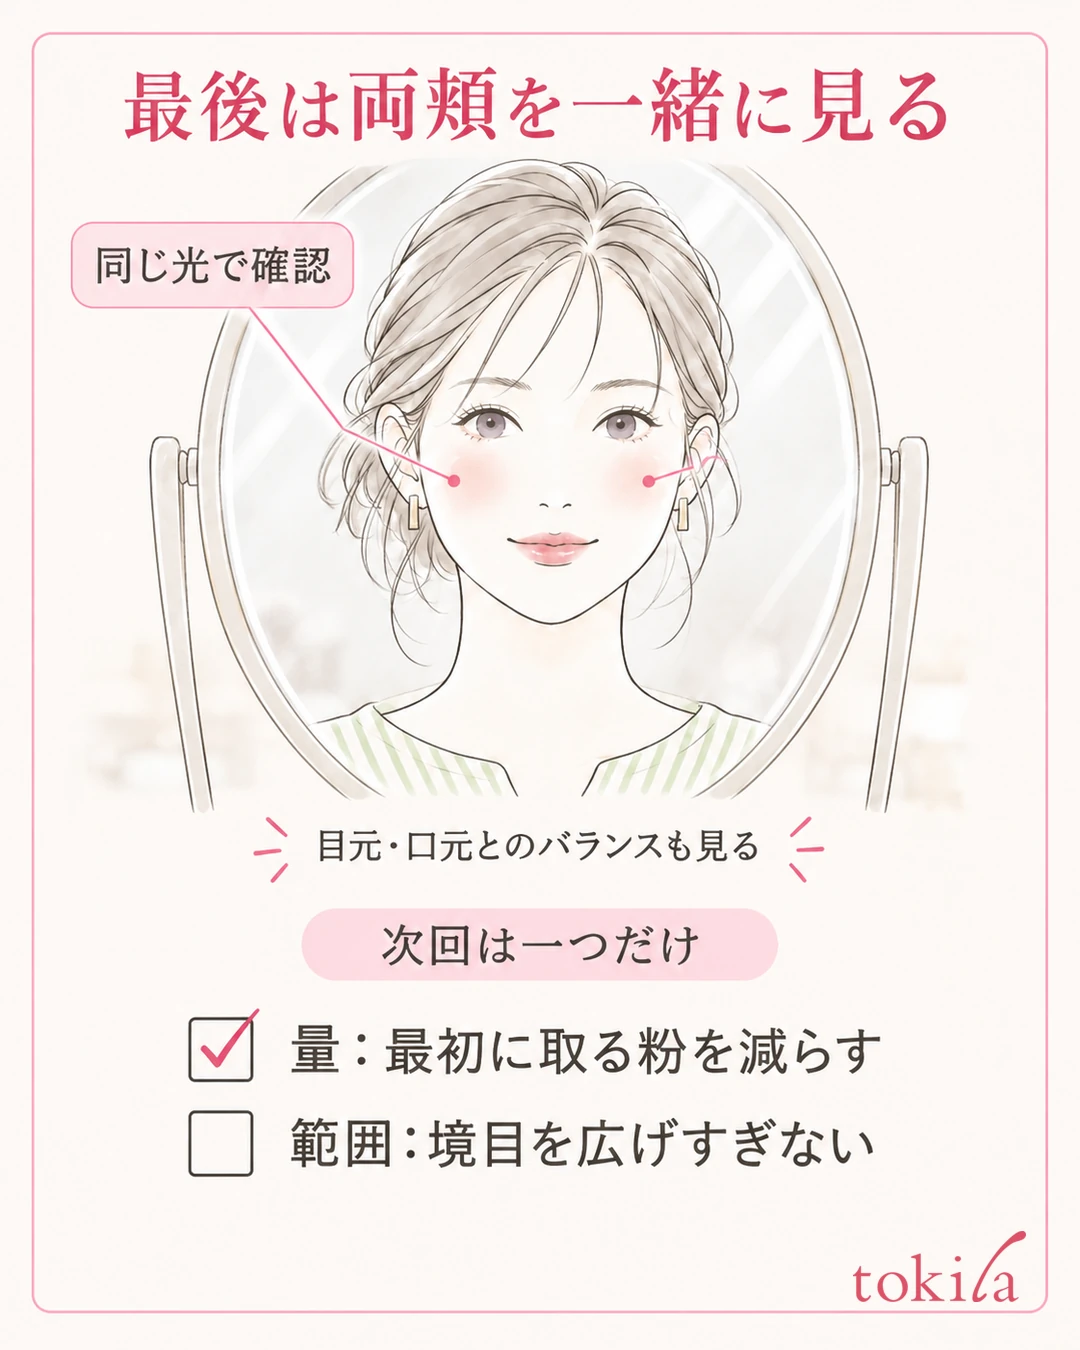
To finish, step back from the mirror and look at both cheeks together under the same light. After checking the intensity and edge from the front, turn slightly to the side and see whether the color has spread at the sides. Then bring your gaze back to your eyes and mouth and check whether the cheeks look too strong compared with the feature you want to be the star today.
Makeup that colors the cheeks firmly is also an option. There is no need to think that "strong blush is always a failure." Decide based on whether the amount or the edge bothers you relative to the finish you are aiming for. If you want to think about the strength of all three parts together, combining eyeshadow, blush and lip color may help.
If you tend to apply too much repeatedly, choose one condition to change next time. For example, reduce the powder you take at first, make the movement that widens the edge smaller, or check the amount with the specified included brush. Rather than changing the product, tools and base all at once, it is easier to look back and see which adjustment made things easier to handle.
In your notes, record "the blush you used," "the tool," and "where it looked dark." If you write "strong when layered on the center of the cheek" or "only the edge bothers me," it will be easier to decide the amount and where to move next time. If old color remains on your tools, refer to caring for brushes and sponges, tidy them by the specified method, and let them dry fully before use.
If the finish still doesn't suit you after adjusting the amount and range, choose again using the official color and texture descriptions or by consulting in store. Before buying more, putting into words what you want to change, the intensity, the edge or the texture, will narrow your options for what to try next.



