
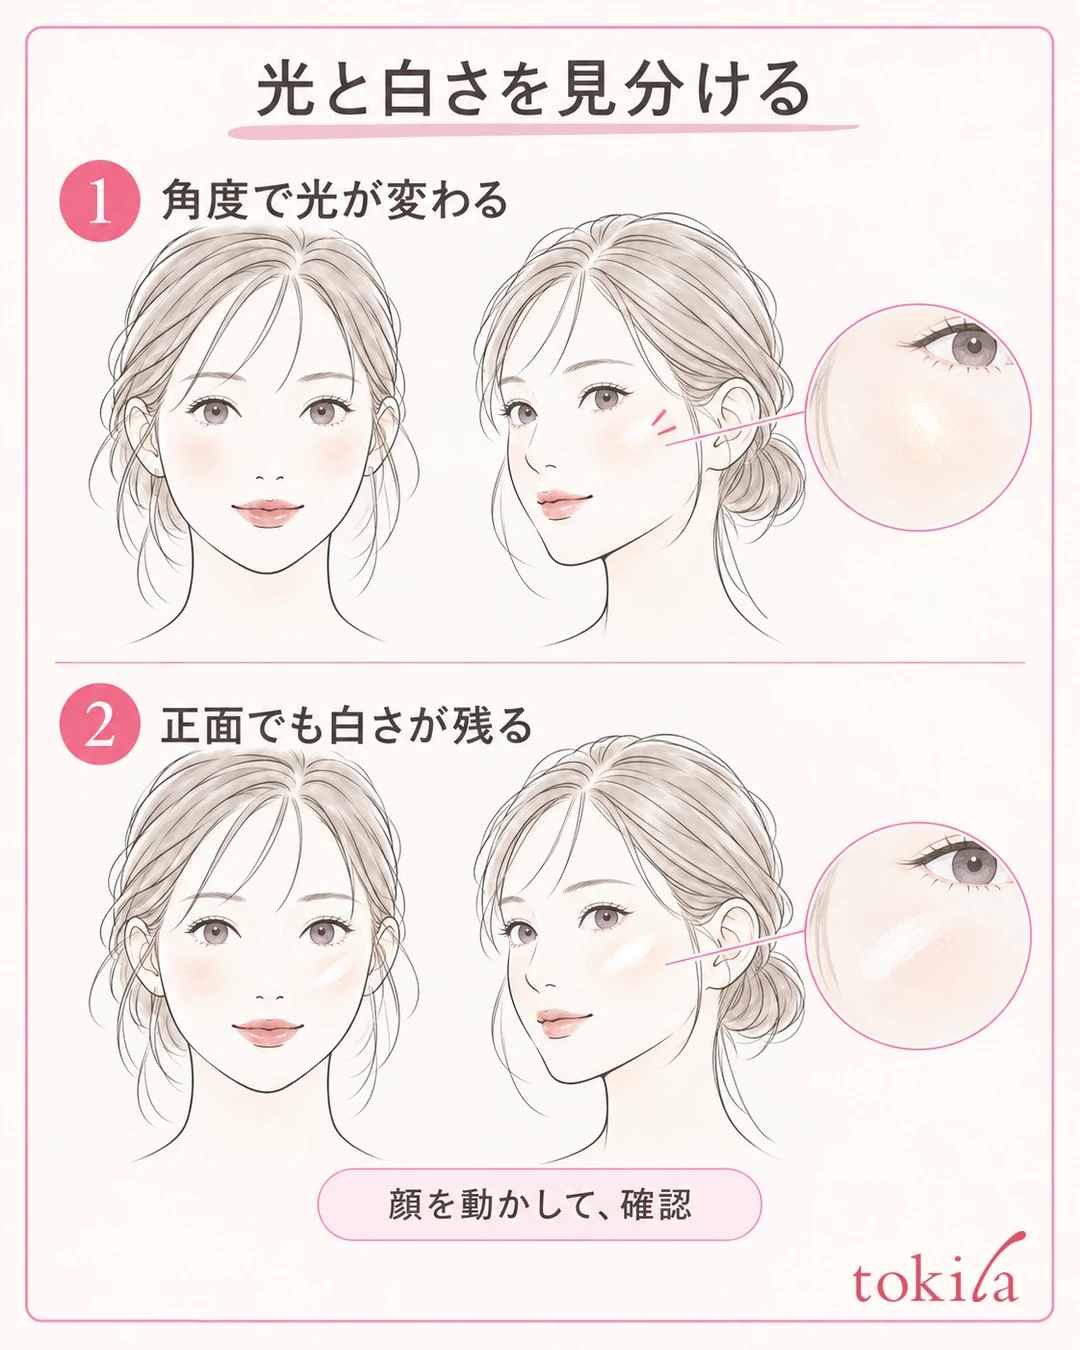
You applied highlighter, and now your cheeks look like a white band, the glowing area is too wide, or the edges are sharp. When that happens, don't add new color or powder right away. First, move your face a little in the mirror. The order of adjustments depends on whether only the reflection is strong, a white tint remains even from the front, or the foundation underneath has shifted.
This article focuses on cheek highlighter. It explains how to tell when you've applied too much, how to adjust powder and cream products, and how to decide the amount and area for a thinner application. It is a process for finding the glow you want to keep, not for removing all the shine.
1. Move your face and separate reflection, white color, and base breakdown
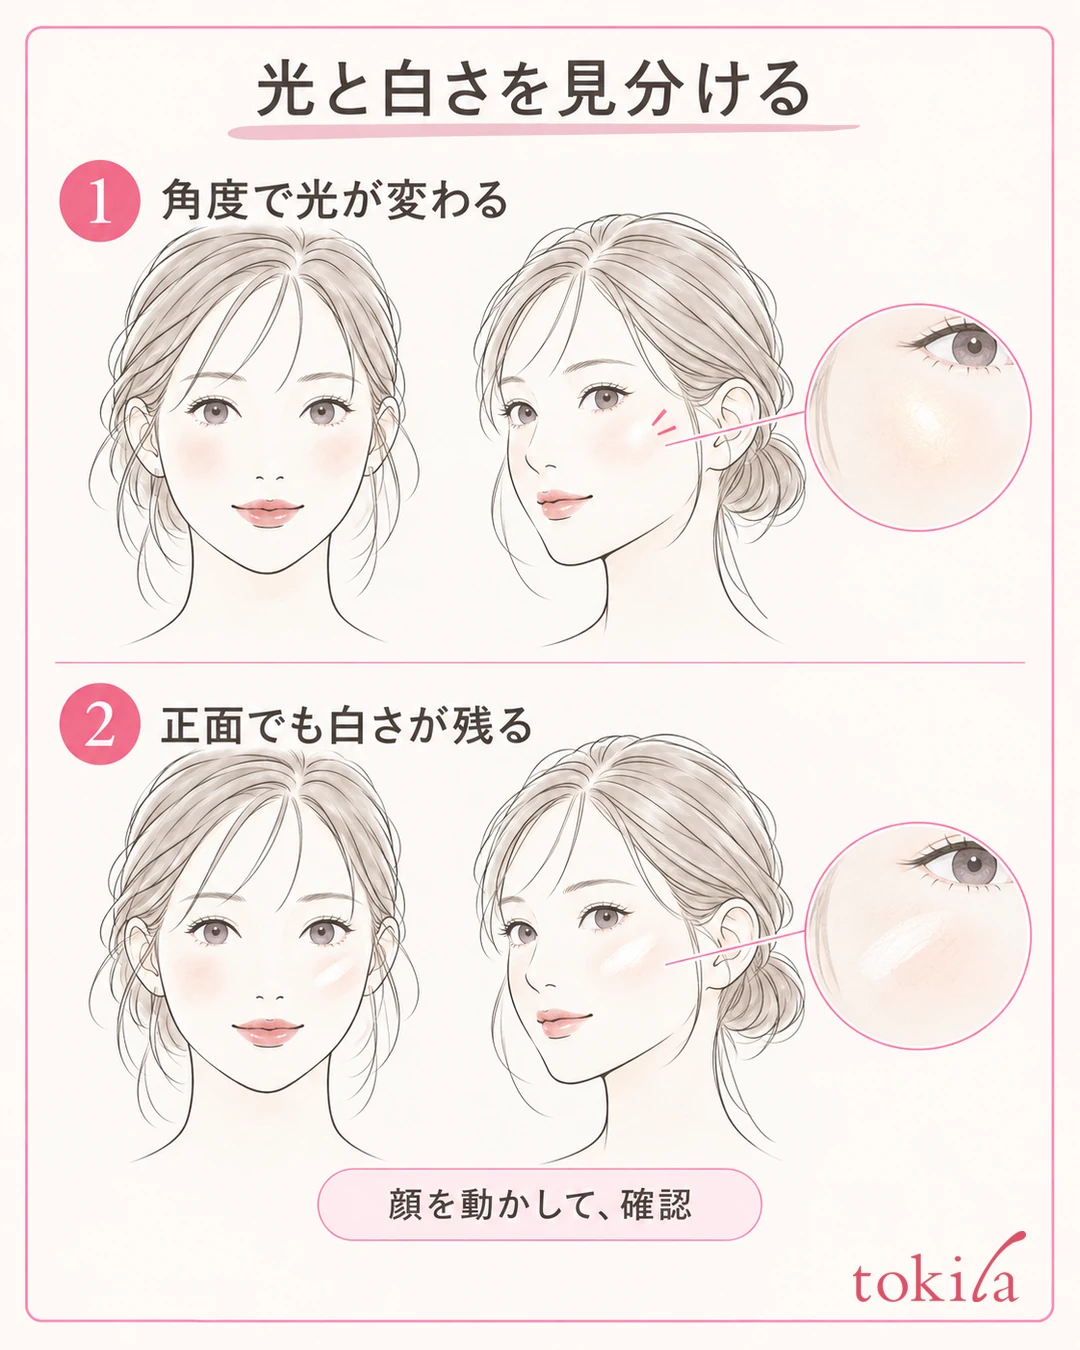
First, bring the mirror close and check which part of your cheek bothers you. Then step back to a distance where you can see your whole face, and look both from the front and from a slightly turned angle. If the light looks strong from only one angle and blends into your skin when you face forward, you are at the stage of checking how the reflection looks. You don't need to wipe everything off right away.
If a white band remains when you change the angle, or if the color boundary with the surrounding skin is clear, review the color, the amount, and the area you applied. If there are streaks where your finger touched, or the foundation color has come off, adjusting the glow alone isn't enough. Think of the highlighter on top and the base underneath separately.
In a bathroom where the light comes from one direction, the light can look different on the left and right. Slowly change the direction of your face in the same spot, and avoid comparing by turning only one cheek strongly toward the light. Check in a bright place too, but there's no need to face direct sunlight and look only at the strong reflection.
If you're not sure which state you're in, put your problem into one phrase, such as "a white tint remains," "the glowing area is wide," or "the base has moved." Even if you feel your pores or skin texture stand out, you can't determine the condition or cause of your skin from a diagram alone. Deciding whether you want to tone down the color or narrow the area today makes it easier to choose your next step.
Also check whether your product is a powder or a cream, and what tools you can use and in what order. Even when the name includes "highlighter," the texture and use are not all the same. Whether you can use it around the eyes should also be judged by each product's instructions, and you shouldn't extend a description meant for the cheeks directly to the eyelids.
If your main concern is overall shine on the face or foundation creasing, go to the order for touching up makeup. Here, we focus on the amount and the edges when a highlighter you added on purpose looks too strong.
2. For powder, tidy it little by little with a clean brush that adds no color
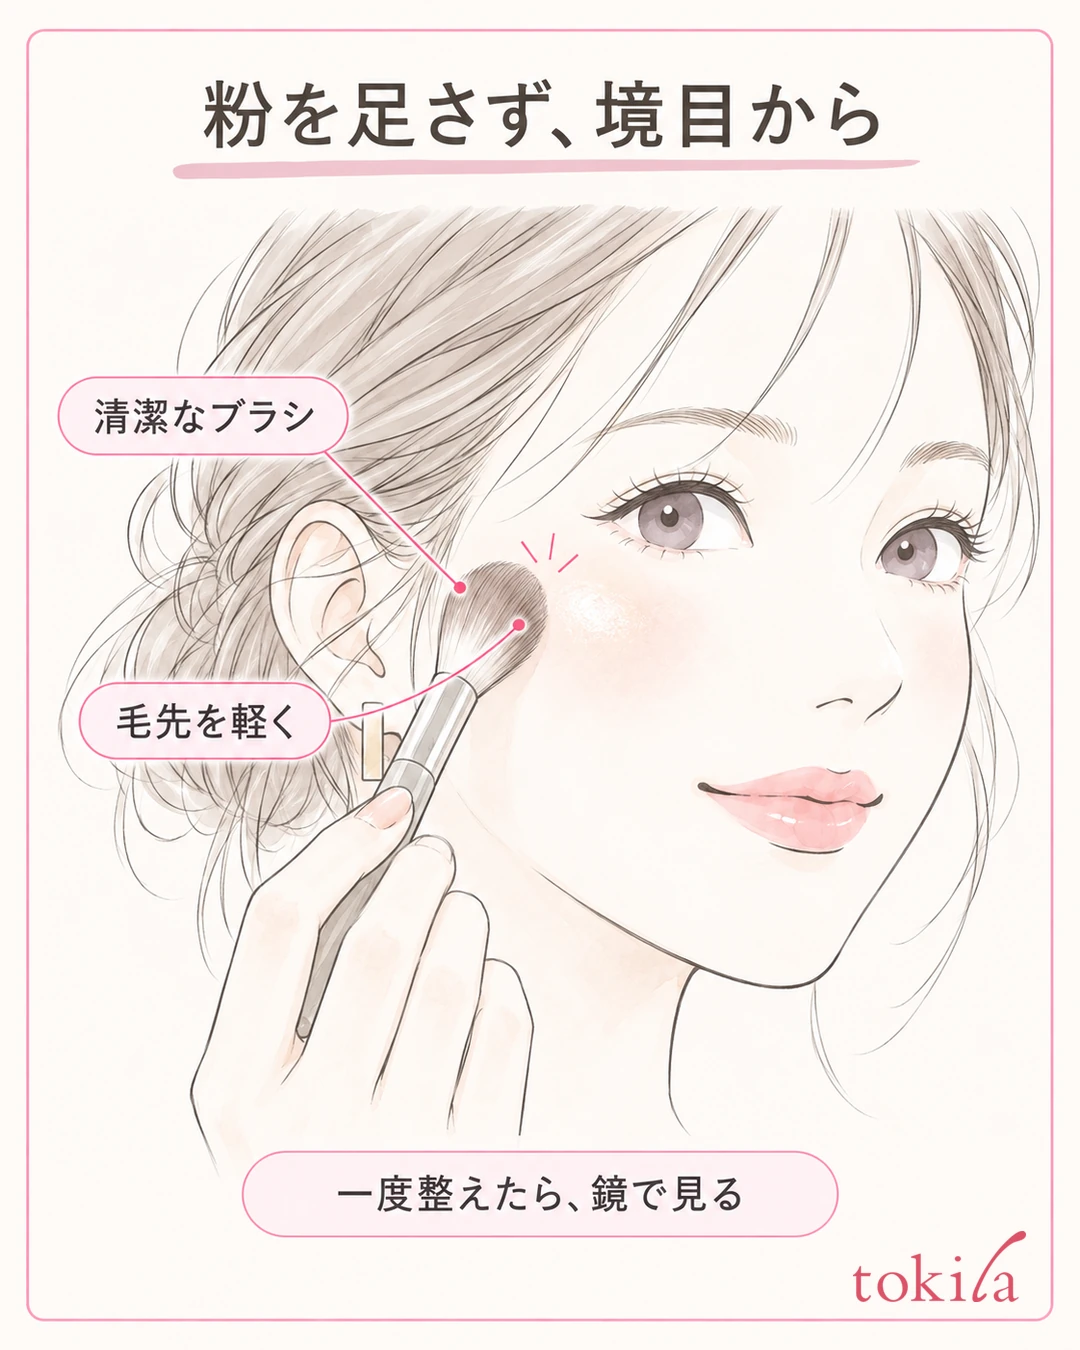
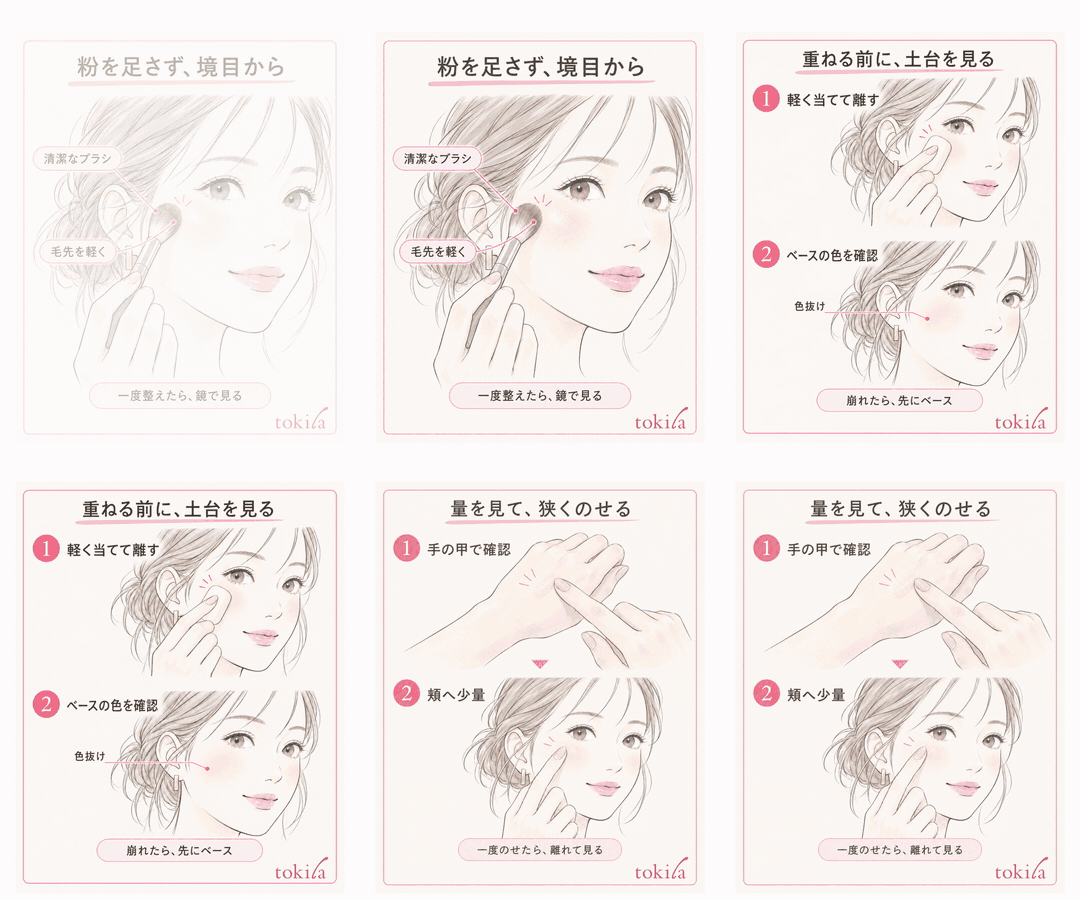
If the base hasn't moved and you applied a lot of powder highlighter, prepare a clean, soft brush that has no makeup on it. With a brush that still holds dark blush or another highlighter, you would add new color or glow while meaning to tidy. Check the condition of your tool before using it.
First, lightly touch the bristle tips to the edge that bothers you. Don't press them into the skin or spread the bristles wide. Tidy the excess powder on the surface with short movements, lift the brush away, and check in the mirror. Rather than going back and forth many times and spreading it across your whole cheek, start by stopping in a small area and looking.
When powder transfers to the brush, clean it according to the instructions for the product or tool, and don't put the same powder back. You can also check tool care in how to wash makeup brushes and sponges. Don't force yourself to use a brush whose tips feel stiff or catch.
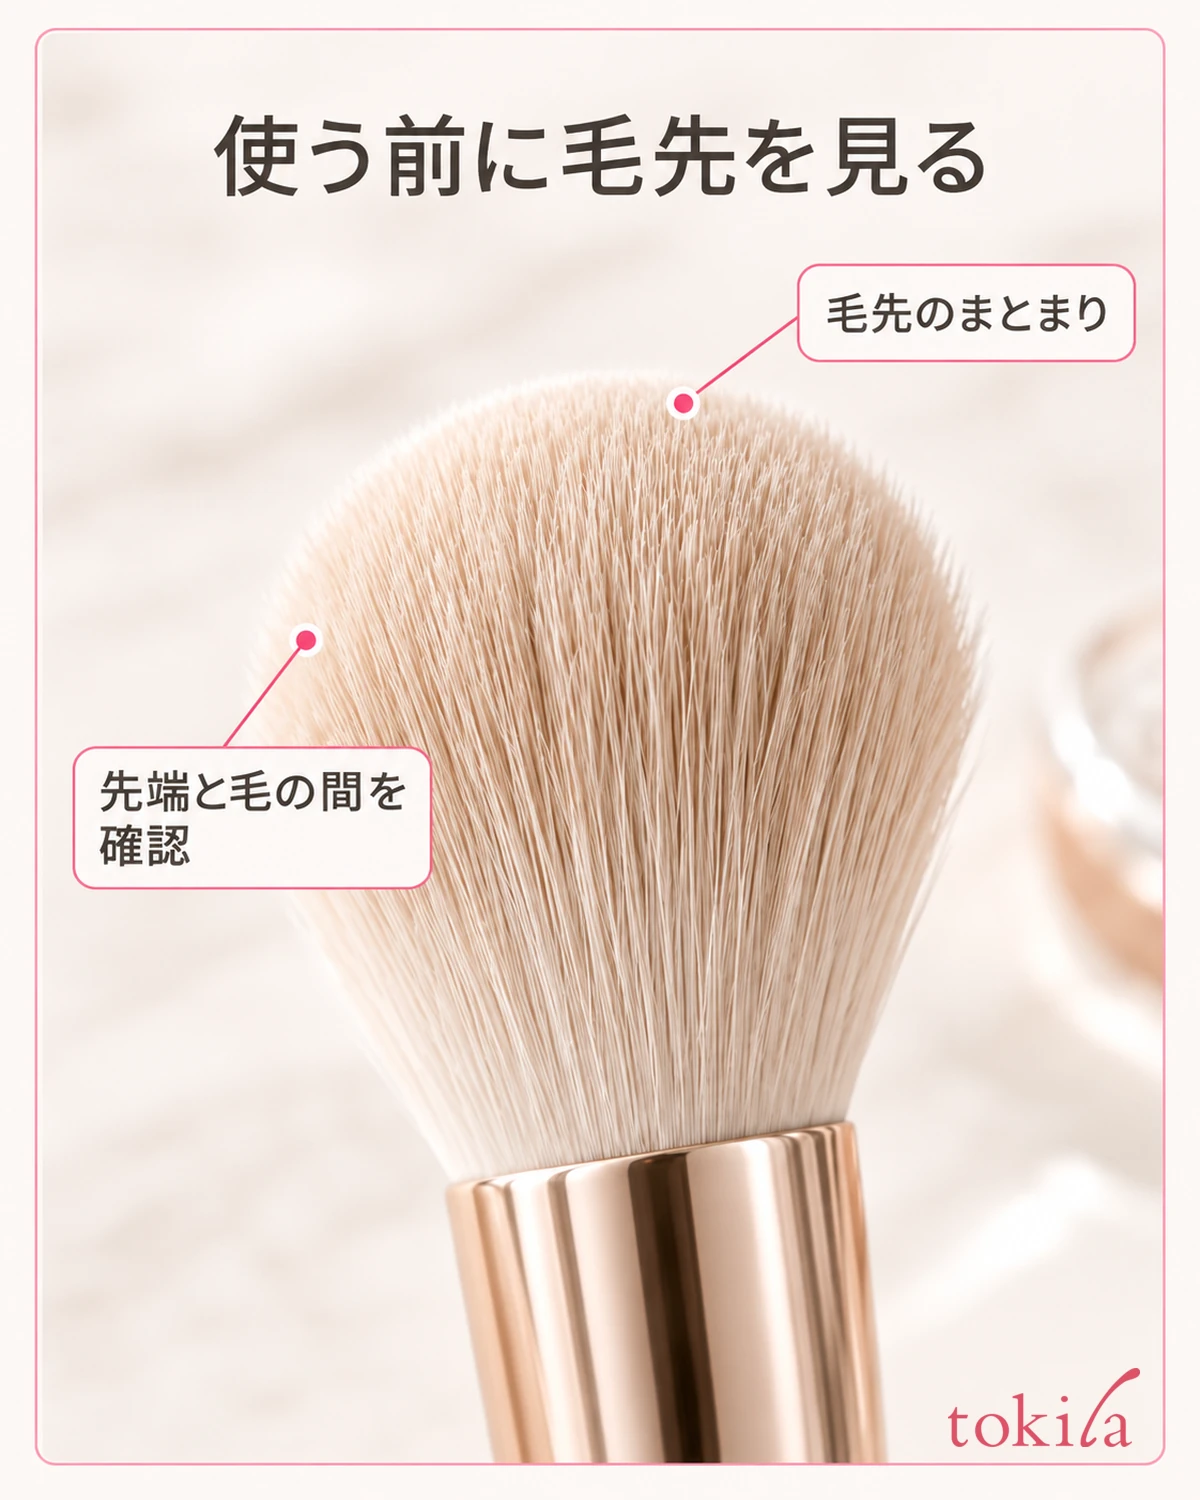
Even when the edge softens, some glow may remain in the center. If you like that glow, you don't have to keep touching it to remove it. On the other hand, if the pearl is spreading across your whole cheek, stop that action. Don't switch to a motion of rubbing a wide area hard; judge whether it would be easier to redo just that part.
We don't make it a standard step to layer a lot of blush or face powder over the whole face to hide the whiteness. The more you layer, the more other colors and powder thickness are added, and the harder it is to tell what you wanted to fix. Once you've lightly tidied the excess, look again at the glowing area and your skin color.
This method won't necessarily remove all of the pearl. With strongly adhering products, a brush alone may not change much. If nothing changes, don't increase the pressure; choose between moving on to the next partial fix or leaving it as that day's glow.
3. For cream or a broken-down base, don't keep layering; redo only that part
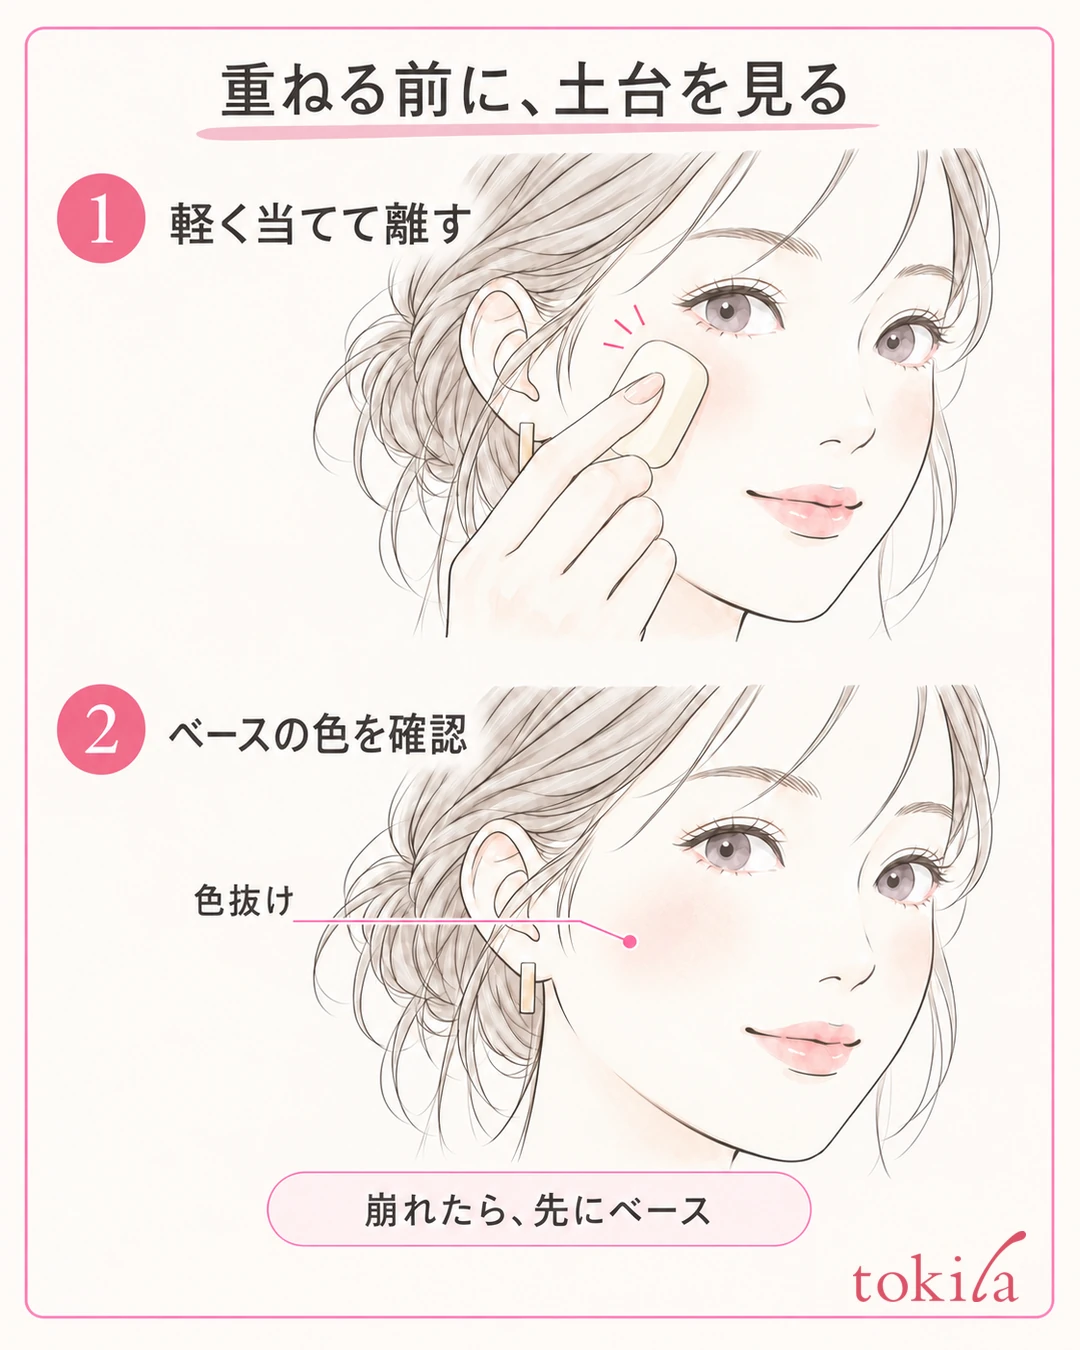
When cream highlighter remains thick, or the base moves the more you touch it, don't rub repeatedly with a dry brush. First read the product's directions and check how to handle layering over it. Doing the powder adjustment with the same pressure won't necessarily give the same result.
Please don't replace this with a blanket method of sliding a stick across the skin hard, many times.
To tidy the excess layer on your skin now, choose a tool you can use with the base you have, such as a clean sponge. Lightly touch and lift it from the small area that bothers you, and look at how the surface and edges change. This is an editorial step for slightly adjusting the amount applied, and it does not quote a removal method specified by the product above.
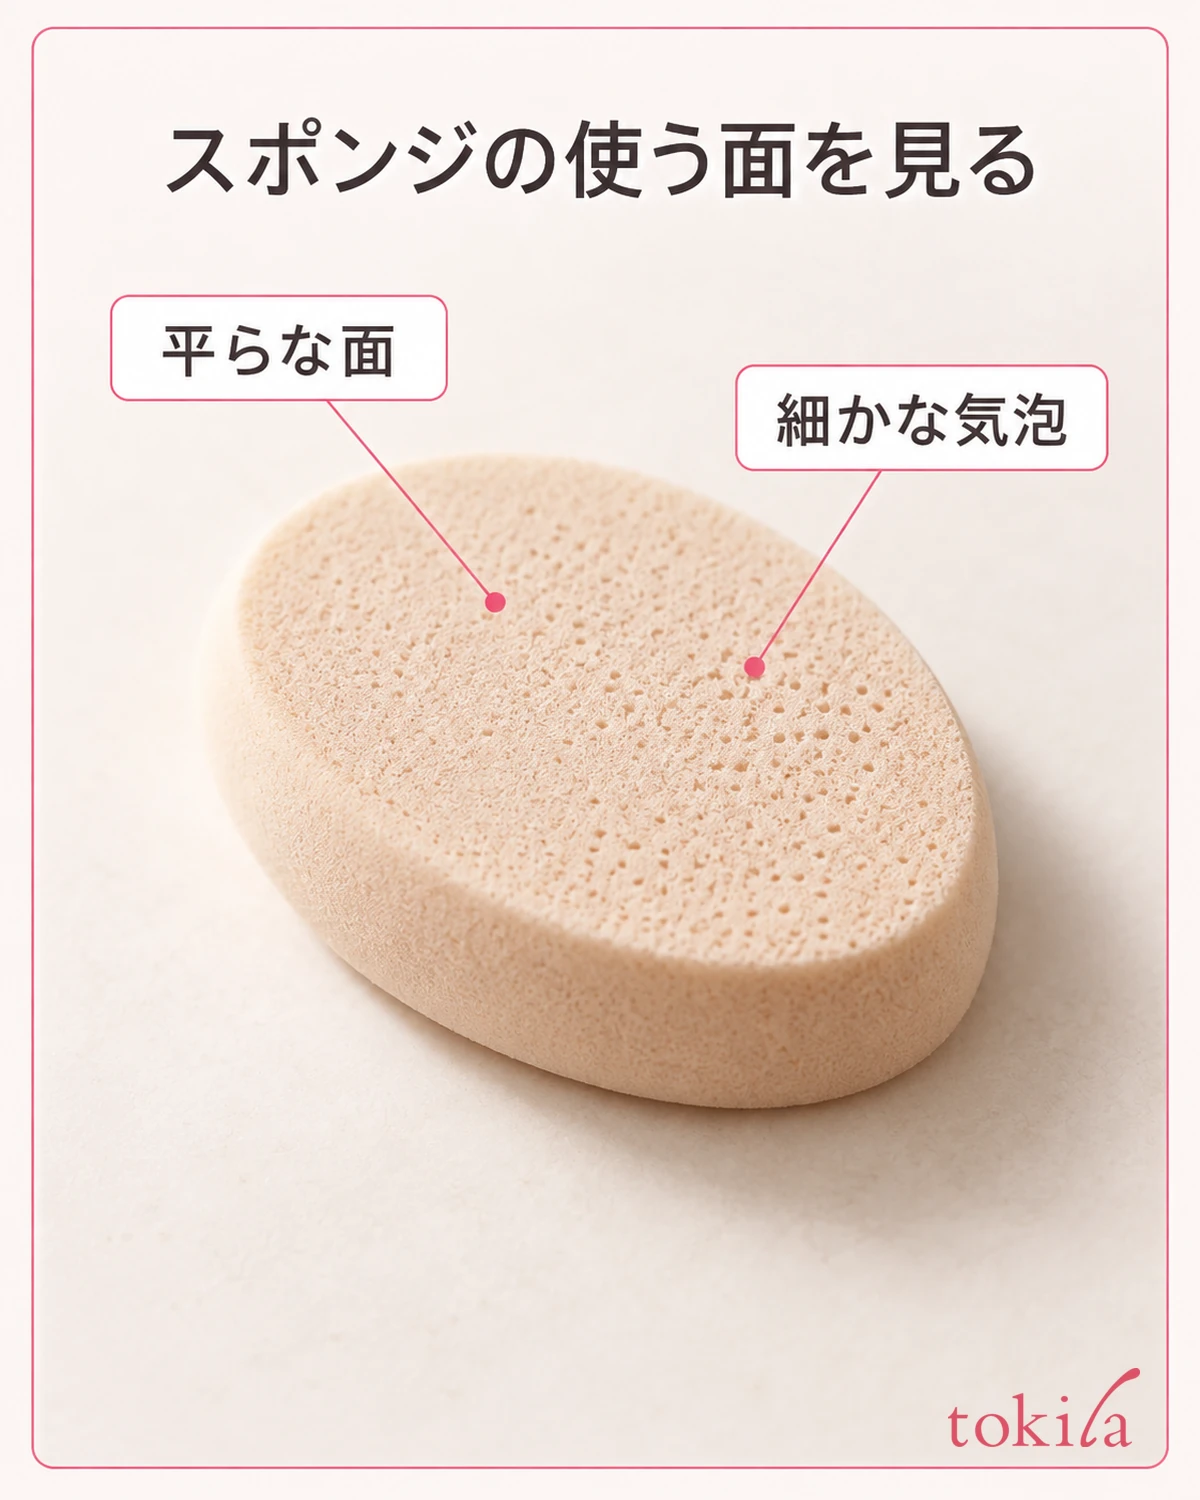
Don't pull the sponge hard sideways or wipe a wide cheek area in one go; check with a single light touch. If the color of the base comes off too, don't put the highlighter straight back on top. First, lightly fill in the areas that need foundation according to its directions. Once the unevenness settles, decide whether to keep the glow.
If large patches or a thick layer remain and a light adjustment doesn't fix it, follow the directions for a remover that can be used for makeup touch-ups, remove the necessary part, and rebuild from the base. Rather than continuing to layer base and highlighter bit by bit, it is important to decide the area you'll fix. Don't leave the removed part dry; also check how you usually use your skincare.
Look at the finished spot from farther away from the mirror. If you keep touching it up close to remove a single speck, the surrounding base changes too. If you feel pain or irritation on your skin, don't try to solve it by layering makeup; stop using it and follow the product's cautions.
4. Next time, check the amount on the back of your hand and apply thinly from a narrow area
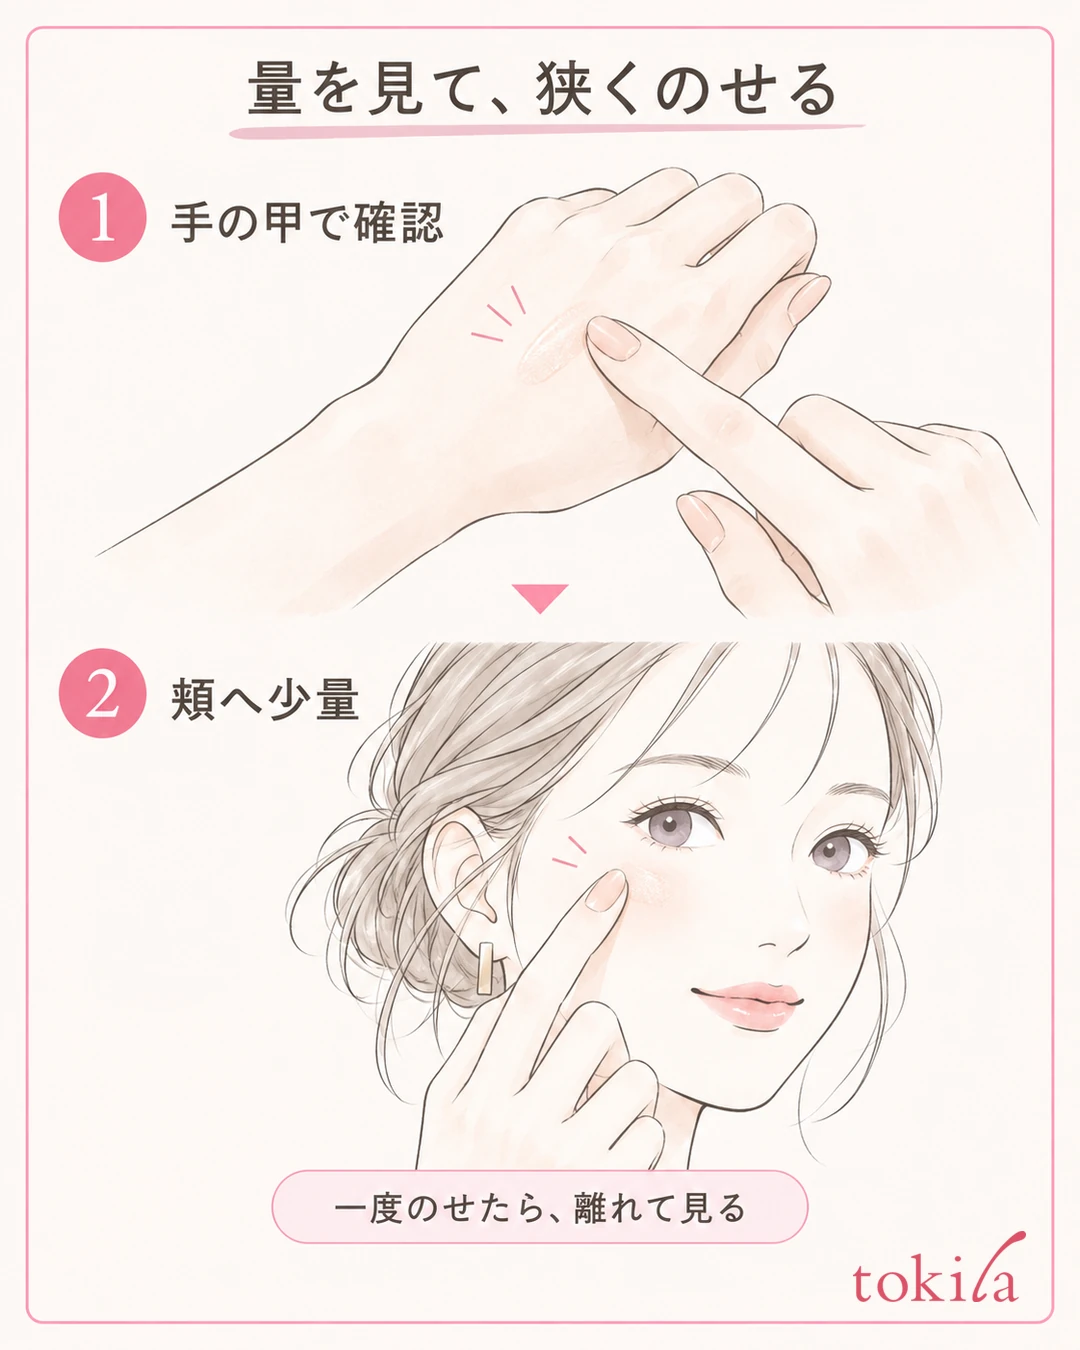
The next time you apply it, don't spread it across your whole face at once; take a small amount on a tool suited to your product.
What you check on the back of your hand is how much the tool picked up at one time and how strong the glow is with a light touch. The skin tone, angle, and light differ between your hand and your face, so the color you see there won't necessarily be reproduced exactly on your cheek. Use it as a check of the amount before applying to your face, and decide in the end by how it looks on your face.
For the cheeks, start with a small area, on the high point of the cheekbone, where you want to add glow. Keep a distance so it doesn't get in your eyes, and don't apply it to the whole area under your eyes or the whole cheek from the start. If the amount is too little, you can add a bit, but returning something spread too far to a narrow shape takes effort.
The forehead and chin tip also come with a caution about applying over a wide area. In this article, we don't set the goal of applying to the same seven spots for everyone; first, check the amount on one cheek that bothers you.
For powder, adjust the amount picked up on the brush; for cream, blend it thinly with a specified tool such as a fingertip. Check the order of use according to the product and the base you combine it with. Rather than fixing "highlighter always goes last in makeup," read whether it is for finishing or meant to be used as a base, and choose accordingly.
Once you've applied it, put down your tool and turn your face slightly. If your skin color connects naturally and you can see the glow you want to keep, stop there. If you want it brighter still, add a small amount to the first area, and be careful not to unconsciously spread the glowing surface sideways.
5. Check the whole face and review one of amount, area, or texture
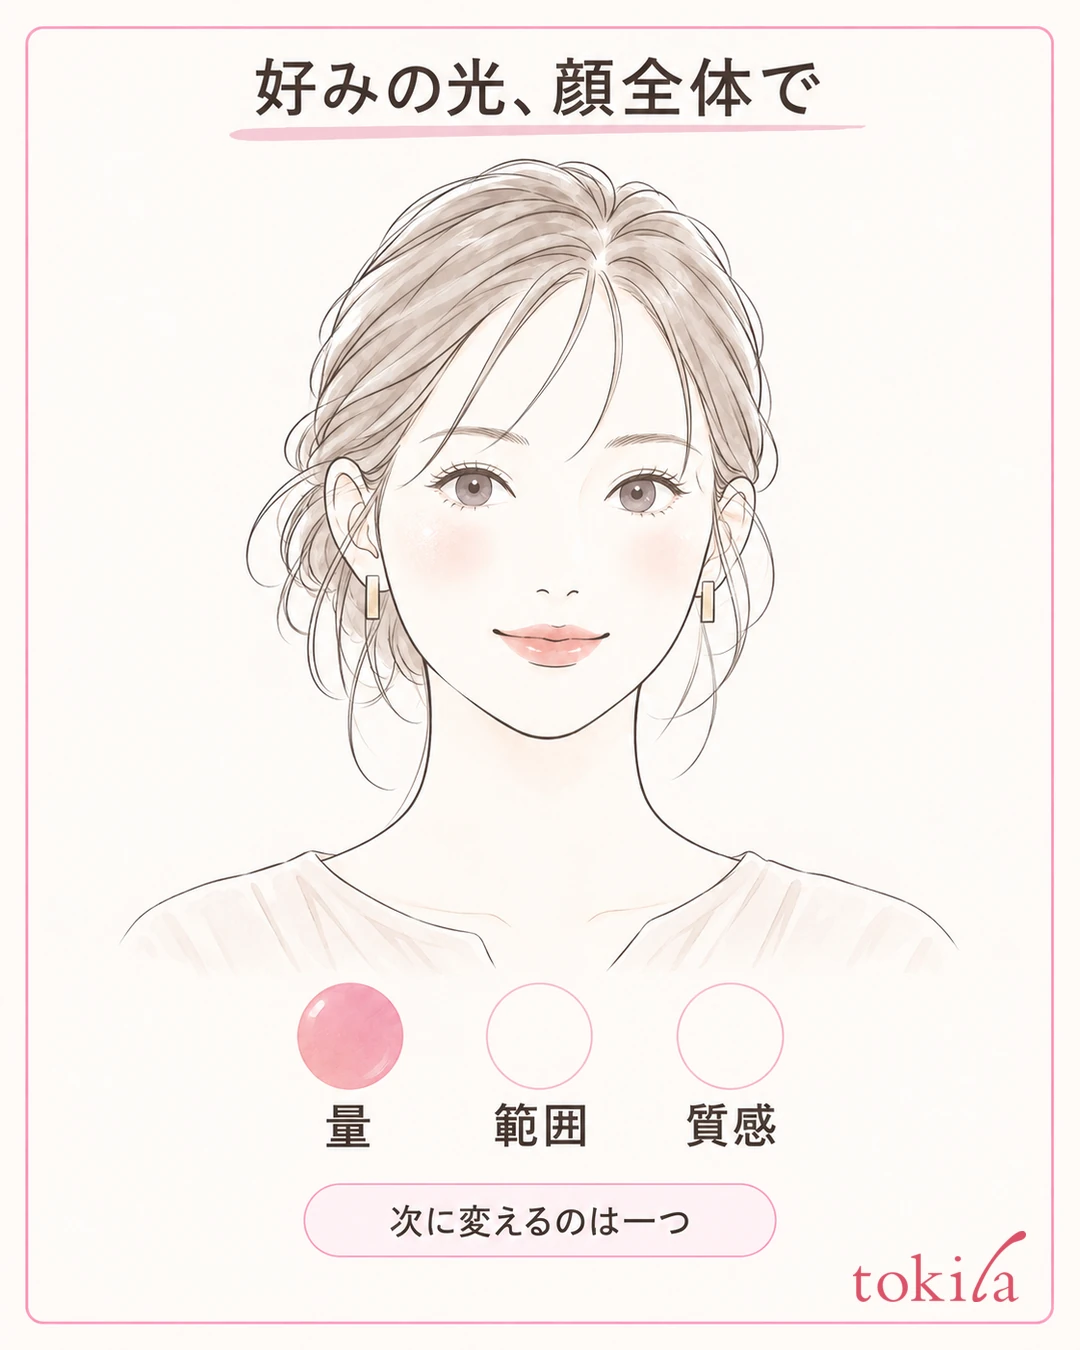
Finally, don't compare only your left and right cheeks up close; look at your whole face, including your brows, eyes, blush, and lips. The glow you want to keep changes depending on whether only the highlighter stands out or looks just right next to the rest of your makeup. Making both sides equally white is not a pass condition.
For next time, choose one thing to change: use less, narrow the area you apply to, or change the texture. If you change everything at once, it becomes hard to tell what suited you. First review the amount with the product you have, and if the band of color still bothers you, you can then move on to thinking about the color or texture.
If you choose a different product, check whether it shows a clear white color, whether it is centered on glow rather than color, and whether the presence of the particles suits your taste. Don't decide by category alone, such as powder is always natural and cream always glows strongly. Look at the official description, and if possible, ask at a store how it looks on your face.
A short sentence is enough for your notes, such as "a white band remained even from the front," "the glow was strong when I turned sideways," or "the edge didn't bother me with a small amount." Use it as a memo for deciding what to change in your next makeup, not as a test that proves a product's effect.
If your main problem is the whiteness after adding powder, also see how to fix too much face powder. Without confusing highlighter with finishing powder, sorting out what you layered and when makes it easier to decide the area to fix.
If you feel you've applied too much highlighter, first change the angle and look, and separate the color, the reflection, and the state of the base. Check whether you can stop with a light adjustment, and when it doesn't settle, fix the base in just that part. Next time, apply a small amount to a narrow area and find the glow you like across your whole face.



