
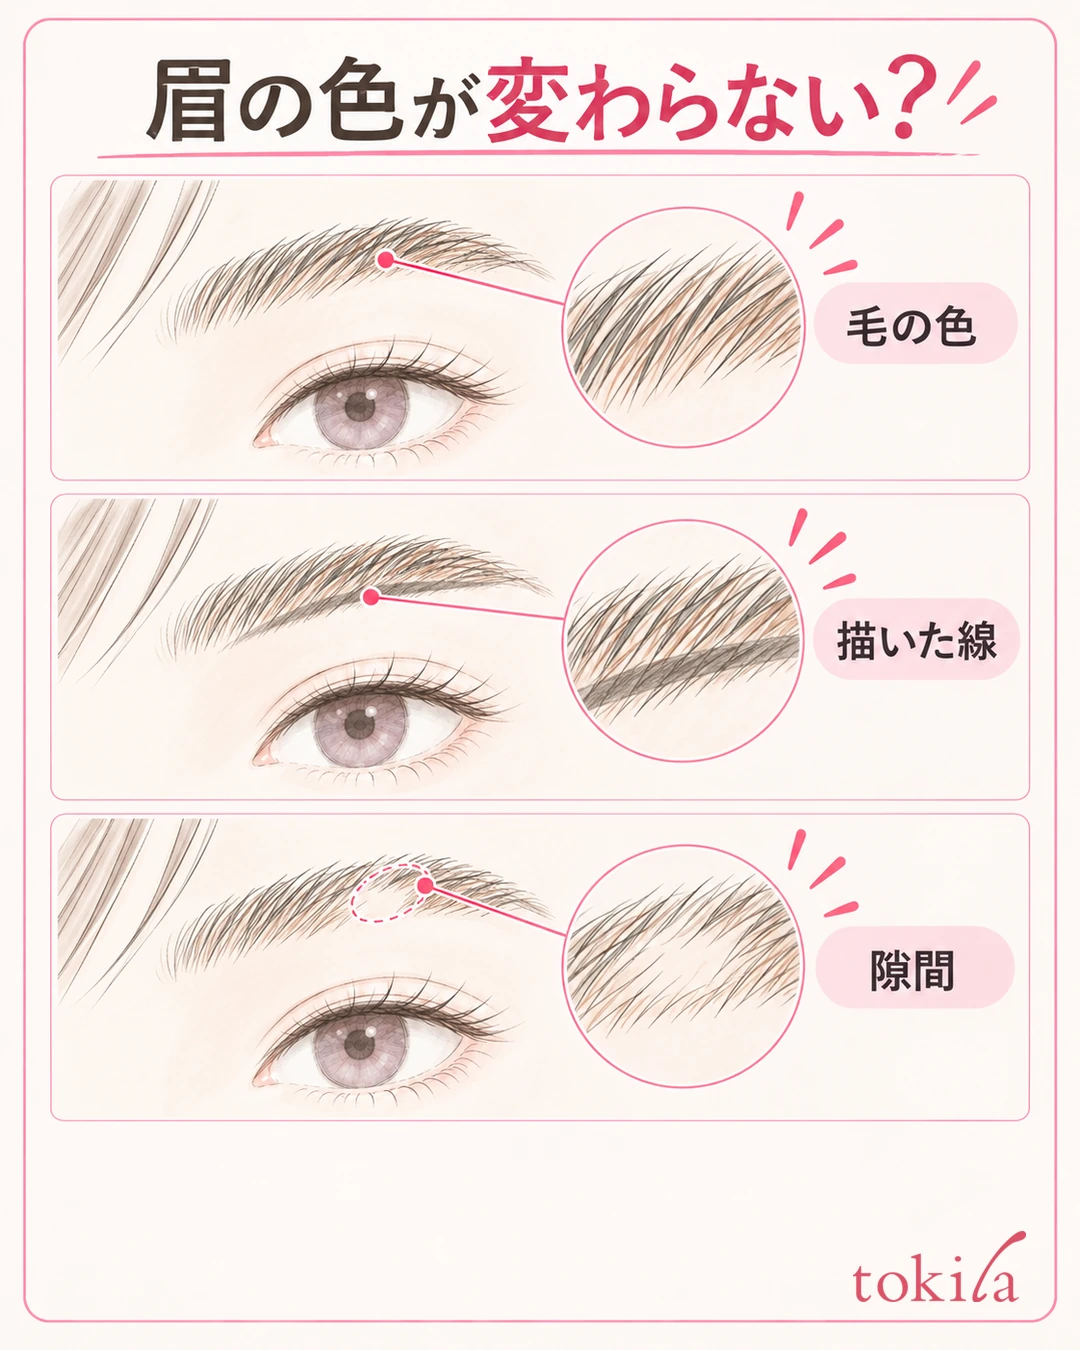
You applied brow mascara, but in the mirror your brows still look the usual black. You layered more to change the color, and now the hairs have clumped together. In cases like this, before adding more product, check three things separately: "the role of the product," "contact with the hairs," and "how the finish looks."
This article is about how to rethink things when the color of your brow hairs does not change as much as you expected right after applying. It does not cover removing color from the skin or designing the shape of your brows. It organizes, in five steps, how to put color on with the product you already have and how to decide before layering. The finish varies with your natural brow color, hair direction and the product, so you do not need to make every hair the same brightness.
1. Tell whether the color is not taking or the change is just small
First, move the brush away from your brow and look in the mirror. In a spot where light hits you from the front, check which parts still look close to the color before you applied and which parts took color. Choose just one place where the change is smallest: the inner end, the middle or the tail of the brow. This is to narrow down where to look before going back and forth over the whole brow.
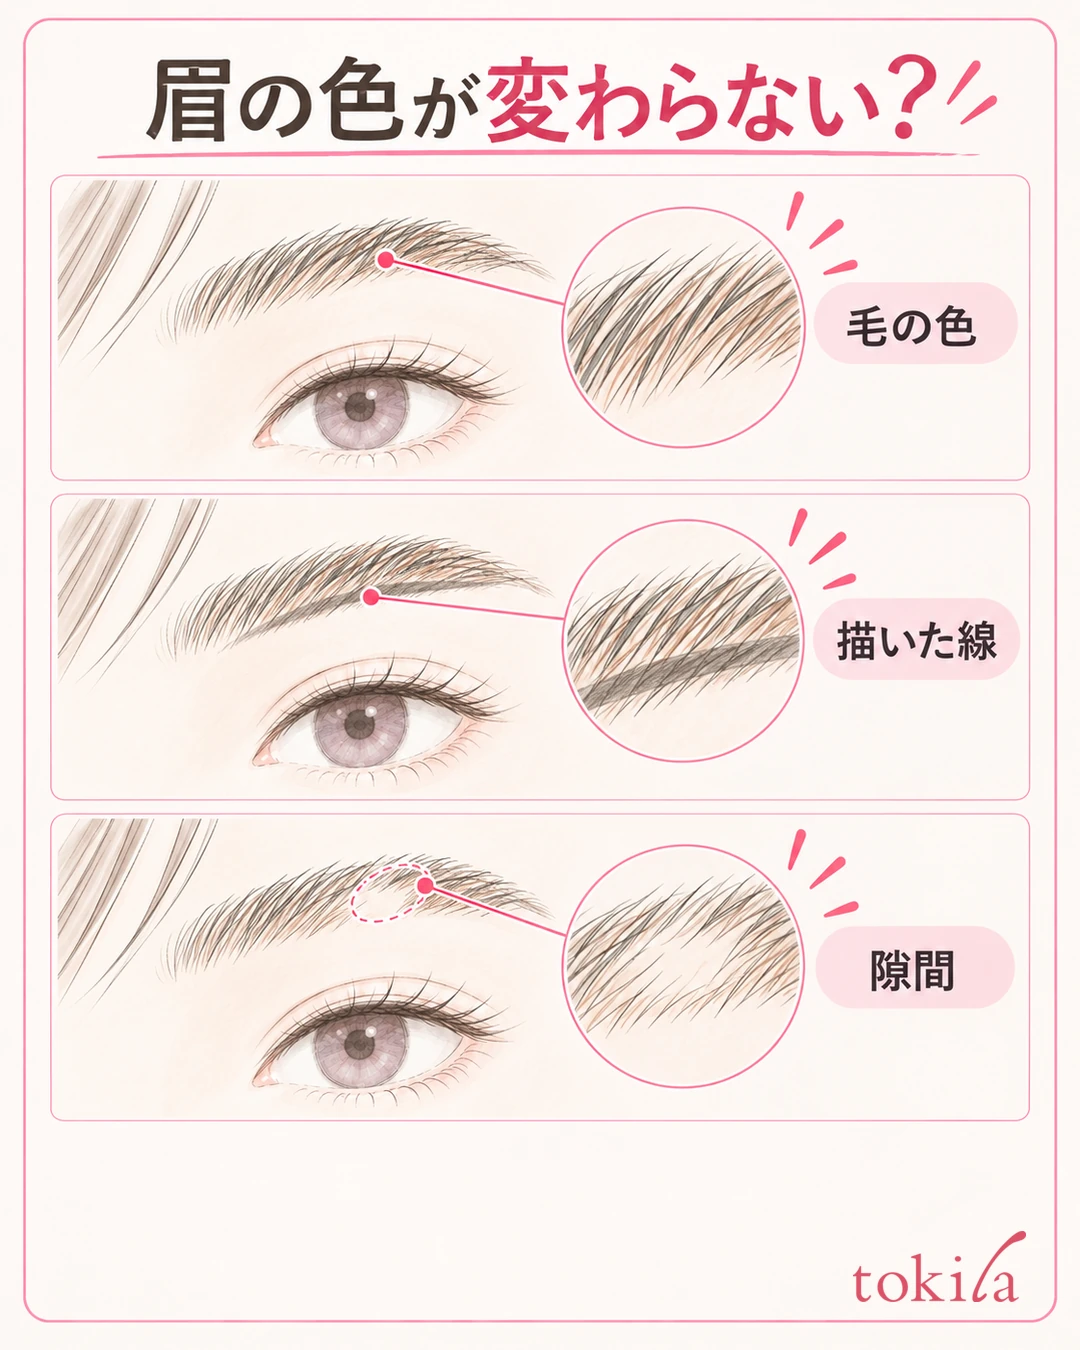
If the tips of the hairs have color but the overlapping parts look black, consider that the brush may have touched the hairs from only one direction. On the other hand, if the whole brow looks evenly subdued, you may have chosen a color close to your natural brows, so the change is gentle. Both feel like "not taking" in the mirror, but one is a time to review how you apply it and the other is a time to check the color you chose.
What you are looking at here is the color of the brow hairs themselves. Brow mascara is not expected to lighten a dark line drawn with a pencil or powder filled in between the hairs in one go. If the hairs have color but the outline looks strong, review the line you drew first. It is also important not to count brown dots on the skin as hairs that took color.
If you are aiming for the bright brows seen in photos, remember that the lighting and editing on a screen differ from the conditions of the mirror in your hand. Go back and forth between how it looks hair by hair in a close mirror and how it looks across your whole face, and decide how much you want to change today. What you need to adjust also differs depending on whether you want to "soften the blackness a little" or "clearly change the color."
Separate gaps with no hair from unapplied spots. Brow mascara is a tool for putting color on hair, so pressing the brush there will not draw new hairs. For a lack of shape or length, refer to how to check and draw uneven brows and decide whether to fill it in with another tool.
When comparing both brows, light them from the same direction and bring your face back to face straight ahead. With a mirror brought close on one side only, or with light from the side, a difference in how the hairs overlap can look like a difference in color. If a part still bothers you after matching the viewing angle, put into words which spot it is before touching it. You do not need to mechanically add the same amount to the left and right when the hair density differs.
2. Check clear types, colors and layering with the products you have
Look at the labels on the container and box to confirm whether it is a type that changes color or a type that uses a clear liquid to tidy the hair direction. Layering a clear type cannot be expected to turn your brows brown. If you own products in similar containers, check not only the product name but also the color name and number you have in hand.
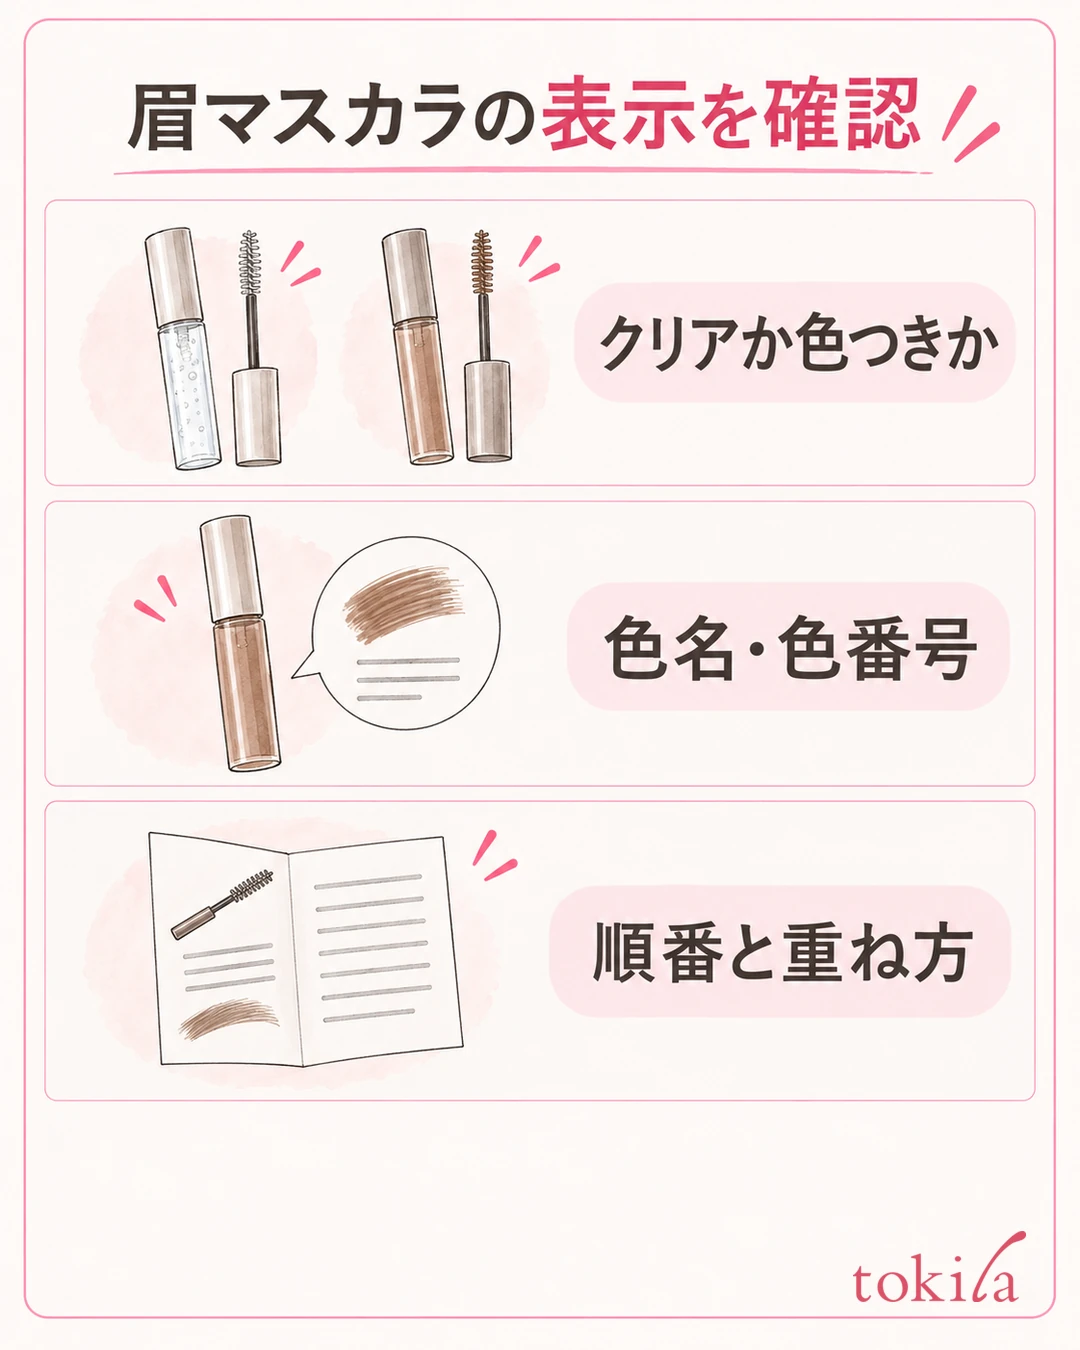
Try not to assume that everything called "brow mascara" gives the same color.
Even among colored ones, a color that blends in softly and a color that changes to a brighter shade aim for different impressions. Do not treat your hair color as the only right answer. Look at the official color swatch and description, and check what finish the color in your hand is meant to give. Instead of trying to turn it into a different color by layering a lot of liquid, first see whether you can handle that color in a small amount.
The order of use with other brow products should also follow the product's instructions first. This product introduces layering before it dries, but do not extend that condition to every brow mascara.
When reading the directions, check the order of application, the timing for layering and how to remove it as a set. If you mix them in your own way, such as adding more after it has dried or handling it before it dries, an effort to add color can turn into repeatedly combing through clumped hairs. If the directions are unclear, check the product's labeling, and it is also an option to stop without layering on today's brows.
3. Do not wipe off too much liquid; create a brush surface that touches the hairs
After taking out the brush, check whether there is a clump of liquid at the tip and whether the liquid is concentrated unevenly between the bristles. Tidy any excess liquid in the way suited to your product, but you do not need to wipe repeatedly until the part that applies color looks dry. The point is not to treat a large amount as the same thing as getting color on.
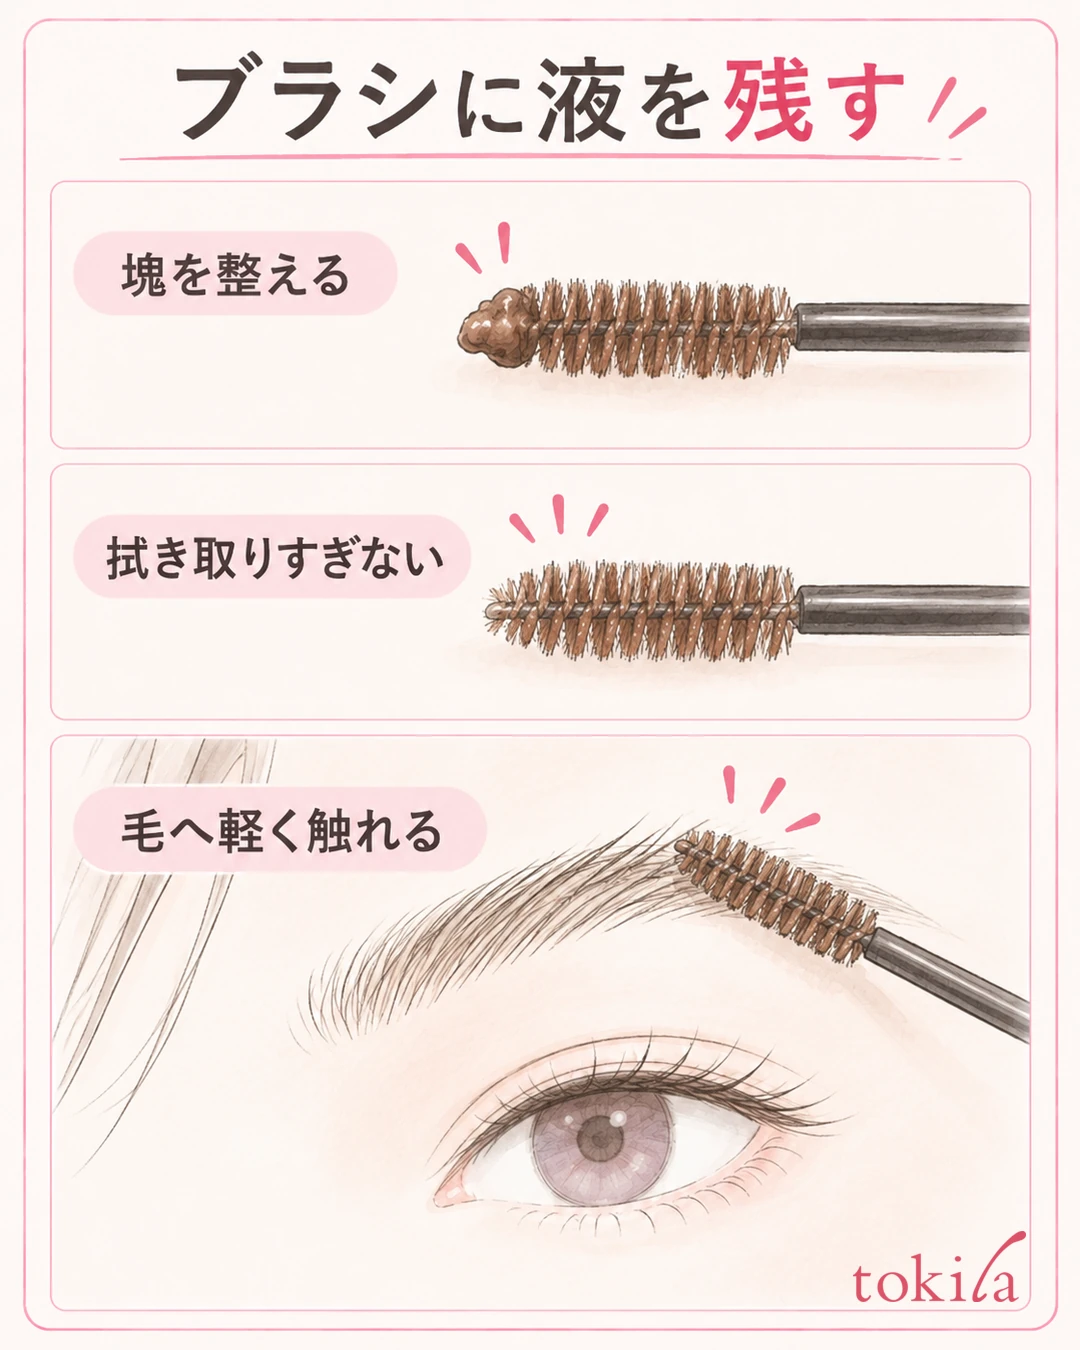
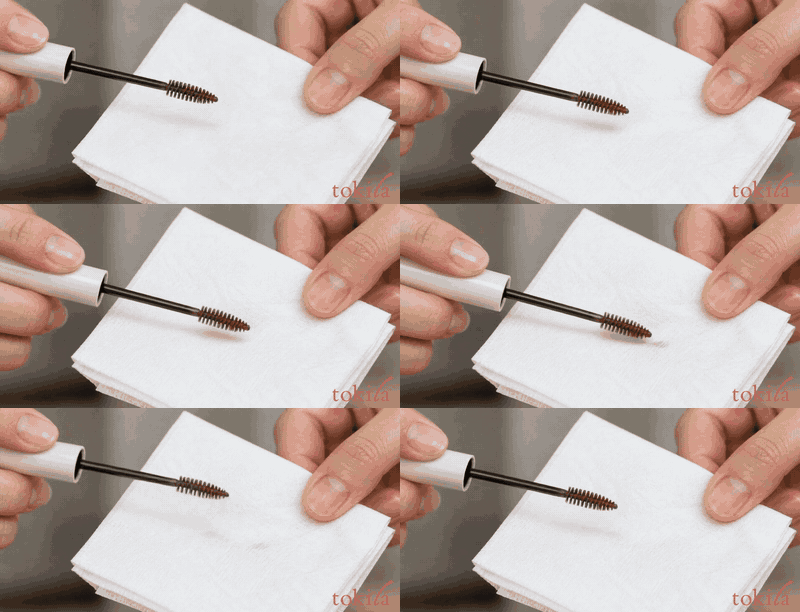
In this article, we use that idea as preparation: reduce the clump while leaving the liquid that can transfer onto the hairs. Rather than rubbing hard with a brush that has almost no liquid, take a small amount as directed and tidy up only the excess.
Before applying to the brow, check that you are not trying to use only the unevenly loaded tip. Lightly touch the part of the brush where the bristles are lined up to the brow hairs, and look for an angle that can catch the hairs. The shape of the container and the length of the brush differ by product, so do not poke the tip straight into the skin or press the brow with the shaft.
Before applying, also lightly tidy your brows with a clean spoolie that has no product on it. Once you can see where hairs overlap and hide each other and where they are short, you do not need to move the brush in big strokes. In sparse areas, check whether the brush reaches the actual hairs, rather than painting the skin to increase the area of color.
If no liquid comes out, there are hard clumps, or the brush is bent and cannot reach the hairs, check conditions other than how you apply it. Do not add water or toner to the container to thin it, and do not force the brush to bend; read the storage and usage precautions. Do not try to solve a state where there is resistance enough to pull the hairs with force.
4. Apply color in the product's direction and return the hairs to their natural flow
Once the brush lightly catches the hairs, work on a small section first, in the direction your product specifies. Rather than pressing into the skin because the color is hard to change, check in the mirror whether the brush is touching the hairs. After each movement, lift the brush away, look at the color and grouping of the hairs, and then move on.
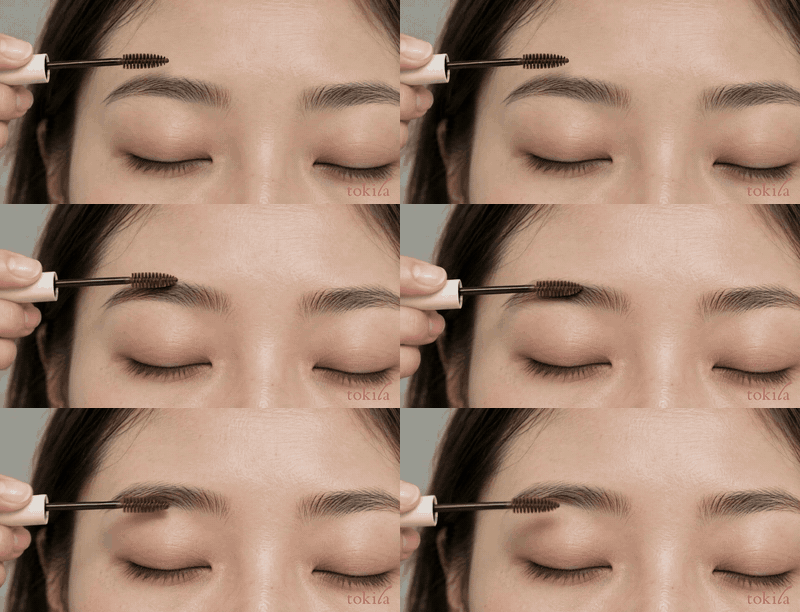
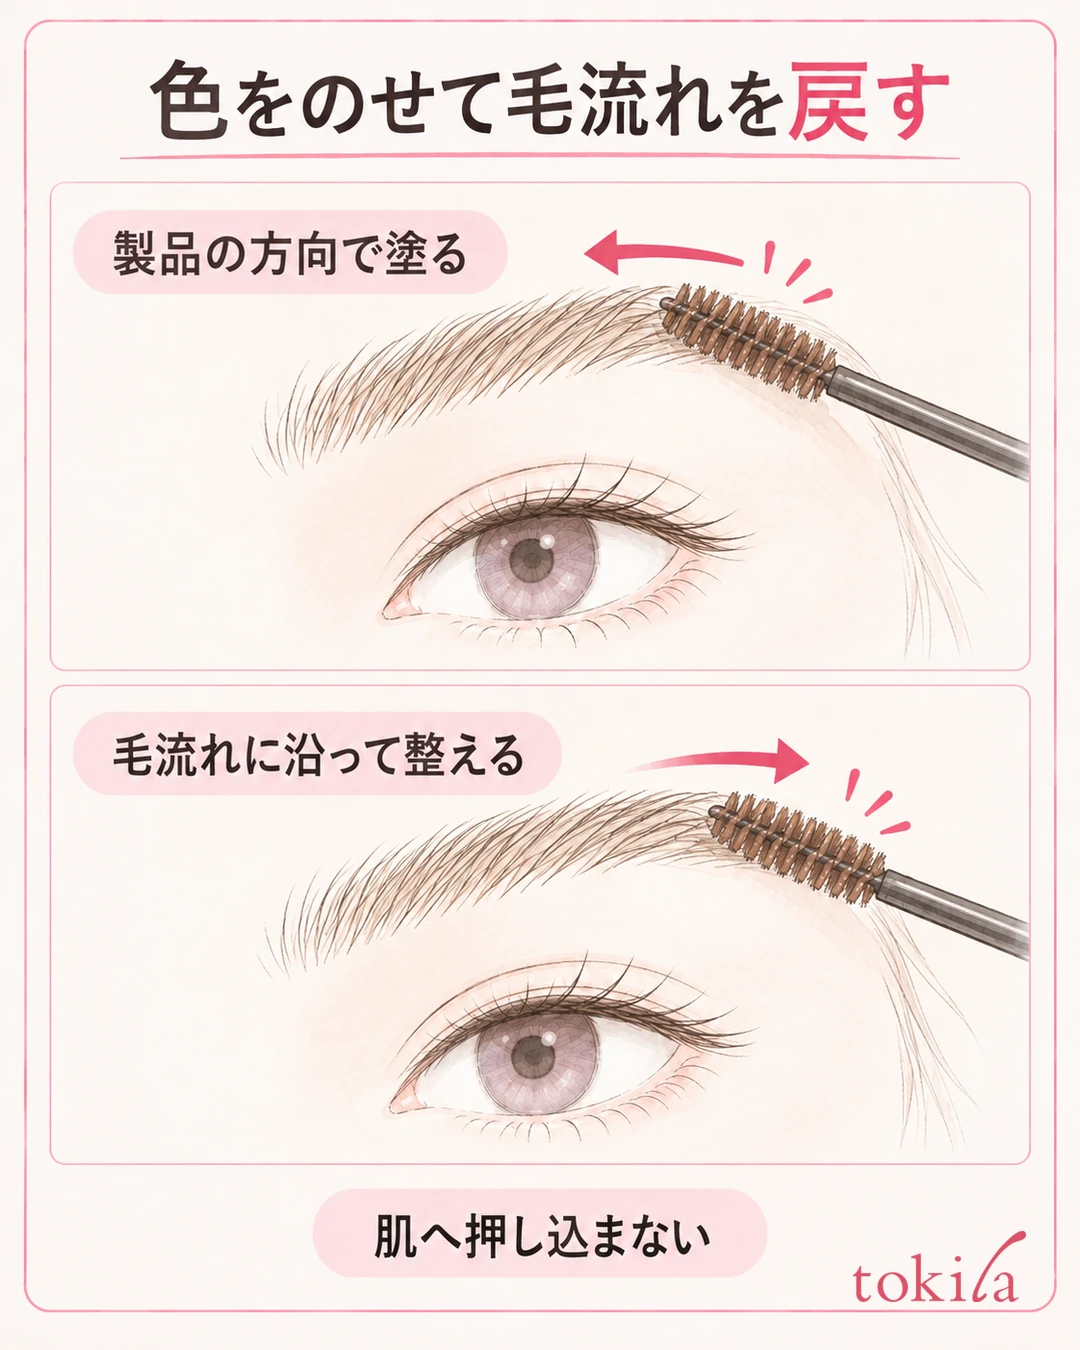
Even a similar flow can have a different starting position, so check the explanation in front of you.
The reverse-direction step is not meant to rub liquid into the skin. It is a step where you move the brush against the direction of the hairs to put color on them. Do not go over the thin tail of the brow again and again against the grain with the same width, and make smaller movements on short hairs. Also use the direction of the hairs you can see as a clue, such as the inner end standing up and the middle lying sideways.
At the finish, return the lifted hairs to their own flow and tidy the colored hairs into a cohesive direction. If you think of the step of applying color and the step of settling the final shape separately, you can avoid adding more back-and-forth passes.
Once a section you have worked on has taken color, check the next one instead of chasing the same spot. If dried hairs are clumped together, do not force them apart by combing with strength; decide whether to remove and redo them in line with the product's guidance. How liquid dries is not uniform, so do not treat a set number of seconds or passes as a guideline for everyone.
5. Judge any remaining blackness across your whole face and narrow what to add to one condition
Finally, step back from the mirror and look at both brows, your hair and your eye area in the same light. Even if some black of your natural brow remains up close, your whole face may already give the impression you want. If you have changed the color that far, you do not need to add more to cover every last hair, and it is fine to stop there.

If color has clearly not reached only one part, decide whether to lightly touch up just that section, within what the product's layering allows. You do not need to add the same amount to other places to even out the left and right. If the whole is even but the color change is only small, recheck the explanation of the color you chose rather than repeating the application.
If dots land on the skin or the hairs clump with liquid, do not add more by telling yourself the color is not enough. Set the brush down for now and switch to fixing brow mascara on the skin and the amount of liquid. Handle color that has dried and will not come off with the removal method for your product, and avoid actions such as scraping it with a fingernail or pulling hard.
A note for next time can be one specific condition. Connect an observation to the next action, such as "the middle hairs were hard to touch, so next time I'll check the brush angle" or "it went on evenly but the color was dark, so I'll review the official color swatch." If you change the amount of liquid, the product and the way you apply it all at once, it is hard to tell which one made things easier to handle.
Before buying more, sort out where you had trouble and what color you want. If it is hard to reach the short tail, the brush shape is the point to check; if it goes on evenly but the change is small, the explanation of the color and finish is the point to check. Choose in this order: check with the tools you already have, and if needed, consult official information or ask in store.
How well brow mascara takes color can be reviewed through this flow: confirm its role, tidy the liquid on the brush and its contact, apply in the product's direction and look at the whole. Before increasing the amount, find the one step where the change is small. Written by the tokila editorial team. The editorial team checked official information and organized a decision process that can be used in everyday makeup.



