
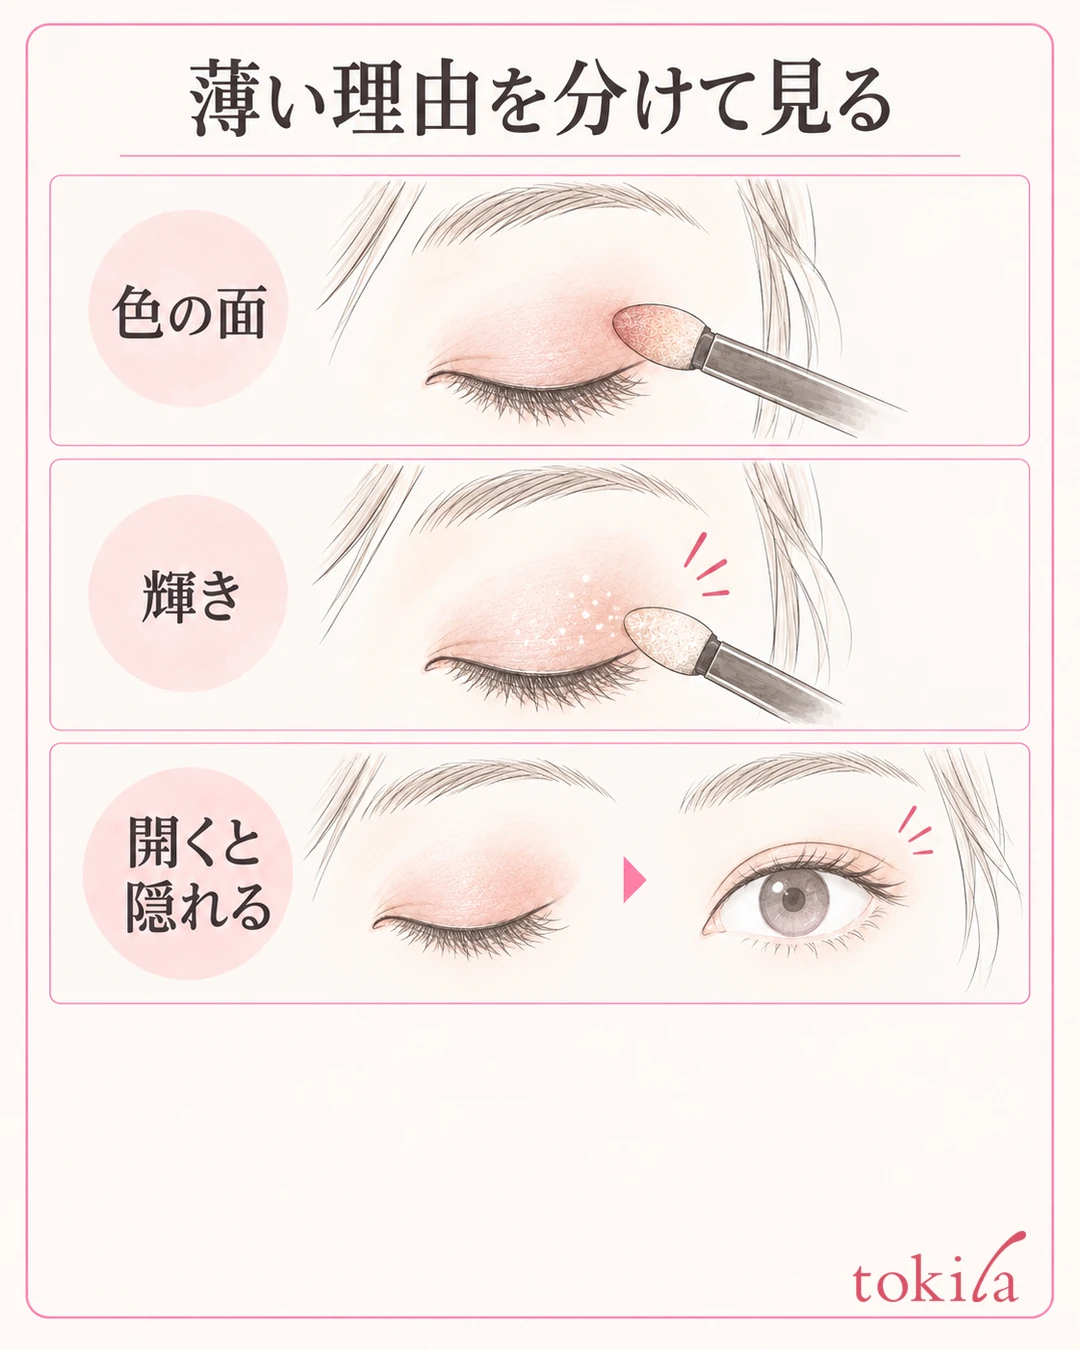
When eyeshadow still looks pale even after layering, check the finish of the color itself, the tools you are using, and the area that is visible when your eyes are open before you add more powder. Separating the step of placing color from the step of blending the edges makes it easier to break the cycle of adding and losing color.
This article covers the situation where the color looks too faint on the upper lid right after application. If your concern is color settling into the creases over time, see Rethinking eyeshadow that collects in the creases. Rather than treating intense color as the only right answer, adjust to the color and shine you want to show today.
1. Tell apart "the color is faint," "the shine shows," and "it disappears when I open my eyes"
The color looked deep in the palette but you can hardly see it on your lids. In that case, first bring the mirror back to face level, then lower your gaze slightly and look at your upper lid. Without lifting your brows or pulling the skin, check naturally where you placed the color.
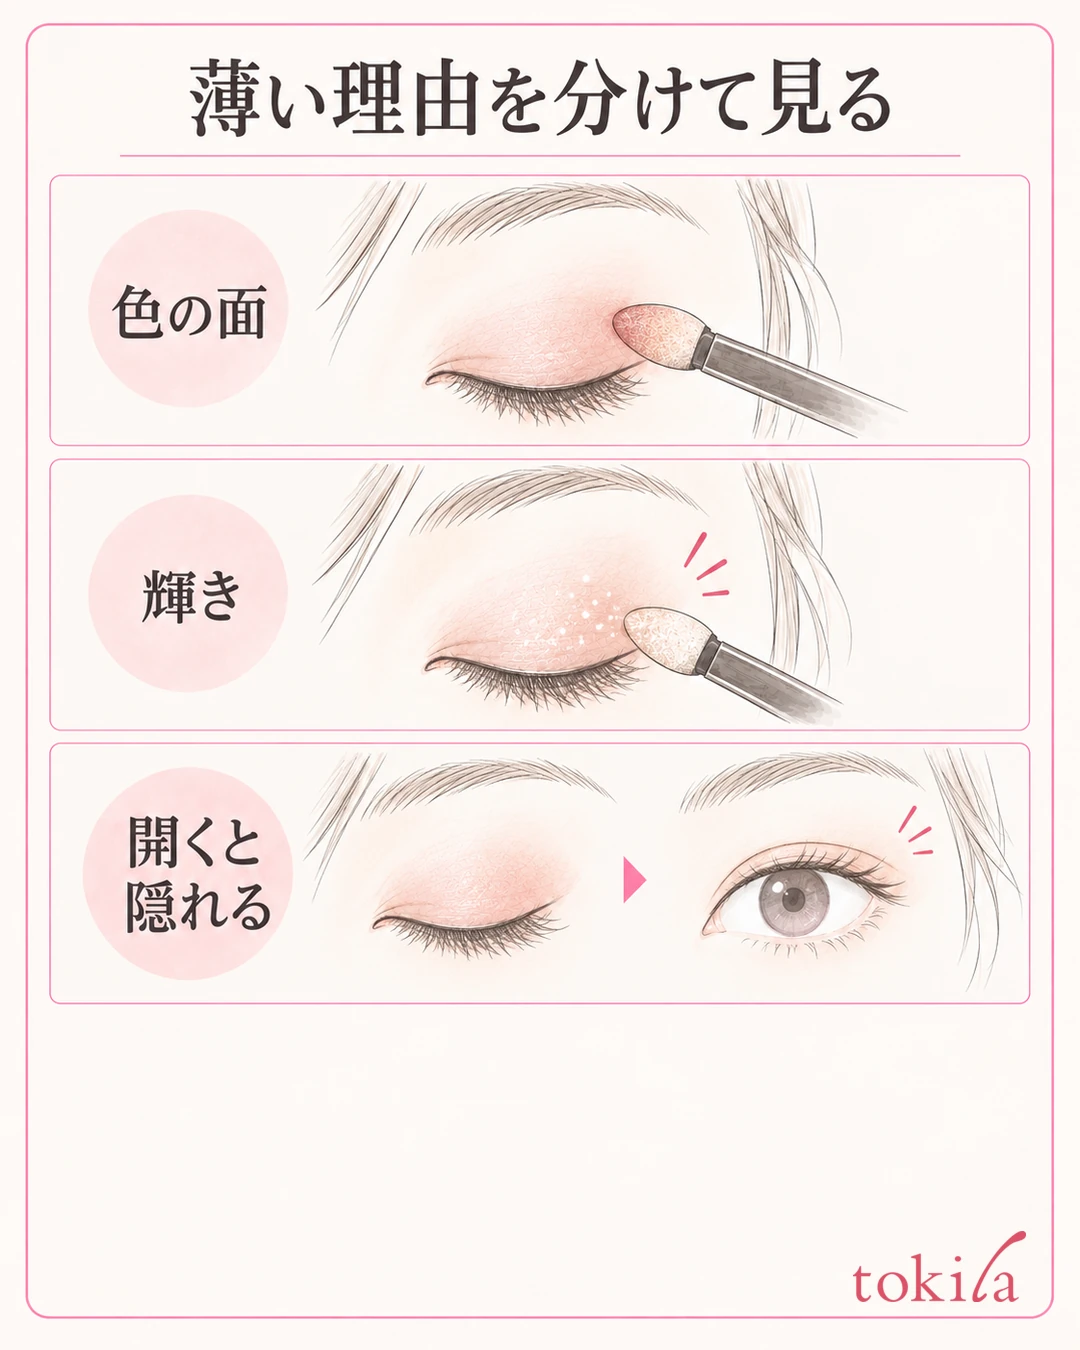
If the color shows when your eyes are downcast but hides in the crease when you open them, that does not necessarily mean no color was applied. Conversely, if there is little difference from your skin tone even with your eyes downcast, it is a moment to review the product's finish and how well your tool picks up and deposits color. Do not treat the two as the same cause and keep adding more across the whole lid.
Also look at the shine of glitter and pearl separately from the base color. Do not decide that a pale color is a mistake in how you used it; read the official description to see what the color you own is meant to show.
Try changing the angle of your face just a little under the same mirror and lighting. When the sparkle appears and disappears depending on the angle, and when the color itself is faint, the reason for adding more is different. Rather than adding the same amount every time the lighting changes, keep the conditions the same once and decide whether you want color or shine.
A swatch on the back of your hand or an official image is a clue to the color and texture. However, it is not the same skin, thickness, or light as your eyelid. Do not make it your goal to layer until you reproduce the depth in the photo; narrow down to one place where your eyes currently look lacking.
If the color shows in the morning and fades in the afternoon, note it separately from the color payoff right after application covered here. If powder is falling onto your cheeks, you can also check Rethinking the amount and tools to prevent fallout of powder and glitter. The starting point is not to apply the same touch-up to a different condition.
2. Choose tools by purpose: "placing color" and "blending"
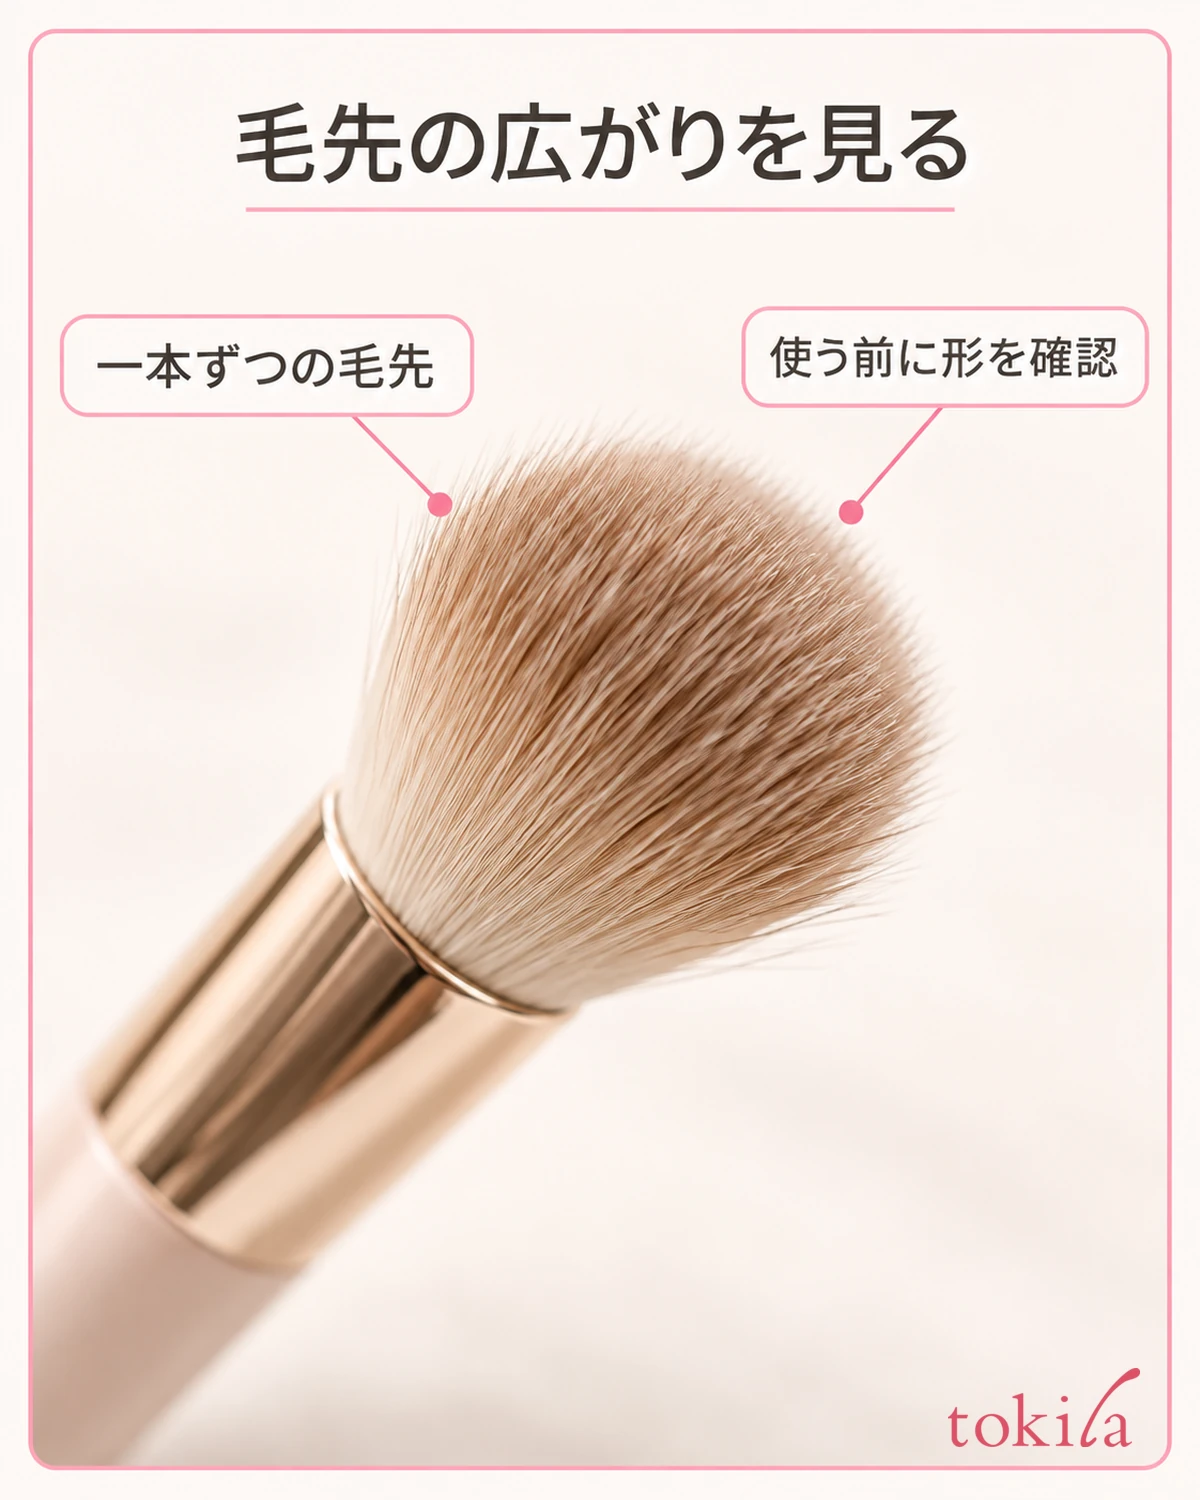
Do you always pick up, spread, and blend with one large brush? What you need from a tool differs when you want to place color firmly and when you want to spread it softly. First decide how wide an area you want to place color on, and check the tools you can use in the product's instructions.
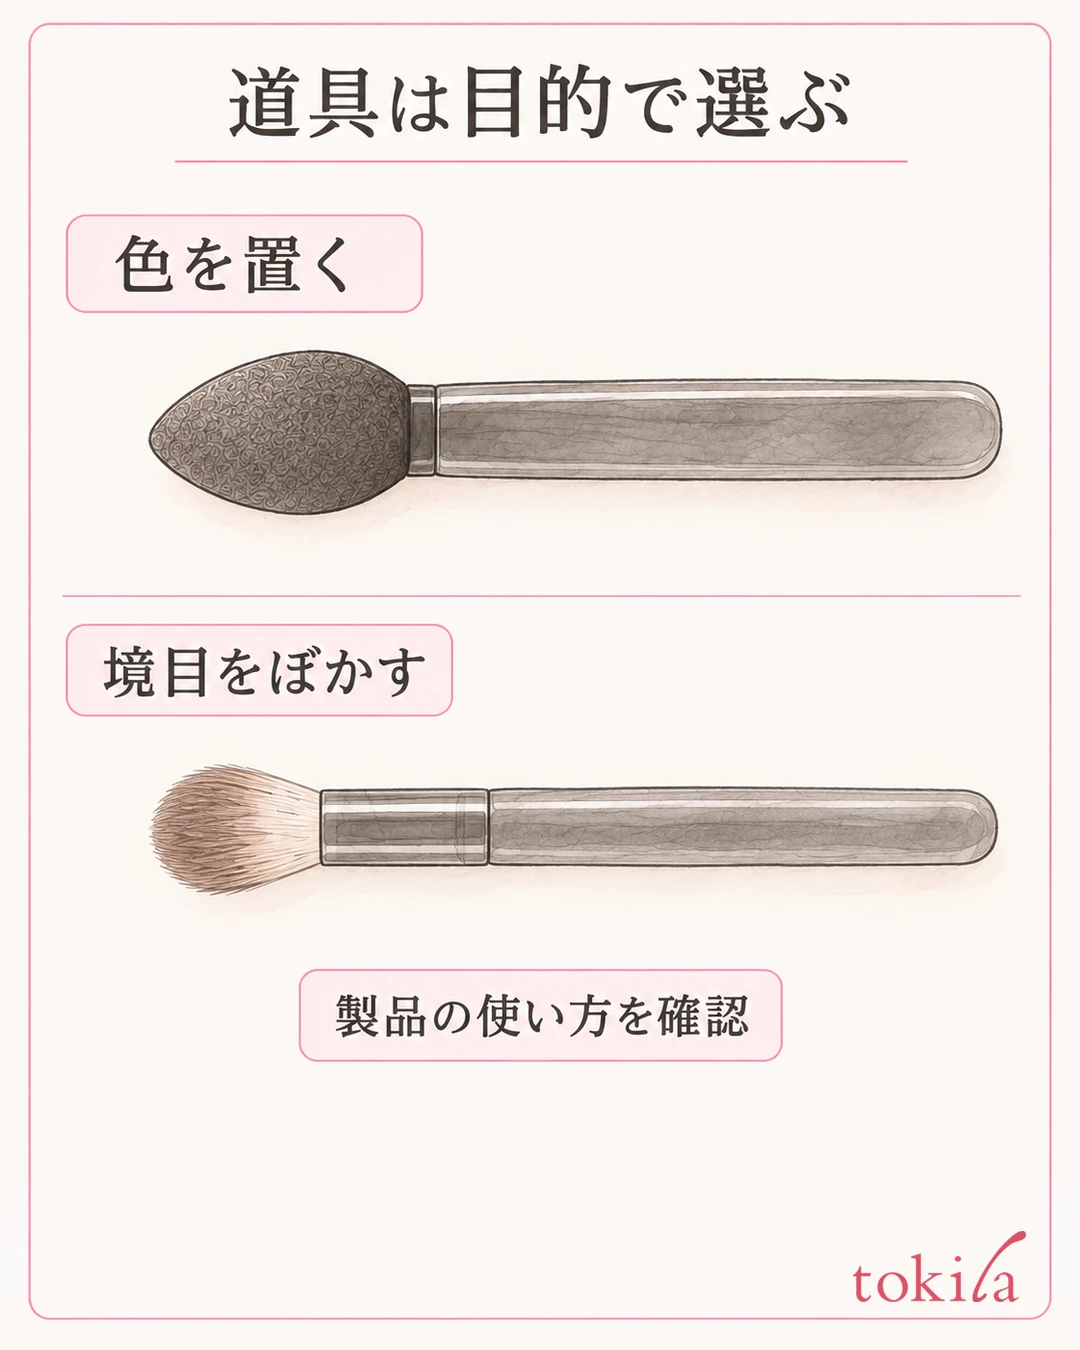
In general, a tip is a candidate for bringing out color and a brush for spreading it softly, but this also changes with shape and bristle density. Do not decide that "a brush is always pale" or "fingers are always deeper."
If the color spreads out hazily with the brush you have, one option before doubling the powder is to try a smaller tool meant for placing color.
When you change tools, start with a small amount of the same color in the same place. If you fill the whole lid with a large tip from the start, not only the color payoff but also the area changes, and it becomes hard to tell what made the difference. Rather than using different tools on the left and right and competing on the finish, first check how the color takes in a narrow area on one side.
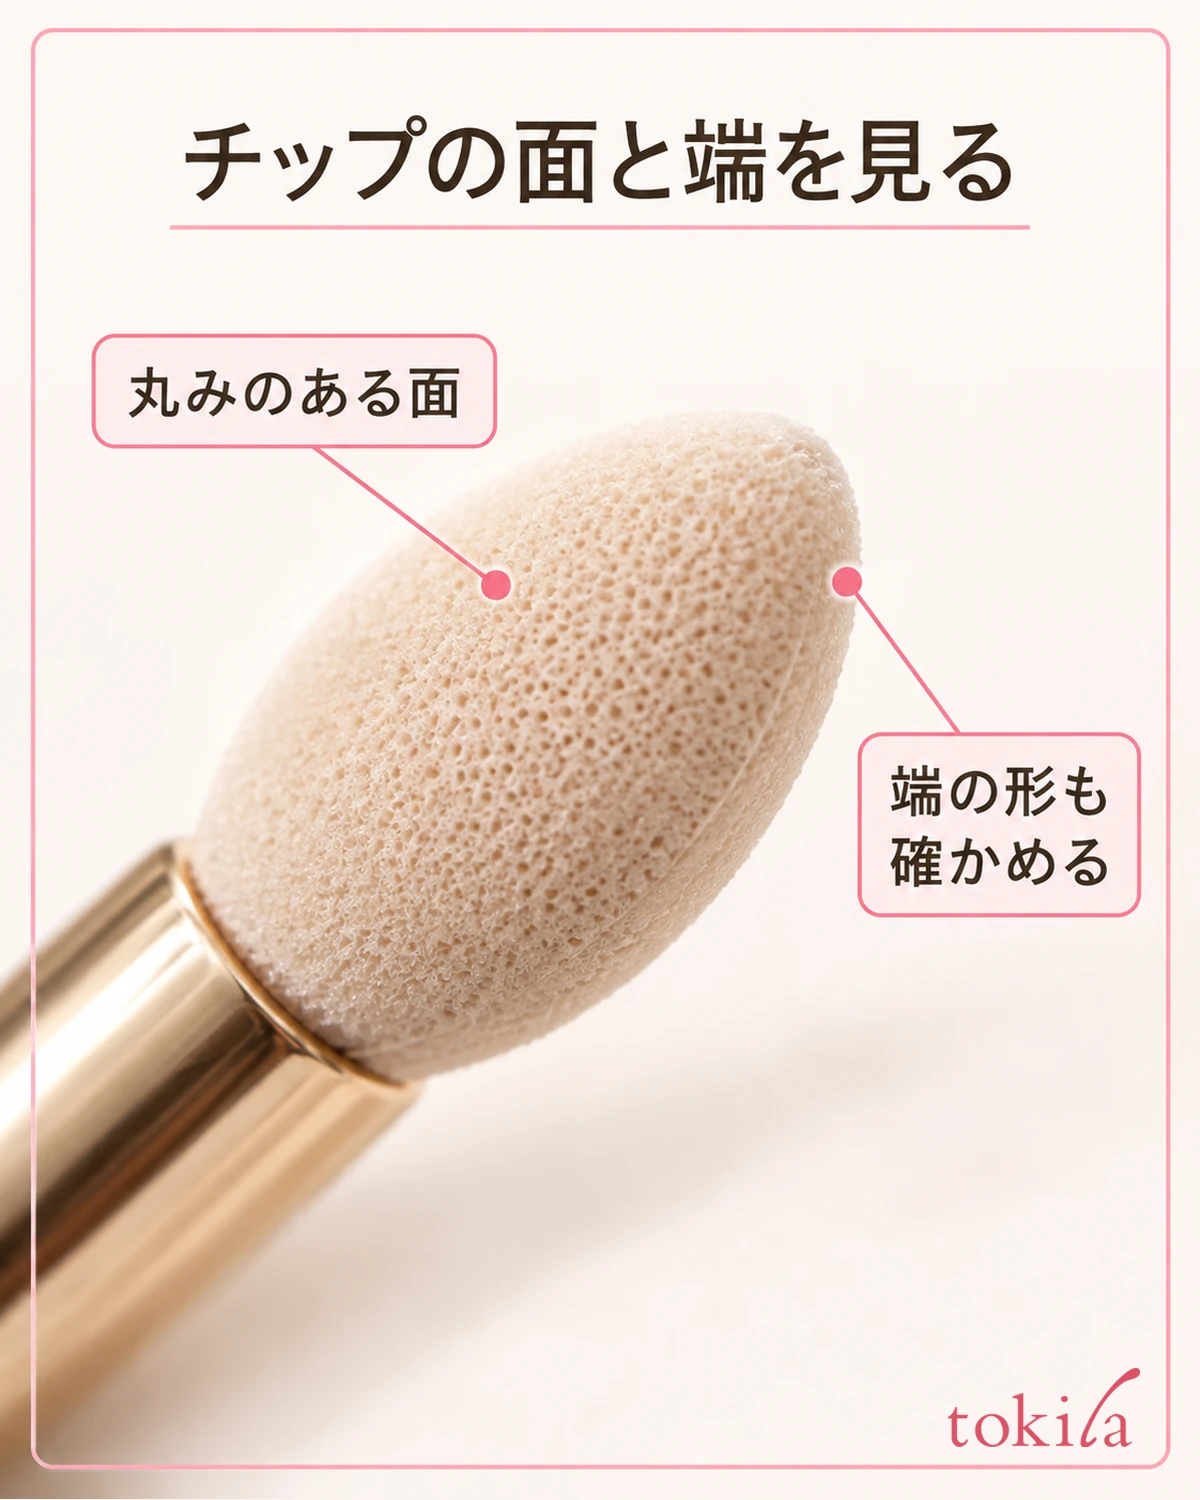
Also check whether another color or base remains on a tool you have been using. If the previous color mixes in, it becomes hard to judge how the current color looks. Follow the tool's instructions for care and replacement, and do not use a freshly washed, damp tool under the same conditions as a dry one.
It is convenient if you can separate the tool that places color from the tool that blends the edges at the end. If you use one for both, tidy the remaining color according to the handling instructions before switching roles. The goal is not to increase the number of tools but to keep it possible to trace which step made the color fade.
3. Place a small amount in a narrow area, lift away, and check how it has taken
Once you have picked up color on the tool, first check the amount in a place that suits the instructions for use. This is not a guarantee of color payoff on the lid; it is preparation to learn the amount to start with.
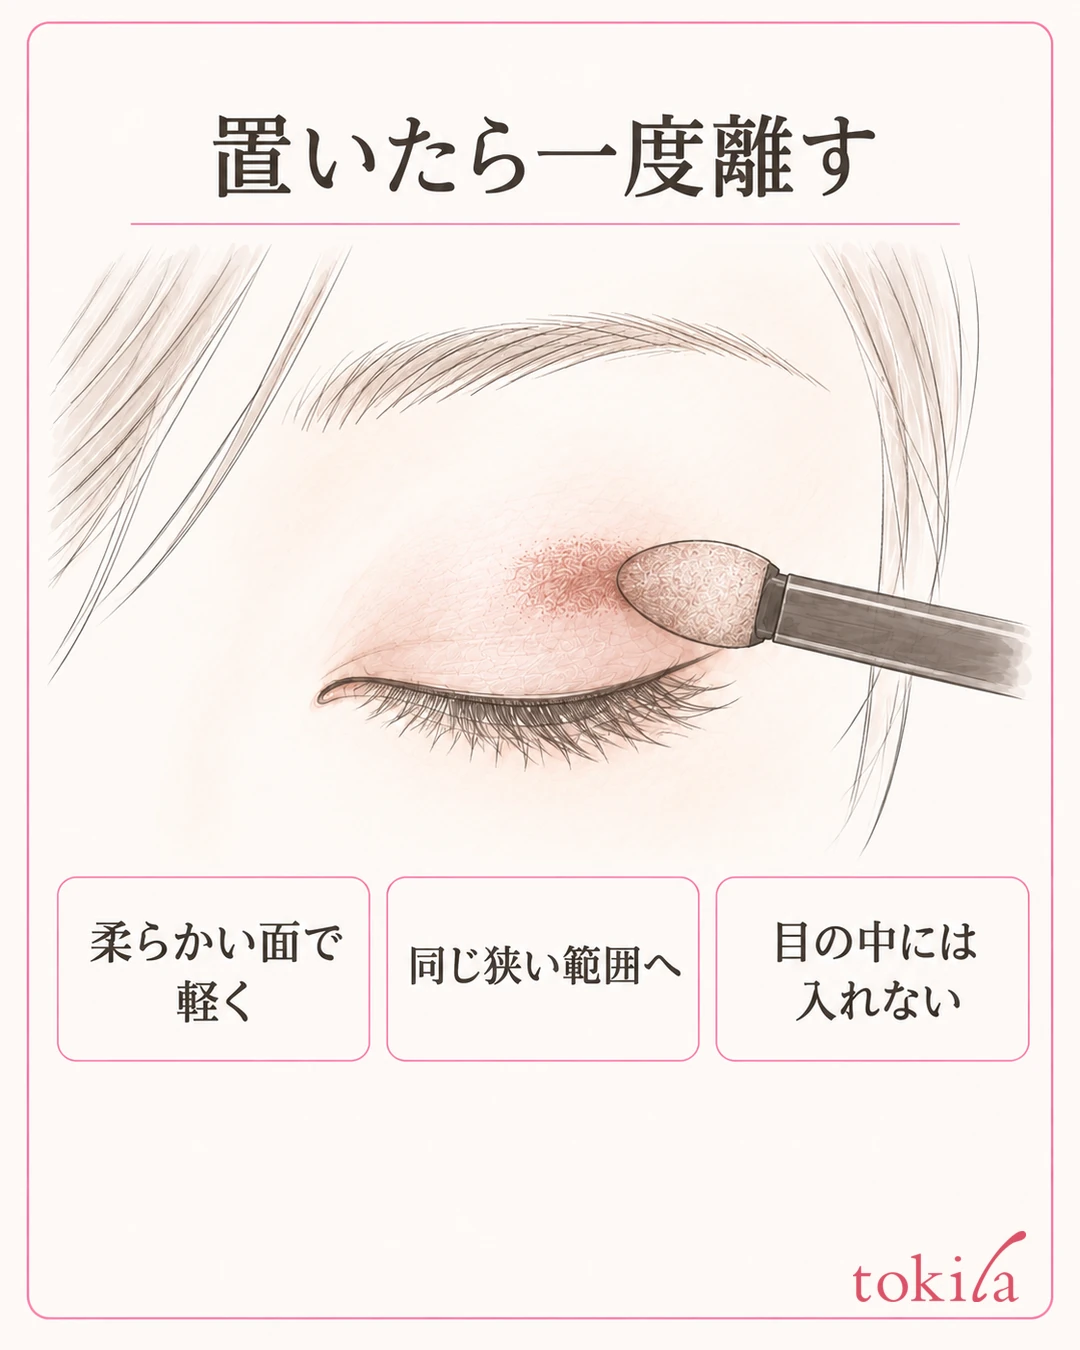
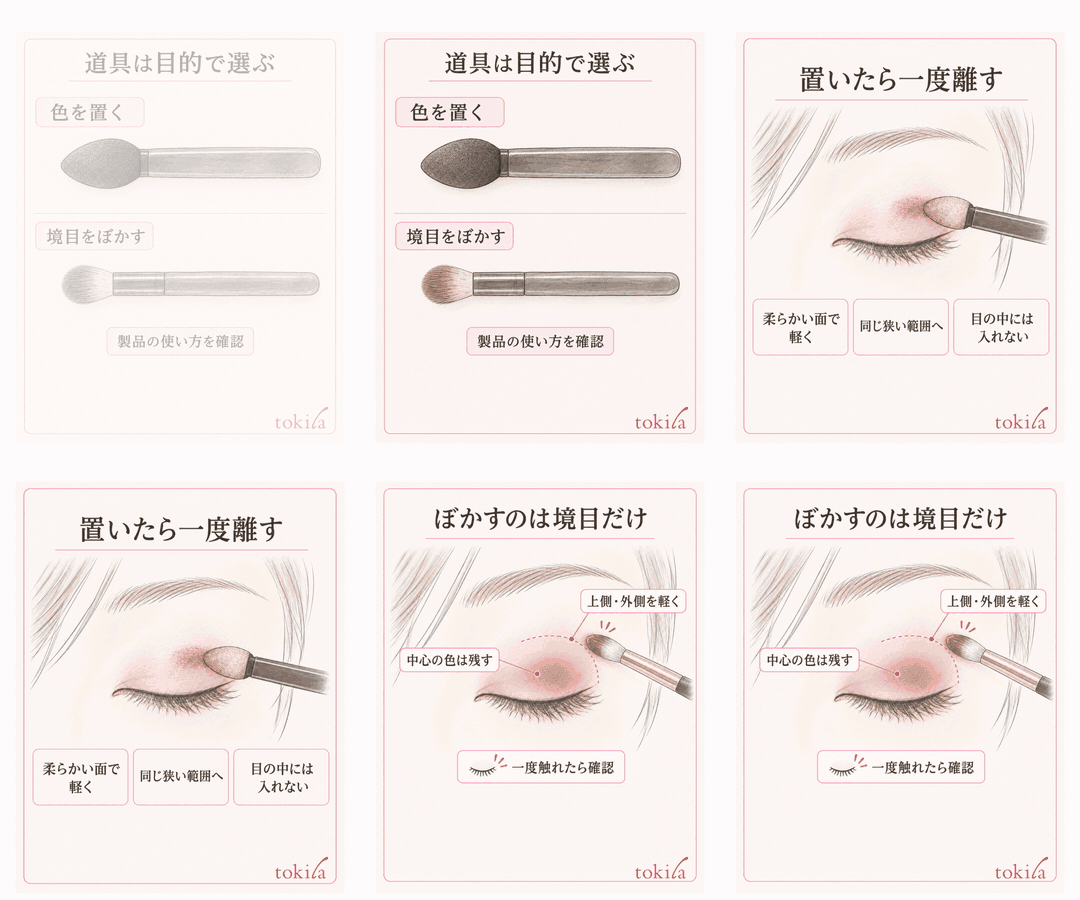
Set the mirror a little lower, at an angle where you can see the skin of your upper lid without strain. If the product allows use with a tip, lightly touch the soft face of the tip to the narrow area where you want to place color and lift it away. There is no need to press hard to force powder out or to rub the same spot repeatedly.
The first time, check within the area of the upper lid where you originally placed color. Do not spread it all the way to under the brow in one go just because it looks pale. After placing the color, lift the tool away and look with your eyes both downcast and facing forward. If the color is not enough, layer a small amount over the same small area, and look again each time you add.
If the color hides when you open your eyes, simply increasing the amount you pick up will not change the place that is visible. First check which position is visible and, if necessary, adjust the area only slightly. Rather than fixing the width by a classification of eye shapes, use your own eyes opened naturally as the guide.
Do not push the corner of the tip into the lash line, and do not apply to the mucous membrane or inside the eye. If you are aiming at a thin area, switch to a small tool that can be used there before using a large tool at an awkward angle. For products used with the fingers, place them with the pad of a clean finger, following the specified method.
If it becomes deeper than expected even with a small amount, stop adding. Rather than layering a lot of a different light color to make up for it, decide the area with excess color and tidy it lightly. If it has become wide and thick, redo the necessary part following the method of an eye makeup remover, and do not keep rubbing it.
4. Check the product's order for the base, and blend only the edges
If the color is visible right after you place it but fades every time you blend, check the area you are moving. Are you making many passes with the same pressure all the way to the center, where you want to keep the color? Separate the action of spreading the center widely from the action of softening the surrounding edges, and decide in the mirror where you will touch.
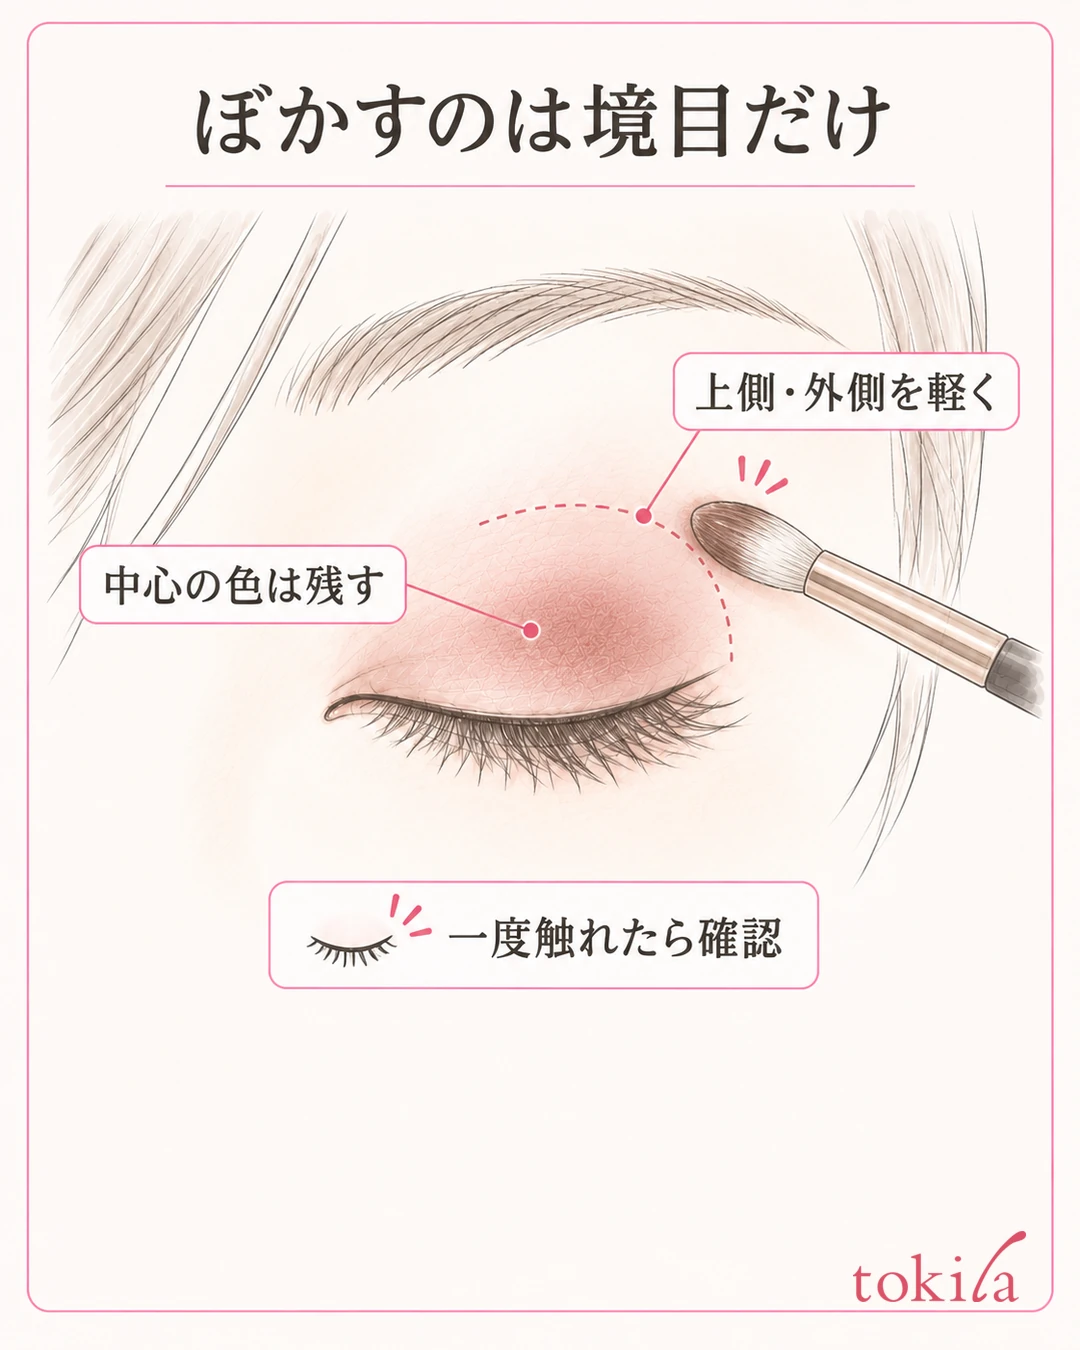
With a clean tool that has no color on it, touch the upper or outer edge briefly and lift away. If the necessary color remains in the center and an abrupt change of color does not bother you, you can stop there. There is no need to erase the color of the whole area just to eliminate the edge. For the basic color combination, see How far to apply and how to blend two eyeshadow colors.
As a way to change the base before applying, there are also eye shadow bases made for the eyes. Do not use this order as a procedure common to all bases.
If you use a base, read that product's amount, where to apply it, and the order of layering. If you try to adjust color payoff by adding a lot more base on top of thick foundation and a lot of powder, it is easy to lose track of which layer is moving. If there is any clumping in the previous layer, tidy it before covering it.
Some bases also have color or pearl. It will not necessarily look the same as a colorless one, so check the impression of the color you place on top as well. Start with your usual single color and change only the condition of using a base; this makes the points to review clearer than changing the tools at the same time. Do not treat it as a guarantee of color payoff or wear.
Wet the tip or brush with water or toner only if the product allows it. Do not return a tool you wetted on your own judgment to make the color look deeper back into the container, and check the handling instructions for what you own. Rather than alternating, "powder because it is sticky, cream because it is pale," stop the process once and sort it out.
5. Decide when to stop by looking at the whole face, and change only one thing next time
Finally, bring the mirror back in front of your face and open both eyes naturally. What to check is whether the color you want to show comes through, whether there is an edge you have spread too far, and whether the strength on the left and right bothers you. Do not make matching the depth with downcast eyes the only condition for being finished; judge by how the color around your eyes looks on the whole face.

If you plan to add eyeliner or mascara, look again after that. Even if you feel it is lacking midway through the eyeshadow, the rest of your makeup will change the impression of your eyes. Rather than adding more color than necessary from the start, finishing first and then considering only the small spots that are lacking lets you narrow the area you need to fix.
Do not keep making your everyday makeup deeper only because it looks pale in smartphone photos. Photos are affected by light and retouching, and they do not necessarily match the color you see in the mirror. Separate days when you adjust for photography from your usual finish, and check in a way that suits where you want it to be seen.
If the color shows in your usual room and the edges look natural, it is fine to finish while it is still soft. Success is not only about reproducing the palette color across the whole area. If you separate days when shine is the star from days when color is the star, you can move away from judging "it's pale, so it failed" and enjoy the finish you chose.
Notes for next time can be short. Record the color you used, the tool, the place you first placed it, and the step where it began to look lacking. Write down what you saw, such as "it looked faint after spreading with a large brush," and avoid concluding anything about your skin type or the product's performance from a single try.
Next, review just one condition at a time: only the tool, only the blending area, or only whether you use a base. If you change color, amount, and tool at the same time, it is hard to carry over what worked to the next day. If you feel discomfort or irritation around your eyes, do not continue layering, and review your use according to the product's precautions.
Written by the tokila editorial team. We have organized judgments and adjustment steps you can review with the tools you already have.



