
You pinned your hair, yet the section loosens with a little movement. Even when you push it back in, only the pin slips out. When that happens, before adding more pins, work out whether the pin is coming out or the hair you clipped is sliding. What you should recheck depends on how thick the section is and whether you caught the hair underneath that acts as support.
Here we focus on bobby pins, which hold hair between two legs, and explain how to secure a small section of hair. U-shaped pins and decorative pins that open and close work differently, so do not apply the same direction or motion to them. Do not push in a pin while putting up with pain; go by the shape of the tool you have and its label.
1. See whether the pin is slipping out or the hair is coming loose
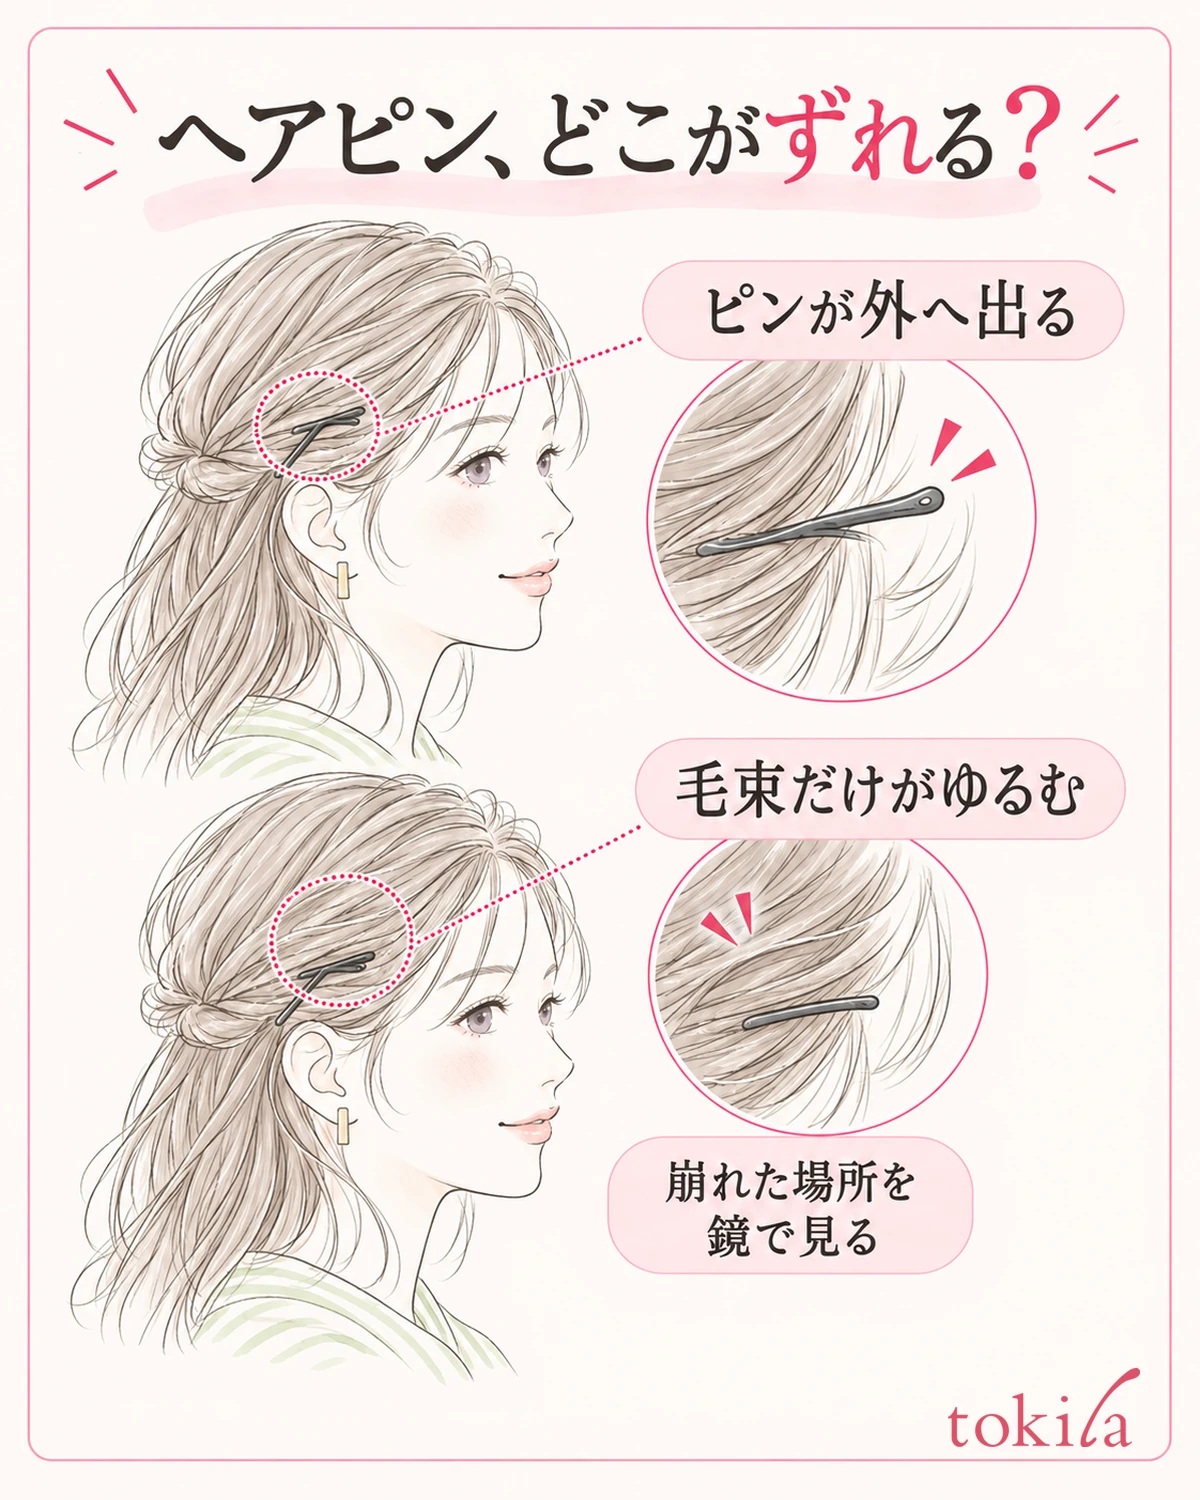
First, instead of continuing to touch the spot that came undone, look at it from the side in a mirror. If the folded end of the pin sticks out farther than it did at first, the pin itself is moving. On the other hand, if the pin stays where it is but the hair above puffs up or the twist comes undone, you may not be catching enough of the section you want to hold. If both are happening, taking it out and starting over is easier to judge than searching for the place to push it in.
Support the section you want to hold with one hand, and lightly hold the visible part of the pin with the other. If your scalp is pulled at this point, do not push further in that direction. When you move the pin back a little, do not yank out caught hair; loosen the section as you take it out. If the back is hard to see, use a hand mirror, and for your first practice it is fine to switch to a spot you can check by hand, such as above the ears.
What to check is not all of your hair but the part that a single pin is holding right now. The support you need differs depending on whether you are leaving the weight of a large bun to one small pin or just want to hold down a short strand at the side. For a large section, you can also first make a base with an elastic or similar and leave the pins to adjust the ends and the surface.
Before undoing the section, also note where you had pinned it. If you keep pushing by feel because you cannot see the pin, you lose track of the original direction. Check in the mirror before taking it out, and keep a dish for the pins and a comb nearby so you do not have to let go of the section midway.
Remember just one situation in which it comes apart. The differences are things like it falls right after you pin it, it slips out when you shake your head, or it gets pulled when you hang a bag on your shoulder. If it falls right after pinning, start by rechecking how you clipped it; if it moves only afterward, recheck where you secured it and what it touches, and you are less likely to repeat the same failure. For how to make the whole hairstyle, see also the basics of updos.
2. Check the shape and tips of the pin, and set aside damaged ones
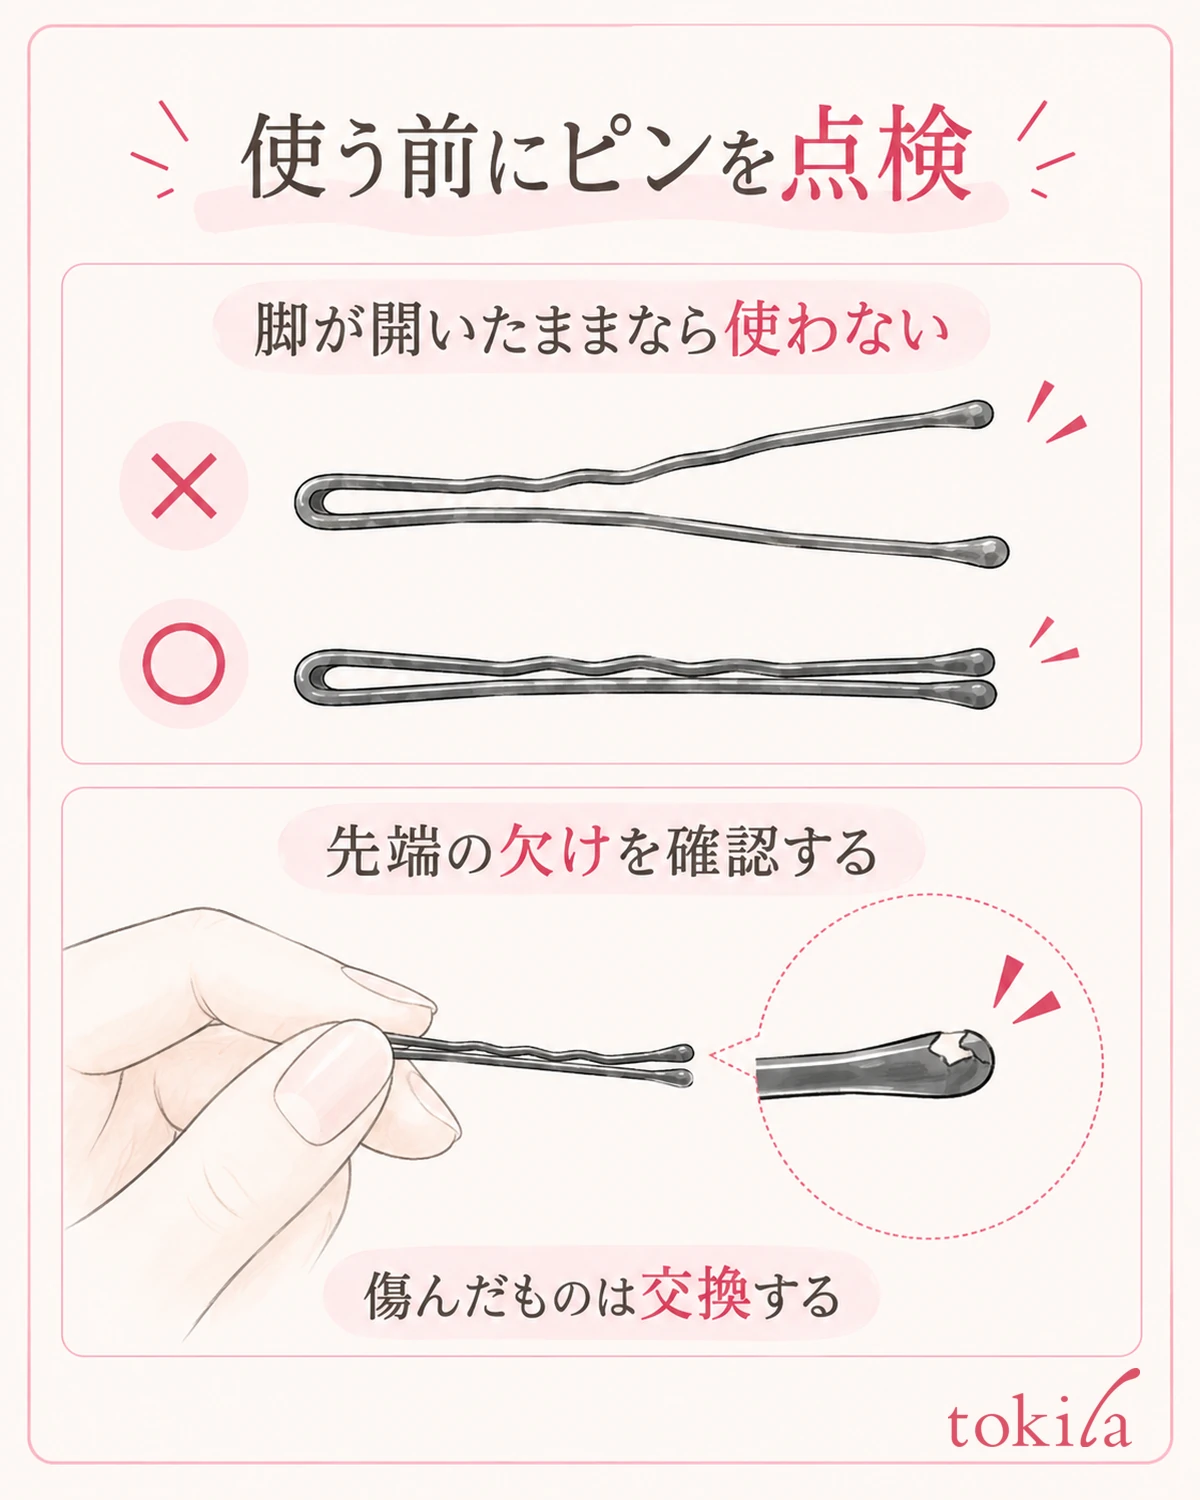
Bobby pins come with straight legs, wavy legs, legs curved to follow the roundness of the head, and so on. There may be a long leg and a short leg, or the two sides may be similar in shape, so first look at one pin on a desk. Do not decide only from a rule of thumb such as "the wavy side always goes down"; check the shape of that product and its directions for use. The steps from here are one example of clipping a small section with a typical bobby pin that has a long leg and a short leg.
Set aside pins whose legs stay wide open even when nothing is clipped, whose two sides are twisted and do not meet, or whose protective tip is chipped and catches. Separating whether it opens only when it clips hair or does not return even when empty keeps you from confusing the amount of hair with wear on the tool. Do not bend it back into shape by force or repair the tip with glue; replace it with one in good condition.
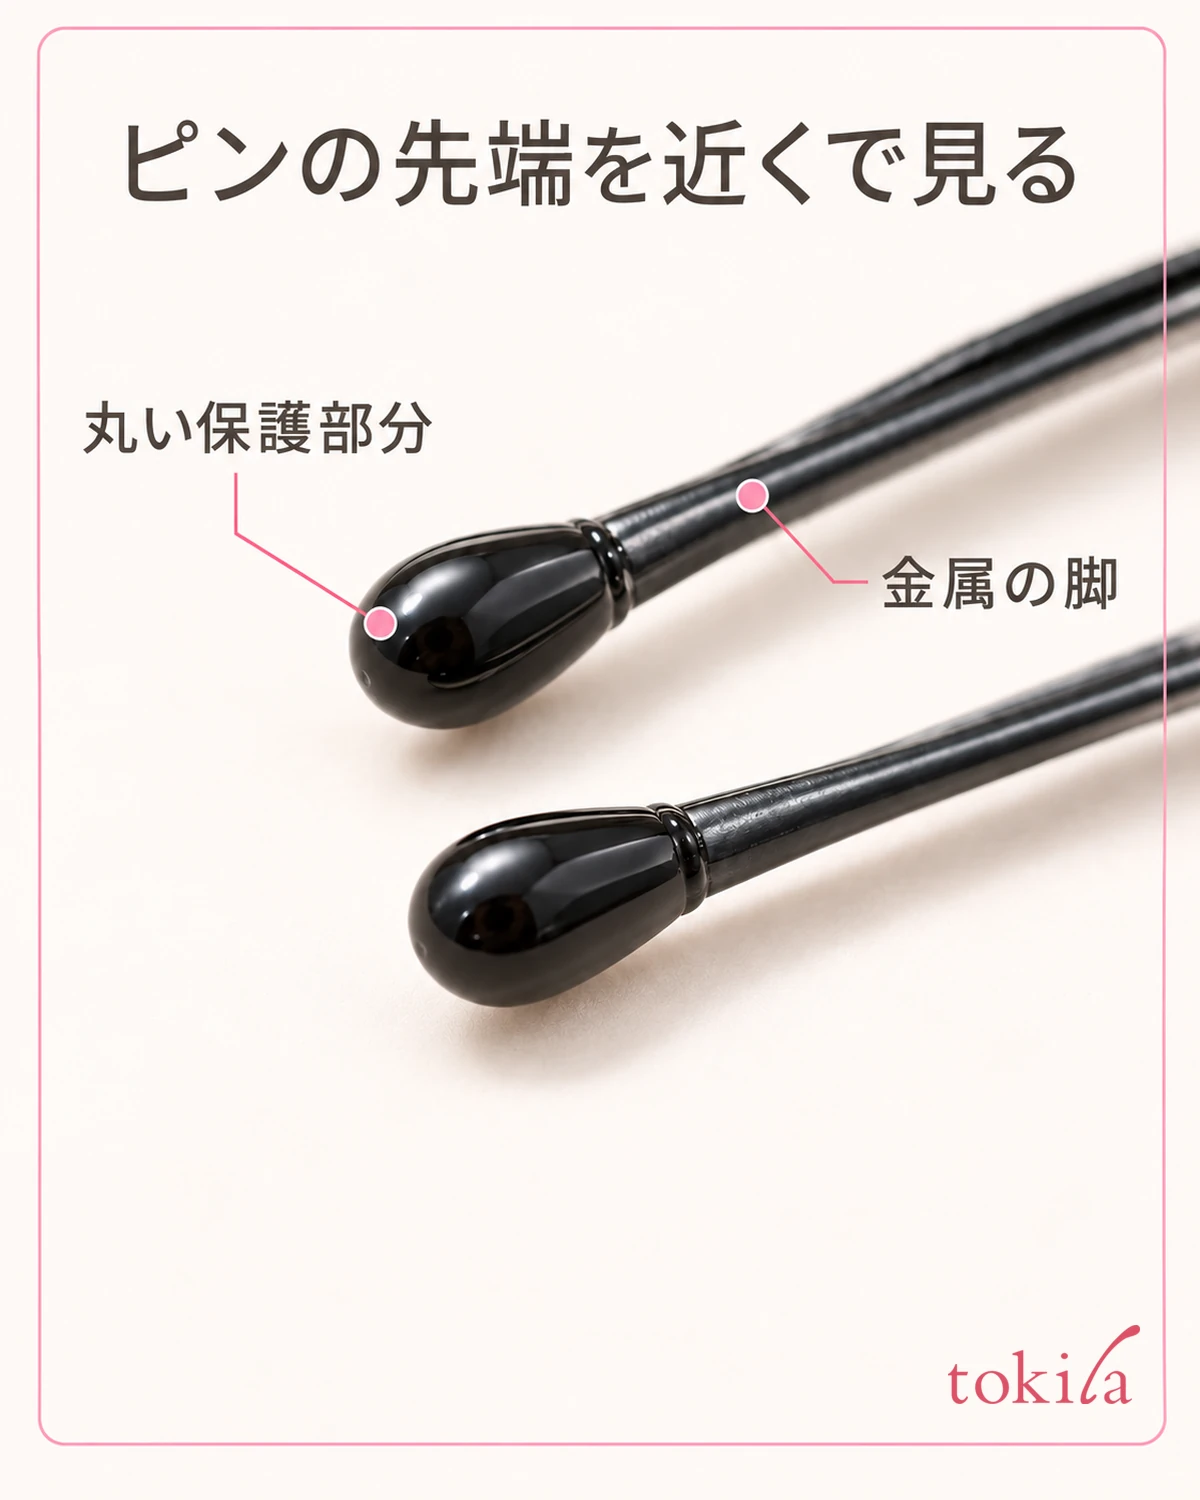
Length alone does not decide how firmly it holds. If you use a large pin with a decoration on a short section, the weight and the bulk of the decoration may bother you. Conversely, if you try to fit a thick section entirely into a small pin, the legs spread and it becomes hard to catch the hair. Choose a tool that fits comfortably over the area you are pinning and whose tip does not poke out.
Decide which side to pin first by what is easiest to see and hold. Directions look reversed in a mirror, so do not remember them only as words like "move it toward your right hand"; look at where the opening and the tip actually go. Even if you want both sides to look the same, do not push them in at the same angle from the start; follow the flow of the hair on each side.
If styling product or dust is noticeable on the surface that touches your hair, remove it according to that pin's care instructions. Being metal does not mean it can always be washed in water or wiped with alcohol, and the handling of paint and resin varies. Do not open a pin with your teeth or hold it in your mouth for a moment, and if you put the pins you will use in a small dish within reach, you can choose them while checking their direction and condition.
3. Do not clip a thick section all at once; reduce what each pin holds
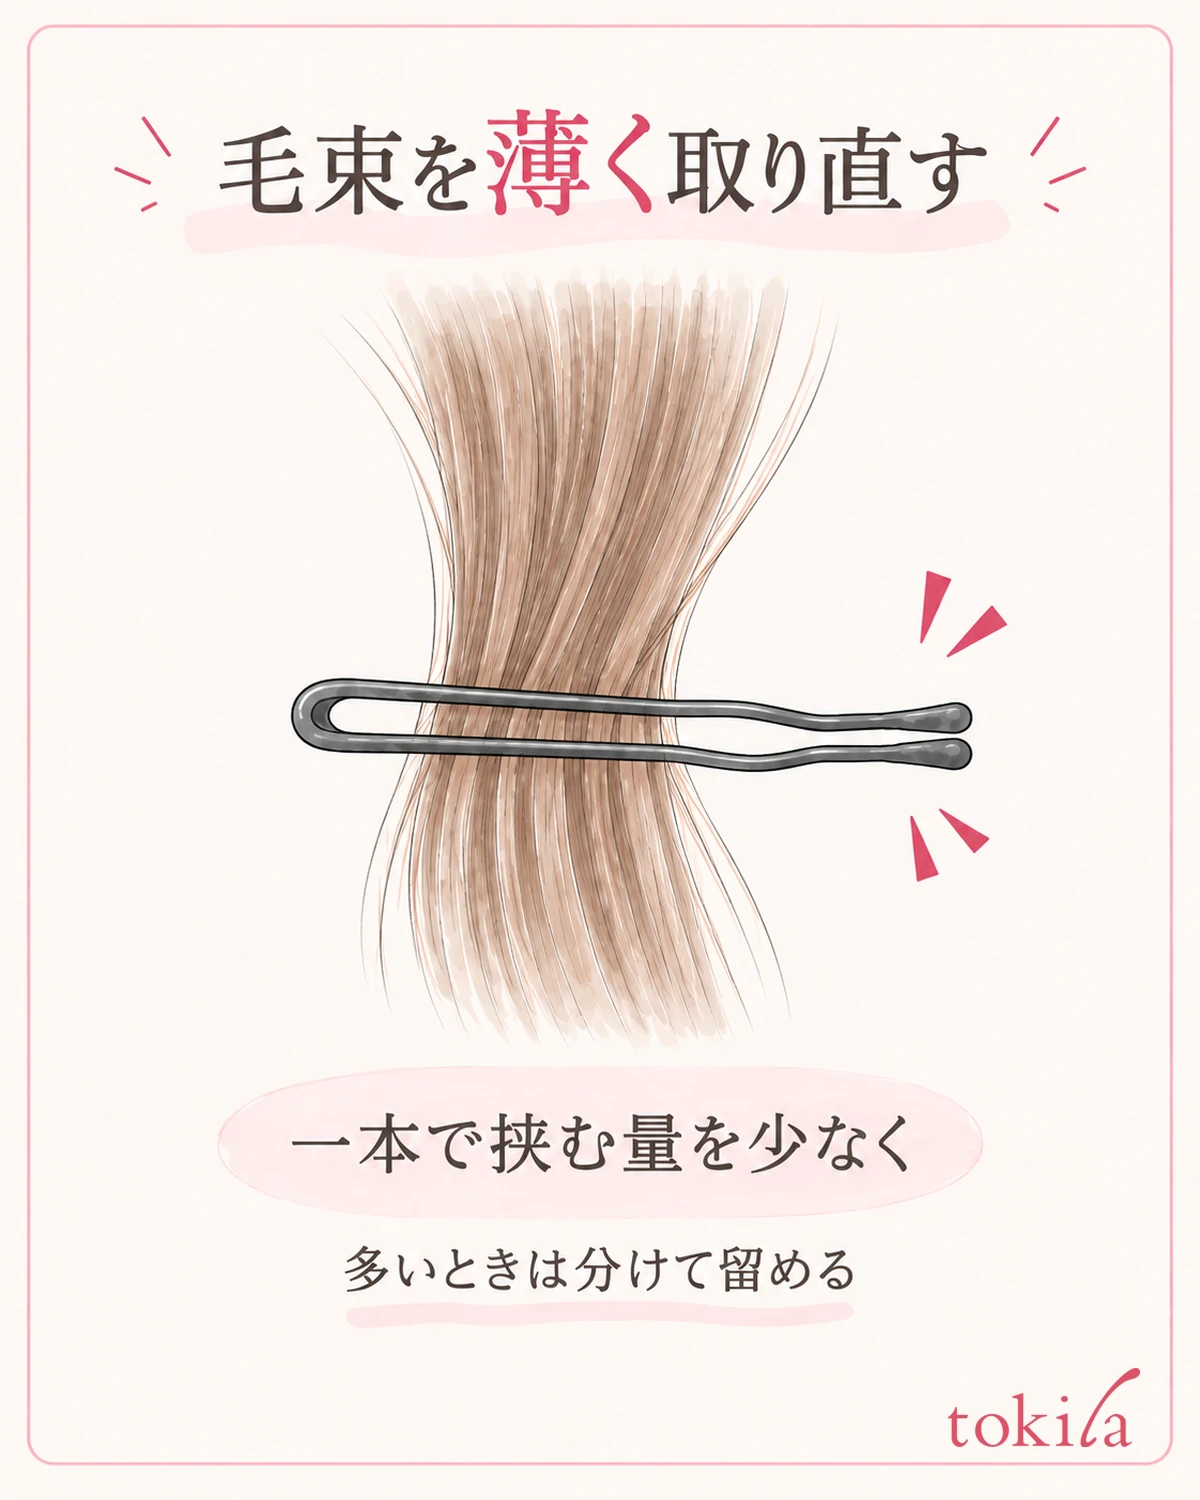
If there is nothing wrong with the tool, next look at how much one pin is clipping. If the legs open wide and the hair bulges at the entrance, check whether you are trying to put in a thick section all at once. Rather than pushing it deeper with force, taking the pin out and picking up a thinner section of the part you want to hold is easier to adjust. The number of hairs and the width of a section differ with hair type and tool, so there is no fixed number of centimeters or strands.
When pinning hair at the side, do not scoop up all the hair above the ear; take a small section from the surface and support it with your fingers. You do not have to pull it hard from the root and press it flat. Place the pin near the fingers supporting the section, and after clipping the hair, look from the side to see that the legs are not spread too wide. If the entrance still lifts, divide the section further and start again.
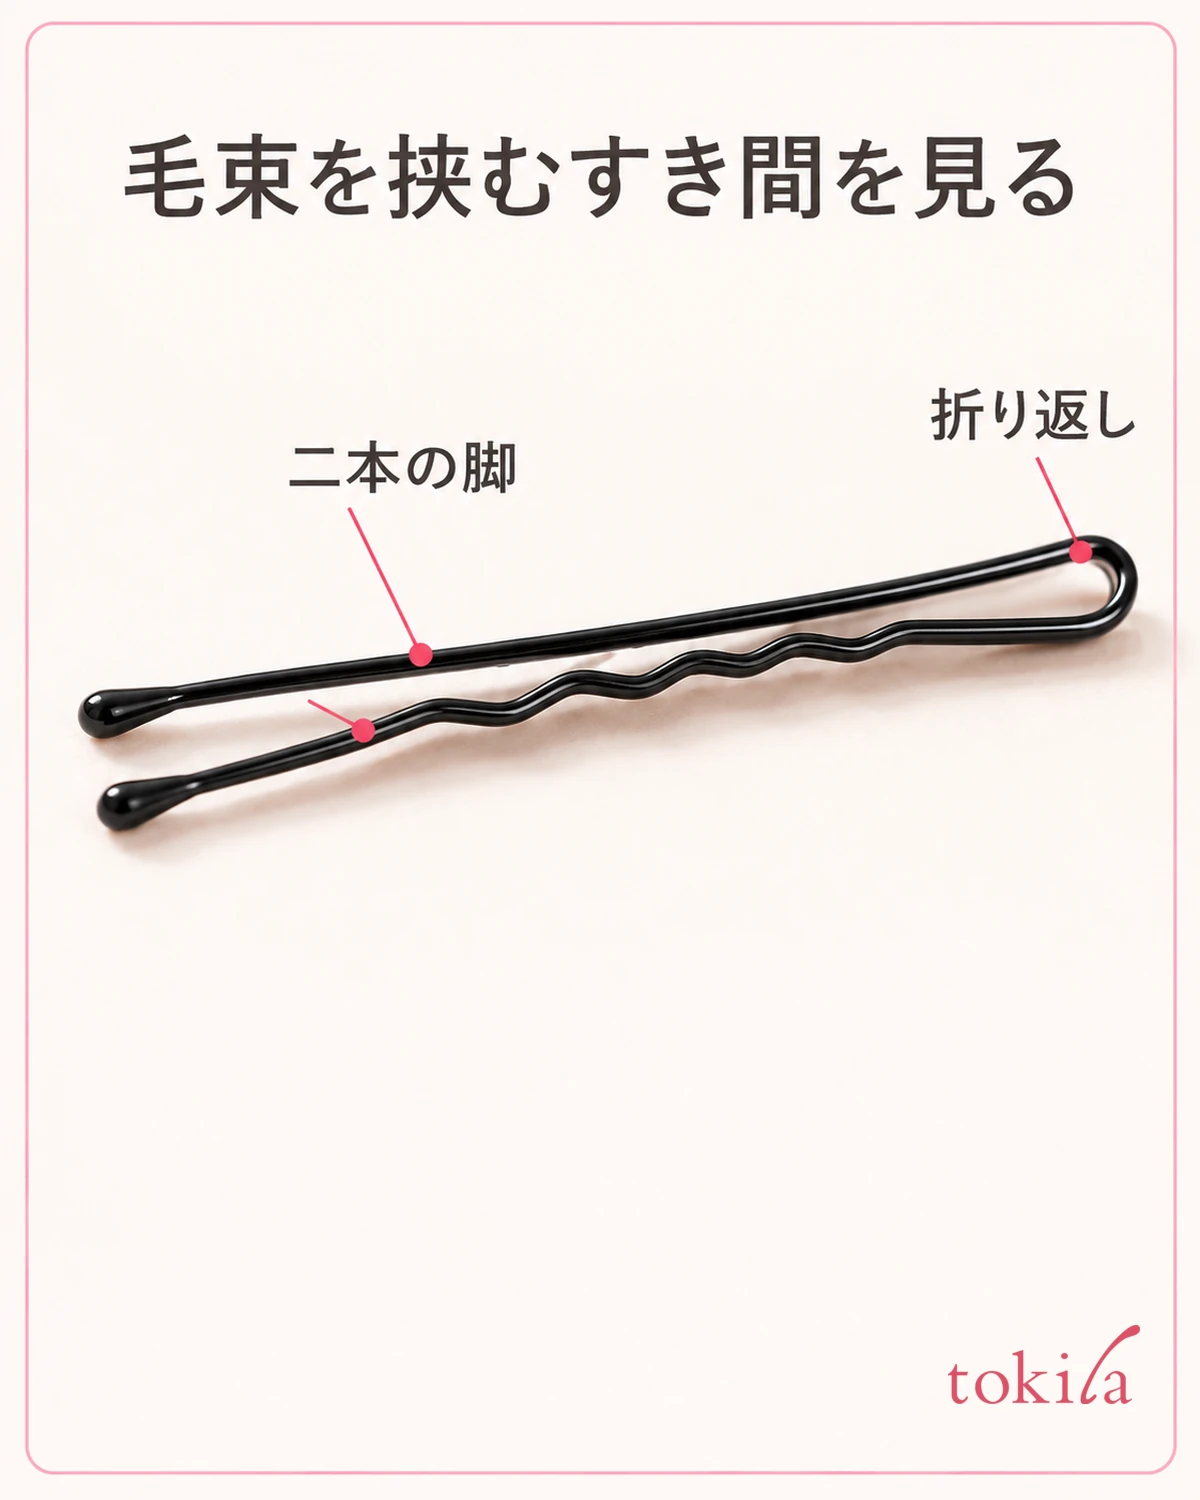
Reducing the amount is different from forcing yourself to pinch just a single strand. If the hair you want to hold touches only one side of the pin and slips out as soon as you let go, recheck where you support it and how much of the hair underneath you are taking in. A thinner section does not always hold, so check the connection with the base in the next step.
If a large gathered section is heavy, do not leave all of it to one pin; first check whether the base, such as the knot you made earlier, is stable. Instead of piling on extra pins blindly to support the first one, let them hold other places that loosen. Do not cross metal pins hard and press them against your scalp or push many into places you cannot see; keep track of the position of each pin.
4. Clip the section and the hair beneath it together
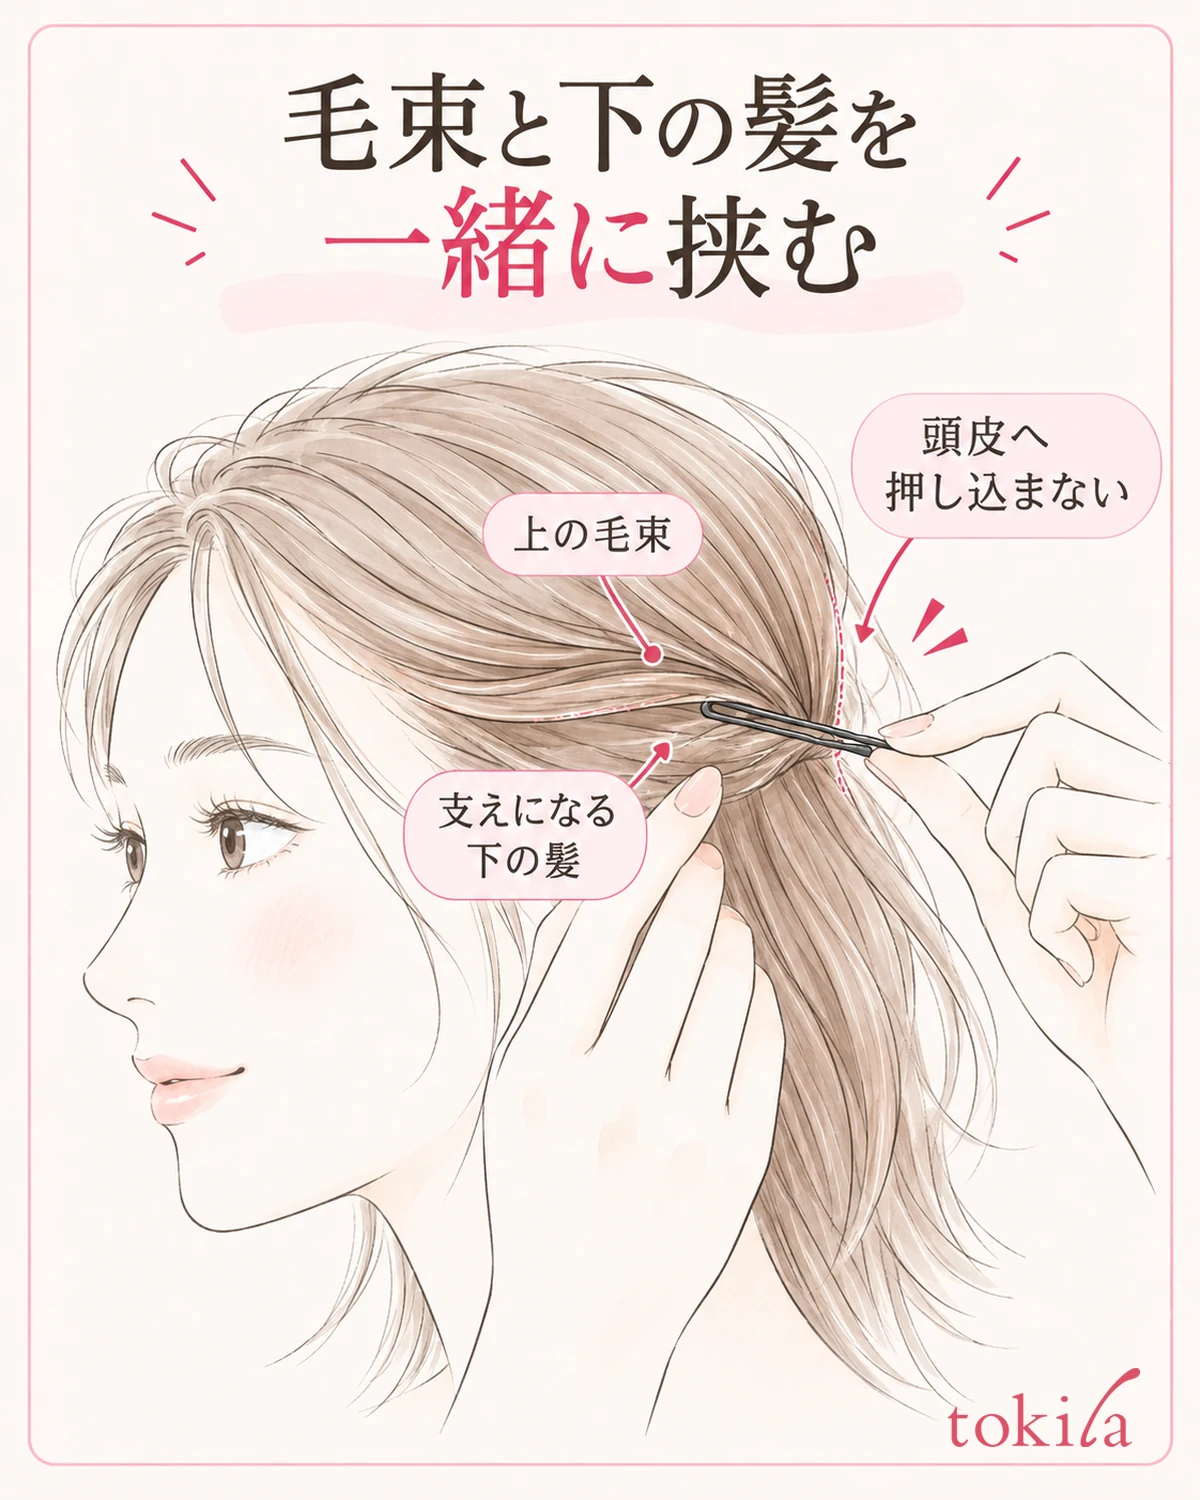
Even if you pass the pin through only a small section you picked up, it may move together with that section. What supports it is the hair under the section that grows along the head. Look for a position where both the section above and the hair beneath fit between the two legs. The pin is not meant to be stuck into the scalp for support, so avoid pushing toward the skin.
First, while still supporting the section you want to hold with one hand, bring the pin's opening to its edge. With a bobby pin that has a long and a short leg, one method is to place the long leg where it can scoop the hair underneath. Do not just slide over the surface of the section; clip a small amount of the hair beneath it as well and slowly advance in a direction that follows the surface of the head. Do not mix this with flipping methods such as twist pinning, and at first check with the motion of pinning a small section flat.
If it catches partway, hurts, or the pin bends outward, stop pushing. Take it out and start again after changing just one of these: make the section thinner, move slightly to a position that clips supporting hair, or check the direction of the pin. If it slides in the same direction as the flow of the hair, also see whether you can clip across the hair underneath. Do not make it a rule that you should always insert straight up or down for every hairstyle.
After inserting it, loosen the fingers that were supporting the section little by little and see whether it lifts. If it comes undone right away, do not cover it with other hair from above to hide it; check where you managed to clip. You can think about whether the pin is noticeable after it holds. When you finish by pulling out some hair, support the secured part with one hand and avoid pulling around the pin all at once.
5. Check after moving, and remove pins one at a time when taking them out
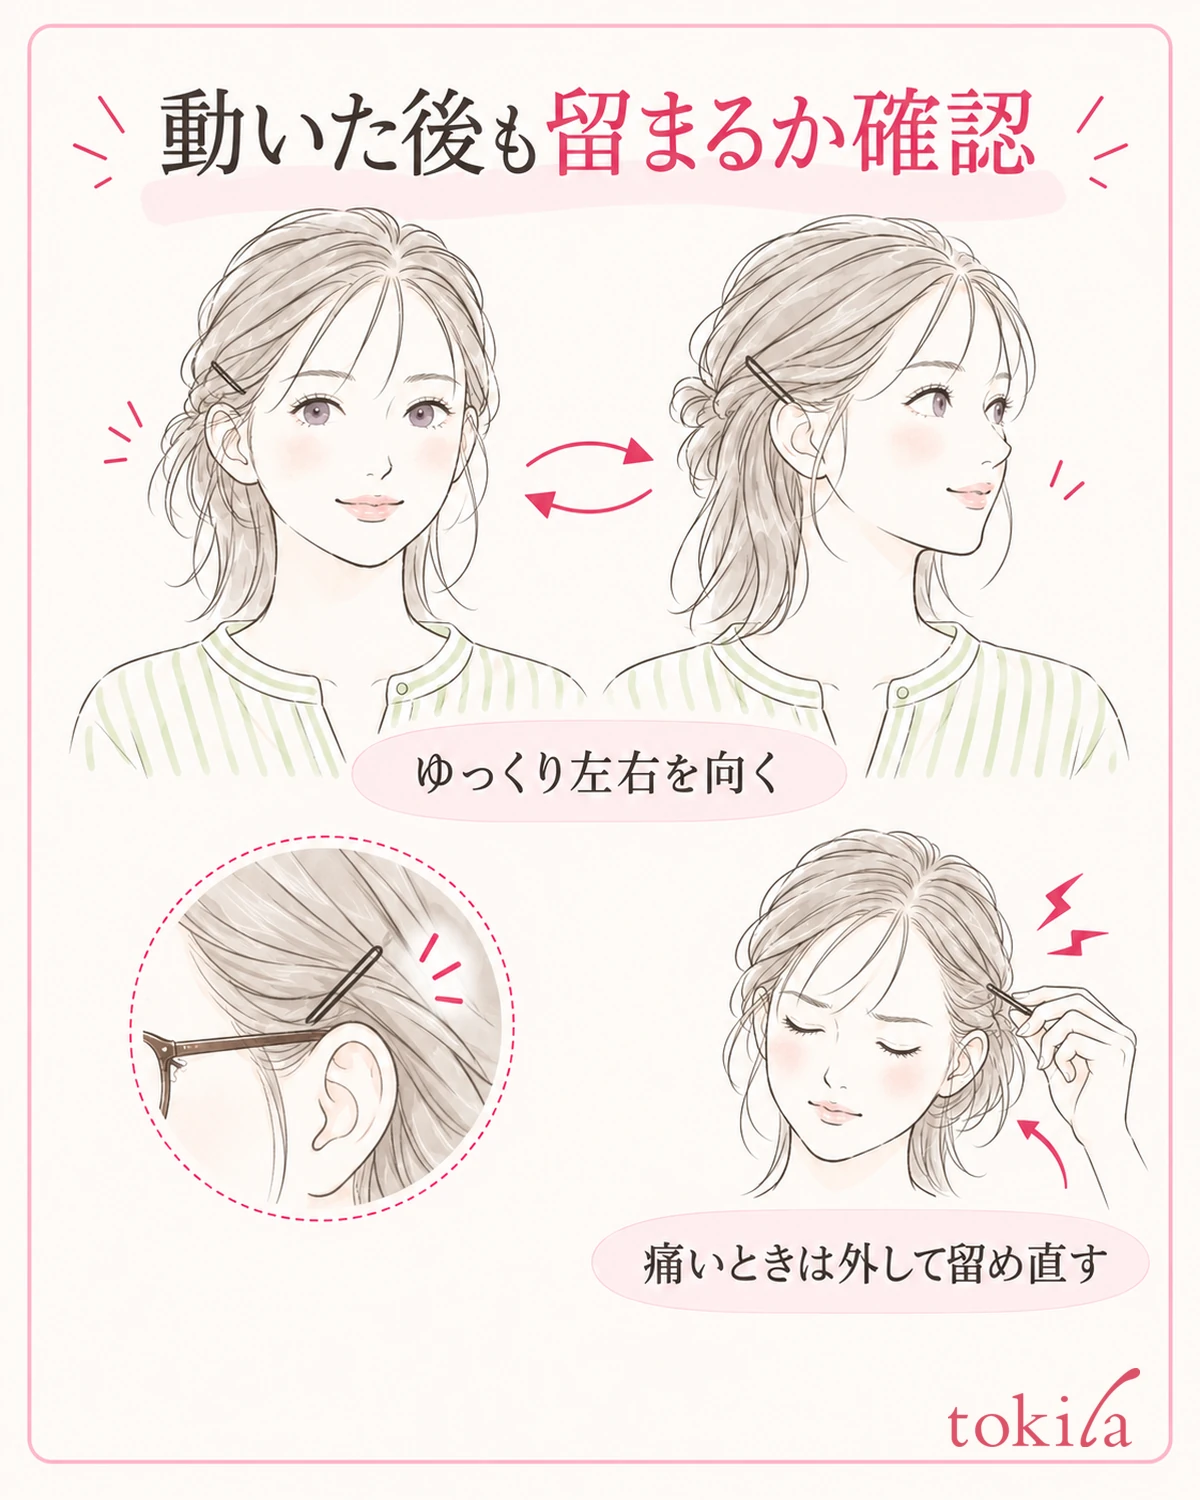
Even if it is stable right after you pin it, check with actual movement. After letting go and looking at the front and the side, slowly turn left and right and lower your head slightly and come back up. Check that the folded end of the pin does not come out and that the roots of the section are not pulled. There is no need to shake your head hard to test the strength. If a hold hurts, change its position even if it looks neat.
If you use glasses temples, mask straps or a hat when you go out, put them on and take them off as you normally would. If it catches on the pin each time, re-pin it where it does not interfere instead of hiding it deeper. If the ends of your hair get pulled by a bag's shoulder strap, do not change only the strength of the pin; look at the hair falling onto your shoulder and where the bag sits.
If your arms get tired from fixing it again and again, take the pins out and rest for a while. On a rushed morning, you can also choose not to force a section that will not hold, and limit it to a small area you can manage with the fasteners you have. Give priority to being able to check the position yourself and to taking it out later, not to how well it is hidden.
When you compare ways of fixing it, first change only the amount, using the same section and the same tool. If it still comes out, check the position you clip, and then the tool, and you will remember what you changed that made it easier to handle. If you note one condition of your own, such as "it held when I took a smaller section" or "behind the ear touches my glasses," you can use it to prepare next time. You do not have to match other people in how long it holds or how many pins you use.
When you take it out, support the section and slowly pull the pin out back along the way you put it in, without pushing it further in the direction it was advancing. If hair is tangled, loosen it with your fingers first, and do not pull and break it. Before bathing or going to bed, take out the pins you used one at a time and check that none remain. Check the removed tools for dirt and wear, and store them dry. If the same place slips next time, before adding more pins, recheck in this order: amount, base, and what touches it.



