
I was making marble nails, and the two colors blended into what looks like one. The more color I add to try to bring the streaks back, the thicker the painted surface gets. When that happens, before mixing any more, try separating the places where you want to keep the color from the boundaries you touch with the brush.
This article mainly covers practicing on practice tips with air-drying nail polish. The process differs from gel that cures under a light. It introduces a flow of checking the pairing of polish and tip and the drying and finishing instructions, then practicing one tip at a time without changing too many conditions.
1. Tell Blended Color Apart from the Color Streaks You Want to Keep
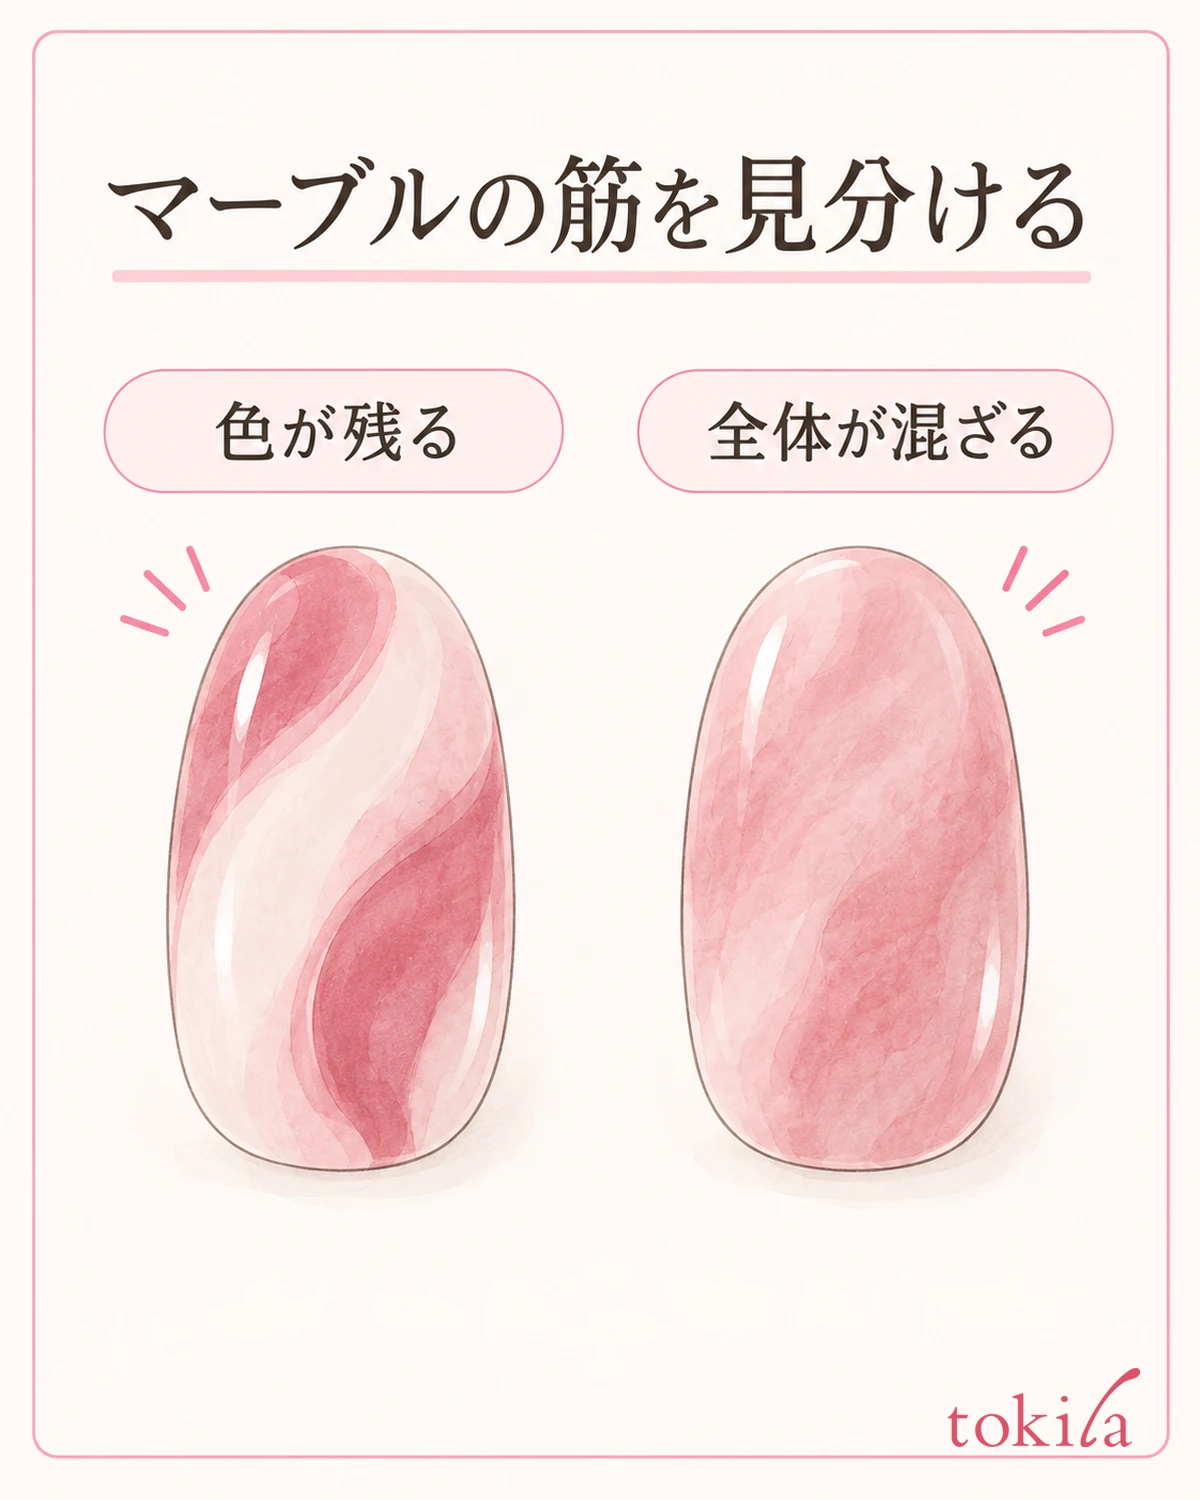
First, lift the brush away from the tip and look at the surface in a bright place. Separate whether there are parts where each of the two colors remains, whether only the boundary has softened, or whether everything looks like the same in-between color. If you want to keep the streaks of color, look not only for the dark spots but also for where there is a surface you can leave untouched.
Marble patterns include ones that bleed softly and ones where the streaks are clearly visible. You do not need to call it a failure just because the boundary has blended a little. If you first choose whether you want a soft haze today or a look that shows the lines of two colors, it becomes easier to think about where to stop the brush.
When choosing where the color streaks will remain, you do not have to touch all the way to the edge of the tip. Try one spot in the center first, then see whether it has become the pattern you like. Separating a way of painting that aims for a uniform overall color from one that leaves color in parts makes it easier to decide where to stop.
After looking at the same tip from above, tilt it slightly and look again. A part that looks white from light reflection is different from a part where a light color was actually placed. Do not assume that strong gloss alone is a white streak; check whether the color difference remains when you return the angle. You do not need to match the colors in a photo or diagram.
Once everything has blended, you cannot separate it back into the original two colors. Rather than adding a lot of color on top to try to recreate the original arrangement, stop the brush for now and choose between keeping the current pattern and trying again on a new practice tip. If you are concerned about thickness or slow drying, choose the option that does not add more layering steps.
The goal differs from creating the gentle boundary of a gradient. If you want to keep the streaks but keep going back and forth over the whole surface, it is easy to drift away from the pattern you are aiming for. Start by choosing one part you want to keep rather than changing the colors, and practice without putting the brush into it.
If you would rather finish the boundary gently instead of as a line, you can also refer to checking the boundaries of gradient nails. You can read it separately from the goal of keeping color streaks in marble.
2. Check the Combination of Polish, Fine Brush, and Tip
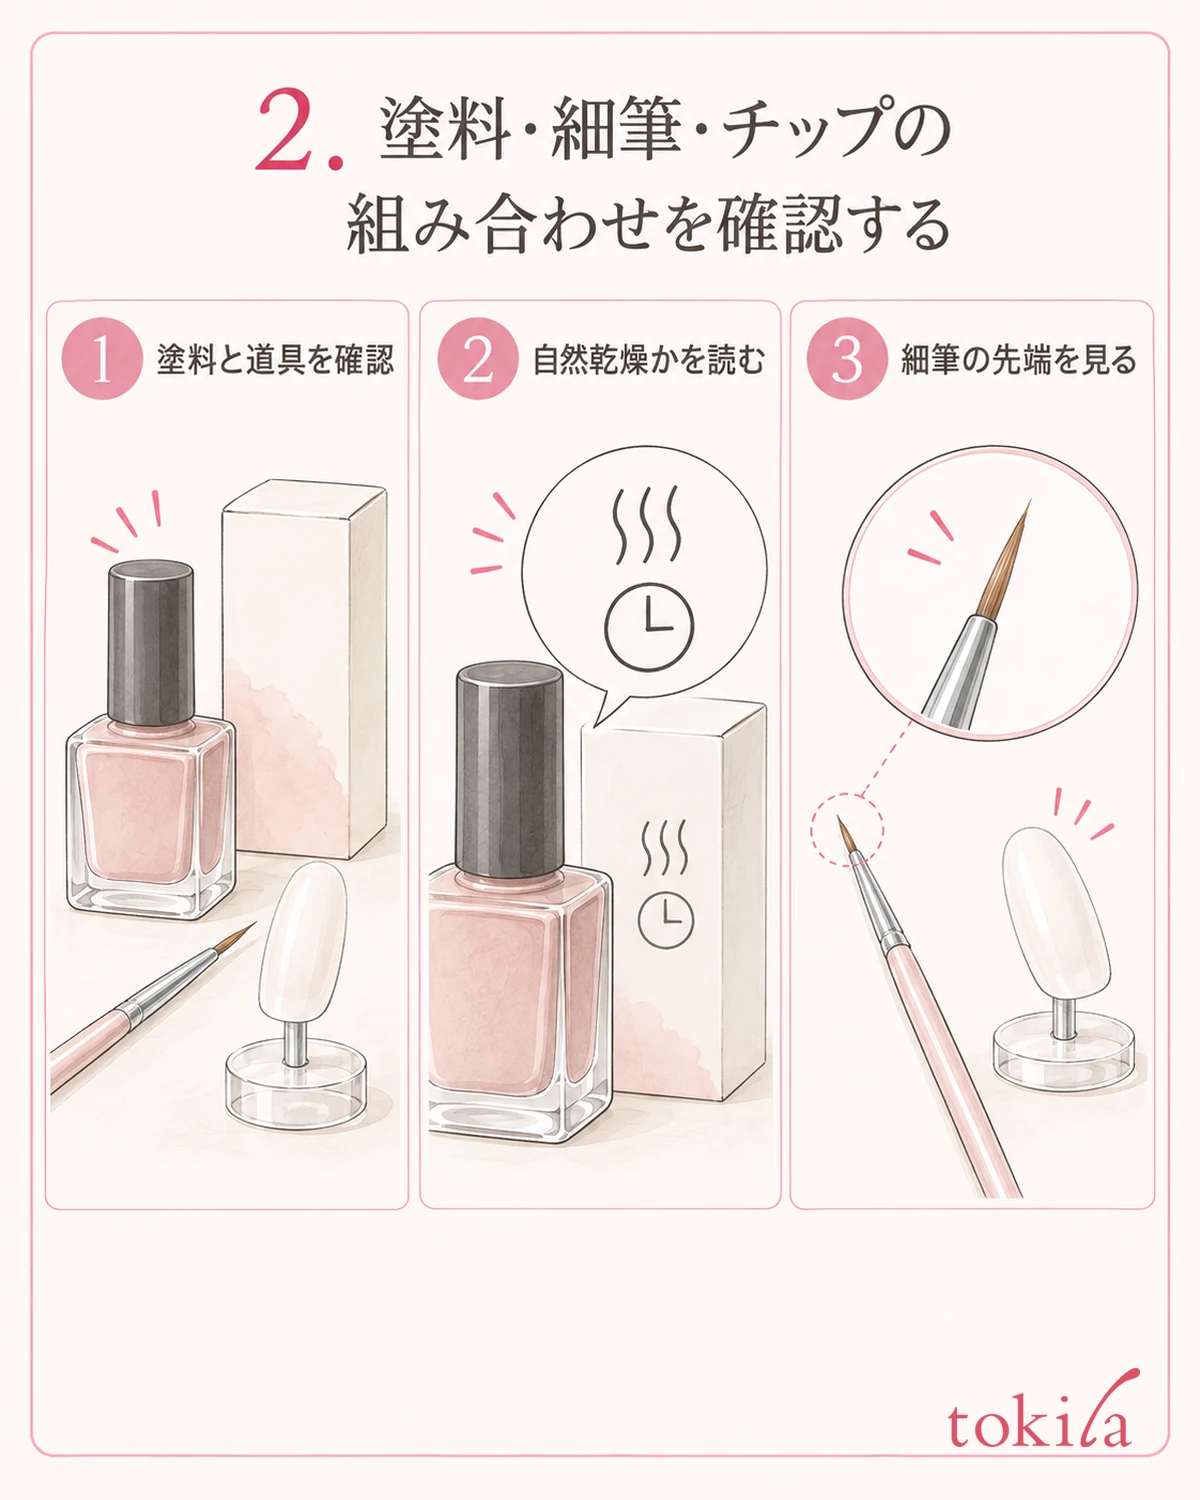
Check on the container or outer box whether the polish you have is an air-drying nail color or a gel that cures under a dedicated light. Even if the names or looks are similar, the processes are not shared. The practice in this article centers on the air-drying type; if you use gel, treat it as a separate process, following that product's instructions for layering, compatible lights, and curing.
Choose a tip made of a material that can be used with that polish. Check the instructions for both on surface preparation and on whether a base or top coat is needed, and confirm before applying to a combination whose compatibility is unclear. Wiping the tip with remover or solvent is not made a step to do regardless of the material.
When touching small boundaries, prepare a fine brush whose tip shape you can make out. With a brush whose bristles are split or spread widely to the sides, it may touch a wider area than you intended. A fine brush does not guarantee that streaks will remain, but get it into a state where you can check which part is making contact.
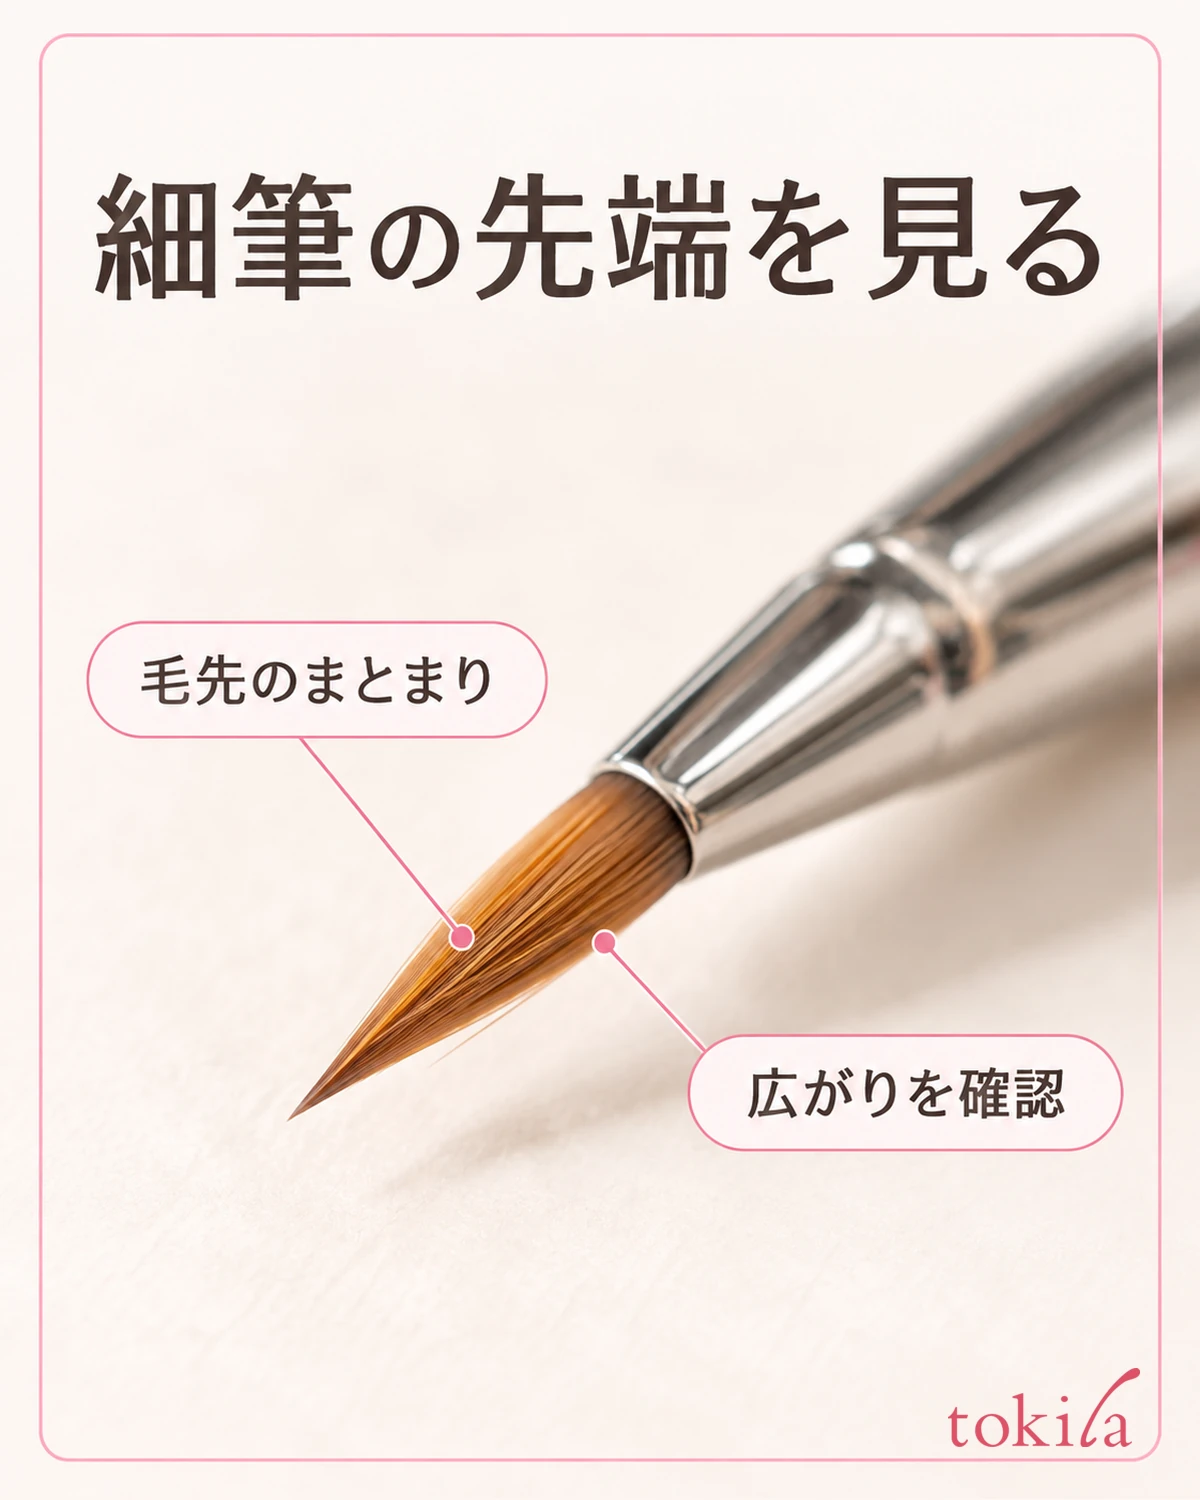
Follow the product's instructions for brush care and for handling leftover color when moving to another color. Avoid returning the attached brush to a bottle of a different color and unintentionally mixing the contents. Set out only the two colors you will use and the tools you need on the work surface, and keep the caps matched with their original containers.
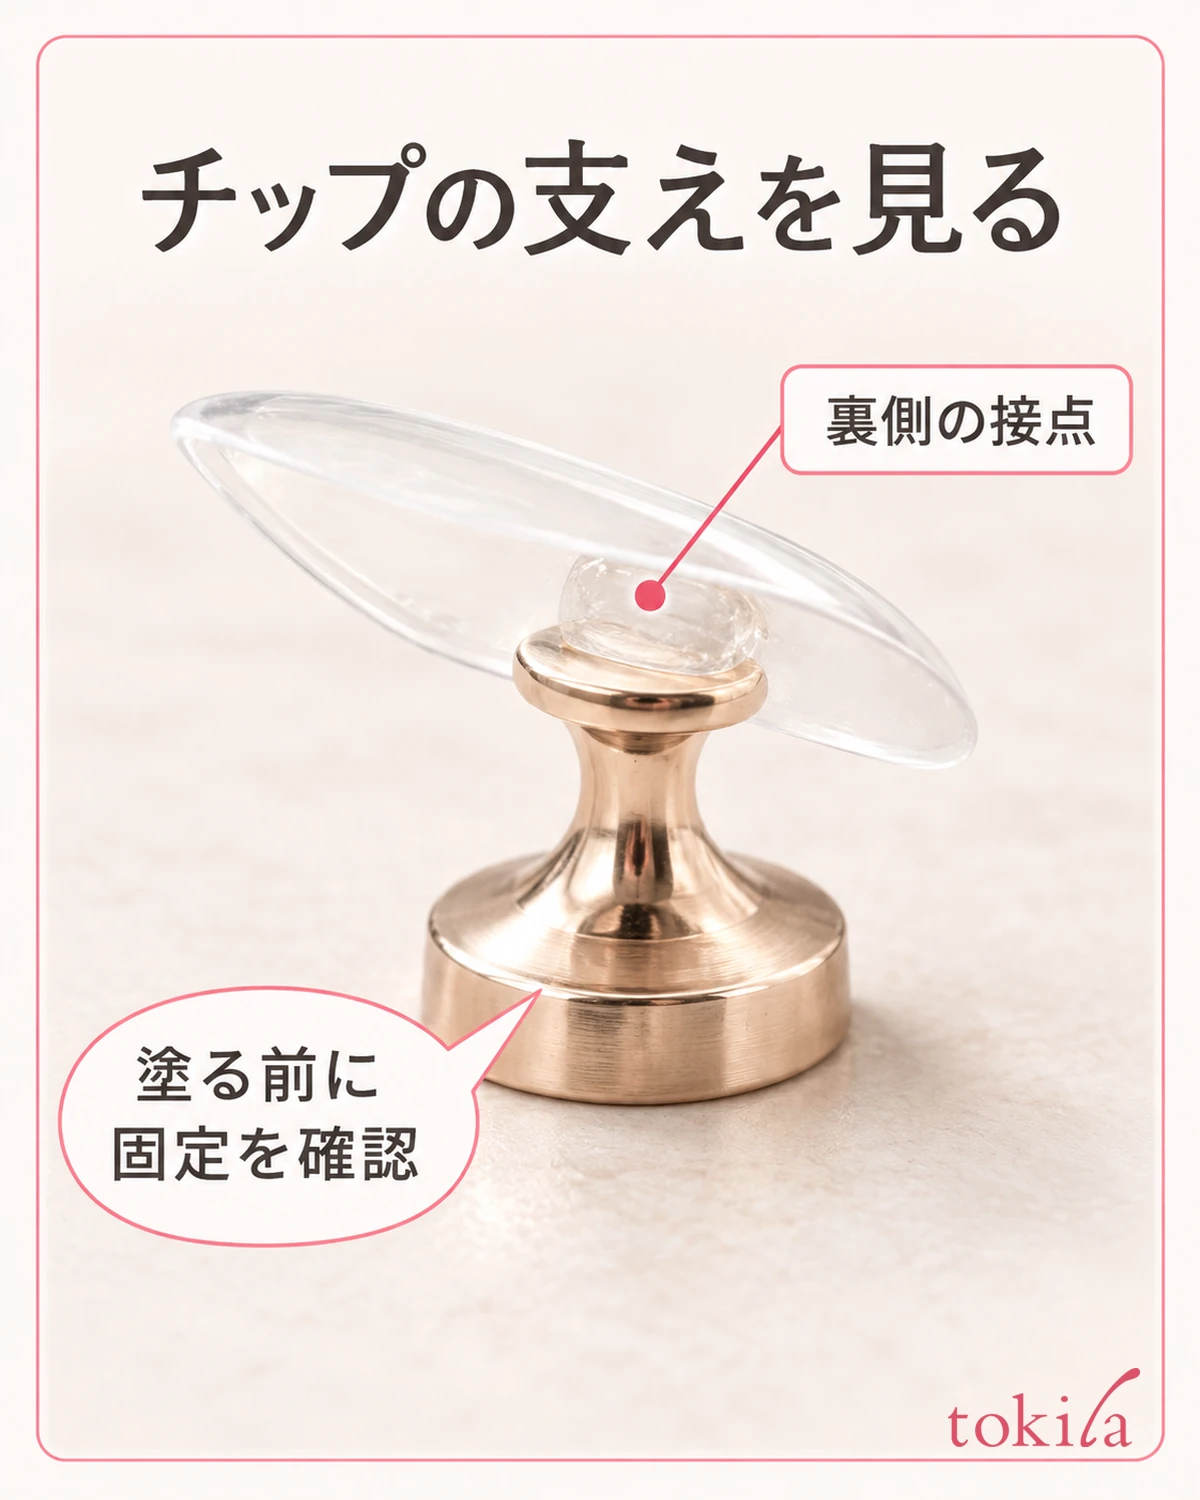
Fix the tip on a compatible stand, and before painting check that it does not rotate when touched lightly with the brush. If you use a stand with adhesive, look at the contact between the back of the tip and the support. Rather than chasing a small tip with one hand while painting, setting it so that it does not move first makes it easier to check where to stop the brush.
3. Leave the Center of the Color and Touch Only a Narrow Part of the Boundary
For your first practice, narrow it down to two colors with distinguishable depth. Do not decide by the color in the container alone; check whether the two colors can be told apart when painted on a compatible tip. Pale, sheer colors may show only a small difference. Before adding a third color or glitter, confirm how your two colors look.
For products that need a base, apply it in the specified order and let it dry. The step of moving the color afterward to make a pattern is done while the polish can still be moved. However, we do not set a number of seconds that is guaranteed to be in time. It also changes with the room conditions and the amount applied, so do not start painting many at once; proceed with one practice tip.
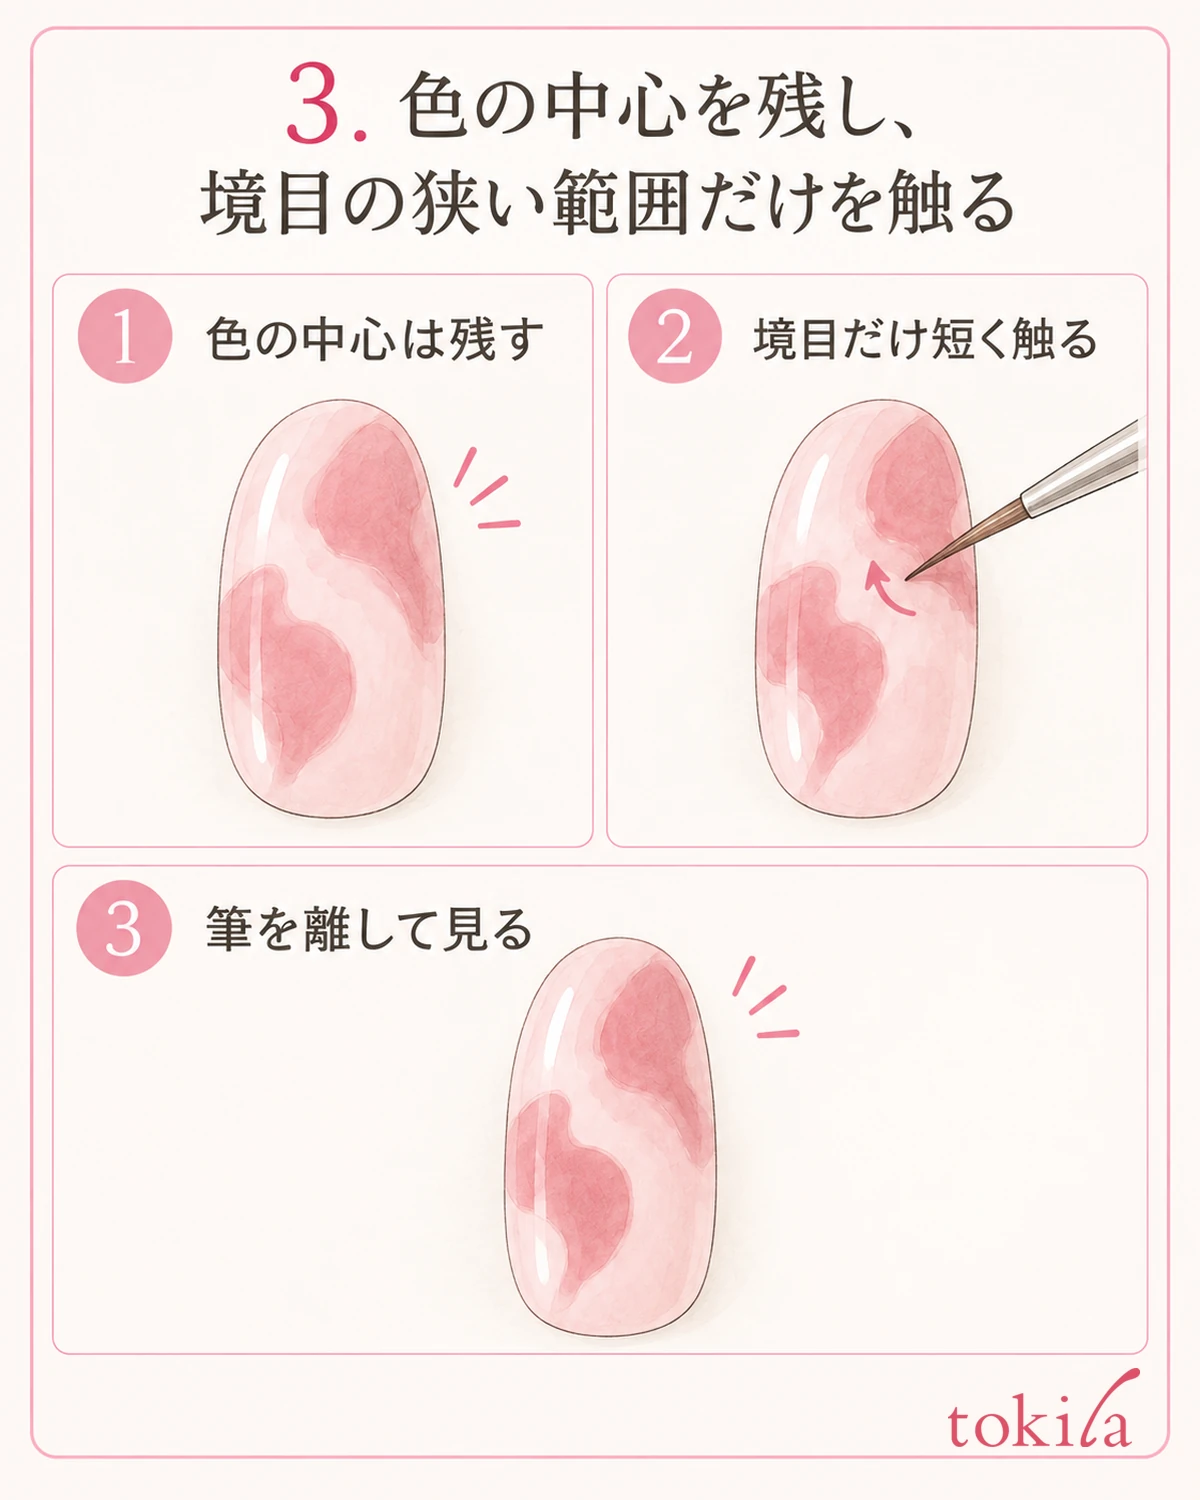
Once you have placed the two colors in parts, rather than mixing everything, choose a part of the boundary where the colors meet. Create a surface you leave untouched at the center of the darker color, and gently move the tip of the fine brush over a short area. Do not press the brush in deeply and drag through to the lower layer.
Match the area where you place the color to the size of the tip. If you place large blobs repeatedly on a small surface, the surfaces of the two colors tend to overlap even without moving the brush. Think about whether you want to see wide streaks or keep a small accent, and leave untouched places at the moment you place the color.
After moving it briefly, lift the brush away and see whether the streaks remain. Even when you want to make the pattern more complex, stop once and make a decision before going back and forth over the same spot. There is no fixed number of strokes that is correct; when the color you want to keep becomes small, reconsider whether you need to touch it any more.
You do not have to make a symmetrical pattern or the same streaks on every tip as a first condition. If you can tell whether the center of the color remains and where the touched boundary is, you can choose the next condition to change. The knack is not to equate adding more brush movements with getting a pattern you like.
4. Do Not Chase It Once It Starts to Dry; Keep to the Finishing Conditions
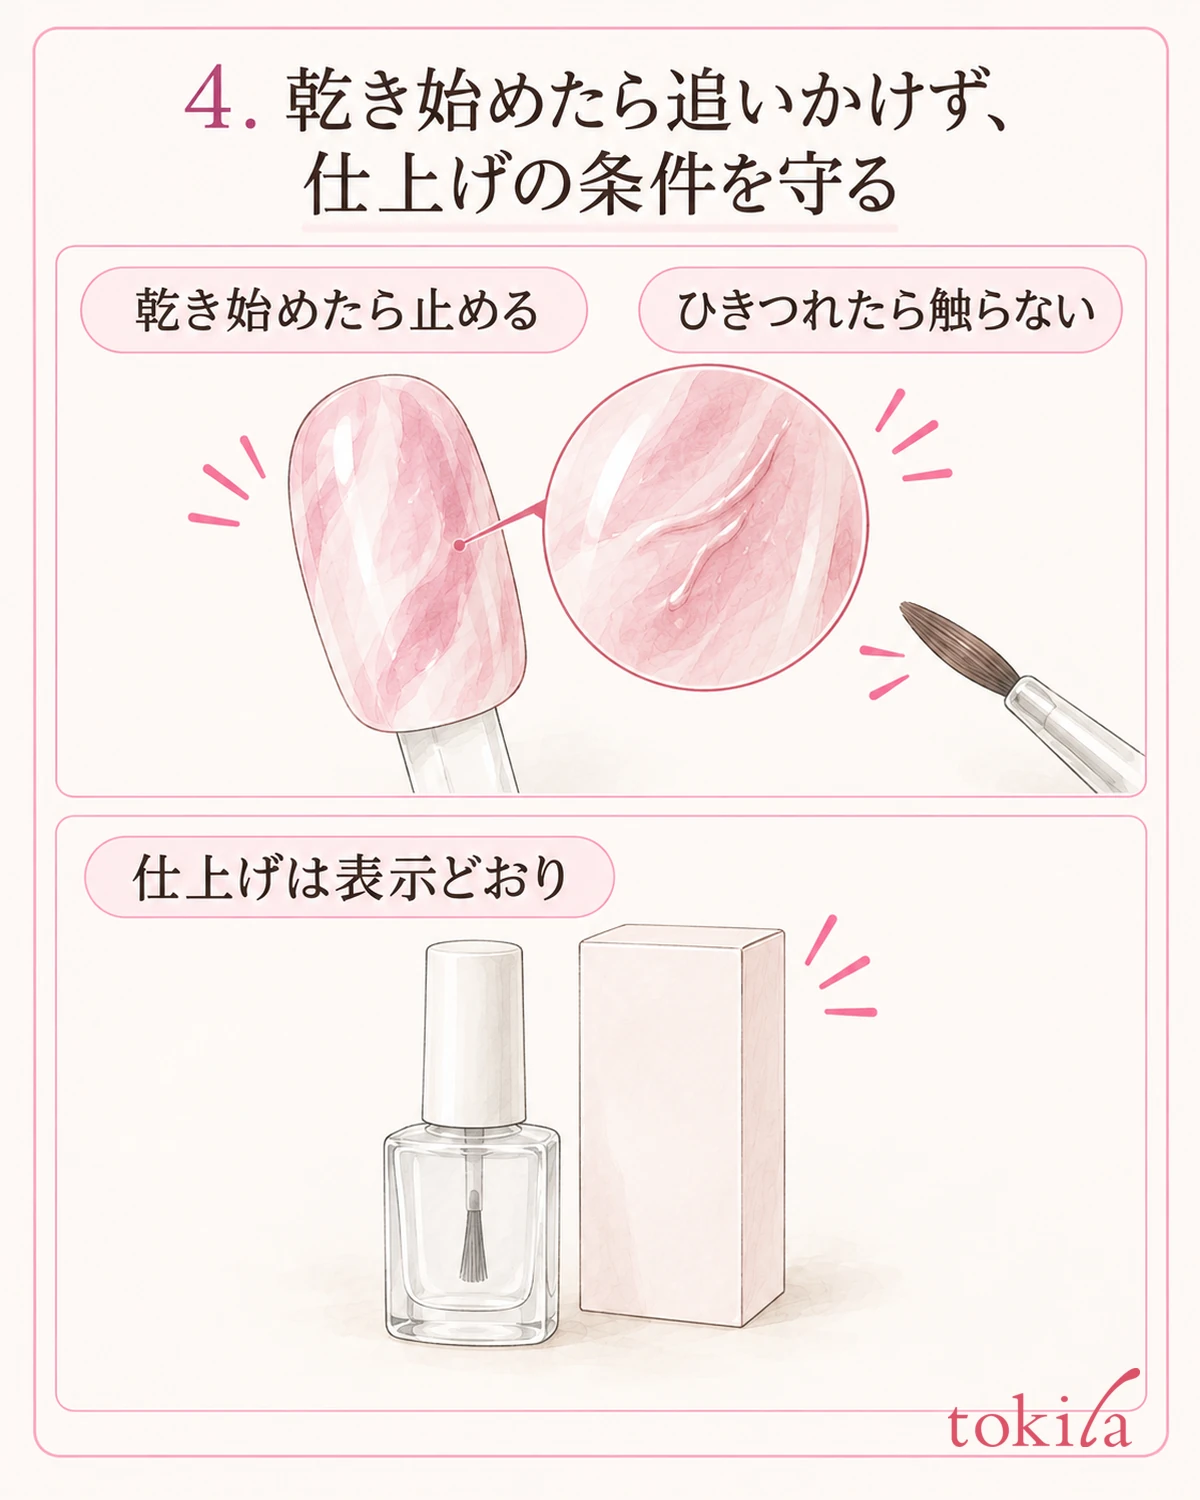
If the traces of the brush start to pull, the surface wrinkles, or the polish begins to string, do not keep going back and forth to fix the pattern. Touching a layer that has started drying over and over can disturb not only the color streaks but also the surface. Do not add water or the solvents you have on hand to make it move more easily in your own way.
If you keep the current pattern, finish by checking the polish's drying and the directions for using the top coat. Do not judge that it has dried through just because the surface looks settled. Follow the product's guidance on drying, and also avoid pressing it with your finger again and again to check.
When layering the top coat, also avoid rubbing it over and over, as you would when drawing the pattern. For how much to load the brush and the conditions for layering, use the instructions of the product you have as the standard. It is important not to assume that every polish can be blurred with the top coat just because the surface moved a little.
If you redo the practice, judge from the material and the product's instructions whether the tip can be reused and how the polish can be removed. Without considering that it might melt or deform, do not make it a step to soak it in remover for a long time. When in doubt, you can switch to a new compatible tip and keep the original result for comparison.
After working, close the bottles you used properly and put away the brush in the specified way. Do not put tools with mixed colors straight into another bottle, and follow the instructions for disposing of leftover polish. For the air-drying type, keep away from open flame and follow cautions such as ventilation. Do not put off the conditions for tidying up just because you are worried about the pattern.
5. For the Next Tip, Change Just One Thing: the Brushed Area or the Amount of Color
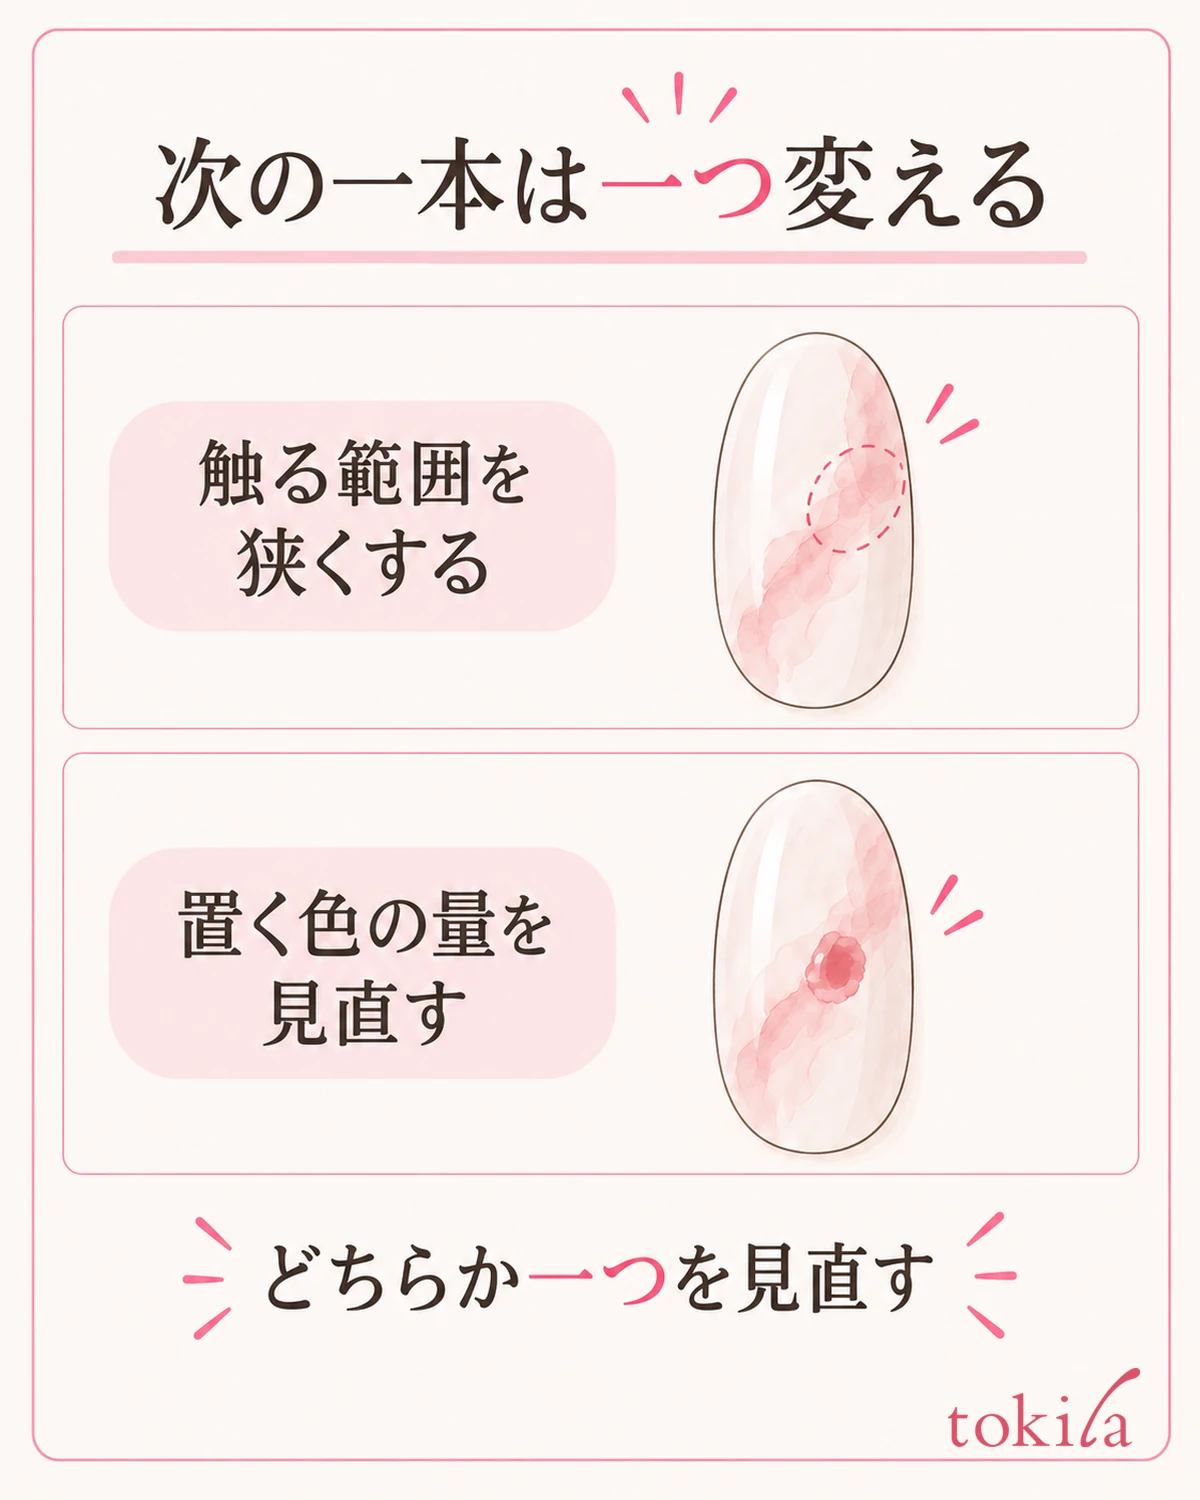
In the next practice, keep the polish, tip, and two-color combination the same and choose one condition to change. If even the center of the color disappeared, next narrow the range of the boundary you touch. If the dark color filled the surface, review the amount of color you place. In this way, connect the result you are seeing now with the next action.
If you change the brush size, colors, amount placed, and drying step all at once, it becomes hard to tell what affected the pattern. Try one condition first and observe at the moment you lift the brush. Without making any specific number of strokes or amount the right answer for everyone, compare within a range where you can follow the polish's instructions.
You can also note the colors you used and the action you changed on the back of the tip you are comparing or near the stand. You do not need to write directly on the painted surface. Do not try to pick up an undried tip to write on it; use a separate note on the work surface and keep the record without touching the polished surface.
After they dry, finished practice tips are easier to compare when lined up in the same direction under the same light. Strong reflections on curved surfaces or differences in diagonal shadows can be confused with differences in color streaks. Without changing stands or lifting only one of them, first arrange them the same way and then look.
If you keep a record, leave a short note of an action you can reproduce next time, such as "I left the center of the darker color" or "I touched the boundary briefly and stopped." Do not end with just "it went well" or "it failed"; try putting into words where the streaks you like remained. You do not need to treat your own notes as experimental results or as proof of performance.
Practice for keeping marble streaks starts not from adding more colors but from choosing where to put the brush. Check the polish and tools, touch the boundary one tip at a time, and look after lifting the brush. Once it starts to dry, do not chase it, and change just one condition on the next tip. Check with the tools you have the flow that lets you stop at a pattern you like.
Written by the tokila editorial team. We organized steps you can check with the tools you already have.



