
You fasten your belt and a long end is left over, sticking out sideways or hanging down over your clothes. When that happens, before moving to an even tighter hole, look at where the extra is and how the belt is threaded. The starting point is to think separately about how tight it is around your waist and how long the part beyond the buckle is.
Here we focus on ordinary belts that fasten with holes and a prong, and explain checking the length, threading the end through the loops, and choosing again when it will not fit. Ring-type belts and belts without holes fasten differently. Give priority to the labeling and structure of the belt you own, and start with checks you can do without cutting or making holes.
1. Before changing the tightness, check where the extra is
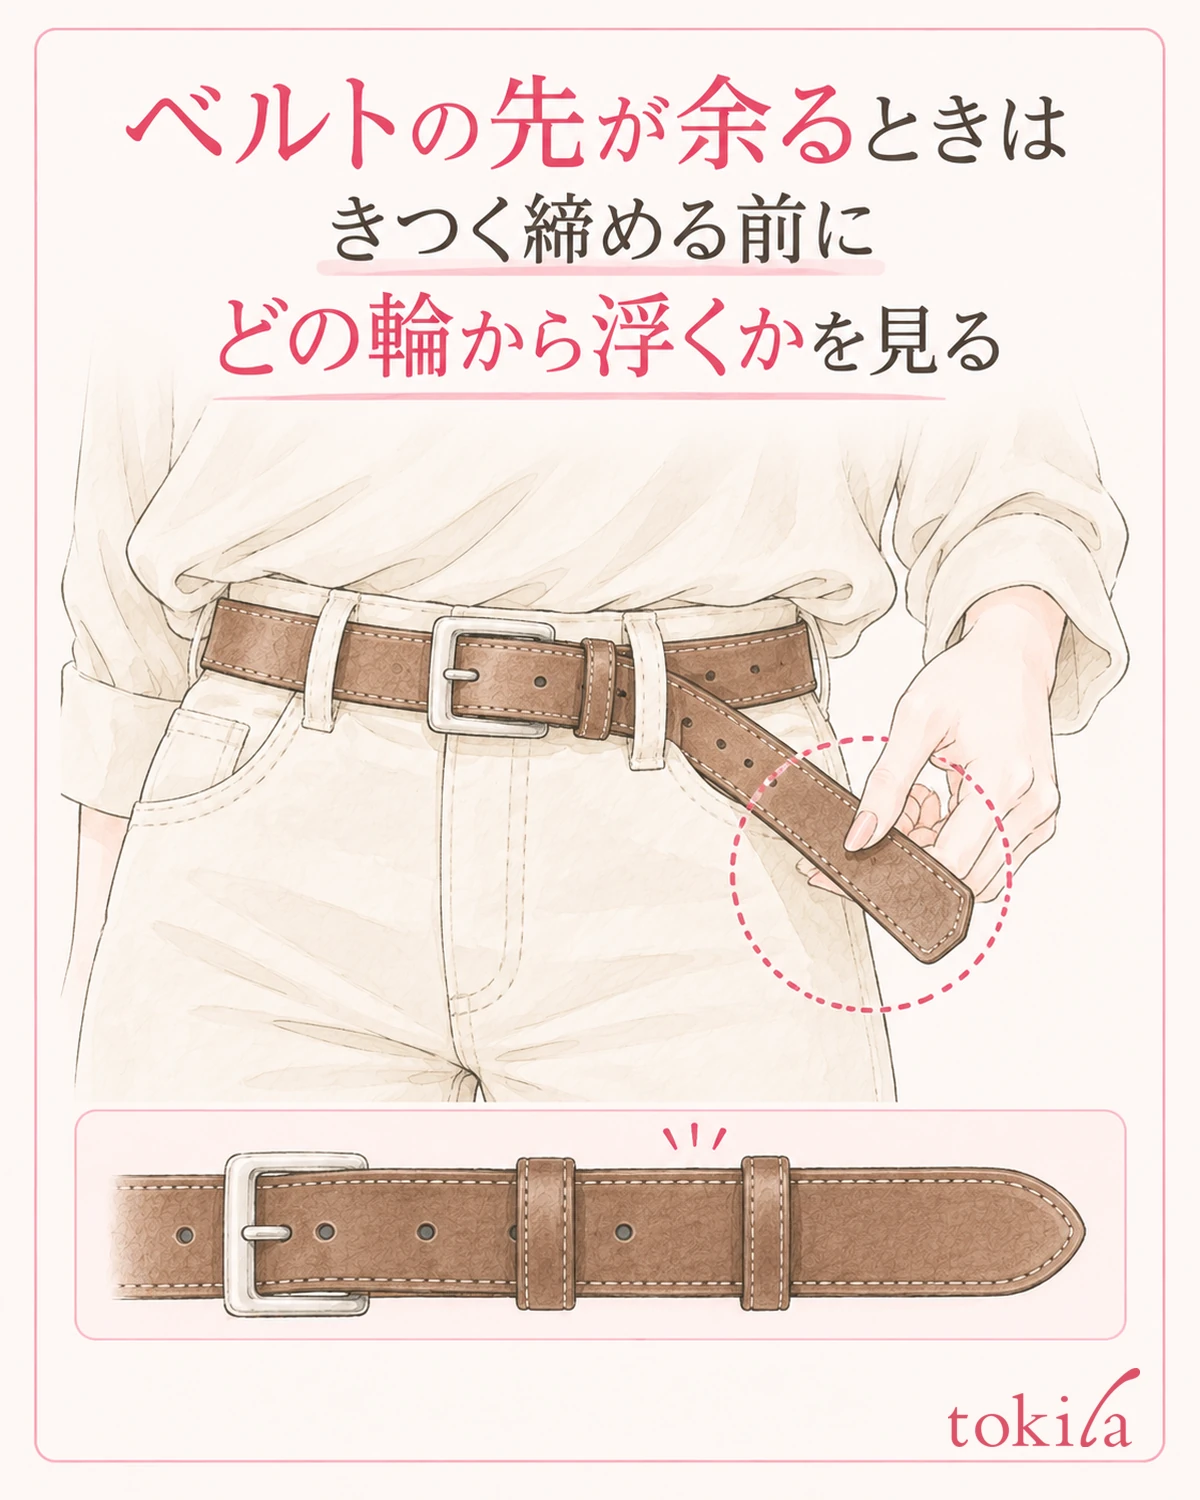
First, thread the belt through the pants or skirt you usually wear, and fasten it at a position you can hold comfortably. Check not only while standing, but also that it is not uncomfortable when you sit. Do not move it one hole inward just to make the end look shorter and end up squeezing your waist.
Next, follow your eyes from just beside the buckle to the end. Separate the cases: it may not be passed through the small loop attached to the belt, it may skip one belt loop on the clothes, or a long end may remain even after passing through all of them. If you simply forgot to thread it, the belt itself is not necessarily too long.
In the mirror, look at both the front and the side where the end is. Move your jacket aside a little and check where the end is sticking out from. If the fabric of your clothes has been caught under the belt, loosen it once, smooth the fabric flat, and fasten it again.
Some belts are designed to be worn with a long end hanging. Do not decide it is the wrong size just because the end is long; think about matching the look you want with the structure. This time, these are steps for checking whether the extra can be supported without strain when you want the usual sideways tuck.
Even with the same belt, the length left over differs between wearing it at your hips and at a high waist. If it is long only on days you wore it at an unusual position, there is room to review the combination with those clothes before altering the belt to fit your body.
On a day with a thin top and a day with a thick top tucked in, the same hole feels different. Do the check with the clothes you will wear that day, and do not decide a permanent length adjustment based only on the extra when you are wearing fewer clothes.
While checking how it looks, do not pull the belt far away from your body to measure the length. If you keep the usual fastening position and look only at the end that is sticking out, you can avoid confusing the waist size with how the end is handled.
2. Tell the belt's own loop apart from the belt loops on the clothes
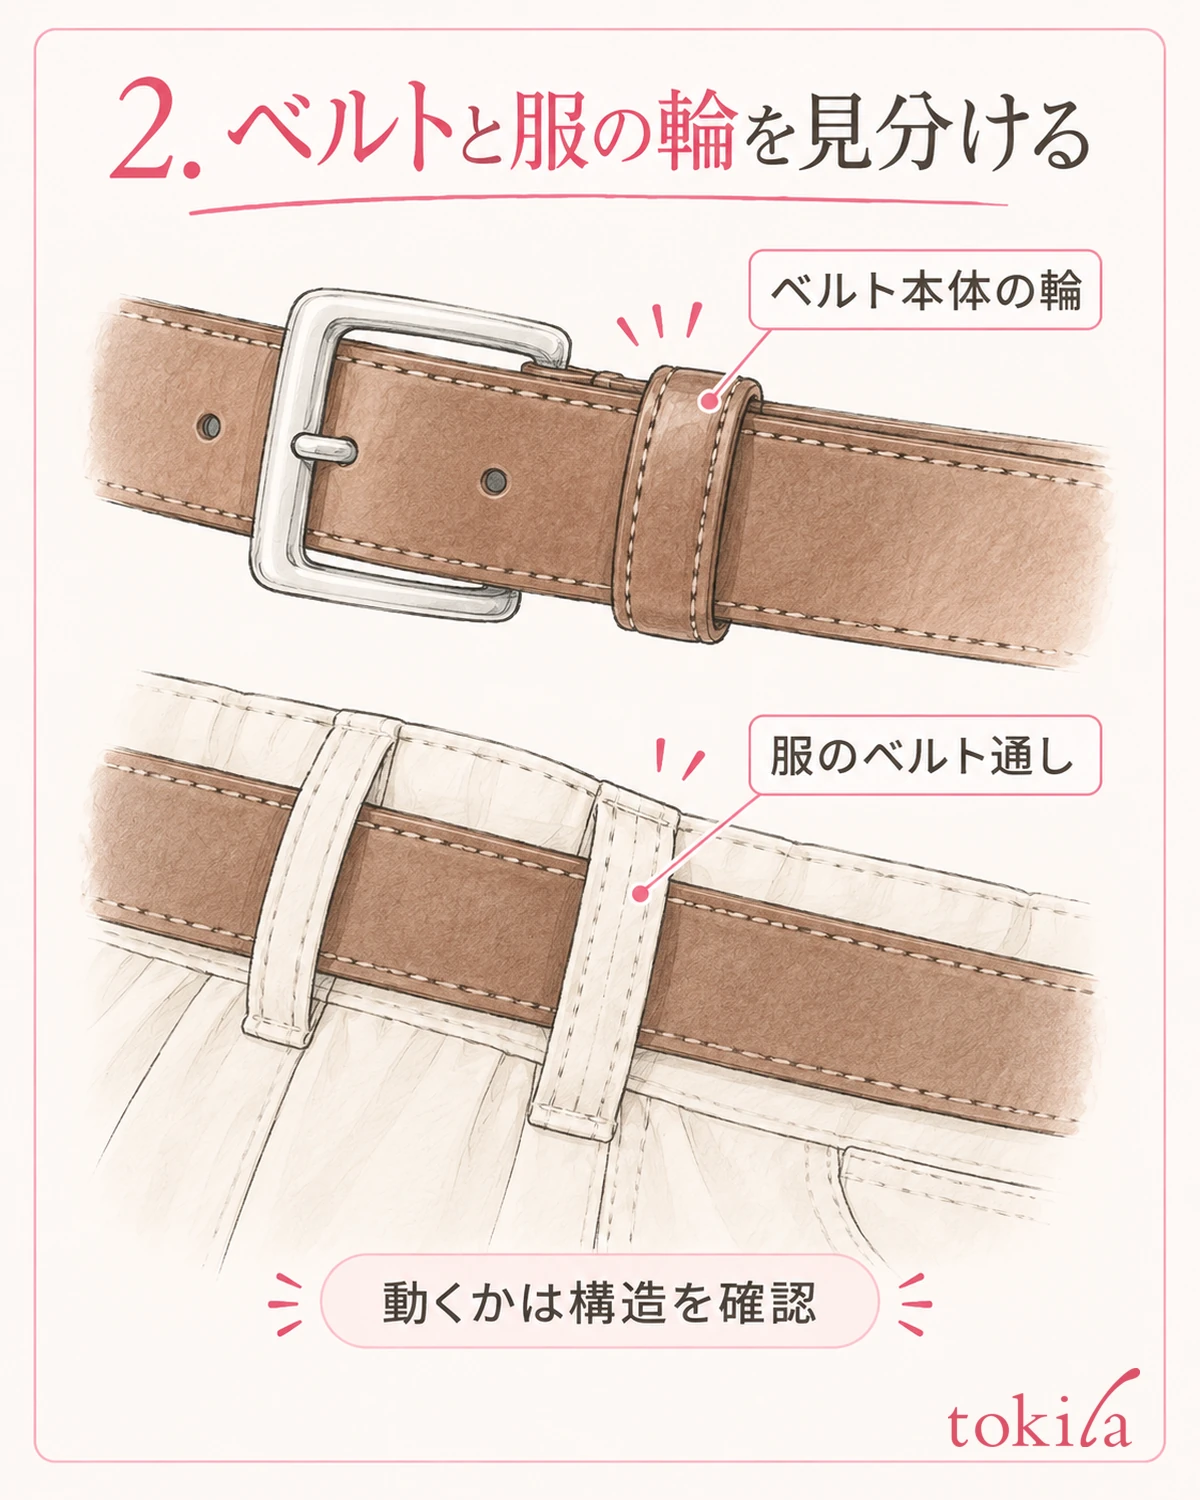
Some belts have small loops near the buckle that the strap passes through. A loop fixed in place and a loop that can be moved along the strap are handled differently. Do not decide it moves by appearance alone; check within a range that does not apply undue force, following the care instructions.
The belt loops sewn onto clothes are separate parts from the belt's own loops. Even if the end reaches them, the strap will not go through if the width or thickness does not fit. Do not push a wide strap into a narrow loop or spread the fabric with your nails; see whether the width passes through that garment without strain.
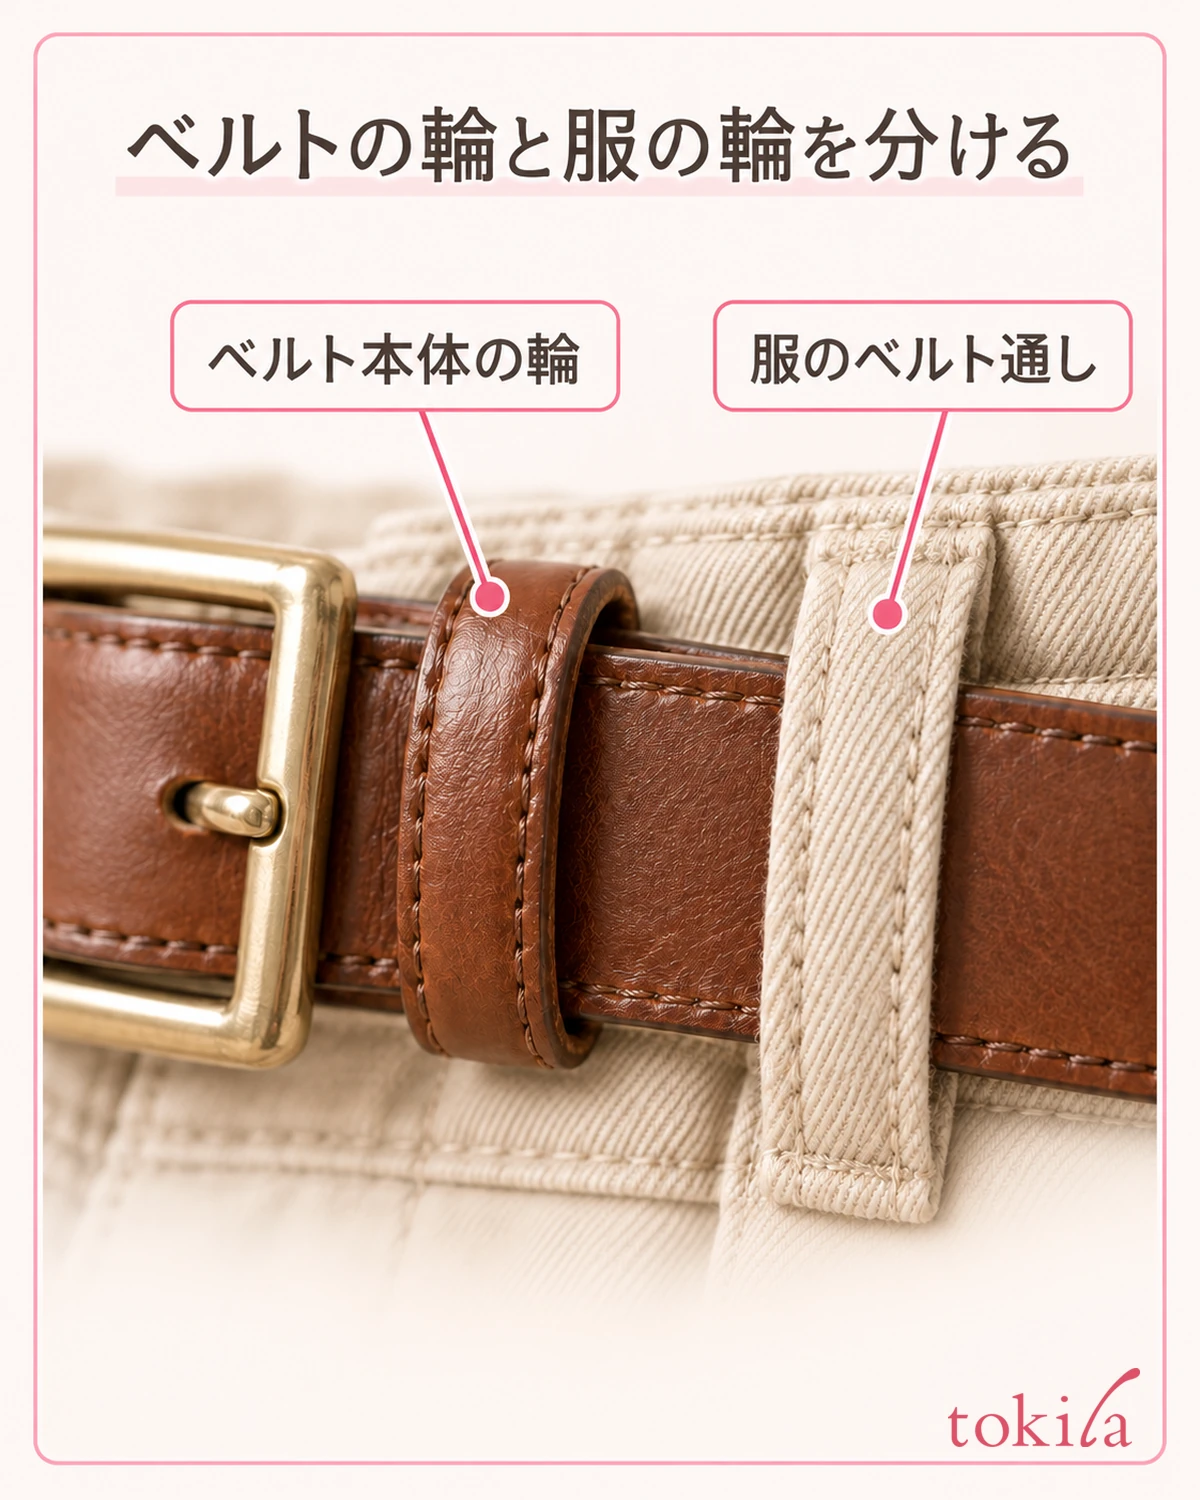
If you take the belt off to check, lay it flat with the front and back identifiable. Look at whether the small loop is twisted, whether the stitching is fraying, and whether the end is warped or split. Avoid continuing to use a damaged loop by fastening the belt tightly.
For a type with a loop that can be moved, check whether that loop is meant to move in its original way of use. Do not pull on a sewn-on loop or a part fixed to the metal fitting, mistaking it for a moving loop. If it does not move, stop there and think of another way to tuck the end.
Ring-type, mesh-type and holeless buckles differ in how the strap is returned and fixed. Do not apply the illustration for a hole-and-prong belt as it is; fasten it in the threading order shown for the belt you own. Before removing accessories or changing to a different kind of fastening, check the original structure.
If a loop that supports the strap is missing, do not pull on the clothes' loop to use it as a substitute; check the condition of the part. Whether only the loop is lost or it came off together with the stitching also changes your judgment about whether you can keep using it as it is.
Increasing the number of loops does not always make it fit either. Putting into words one condition that bothers you, such as a thick strap, a strongly curled end, or clothes' belt loops that are far away, decides what to check in the next step.
3. Keeping the fastening position, tuck the end into the loop
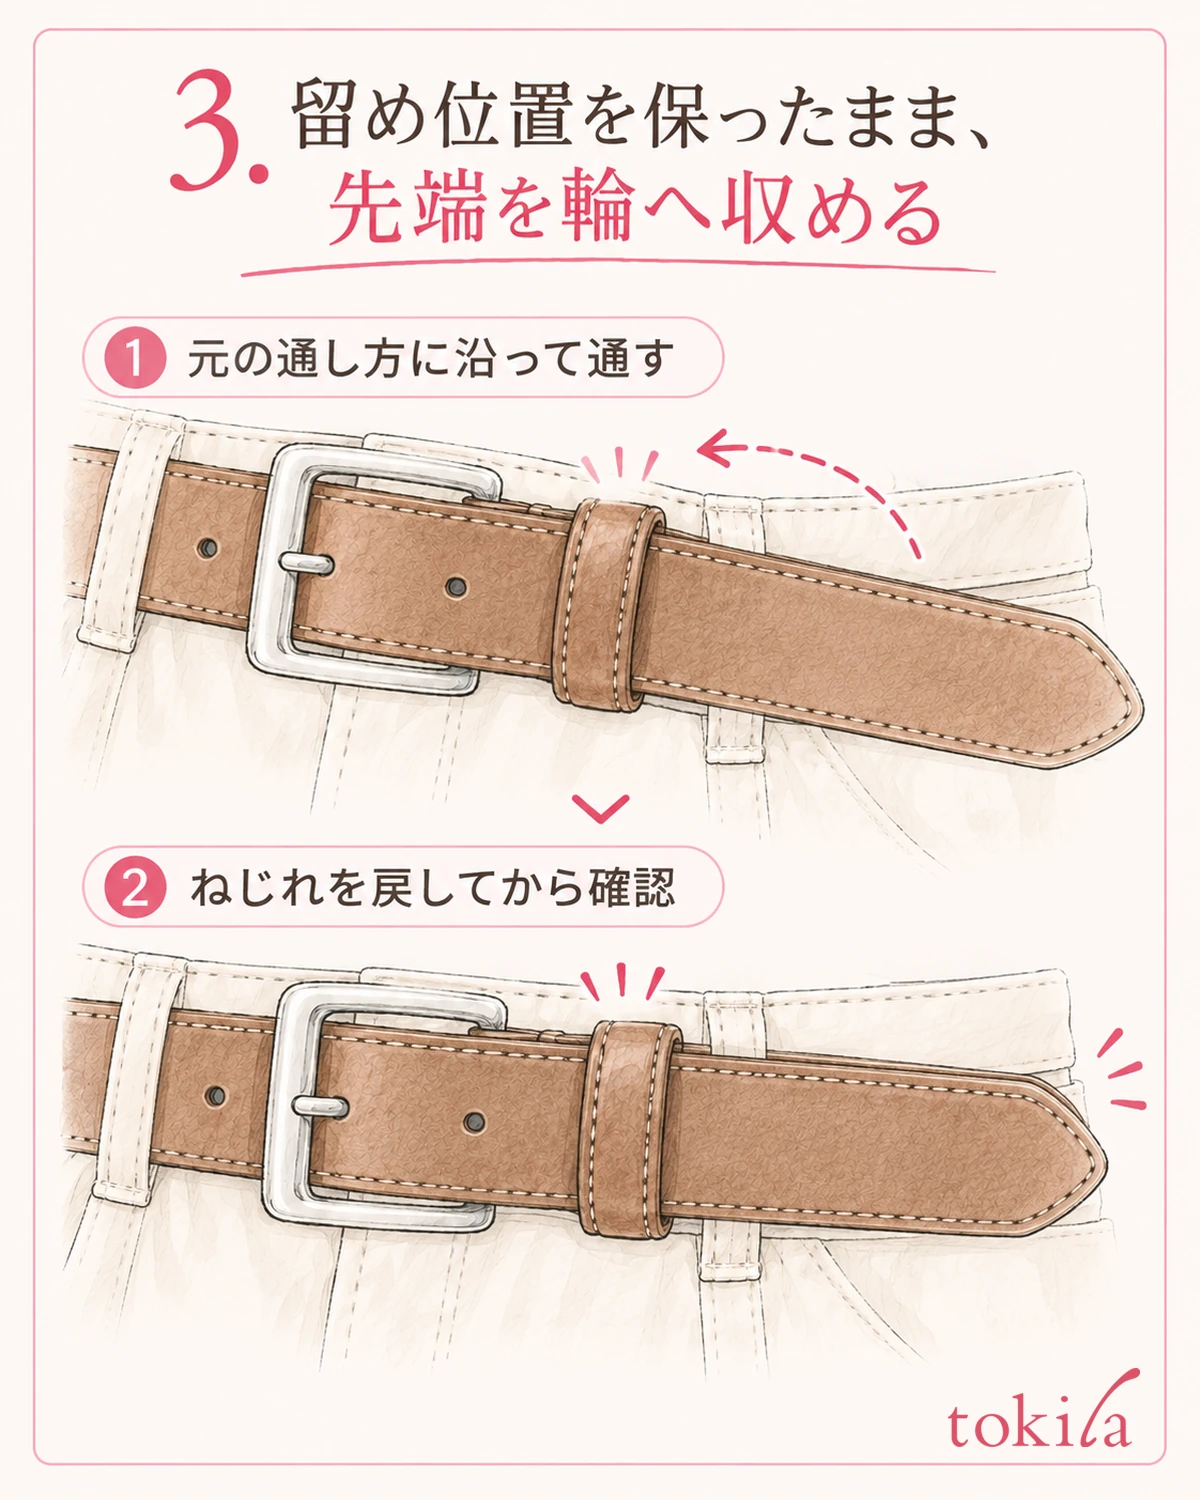
For the type that fastens with holes and a prong, first fasten the buckle correctly at the position you have chosen, then pass the end through the belt's loop. If there are several loops, pass through them in order following the original way of threading the belt you own, so the strap does not flip over partway.
When passing it through, do not fold the end sharply; move it gently along the flow of the strap. If the strap overlaps and bulges in front of the loop, go back once and undo the twist. If it only goes through when you pull hard, first review whether the width and thickness fit.
If there is a loop that can be moved, with the end passed through, move it little by little to a position where it can support the extra part. Do not aim to push it right up to the very tip; check whether it is hard for the end to slip out when you move, and whether the loop is about to come off the edge. A loop that cannot be moved is used as it is.
If the end naturally reaches the clothes' next belt loop and the width and thickness fit as well, passing it through there is another option. If reaching it requires tightening your waist or stretching the clothes' loop sideways, stop using this method.
When you have finished threading, let go and see whether the end follows your body. If it lies flat only while you hold it down with one hand, it may stick out again during ordinary movement. Check whether the loop is supporting the strap or the end is just overlapping beneath it.
Sometimes the end only barely reaches the next loop and slips out when you let go. Do not keep pulling just to pass it through that loop; either go back to a position where the original loop can support it, or choose a combination with a suitable length.
If the end catches when you put your jacket back on, do not count it a success while the clothes are lifted; check again in the state you will actually wear it. Include checking for the situation of use in the steps for tucking the end.
4. If it still does not fit, check whether the belt can be adjusted before cutting
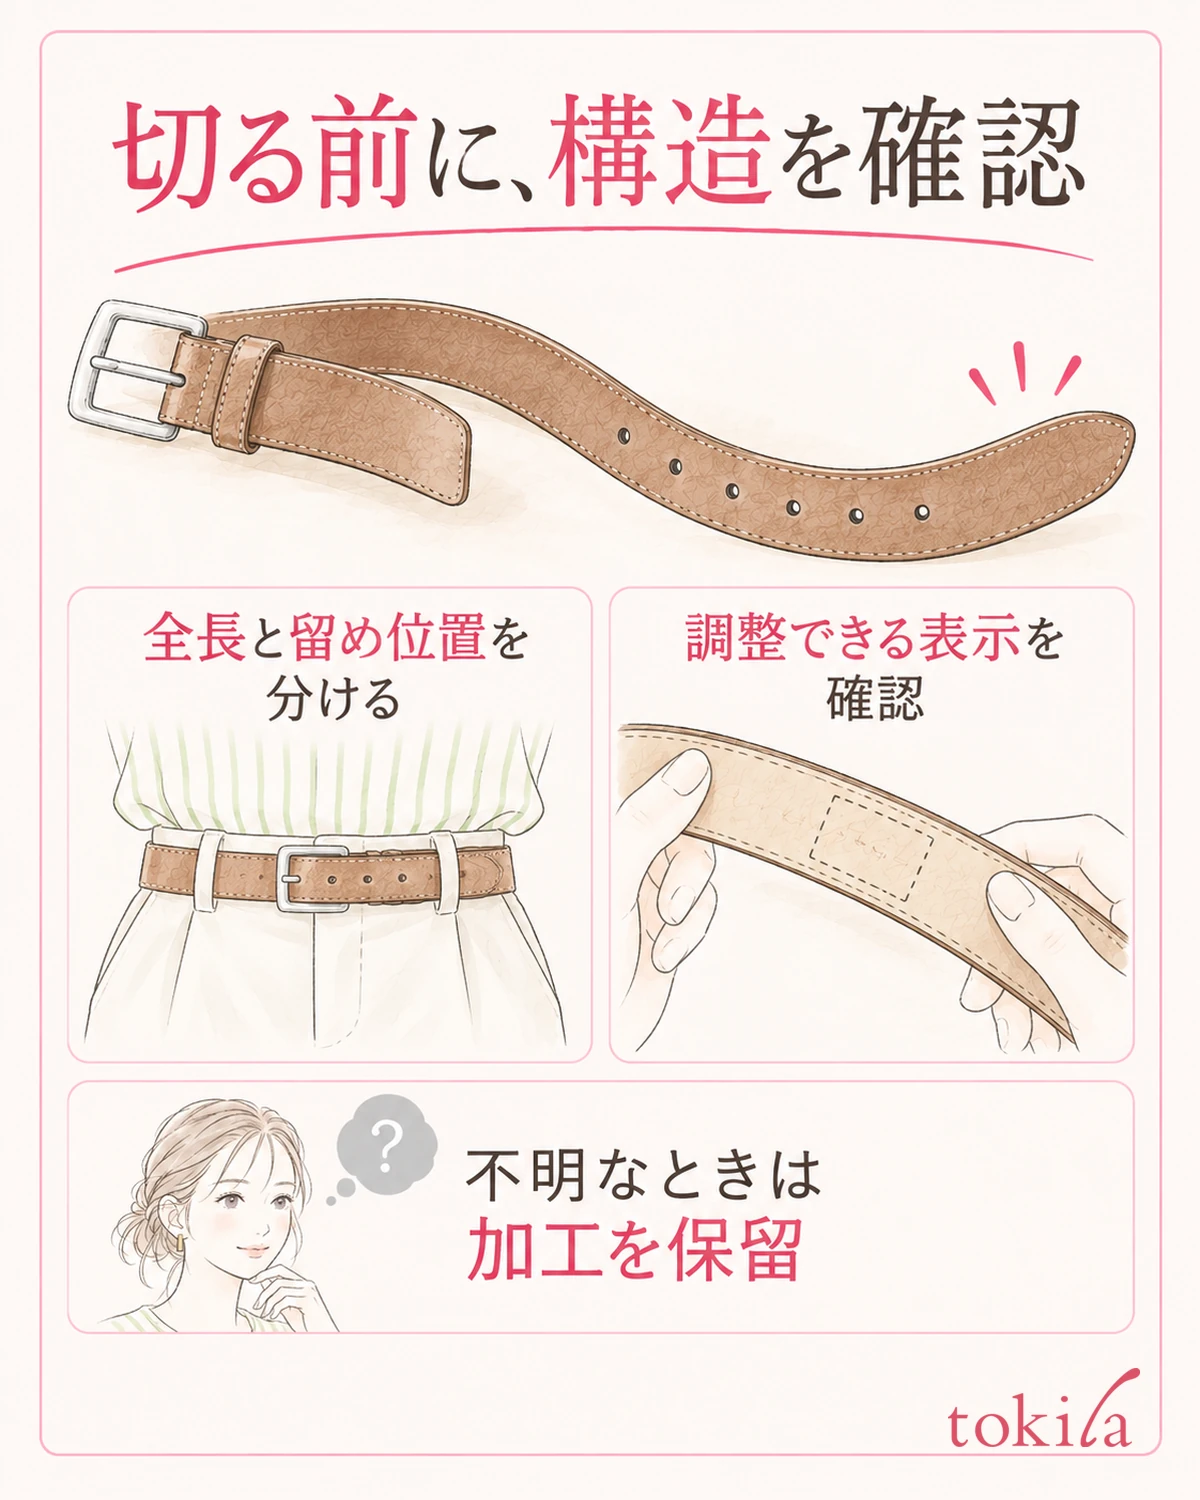
If length remains even when you use the loops correctly, check the total length and the fastening position when worn separately. The labeled "total length" may include the buckle, and does not necessarily mean the same as the corresponding waist size. Do not compare only the numbers; read from where to where the value was measured.
When considering replacing it or choosing another size, take the current belt off and note the total length, the width and the position of the hole you usually use. Also check whether the width fits the belt loops of your clothes. If you choose only by the length of the extra end, you may then be unable to fasten it where you need to.
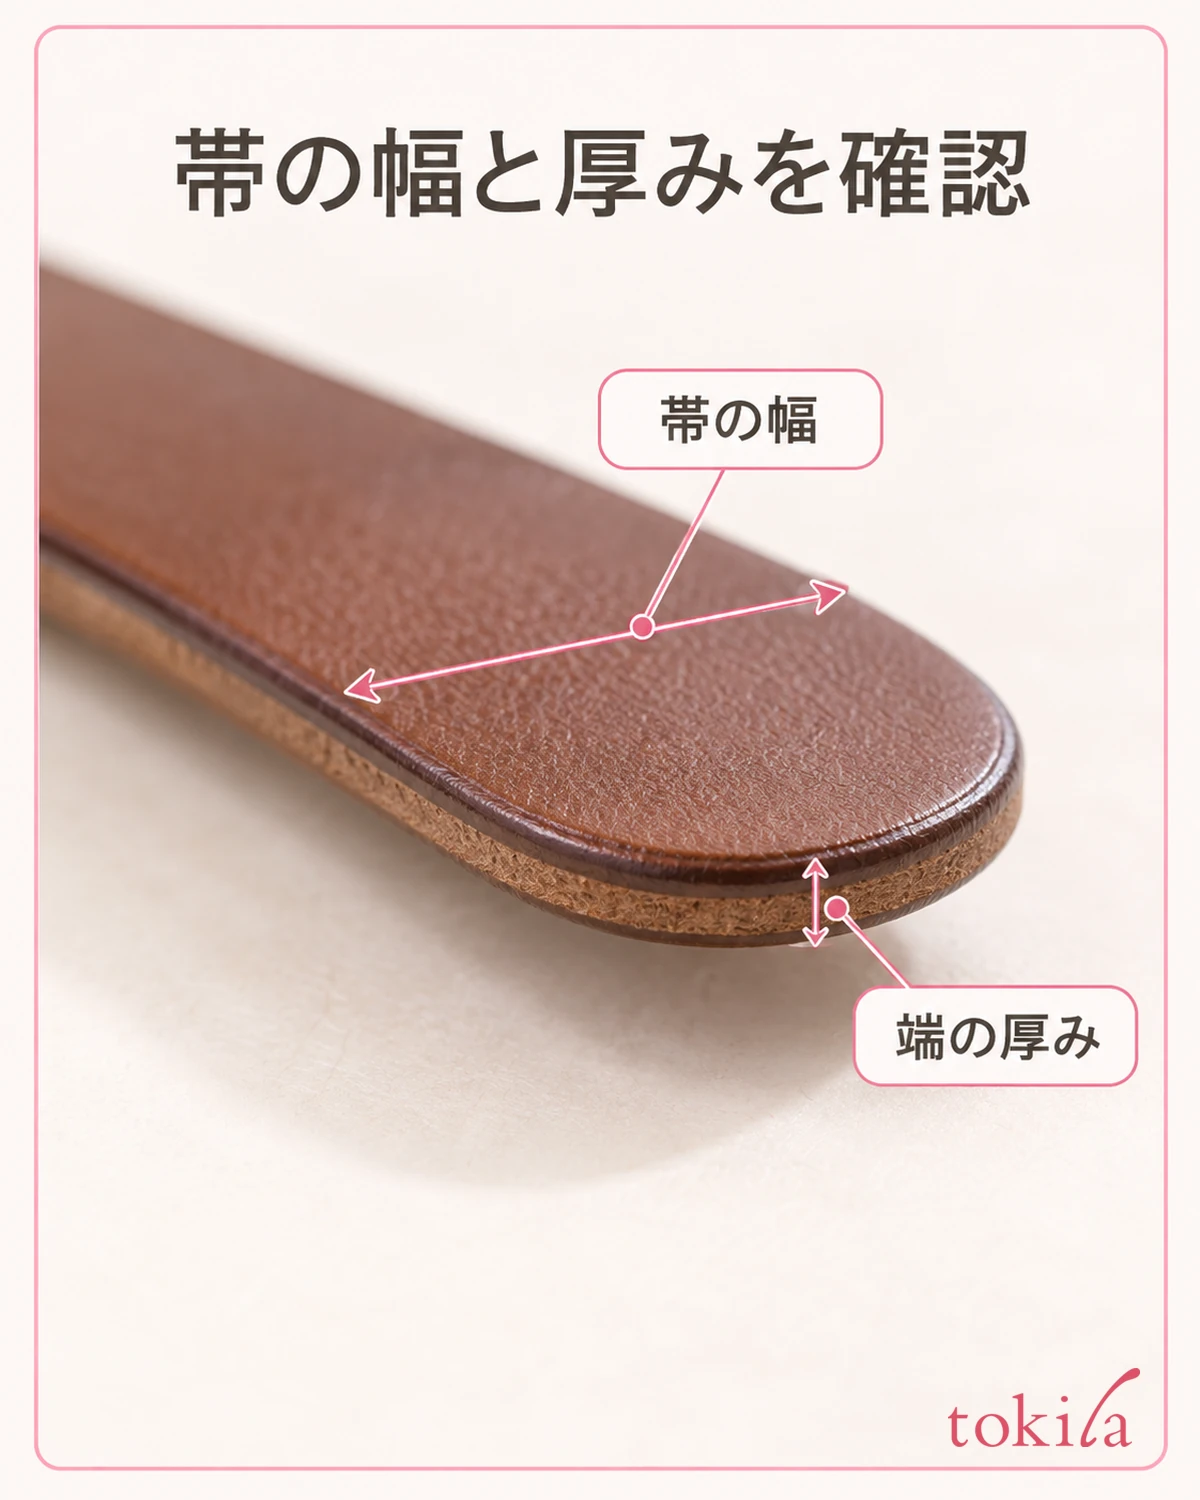
Some belts allow you to adjust the length by cutting the strap on the buckle side, while others cannot use that method because of the stitching or the structure of the metal fittings. Do not take it apart just because metal parts are visible. Check labels such as "length adjustable," and the handling that suits the product.
Even for an adjustable type, do not make the steps a matter of cutting the end side casually. The position of decorations, holes and stitching would change, and it could not be restored. If you cannot confirm where to cut, which tools to use and how to refasten it, hold off on altering it; choosing another belt that works in its original state is also an option.
Adding holes is also not a process that directly shortens the extra at the end. If it means changing the fastening position and tightening your body, it does not solve the problem you have this time. Before making holes yourself or prying open a metal fitting, sort out the size and structure.
If the explanation from when you bought it remains, look not only for the material name but also for any labeling about length adjustment. Even among leather items, there is not just one way of fixing. It is also important not to use the steps for another belt with a similar surface material as they are.
Stopgap measures such as sticking on tape, binding it tightly with a thin elastic, or tying hard leather may leave marks or strain on the material, so we do not make them a standard step here. Do not decide it is fine because it can be removed; choose from the range that can be done without altering it.
5. Check by standing and sitting, and decide one condition to change next
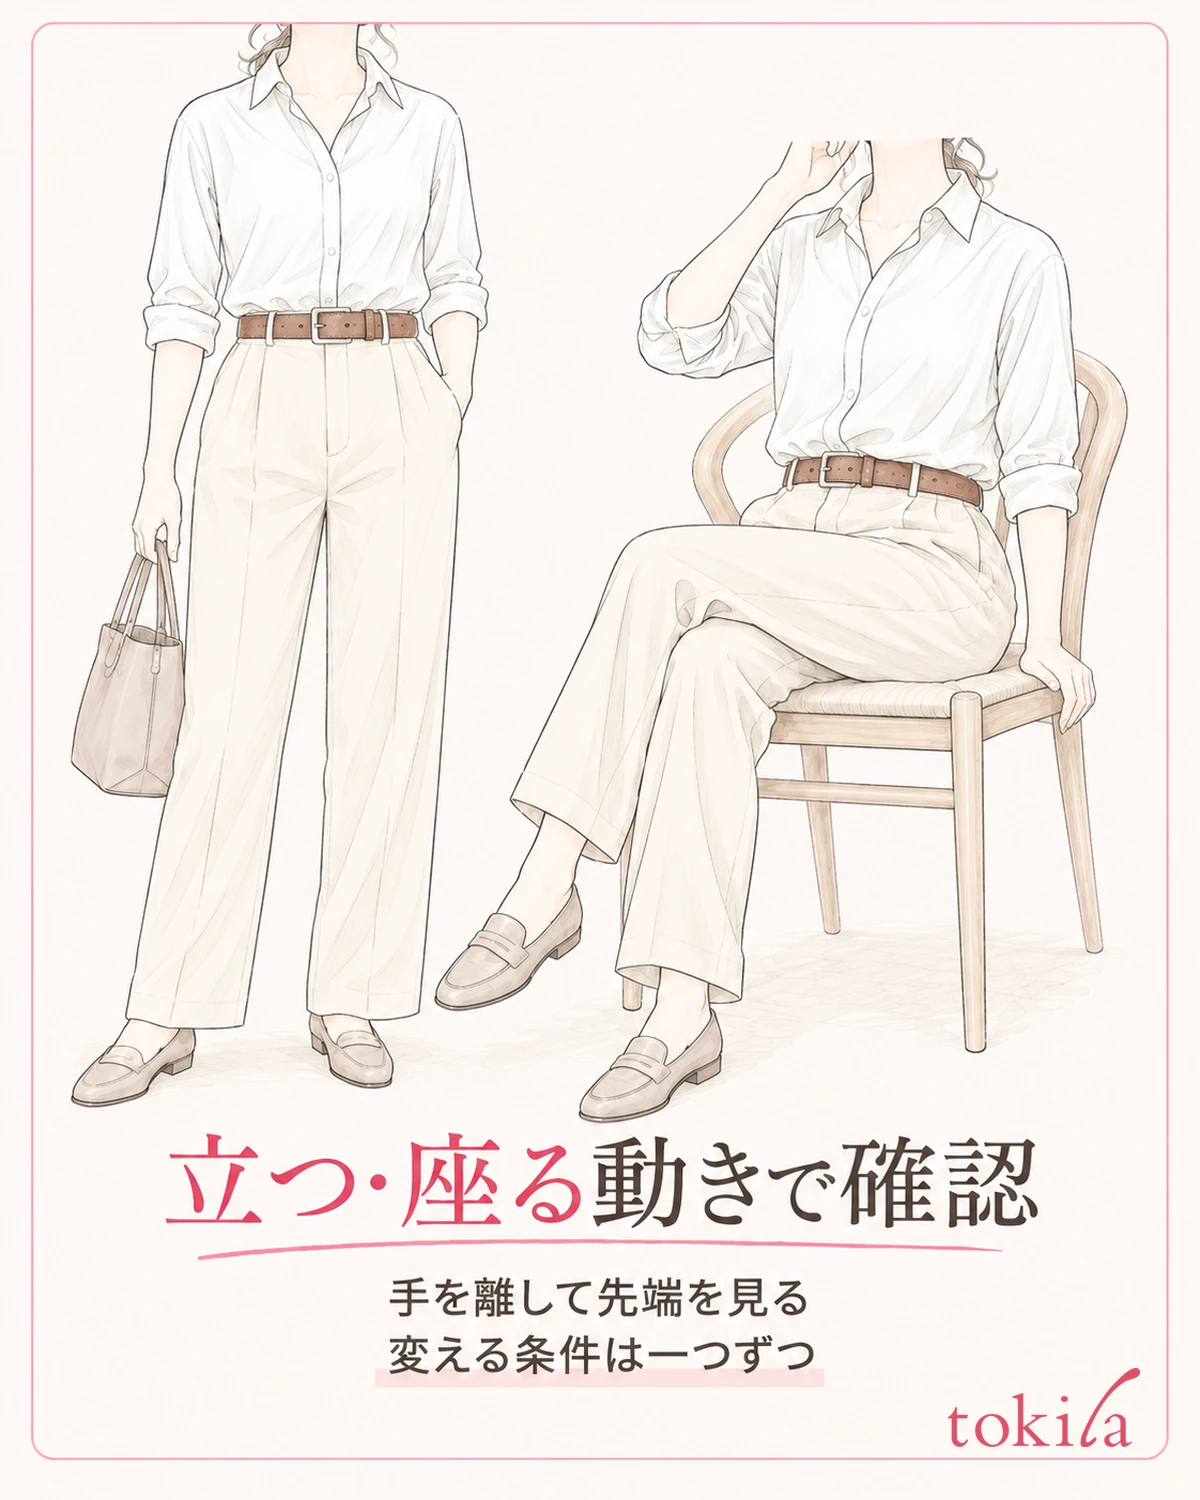
Finally, look at the front and side in front of the mirror, and check whether the end follows your clothes and body and whether the loop is twisted. Even if it looks neat while standing, the end can be pushed out when you sit. Within a range that is not strained, sit down and stand up, and look at how it settles after you let go.
If the end slips out when you move, try one thing at a time, such as changing the position of the movable loop just once and checking, or seeing whether you can use the next belt loop of the clothes. If you also change the hole position at the same time, you will not know which change made the difference.
If it goes back even after you change the position of the loop, the strap curls and catches on your jacket, or the metal fitting is about to come off, do not try to fix the shape by applying force on the spot. Take it off, check its condition, and switch to another belt if necessary. Confirm not only how it looks but that it stays fastened without strain.
For next time, keep a note pairing the clothes with the condition that bothers you, such as "it is long only at a high waist position," "it does not reach the next loop on these pants," or "the strap width does not fit the clothes' loops." This makes it easier to think about the size or combination to switch to next, rather than deciding belts in general do not suit you.
If you want to think about the color of accessories once your waist area is in order, you can also refer to how to match accessories to the colors of patterned clothes. You do not need to force yourself to use a belt whose length or width does not fit just to unify colors.
When the end is left over, before tightening hard, try checking in this order: a missed loop, the position of the loop, how it works with your clothes, and a structure that can be adjusted. Even if it will not fit, instead of cutting right away you can choose again, one at a time, from options you can try without altering the belt.



