
You tried to use a nail sticker, but you can't find the edge. When you pinch it, only a clear film comes off, or the sticker stretches. When that happens, before adding force, check whether what you are touching is the backing, the sticker itself, or the protective film on the surface.
What is covered here is nail stickers that you take out of the sheet before applying them. Removing them after they are on your nails, water-transfer designs, and hard nail tips are different subjects. Even if they look alike, the structure and the order of use are not necessarily the same, so proceed with the diagram from your product's instructions on the desk in front of you.
1. Before peeling, tell the backing, the sticker and the protective film apart
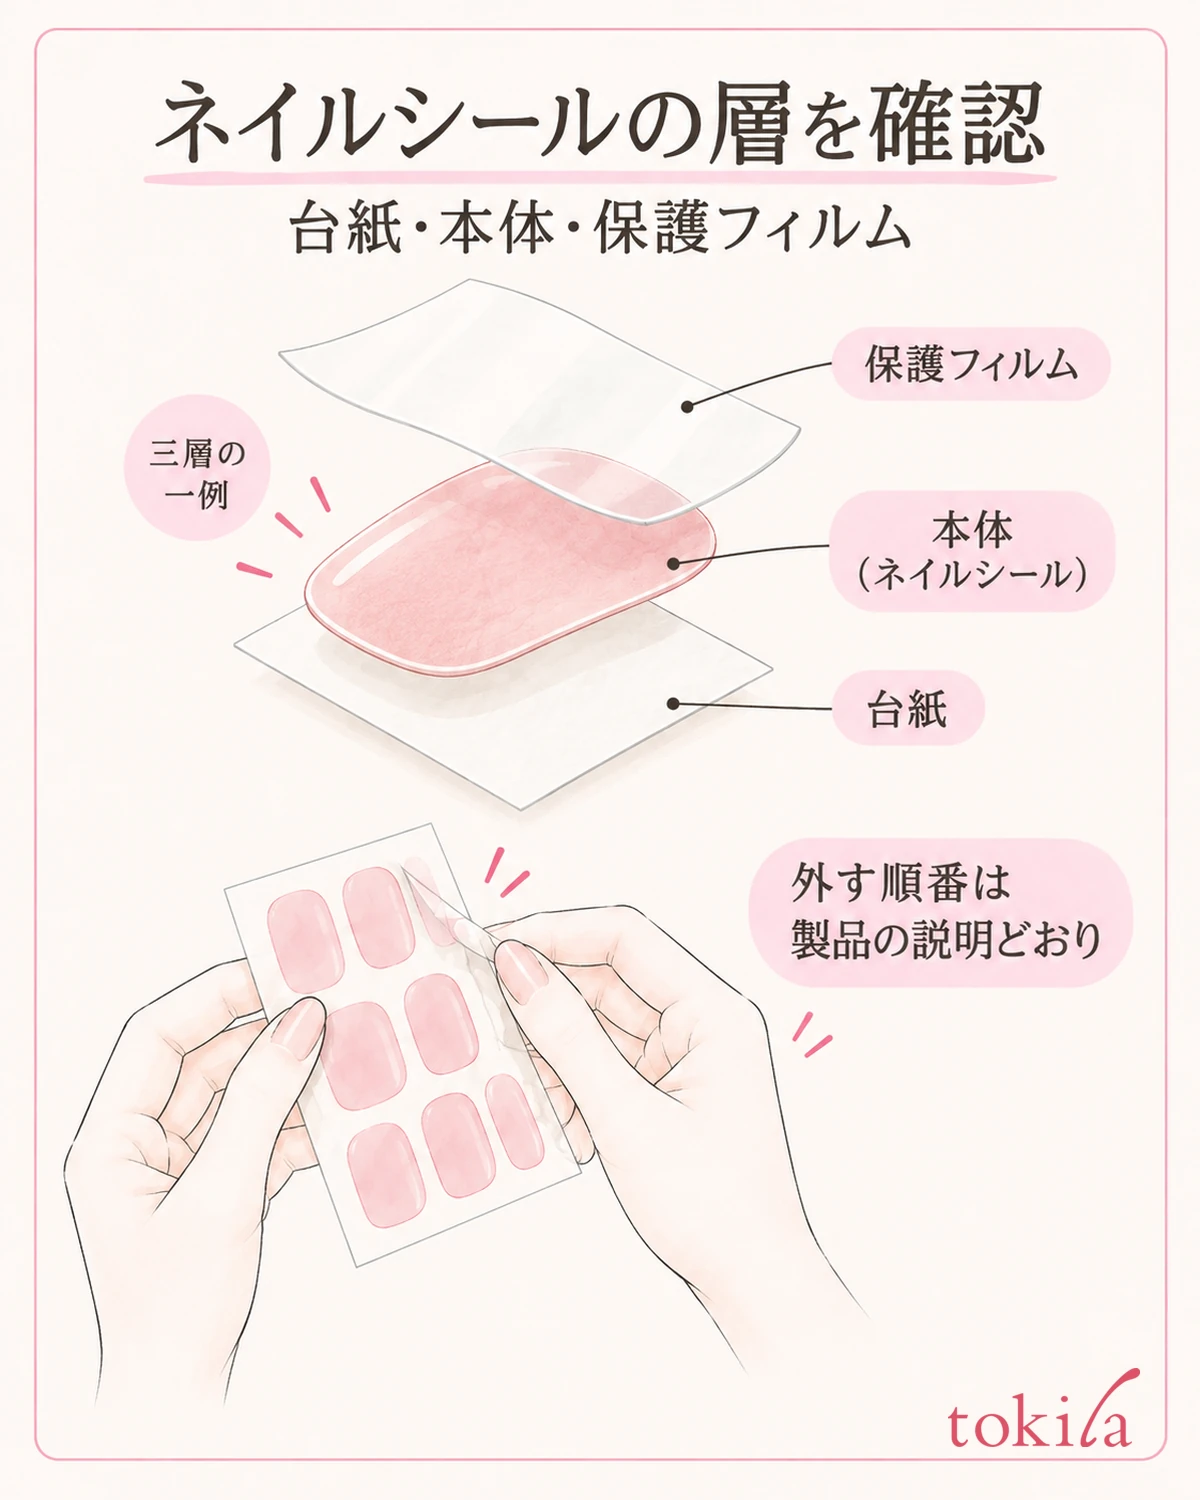
First, open the directions on the package and look for the diagram of the step for taking the sticker out. The support material under the sticker is the backing, and the part with the color or pattern that goes on your nail is the sticker itself. Some products have a protective film over it, but not all have three layers. It is important not to decide by looks alone that clear means backing and colored means sticker.
Check the step for removing the surface film for each product. Some are removed before taking the sticker off the backing, while others are applied to the nail with the surface film left on and removed after they are pressed on. It cannot be made a common step of "first remove the whole clear film." Compare the numbers in the instructions with the state of the sheet in your hands, one by one.
In the diagram, look at the handle and the cut lines too. Just because an edge has a margin, it is not necessarily the handle. If a dedicated tab is drawn, check whether the same part exists on the sticker in your hand. If the color or shape is different, make sure you are not looking at the directions for a different series, by matching the product name with the included instructions.
If you switch products partway through preparing, switch to that product's instructions as well. A film you removed first on the previous sheet does not necessarily play the same role on the new sheet. Look not only at the box but also at the bag and the included paper for any order of use, and read the taking-out step and the applying step as connected.
Before you start peeling, get the tools you need and the place you will apply it ready. If you have not yet decided on the size, you tend to hesitate while holding the sticker you took out. If the width concerns you, narrow down your candidates with checking nail sticker width to fit your nail before moving on to taking it out.
If you cannot tell whether a film is there or the order, do not keep probing the edge to find out the structure; leave that sticker on the backing. Return to a state where you can check the instructions first. The three layers in the diagram are one example for thinking about the structure, and are not instructions to add or remove layers on your product.
2. On a bright desk, check the specified edge and where to hold
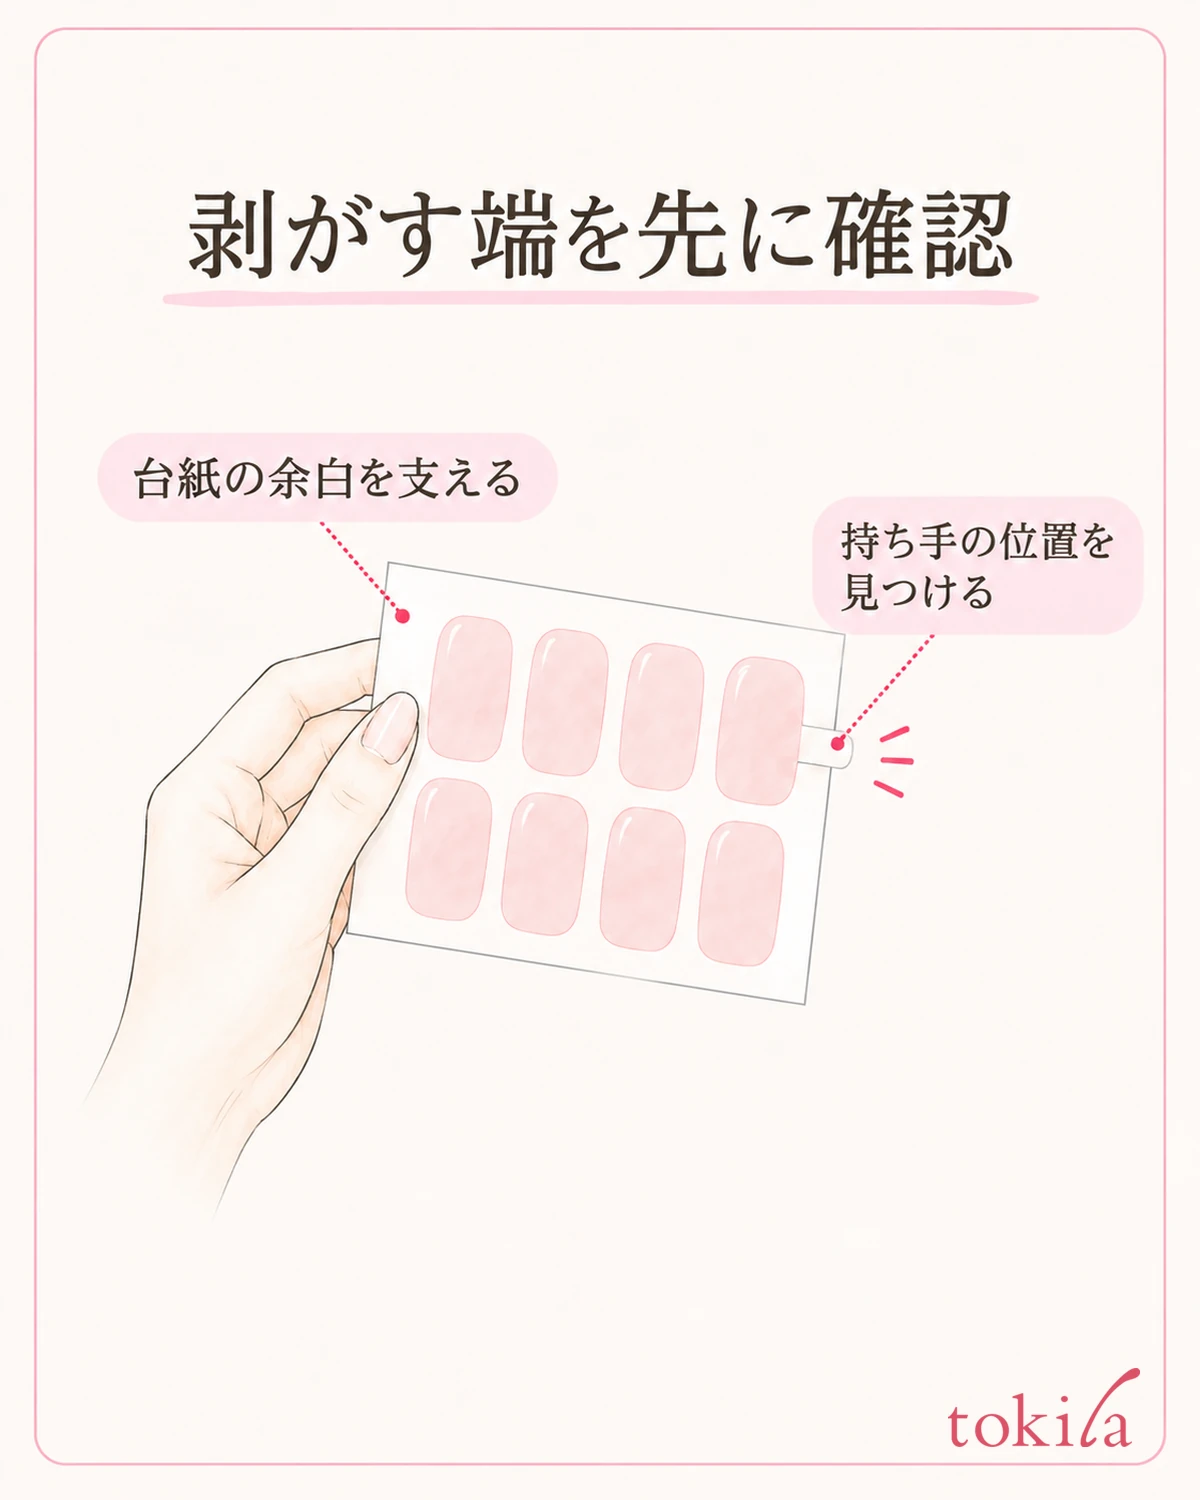
Place the sheet on a bright, stable desk and turn it so that the target sticker and its surroundings can be seen. Rather than holding it up to the light and keeping it there, putting the sheet down and changing the lighting or your viewing angle to look for the outline makes it easier to decide where to place your fingertip. Take care not to confuse the lines of clear reflections with edges that are actually cut apart.
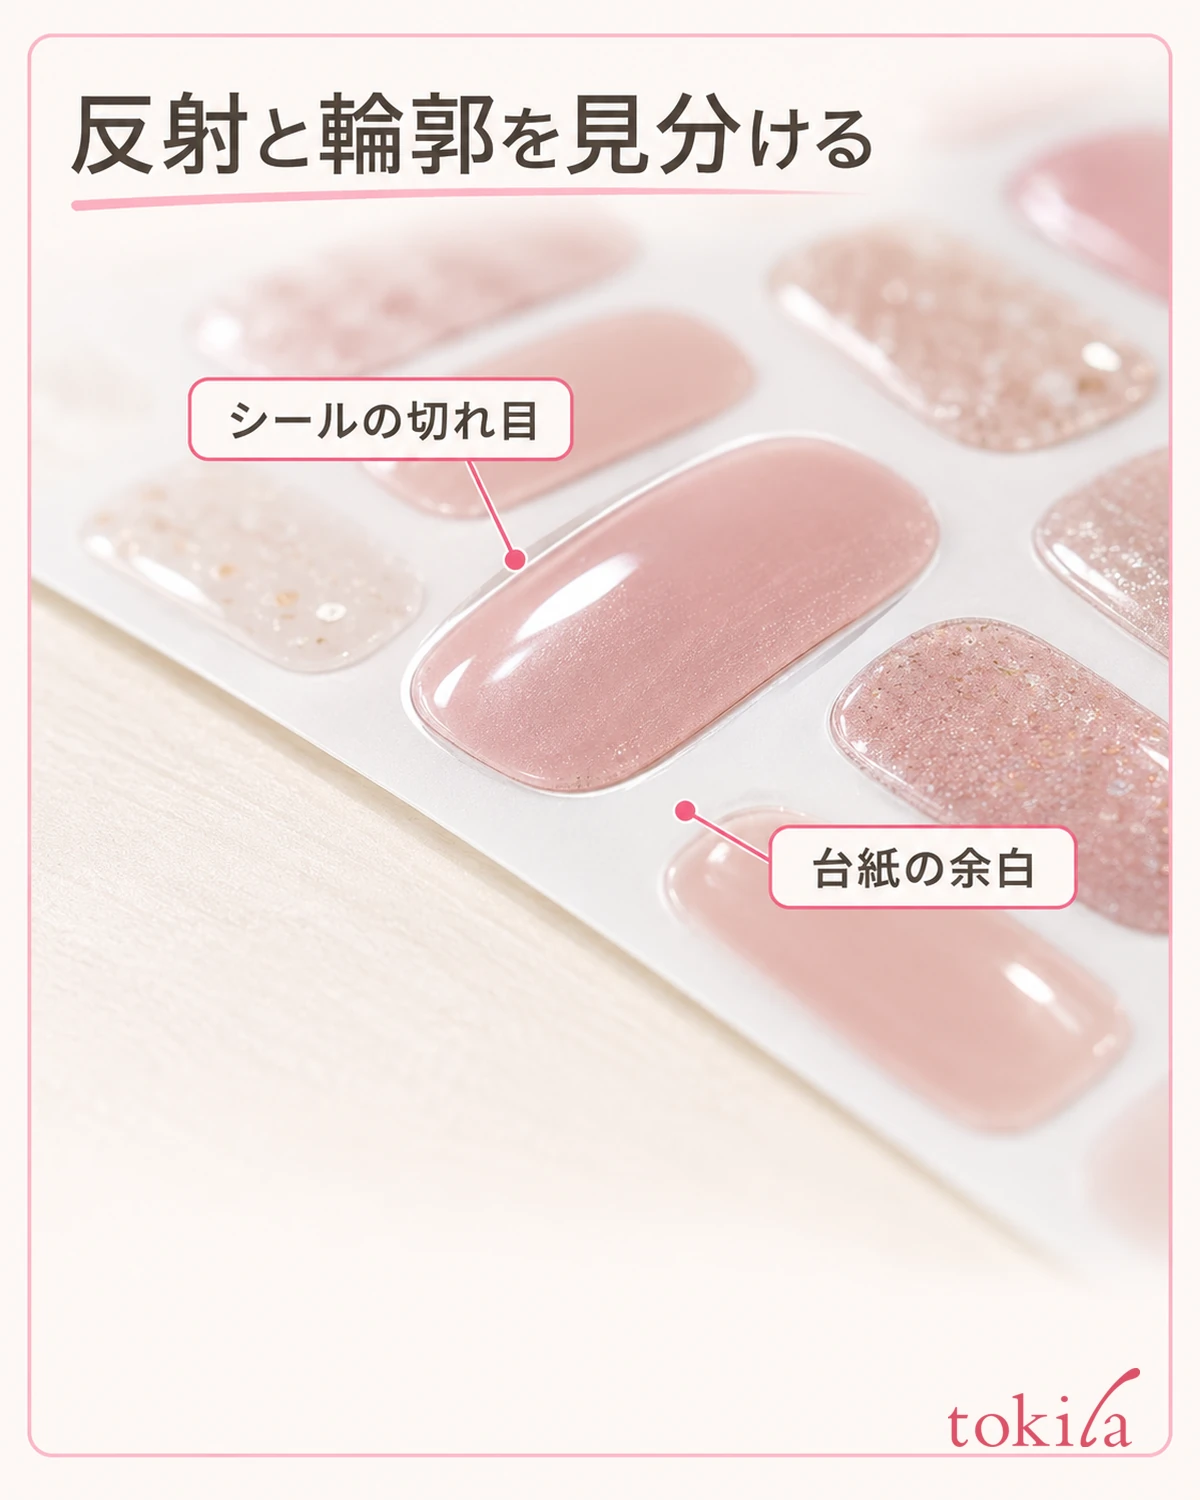
First, follow with your eyes the tab or edge position shown in the instructions. For a product with a step of cutting out each sticker one at a time, also check whether you do that step first. Before tearing a line that looks like perforation on your own judgment, or digging a nail deep into the edge of a design, check again whether it matches the place to hold in the diagram.
Divide the roles of the hand that supports the margin of the backing and the hand that takes out the sticker. The supporting side should be placed where the edge you are working on is visible, not pressing on the sticker you chose. If the whole sheet warps because you press too hard, let go once and arrange the direction and where you hold it again on the desk.
Prepare your fingertips and tools to suit the conditions of your product, too. If you have washed your hands, wipe off the moisture and do not put the sheet in a wet place. Separate work that easily leaves oil or dirt on the adhesive side, such as taking out several stickers while applying hand cream.
When your finger hides the edge you are working on, rather than trying to pull the sticker out, change the position of the fingers supporting the backing a little. Once you know which direction lets you see your hands, put the sheet back on the desk and then take it out. Avoid searching for the edge without looking, and pay attention only to the part you are moving now.
There is no need to bend the sheet in general on the idea that bending it largely will lift the edge. Only for products whose instructions include bending the backing should you do it, within that range. Instead of forcibly folding a hard backing or a semi-cured material, first check whether the specified handle is visible and whether the stage of the surface film is correct.
3. Using the handle or the specified tool, take them out slowly one at a time
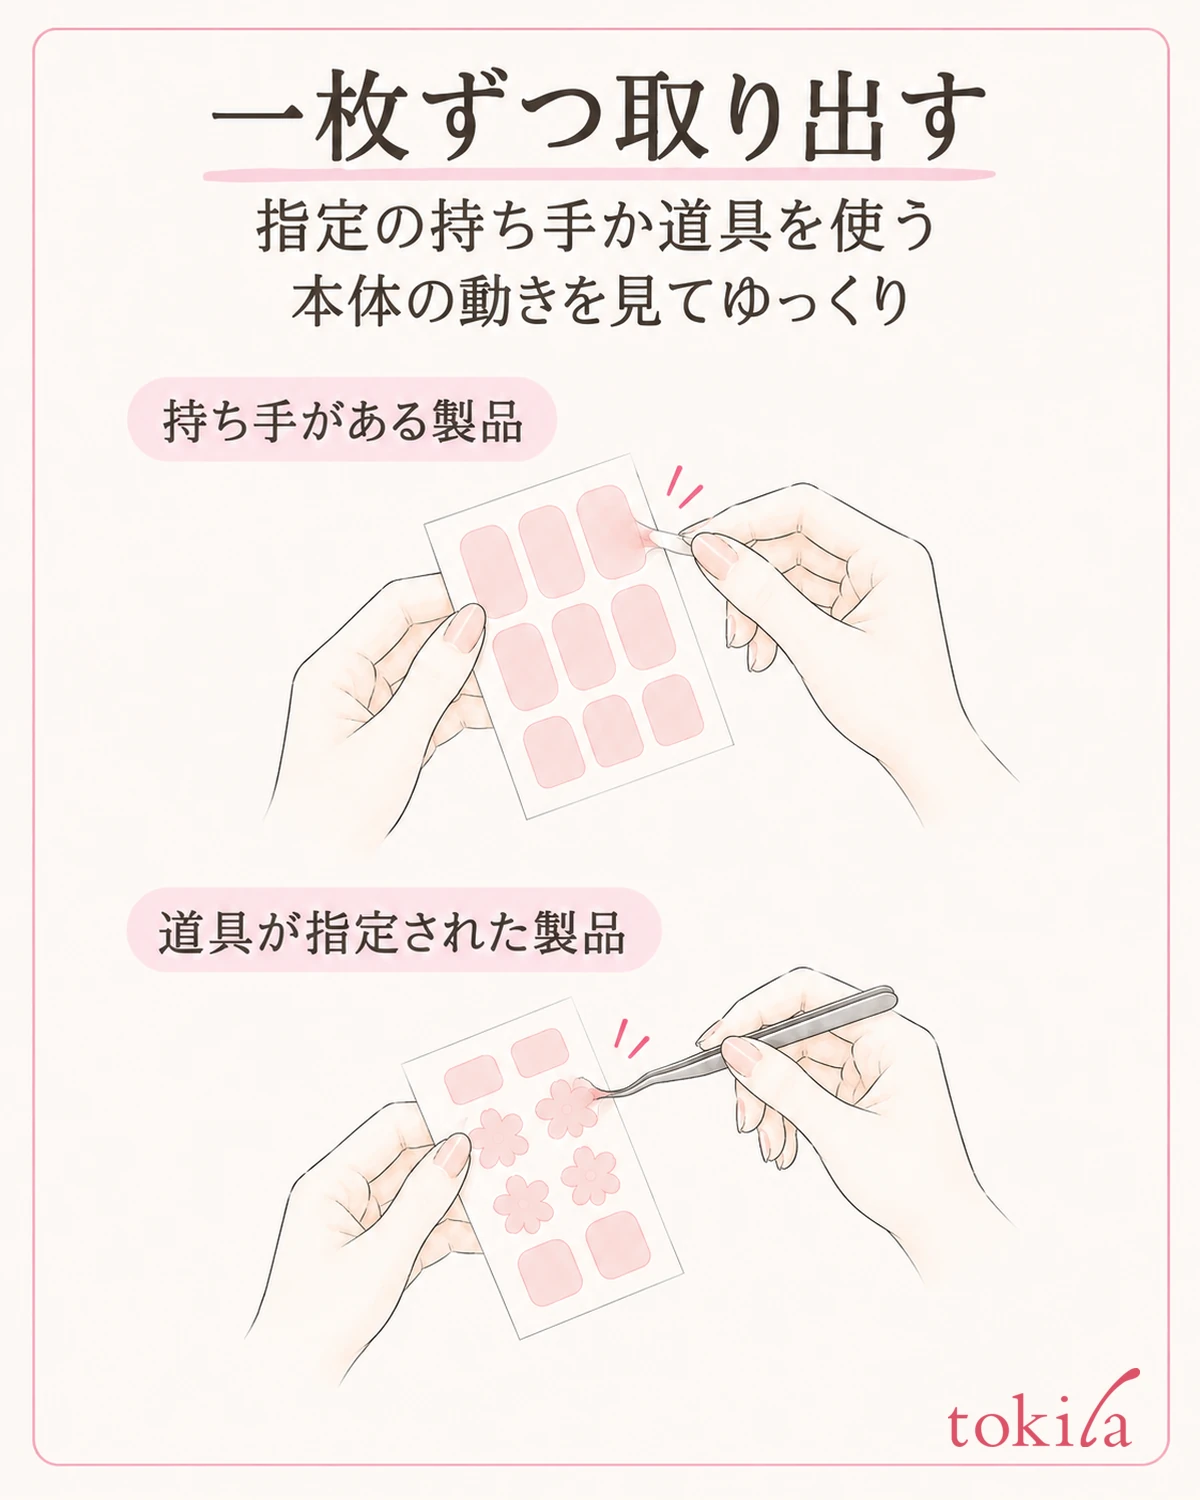
For a product with a handle, use the specified handle, not the sticker's pattern or adhesive side. Steady the backing with one hand, hold the handle with the other, and slowly take it out in the direction shown in the diagram. How the handle looks, such as silver or clear, differs by product. There is no need to look for a part of the same color as on another product.
For a product whose instructions recommend tweezers, pinch the specified edge with that tool. Do not add operations such as driving the tip deep into the center of the sticker, rubbing the adhesive side over a wide area, or making a gap with a metal blade. If you cannot pinch a small part, before gripping harder, check whether the tip of the tool reaches the edge of the target.
Once it starts to peel, check midway whether the sticker itself is coming off the backing or only the surface film is moving. If the part that moves differs from the instructions, stop instead of continuing. Do not conclude that you have taken out the sticker itself just because you managed to peel off the clear film.
Removing several at once makes the order of application and front and back harder to tell. Take out the one you need and move on to the next step, and manage the rest on the backing. Do not change to temporarily placing a removed sticker on the desk adhesive side down, and check in advance with the diagram where you will hold it when applying.
If you are pulling so hard while taking it out that the sticker's length or width visibly changes, ease off and stop for now. Even for a product whose size can be adjusted by stretching, stretching it strongly to take it out is not the same thing. Take it out while keeping its shape, and make any later adjustment at the separate step that is specified.
4. If it stretches, tears, or the backing comes with it, do not keep pulling
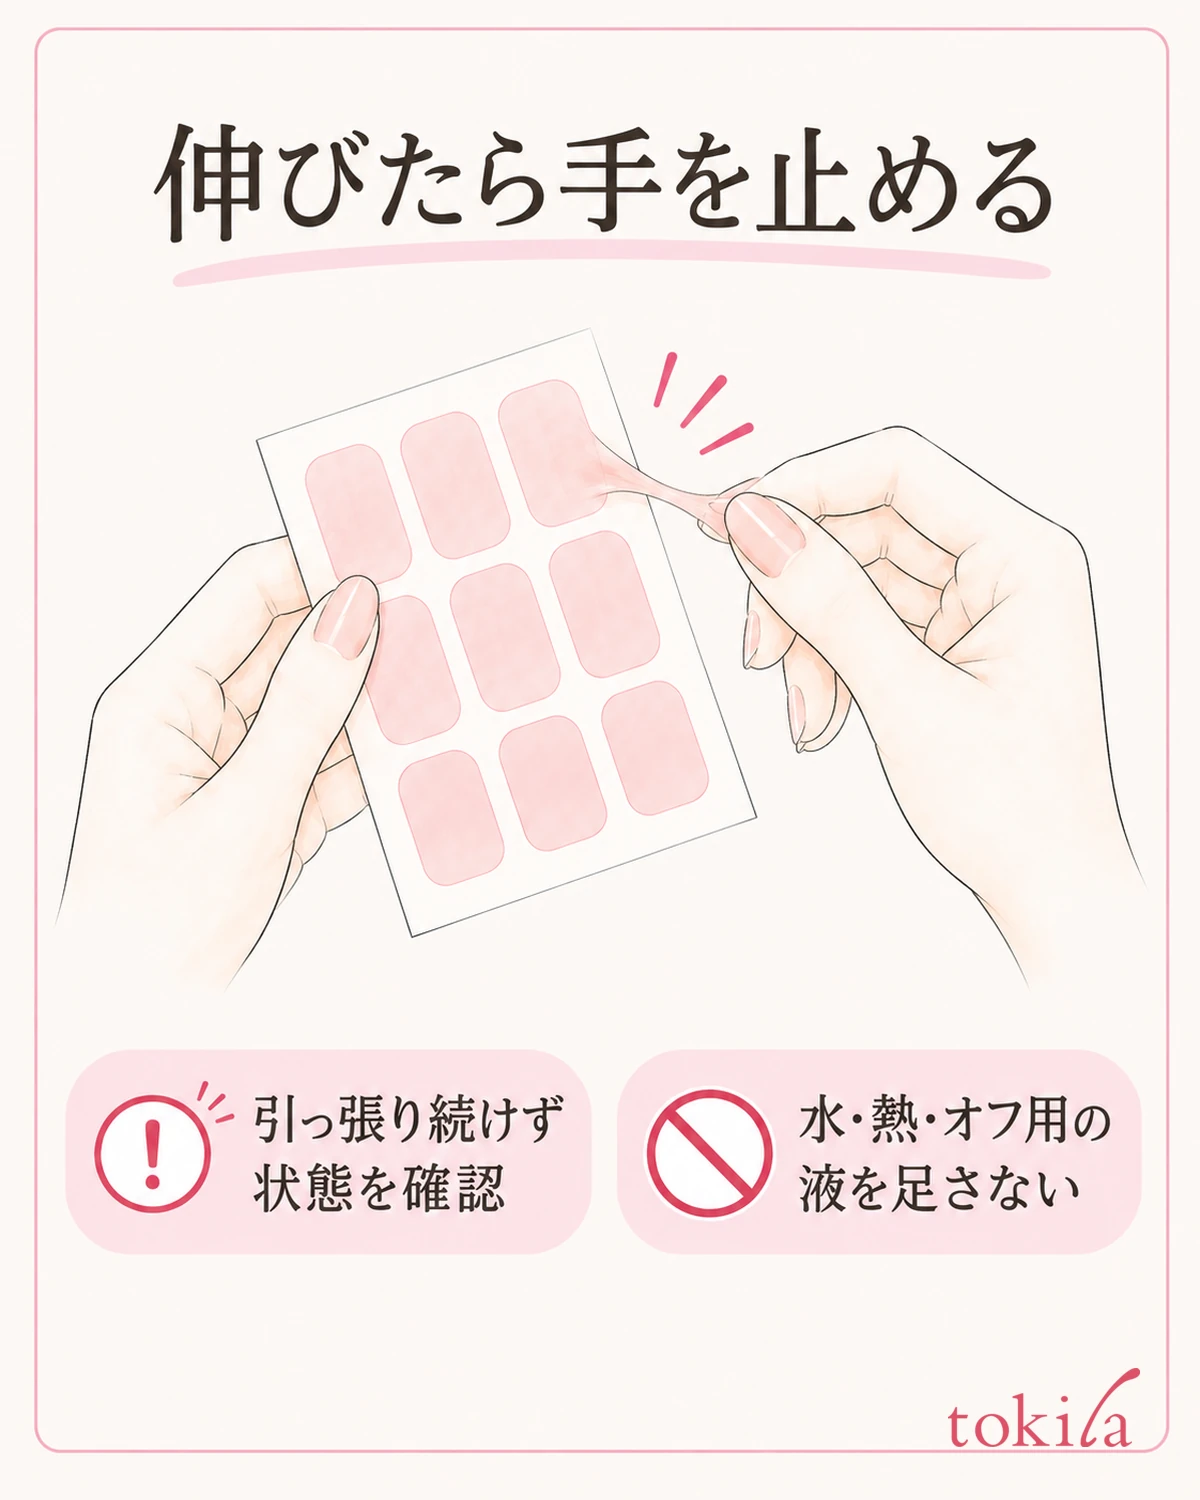
When it does not come off well, separate what is happening now: "I can't find the edge," "only the film peels," "the sticker stretches," or "something like paper comes with it." If you treat all of them as a lack of force, you will overlook differences in where you hold or the order. First stop, and check the state in a position where the sticker does not stick to the desk or your fingers.
If you can't find the edge, go back to the relevant diagram in the directions and recheck whether there is a handle and the order of peeling. If you cannot take it out even with the specified tool, do not move on to poking holes with a needle or a cutter. Before strengthening your force, check whether the place where you are working is right in the first place.
If the sticker tears, a strong crease remains, or dust sticks to the adhesive side, do not press it onto your nail to hide it. Whether it can be reapplied or reused differs by product, so check its state against the instructions. Do not do your own repairs, such as mending torn parts with adhesive or joining another sticker over it; consider another usable sticker.
When something that looks like backing remains on the back, it is not necessarily usable if you rub it off. Check the product's instructions for whether there is guidance on removing part of the backing. If there is no such guidance, do not dig at it or wash it by force; hold off on deciding whether to use that sticker. Do not apply the remedy for a similar but different product as is.
Adding water, oil or nail polish remover to the sheet, or applying a hair dryer or light, to make peeling easier is not generally recommended either. It is important not to carry over the liquids used in the step of removing from the nail, or the curing step after applying, into the work of taking stickers off the backing. If you suspect that the condition changed after opening, also check the storage conditions.
5. Return the rest along with the instructions, and note what to check next time
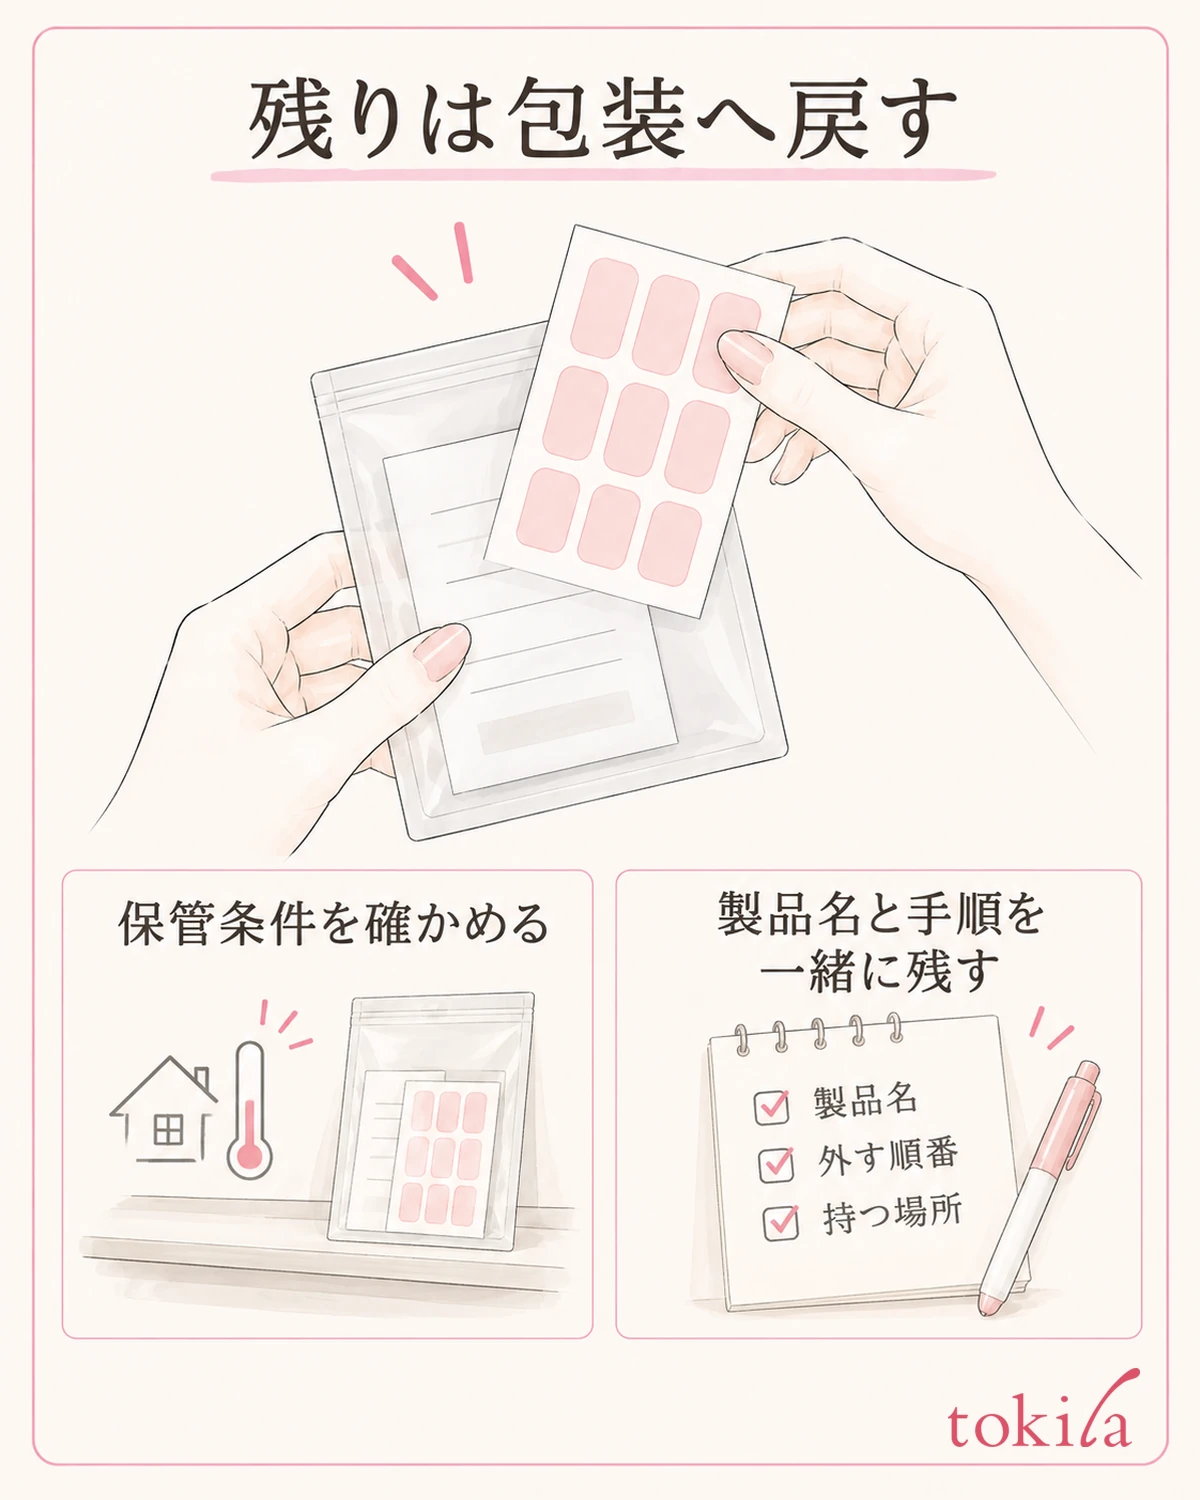
Once you have taken one out, move on to the applying and finishing steps specified for that product. Do not guess the stage for removing the protective film, how to press it on, or whether a light is needed from the taking-out instructions alone. If there is anything wrong with your nails or the surrounding skin, avoid deciding to cover them with a sticker and keep using it.
Return the remaining sheets to the bag or container that your product specifies. The conditions differ between things that need to be kept from light and things that need care against drying after opening. Rather than moving everything to the same clear case, keep the original packaging and instructions so it is clear what applies the next time you use them.
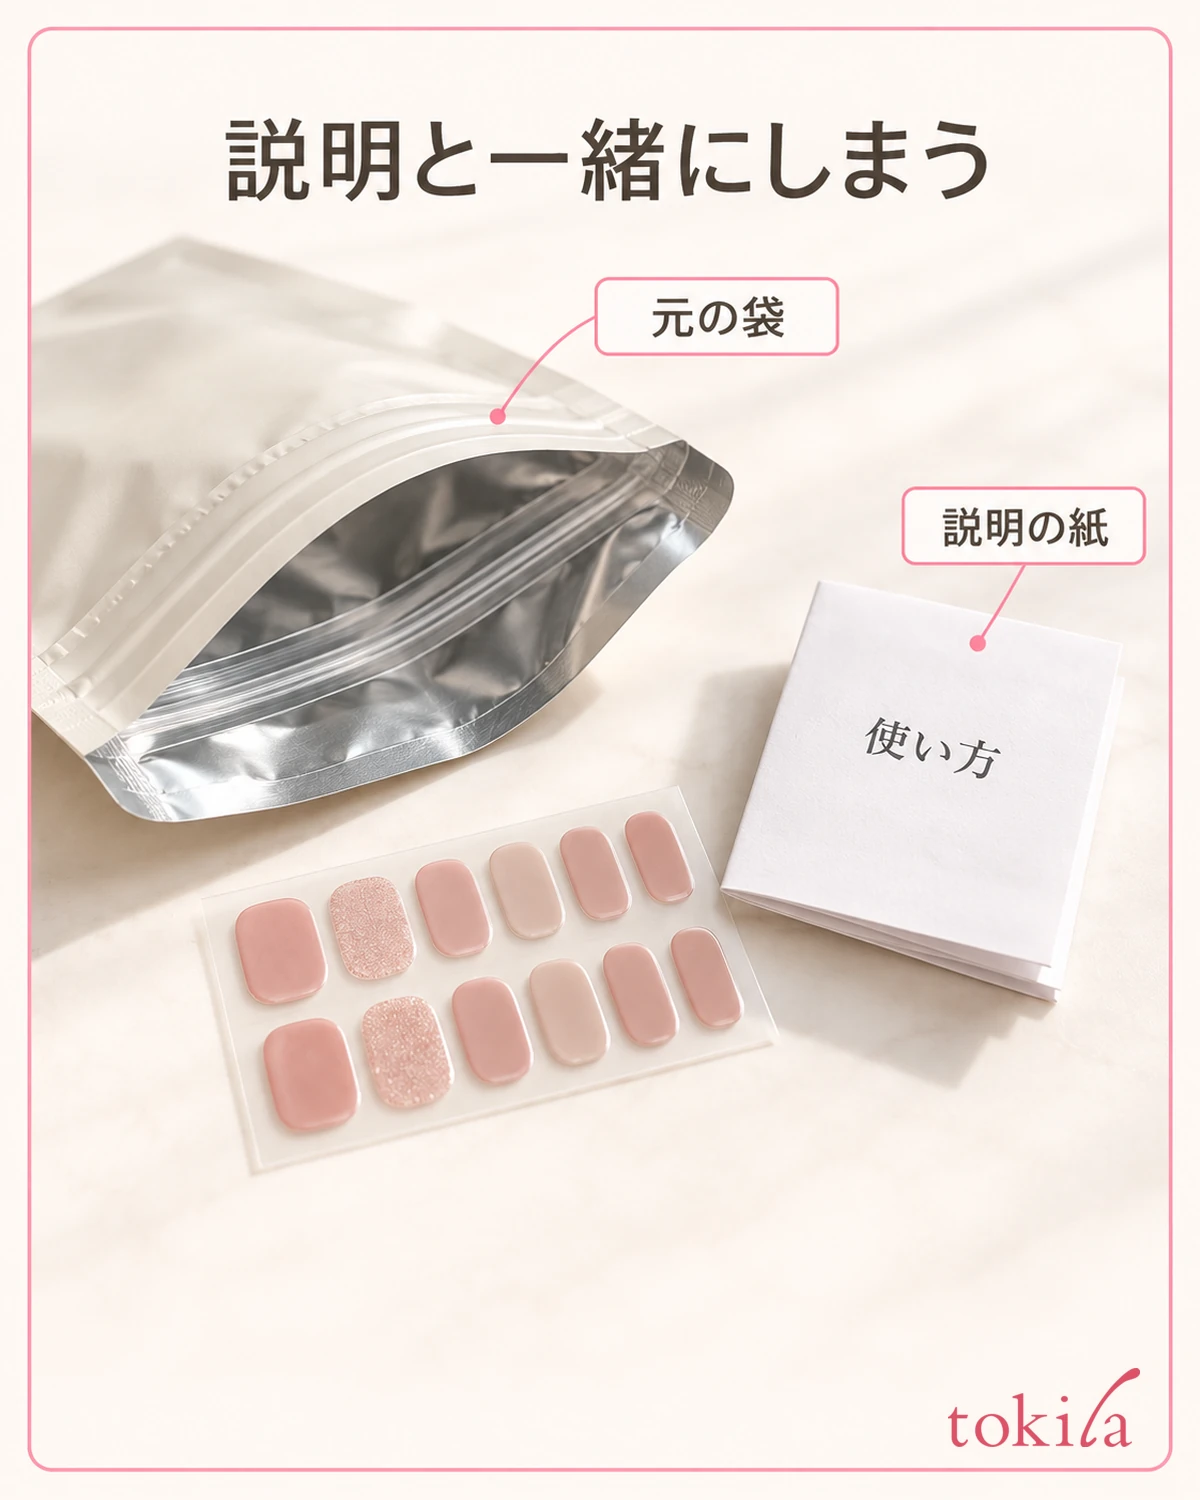
For notes, write down only what you could confirm from your own product's labeling, such as "take out from the handle at the upper right" or "remove the surface film after applying." Write it on a separate sheet together with the product name, and do not write directly on the adhesive side or the sticker's pattern. Even if you buy stickers of the same shape again, do not proceed on last time's notes alone; check against the new instructions.
Record, within what you can tell while it is still stored, whether it happened with only one sticker or whether the rest are in the same state. There is no need to peel off every sheet to check. Noting the state specifically, such as "only the film came off" or "the backing stuck to the sticker," makes it easier to avoid applying force to the same place next time.
If you want to switch to nail polish you paint on, you can also check how to support your hand when painting the nails of your dominant hand. When taking out stickers, start by checking the structure of one and where to hold it, rather than rushing to take out all ten. If something moves differently from the instructions, do not add force; go back to that step and make your judgment.



