
When you try to put a decorative comb into an updo, the teeth stop partway, only the decoration tilts, or it slips when you let go. In such cases, before pushing harder, check separately the type of tool and the base of hair that supports the decoration. The size of the decoration alone does not decide how much hair it can hold or which way to insert it.
This article covers a single-piece decorative comb with one row of teeth under the decoration and no electric function. Distinguish it from a comb for brushing hair, a pair of left and right combs joined with elastic, and fasteners for wigs. These are steps for trying it only after confirming the direction and way of fastening in the instructions for your own piece, without applying the same motions to things used differently.
1. Separate a comb for brushing hair from a decorative comb that holds
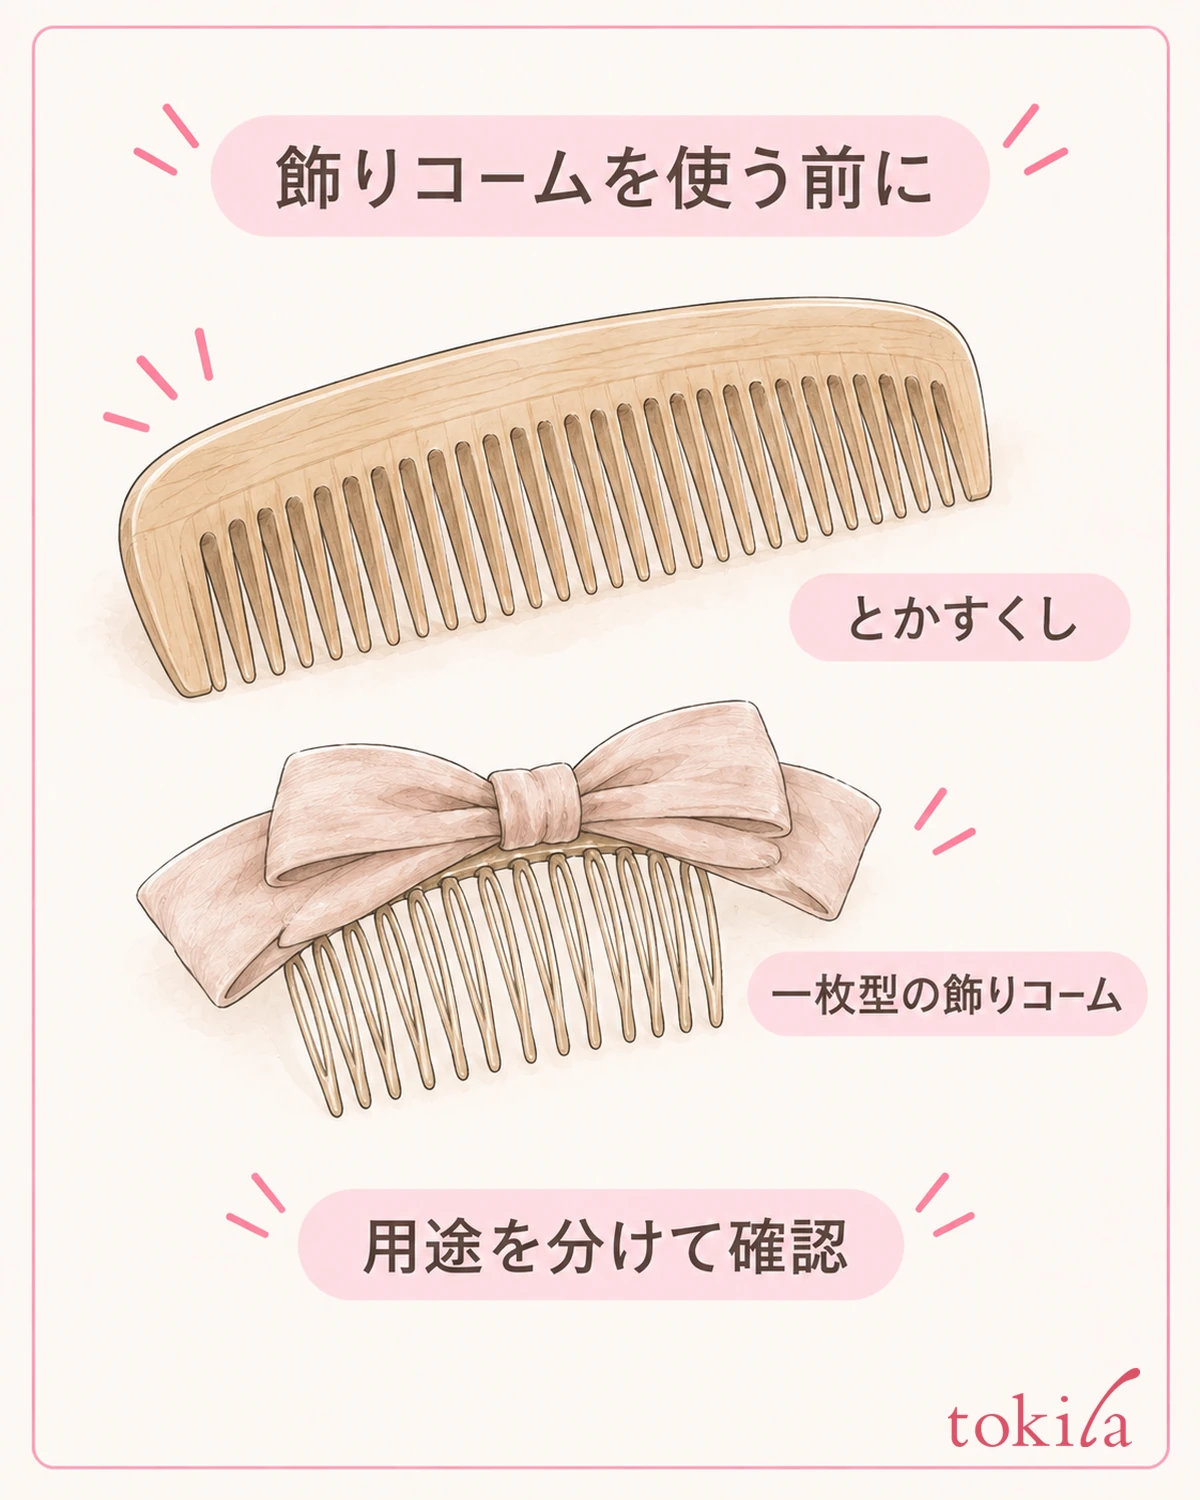
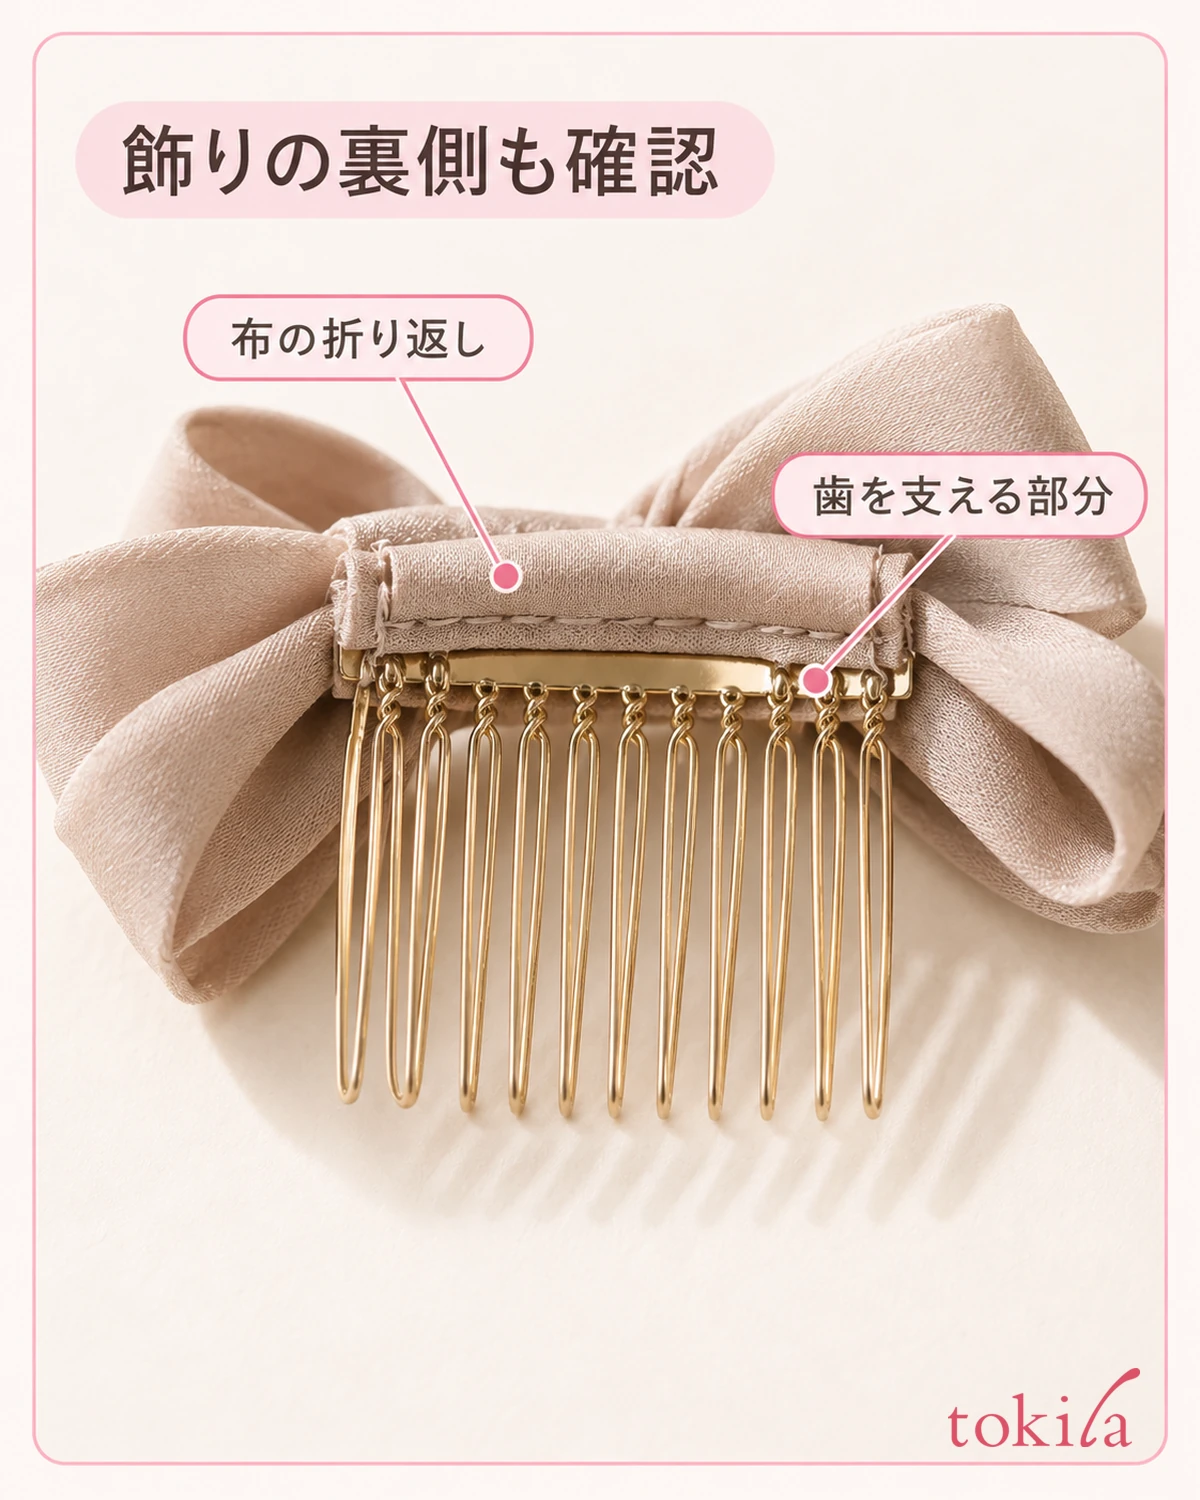
First, away from your hair, look at how the teeth line up and how they connect to the decoration. Check whether the row of teeth and the part supporting the decoration are one piece, or whether a separate fastener is attached. If metal fittings are hidden under a large flower or fabric, do not pull the decoration open; follow the back with your eyes.
A comb for brushing is a tool for passing through sections of hair to smooth them. By contrast, the decorative comb covered here is used by fastening it at a chosen position in the hair. Just because it has teeth does not mean you should hold the decoration and comb from root to tip. Do the work of smoothing your hair first with a comb suited to that purpose.
The number and length of the teeth, their curve, and the weight of the decoration differ by product. Do not decide that short teeth are always for thin hair, or that long teeth can hold all of thick hair. Check whether the backing card or enclosed instructions specify the position to wear it, the hairstyle, or auxiliary fasteners.
Types that join two combs, or ones with a fastener that opens and closes, should be treated separately from the single-piece type in this article. Do not force bending or spreading them using the steps for a similar-looking product. Also avoid bending metal fittings to fit your hair if there is no instruction to change their shape.
Decide beforehand on the occasion too. What you check as the base differs depending on whether you add a small decoration to an everyday updo or support a large hair ornament for a special day. If the ornament is heavy and hard to judge whether it stays on by yourself, do not keep trying too hard right before going out; keep the option of asking someone how to put it on.
When preparing, set the comb on a bright desk and keep a mirror and the instructions at hand. Rather than looking for the back for the first time inside your hair, confirm in your hand which way the tips of the teeth point; that lets you sort out the motion before bringing it close to your hair. The starting point is not to switch your grip while looking only at the front of the decoration.
2. Look at the tooth tips, bases, and back to check it is in usable condition
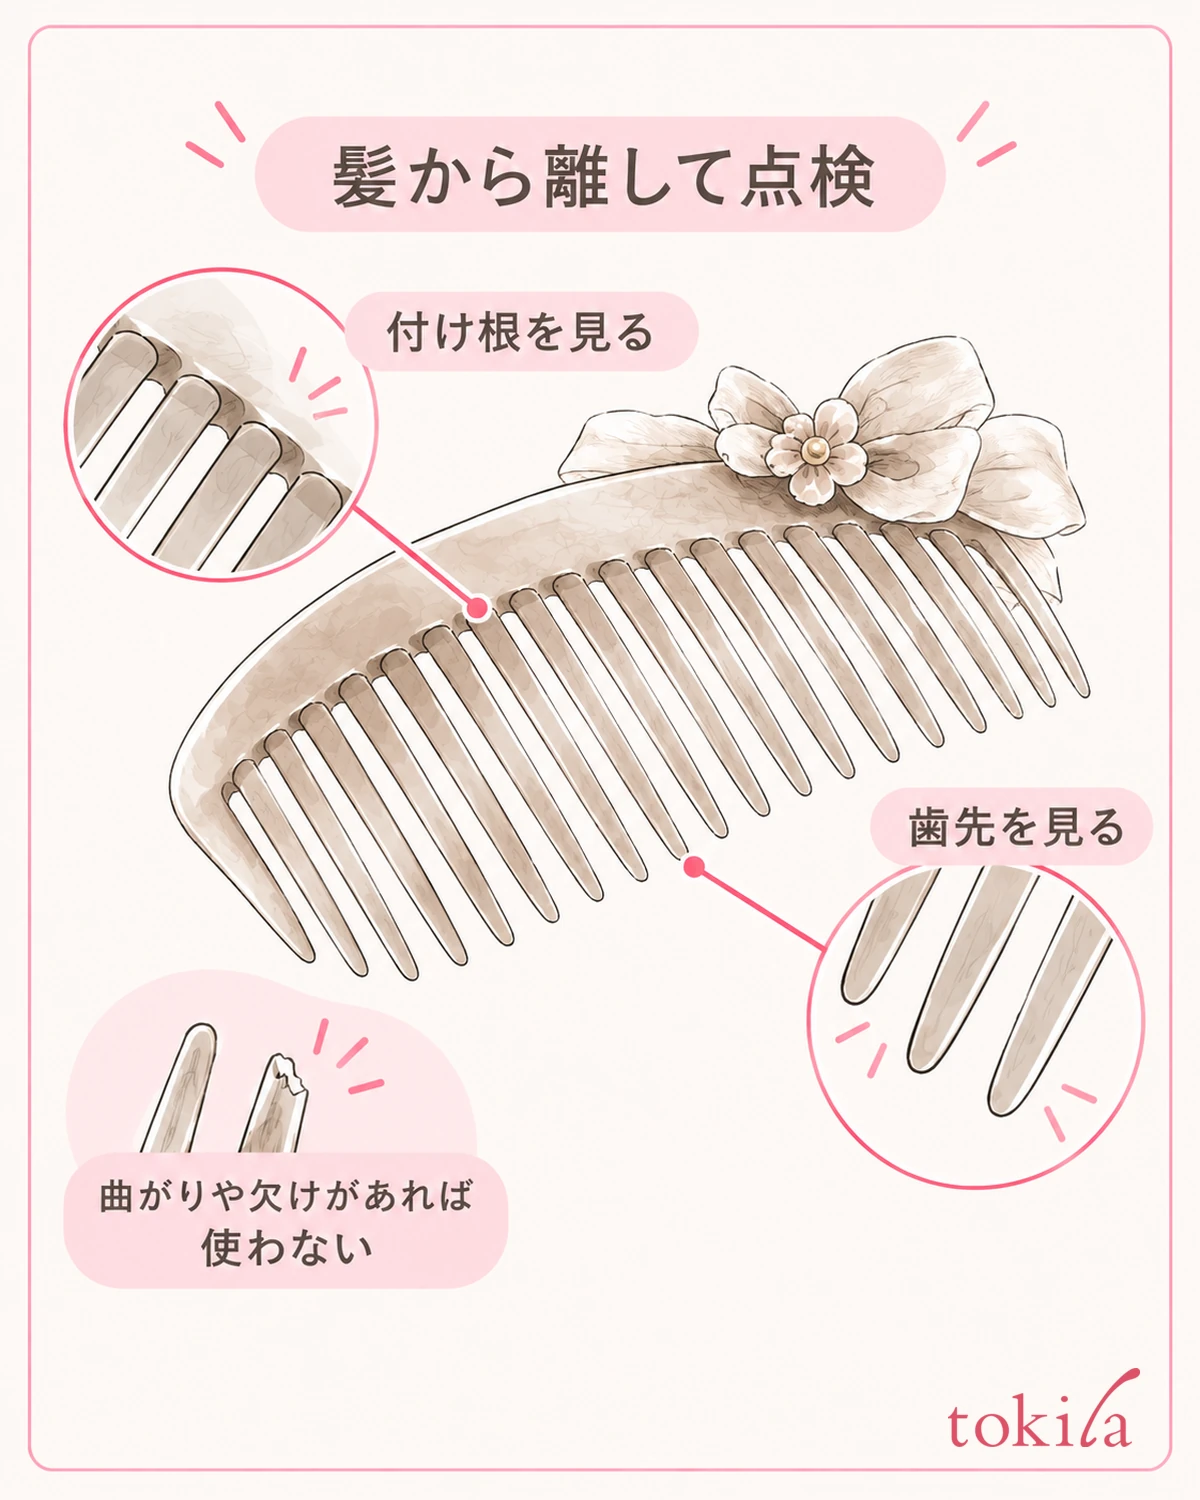
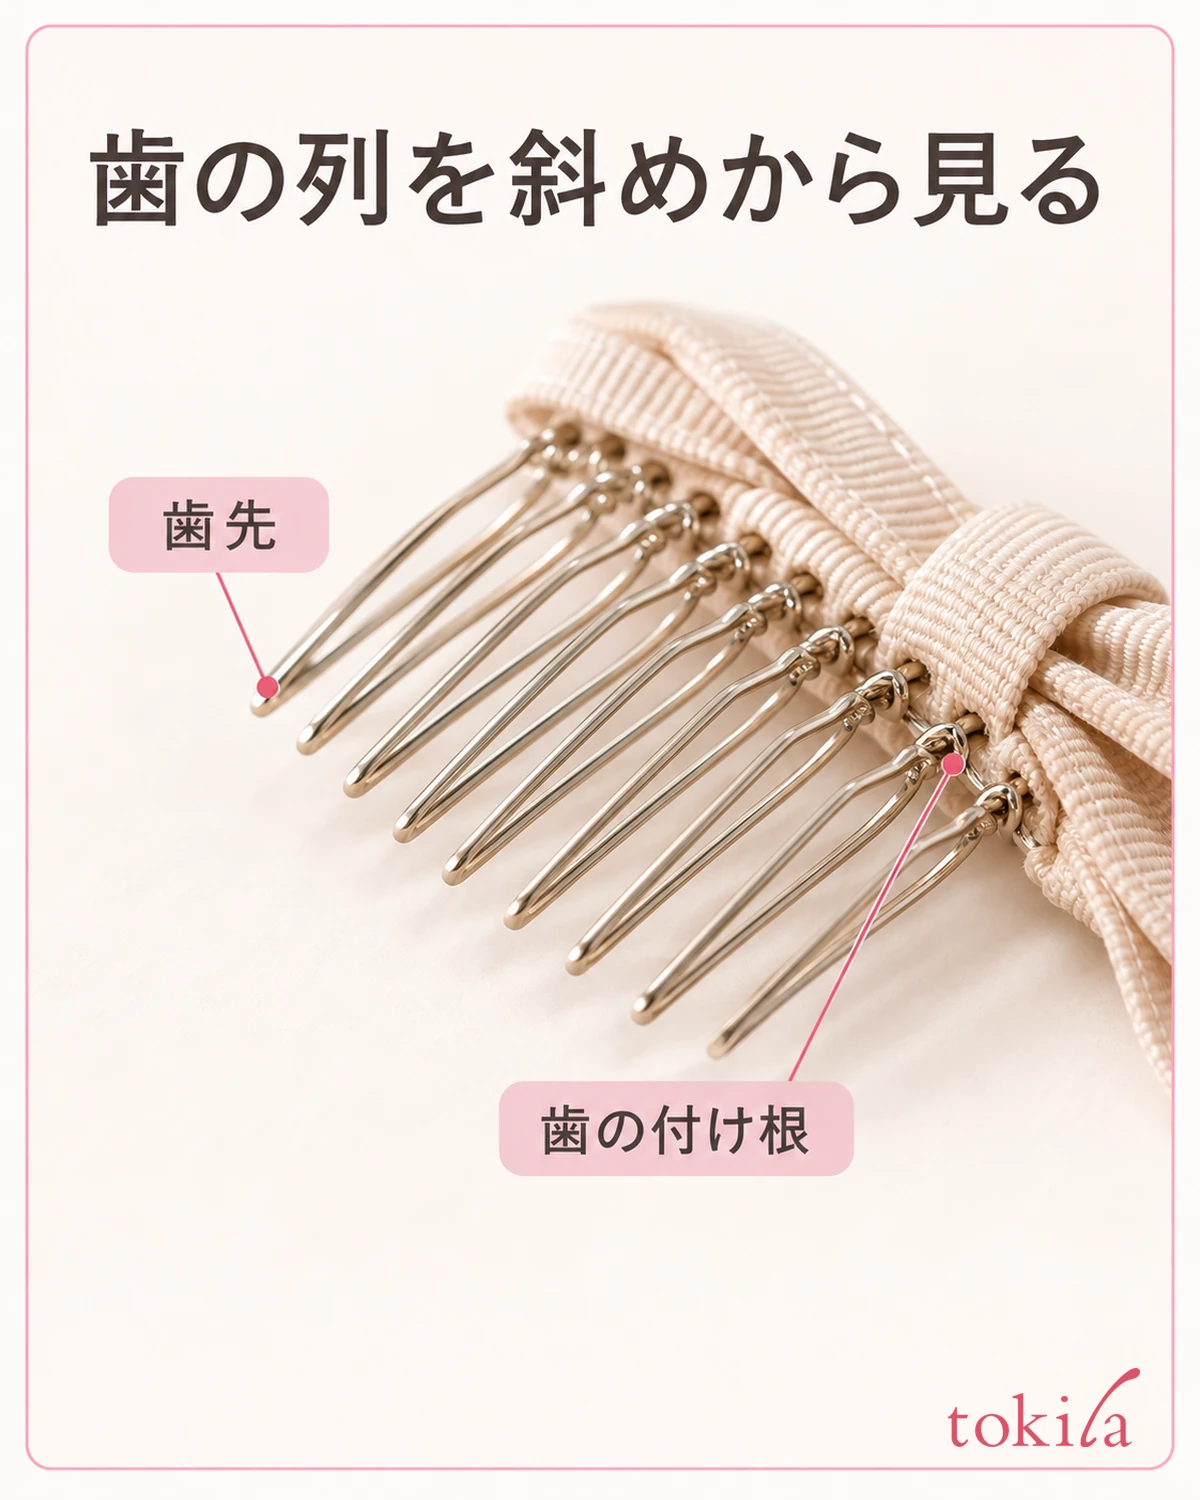
Before bringing it close to your hair, follow the teeth one by one from tip to base. See whether there is anything unusual, such as one tooth being shorter, one bent out of line, or a joint that is lifting. If the outline is hard to see because of reflection from the metal, change the angle against a plain, light-colored sheet of paper.
Even if the tips of the teeth look rounded, do not judge from that alone that it is fine to press hard against skin. There is no need to test it by pressing against your nails or scalp. If you see a chip or sharp deformity, hold off on using it, and do not keep using it after repairing it yourself by filing, gluing, or applying heat.
Next, look at where the decoration meets the base of the teeth. If the decoration turns, there is a gap at the joint, or thread or wire sticks out, check how to handle it before trying to fasten it in your hair. Avoid testing durability by pulling the decoration hard, or checking by bending the teeth one by one.
On the back there may be seams, glued parts, or folded-back wire that you cannot see from the front. Tell apart what is in the area where hair will touch. For fabric decorations, check the overlapping edges too, and do not try to make up for a state where hair would snag by making it slippery with styling product.
If hair or residue from earlier use remains, clean it up by a recognized care method. Do not judge that a piece combining metal, fabric, and resin can be washed with water based on just one of its materials. Even if you can clean it, bent teeth will not straighten, so check dirt and damage separately.
Once you have checked, keep only the comb you will use at hand. If you have several similar decorations lined up, be careful not to mix them up with ones whose teeth differ in shape or direction. Just before inserting it into your hair, look at the back once more and make sure it is the same piece you checked in your hand.
3. Set the updo first and choose where the decoration will be supported
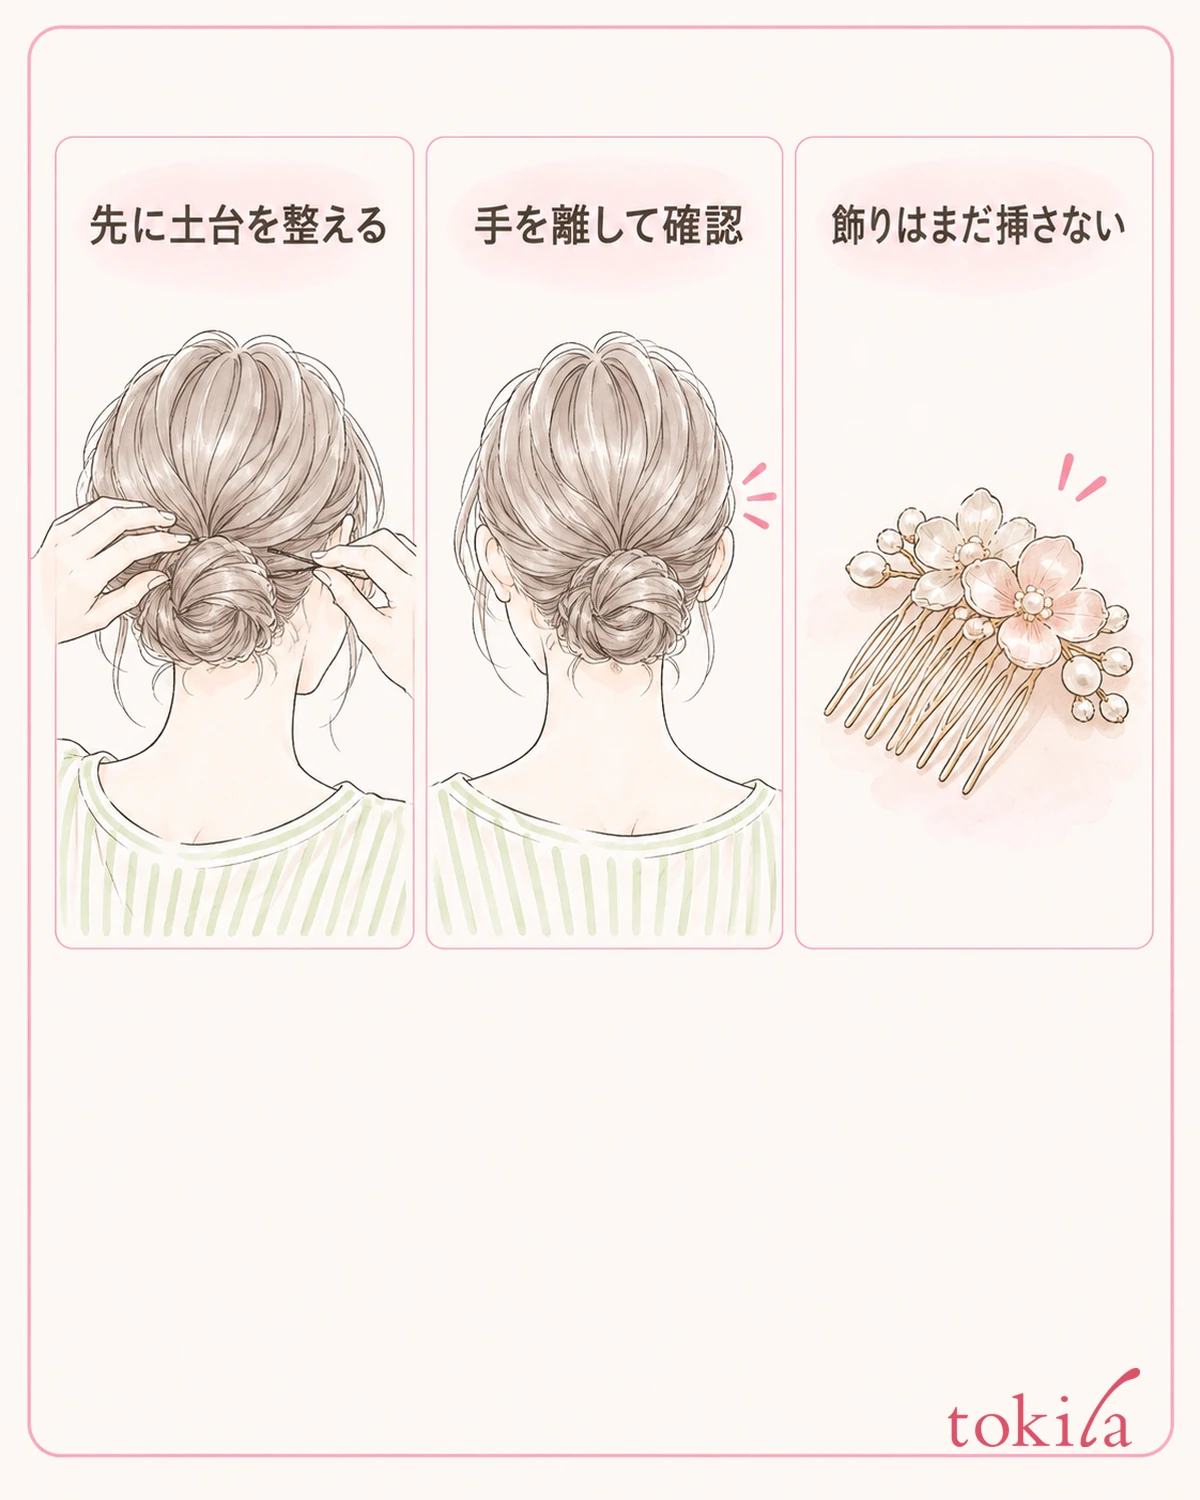
Before inserting the decoration, shape the updo with an elastic or a pin suited to the purpose. Check on your own piece whether the decorative comb is designed to hold the whole section of hair itself, or to be added to a finished style. Do not use something meant for decorating as a tool to retighten a loosened base.
Let go once and see whether the gathered hair moves a lot. If the base sinks, the elastic slips along with it, or a pin lifts, go back to that part before adding the decoration. If you want to tuck in the ends of a bun, also see reviewing the ends that stick out of a bun, and do not try to force them down with the decoration.
When deciding the position, look at the sides and back in the mirror. Check not only where the front of the decoration shows, but also which sections of hair lie in the area where the teeth go in. Do not gather up a large amount of just the thin hair on the surface, or push the tips of the teeth into a spot you cannot see; choose the position that your piece is meant for.
If the hair section is thick and the teeth do not go through, take the tool away before increasing the force. Conversely, if it slips when you let go, do not assume that inserting it deeper will solve it. Check whether the hair base, the size of the decoration, and the specified auxiliary tools match, and see whether you can choose the position again.
If the instructions mention auxiliary pins, follow that combination and order. Do not fix a shared figure, such as every comb needing the same number of pins, or crossing them always holding it. Do not push in where a pin and the comb collide; handle them within the range where you can check each other's positions.
Also look at the places that glasses, ear accessories, and collars or stoles touch. Even if it holds right after you put it on, your hand may hit the decoration when you put on or take off clothes. If you will wear a large decoration, think first about whether you can change clothes, and prepare so that clothes do not push it down later.
4. Confirm the direction and try it, and go back if you feel resistance
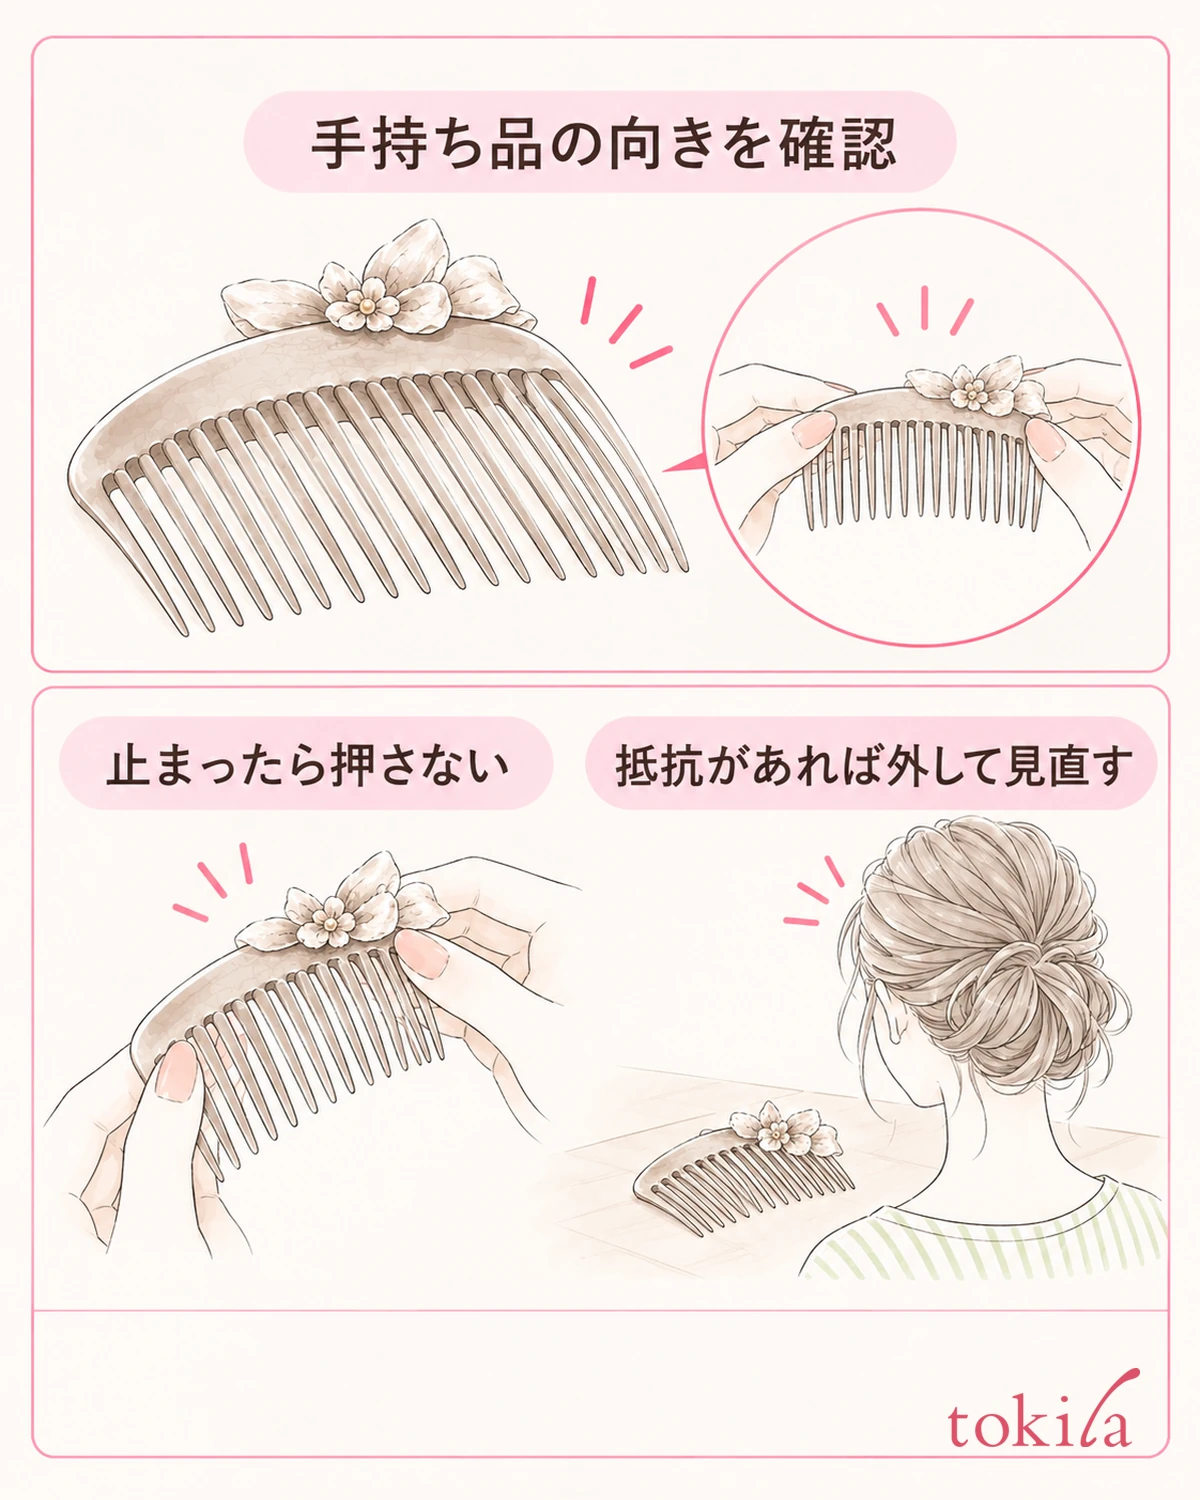
Confirm the direction of insertion from the diagram or instructions that came with it, not by guessing only from the curve of the teeth. It is important not to mix up a design where the teeth are turned over to fasten with one that is inserted straight in. Avoid trying to rotate something whose instructions you do not understand while it is against your scalp.
Also check where to hold it. Do not push by holding fragile petals, beads, or the ends of hanging ornaments; support the part the instructions show as easy to hold. Even when supporting the base of the updo with your other hand, do not press hard against the scalp, and handle it while checking the insertion position in the mirror.
If the teeth stop partway in the trial, do not add force from that position. Check what is blocking the way: the thickness of the hair, existing pins, tangled hair, and so on. Rather than twisting sideways while it is caught, undo the movement within the range you can move, and take it away from the hair to review.
If hair is wound around the teeth, do not grab the decoration and pull it out all at once. Separate the visible hair little by little, and do not apply excessive force where there is resistance. If you cannot see it at the back of your head, it hurts when you move your hand, or you cannot remove it yourself, stop and ask for help.
If you try again, review one thing, either the position or the base, with the decoration taken away. If you add pins, layer on styling product, and insert it deeper all at once, it becomes hard to tell what changed. Choose a way you can handle without strain, including switching to a different fastener if the tool does not fit.
Do not put up with pain or discomfort just because it looks neat. After taking it off, check whether your hair is being pulled, or whether the teeth or decoration touch your skin or ears. Do not keep using a damaged part or an ill-fitting shape by only adjusting how tightly you wear it.
5. Check how it holds from all directions, and protect the teeth after removing it
Once it is in, let go and look at the tilt of the decoration and the base from the front, side, and back. Do not decide from one direction close to the mirror; return to your usual posture and check. There is no need to test durability by shaking your head hard. See whether you feel it slipping or pulling when you naturally turn.
If there are hanging ornaments, also check that they do not tangle with clothes or ear accessories. Even if the decoration on the front looks neat, the teeth on the back may be lifting. Rather than pressing the lift down, go back to taking it out and reviewing the position and base where you fasten it.
When taking it out, do not pull only the tip of the decoration. Support the base and separate the teeth from the hair following the removal method shown for your piece. If you used auxiliary pins, look at their positions and handle them one at a time, and if something catches, do not keep pulling; check for remaining fasteners or hair wound around it.
Put the removed comb on a desk and check for hair, residue, and changes in the teeth. Care for it according to the material and instructions, and do not wipe the decoration hard or soak all of it in water. Do not decide it can be put away damp; follow the drying and storage conditions that suit your piece.
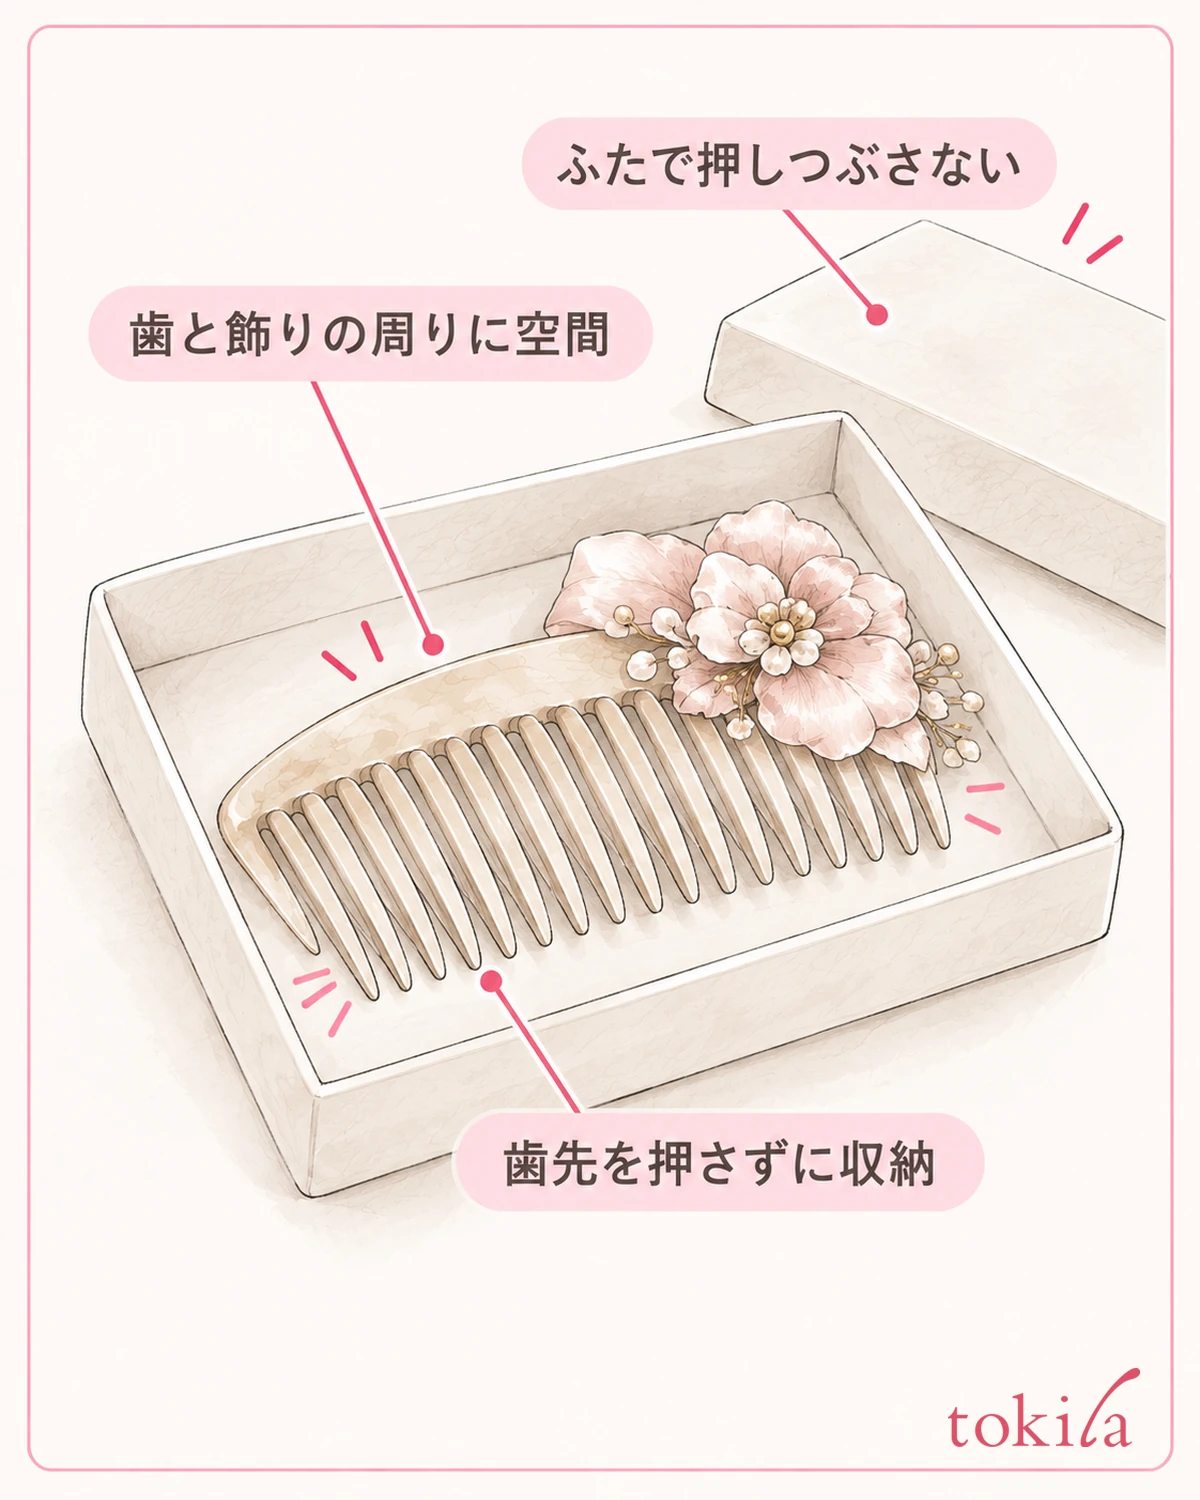
Choose a place to store it where the tooth tips and decoration are not pressed by other things. If you put it in a pouch, check that zippers or hard small items do not overlap the row of teeth. If there is a dedicated box or protective material, check that it fits without the lid crushing the decoration before closing it.
Next time, jot down one step you went back to, such as "I inserted it before making the base" or "it stopped at the place with a pin." This is not a verification that determines the cause, but a check for your preparation. Separate the types, look at the teeth and back, and confirm the base and direction. When it will not hold, return to this order before adding force.



