
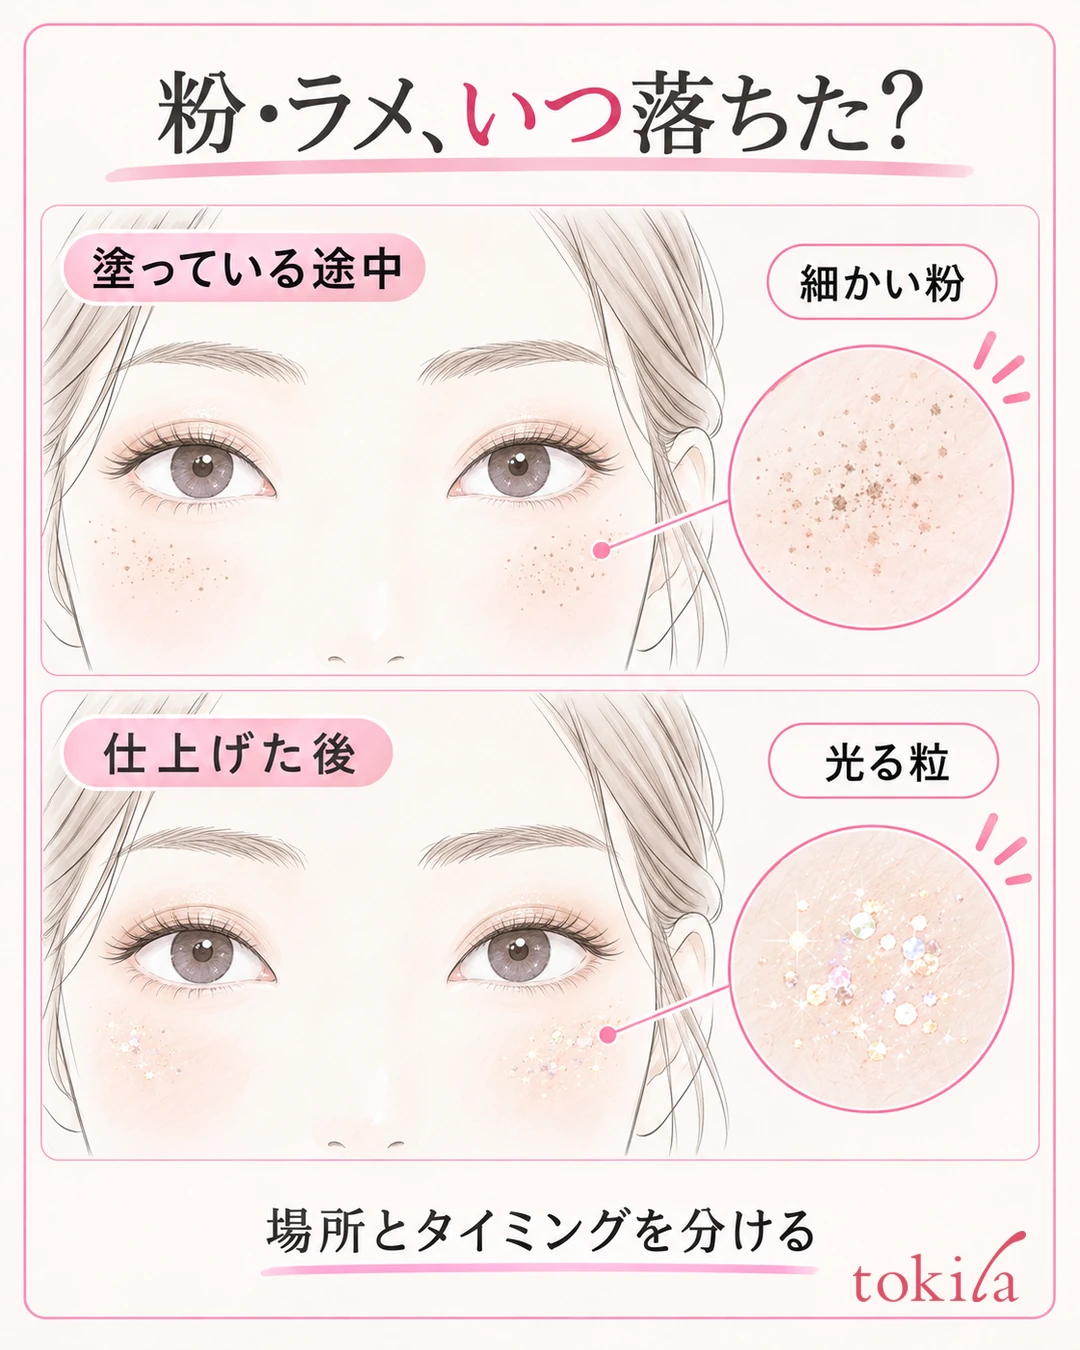
You applied eyeshadow and brown powder fell onto your cheeks. After finishing, glitter shines only under your eyes. When that happens, before covering the fallen particles with foundation, check when they fell, and how much product and which tools you used.
This article focuses on powder fallout and glitter fallout from powder eyeshadow, and explains how to adjust before applying, how to lay the color on, and how to touch up when it has fallen onto your cheeks. It puts the product's instructions first and does not call for rubbing everything away hard.
1.Separate fallout while applying from glitter that falls later
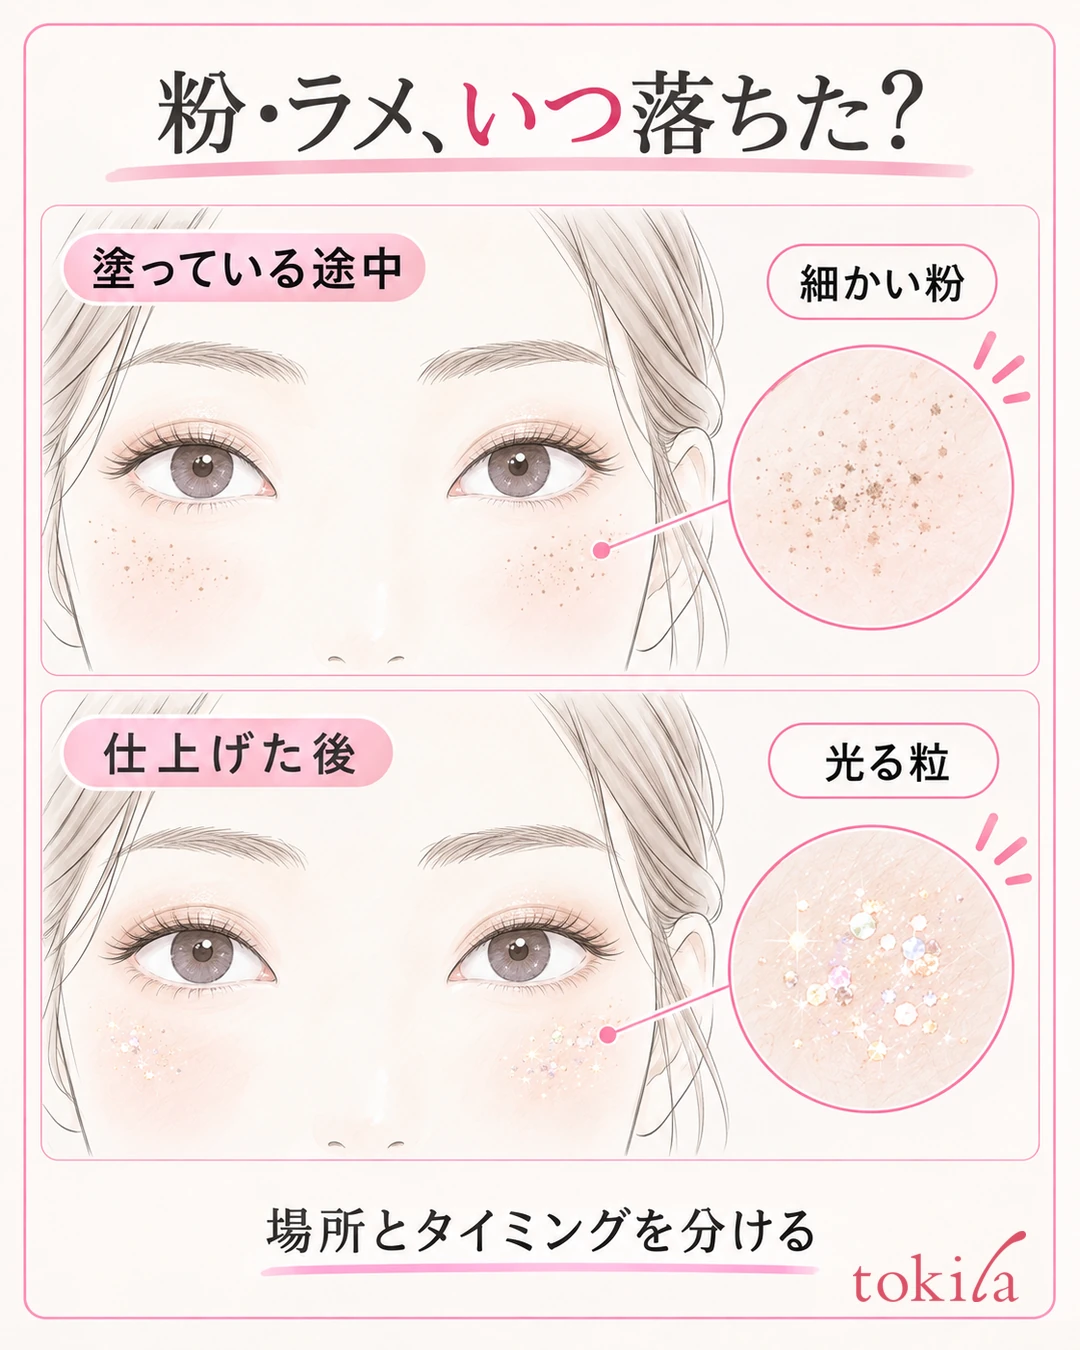
First, stop picking up new color and look at your upper eyelids and your cheeks separately. Did fine powder fall right after you moved the brush, or did particles that were not there when you finished show up under your eyes later? Both are powder-falling problems, but the steps to review are not always the same.
If it happens while applying, look back at how much you picked up on the tool at once, where it touched first, and whether you went back and forth many times. If it happens after you go out, check how far you spread the glitter, how many layers you built up, and when you touched your eye area afterward. Do not judge your skin type or the product's quality from looks alone; start from what you did today.
Look in the mirror under bright, frontal light first, then turn your face just slightly. This keeps you from confusing the brown specks or sparkling particles left on your cheeks with the shadows that are naturally under your eyes. If you trace every sparkling dot with your finger, it becomes harder to follow where they are, so narrow down the spots you will touch first.
If you applied glitter or pearl to your lower eyelids on purpose, separate that area from the unplanned residue on your cheeks. There is no need to treat all the shine on your lower lids as a failure. Whether it has fallen beyond where you placed it is the sign for whether to fix it.
On the other hand, color gathering in a line in the crease of the upper eyelid is a different matter from powder falling onto your cheeks. If that is your main concern, see how to review eyeshadow that collects in the eyelid crease. Black smudging from eyeliner or mascara should also not be lumped together with fallen eyeshadow in the same fix.
On days when the fallout differs between left and right, recall how much you used and how you moved the tool on one side. Do not remove everything to match the clean side; first tidy the affected side only as far as needed. At the observation stage, it is enough to know where and when it fell, rather than to add more intensity.
2.Adjust your tools and the amount of powder before bringing it to the eyelid
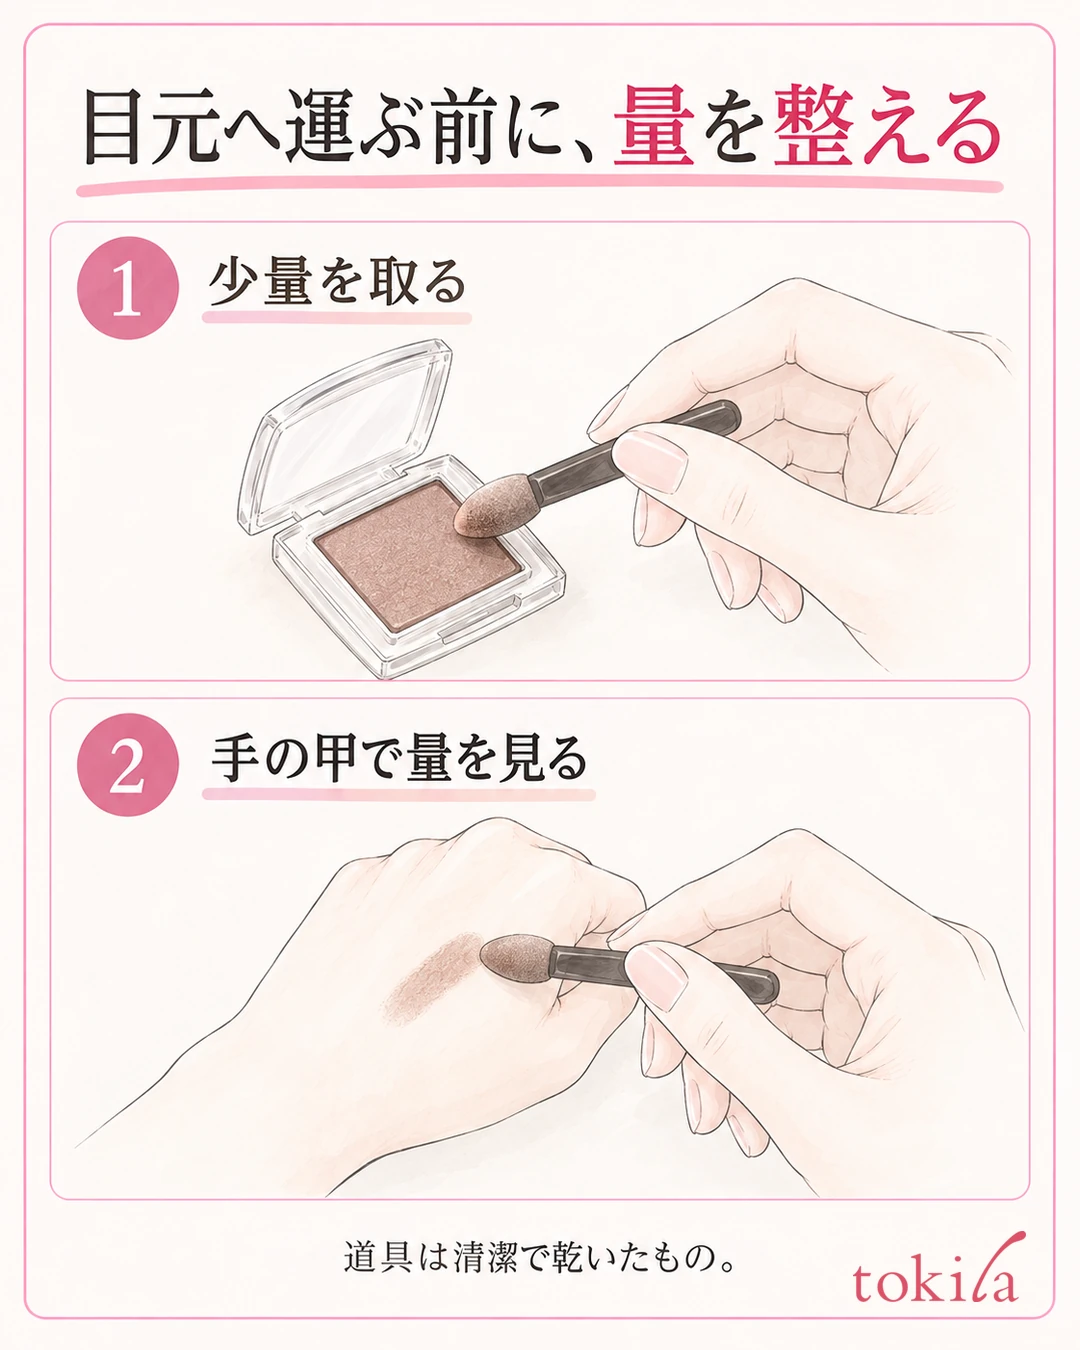
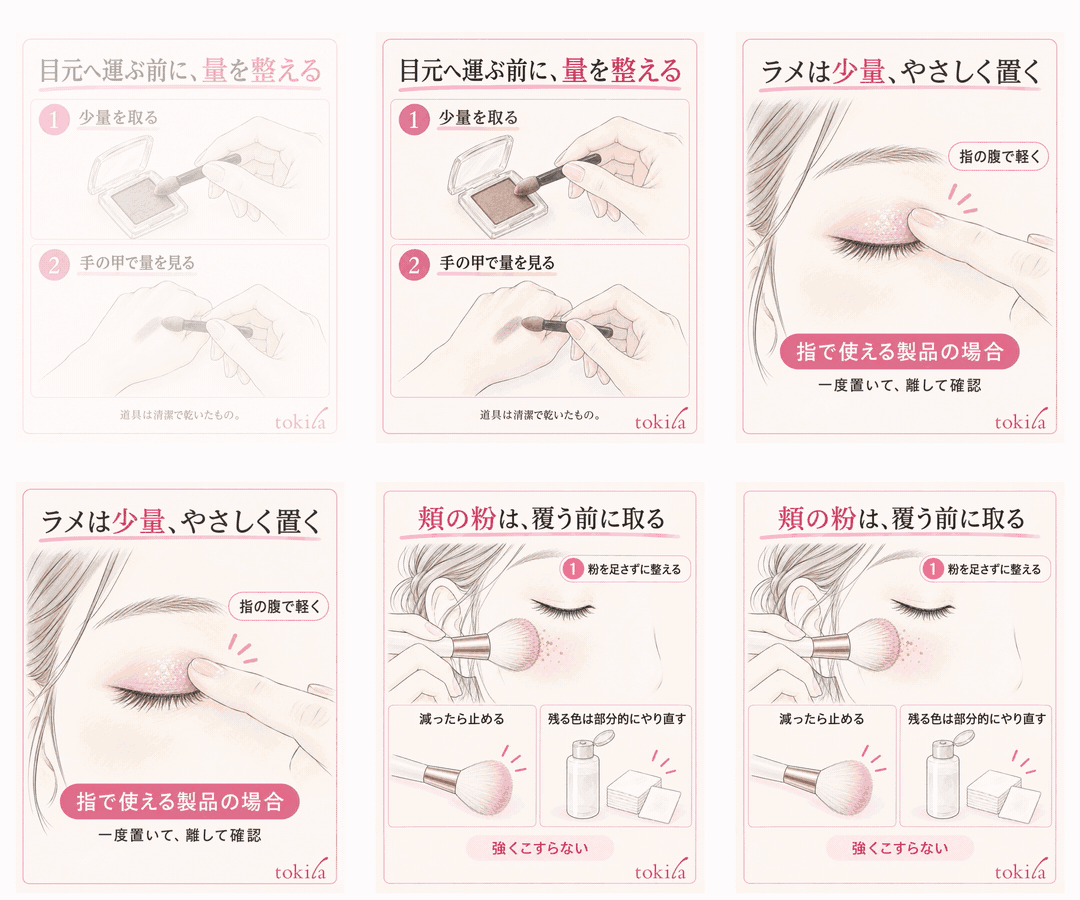
Once you have chosen your colors, prepare tools that are clean and dry. If you pick up new powder with a brush that has thick leftover color on its bristles or with a damaged tip, it becomes hard to track the amount and the color. If you have just washed it, let it dry thoroughly, and first check how to handle the palette and tools.
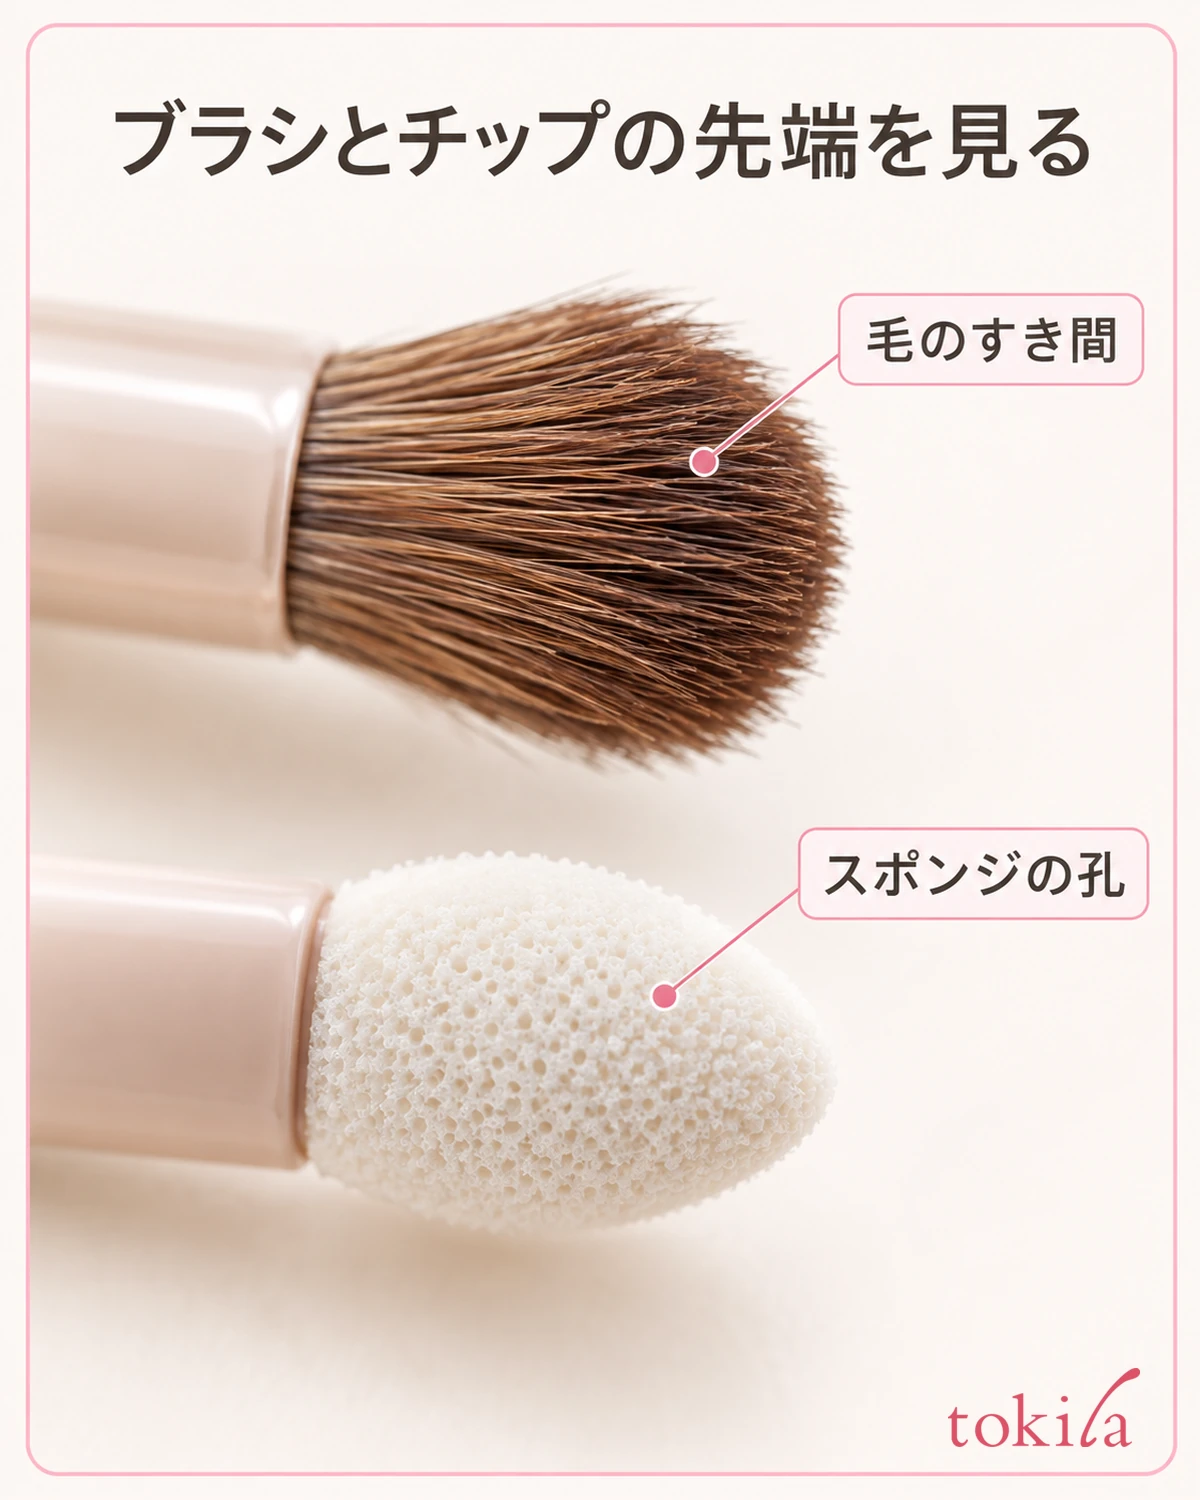
This step is for seeing how much color comes out at first.
If you check on the back of your hand, touch a clean spot lightly once. If the powder is sitting in a heap, do not bring that amount to your eyelid; adjust it first. However, the back of your hand and your eyelid will not give the same color payoff or adhesion. Here you are just looking at a guide to the amount you carry at one time.
Do not shake the tool near your face or blow on it to reduce the powder. Adjusting as instructed, away from your face, helps you check the next stroke calmly better than handling the tool forcefully. Also reconsider the habit of scraping the palette hard to pick up a large amount.
Also check that the width suits the area you are coloring. A tool for blending a broad area and a tool for placing color in a narrow spot have different roles. There is no need to go back and forth many times with a large brush over a thin glitter accent. Conversely, covering the whole area repeatedly with a tool that is too small makes it hard to manage the amount you have layered.
Do not decide that fingers will never cause fallout compared with a brush, or that a tip suits every product. Read whether your eyeshadow's instructions recommend fingers, a tip or a brush, and choose from that. Wetting your tool with water or mist should also be done only when water use is specified.
3.Place a small amount, then blend, and use glitter with a tool that suits the product
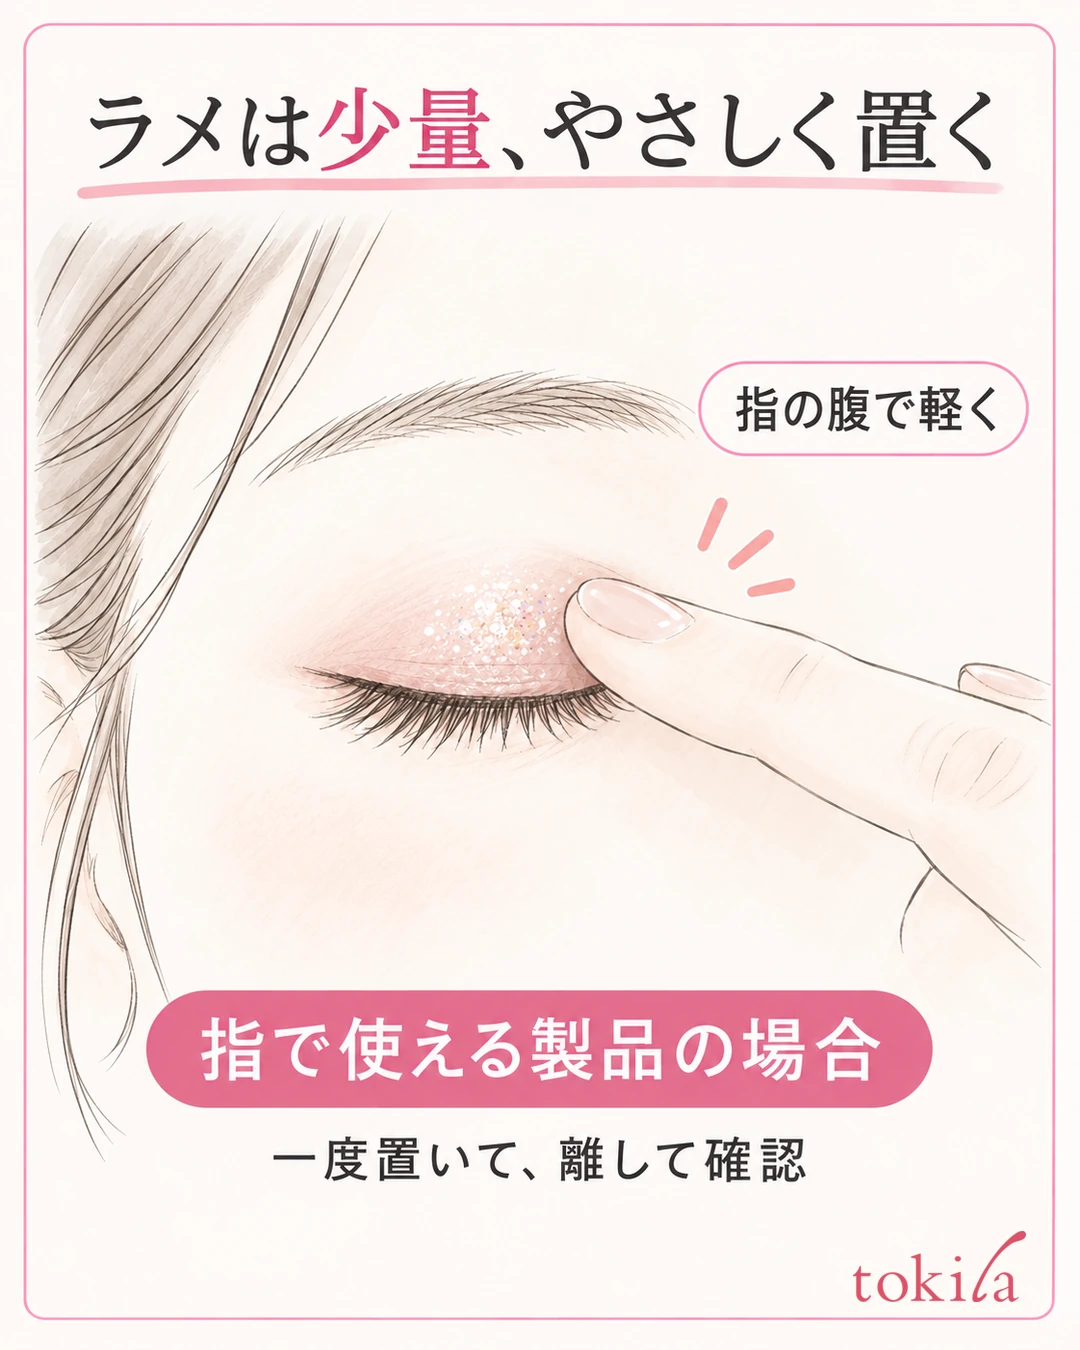
When you apply color to the upper eyelid, hold a hand mirror slightly lower, drop your gaze, and look at the area you are coloring. Do not pull the eyelid hard; start in a posture where you can see both the skin and the tip of the tool. First lay a thin layer on the small area you want, lift the tool away, and look at the depth of color.
When blending powder, blend lightly within the area that needs color. Rather than going back and forth many times from one end of the lid to the other in one go, work in short movements and check afterward. Do not pick up a large amount again before the color shows; look at how the current layer looks, and then think about the next small amount.
Handling glitter separately from the step of spreading color makes it easier to review the amount. This is how to use that particular product.
If the product can be used with fingers, pick up a small amount on the pad of a clean finger, lightly close your eyes, and gently place it on the skin of the upper eyelid. Do not press it in with your nail or fingertip, and keep it away from the eyeball and mucous membranes. Even if you think the shine is not enough, check how it looks where you placed it before rubbing and spreading it widely and firmly.
If you use a dedicated eye primer, check the order of use and what goes on top, and blend it in the specified amount. Do not strip away the moisturizing you need; sort out the amount before adding more steps.
Liquid glitter differs in how it is handled until it dries and in the tool that comes with it. Do not carry over how you blend powder as is; follow the description of the product you have. For the basic range of color, how to apply two eyeshadow colors is also a useful reference.
4.For powder that has fallen on your cheeks, remove it before covering it, and fix only the color that remains
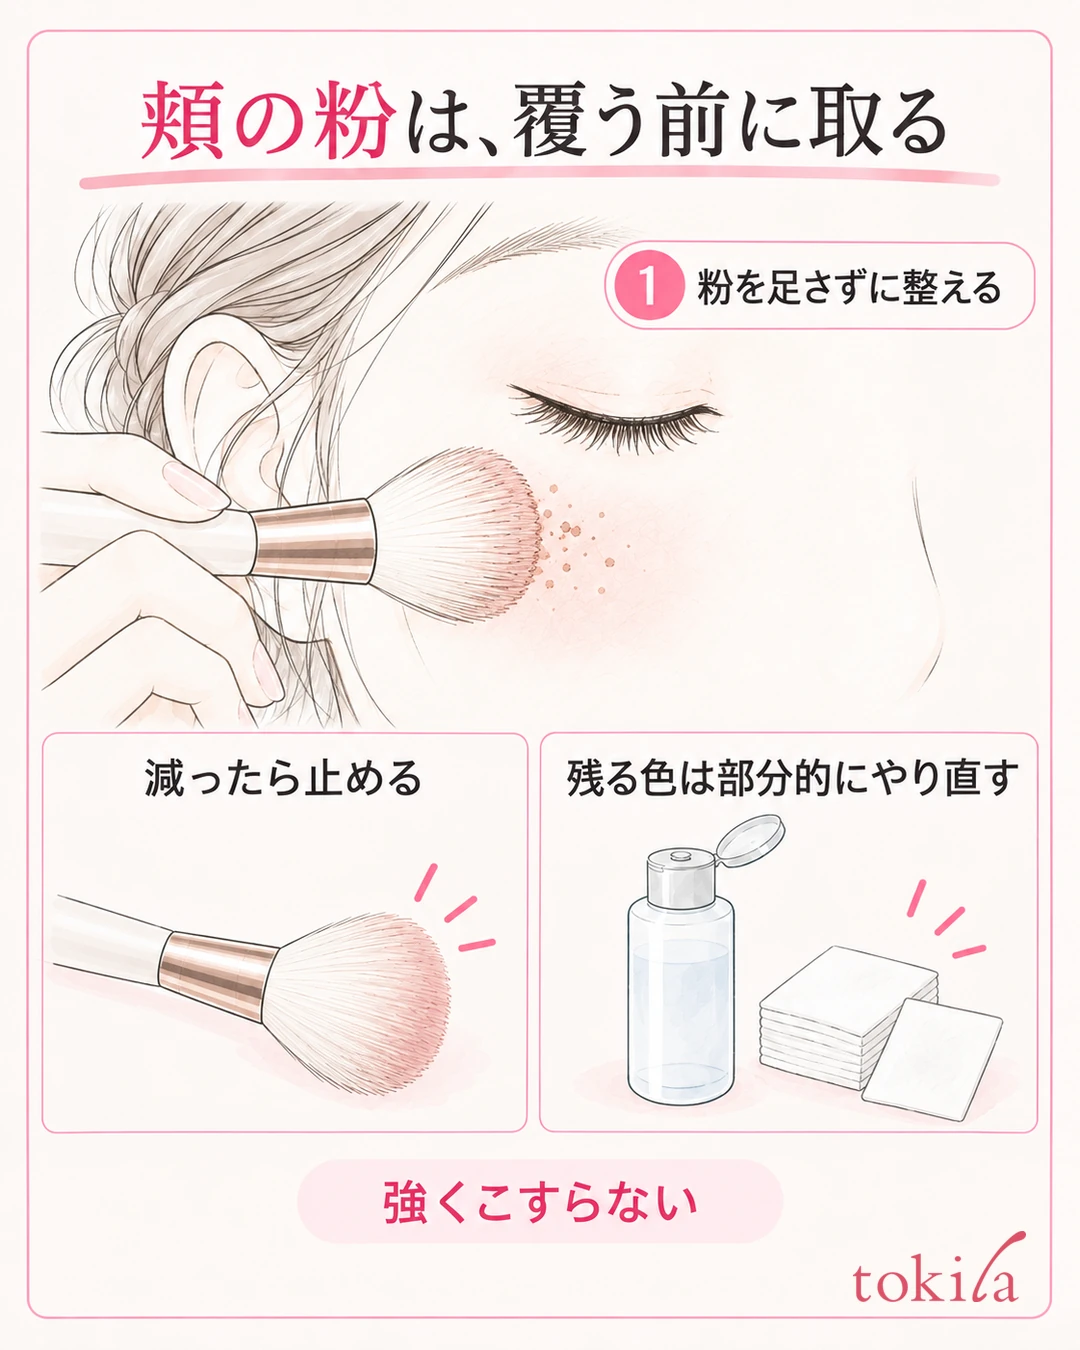
When powder falls on your cheeks, stop picking up new eyeshadow. If you layer foundation or concealer on top right away, you may spread the fallen color along with it. The first thing to check is whether the powder is sitting on the surface or has already blended into the base and left color.
If a small amount of powder remains on the surface and the base has not broken down, you can choose to lightly sweep it away with a clean, soft brush that has not picked up any new powder. Rather than sweeping near the edge of the eye, lightly touch the bristles to the residue on your cheek that you can see in the mirror, and tidy it with small movements that do not point toward your eyes.
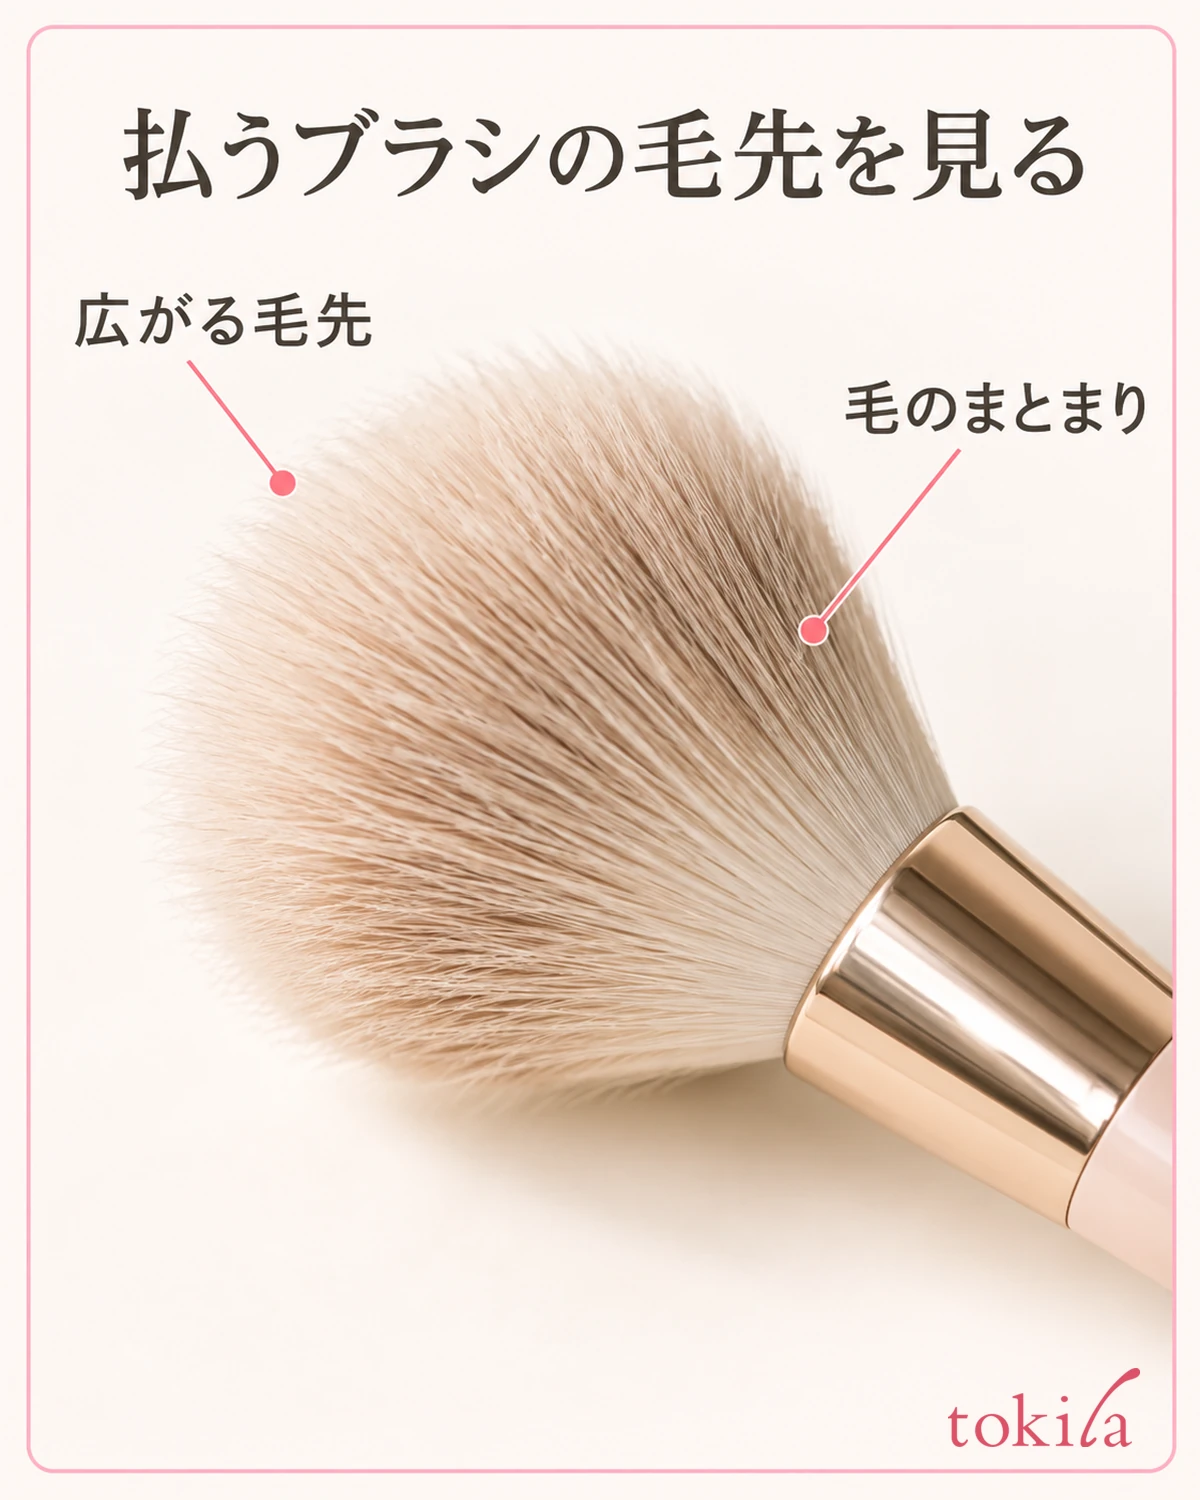
After one pass, lift the brush away and check whether the particles have decreased and whether the brown has spread. A brush that has been used on the eye area keeps some color, so do not use it as is for touching up the cheeks. If it does not come off when you move the brush, or if the color mixes into the base, change your method instead of increasing pressure and rubbing many times.
For a small area where color or glitter remains, use a cleanser that can also be used around the eyes, following the product's instructions, and redo only the places you need. This is a set of options for fixes compiled by the editorial team, and it is not a guarantee that the same tools or number of repetitions suit every product. Do not dilute the liquid your own way or stick adhesive tape on your eye area.
For the area you removed, restore the skincare, sunscreen and base you need, in the order of use. You may have removed the sunscreen as well, so do not stop at just restoring the skin tone. Blend the border with the surrounding skin thinly, and if you are also concerned about the base over your whole face, you can check the order in makeup touch-ups by how it breaks down.
If powder or cosmetics get into your eye, stop touching up the look of your cheeks. If pain, a feeling of something in your eye or other abnormalities remain even after rinsing, consult an ophthalmologist.
5.Check your whole face, and next time change just one of the amount, the tool or the order

To finish, bring the mirror back to the front and look at both eyes and your cheeks under the same light. Do not remove all the color or shine on your eyelids; check whether the unplanned particles on your cheeks bother you. Do not keep searching with a magnifying mirror alone; look from a distance where your whole face is visible too, and stop once the fixes you need are done.
For your tip for next time, choose one of the first amount you pick up, the tool you use, or the order of your makeup. If powder fell while applying, "adjust the amount before bringing it to the eyelid"; if you spread the glitter too far, "make the area you use smaller" — tie it to the step that gave you trouble. Not changing everything at once makes it easier to remember which method worked well.
If you find that powder falls onto your cheeks every time during a step that uses a deep-colored powder, you can also finish that eye-area step first, tidy the fallen powder, and then finish the base on your cheeks. However, you do not need to change every base to go after the eye makeup. Keep the order specified for products such as eye primer, and redo the UV protection you removed.
When changing the texture, compare not only the fineness of the powder but also the amount used, the tool, and the guidance on when you may touch it after applying. Do not conclude that a liquid will never fall; consider the effect described in the official information separately from your own handling. Before buying more, check whether you can handle the product you already have in a small amount as directed.
It is enough to briefly note the colors you used, when it fell, and the condition you will change next time. You do not need to turn this into a long-term test you have not carried out, or a guarantee of how many hours it will not fall. Powder left on your tools also affects the amount next time, so check how to care for brushes and sponges suited to their materials.
For powder and glitter fallout, start by reviewing the amount you pick up and the tool you carry it with, before covering the spot where it fell. Place a small amount and check, tidy the powder on your cheeks without adding to it, and redo only the color that remains. Sorting out the step that troubles you one at a time makes it easier to think separately about fixes during makeup and after finishing.



