
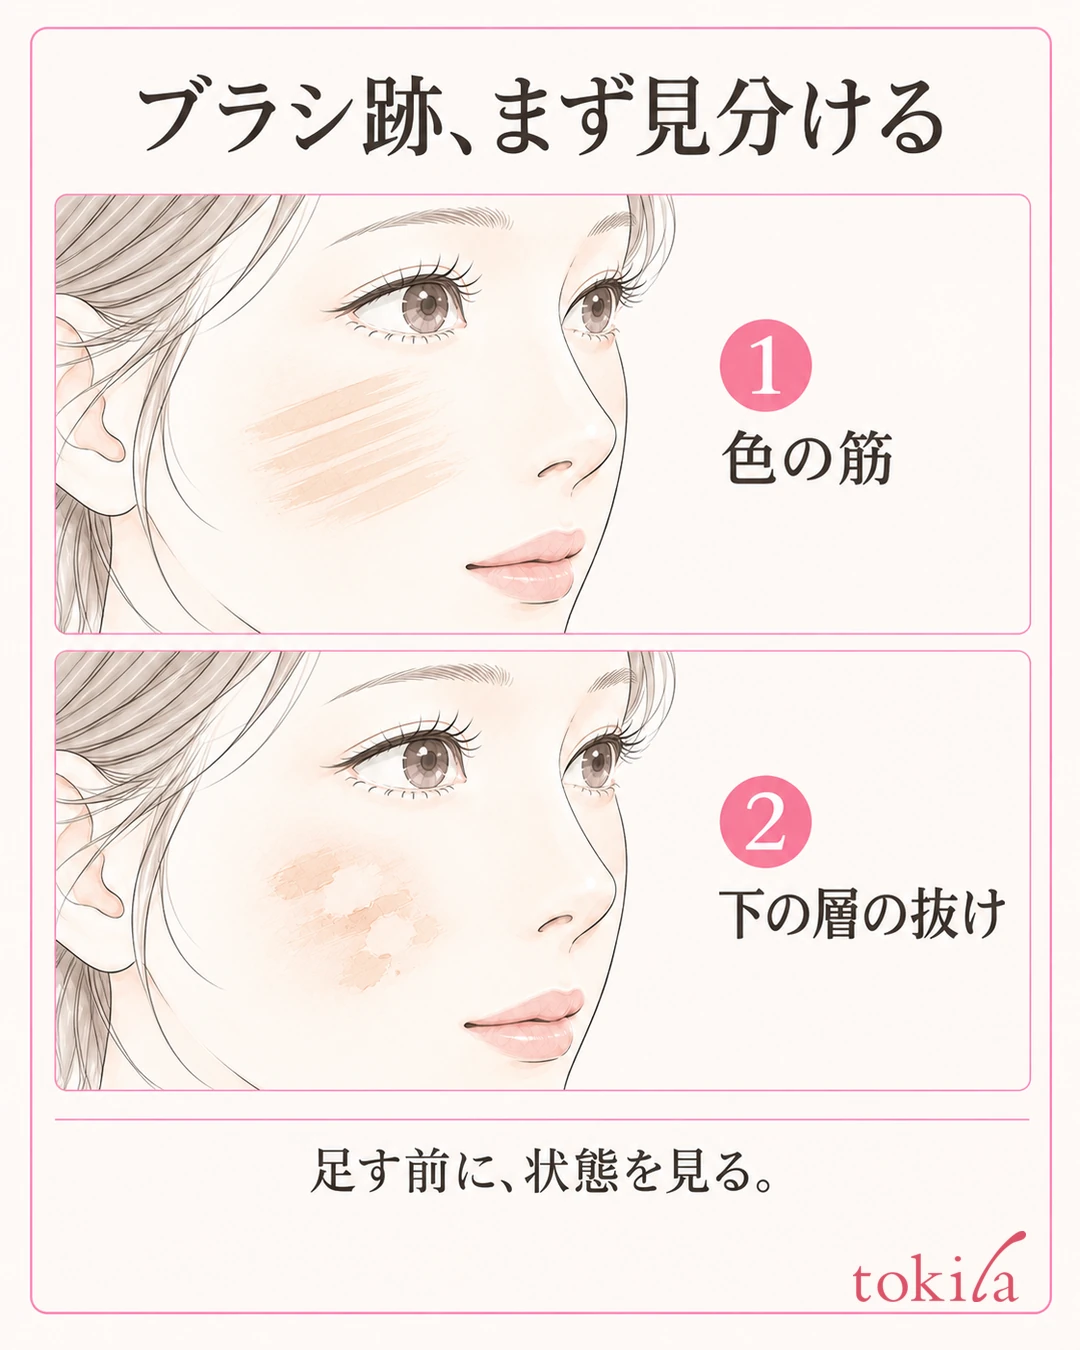
You spread liquid foundation with a brush, and thin streaks were left on your cheeks. As you go back and forth over them to get rid of them, thick and thin spots increase. When that happens, lift the brush away before adding more, and check whether you are seeing streaks of color or the layer underneath being moved.
This article focuses on brush marks you can see right after application, and covers preparing your tools, the amount, how you apply, and how to finish. It separates these from afternoon oiliness and product pooling around the nostrils, and sorts out what you can review in the morning application step.
1. Tell brush streaks apart from a breakdown of the layer underneath
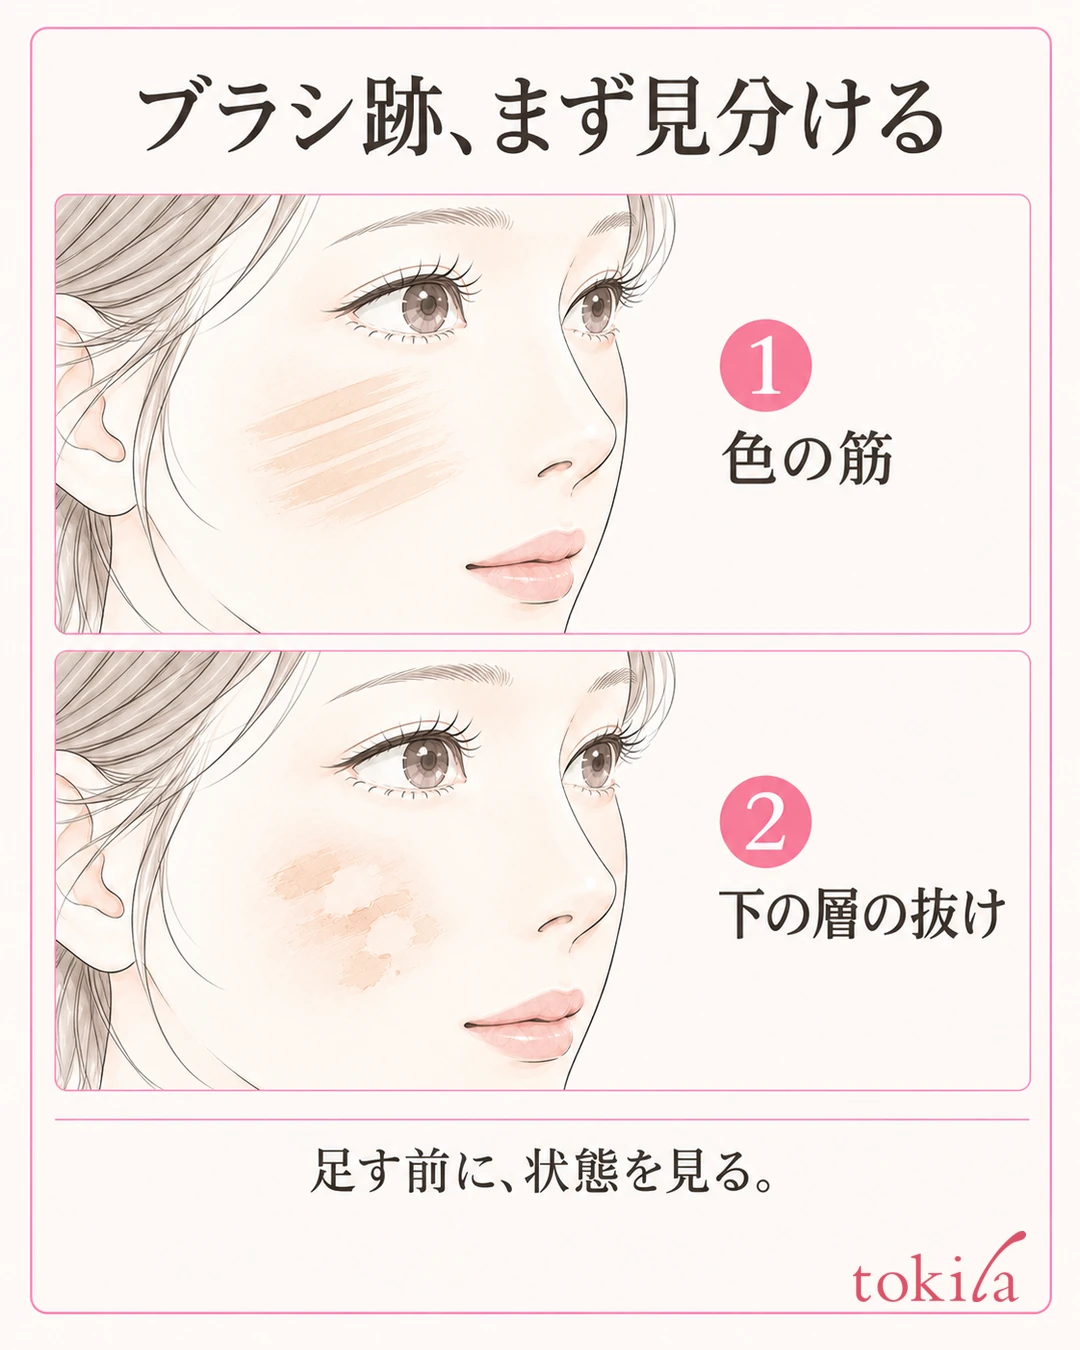
Step back from the mirror a little and see where the marks are. Then move closer to your cheek and check whether there are thin lines of color that follow the direction the brush moved. Do not aim to erase the natural texture of your skin or fine hair; look for places where the shading of the product itself has turned into lines.
Thick streaks left on the surface, thin spots only between the lines, and the base coming off the more you touch are not the same condition. Before adding more on top of thick areas, think about whether the color already there can be blended in. If the layer underneath is moving, it is easier to decide the steps by checking from the foundation up than by increasing the number of strokes.
However, you cannot decide that dryness is the cause just because streaks are visible. Check your tools, the amount and the condition before application, in that order.
If small crumbs are coming off, you need a different check from brush marks. See how to deal with sunscreen and primer pilling and check at which step it appeared and how the layers were applied. Do not keep rolling the particles with the brush to try to remove them.
If the marks stand out on one cheek only, look at the other side under the same light. When your face is tilted, the way reflections look also changes. If you work out whether it is a streak of light or a line of deeper color before touching it, you can avoid continuing to fix areas that are already even.
Briefly remember the step at which the marks appeared, such as "right after spreading on the right cheek" or "where I layered a second time." Separating whether it appears with the same movement every time or only when you touch it up at the end helps narrow down the condition to change next time. This observation is not meant to diagnose how well a product suits you or your skin type from appearance alone.
2. Check that the brush works with liquids and the condition of the bristle tips
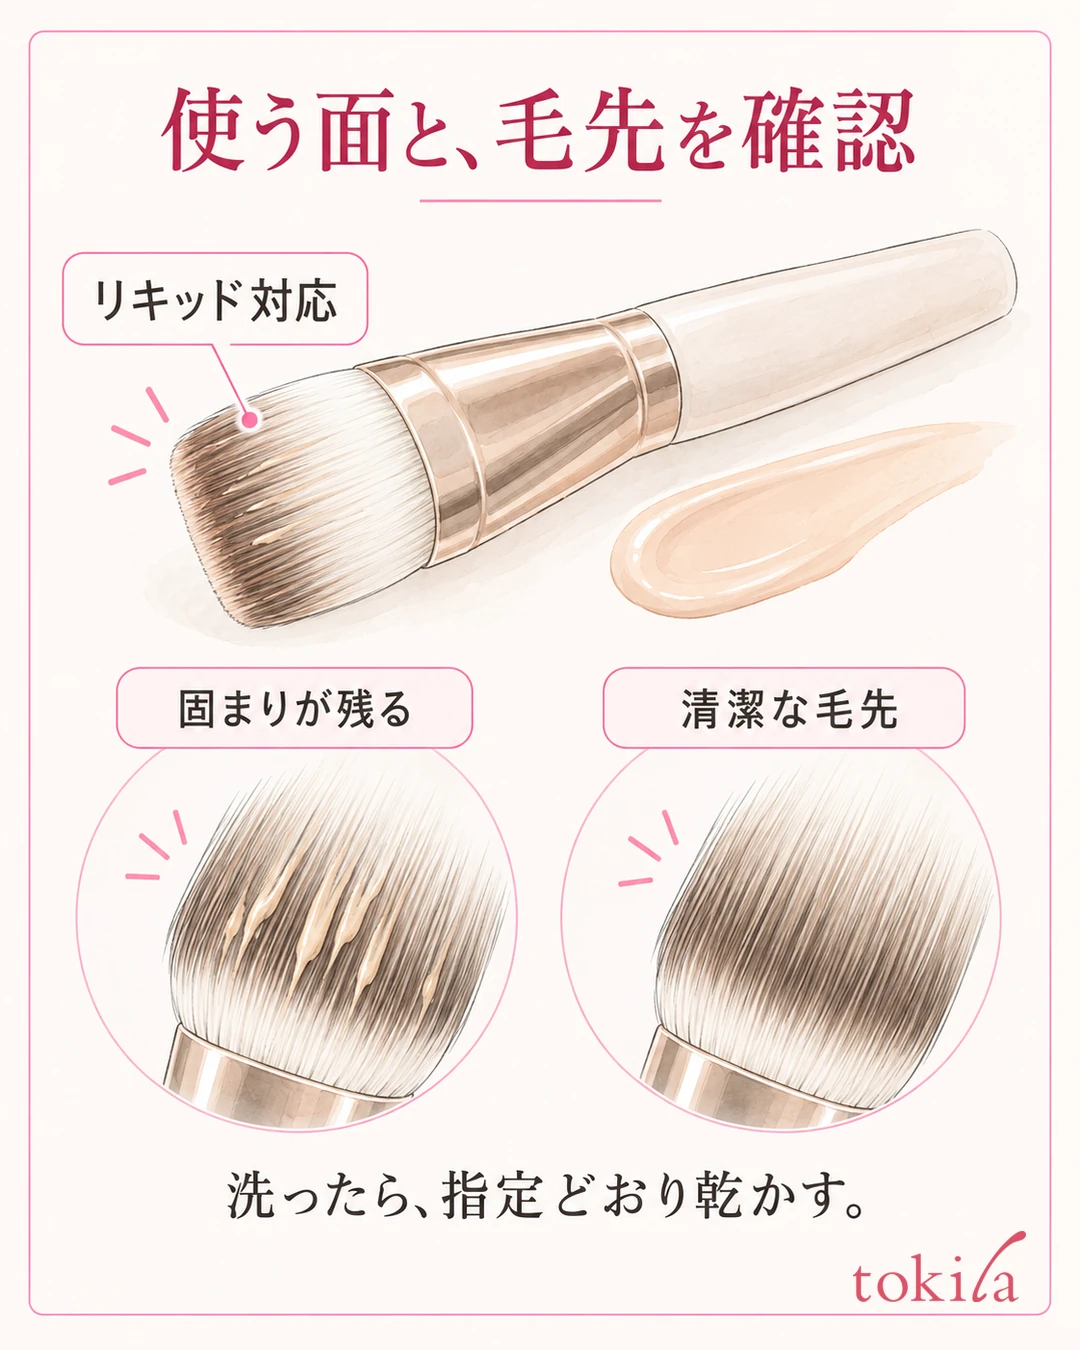
First, read whether the brush you have supports liquid foundation. Do not assume that a large brush for powder or a small brush that came with a product can be used in the same way just because the shape is similar. If the foundation also recommends a tool, follow that guidance.
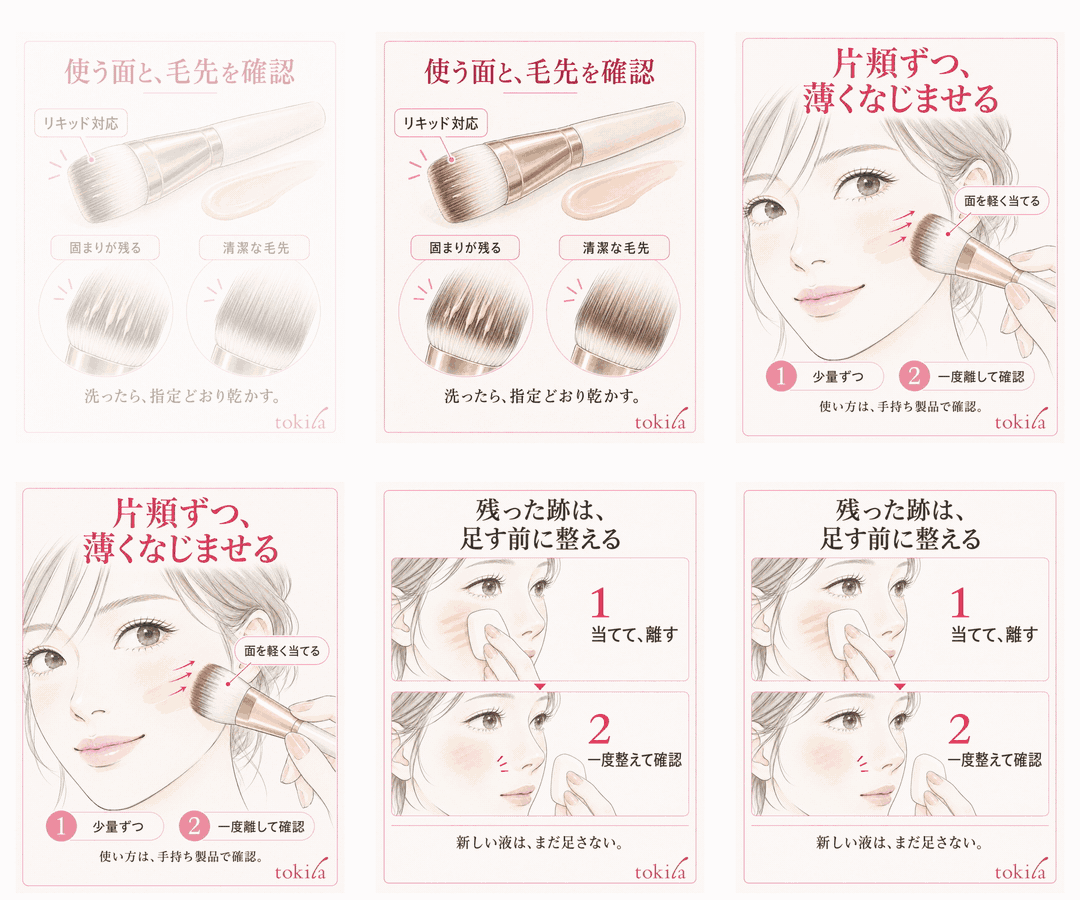
Check whether the previous product has caked on the bristle tips and whether the bristles have splayed wide. Prepare a clean tool, and use a washed one only after it is fully dry as directed. Do not press a dried clump of product hard onto your face to loosen it.
The working surface changes with the shape of the brush. Check in the usage diagram that came with the product whether to use the flat surface, the angled bristle tips or the tip pressed lightly. If you have been gathering liquid on just one row at the edge of the bristles, review the step of blending it onto the surface the instructions describe.
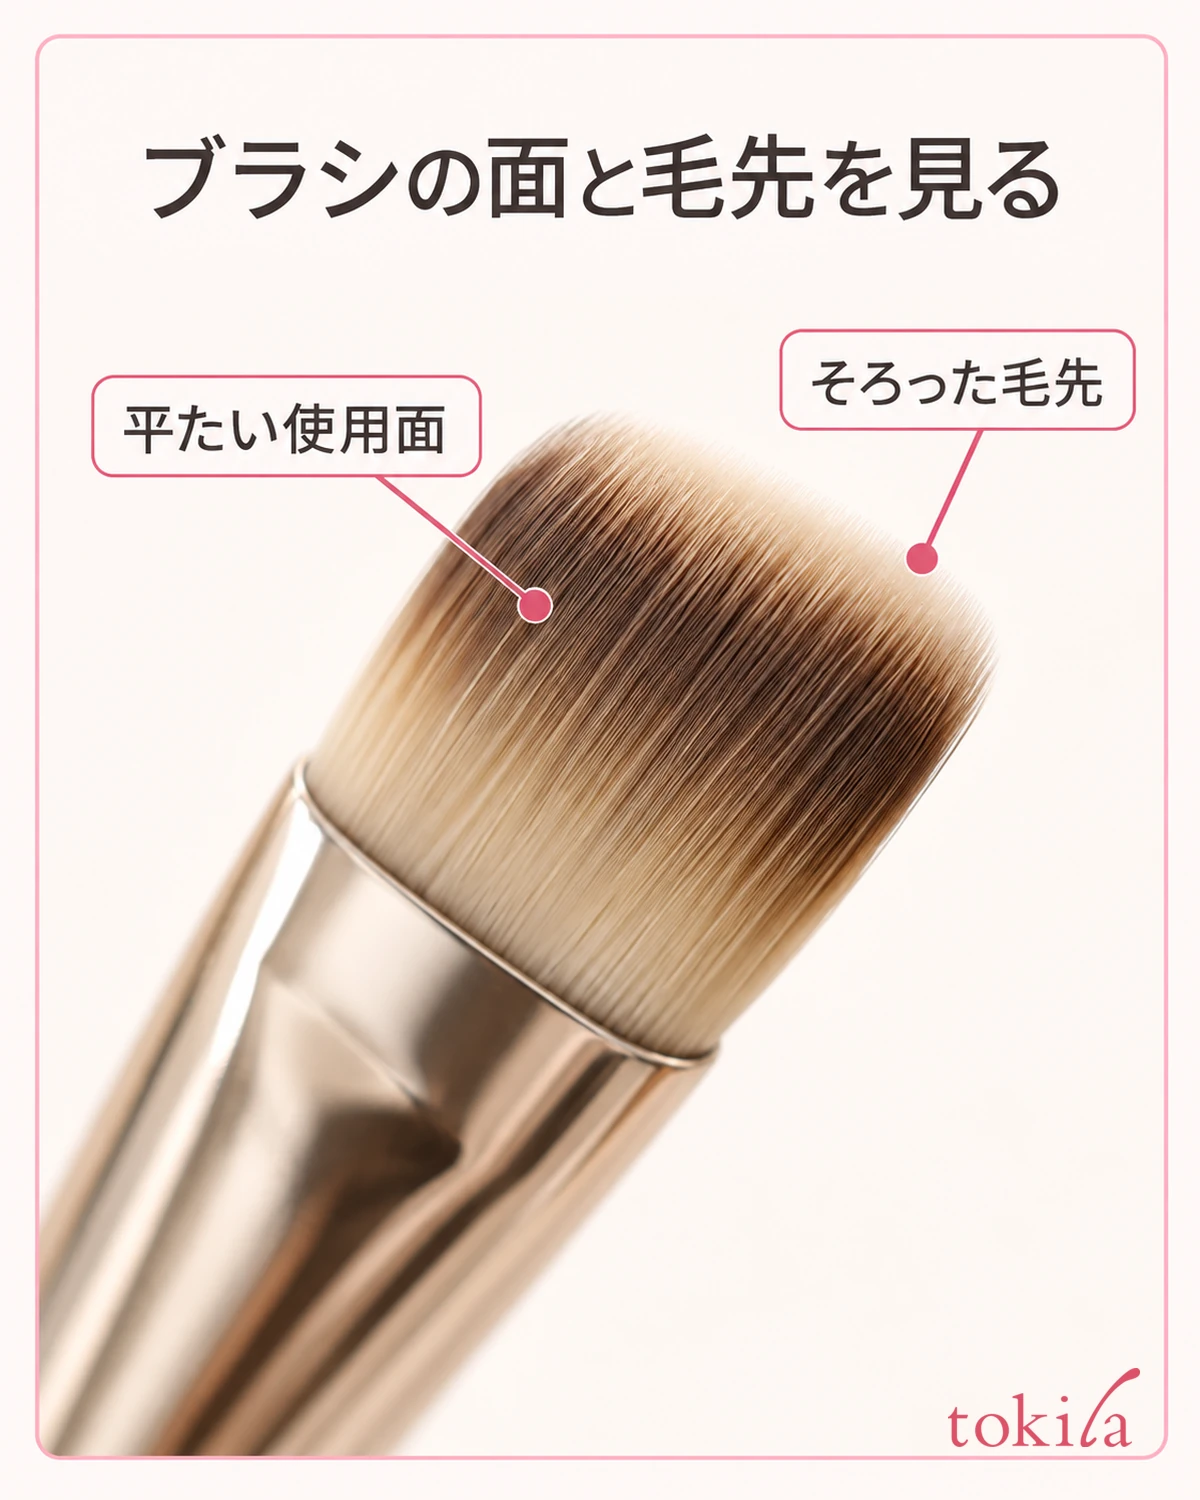
Rather than putting a large amount directly onto the tool, there is a method of first taking it onto the back of your hand or another clean surface you can use, and handling the amount you need. Follow the product's instructions for how to take it, and do not put a used brush tip back into the container opening or a shared product. If you take it onto your hand, clean your hands first.
Do not add water or toner to a brush that is not designated to be dampened, in order to erase streaks. It changes how the liquid spreads and the finish, and makes it hard to tell what you adjusted. For sponges as well, check separately whether they can be used wet or dry.
If bristles shed, the touch is painful, or clumps remain even after washing, do not keep using it with force. For checking care and replacement, go to how to care for makeup brushes and sponges. The starting point is to check the purpose and condition of the tools you already have, rather than deciding first to buy new ones.
3. Do not increase the amount all at once; blend thinly one cheek at a time
Use skincare, sunscreen and primer according to each one's instructions. Do not hurry to layer foundation over a previous product that is still widely left on the surface. Do not set the same waiting time for everyone; check the instructions and the condition on your skin. Do not reduce the required amount of sunscreen to avoid streaks.
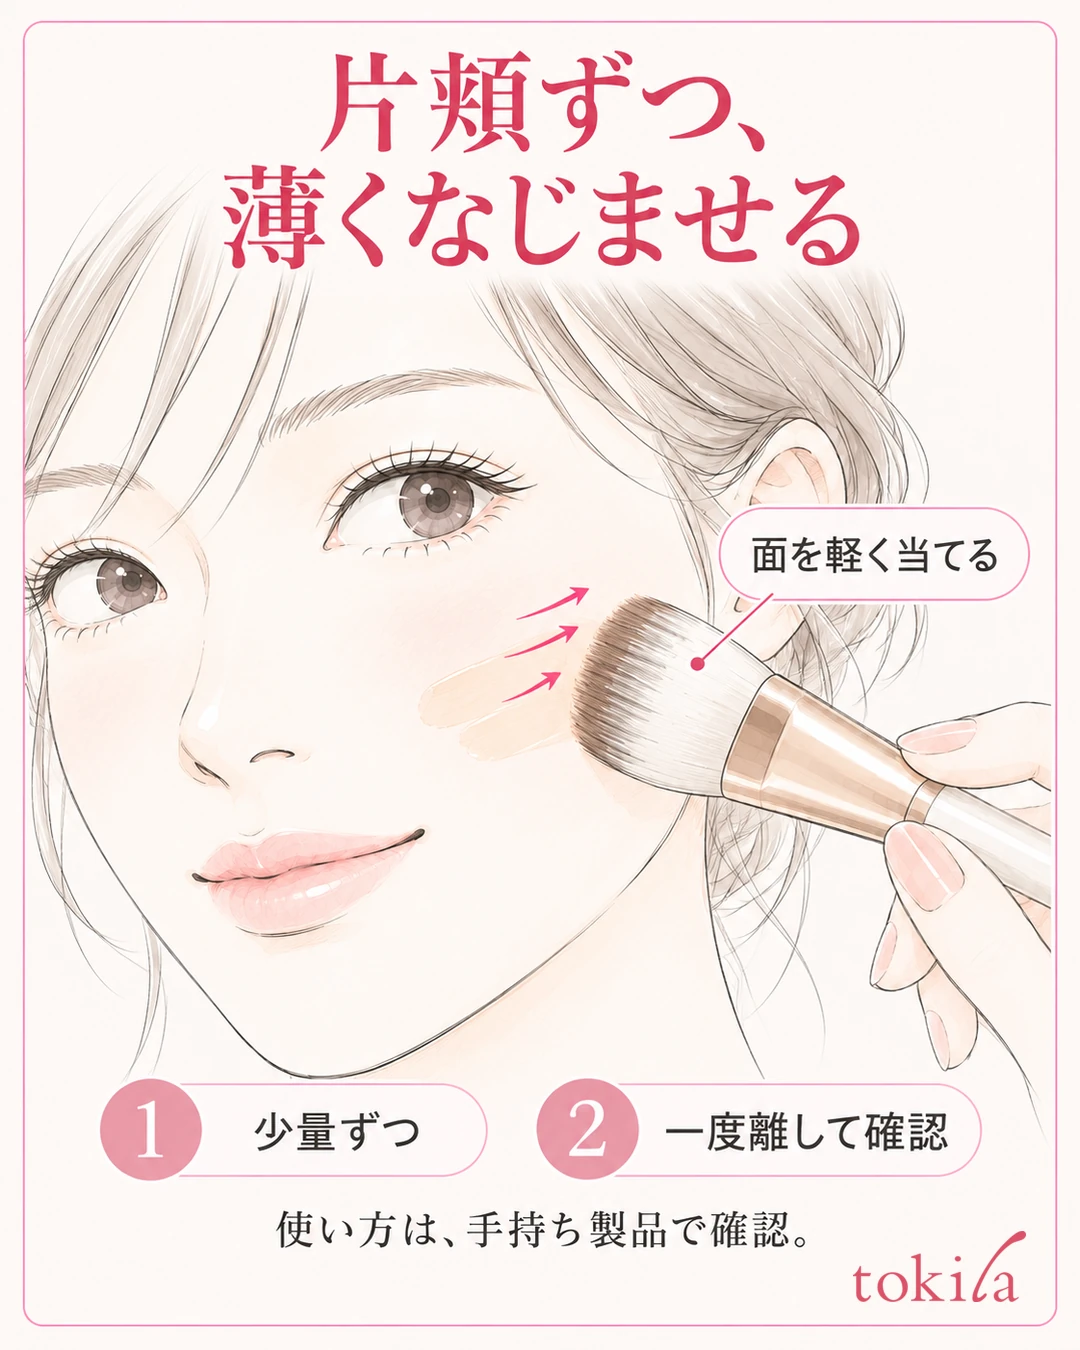
Read the amount of foundation to use, and if the instructions say to finish half the face at a time, proceed that way. Rather than first placing a thick amount out to the edges of the face and going over the whole face many times, checking how it applies on one cheek before moving to the other makes it easier to follow the areas you have moved. You do not need to use up all the leftover product on your face.
The amounts and numbers of strokes written there are the conditions of that usage example. Do not apply them uniformly to other brushes; check them with the combination you have.
When spreading thinly from the inside of the cheek outward, lightly touch the working surface of the brush to the skin. Do not use so much force that the bristle tips flatten greatly and pull the skin; move, then lift off once. The direction of spreading and the step of pressing to blend differ by product, so do not decide that only one movement is correct.
It is important to read this separately from the example of sliding a flat brush. Do not make drawing large circles many times, or polishing the same spot, a common procedure for all tools.
If you see lines after spreading, do not immediately pick up new liquid; see whether the amount remaining blends in lightly. Separate adding only to spots where the color has come off from layering thickly over streaks. If you keep doing the latter, layers may increase while the difference in thickness you wanted to fix remains.
Another point to check is not to keep moving an area where the spread has started to change. If marks increase while you are finishing one cheek, lift the tool away once and review the amount of liquid and the surface of the bristle tips. Do not fix the drying speed in seconds; decide based on the product's finishing instructions.
4. Fix remaining marks in small steps before adding new liquid
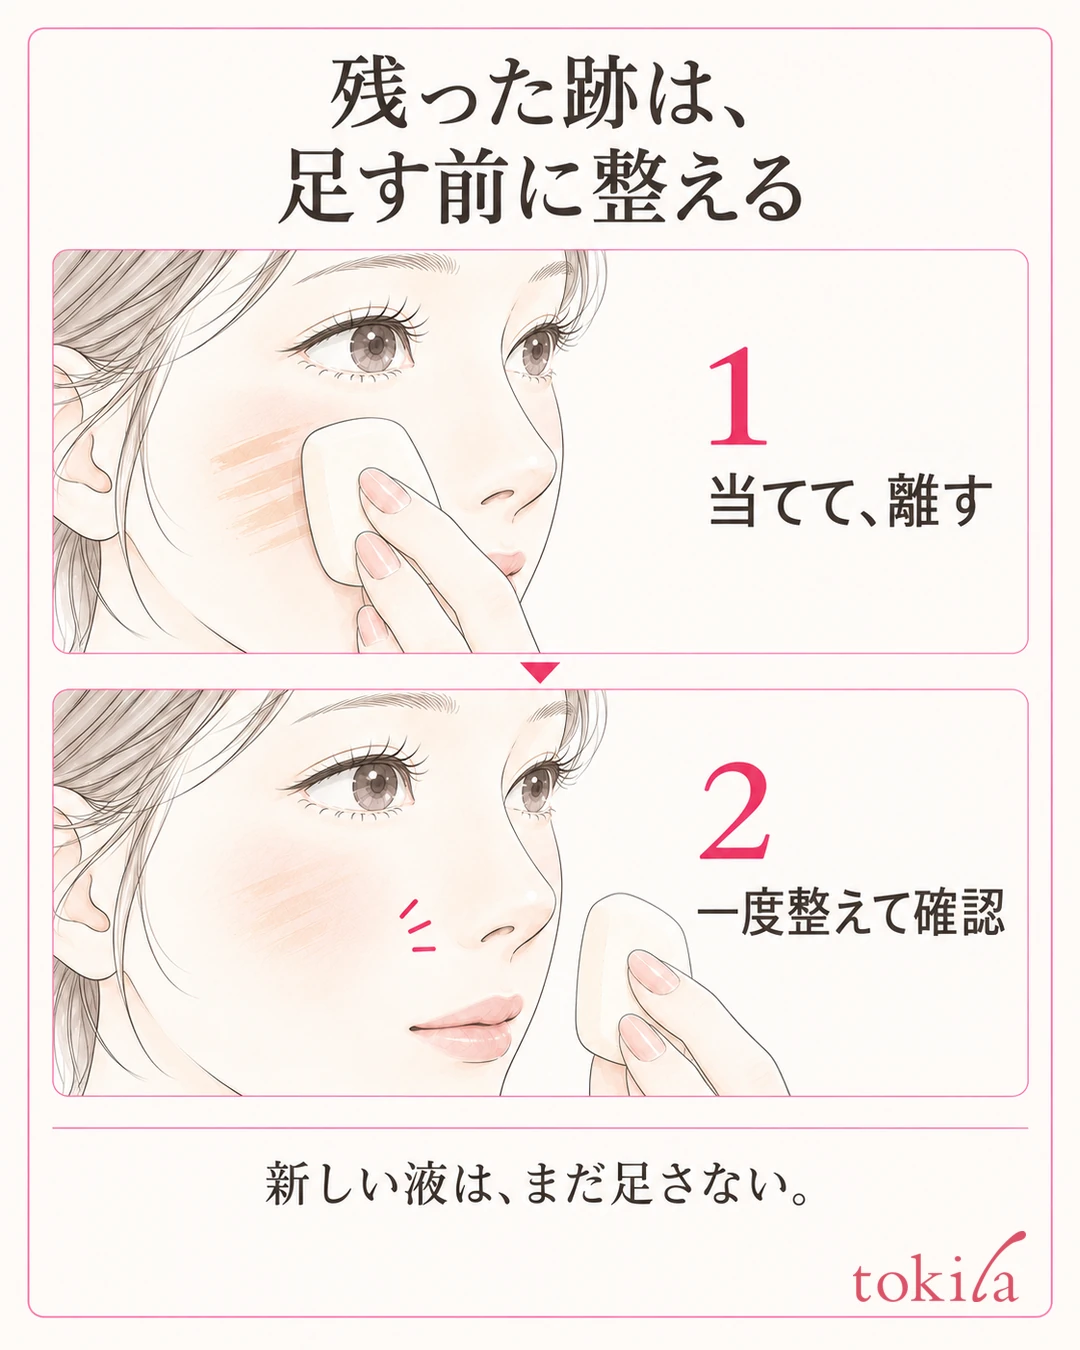
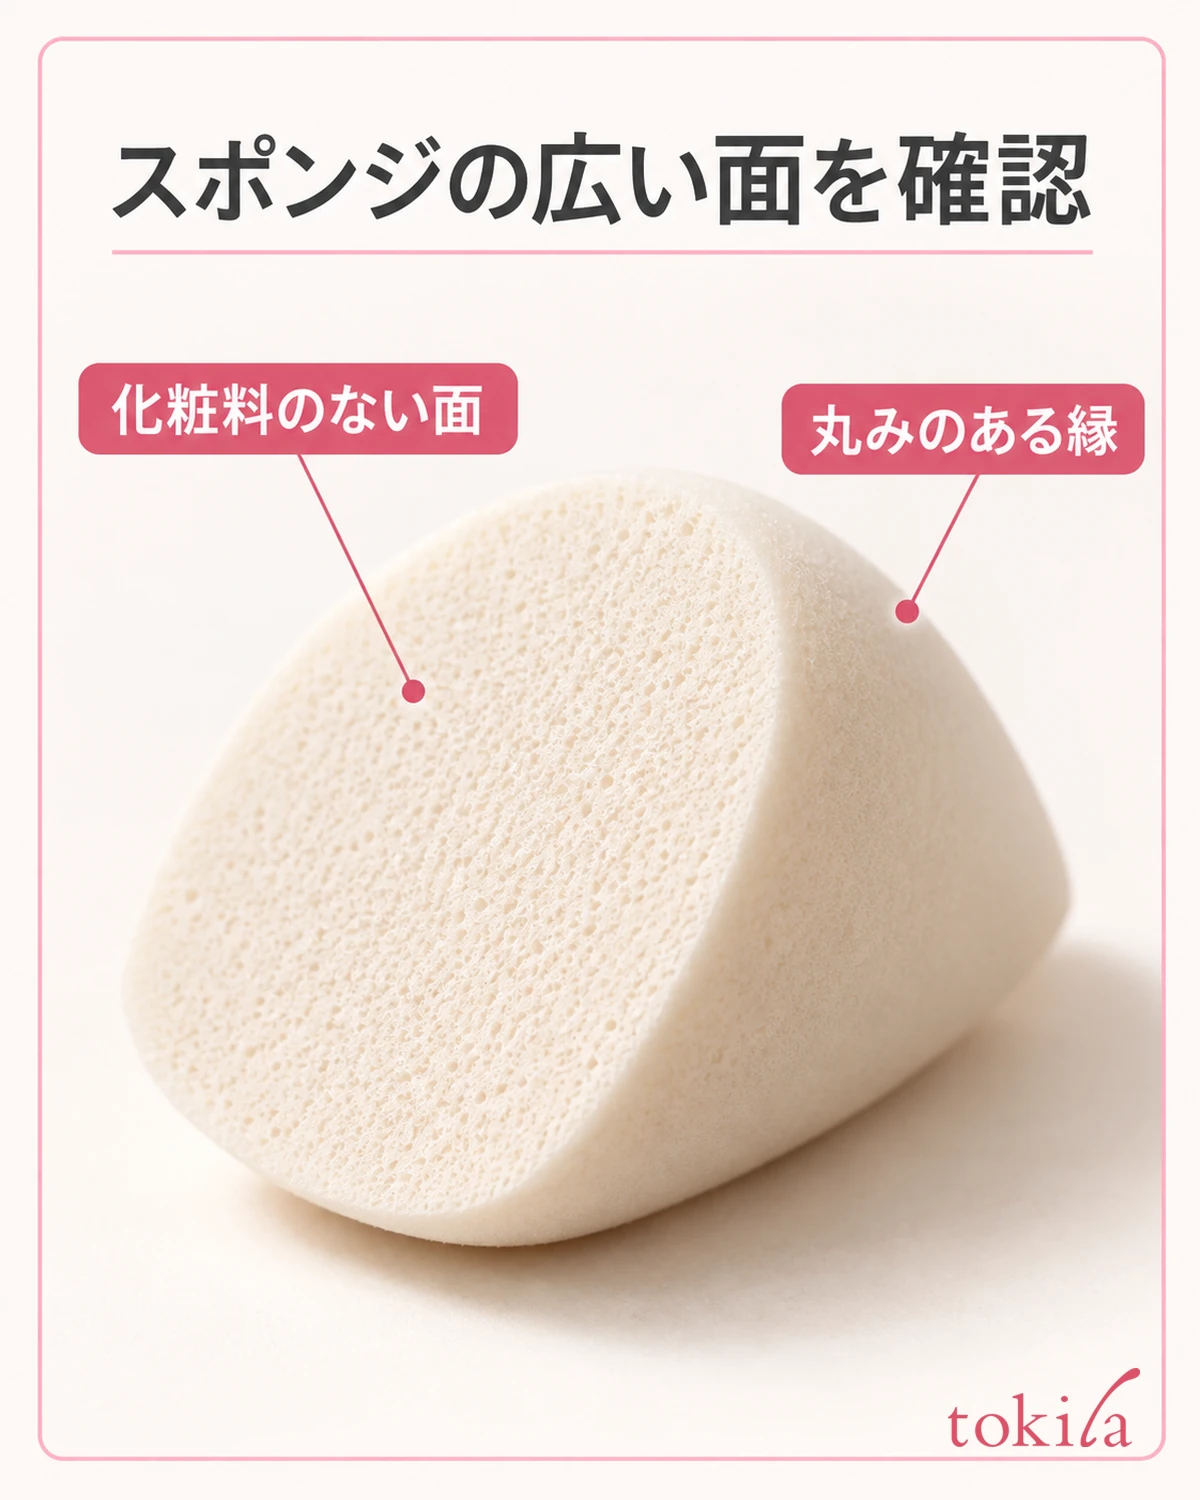
If thin streaks remain on the cheek and the layer underneath has not broken down, there is a method of lightly blending with the face of a clean sponge that works with liquids and has not picked up fresh product. Touch the wide face to a small area and lift off, without dragging the skin sideways. Keep this separate from pressing hard to erase lines.
Here we take as a reference the idea of reviewing the existing layer without adding new liquid. It is not a guarantee that every mark will disappear.
Once you have blended, lift the sponge and see whether the streaks have become lighter or the color has come off. If they have become lighter and the color is sufficient, you can stop there. When product has transferred to the sponge, use a clean face, and do not go back and forth with a heavily soiled face into the neighboring area.
If only a color that bothers you is lacking, add a small amount of the foundation or concealer you have. Follow the product's order of use and blend thinly around the area you added. If you look separately at the difference in color and the difference in thickness before increasing coverage, you can avoid reapplying over the whole face.
When the base comes off, a hardened layer will not move, or unevenness spreads each time you touch it, do not alternate between the brush and the sponge over and over. Switch to removing that spot in a way that suits the product, and starting again from moisturizer and a thin base. Also add back UV protection on the area you removed, following the instructions of the sunscreen you use.
Before dusting powder to hide streaks, check the condition of the base. Use face powder only in the range the finish of that product needs. Do not treat it as a rule that you must add more because streaks remain. Stop correcting any area where irritation or pain has appeared, and follow the product's cautions.
5. Check the whole face and choose one condition to change next time

Finally, return from checking only the cheek in close-up to the whole face. Look at the streaks on the cheek, the edge at the jawline and the thickness on left and right, from the front and with your face turned slightly. Looking under the same lighting makes it easier to tell reflections from differences in color. Do not substitute a photo with the marks retouched away for checking how you applied it.
If it does not bother you at your usual distance and the edges of the application blend in, you do not need to add more even if fine skin texture is visible. If you try to make everything a uniform flat surface, new layers also build up on places that are already even. Take the point at which the streaks that were today's worry stop standing out as your stopping point.
Next time, change one of these that fits your observation: "the amount picked up on the brush at once," "the surface of the bristle tips you touch," or "the number of times you touch the same spot." Rather than changing tools and products all at once, you can look back on which step became easier to handle. A short note such as "streaks appeared when I went over the right cheek twice" is enough.
If it keeps happening even when you use things as directed, put together the names of the foundation, primer and brush you use and your steps, and check with the manufacturer or at the counter. Do not assume that an expensive brush will always solve it, or that dense bristles suit every product. First check the explanation of the combinations that can be used and how to move them.
For shine or creasing after some time has passed, you can check the order of makeup touch-ups to match how it breaks down. This time, look at the streaks right after application before adding more, adjust the tools and amount, and if needed blend in small steps with a clean sponge. Please try this flow with the products you have.



