
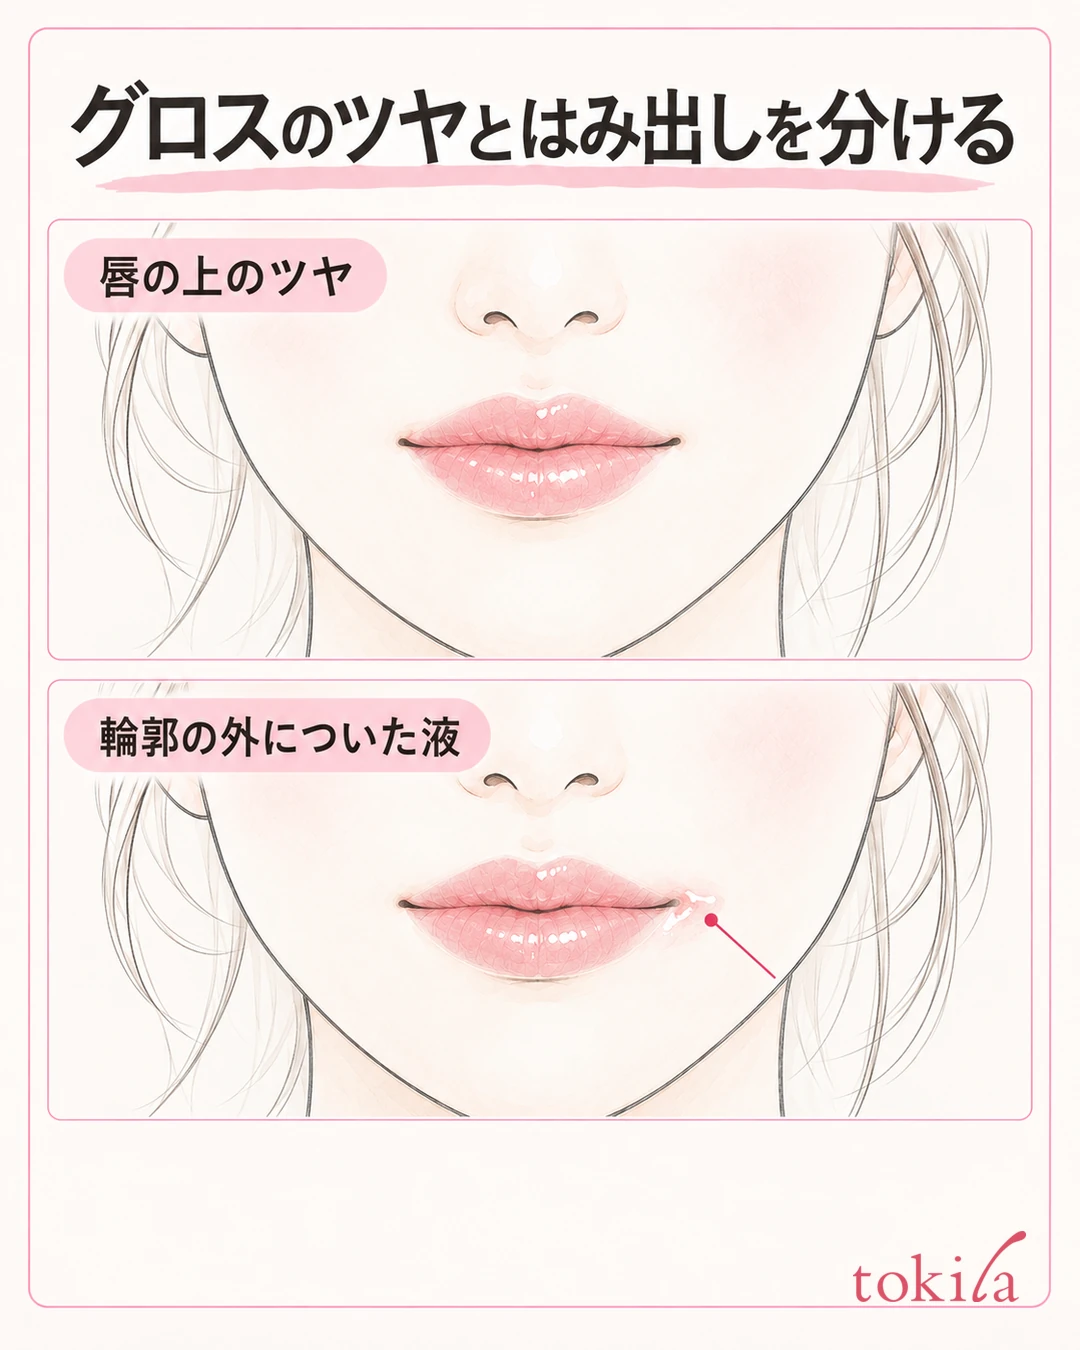
You applied more lip gloss, and now the shine seems to reach beyond your lips. The liquid pools at the corners of your mouth, and the more you fix it, the more your lipstick color spreads. Before you layer on powder to dull the shine, check where the liquid has gone and the order in which you applied things. Shine on the lips and liquid that has moved outside the lip line do not need to be fixed in the same way.
This article focuses on gloss applied with a tip or similar that spills outside the lip line. It is separate from uneven lipstick color or a lip liner line that floats, and it goes in order through the product's labeling, how much to pick up, how far to spread it, and how to touch up the part that spilled over. The basic approach is to put what you already own first, and not to set one amount or waiting time for every product.
1. Separate the shine on your lips from the liquid outside the lip line
First, pull the gloss tip away, close your mouth lightly, and look in the mirror. Is the center of your lips just shiny, is liquid collecting at the corners, or is the skin outside your lips shiny too? Before adding lipstick, pick one spot that bothers you.
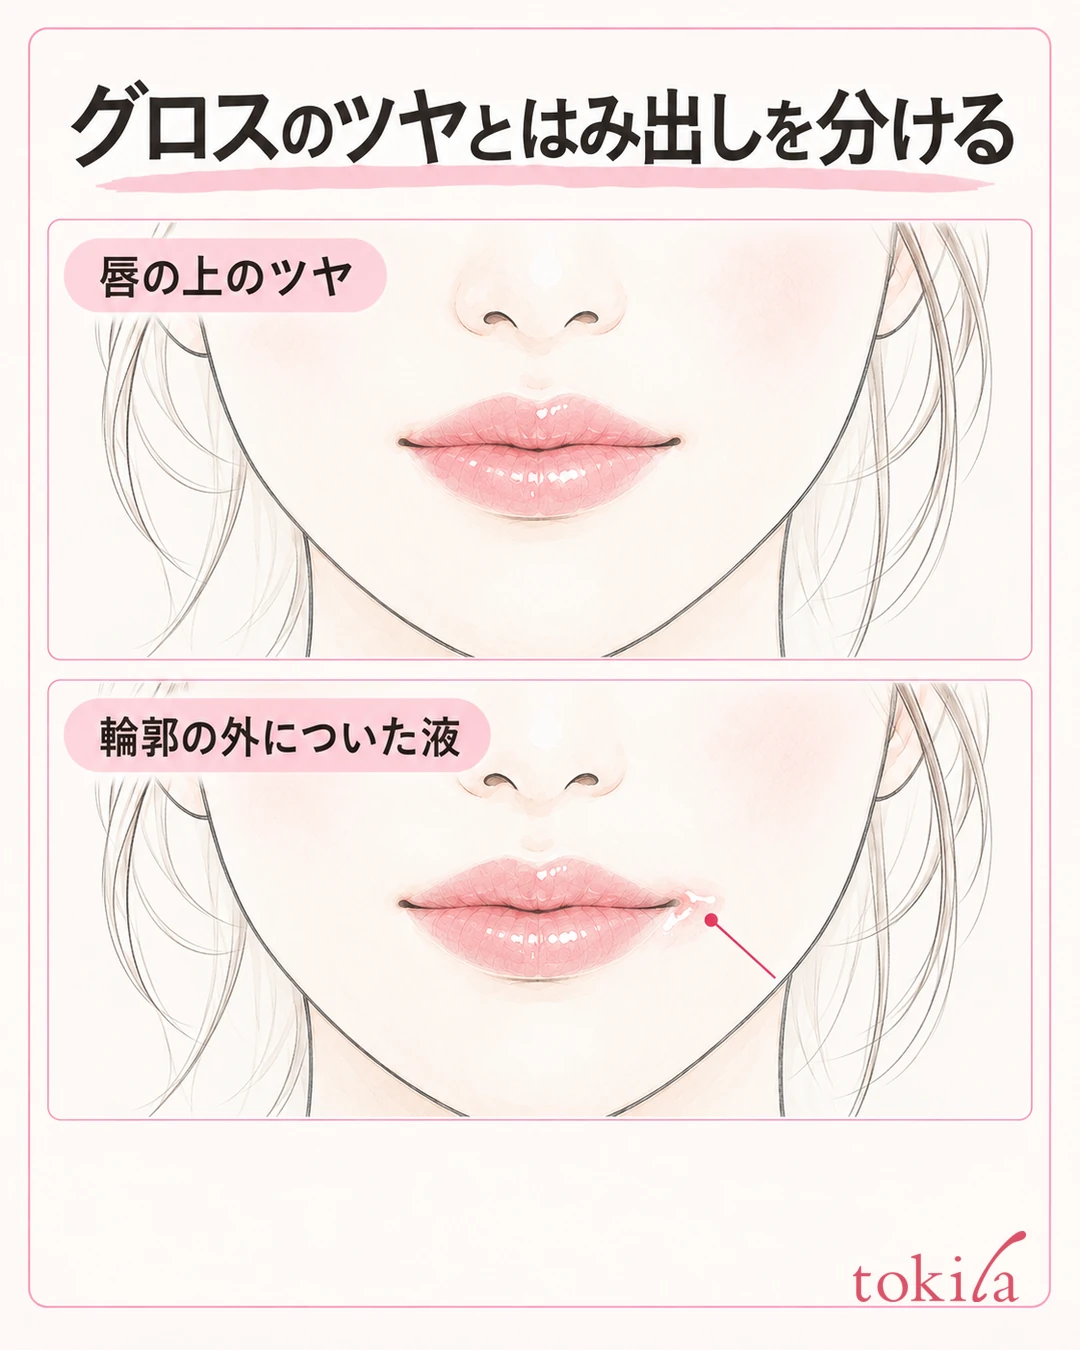
With a high-shine finish, the part where light hits can look white. If you judge all of that as a missed spot and add more color, it becomes harder to tell what your current finish looks like. In the same spot, turn your face slightly and check whether the reflection moves and whether liquid remains outside the lip line.
Check the lip border without getting too close to the mirror and without opening your mouth wide. The shape you stretch while applying is not always the same as the shape of your lips when they are lightly closed. If you followed the outline with the corners of your mouth stretched for a long time, return to a natural shape and then choose the area again.
If liquid has gone outside the lip line, that area is what you tidy first. Separate whether you need to remove even the color remaining inside the lips, or whether the outside alone is enough. If the color stays inside and only the shine is strong, treat it as an adjustment of your preferred finish, stop adding more, and review.
Also recall whether it spilled over right after you applied it, changed after layering over lipstick, or changed after eating or reapplying. Do not decide on a product's compatibility or deterioration from appearance alone; use the step where things changed as a clue to reread the directions.
There is no need to deny the original shape of your lips or to try to make the height of your mouth corners exactly the same on both sides. What we cover here is how the liquid is placed and what clings to the outside. If your main concern is uneven lipstick application or the color of the outline, you can check how the roles differ in how to tidy uneven lip color and spillover.
2. Decide between using it alone or layering it by the product's labeling
Next, look at the type and directions of the product you have. Is it a tinted gloss applied alone, a clear shine added over lipstick, or a type that combines a dedicated color with a top coat? Even in similar-looking containers, the order and the necessary follow-up steps differ.
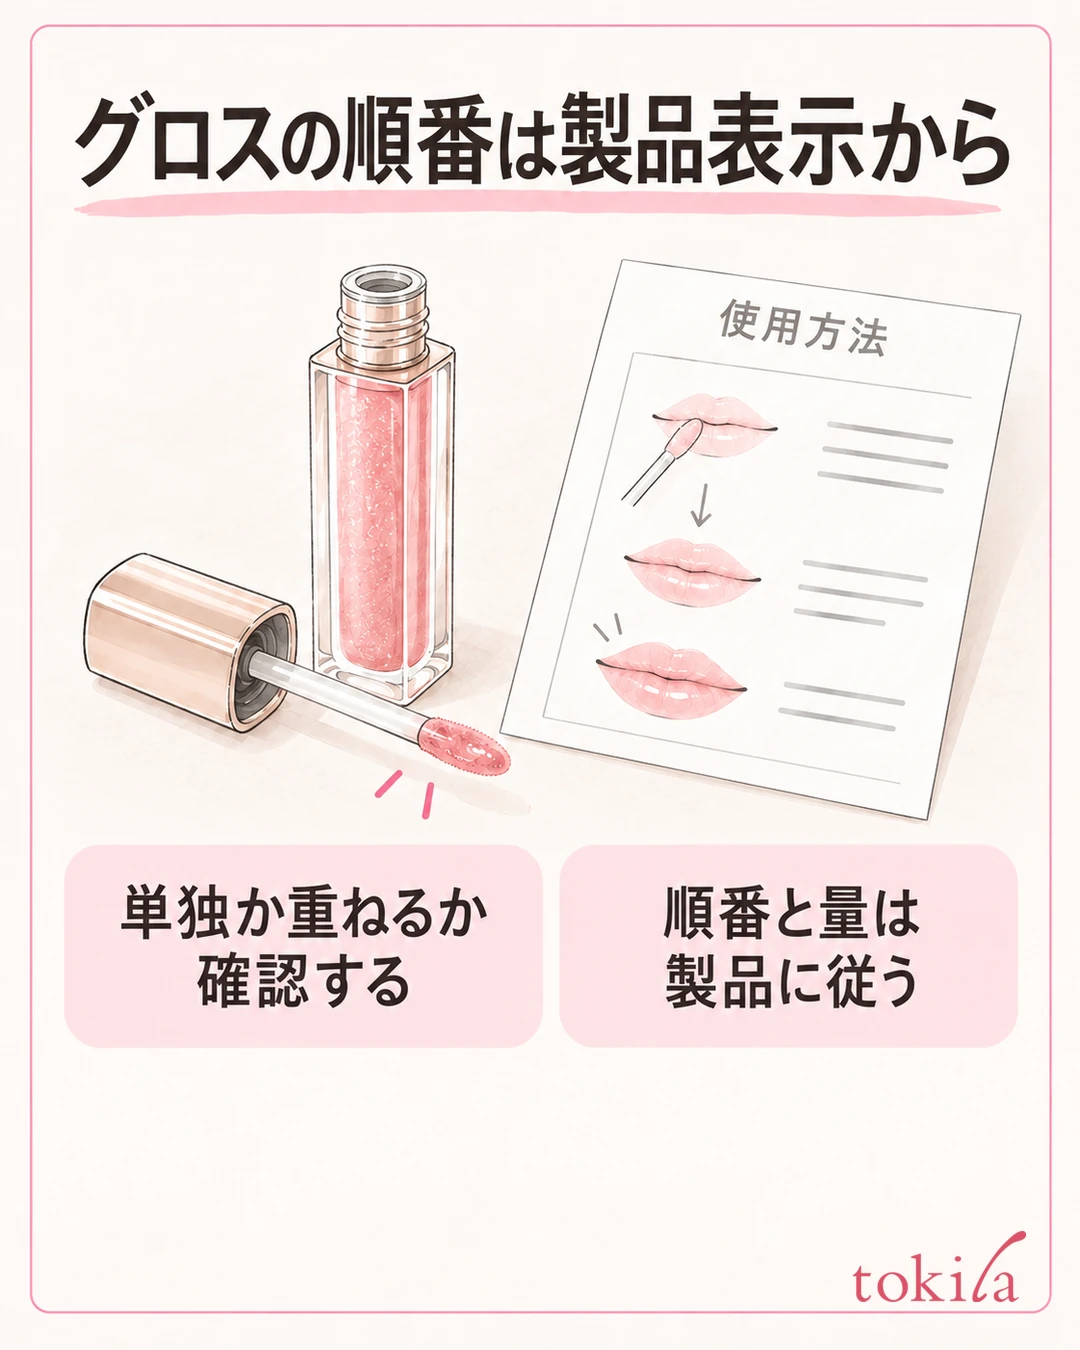
However, those options do not necessarily apply to every product you own. Check the body, the box, and the product's labeling for guidance on solo use or layering.
For products with a dedicated combination, or with an instruction to let it dry before moving on, do not skip that step. Conversely, do not attach a universal condition such as "wait so many minutes and the outline will settle" to a gloss that has no instruction to wait for drying. If color setting and adding shine are treated as separate steps, read the dedicated directions first.
If you use lip balm underneath, also look at how much you applied and what remains. If it looks as though a lot of liquid or oil remains on the surface, stop once before continuing to layer on top. Do not skip moisturizing altogether; separate the preparation that the product describes from the care your lips need now.
If the color spread as soon as you layered over lipstick, do not keep adding more as if it were only a gloss problem. Check whether you moved the lipstick layer repeatedly with the tip, or whether the area where you added shine extended beyond the lip line. Do not conclude that layering a different brand will always work, or that the same brand will never break down.
On days when you are not sure how to use something, you can also choose to handle a product that can be used alone exactly as its labeling says, instead of adding more products to layer. Decide how far you will take the finish with the colors and shine you have, then narrow down in advance where one more layer is needed, which makes it easier to review the amount and the steps.
3. Start with a small amount and check the tip's face and the area you spread
When you take the tip out of the container, check whether there is a large blob of liquid on the end or sides. Before the tip touches the corners of your mouth with too much liquid, check the product's labeling for how to adjust the amount. We do not set here a number of wipes that suits every product.
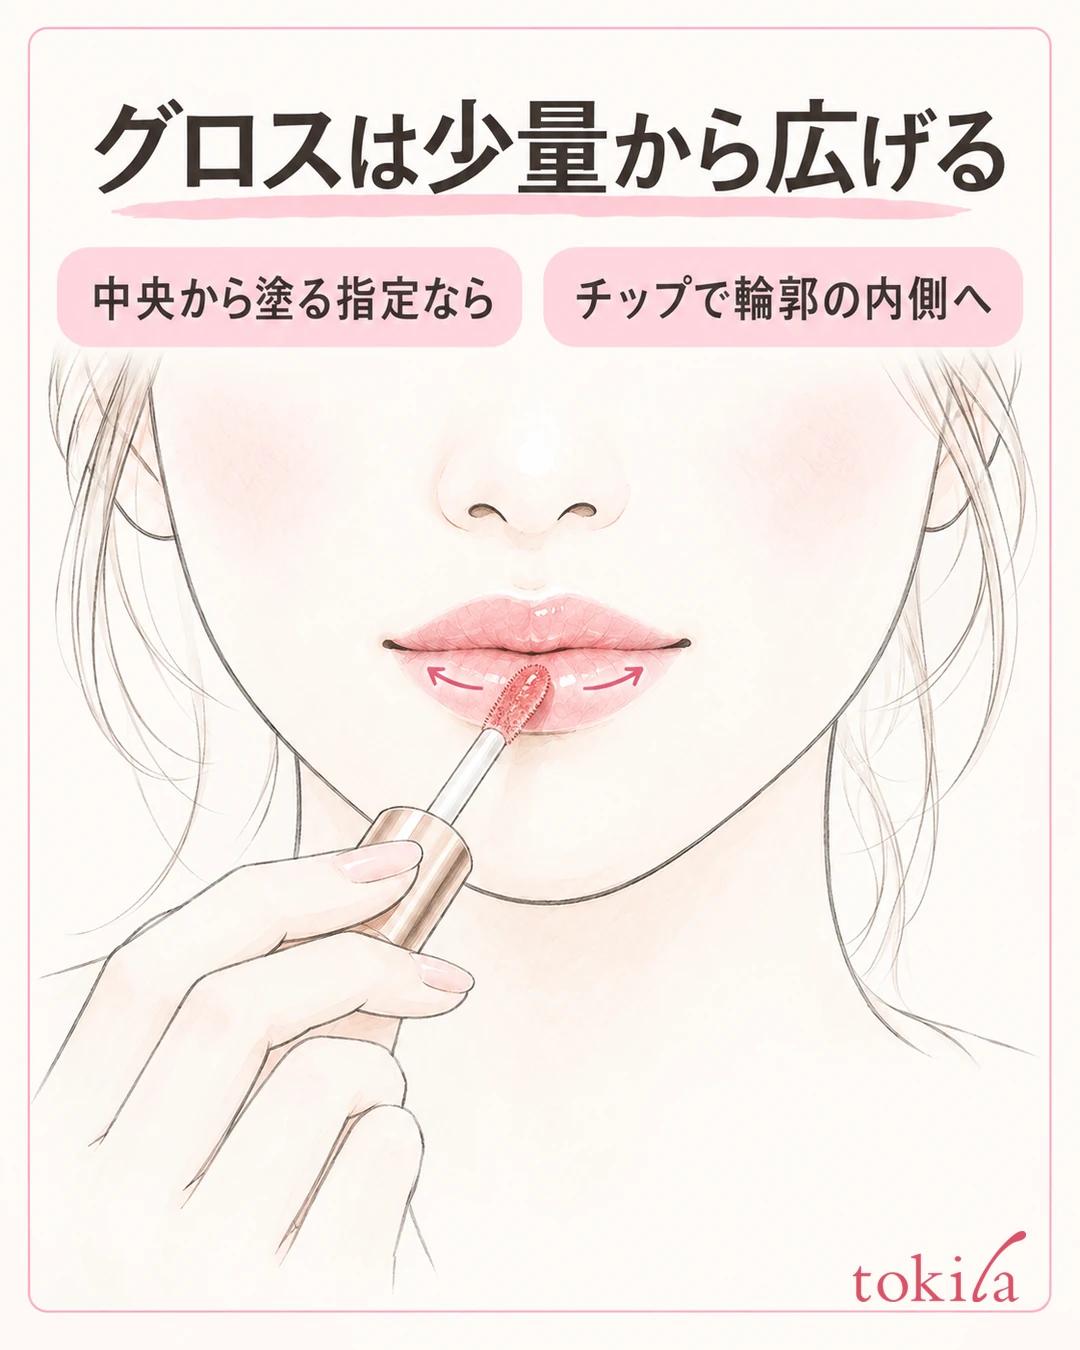
If your product has the same directions, place a small amount at the center, spread it toward the inside of the lip line, then lift the tip away once and look.
Also check where the slanted face of the tip is touching. Rather than poking at the outline many times with the very end, move briefly with the face that fits the shape, and check whether you are pushing liquid out onto the skin outside.
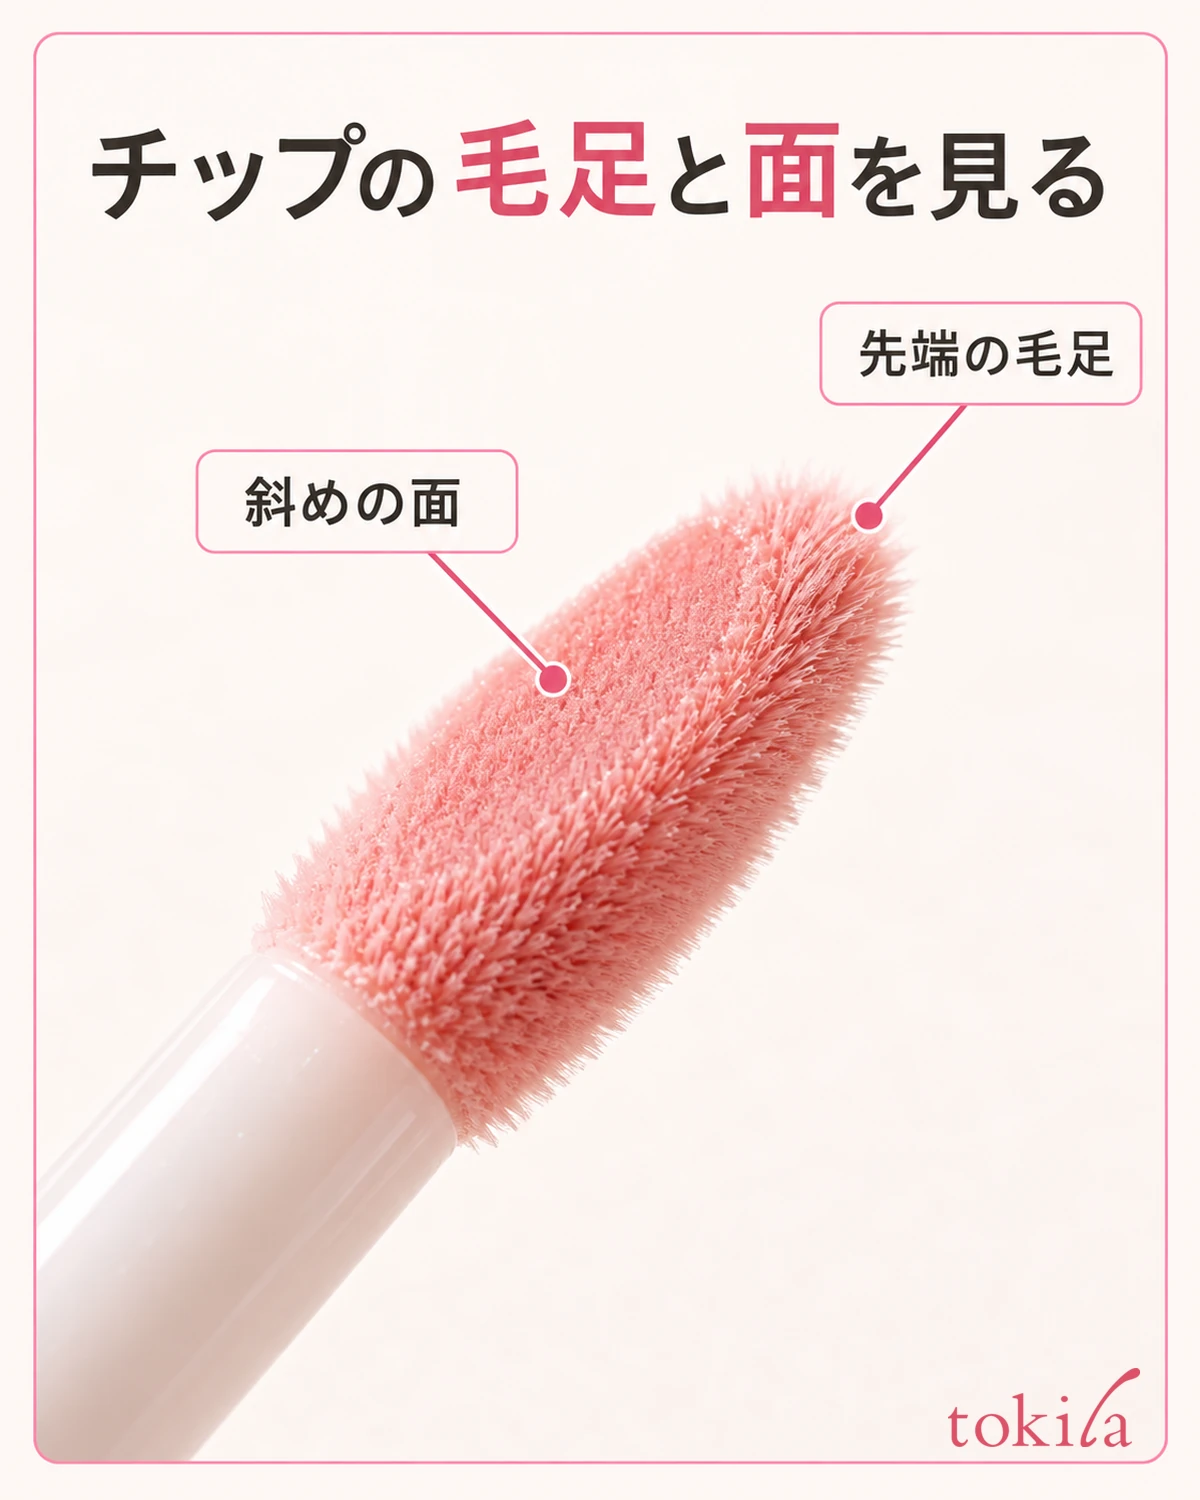
When heading toward the corners of your mouth, check how much remains on the tip and the condition of your lips before picking up the same amount as at the center again. If shine is already there, tidy only the short visible part and stop. Do not make it a condition for finishing that you stretch your lips wide and trace from one end to the other the same number of times.
After applying one side, return your mouth to a natural shape and look at the other side. Rather than applying the same number of times on the left and right, separate where liquid is pooling from where there is not enough. Before layering thickly over the whole mouth because the color looks pale, check on the labeling whether this is the original color payoff or a product meant to be used over a lipstick that sets the color.
If you cannot reach the shine you like in one go, add a little at a time following the product's layering directions. If you spread it so far that the area outside the lip line shines, it becomes hard to tell the plump look you were aiming for from the liquid that spilled over. Choose the area where you want shine to show inside the lips, and do not replace that with a method of coating the skin outside.
4. Do not spread the liquid that spilled over; tidy only the part that needs it
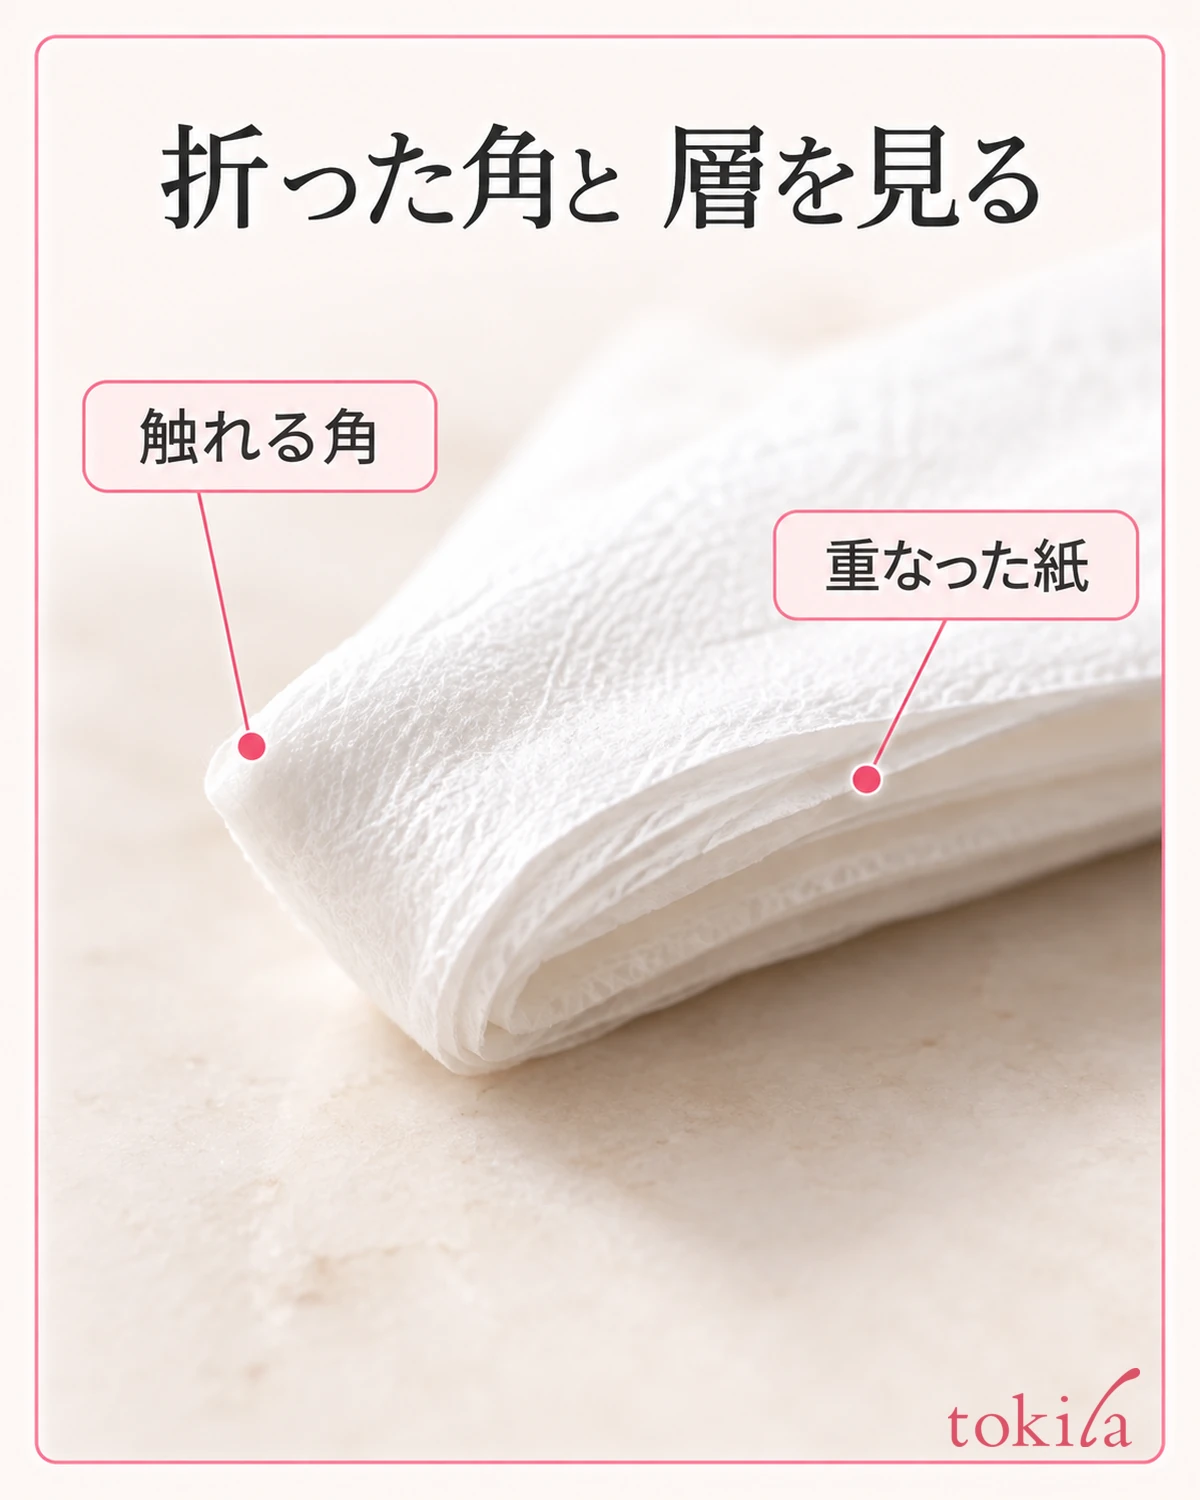
If liquid gets outside the lip line, prepare your touch-up tools before putting the tip back in the container. First, gently touch the excess liquid outside with a corner of a clean tissue or the like, and take it off without dragging it across a wide area. Keep this separate from the step of rubbing the whole lips to remove the shine.
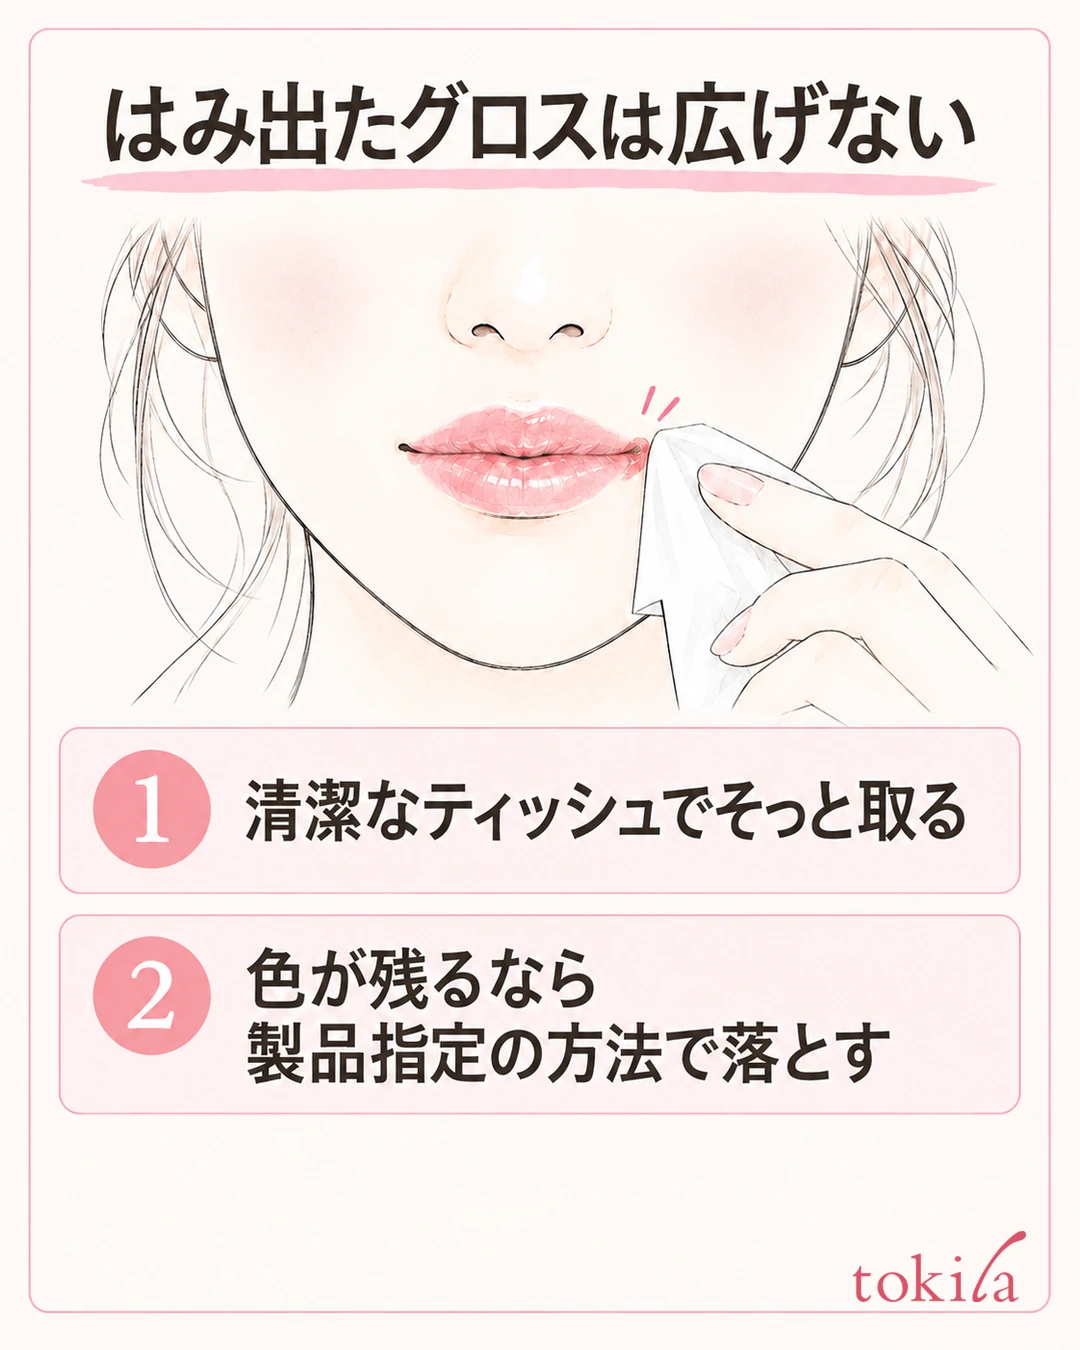
If you trace repeatedly with the same side of the tissue, you may spread the color you picked up to another spot. Switch to a clean side, look in the mirror at what remains, and then move on. If the color of the lipstick underneath has moved too, choose a way to tidy the color outside before adding gloss to cover it.
If color remains on the skin, use a makeup remover that can be used around the mouth, following that product's method. Check the labeling for the amount, the tool to use, and whether to wipe or wash afterward. Do not rush into touch-ups such as scraping hard with a dry cotton swab or rubbing a wide area with your finger.
For the spot you removed color from, follow the remover's after-steps and restore the moisturizer and base you need. If you also removed sunscreen on the skin around your mouth, reconsider UV protection there too. Do not add on to the outline while liquid remains on the surface; return to a state where you can see the color to keep and the area to fix, then resume.
If it is pooled only at the corners of your mouth, tidy that spot first and then check the remaining shine. You do not necessarily need to take a generous amount from the container again and redo your whole lips. If the outline of the color is already tidy, lifting the tip away and deciding before adding shine is also a form of adjustment.
Do not make it your fix every time to layer thick powder or concealer on the outside and press the liquid in. Before adding another cosmetic, choose an order in which you tidy the spilled layer within the range you need. If only the outline of the lipstick stands out strongly, go on to reviewing the color and line thickness of the lip liner, and think of it separately from the amount of gloss.
5. Check with your mouth lightly closed, and review the amount and tools for next time
Finally, look from the front with your mouth lightly closed. Check in order the corners of your mouth, the outside of the outlines of the upper and lower lips, and the shine at the center, and if the liquid outside is tidy, stop adding more. Do not keep redrawing the outline based on how it looks only when your mouth is wide open.
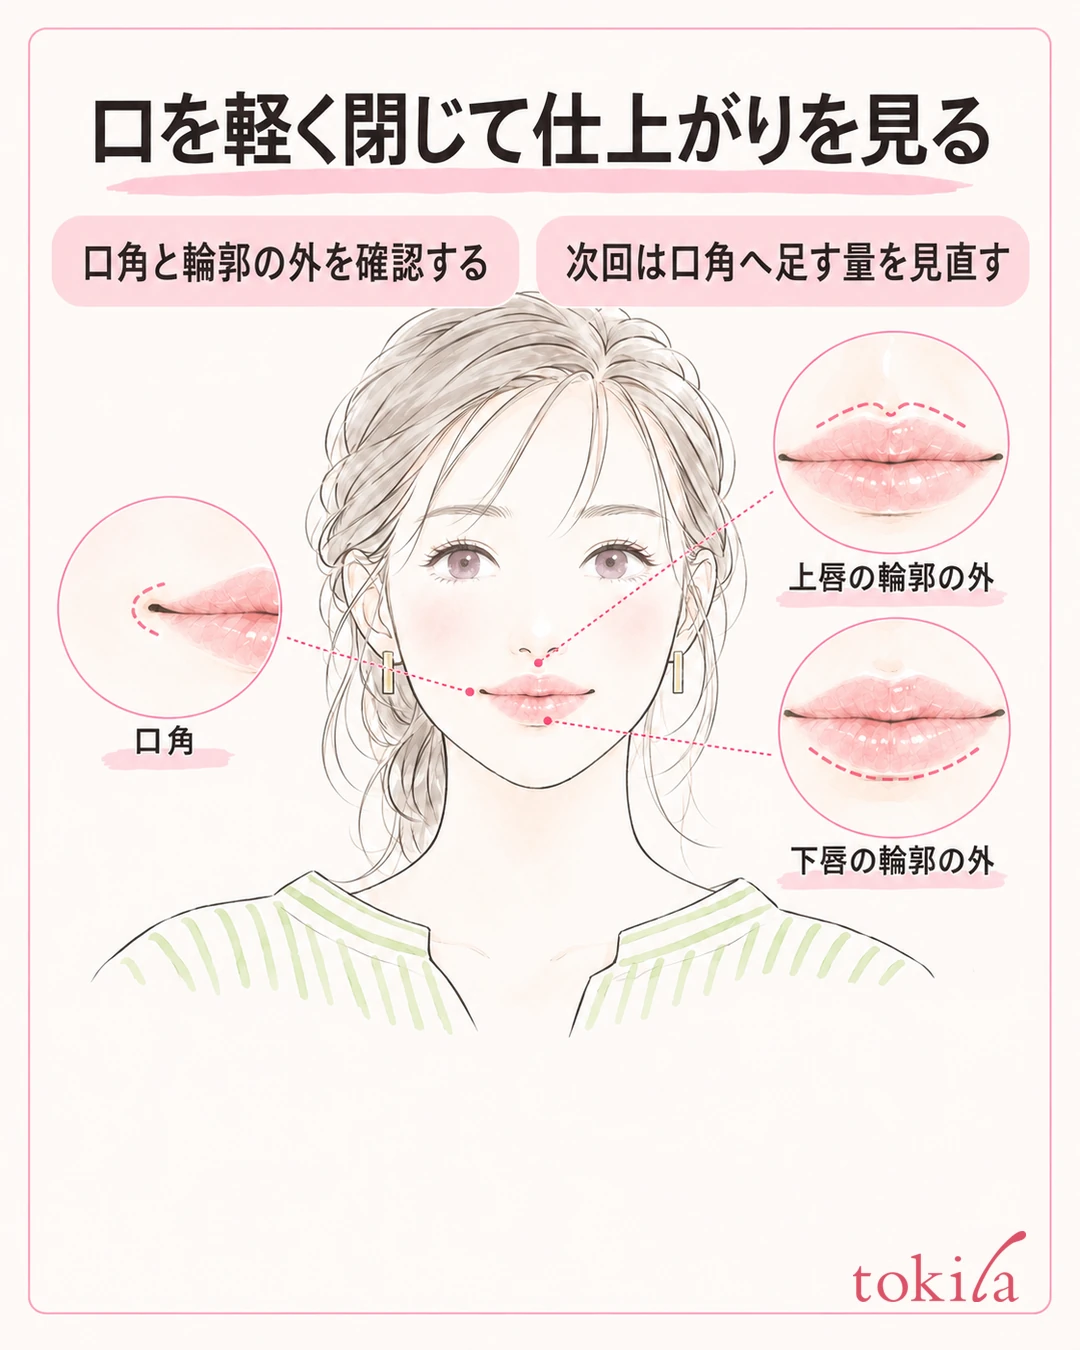
Step back to a distance where your whole face is reflected, and look at the strength balance with your cheeks and eyes. Having the shine you like and having liquid go outside the lip line are separate judgments. If you only want a paler color, check adjusting the depth and amount of lipstick, and do not assume that adding more clear gloss will always make it look paler.
Also check the product's labeling for how to handle the tip after use. Follow it as that product's method, and do not extend it to steps such as taking apart or washing every container you own.
For a product that uses a dedicated brush or tool, follow the directions for caring for that tool as well. Do not put the dirty cotton swabs or tissues used for touch-ups into the container. If you are concerned about the container closing differently from usual or a change in the liquid, do not dilute it in your own way; check where to consult about the product.
Next time, review just one of these: the amount you apply, the area you spread it over, or the layering order. For example, if the center was fine but only the corners pooled, next time reduce the amount you add at the corners and check. Match the operation you changed with the spot where you had trouble, and do not turn one observation of your own into a verification that applies to everyone.
On days when spillover bothers you, first separate the shine on your lips from the liquid outside. Check the directions, spread a small amount toward the inside of the lip line, and tidy the liquid that has gone outside without dragging it. Finally, choose when to stop with a natural mouth; if you treat all of this as one set, you can enjoy the shine while judging how much more to apply.



