
Right after applying, your lipstick looked neat, but when you move your mouth, the color seems to gather in the vertical lines of your lips. You layered more to hide the lines, and that only made dark streaks stand out. In that case, before adding more color, look separately at the natural lines of your lips and the lipstick that has built up on the surface. The starting point is not erasing the vertical lines, but reviewing the product that has been left too thick.
This article covers the situation where lipstick seems to settle in the vertical lines on the inside of the lips. We separate it from bleeding beyond the lip line and from uneven color across the whole lip, and organize the surface before application, the amount you pick up, and the area you reapply into five steps. The basic principle is to follow the instructions for the product you have, and not to apply the same finishing method to every lip product.
1. Look separately at the lines of your lips and the lipstick gathered in them
First, move the lipstick or applicator away, and look in the mirror with your mouth lightly closed. Do you see faint vertical lines across the whole lip, or is there dark color or a thick layer of product left in just part of it? Before leaning toward a small mirror, pick one spot that bothers you with your usual expression.
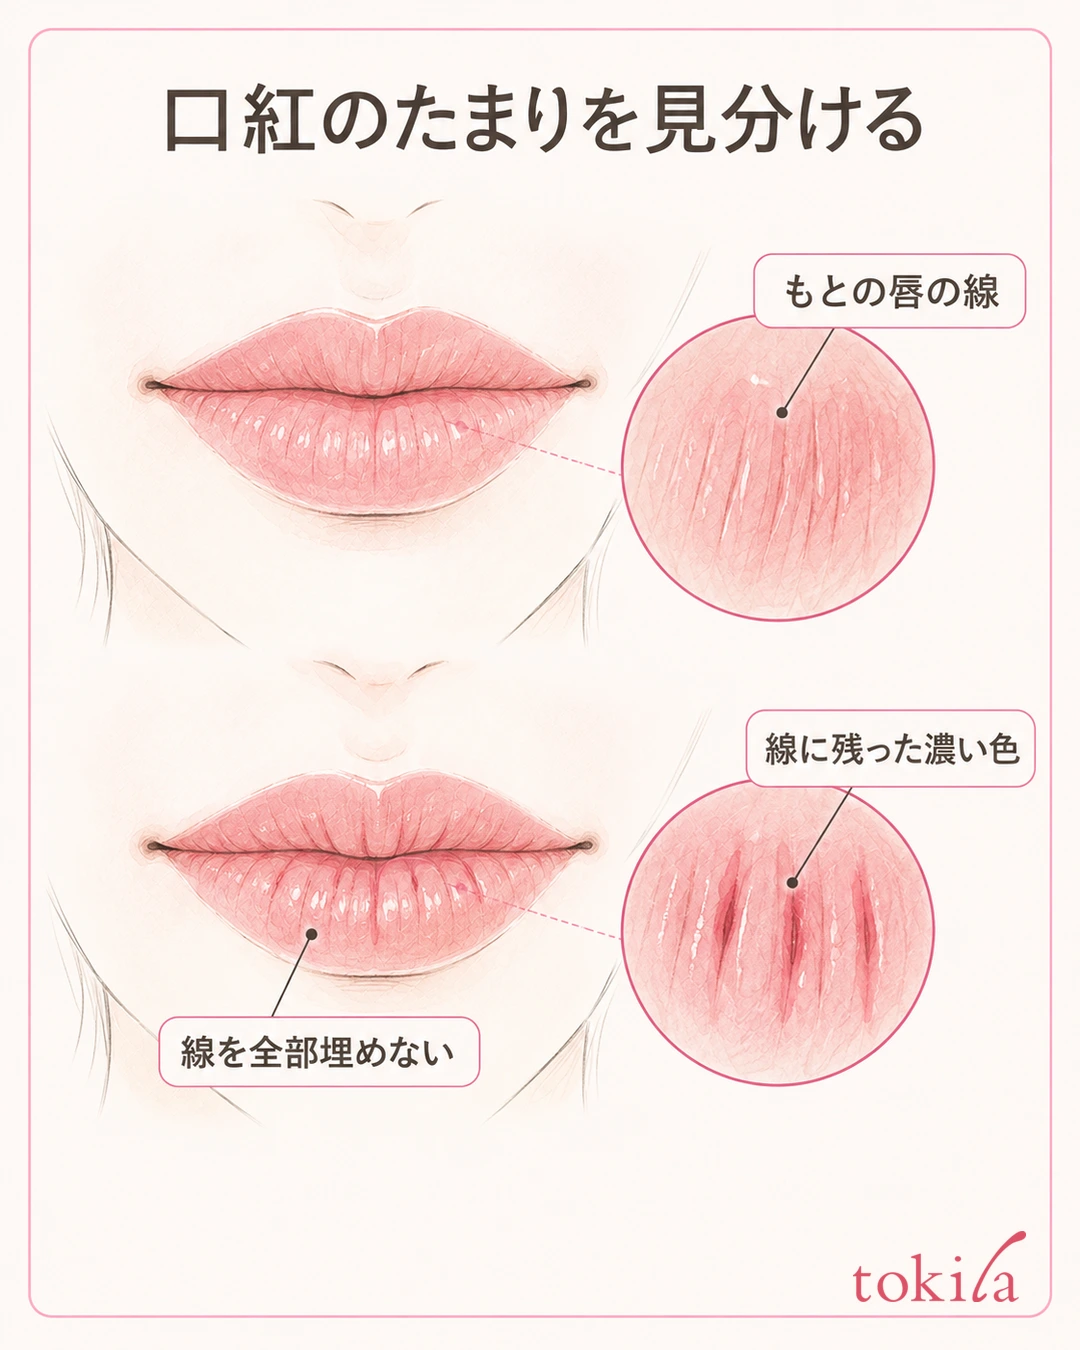
Lips have natural texture. Please do not assume that having lines means dryness or a mistake in application. If the color is evenly and thinly applied, there is no need to layer more to fill in the lines. Do not make erasing every faint line the condition for a good finish.
On the other hand, a dark streak only in the center of the lower lip, or thick color that gathers when you bring your mouth back to rest, is a case for checking the amount and how you layered. Highlights look white and shadows look dark, so change the angle of your face slightly in the same mirror and see whether the color stays in the same place.
Linking the place with the condition, such as "color gathers in the central vertical line" or "it stays thick on one side only," lets you choose the area to fix before adding more over the whole lip. Do not judge only by the shape with your mouth wide open; also check how it looks lightly closed and when you speak naturally.
If the surface is peeling, do not move on to pressing it flat with lipstick. If you feel pain or discomfort, you also do not need to keep applying just to even out the color. Separate the case where you are fixing the thickness of the product from the case where it is a day to go without makeup.
If the main problem is blotchy color across the whole lip or spilling beyond the outline, see how to fix uneven lip color and bleeding. This article is a guide to reviewing color left in the lines inside the lips.
Also remember separately whether the lines were dark from just after application, or became noticeable after eating, drinking or talking. If it was right after application, it is a clue to check the first amount; if it was after reapplying, it is a clue to check the step where you layered over the remaining color. Rather than pinning it on a single cause, use the timing of the change for your next check.
2. Moisturize before applying, and check how much remains on the surface
For the next application, look at the surface of your lips before picking up lipstick. If previous color or residue from eating and drinking remains, clean it following the instructions for your product. Do not start by layering lip balm and lipstick over leftover product and adding more layers.
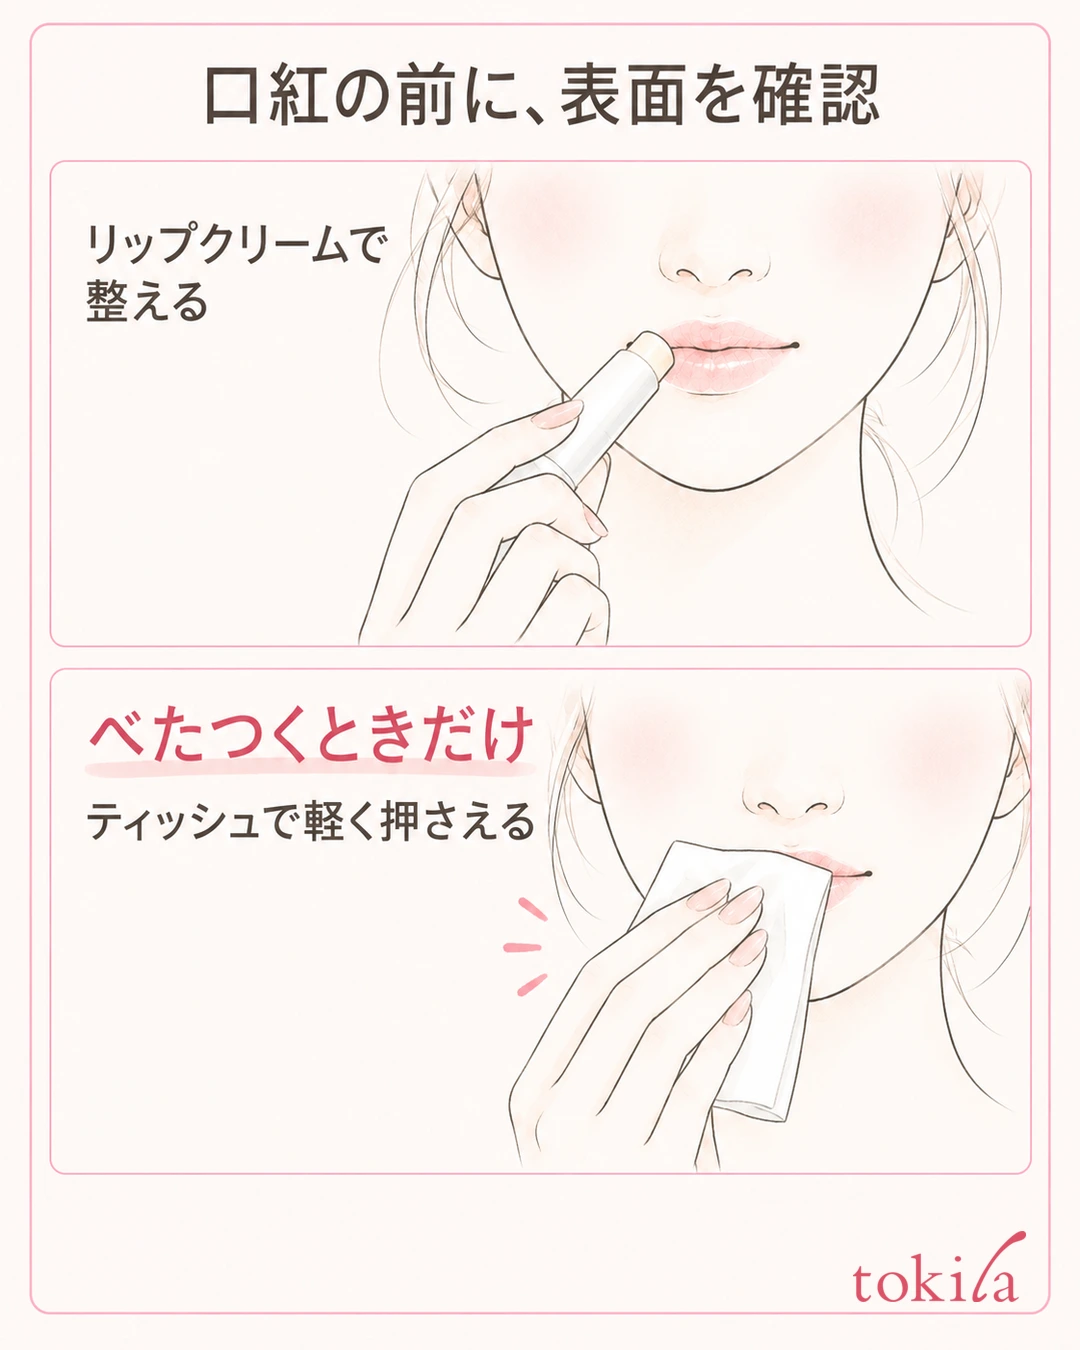
This does not mean you must always wipe everything off after moisturizing. Think of smoothness and excess product on the surface separately.
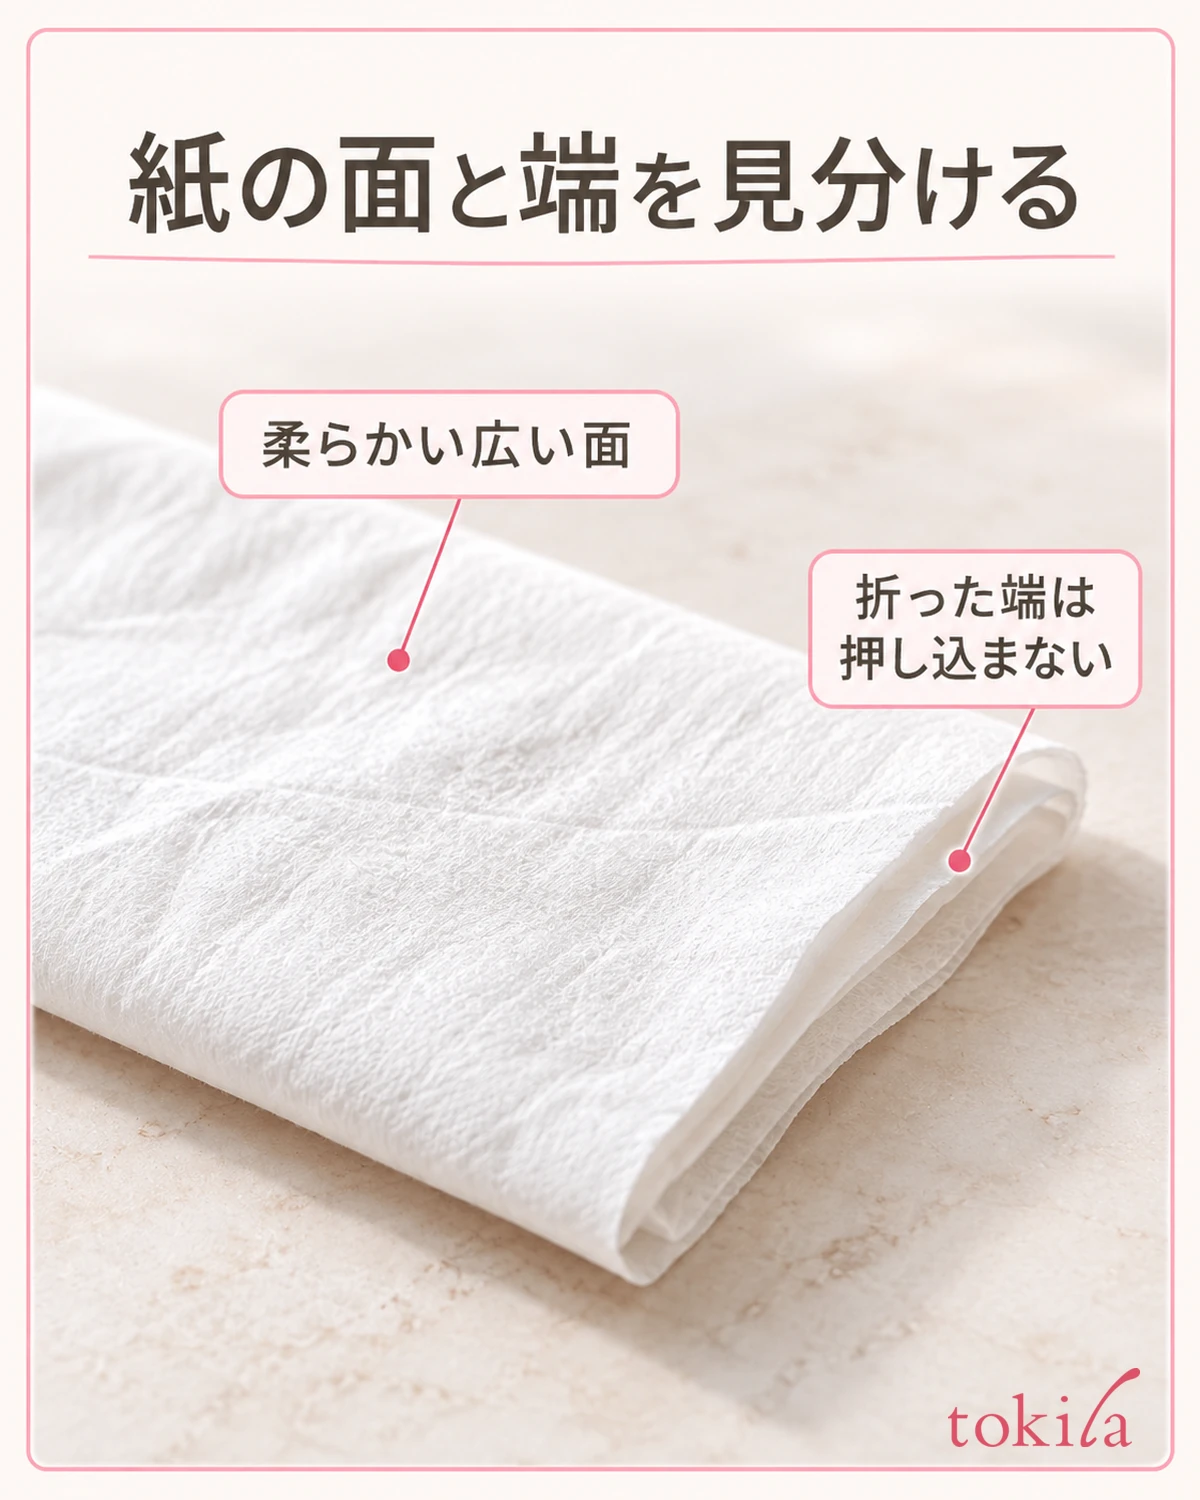
If you use a tissue, gently touch a clean, soft part to your lips and lift it away. Do not drag it side to side or catch the skin on it. Before pressing again and again, look at the surface and check whether it is in the state suited to the lipstick you are using.
Some lip primers specify a waiting time after applying or how to layer them. Do not treat creams, balms and tinted care products the same way; read how each is meant to be used with lipstick. Here we do not set a waiting time or an amount, such as "grains of rice," that applies to every product.
Do not peel away flaking skin with your nails or buff it with a dry tissue.
If your lipstick moves easily even though you moisturized, before skipping the care, check whether too much remains on the surface and whether the product you have is suited to layering. Rather than adding several kinds of primer, recording what you used and how much makes it easier to choose your next adjustment.
3. Spread a small amount thinly and check with your mouth in a natural shape
When applying, do not try to cover the whole lip thickly in one go; start with a small amount. With a stick, twist up only the length the product specifies; with a tip applicator, check the liquid on the side you will use. Pressing harder to fill the vertical lines is not the same as adjusting the amount.
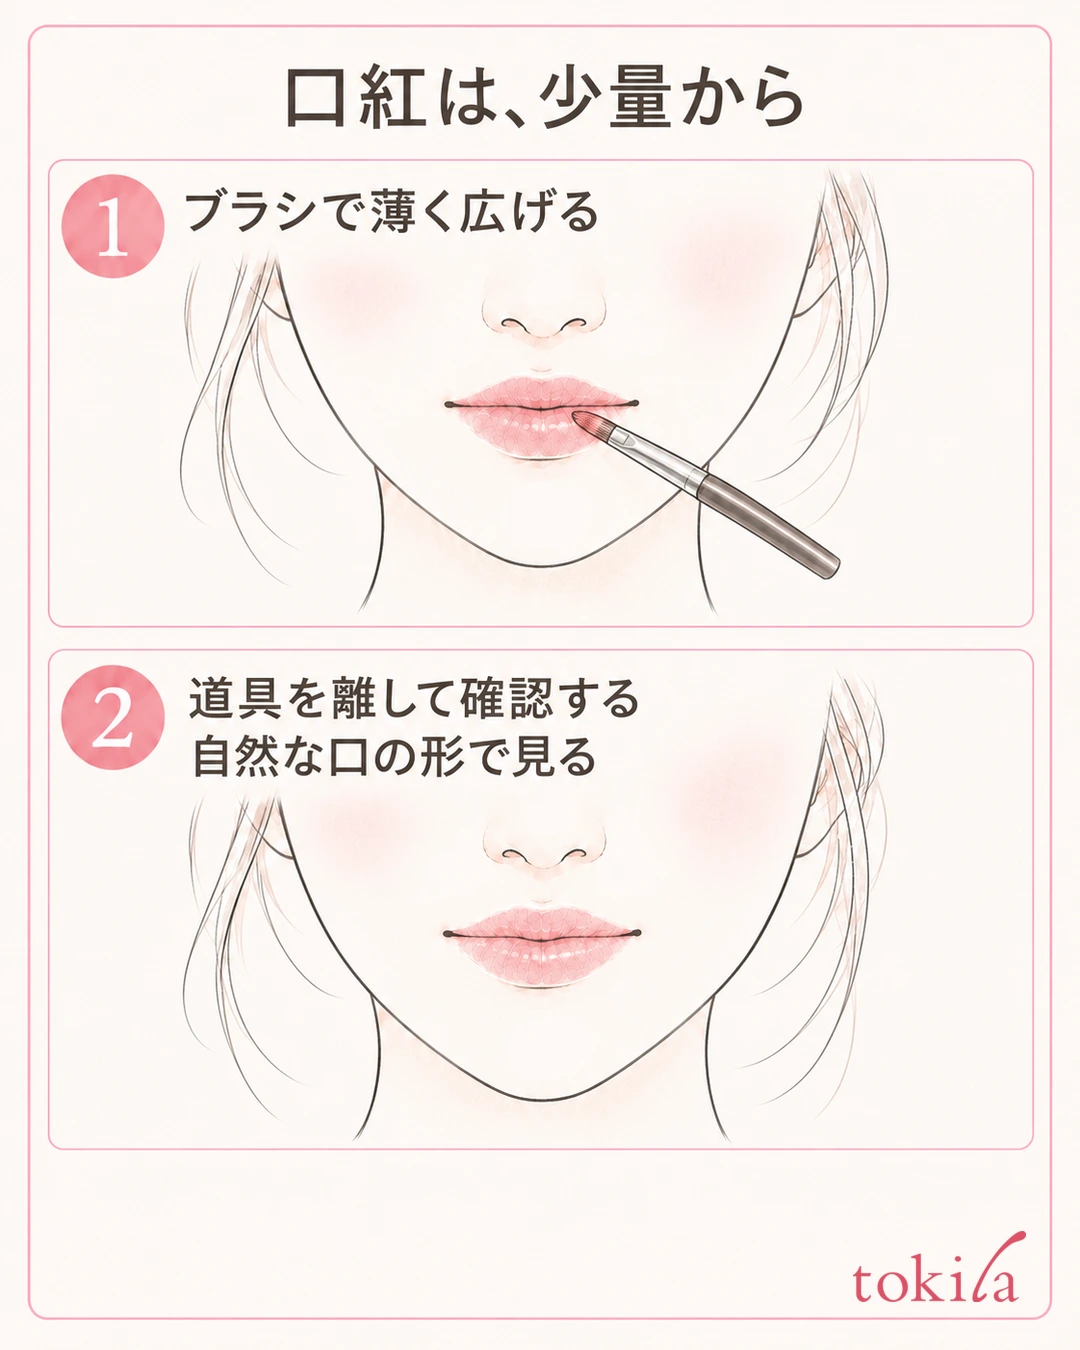
If fine areas are hard to handle, you can choose a clean lip brush that suits the way you use the product. Pick up a small amount on the bristle tips and start by touching lightly. There is no need to press the brush hard and sweep back and forth with the bristles splayed wide.
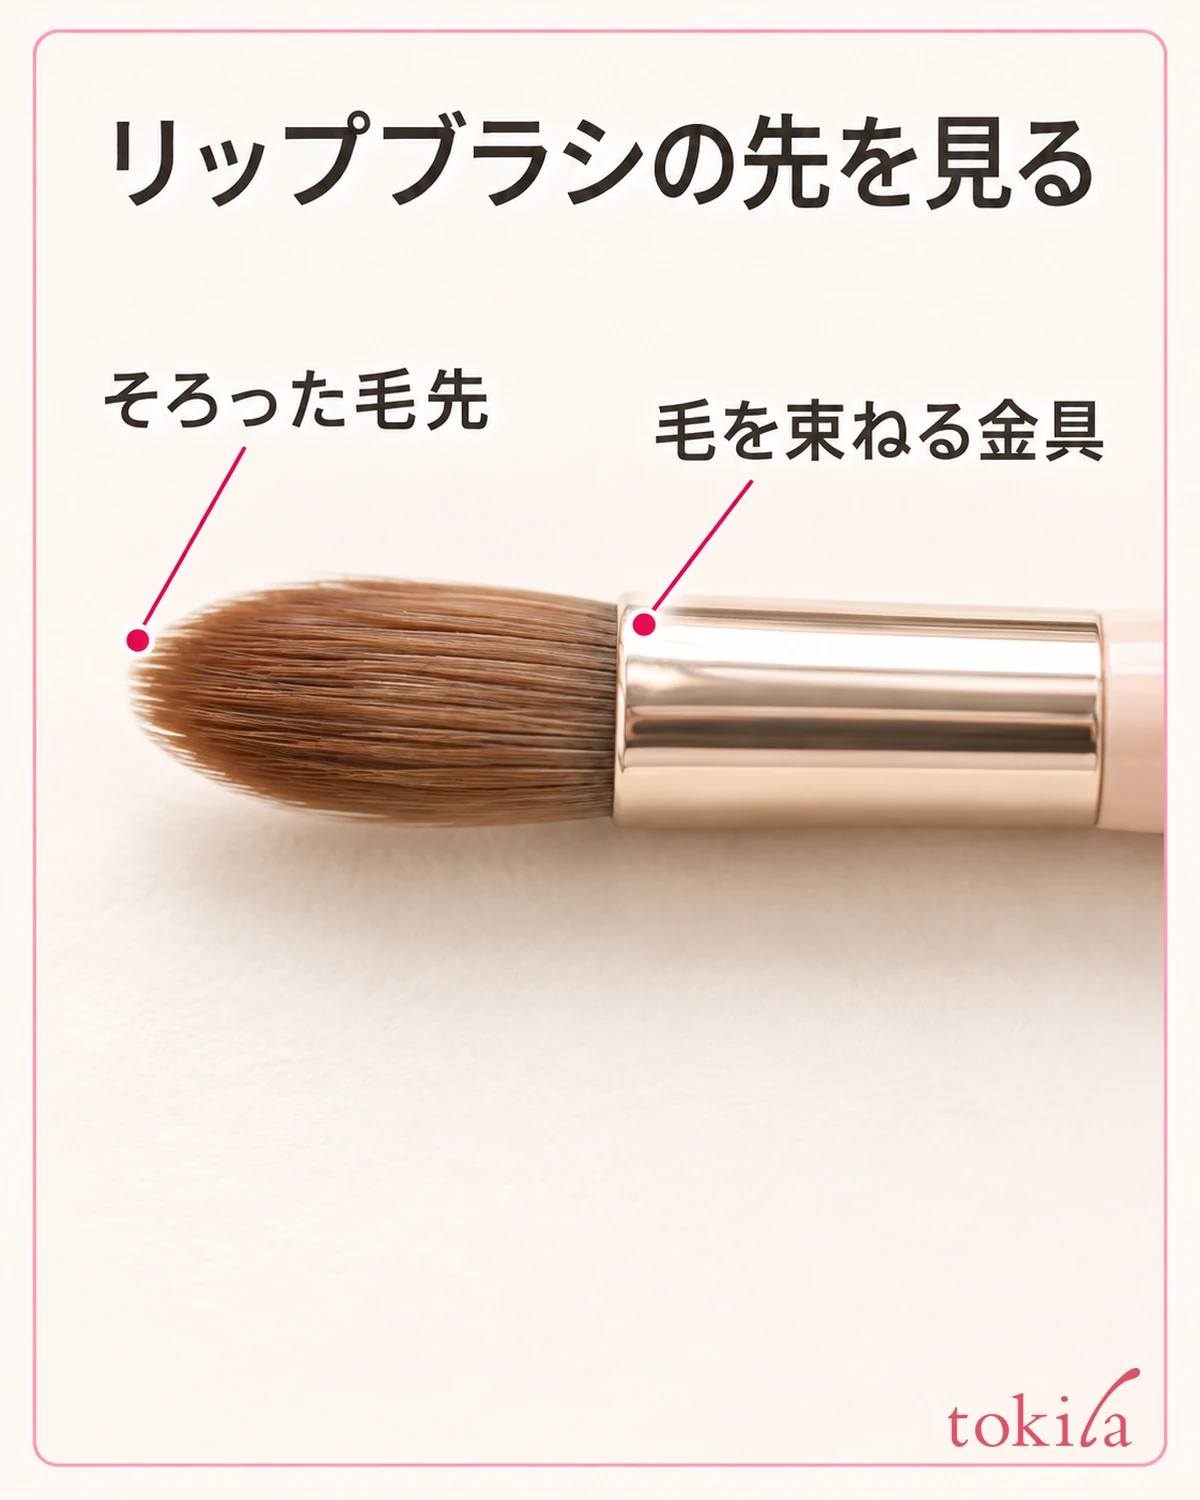
Make sure you can see both the area you are applying to and the tip of the tool in the mirror, and spread the color thinly inside the lip line. Even if the color looks pale only in a line, do not fill it by placing a lump there. After you have finished a short stretch, lift the tool away, return your mouth to a natural shape, and check the thickness of the color.
Stretching your lips lightly while applying and judging the finish are separate things. The color may look even when stretched but gather when your lips return. Rather than layering repeatedly with your mouth stretched wide, choose the places that need more with your mouth lightly closed.
Some tints and liquid types specify not touching the lips after applying. In that case, do not rub your lips together right away or keep moving the color with a brush. Do not change how the color sets in your own way; follow the steps for your product.
If a stick catches, check the surface and how far it is twisted up before pushing it out with force. Do not choose methods such as warming it up on the assumption that it will apply more easily, or adding water.
Even if you are not using a brush, you do not need to start by buying several new ones. Check whether you can handle a small amount with the tools you have, and choose again only if problems remain, such as not being able to see the details or pressing too hard. Care for brushes after use should also follow the material and the manufacturer's instructions.
4. Do not layer over built-up color; remove it and reapply if needed
If a dark streak remains after application, stop adding new lipstick. Judge from the product's instructions and the current condition whether you can tidy only the excess color on the surface, or whether it has already set and needs to be removed and redone.
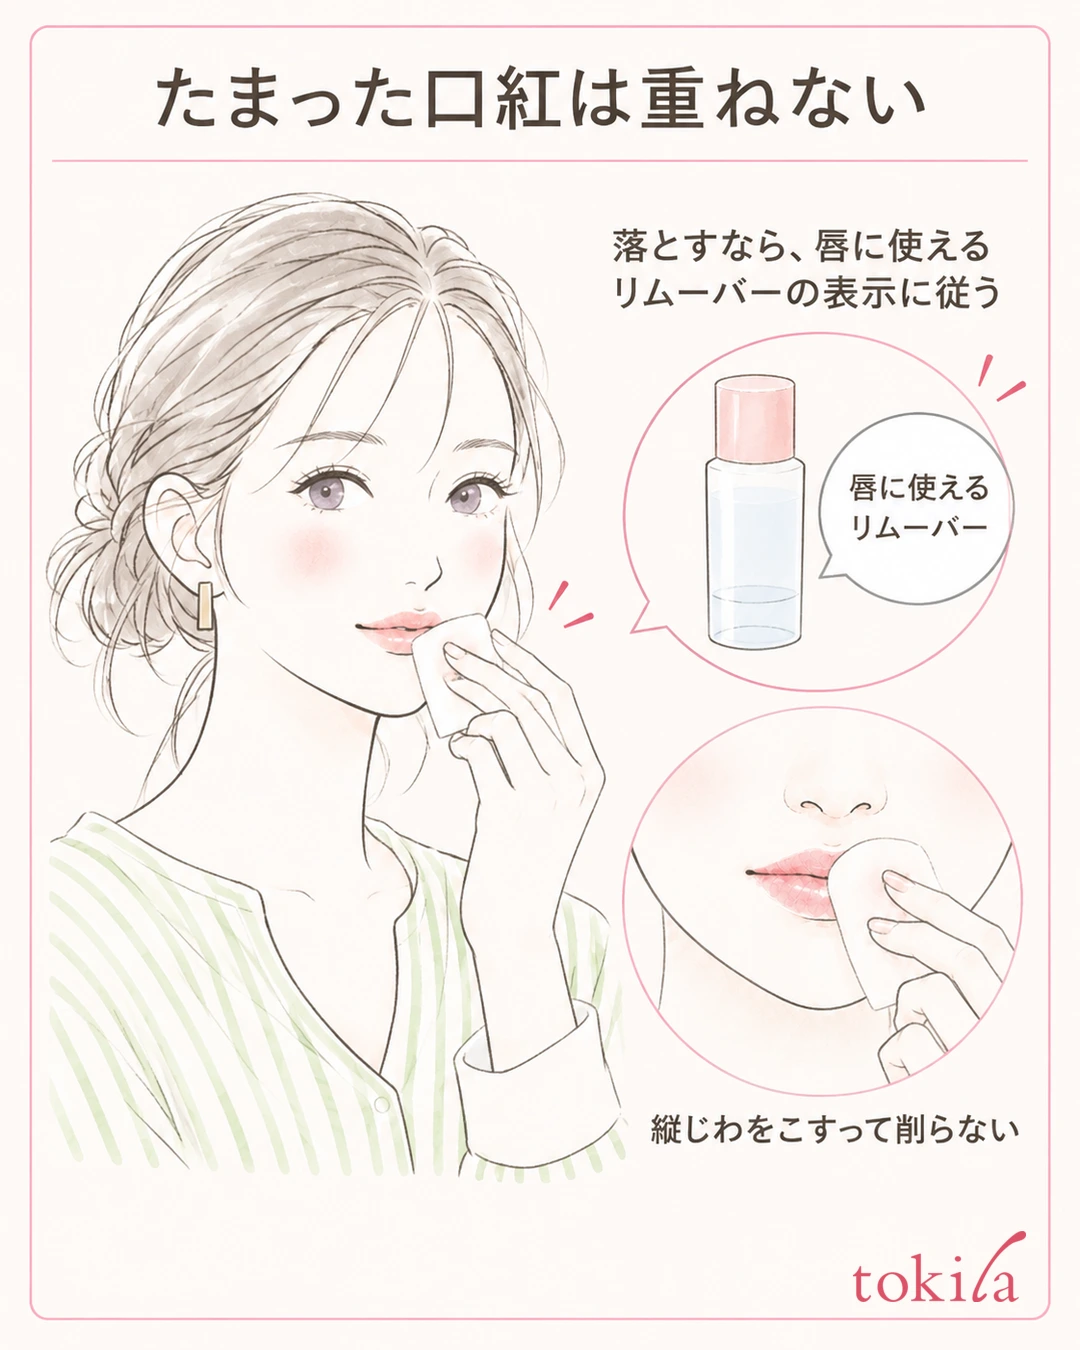
If it is a product you can lightly blot off, gently press with a clean tissue, then lift it away and look. Do not push a corner of the tissue into a dark line or rub sideways to thin it. If the color spreads or you feel your lips being pulled, do not continue that action.
If the color remains strongly and a light adjustment does not fix it, use a remover that can be used on the lips, with the amount, tool and way of blending that it specifies. If the product uses cotton, prepare a clean one and avoid scraping with a dry surface. Not every oil or emulsion should be chosen as a substitute.
Look at whether the area to remove is just a part of the center, or whether it would be better to redo the whole lip because a boundary would form. There is no need to repeat spot fixes again and again and widen the area you touch. Rather than increasing the number of times you remove and redo to perfect the finish, keep the option of ending the day with less color.
After removing, finish the steps the remover specifies, such as wiping off or rinsing. Before adding lipstick, check that color has not spread to the surrounding area and that the surface is not still wet, and start again from moisturizing if needed.
In the area you have redone, do not apply thickly as if making up for what you removed in one go. Restart with a small amount and return to the order of touching, then lifting away to look. For the problem of the overall color being too dark, reviewing the amount and shade of lipstick may also help.
When you are out and have no time or tools to remove and redo, there is no need to force off set color with dry paper. You can also decide to stop adding, check the remaining area in the mirror, and fix it later somewhere you can use the specified remover. Do not switch to increasing the number of times you rub just because of the limited tools.
5. Look up close and at your whole face, and decide how much to pick up next time
Finally, in the same mirror, look both close to your lips and at your whole face. Up close, check the thick color left behind and the corners of your mouth; from a distance, check the overall intensity around your mouth. Here too, keep separate the fact that the natural lines are visible and the fact that color is gathering.
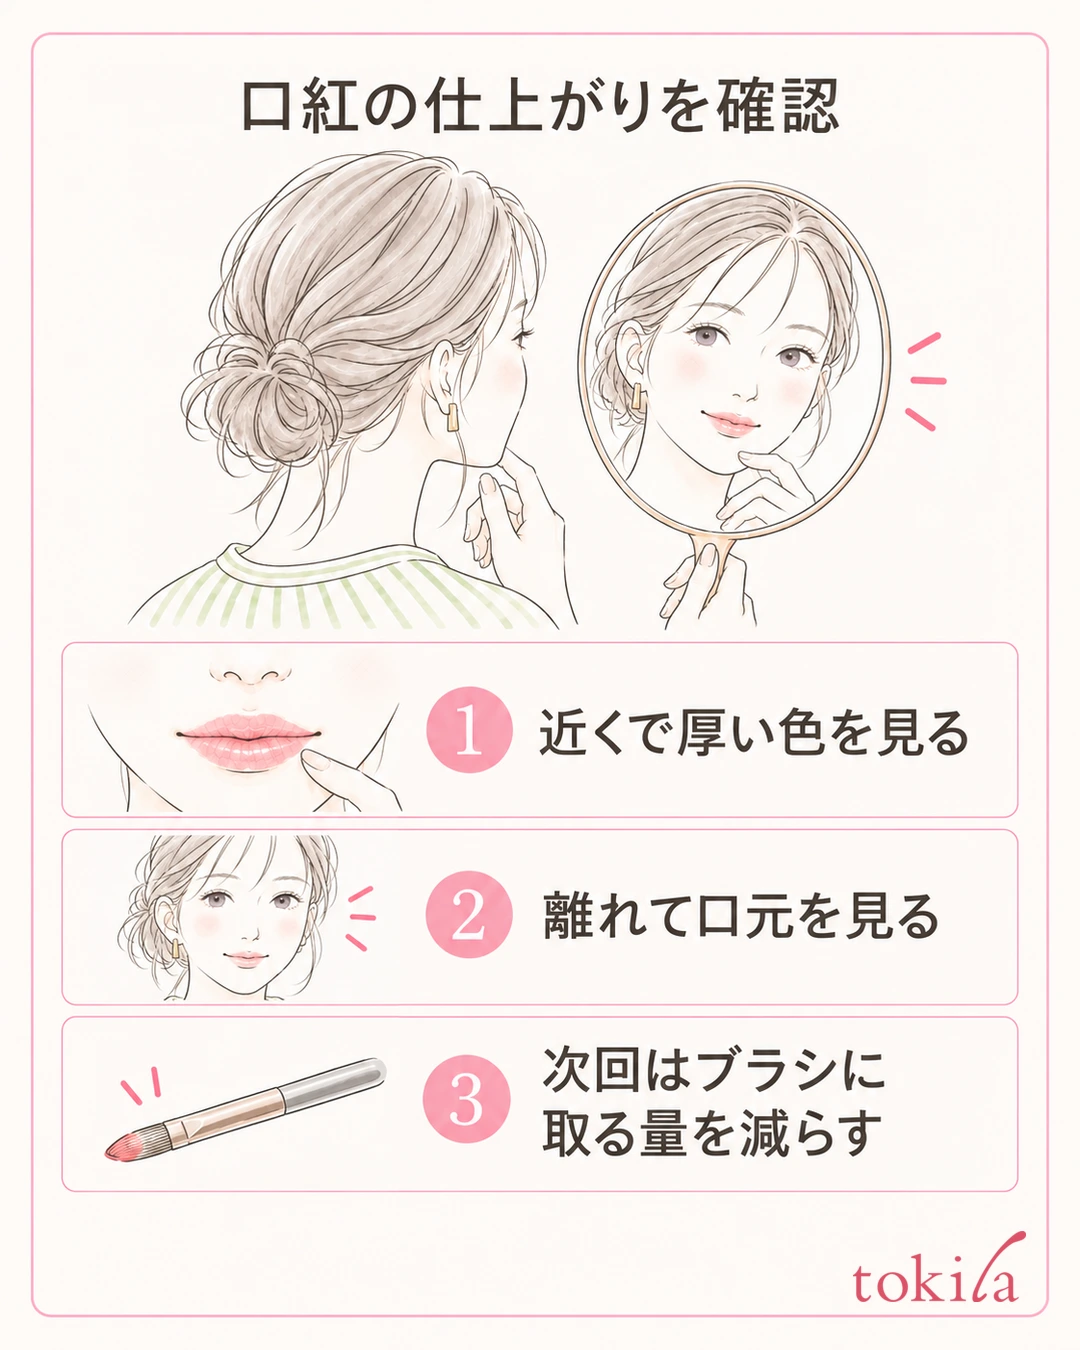
Lightly close your mouth, return to your usual expression, and see whether the color gathers in one part. Without trying to change the shape of the lines themselves, stop adding if the thick streak is no longer noticeable. Do not make it a finishing habit to keep leaning toward the mirror and painting over small bumps.
Between glossy, sheer and matte textures, the lines look different even in the same color. If you change products, first decide the texture and method of use you want. Layering gloss will not always solve it, and adding a lot of gloss can require another adjustment.
If you layered gloss and the liquid went beyond the outline, you can check the amount of gloss and the area to apply it to separately from the vertical lines. The point is not to try to fix lipstick buildup, bleeding beyond the outline and your preferred texture all with a single method.
Tie your notes for next time to the step that gave you trouble today, such as "reduce the amount picked up on the lip brush." If the amount was too much, choose the amount; if the surface was sticky, choose checking after moisturizing, and avoid changing the color, primer and tool all at once.
When lipstick seems to settle in the vertical lines, first separate your natural lines from the product. Check the surface after moisturizing, spread a small amount thinly, and check with your mouth in a natural shape. If needed, remove and redo it the specified way, and stop once the thick color is tidied. Following this order, try reviewing the step where the streaks get darker the more you layer.



