
When mascara clumps bother you, review in order how much product is on the brush, where you layer it, and when you comb through your lashes. Adding more product to hide a clump at the tips can make an even thicker clump. First try these three steps: check the amount of product before applying, apply one thin coat, and tidy clumped lashes before they dry. For clumps that have already hardened, don't move on to loosening them by force; remove the mascara in a way that suits the product and start over.
This article covers how to deal with unintended granular clumps and with several lashes stuck together. It does not reject makeup that enjoys a separated, clumped look. Brush shapes and drying times differ by product, so check the directions for use and adjust to the lashes you want to finish.
1. Tell "granular clumps" from "lashes bundled together"
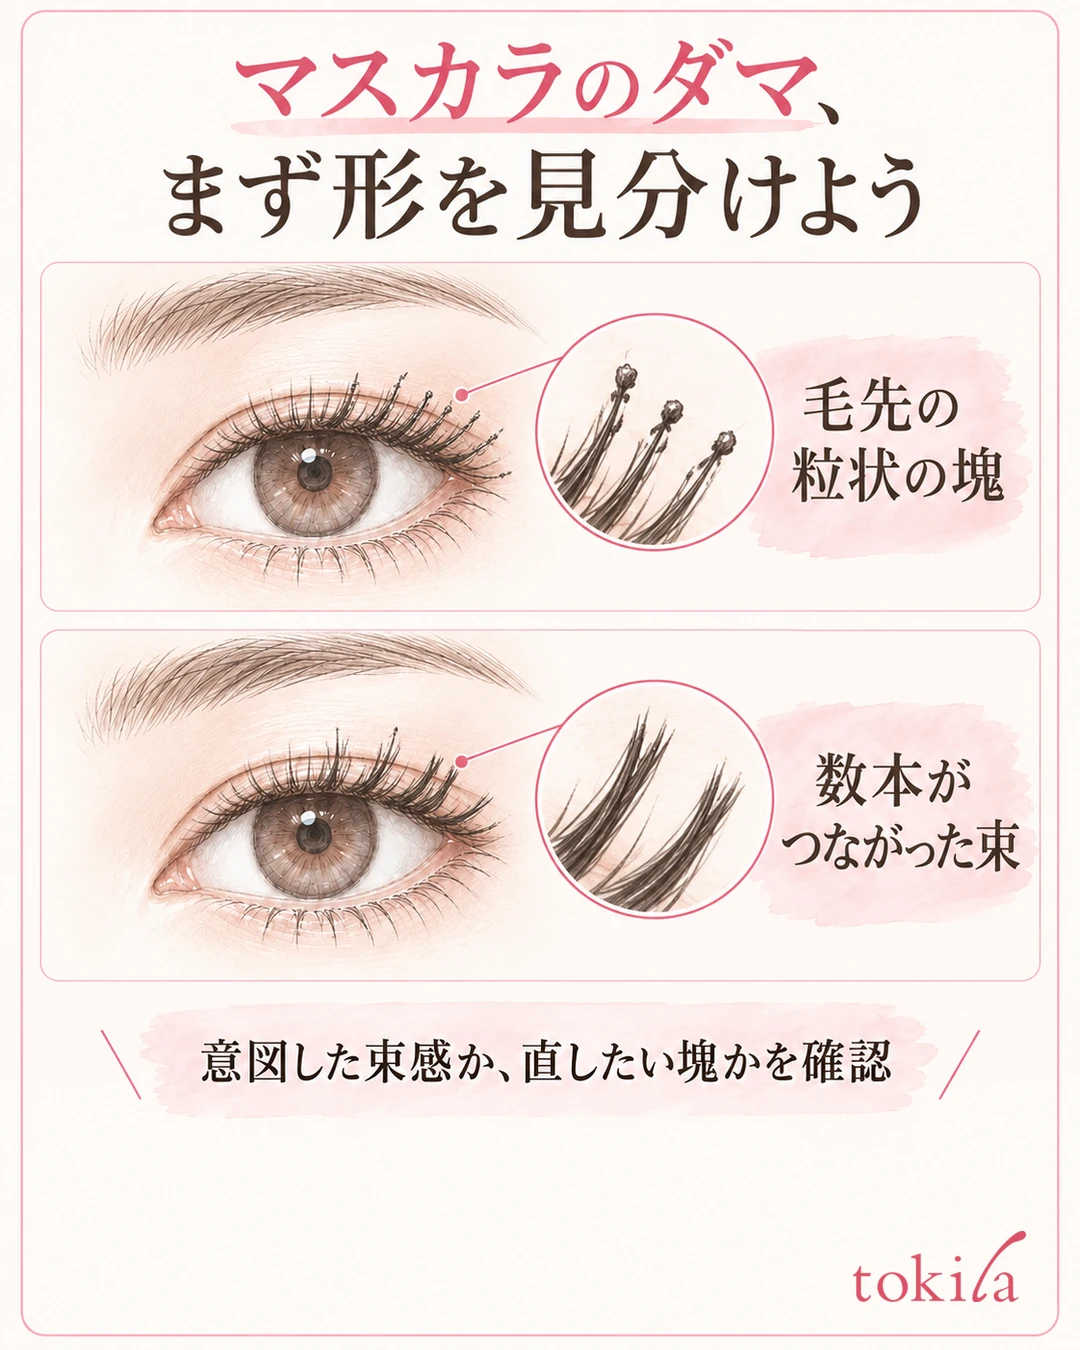
Look in the mirror at the spots that bother you. Are there small lumps at the tips, are several lashes joined from the root, or is the product thick on one side only? Instead of lumping it all together as clumps, looking at what is happening where lets you narrow down the places to fix.
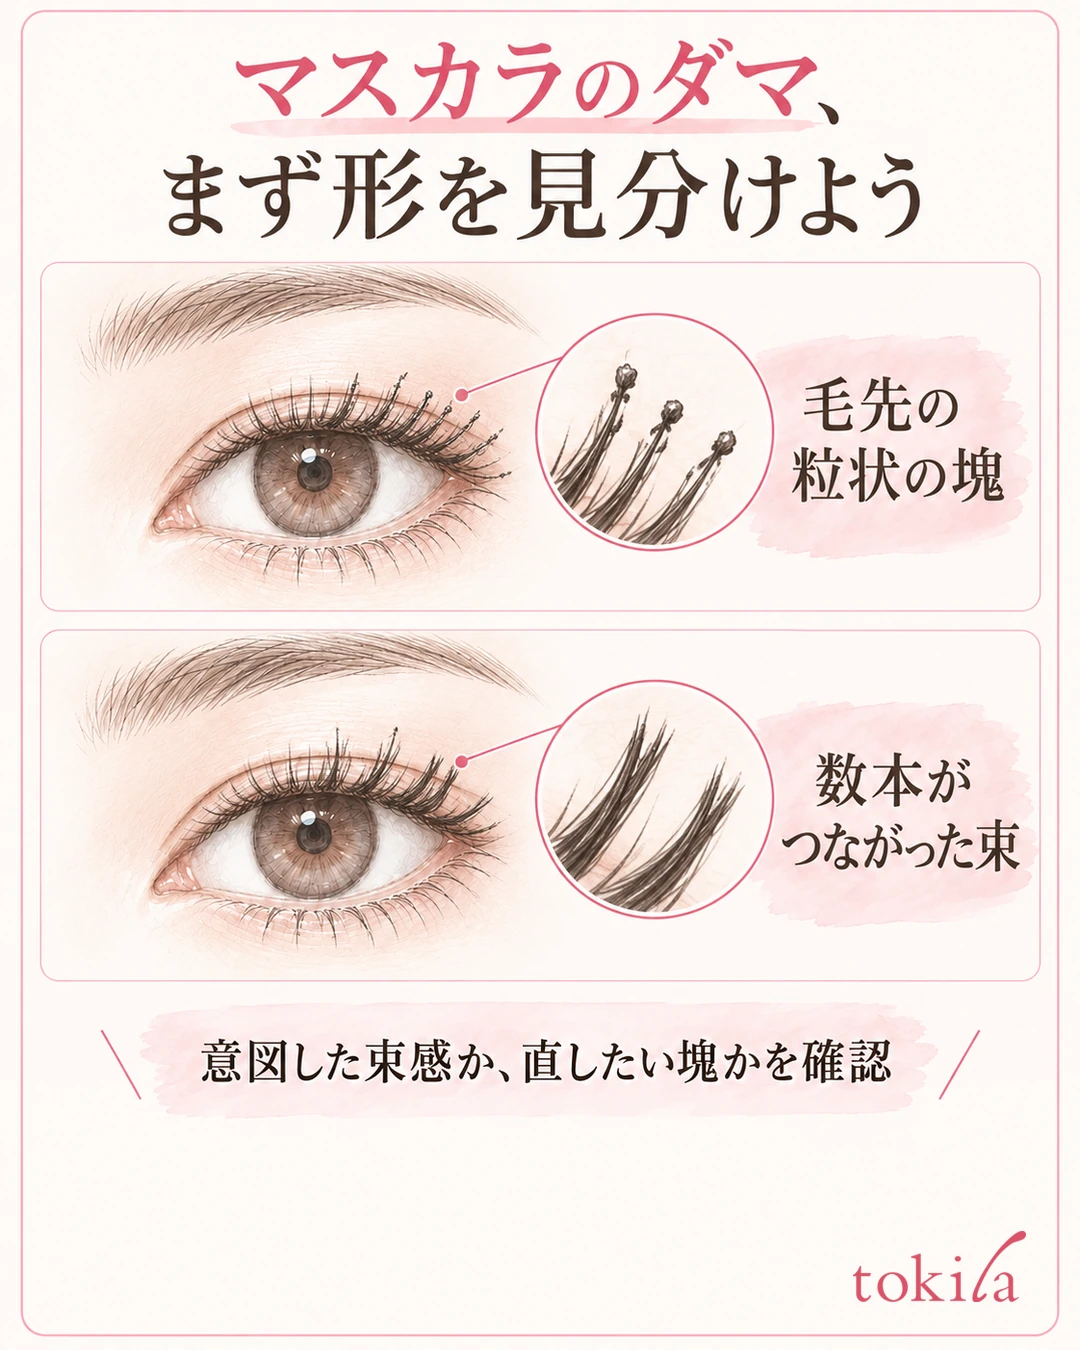
Before applying, also check whether the brush itself has a lump of product on it. If product has pooled at the tip, it can transfer straight onto the fine lashes at the outer corner. If you want to fix just the clumps at the tips but layer over everything, you end up thickening the parts that were already neat.
If the number or growth of lashes differs between left and right, the same number of coats will not look the same. If you want to even out the depth of the eye area, it is important to stop by looking at the result, not by counting coats. Using the thinly applied state as your baseline also makes it easier to find places that need more.
Decide on the finish you want and reduce the places where you add product
The places to add differ between days when you want lashes to look natural and separate and days when you want volume at the roots. For a natural finish, apply thinly all over; for volume, add a little at a time only where needed. You don't need to layer the same number of times across all lashes every time.
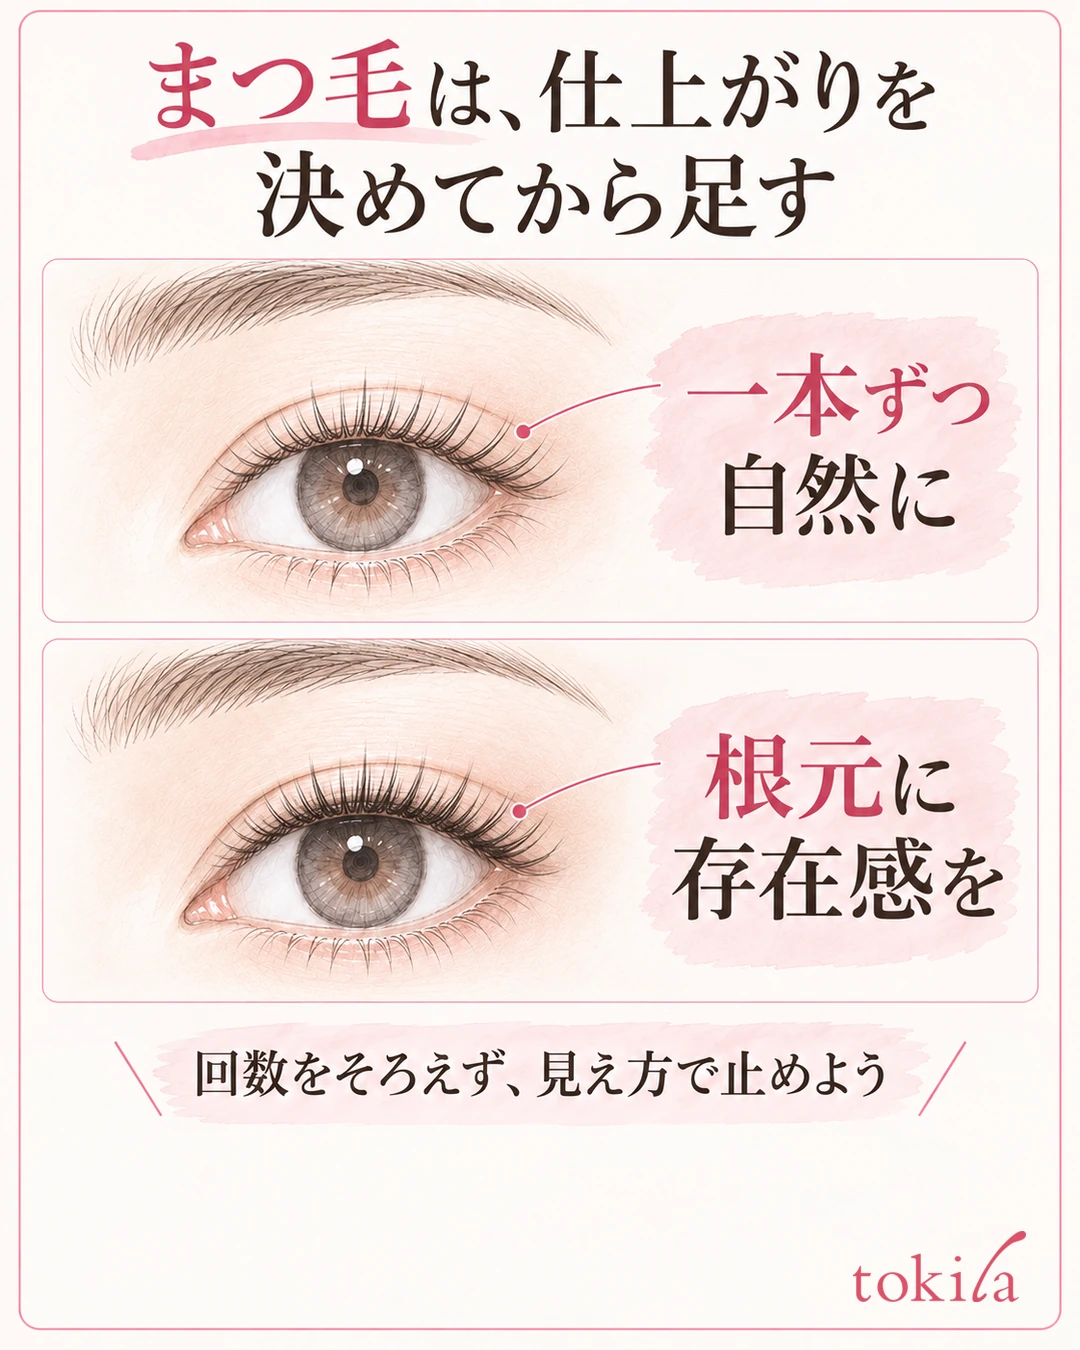
A clumped look you intend is created by choosing the position and thickness of the clusters. On the other hand, if irregular lumps are left at the tips, or large clusters happen to form on one side, that is a sign to adjust the amount and how you comb. Don't think "every cluster is a failure"; judge by comparing with today's goal.
On days when your eyeshadow or eyeliner is bold, the eye area can look put together even if you finish the mascara thinly. Look at the whole face first and add only where something is lacking. For eye color schemes, tips for choosing the star of your makeup and coordinating colors is also helpful.
2. Pull the brush out slowly and adjust the excess product
Pull the brush slowly out of the container and look for large lumps of product on the tip and between the bristles. Follow the instructions of the product you use, and avoid wiping it off by forcing the brush through the opening again and again.
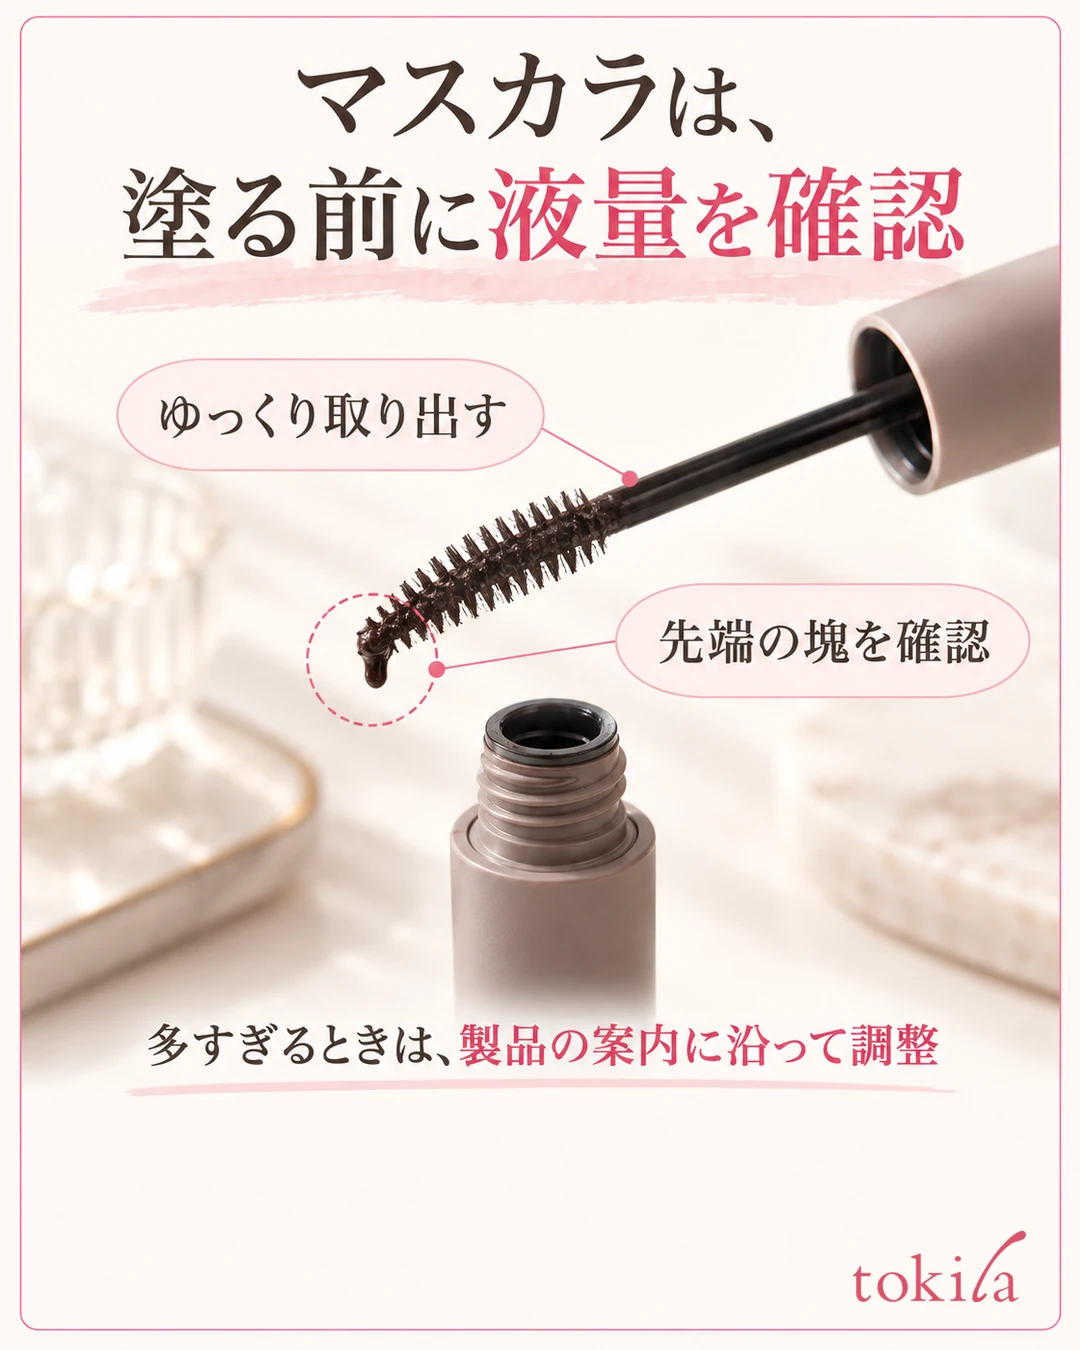
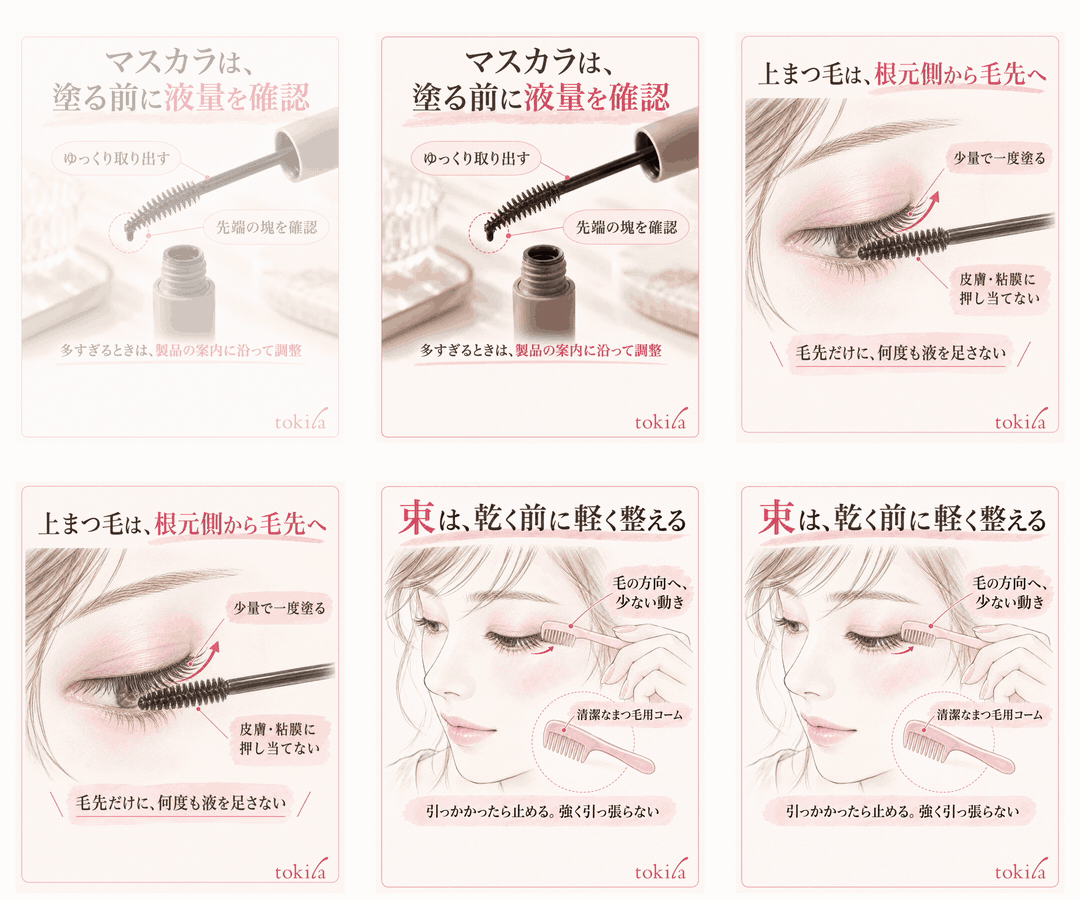
The habit of pumping the brush in and out vigorously, because the product bothers you, is something to review. Once the brush has picked up the amount you need, take it out, check it, and then apply. If product is left on the rim of the container, wipe it off, and close the cap properly when you are done.
If you reduce the amount so much that almost nothing picks up, reload the product following the product's instructions rather than returning the brush to the container many times and building up thickness everywhere. The aim of this practice is to change the routine from "pick up plenty and apply many times" to "apply a small amount and see whether it's enough."
Check the lump at the tip and the state of the base before applying
Before using the tip on the inner or outer corner, check once more that no product has pooled at the end. On fine lashes, even a small lump can look large. With products that adjust the amount using a tissue, handle it lightly in the specified way so that fibers don't stay on the brush.
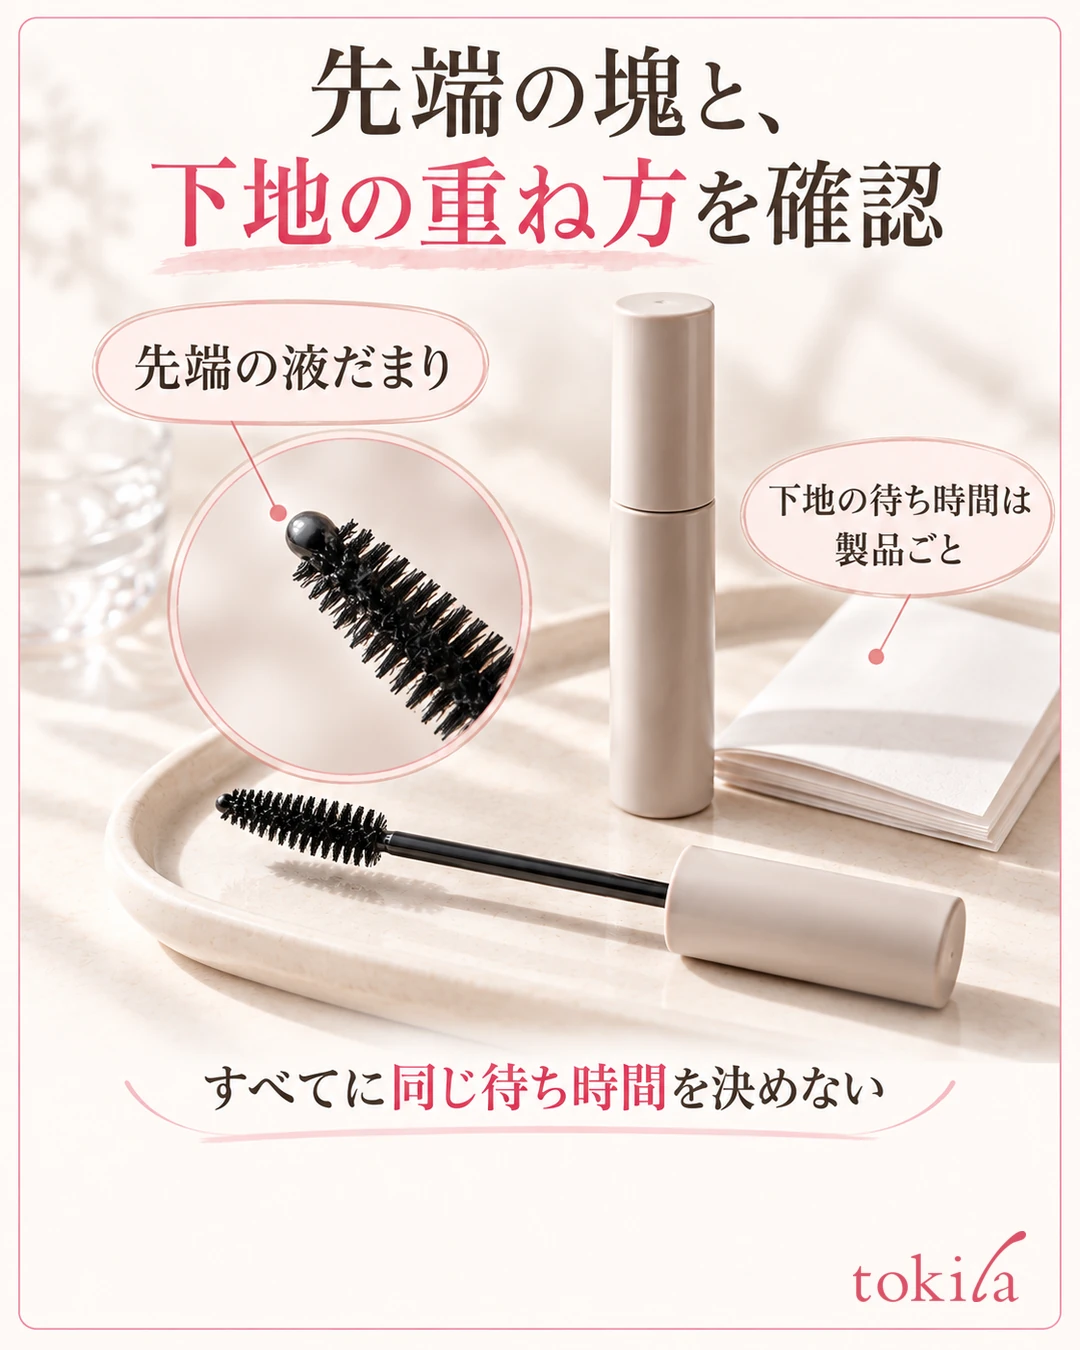
When you use a mascara primer, avoid layering a large amount of mascara over a thick coat of it. For the order of layering the primer and mascara and the drying time, check the instructions of the products you combine. The same waiting time cannot be applied to every product.
When hard lumps keep forming on the brush, don't try to fix it by how you apply alone; review the condition of the product. Don't keep using a dried-out product by thinning it with water or toner. If it can no longer be handled with your usual way of adjusting the amount, it is time to check when you bought it and the precautions for use.
3. Apply the upper lashes from root to tip in a small amount
If you use an eyelash curler, shape the lashes before applying mascara. If you clamp again after applying, lashes may stick to the tool. Check the condition of the rubber and the shape too, and use it so that you don't pinch the eyelid. There is no need to lift with strong force.
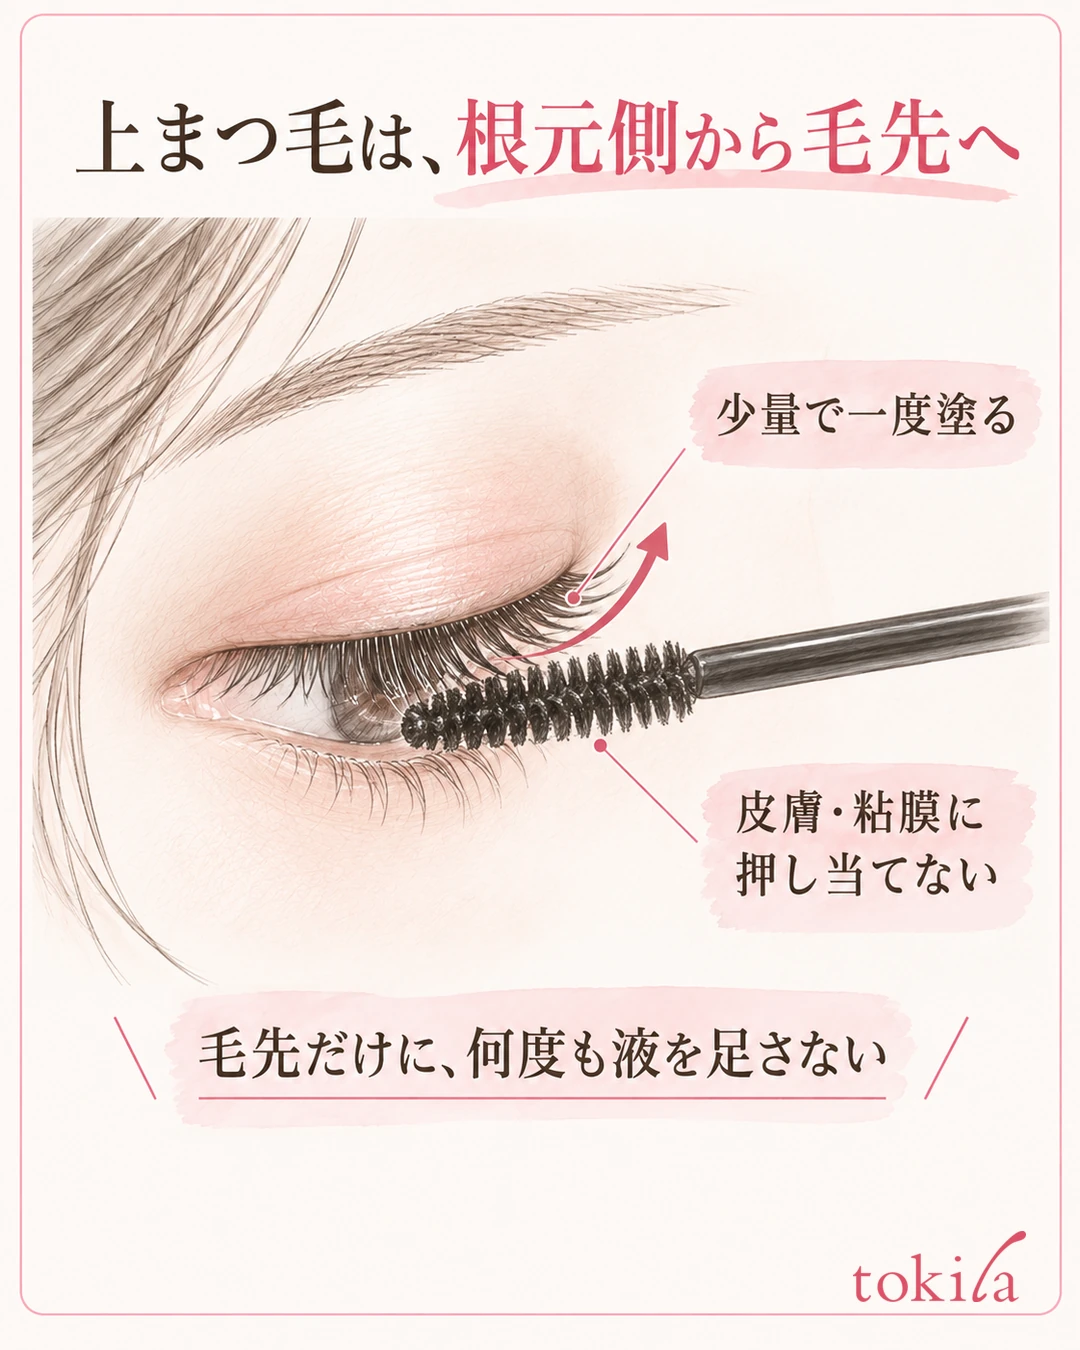
On the upper lashes, spread the product thinly from the root side to the tip. Here too, match the shape of the brush you have and be aware of the direction in which you comb the lashes.
Instead of putting product on the tips again and again, apply one thin coat first and check. Rather than aiming at the center, outer corner and inner corner all at once, dividing the area the brush can reach makes it easier to avoid getting a large amount of product on fine areas. Don't press the brush against your eyeball or mucous membrane.
Look at the roots in the mirror, and use a smaller amount on the lower lashes
When applying the upper lashes, adjust the mirror position and your gaze to find an angle where you can see the roots. If you bring your face too close and your hand becomes hard to move, move back a little. Rather than opening your eyes wide, choose a relaxed posture in which you can follow the brush position.
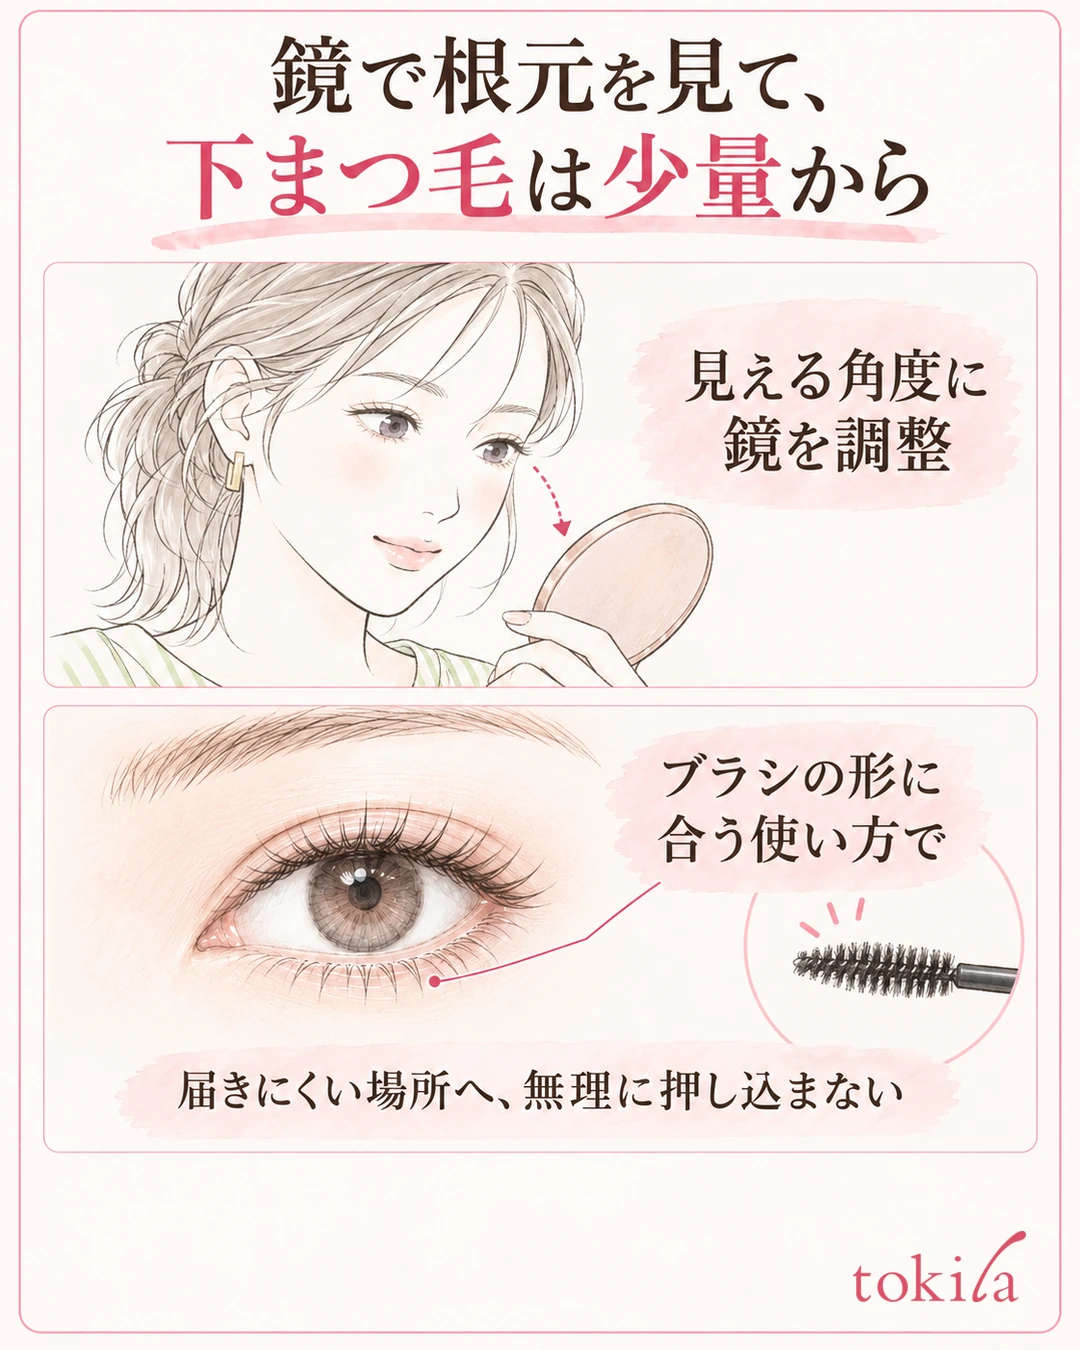
Lower lashes are often short and fine, and adding the same amount as on the upper lashes can make clumps stand out. At first, try with the small amount left on the brush. Brush types and comb types use the tip differently, so check the product's instructions. Don't force the brush sideways; proceed little by little from where it reaches.
It is also important not to move the brush back and forth right next to your eye to fix color that got on your skin. Take the tool away once and check the spot in the mirror. Separating the step of adding to the lashes from the step of removing color from your skin keeps your hand movements organized.
4. Tidy clumped parts with a clean comb before they dry
If lashes stick together right after you apply, lightly comb them with a clean lash comb or spoolie before the product sets. Tidy them along the direction of the lashes, from the root side to the tip, with few strokes.
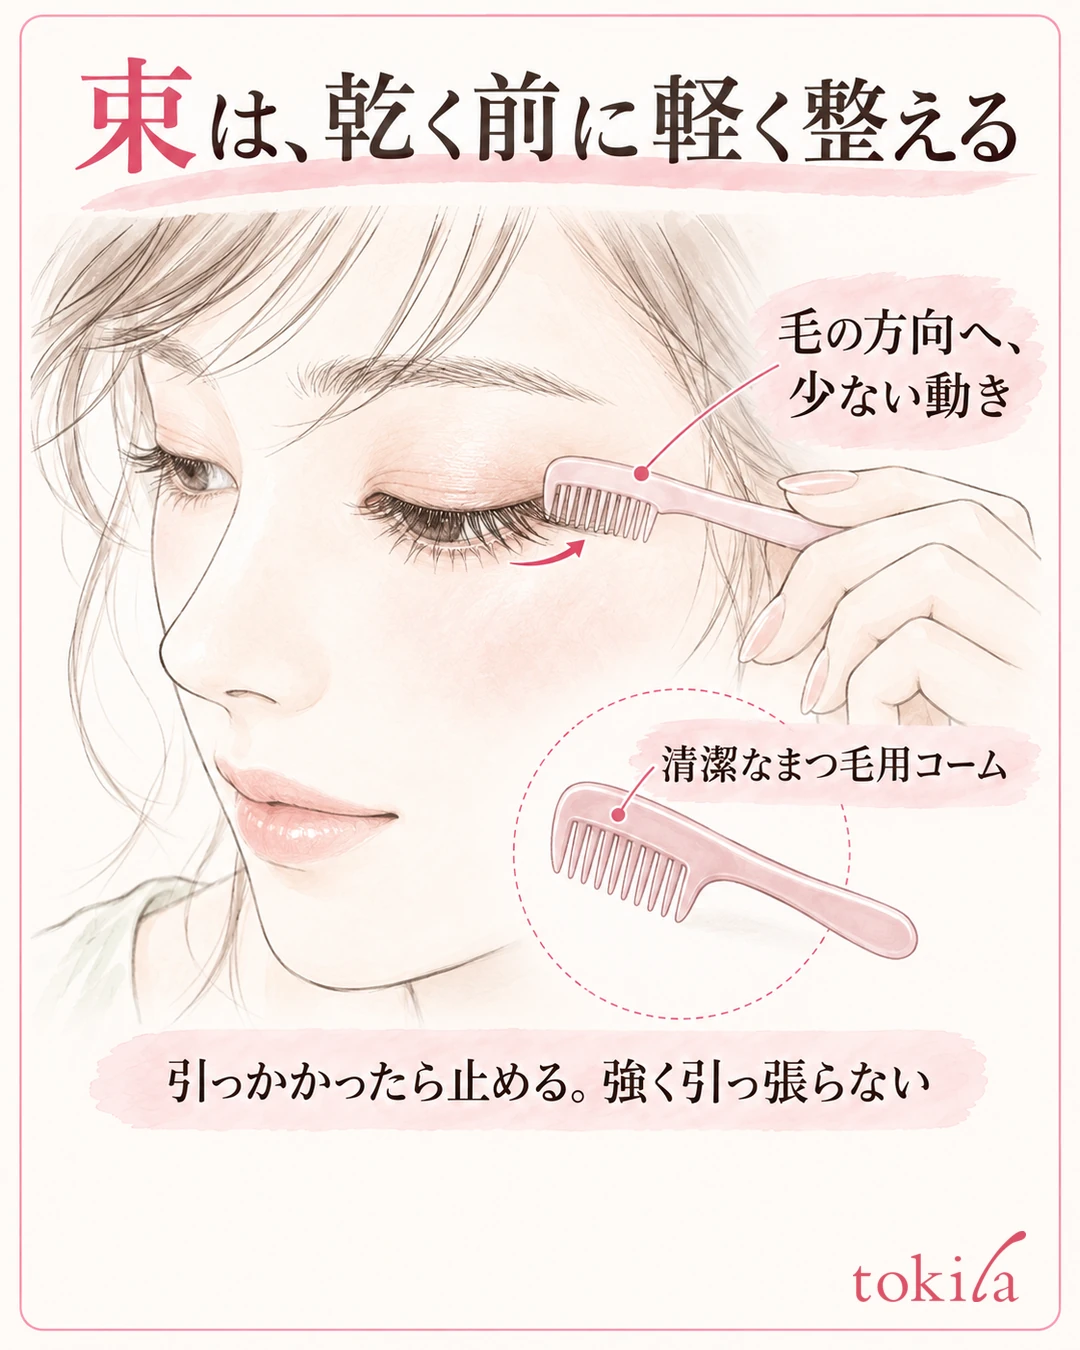
Do this with a mirror in which you can see the position of the tip of the tool, so you don't hurt your eyes. Don't bring it forcibly close to your skin, and don't pull hard on any part that catches. Avoid using sharp objects not meant for lash care, such as needles or pins, to separate clumps.
After combing, don't keep using the tool on the next section with product still on it; clean it according to the tool's instructions. If the removed clumps stay on the tool, they can go back onto the next place you comb. Rather than touching again and again to separate every single lash perfectly, tidy the visible clumps and then go back and check the whole.
For hardened, dried clumps, remove and redo rather than pulling
When a dried lump is firmly tangled in the lashes, don't force the comb through. If it doesn't move with a light combing, layering more product over it will not necessarily make it disappear neatly. First take the tool away from your eyes and remove the mascara in a way that suits the product. Without pinching only the lump or pulling the lashes, tidy the area you can remove without strain and then reapply in a small amount.
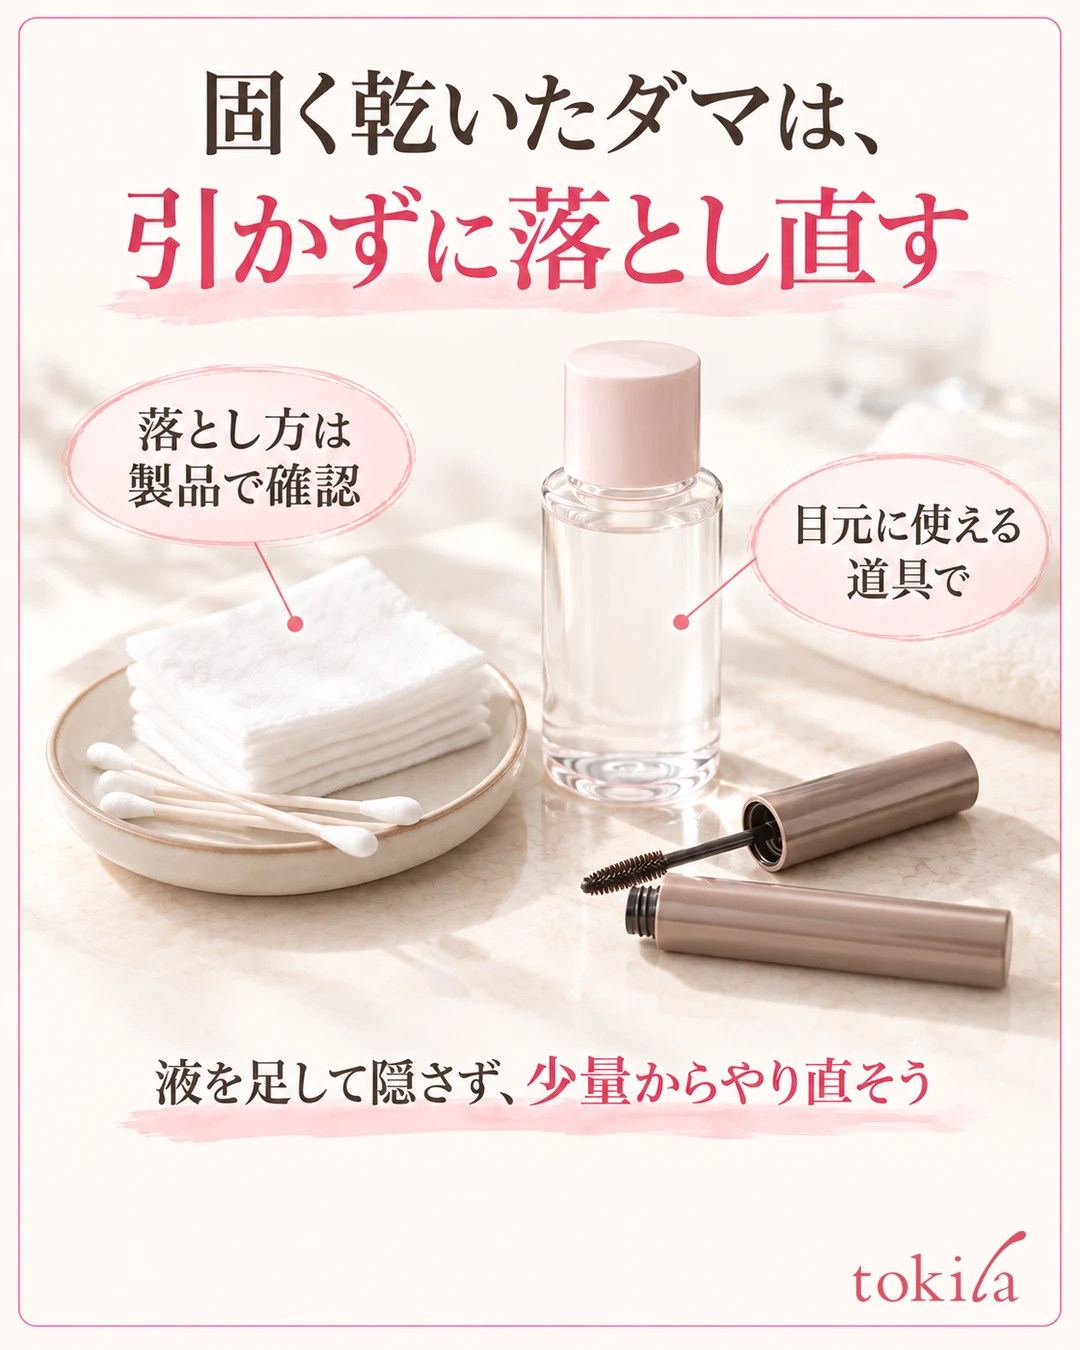
The way to remove it differs by product, such as types removed with warm water and types that use a dedicated remover. When handling with cotton or a cotton swab, don't rub hard, and keep the product from getting into your eyes.
Before reapplying, get to a state where no leftover product or remover remains. On a day when you are rushed and can't fix it, stopping there is also an option, rather than layering more to hide the clumps. If you feel irritation or anything unusual in your eyes, stop using it instead of continuing to adjust the finish.
5. If clumps continue, review the condition of your tools and product
If the same place clumps every time, check the size of the brush, how your lashes grow, and how you move your hand. Are you using a large brush on a small area, and do you keep putting product on the tips? Before replacing the product, try changing the amount and the places you apply one at a time.
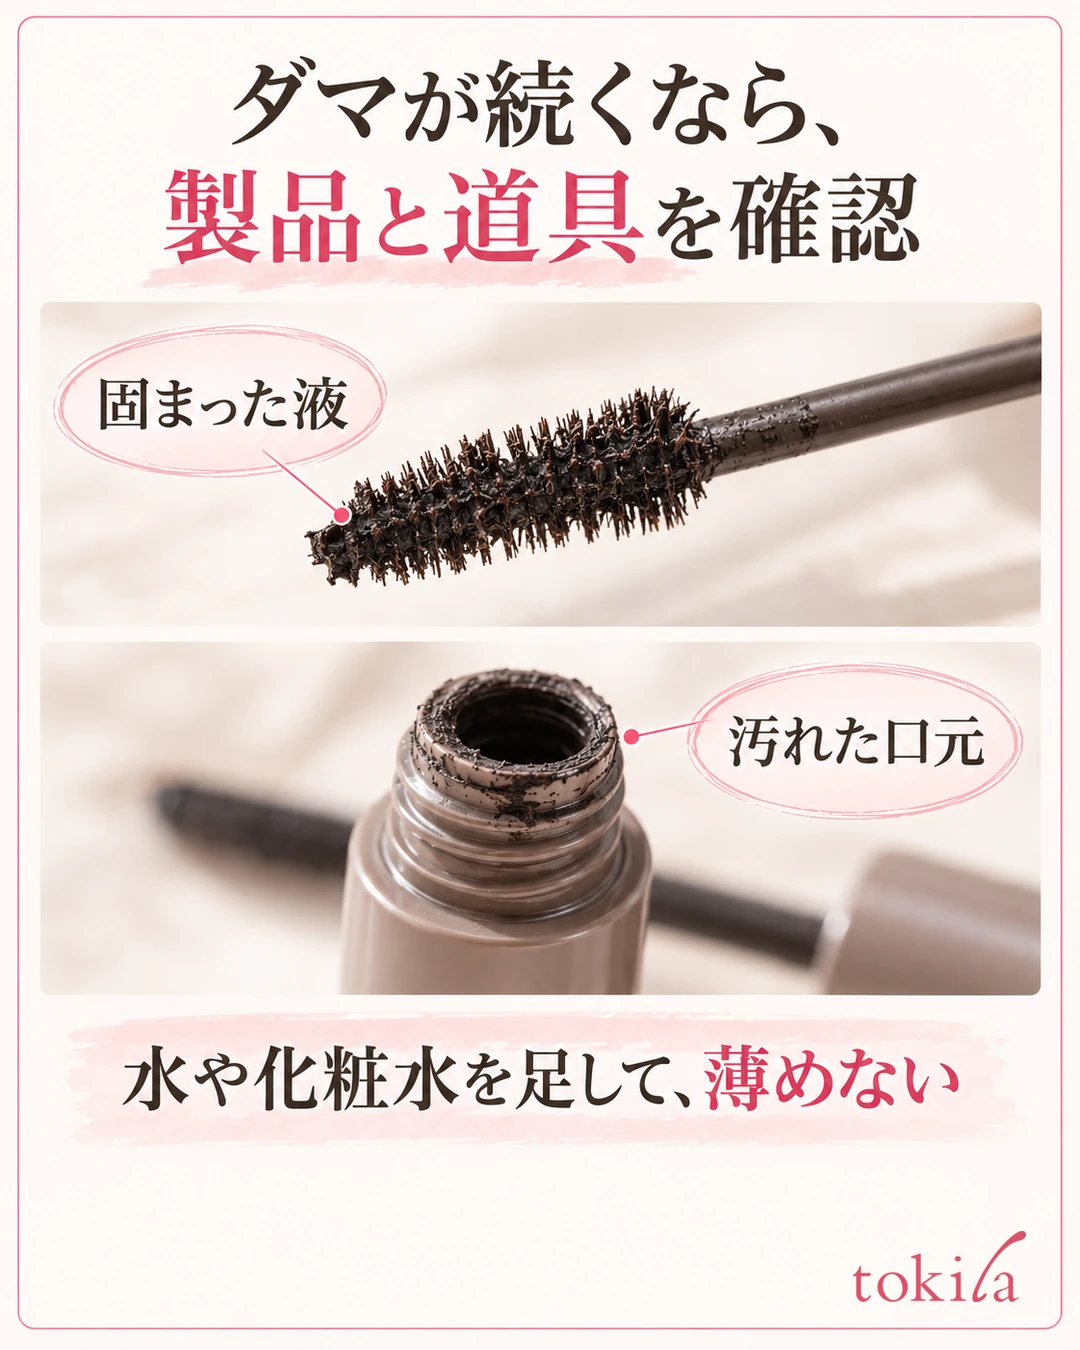
If the brush bristles have hardened and you can't pick up product as usual, consider that the product's condition may have changed. Don't try to revive it by thinning it; check the manufacturer's precautions for use and guidelines for replacement.
After use, tidy the opening, close the cap and store it. Clean the lash comb too, leaving no dirt, in the specified way. Don't share brushes or mascara with others; knowing the condition of your own tools also makes the next day's application easier.
Next time, change just one of "amount, place or timing"
Briefly note the places you fixed today and the actions you changed. Make it something you can repeat next time, such as "reduced the product at the tip," "applied only once at the outer corner," or "combed before it dried." If you change everything at once, it becomes hard to tell which adjustment worked.
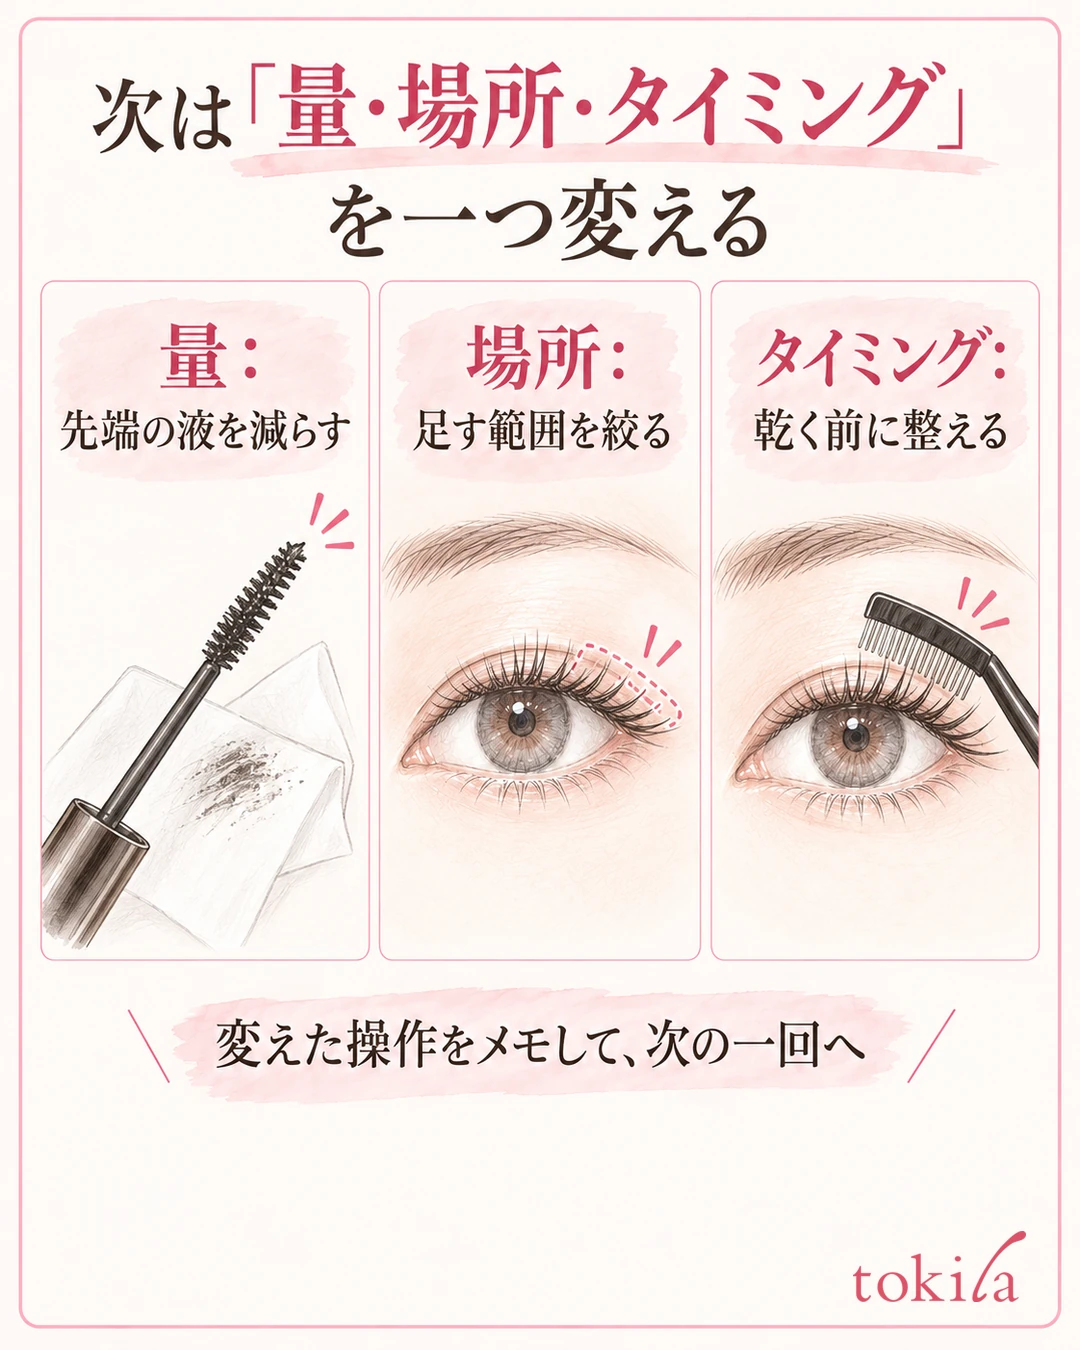
Check where clumps formed first, apply a small amount, and if needed tidy before it dries. Please try this flow with the products you have. For the types and basics of eyeliner and mascara, we also cover them in our basic article on eyeliner and mascara.
Written by the tokila editorial team. The team organized adjustment steps you can try with the tools you already have.
If your lashes won't lift before you apply mascara, you can check where to place the curler, how much pressure to use, and a review of your tools.



