
You just applied your nail polish, yet the color is already gone from the tips. When you layer more color on top, the ridge stands out, and it is hard to know how far to fix. Color loss at the tips is not always the same condition. First, tell apart whether the film of color has chipped, whether the surface has been rubbed thin, or whether a wide area has lifted.
Here we explain how to review regular nail polish that is removed with ordinary remover. Gel polish cured under a light and peel-off types are not covered. Follow the application, drying and removal directions of the product you have, and if the nail itself is cracked or painful, refrain from adding color to cover it up.
1. Tell color loss at the tips apart from chips and lifting
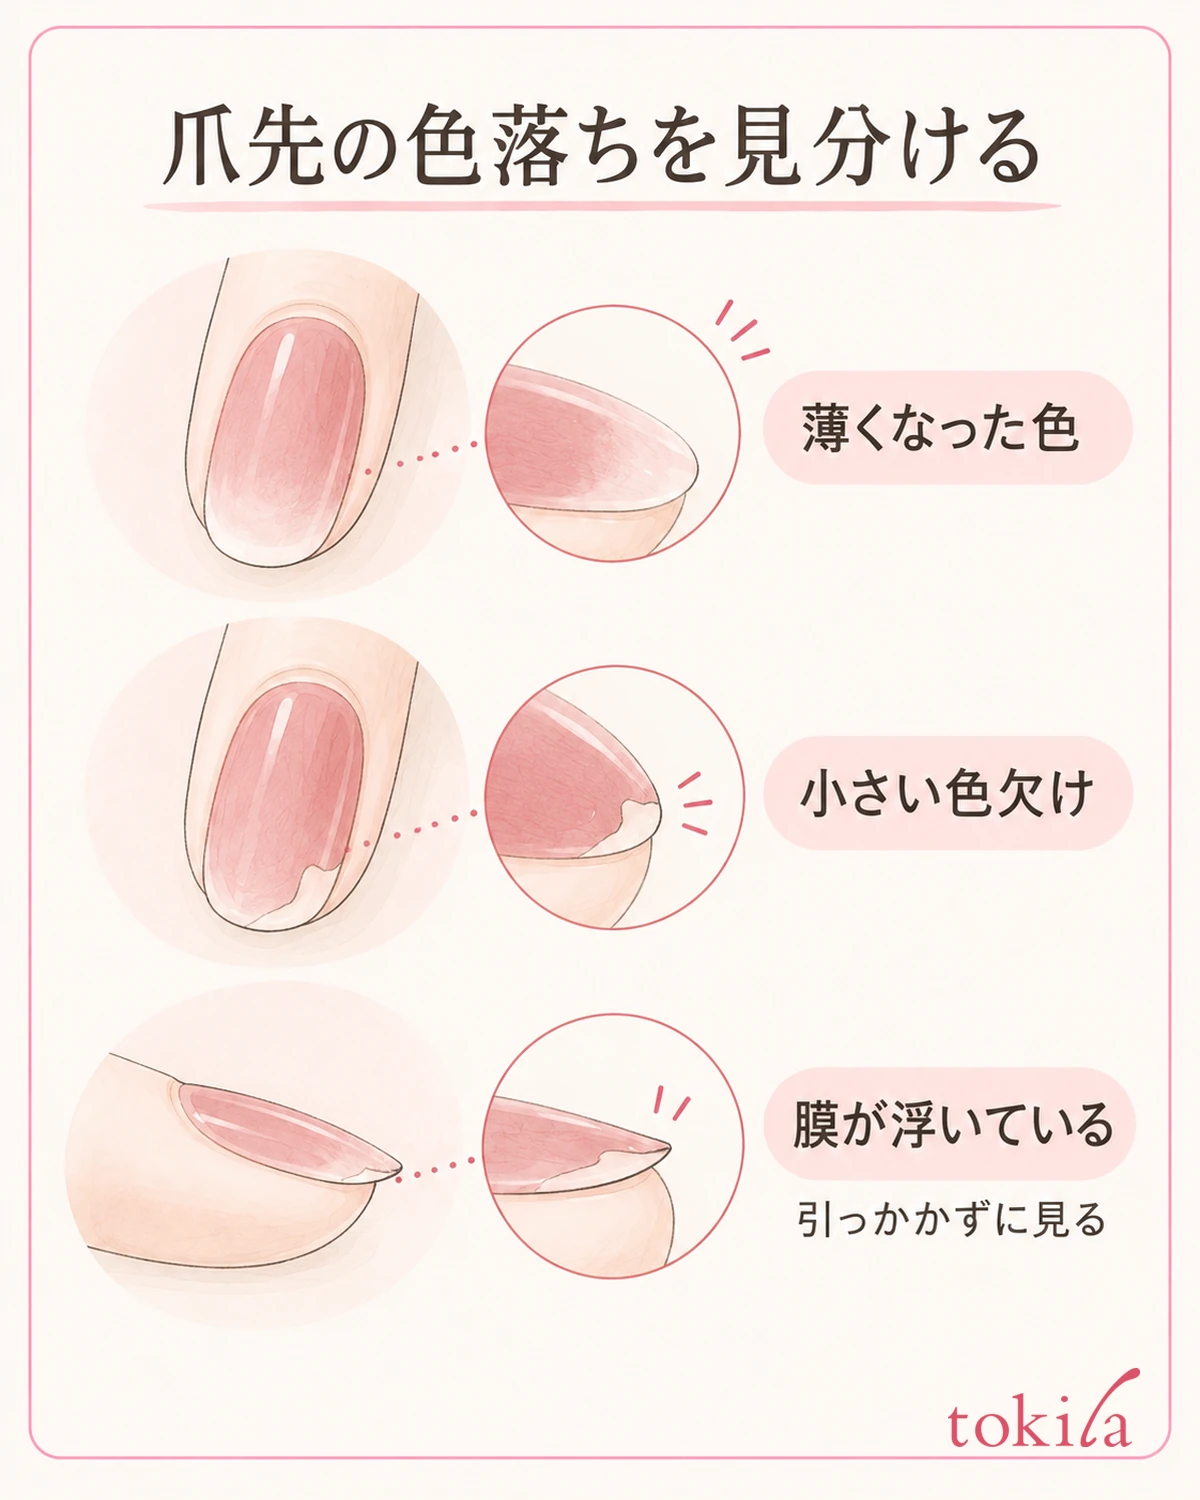
At first, do not add any polish. In a bright place, look at your nails from the front and from the side. Check whether the color has thinned along the tip, whether a part has chipped and the nail shows through, or whether the film of color is lifting. Do not judge only by the whiteness seen in a photo; tilt your hand slightly and distinguish the light reflection from the edge of the color.
A part that has worn thin from rubbing may look continuous along the line of the tip. A small chip, on the other hand, shows an irregular border between the remaining color and the exposed nail. You do not have to decide the cause from appearance alone, though. Noting whether the loss started right after you applied the polish or you noticed it a few days later will help the next time you review.
Do not slip another nail or a tool underneath to check for lifting. If the surface looks raised or you can see a split without touching it, that is a candidate for removing that one nail before applying anything over it. Scratching and widening the border also makes it harder to tell how much needs fixing.
Sometimes it is not only the film of color but the nail itself that is chipped. If the shape of the tip has changed, you can see a crack in the nail, or your fingertip feels strange, treat it separately from repairing the polish film. Do not substitute the partial fix introduced here for gluing a cracked nail or keeping a damaged part covered.
Also look at which fingers on the left and right hands it happened to. Checking whether it is one finger or all of them lets you separate a missed spot during application from how you use your fingertips in daily life. Do not conclude that it is "definitely a missed spot" just because the tip looks white; check how you handle the product in the next step as well.
The decision before adding color is not made by the time since application alone. Even after a short time, if the film has lifted over a wide area, do not continue with a partial repair; and even after several days, if there is only a small color chip, choose after checking the condition and the product's directions. Do not increase the number of layers just because it always peels after the same number of days.
2. Before repainting, check the nail surface and the product's directions
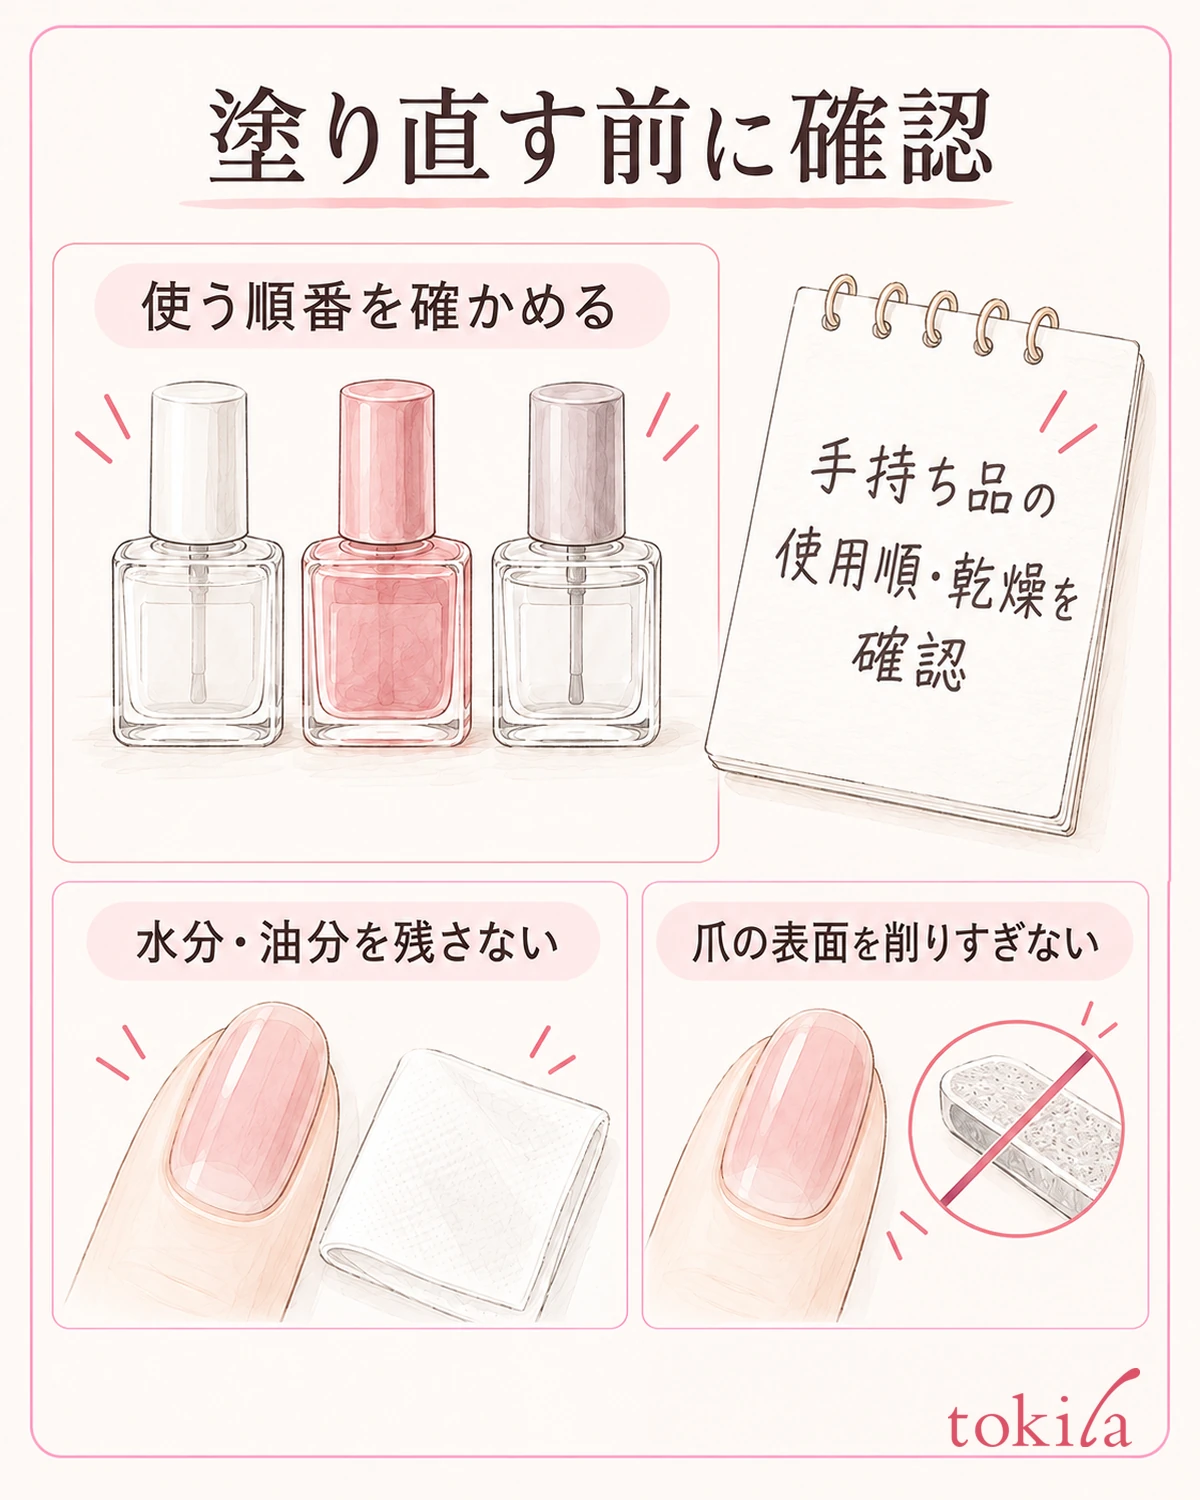
To repaint one nail, use the matching remover and take off the remaining polish as the label directs. Avoid peeling the color off or scraping the border to match the surroundings before painting. After removing it, look for leftover color or any abnormality on the nail, and check whether that finger is in a condition to be painted right away.
Next, check the combination of color, base and top coat you will use. The steps differ between products that need a base and those that finish in one coat. Do not decide "I want it to last, so I will layer everything"; check the order of use and the drying conditions before layering, as shown on the container or in the instructions, as one set.
If hand cream or nail oil remains on the nail surface, do not layer color over it as it is; do the preparation described for the product you use. Follow the product for how to remove oil and which liquids you can use, and do not substitute a strong household detergent. Do not start painting with water droplets still on your hands after washing; wipe the moisture off.
You do not need to buff the nail surface over and over on the assumption that the peeling was caused by insufficient preparation. Do not bring gel preparation or a primer straight into a regular polish touch-up. Rather than adding steps, check one by one whether you match the directions of the product you have.
It is also a good idea to arrange in advance the things you plan to touch, such as caps and your smartphone, so that you do not have to go back to work right after painting. If you have no time to let it dry, you can also choose to repaint one nail calmly later instead of rushing to apply it thickly. Do not use a uniform number of minutes for waiting; check the product's instructions.
3. When painting the tip, do not let the polish wrap around to the underside
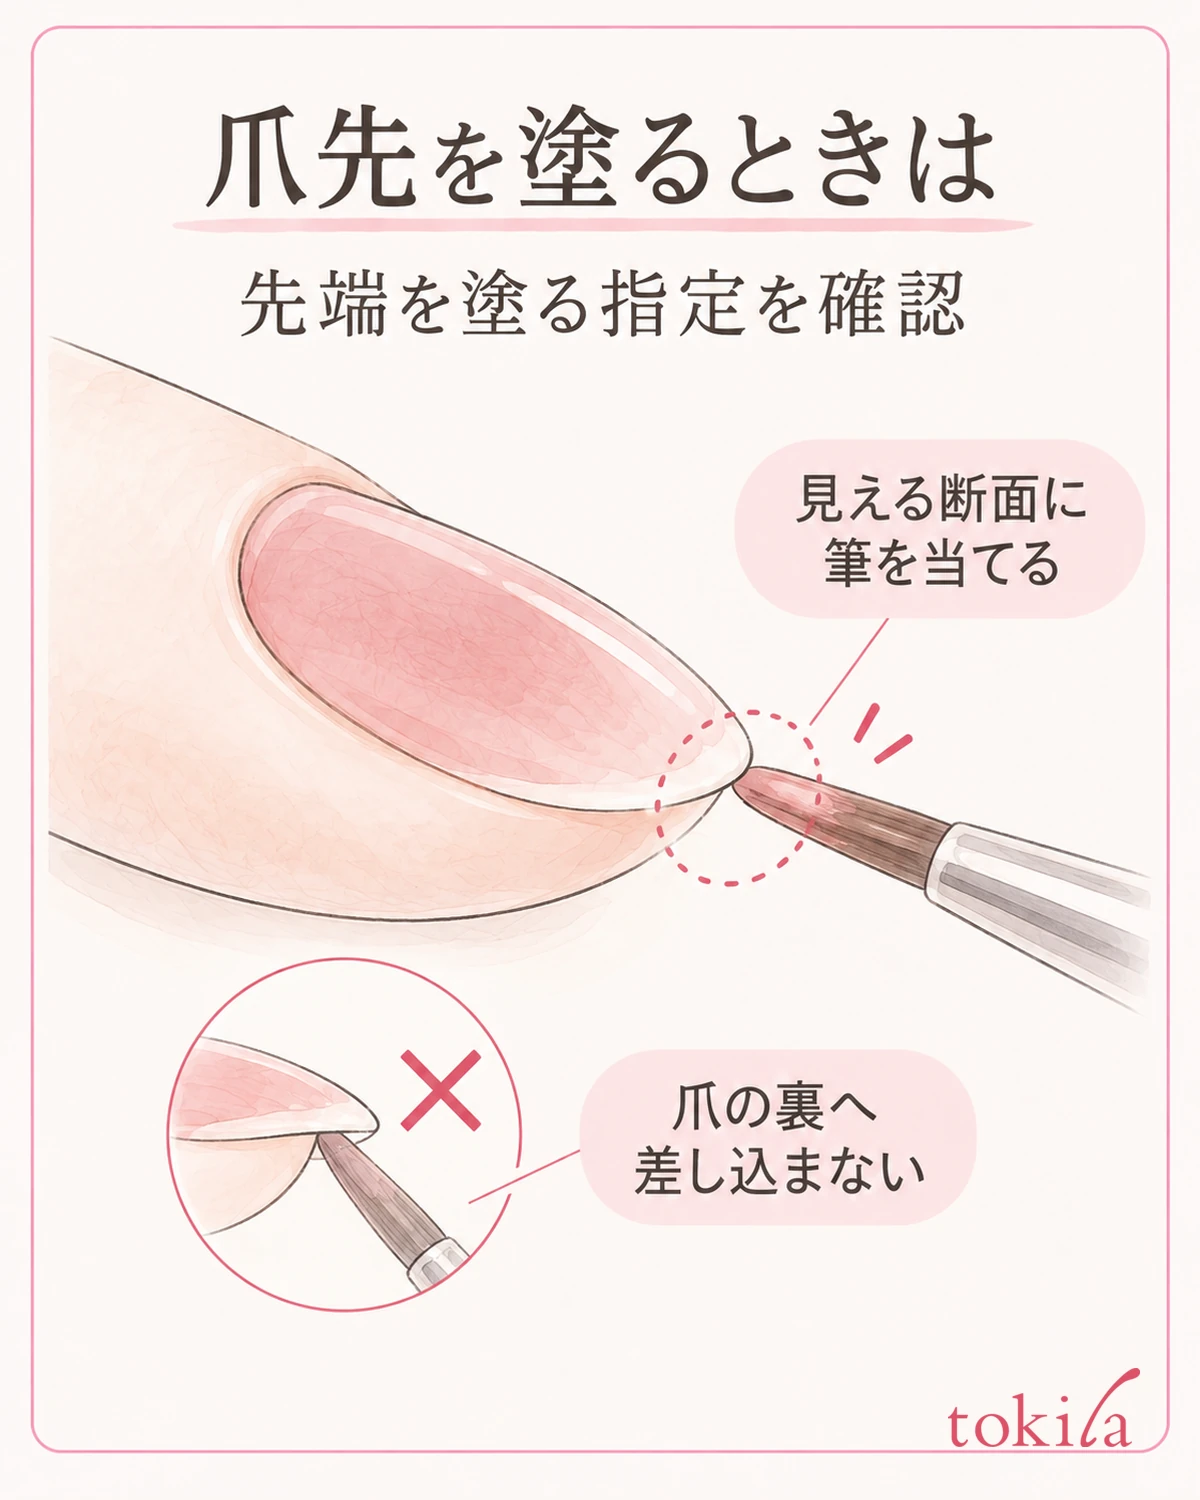
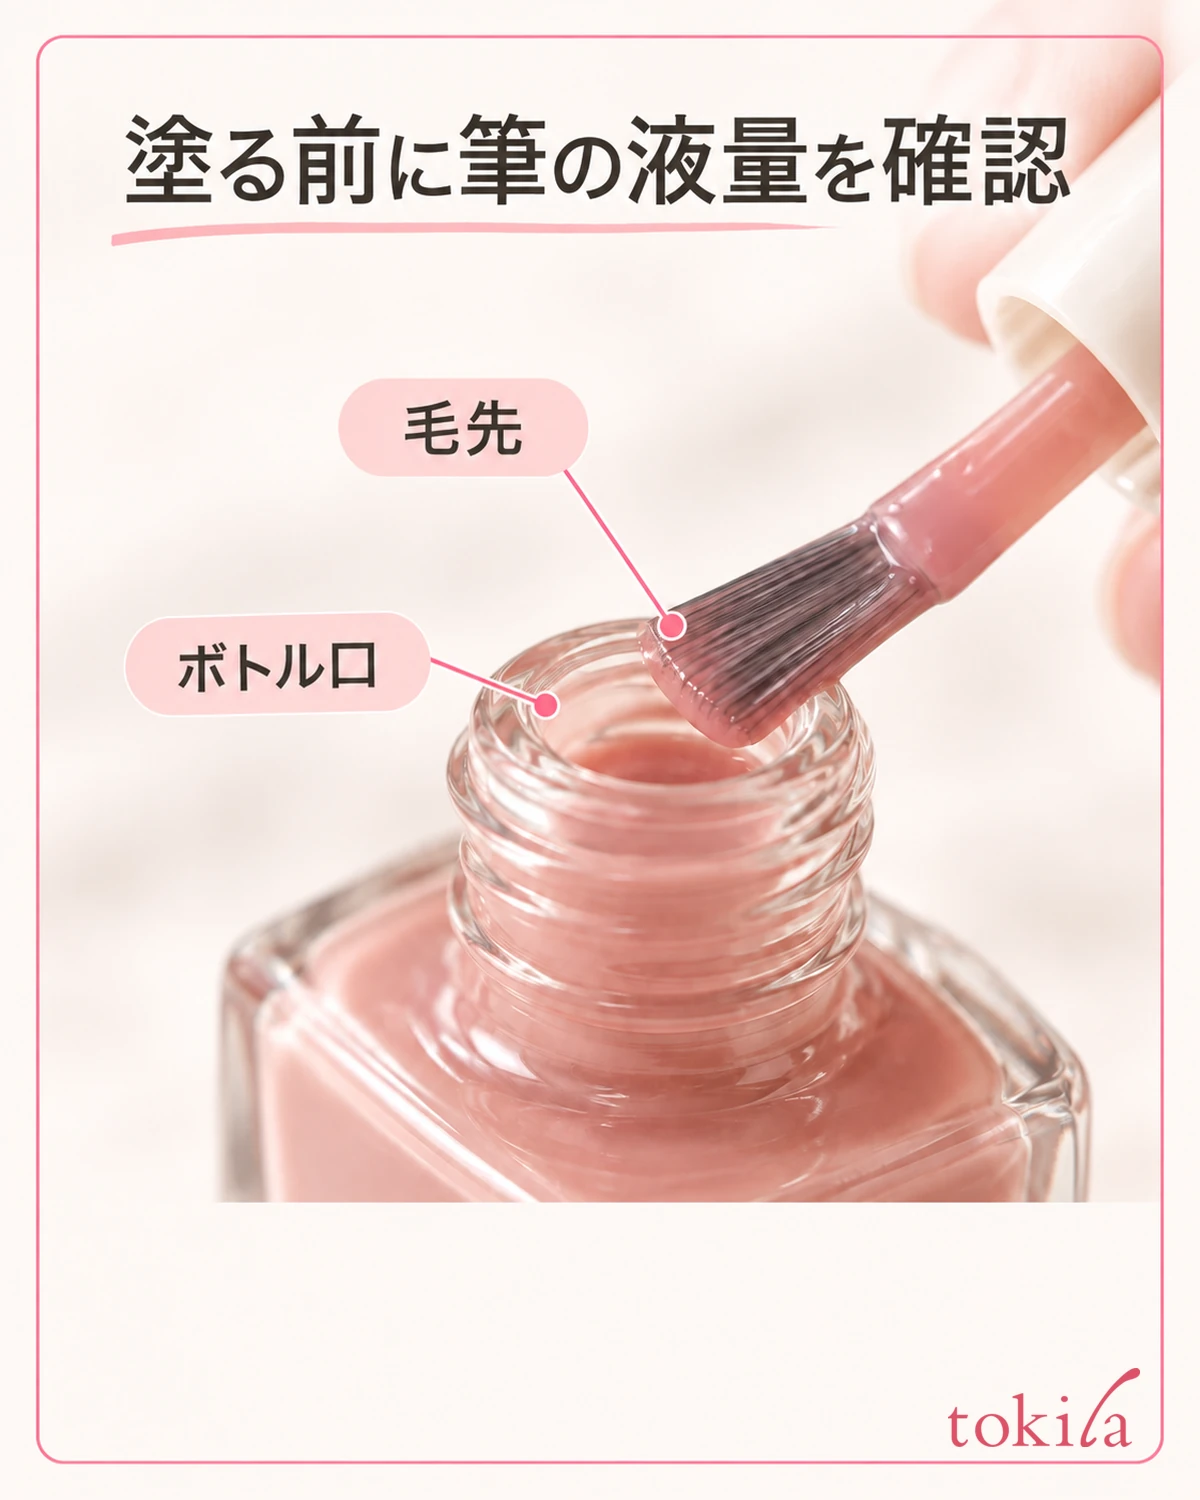
The thin cross-section of the nail tip faces a different direction from the nail surface. If the product you have gives a method for painting the tip, tilt your finger slightly and align the brush tip with the visible cross-section. Just because the color has come off, you do not need to place a large bead of polish on the tip alone. First, adjust the amount of polish on the brush.
When adjusting the amount at the mouth of the bottle, follow the product's directions so that polish does not keep dripping from the tip of the brush. If it feels like too much at the moment you paint the tip, lift the brush once and pick up the amount again. Rather than rubbing back and forth many times after painting to spread the polish, be careful in checking before you touch.
Lightly touch the brush to the visible cross-section of the nail tip, and do not push it under the nail or into the skin of the finger. Do not take the phrase "wrap the tip" to mean pouring polish under the nail. If polish gets on the skin, do not finish with it there; remove it following the product's directions.
If you keep your nails short and the cross-section is hard to see, do not press down on the pad of your finger by force or push the brush further in. Give priority to the range you can paint and the product's directions. Painting the tip alone does not necessarily solve the tendency to chip. Review the thickness, drying and how you use your fingertips separately.
Match the order of painting the surface and the number of layers to the polish you use. If you paint the tip many times and then also gather polish from the surface, that spot may look thick. Turn your hand sideways to check for pooling, and keep to the specified drying conditions before layering.
4. Try a thin layer for small color chips, and repaint one nail if a ridge remains
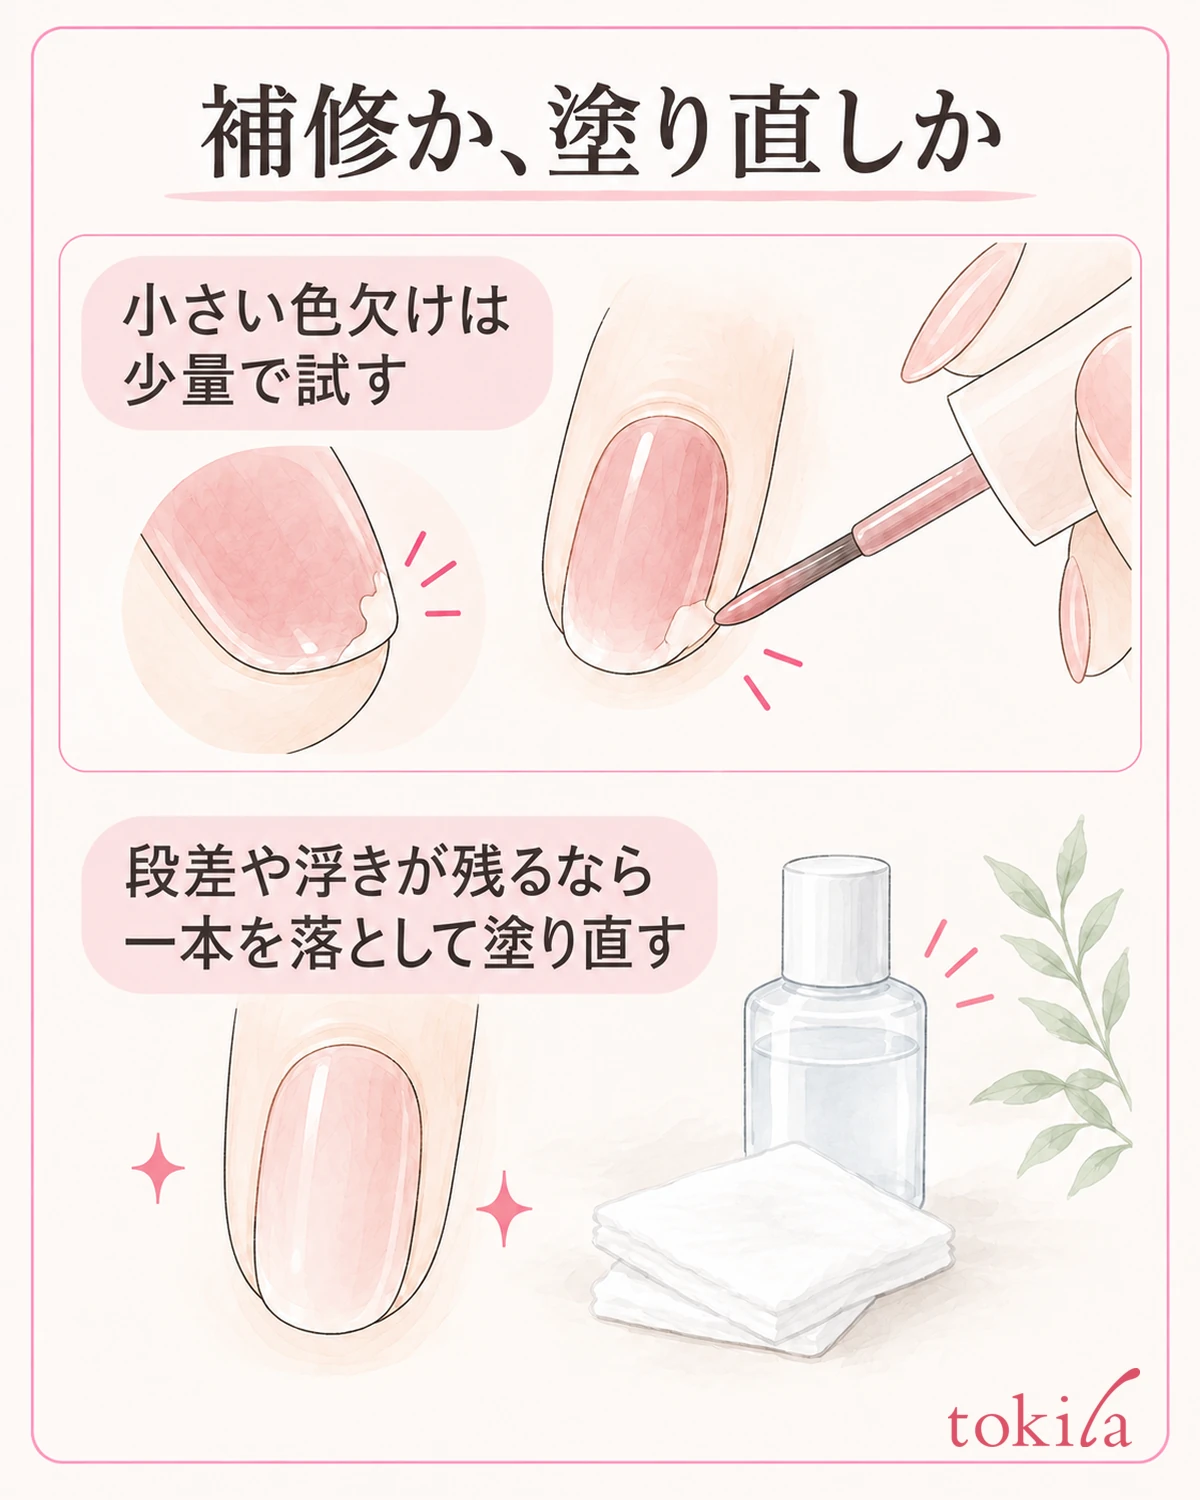
Try a partial fix only when the color chip is small and you can confirm that the surrounding film is not lifting. Check that the product you use can be layered, and place a small amount of color on the chipped spot. Do not paint several thick layers out to the surroundings from the start; lift the brush once and look at how the color connects and at any ridge on the surface.
Do not build up the polish as if filling a hole left by the chip. Even if the color connects, if the border stands out when light hits it from the side, stop adding more. Dark colors, sheer colors and glitter look different when repaired, so do not assume every color will finish the same way.
If the color does not match, the border spreads or the surrounding film shifts, do not continue the partial fix; removing the polish on that nail with the matching remover and repainting makes the process easier to sort out. You do not necessarily have to remove all ten nails, but also avoid forcing polish onto a nail that has an abnormality.
Top coat, too, is not used like an adhesive to hide a chip. Confirm that the color applied first has dried to the specified state, and finish with an amount and range that match the directions. Methods such as adding more polish to press down a lifted film, or dripping remover directly onto the nail to dissolve the border, are not done here.
Even if the repaired spot bothers you, do not press it with a nail or keep touching it with your fingertip while it dries. After it dries, look at it again in a bright place, and if a bothersome ridge remains, switch to repainting one nail next. Rather than increasing the number of fixes in a hurry, decide in advance when to stop.
5. Do not use your nail tips as tools, and pick one step to review next time
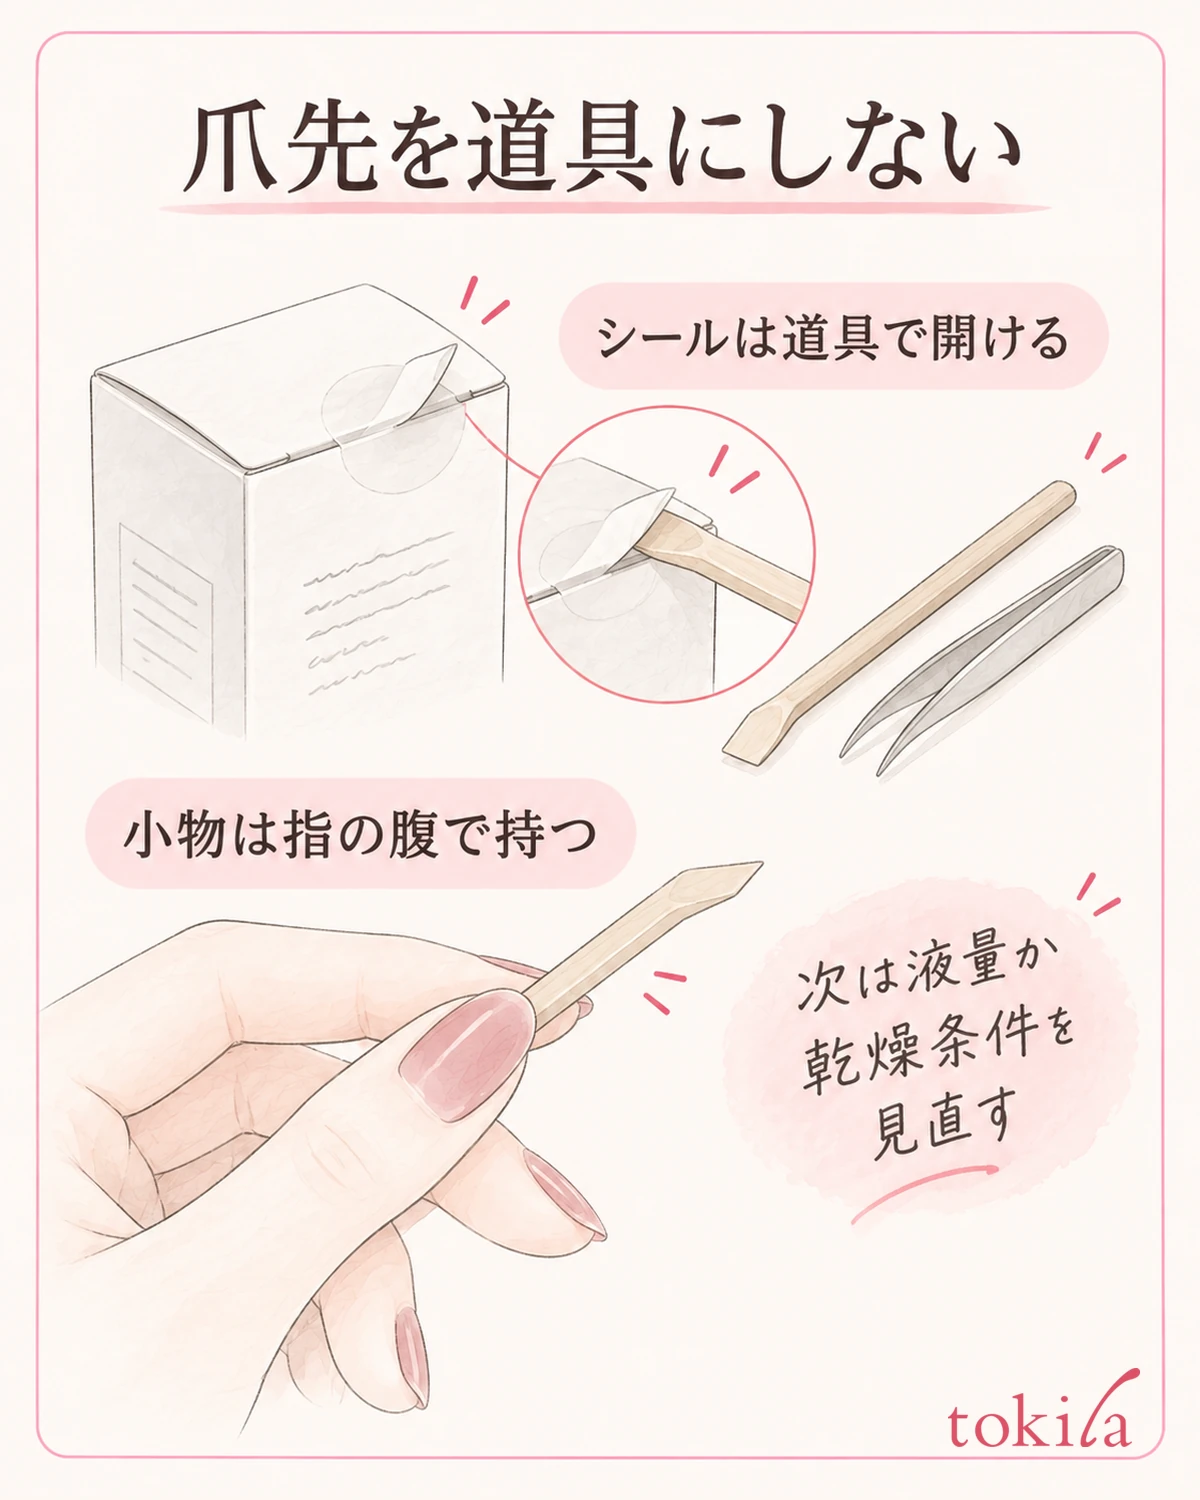
Even if you repaint neatly, peeling a sticker off with your nail tip or pushing a nail into the gap of a lid puts force on the tip. When opening packaging, use a tool that suits the purpose, and when holding small items, use the pad of your finger; try looking back at whether you are using your nails in place of a tool.
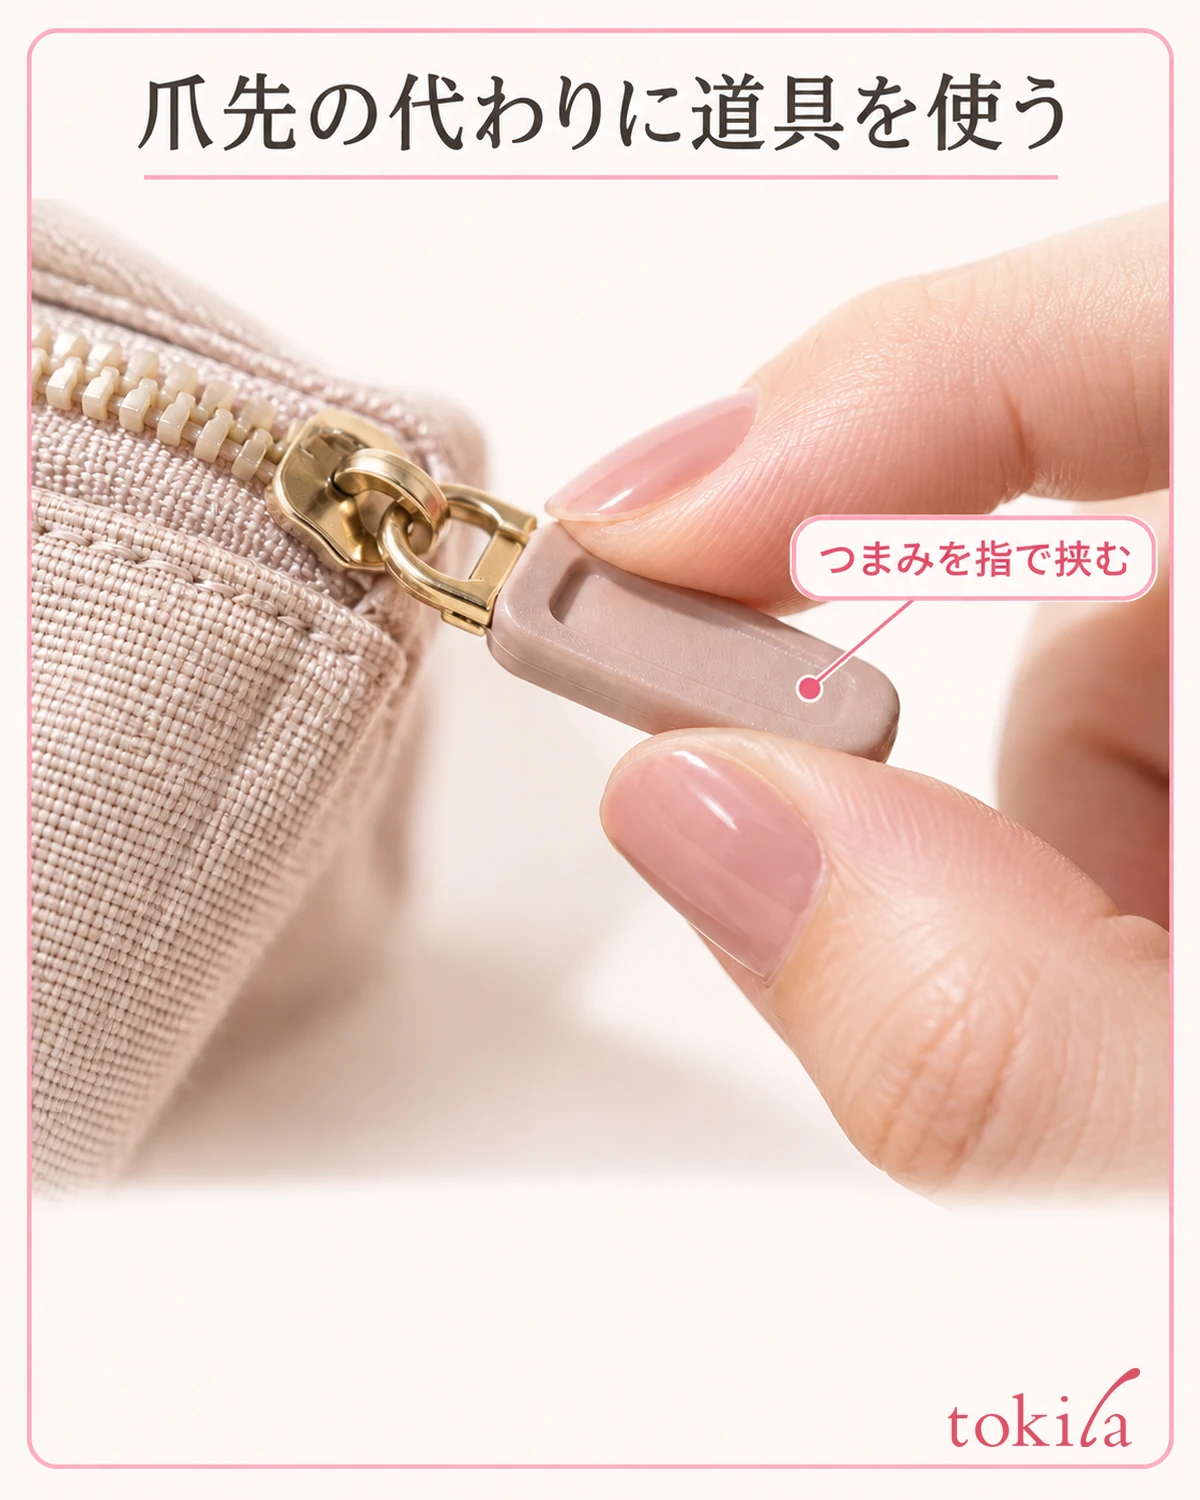
If the color comes off only on a particular finger, recall one situation in which you often use that finger. Before changing how you paint every finger on both hands, check whether you catch the tip on something while working. If you use household gloves, choose ones that suit the task and your size, and do not put them on or take them off before the polish dries, so you do not rub the surface.
Moisturizing the area around the nails after washing your hands or when they feel dry should follow the directions of the care product you use. Keep this separate, however, from oil remaining on the surface just before repainting. Rather than declaring that stopping moisturizing makes polish last or that applying oil prevents chipping, sort out the care steps and the color steps.
Next time, pick one step from "adjust the amount of polish on the brush first," "check the visible range of the tip" and "keep to the drying conditions before layering" in which your check was vague. If you change everything at once, you will not know what made the difference. Even a short note of the finger and the situation you noticed will make it easier to choose the next point to check.
If your hand support is unstable while painting, also see how to support your hand when painting your dominant hand's nails. If bubbles are your main concern, go to steps for reviewing bubbles in nail polish. This time, start by observing the condition of the nail tips, and if a small repair does not even things out, remove that one nail and repaint it.



