
You try to take off a brooch, but the small metal fitting on the back won't move. When you pull the clothing, the fabric comes along with it, and you can't tell where the pin is. In that case, before using more force, take another look at the shape of the fastener and how the fabric overlaps. Even with the same brooch, the place to release differs between one that tucks a long pin into a catch and one that attaches a clasp to a short pin.
This article sorts out the steps for a brooch you have been wearing: preparing before you remove it, pulling the pin out of the fabric, and closing it and putting it away. It is not a procedure for repairing or disassembling the fastener. The basic approach is to match your item's instructions to its actual structure and handle it only within the range where it moves naturally.
1. Before moving the pin, tell the shape of the fastener
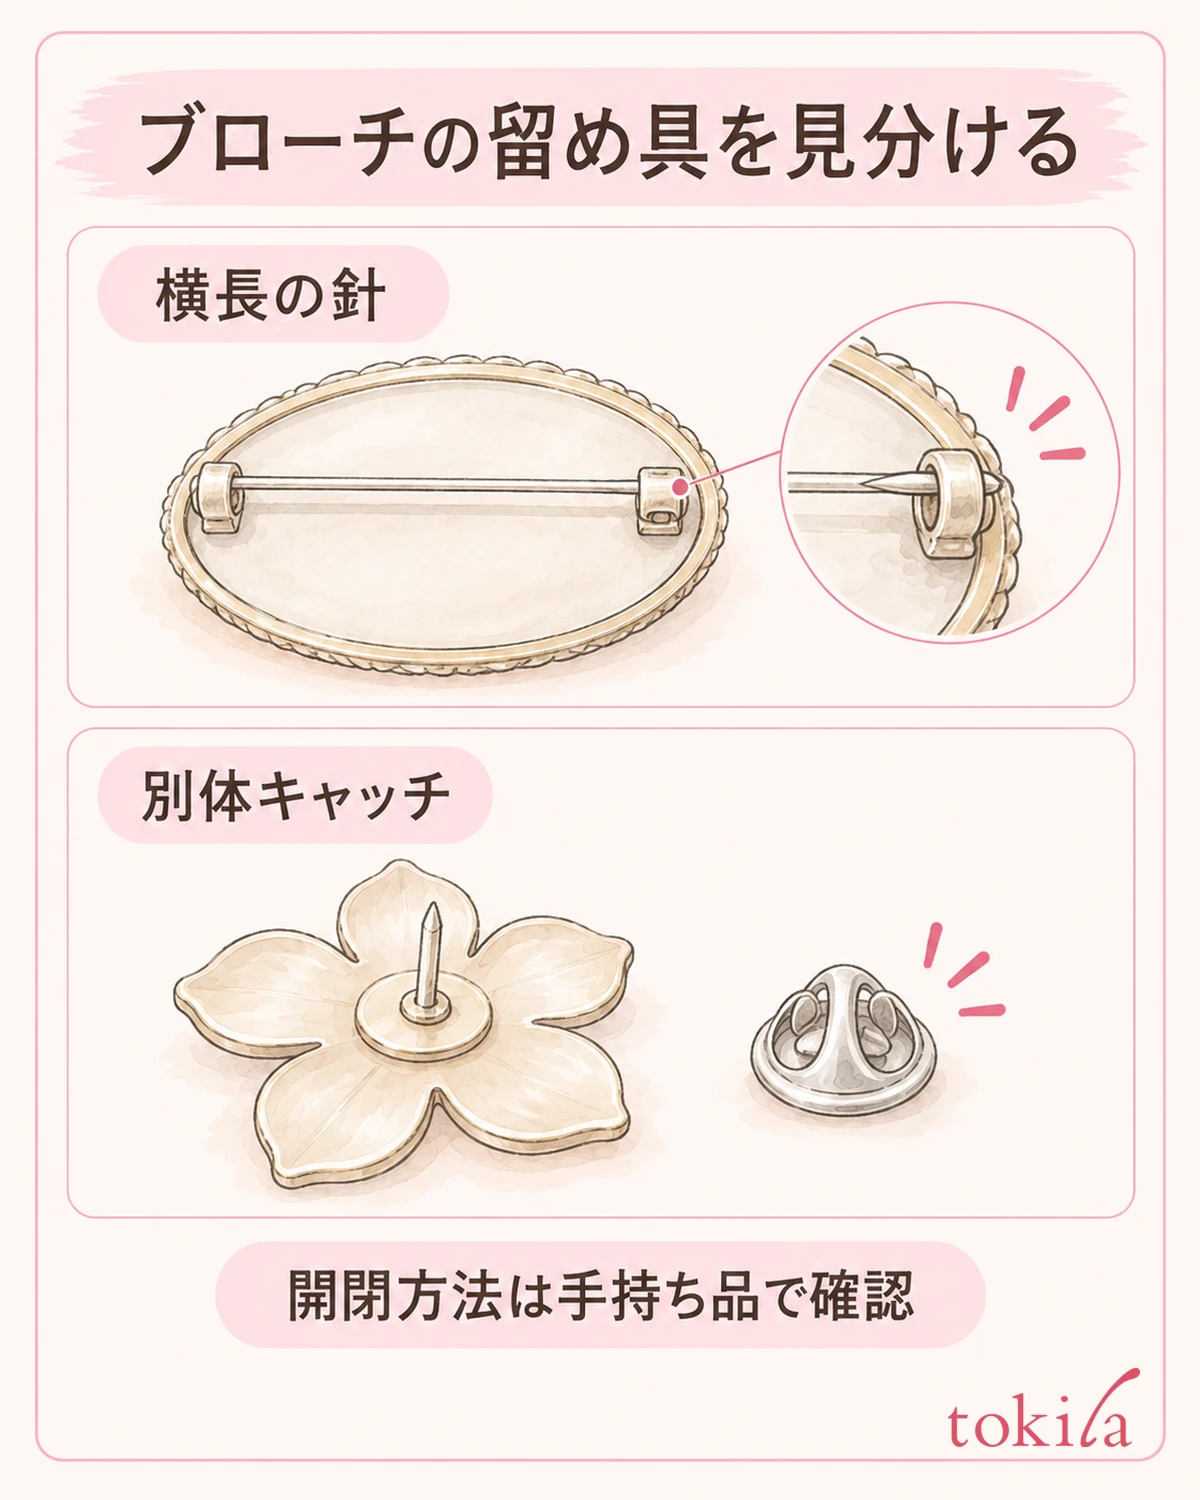
First, create a situation where you can see the back of the brooch. If it is on a jacket, take it off if you can, place it somewhere bright and check. Rather than bending your neck to look while wearing it, or feeling for the fitting by finger alone, give priority to confirming the positions of the base and the tip of the pin with your eyes. When you take off your clothes to remove it, make sure your hands or other clothes don't catch on the brooch.
In a form where a long pin spans the back and one end is joined by a hinge, there is a catch on the opposite side that holds the pin tip. Distinguish between a catch that has a small rotating part and one that works some other way. Do not decide it is a rotating type just because it looks round; check the opening and closing part described in the instructions you have. You do not open it by rotating the pin itself.
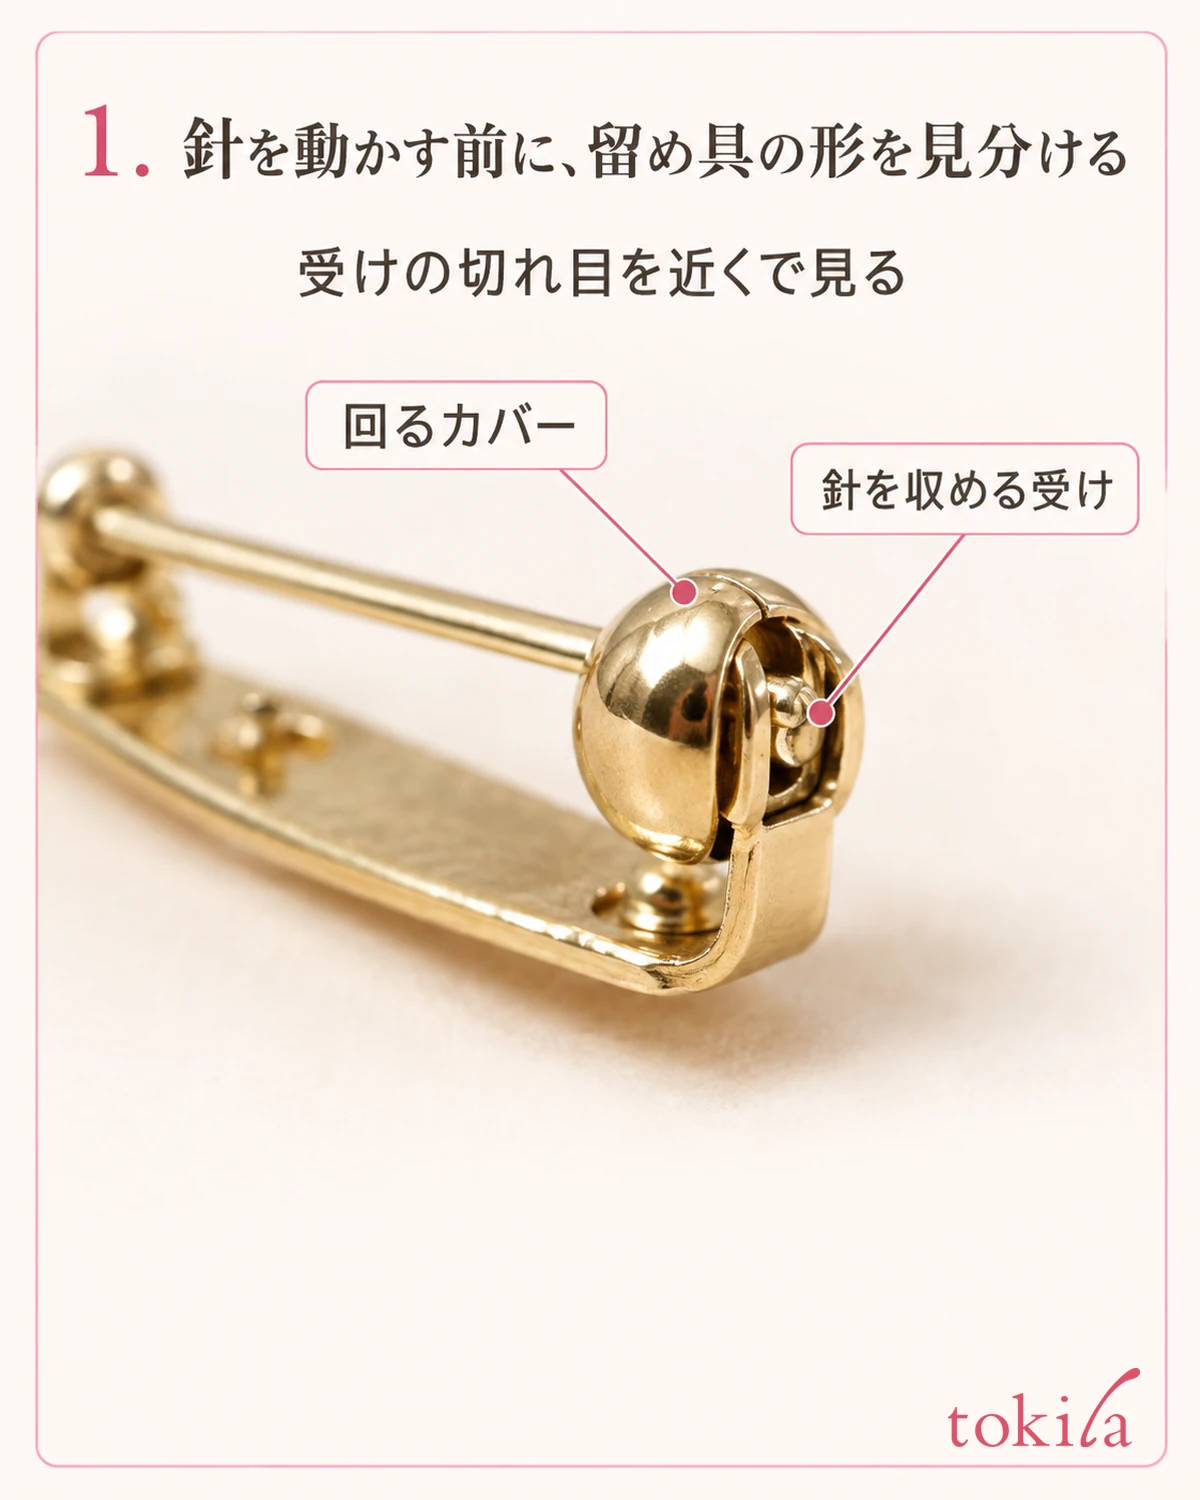
In a form with a short pin and a separate clasp, look at the tab or lock on the clasp side. Some use tabs on the left and right, and some pull the rear part, so the same removal method cannot be used for all. Do not apply the operation for a long pin; if you can't find a matching explanation, go back to the stage of checking how to remove it.
Even if you don't know the names of the fittings, simply distinguishing whether the pin spans sideways, sticks out briefly from the back, or has a detachable part narrows down where to check. If you record the shape, do not bring your fingers close to the pin tip, and keep a record, such as a photo, of what is visible. It is important not to judge a fastener by the design of the ornament alone.
If you have added another accessory to your clothes right before removing it, it can be hard to see which pin connects to which fitting. When you have several brooches, check them one at a time, and do not use a brooch that is still attached as a support. If the fastener is hidden under hair or a stole, first move those aside gently so it is visible.
2. Support the body and the fabric, and make the path of the pin tip visible
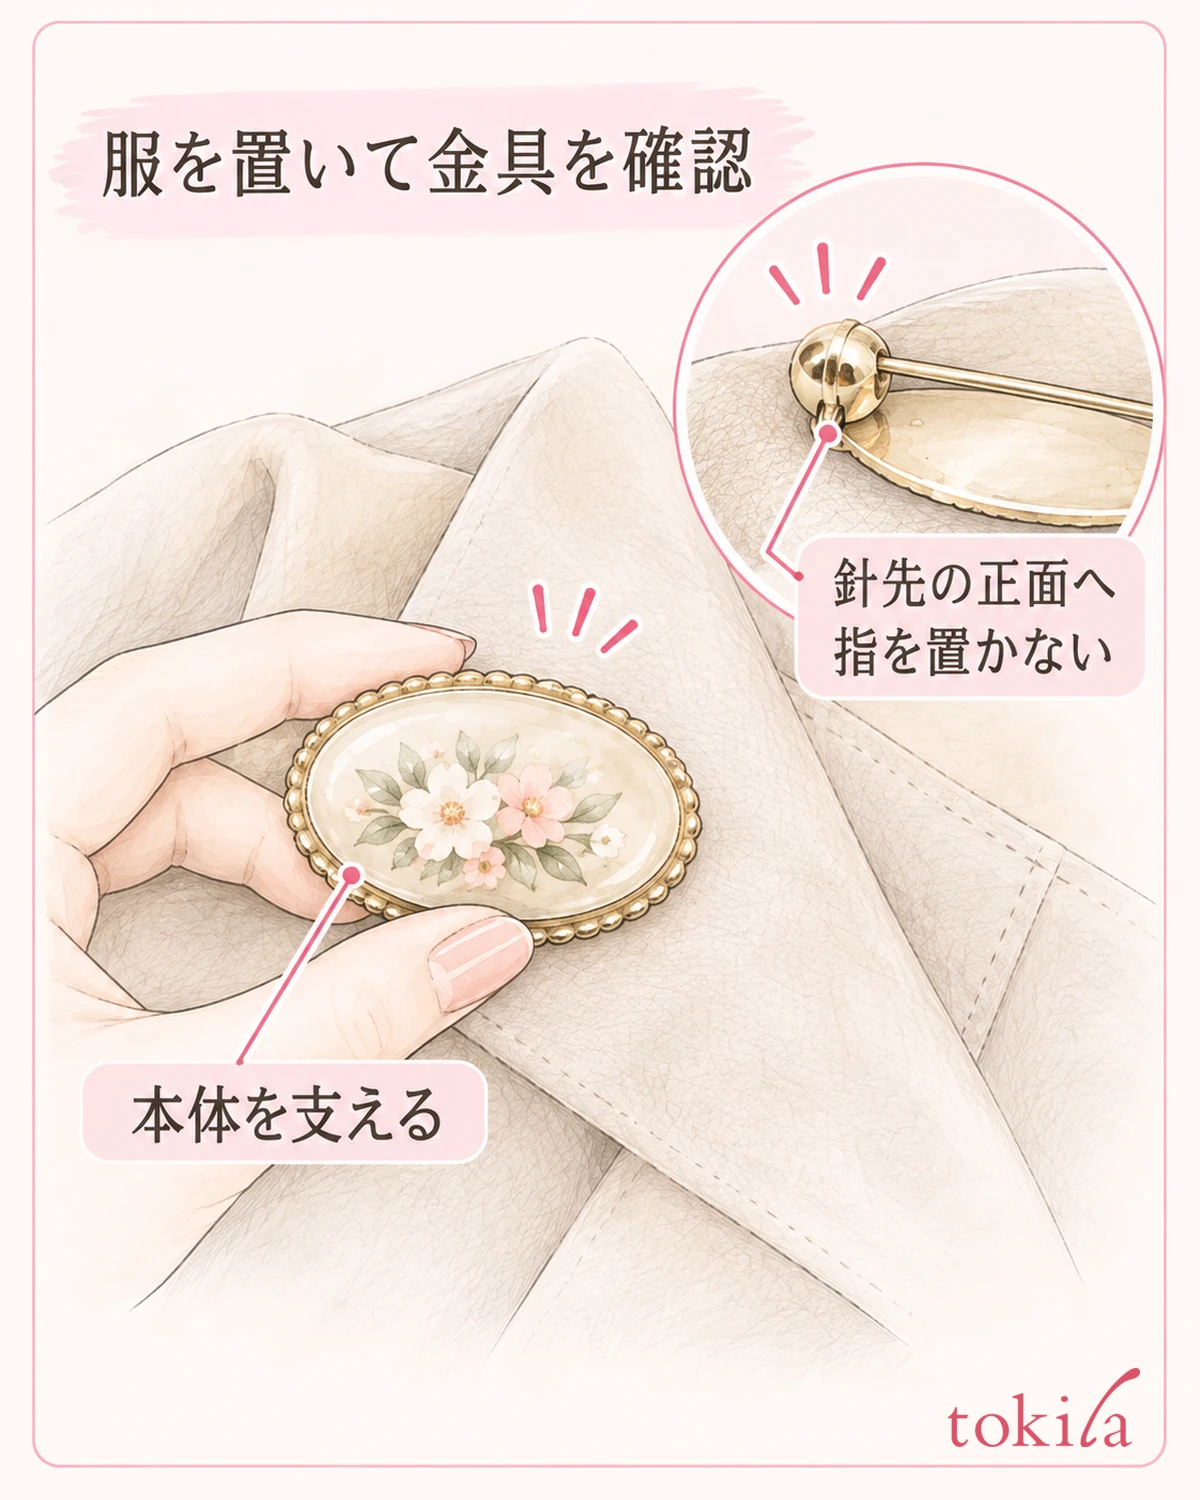
Once you know the type of fastener, work in a place where the brooch won't fall. Use a clean surface where you can lay the clothes, arrange them so the area around the fitting is visible without stretching thin fabric tight. If you lay a soft cloth underneath, choose one whose pile or threads won't tangle in the fitting, and follow the instructions if any material is to be avoided. For a form where you remove a small clasp, decide beforehand where to put it.
Support the decorative body with one hand and operate the opening and closing part with the other. When supporting the body, do not pinch and pull thin ornaments or stone projections; rest your fingers on a part you can hold without strain. Avoid holding methods such as pressing the base of the pin against the clothing or placing a finger in front of the pin tip. If you still can't see it with both hands, change the orientation of the clothing.
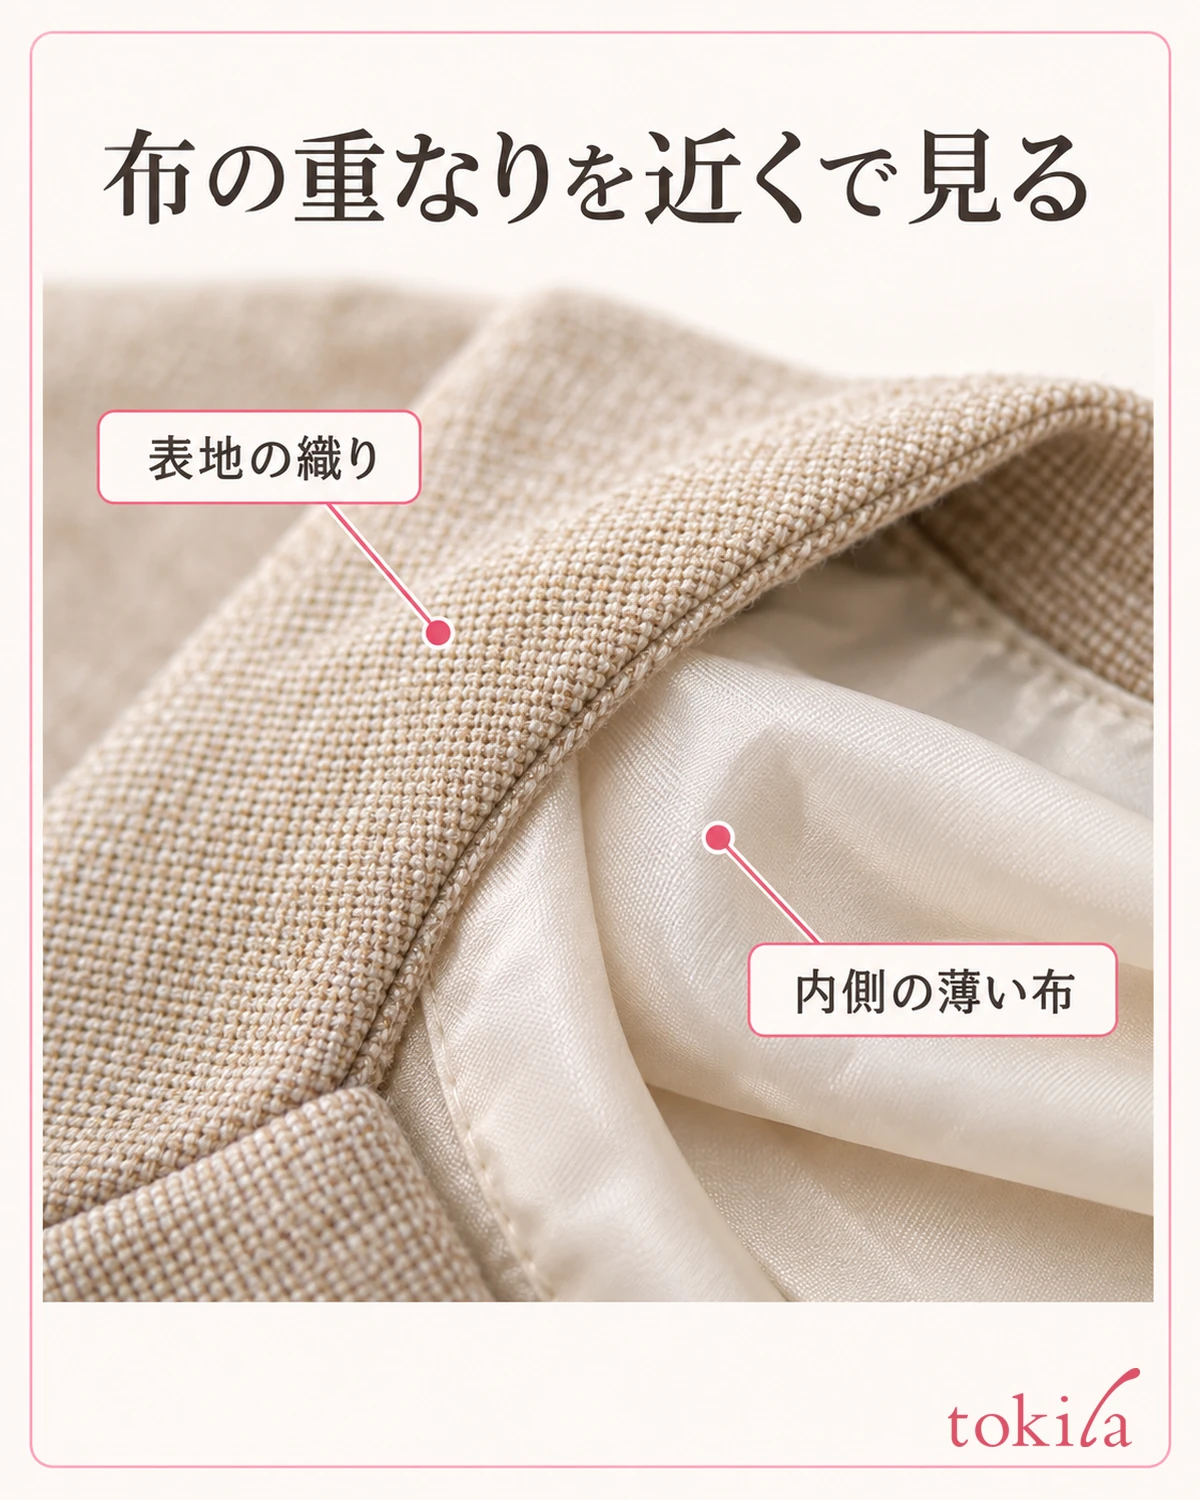
Also check how many layers of fabric overlap. Whether it is only the outer fabric or also a folded-back collar or lining that the pin passes through changes the range you support when pulling the pin out. Rather than stretching the fabric hard to make a path, find the place where the pin went in and the place where it came out, and keep the fabric between them in its natural state.
If it is attached to a stole or knitwear, check whether loops of yarn or pile are caught on the fitting. If you lift the body while it is tangled, it becomes hard to tell which part is being pulled. Do not cut threads that can't be lightly freed with your nails or scissors; leave the snag as it is so you can ask for advice.
If you lose sight of the pin tip while working, do not keep going by feeling for it with your fingers; return your hand position and the orientation of the clothes to where they were. Before the step of pulling out the pin, get into a state where you can see the body, the fitting and the fabric at the same time. If the person spreading the fabric and the person moving the fitting are different, speak up before moving, and do not pull the body suddenly.
Decide the orientation not by your dominant hand alone, but by whether you can hold it without hiding the opening and closing part. Turn the clothing so the position of the pin is visible, and do not cover the rotating part with the fingers holding the body. When you turn the ornament over to look at the fastener, do not twist the fabric; slowly change the orientation of the whole garment.
3. Release your item's lock before separating the pin
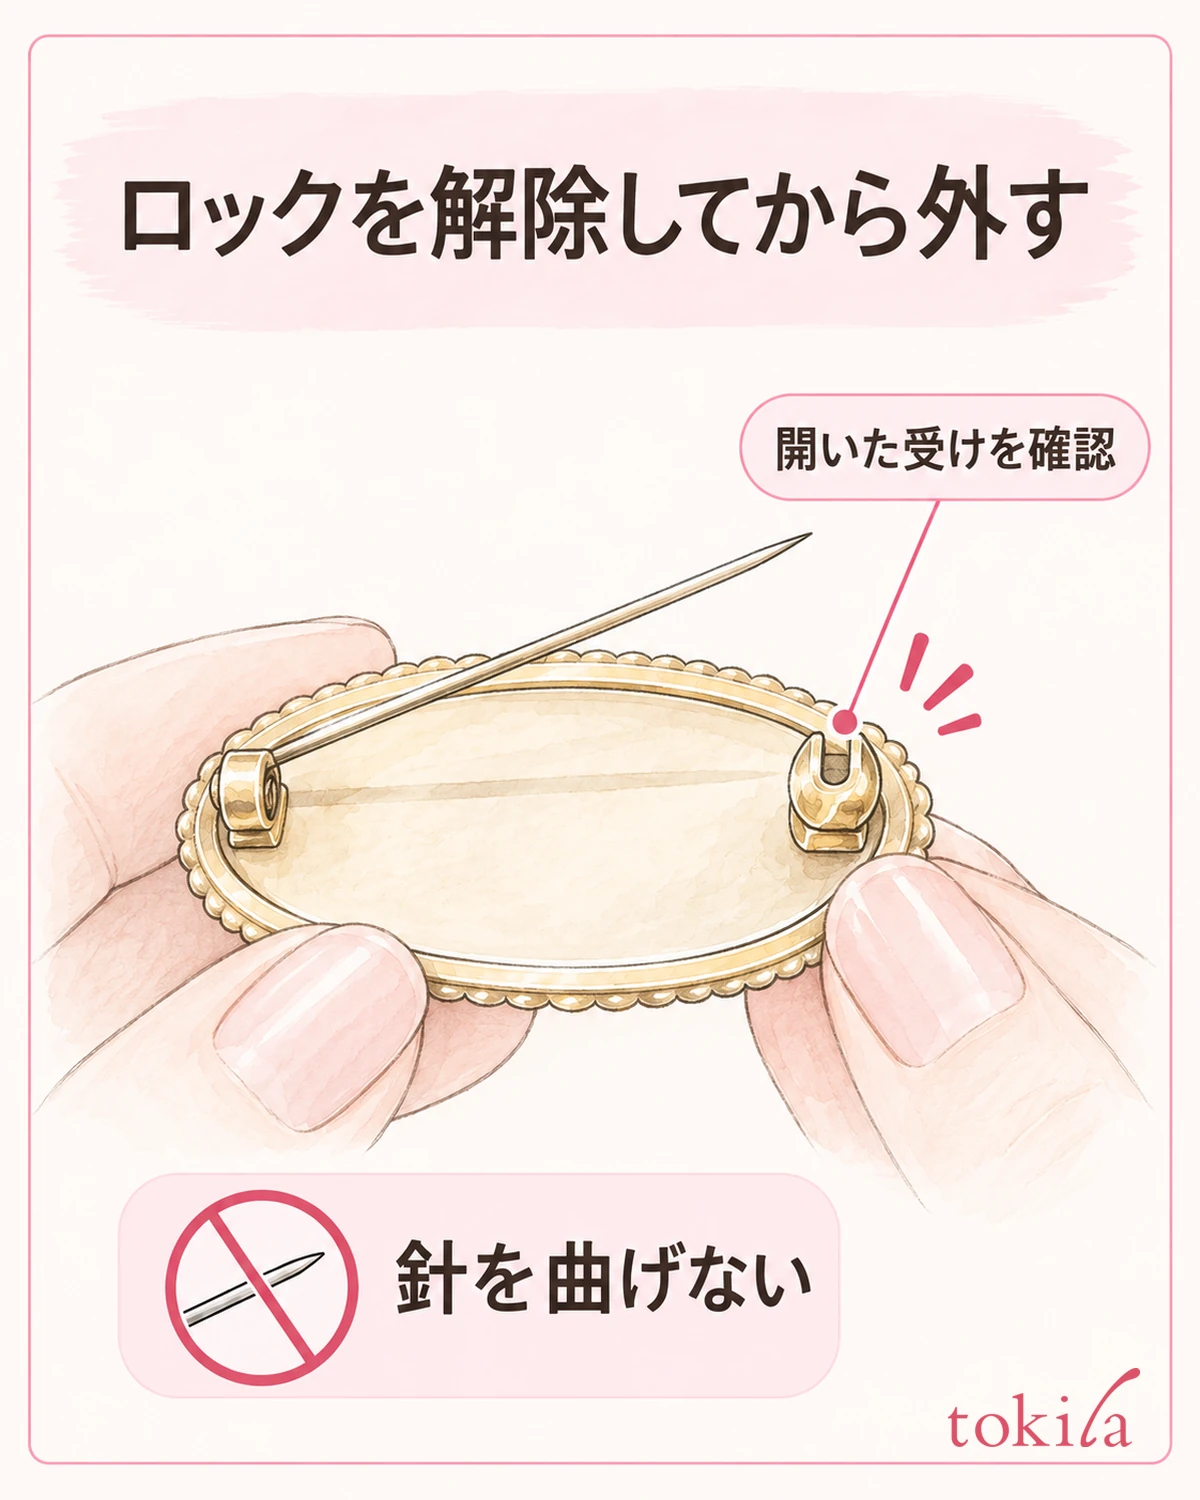
For a form that tucks a long pin into a catch, keep supporting the body and move only the designated opening and closing part. With a rotating type, confirm that the opening of the catch is in a state where the pin can come out before taking the pin tip out of the catch. Do not turn it into a universal instruction such as how many turns to the left or right; match the range of movement to the actual fitting and your item's instructions.
Do not pull the pin up while the catch is not open, and do not bend the pin left or right to make a gap. If the opening and closing part does not move naturally, the part that should rotate moves together with the body, or the pin tip stays caught, stop. Do not judge that a little force is fine because it is metal; check whether there is any deformation or damage.
For a form with a separate clasp, operate the relevant tab or lock while separating the pin and clasp without strain. Even clasps that look similar are released in different ways, so do not make it a method of keeping on trying either "pinching" or "pulling." Put the removed clasp in the place you decided, and do not suddenly let go with the hand supporting the body.
Inserting a tool into small parts, applying oil or detergent, or cutting the pin short goes beyond the range of ordinary removal. Do not assume the reason it won't come off is dirt or rust; sort out since when, where and how it doesn't move. If there are no instructions for your item and you don't know the structure, consult the store where you bought it about how to handle it.
4. Do not pull the fabric; return along the path the pin took
Even after the lock is released, do not lift the brooch off the fabric all at once. With a long pin, support the body and the pin, and while watching where the pin tip is in the fabric, return it little by little along the path it came through. Moving it while continuing to watch the relationship between pin and fabric makes it easier to stop where it catches than pulling the fabric the other way to get the pin out.
If it was pinned through folds or a lining, check one layer at a time which fabric the pin has left. If the feel changes partway, look to see whether the pin tip has picked up another thread and whether pile is caught on the fitting. Do not push through parts you can't see; put it back in an orientation where you can check.
For the short-pin form as well, after removing the clasp, do not pry by tilting the body; check the direction of the pin and the position of the fabric and pull it out. If you keep rocking the ornament side to side, force can be applied to the base of the pin and the fabric. If it won't come out, support the fabric again, and if a catch remains, interrupt the work.
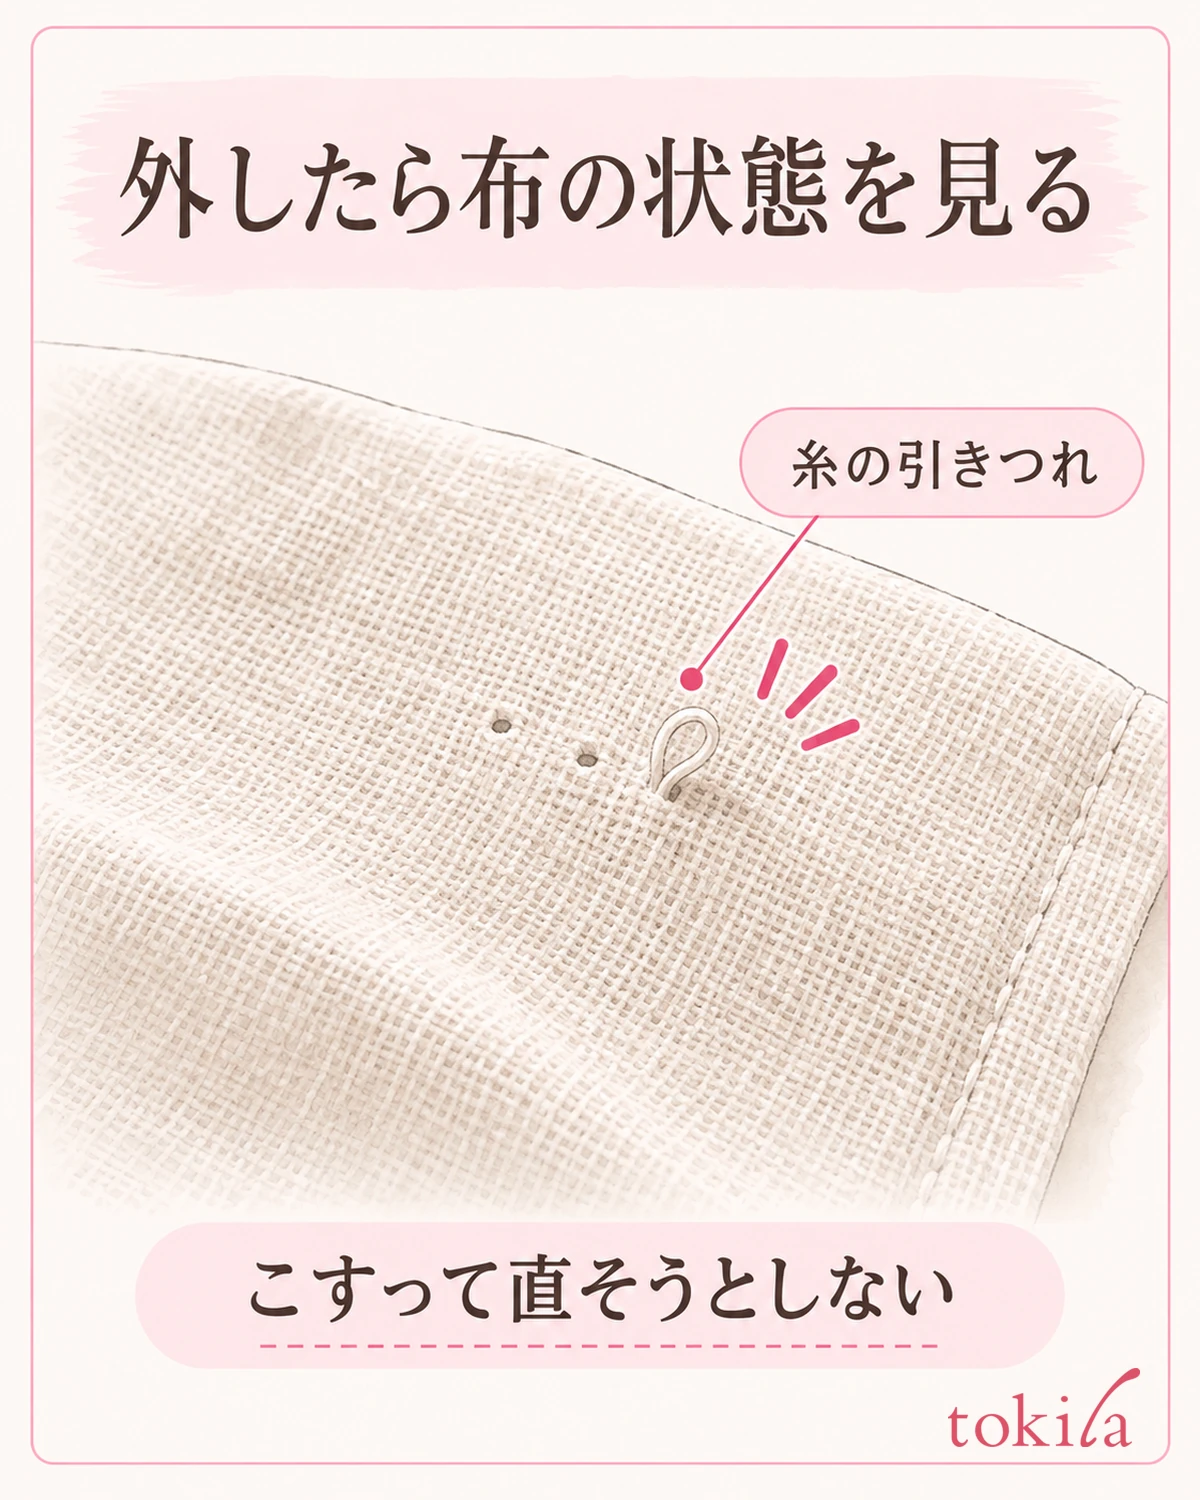
After removing it, look at the part of the clothing the pin went through in a bright place. If there is pulled thread, a tear, or a snag from the ornament, do not rub it hard or apply water or heat to fix it on the spot. Judge according to the material label and how the garment is handled. Do not reattach it to the same place just in the hope that the hole will surely disappear or become less noticeable.
Even if thread remains on the pin after it comes off, do not push and cut the thread while closing the pin. If you don't know which fabric the thread is connected to, put it down with the tip not pointing at anyone and ask for advice about how to handle it. If you can explain separately what you saw, such as whether the garment or the brooch needs repair, the checking goes more smoothly.
5. Tuck in the pin and connect to the check before next use
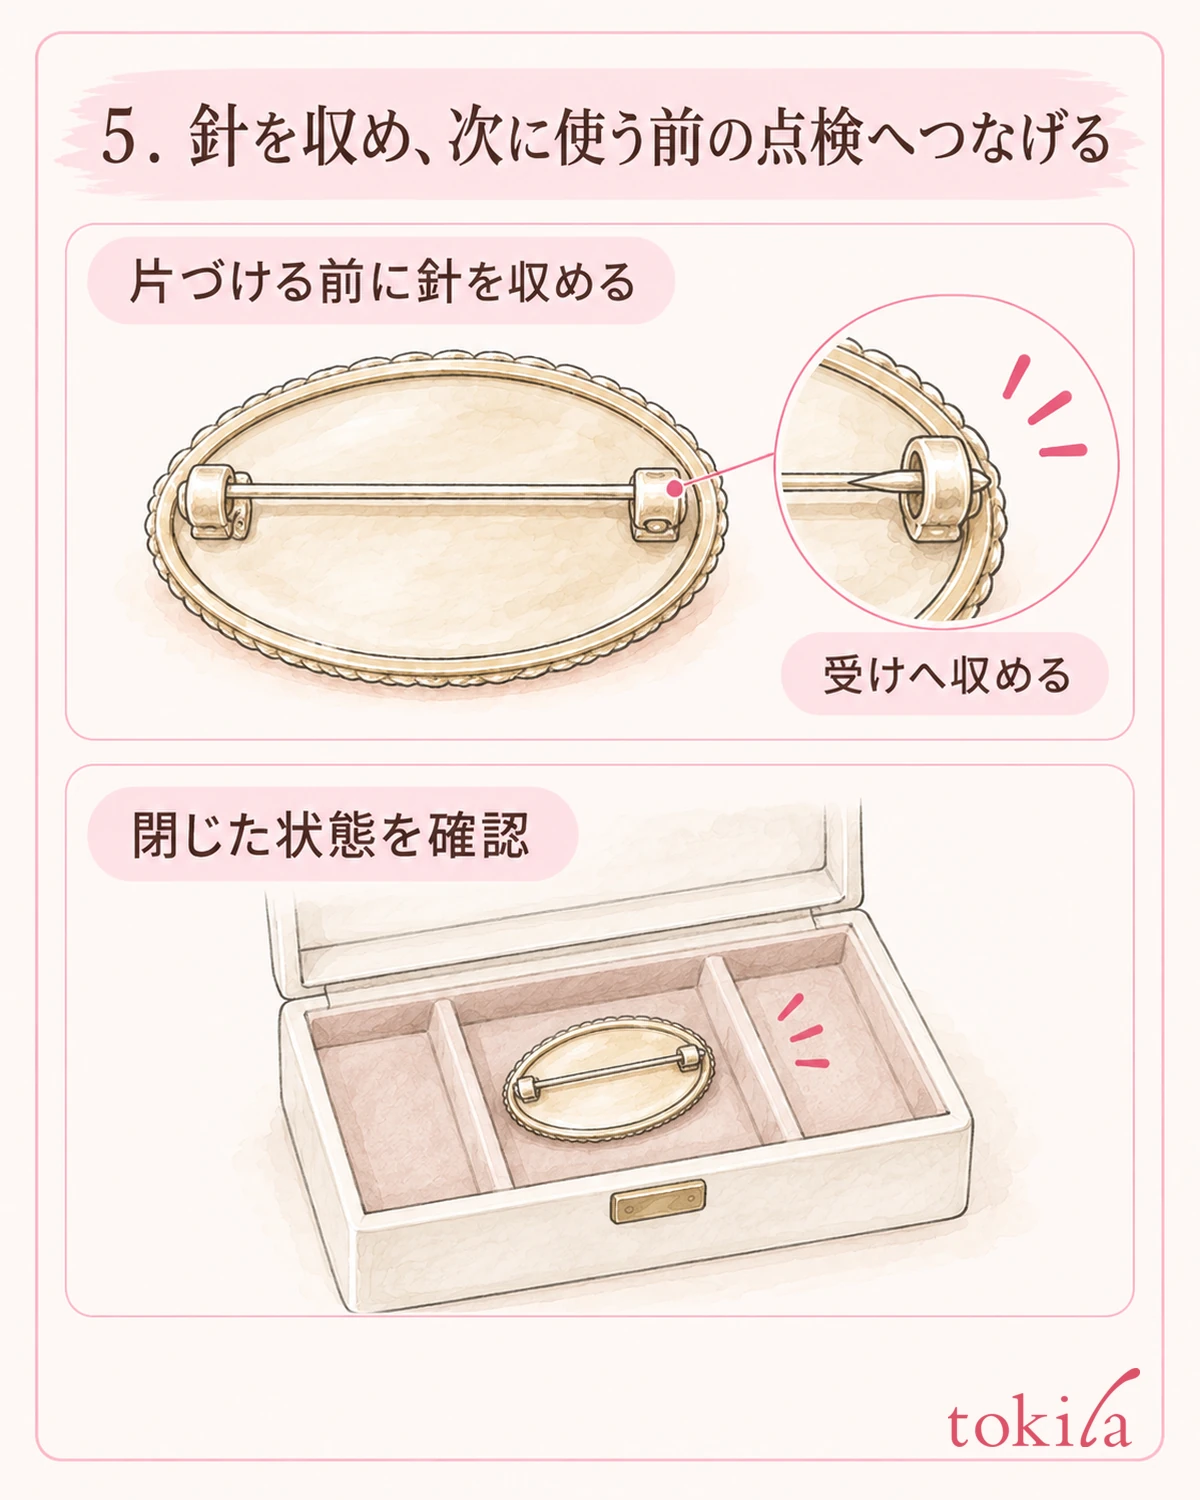
Once it is off the fabric, do not leave the pin tip exposed; tuck it into the catch or clasp in the normal way for your item. With a long pin, check by eye that it is properly in the catch and that the necessary lock is closed. You do not need to press the pin tip with a fingertip or shake the body to check that it is closed.
Manage a separate clasp as a set with the pin it fits. Even if there are several similar parts, do not swap them by shape alone; check the original combination and the instructions. Use the attached box or dividers, and keep it apart from other accessories so pins and fittings do not tangle. Clean it before storing according to the material's specifications, and do not use abrasive cloths or liquids across the board.
If there is a bent pin, a loose catch, a lock that doesn't fully close, or a missing clasp, ask for advice before the next use. Do not judge that tightening the fitting yourself or fixing it with adhesive has returned it to a usable state. Do not store it still attached to clothing, and if you can't remove it, don't force it, and tell them about that as well.
For notes to use when asking for advice, specifically record what you saw, such as "the rotating part doesn't move," "the pin tip won't go into the catch," or "knit yarn is caught." Knowing where you had trouble during removal also makes checking before next use easier. Tell the shape, support the body and fabric, release the lock, return along the path, tuck in the pin. Follow this order, adjusted to the structure of your item.
When choosing the next garment to wear it on, first look at what happened to the pinhole last time and whether it can handle fabrics of a different thickness or weave. Even just moving the same brooch to a different garment changes the layers the pin passes through. Before deciding the position and appearance, build the habit of checking whether it is a combination that can be put on and taken off the fabric without strain.



