
You open a hair clip to take it out, and your hair gets pulled. You are pressing the handles, yet a section of hair stays caught. When that happens, do not increase both the force that opens the clip and the force that pulls it out at once; look separately at where the hair is caught. The place to check differs depending on whether a lock of hair remains between the teeth or fine strands have worked into the area near the handles or the hinge.
This article focuses on claw clips, whose left and right teeth open when you pinch the two handles, and goes through everything from preparation before removing the clip to putting it away. Barrettes and banana clips, which are released by unfastening a catch, open in a different way. Check the labeling and structure of the item you have, and choose only the operations that match its instructions.
1. Before removing it, look at how the clip opens and where the hair is
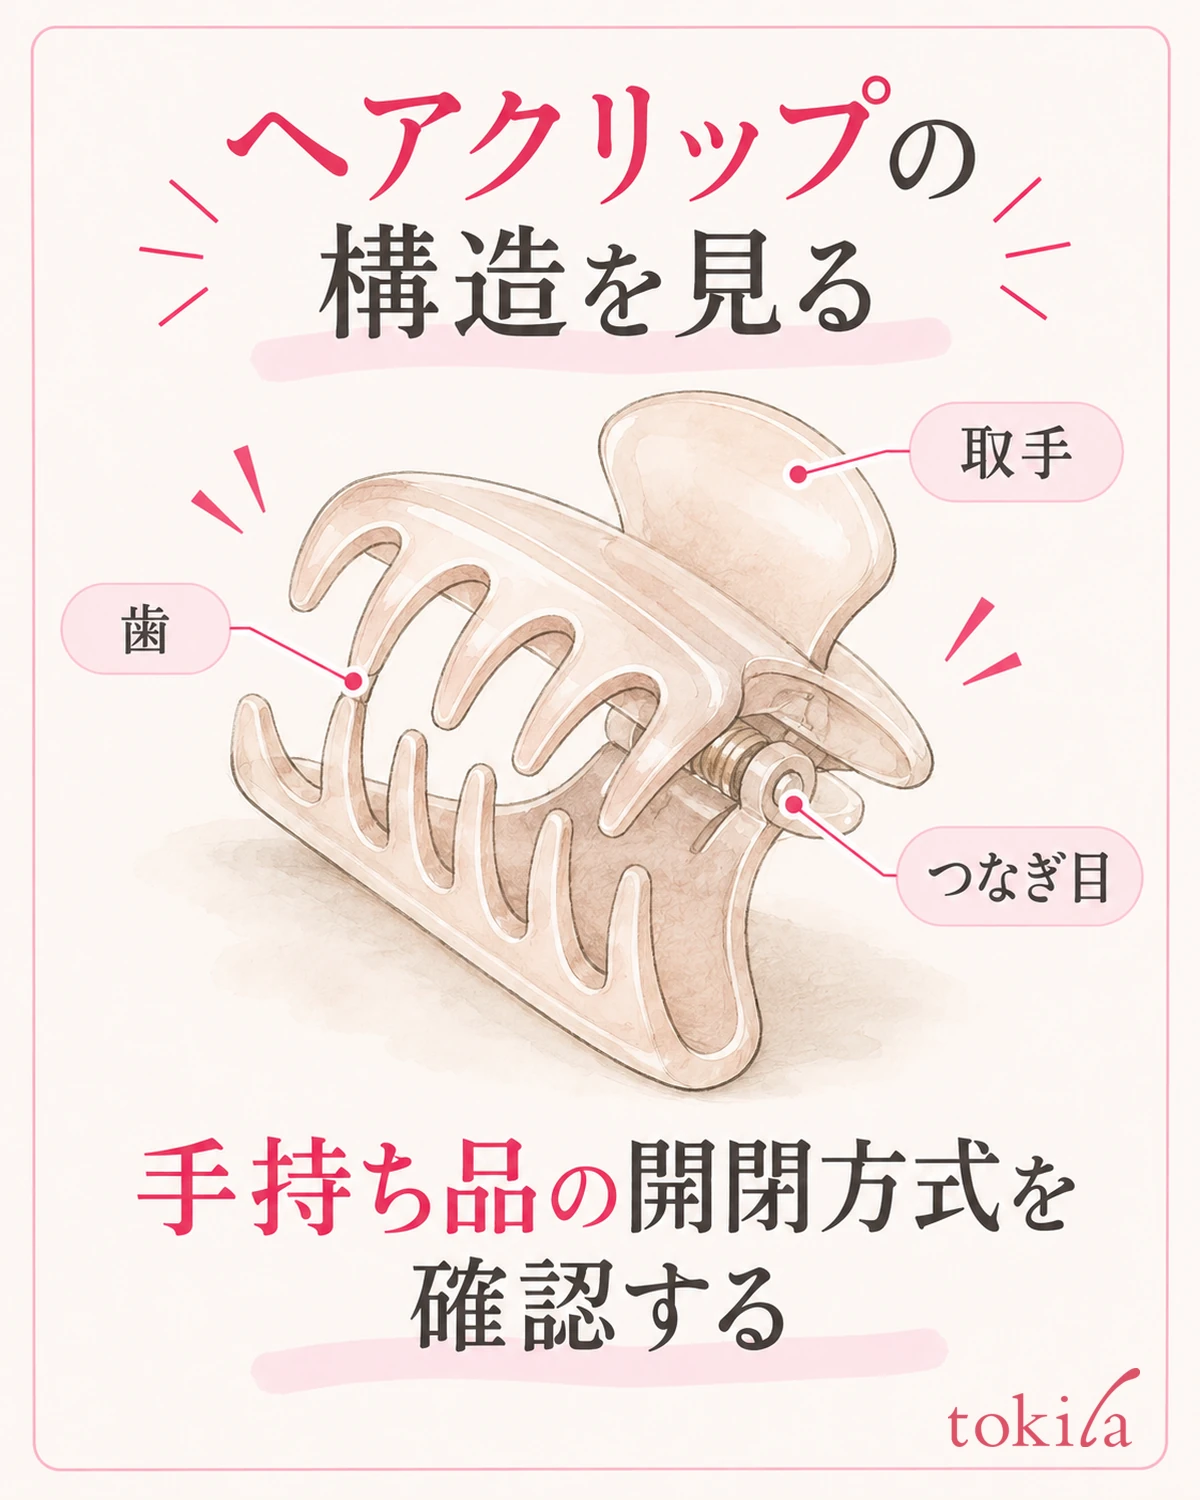
First, check where you hold the clip in your hand for it to open. A claw clip has handles and left and right teeth, but the decorative part is not necessarily the handle. If it is hard to tell while the clip is in your hair, look at its shape from the side in a mirror and compare it with the explanation from when you bought it.
The size of the body alone does not determine how wide it can open or how much hair it can hold. The length and curve of the teeth and how the left and right sides mesh also differ. Rather than applying the same force you used with a previous clip, give priority to understanding the moving parts of the body you are using now. Do not apply the pinching motion for the handles to a clip with a catch.
Next, look at the hair inside the clip. Distinguish the central lock of hair, the fine strands stretched across the tips of the teeth, and the strands crossing near the handles. You do not need to re-section all the hair neatly. Check whether any strands that might be pulled along when you remove the clip have come in from outside the lock you want to hold.
If you cannot see the back of your head, do not twist your neck far and pull by feel; move to a spot where you can use a mirror. If your hair is long, also check whether it is caught on your shoulder or your collar. This is because the reason the clip will not move may be ends of hair tangled in your clothes rather than the teeth.
Also think back to whether the hair is pulled right after you move the handles or when you start to take the body away. In the former case, check near the handles; in the latter, check for hair left between the teeth. However, do not decide the cause from the timing alone; judge by looking at where the hair is actually caught.
If you see a chipped tooth, a cracked handle or a part that is lifting at this stage, do not keep opening and closing it as usual. Think of the clip's function of holding hair and the damage to the tool as separate matters. Avoid continuing to use a damaged tool by making up for it with the amount of hair or the strength of your hand.
2. Support the lock of hair with one hand and decide which hand holds the handles
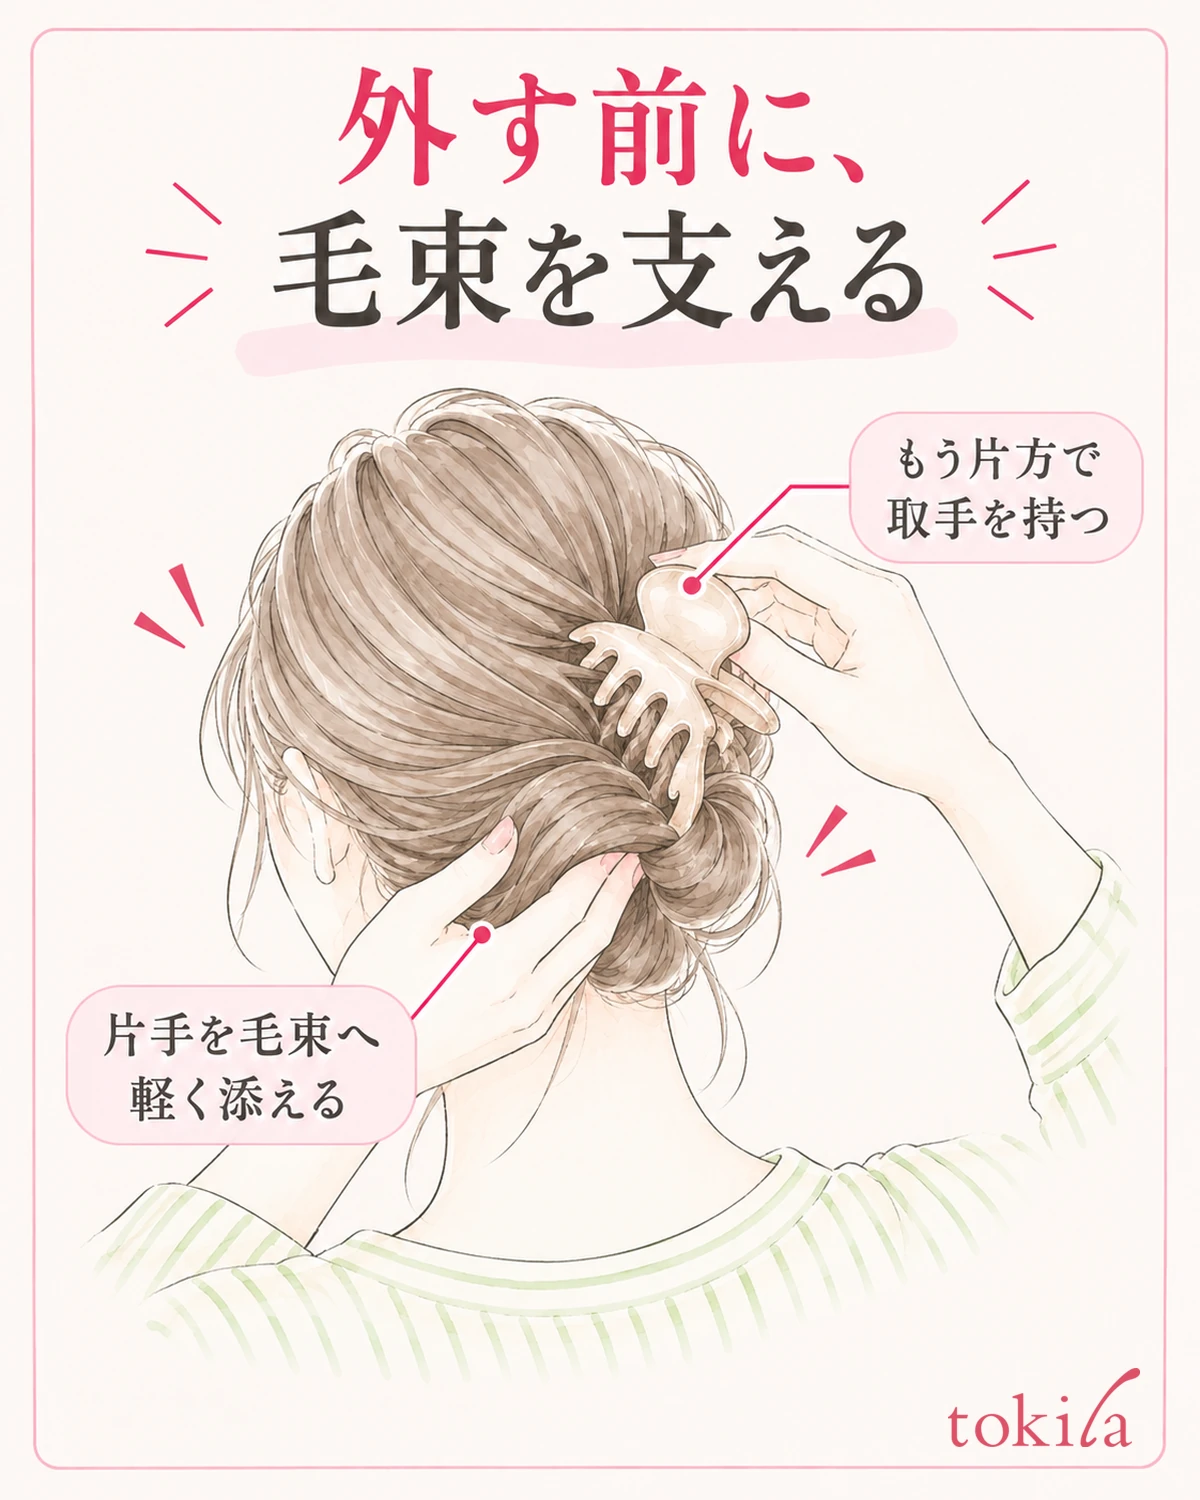
Before removing the clip, lightly rest one hand on the lock of hair near it. This is not support that grips and pulls the hair hard; it is so that the whole lock does not suddenly fall or get pulled when the body moves. With the other hand, hold the handle designated for the tool.
If you remove the clip with all the weight of the hair resting on it, it becomes hard to tell where the pull is coming from when the body tilts. Even when the clip is holding twisted hair, do not twist it further; keep your hand on it and handle the clip and the lock of hair separately. If your arm gets tired, rest once and choose a posture that is not a strain.
Before you put your fingers on the handle, check that you are not also grabbing fine strands between your finger and the handle. Even if you think you are holding only the handle, pressing the surrounding ends of hair with your fingers means the hair gets pulled when you move the body. Do not pull hair out with your fingertips to sort it; instead change your finger position within the range you can see and take a new grip.
Deciding the roles in advance, hair with one hand and handle with the other, makes it easier to avoid having both hands rush to the body alone at the moment it opens. Do not fix your hands by dominant hand alone; choose a way of holding that lets you reach the handle comfortably and see the structure while keeping the lock of hair supported.
If fine strands run from beside your face across to the handle, check whether you can separate the visible lock from the moving part of the body. Do not forcibly sweep aside hair that is still caught; while supporting the lock and the clip, look at which part can move. Give priority to preparing so that you do not pull, rather than to keeping your hairstyle neat.
The condition of the hair and the tool also changes depending on whether the hair is wet or has styling product on it. If it will not come off easily, do not try to solve it by adding water or oil; first check where you are supporting it and where it is catching. Whether you may use the clip on wet hair, and how to care for it, should follow the instructions for the tool you are using.
3. Check that the teeth have left the hair, and release a little at a time
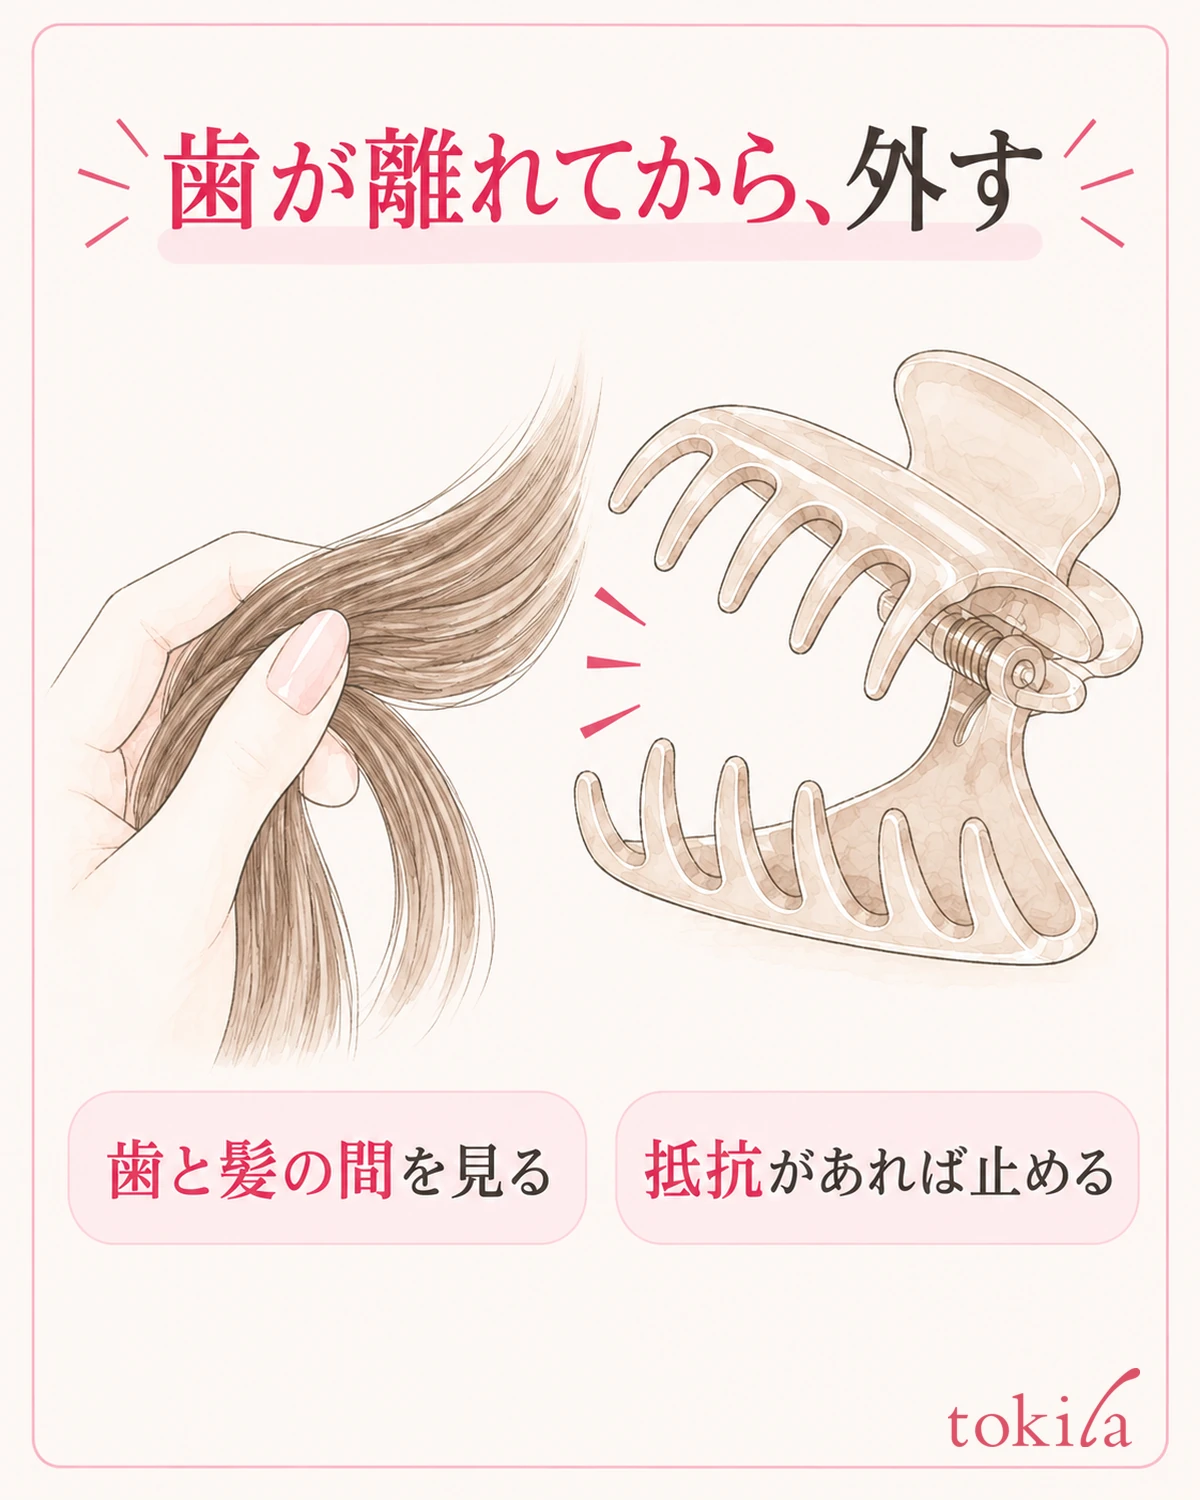
While supporting the lock of hair, operate the designated handle slowly. Keep the motion of pressing the handles separate from the motion of moving the body away from your head. If you start pulling with the teeth closed, or yank it out forcefully while opening it, it becomes hard to see where the hair remains.
After you move the handles, look at whether the left and right teeth have left the lock of hair. The opening width you need differs by body and lock of hair, so do not assume that "opening it as far as it goes" is right. Within the range where the tool moves without strain, confirm that the parts holding the hair have separated before moving on.
When you move the body away a little, keep the hand that supports the hair in place. Move only as far as the hair that was passing between the teeth separates naturally, and stop if you feel any pull. Do not decide on one direction, such as up or down, for removal; look at how it is currently clipped and the direction of the teeth, and check a path along which no hair is left behind.
If you want to switch hands midway, stop the motion while supporting the body so that the teeth do not suddenly close on the place where hair gets caught. Do not try to solve it by shaking it repeatedly while open or squeezing the handles over and over to shake the hair loose. If it is hard to handle with one hand, secure a position where you can see, and then go back to the steps.
When it is completely free, put the clip down first, then slowly take away the hand that was supporting the hair. Do not suddenly close the freed body near your hair; look to see whether any fine strands remain before you close it. Styling comes afterward. If you pull the lock of hair out to fix its shape in the middle of the removal, it becomes unclear where the resistance was.
4. If there is resistance, stop and check the teeth and the hinge separately
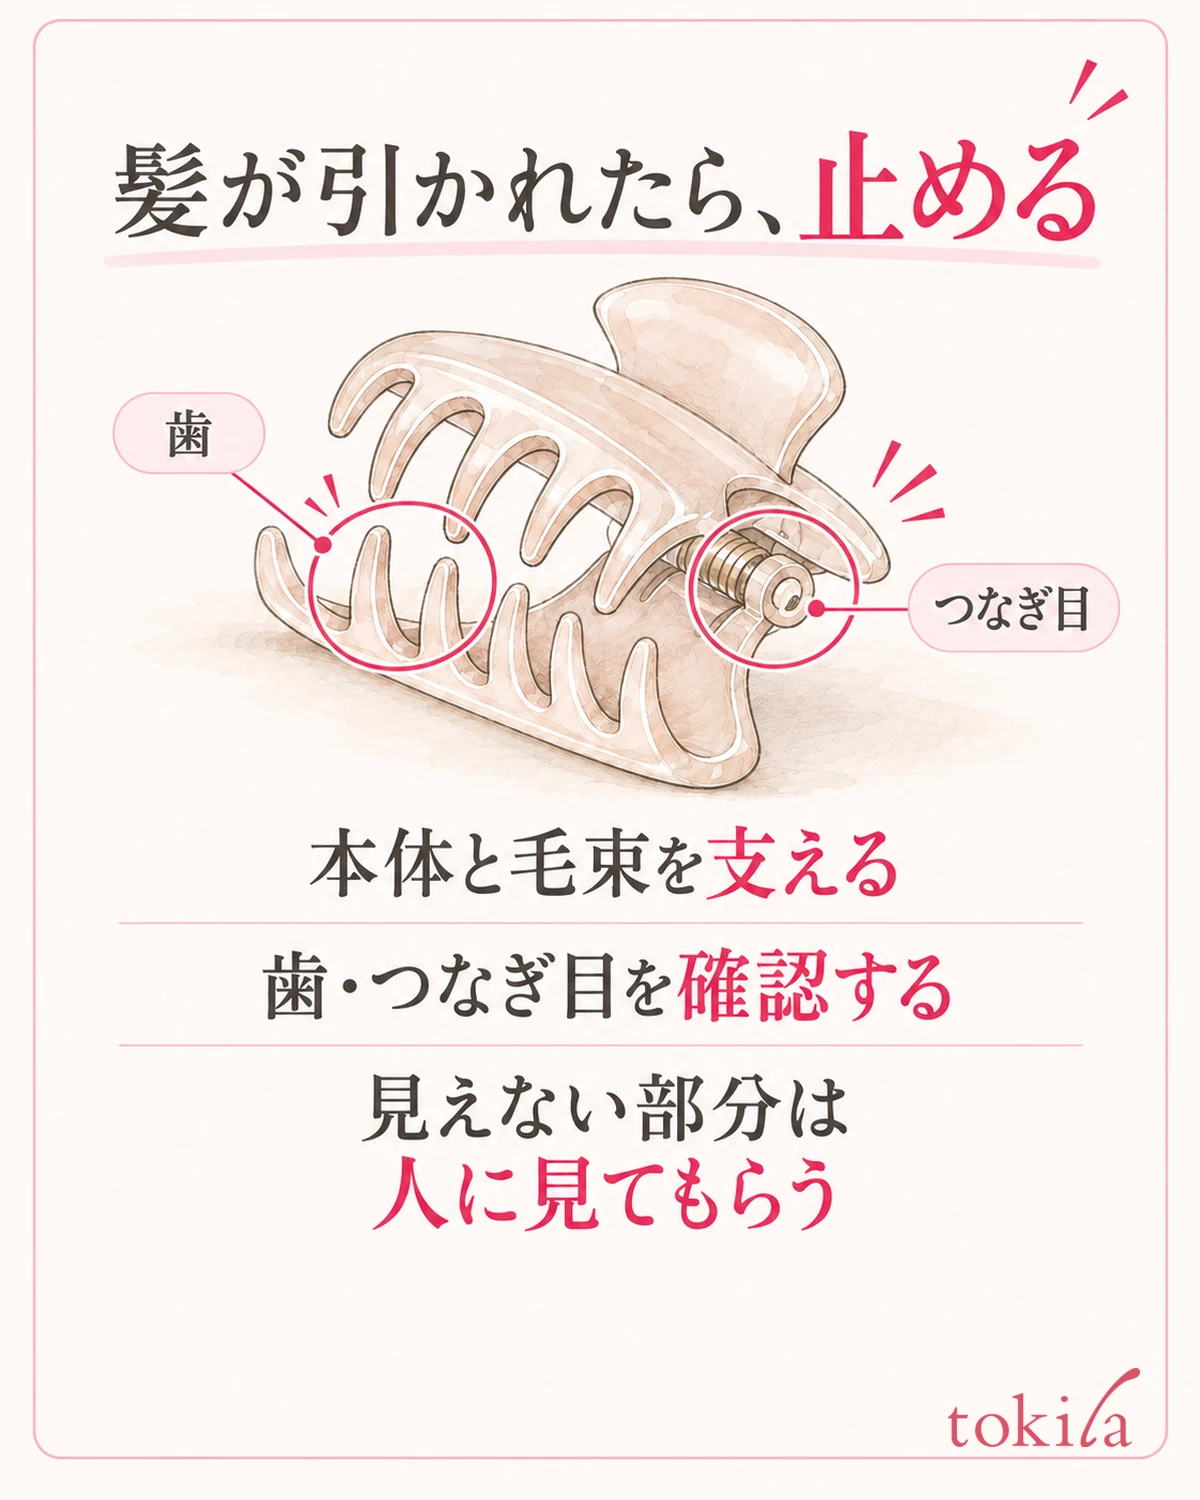
Only part of it will not move, your scalp is being pulled, or it hurts. In that case, support the lock of hair and the body and stop moving. Do not put up with the pain and add more pulling force, or hold your hair down hard with the other hand while yanking. Stopping your hands is also different from pushing the clip back into your hair.
First, look to see whether any hair remains caught between the left and right teeth. Even if the handles are moving, fine strands may be stretched across one of the teeth. Next, check whether hair has worked into the base of the handles or around the hinge. The cause is not necessarily just the single strand visible on the surface, so avoid probing around in parts you cannot see.
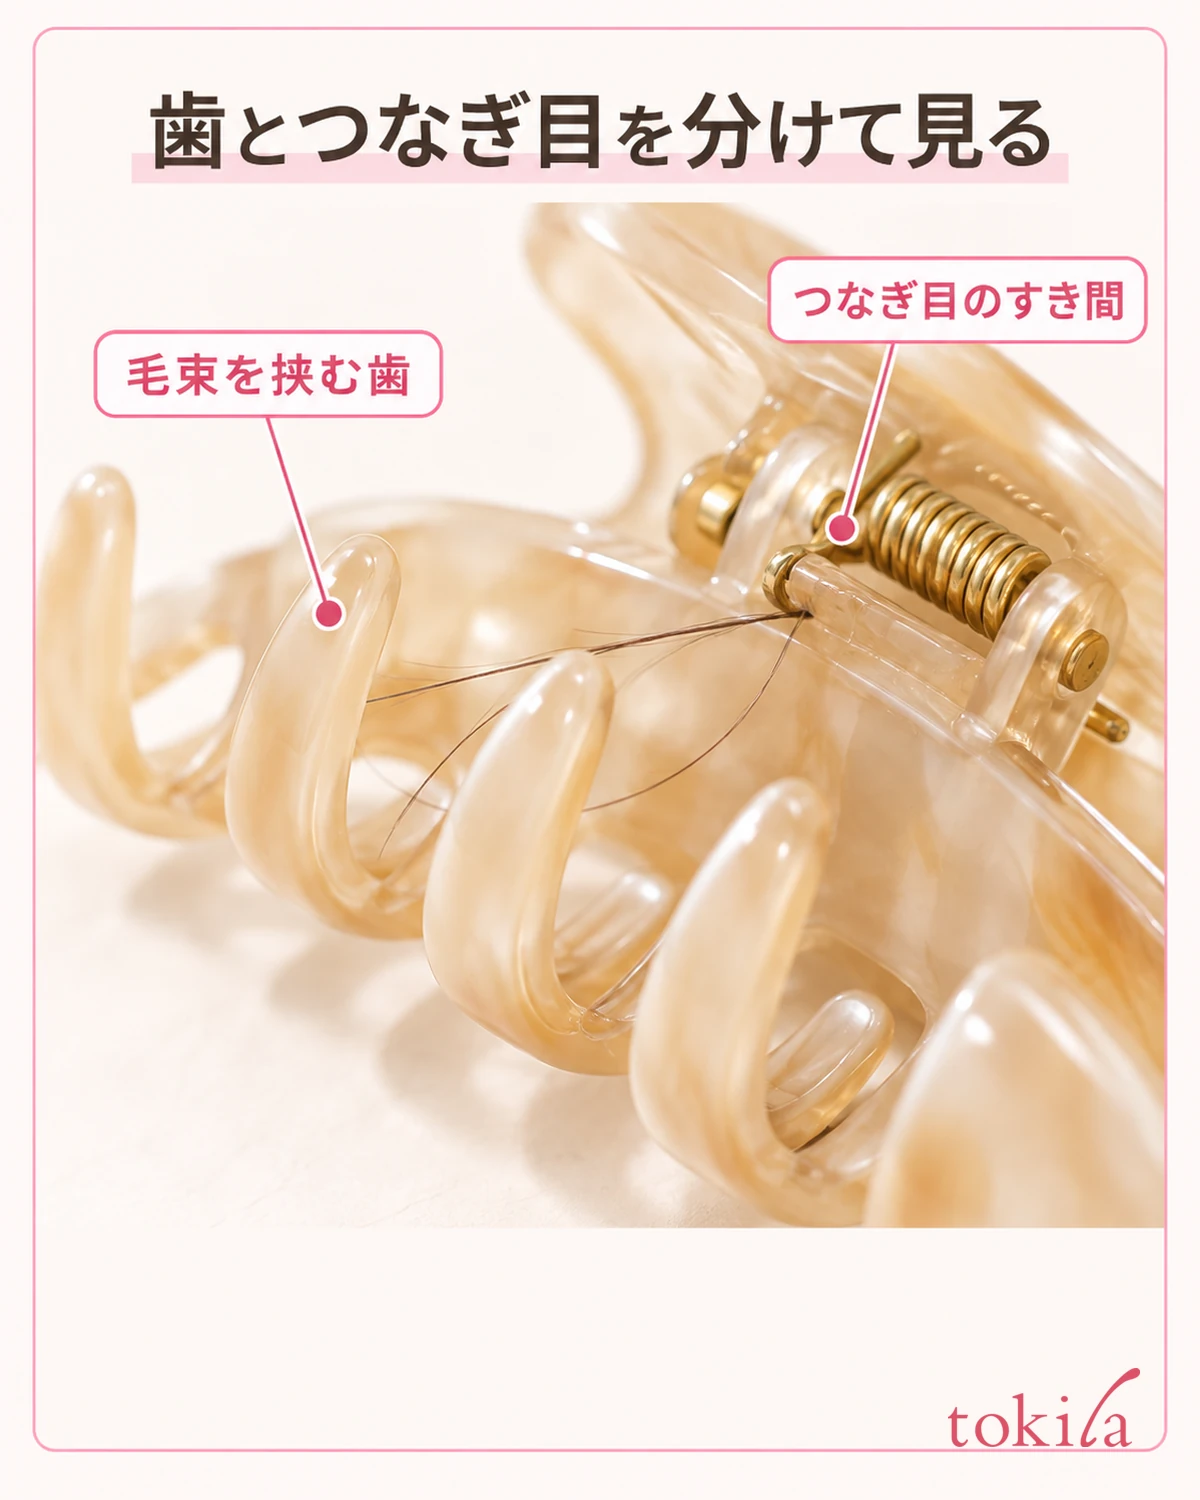
If you cannot confirm the range your fingers can safely see, choose to have someone look at the back for you. If it is tangled so tightly that it will not move, have a salon or similar look at it in person. Do not try solutions such as cutting it yourself with scissors, breaking the teeth or prying open the metal parts near your hair or scalp.
If an odd feeling continues after it is off, stop clipping it back in the same place. Stop using the tool, and if there is anything of concern such as pain or injury on your scalp, consult a medical institution. Do not simply put down the cause of the hair being pulled to your scalp or hair type; look back at how it was clipped and the condition of the tool separately.
Distinguish the state in which hair has come loose after the clip is off from the state in which it is still tangled and will not come free. Before trying to restore the shape by combing hard, look at the hair as it falls naturally. If hair has collected in your brush, also check how to remove hair from a hairbrush, and finish after getting the tools you use in order.
5. Before clipping next time, review how the hair sits and the condition of the tool
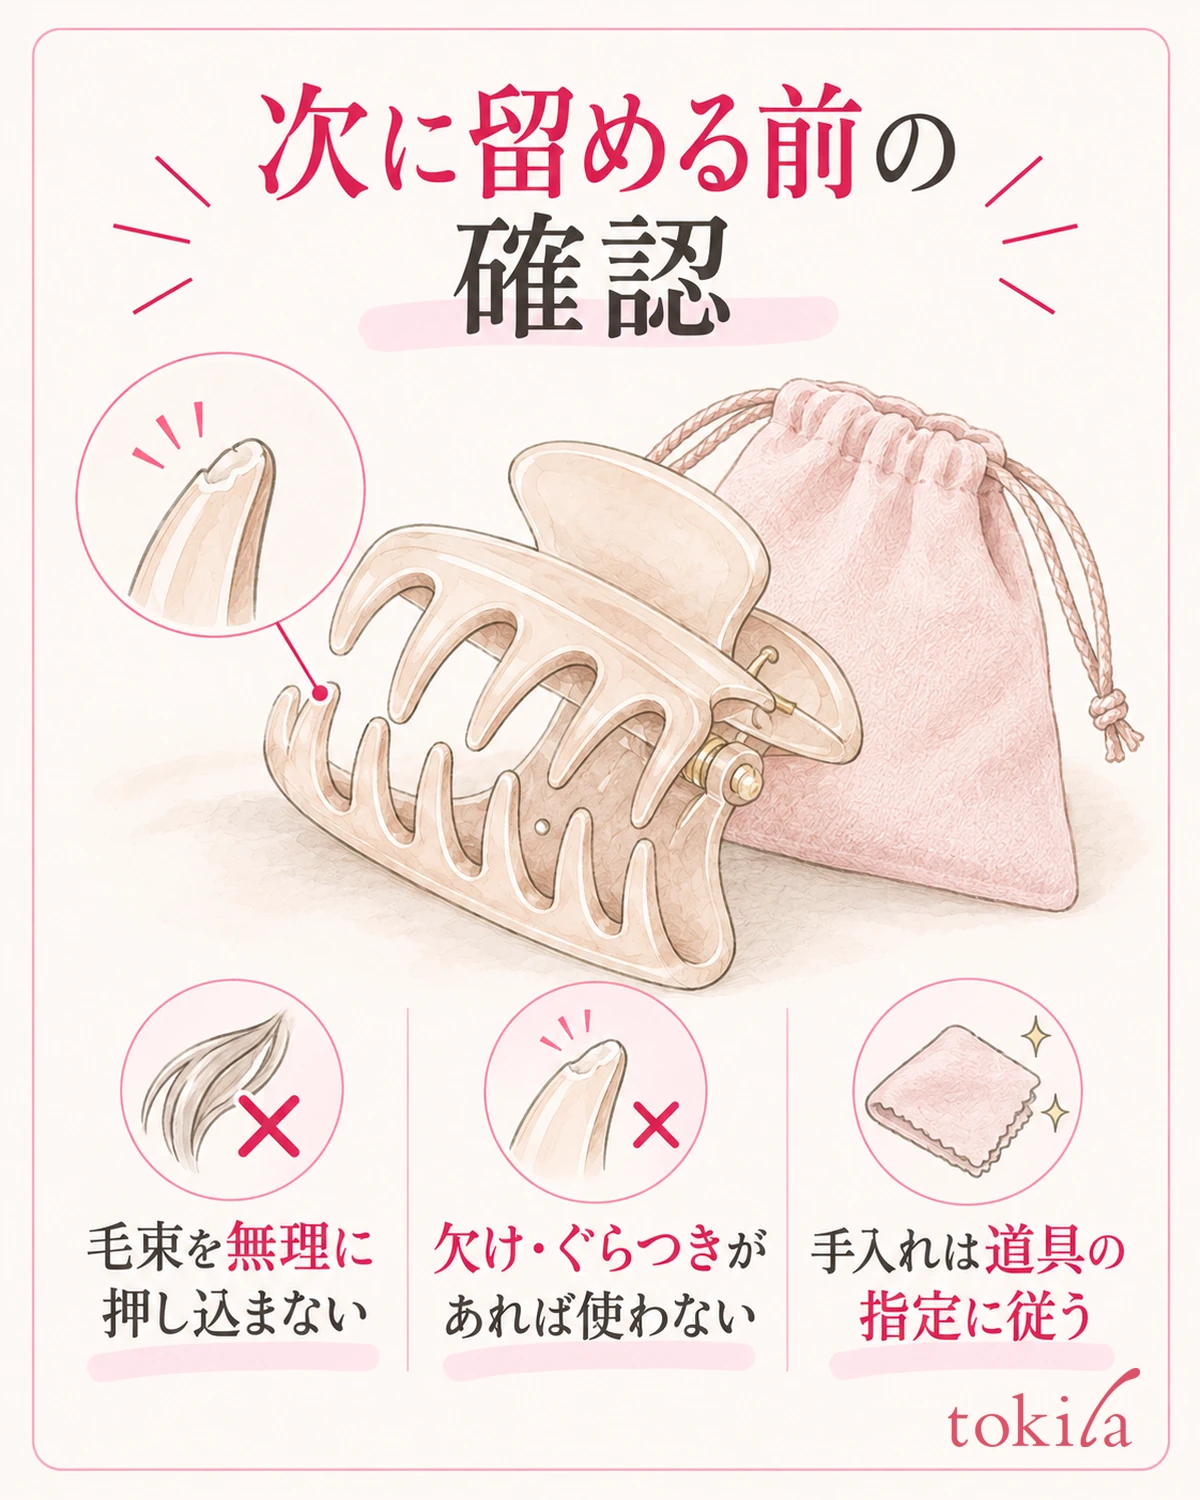
Next time, briefly note where the hair stayed caught. Words that tell you the place are enough, such as "fine strands stretched across the left teeth" or "ends of hair got in near the handles." If it catches in the same place every time, rather than practicing opening it harder, review whether the way you clip lets hair get into that spot.
When clipping your hair, prepare a lock that fits in the clip, and check that you have not rolled extra hair in around the handles or hinge. Do not force a large lock in; if necessary, reduce the amount you clip, or choose a tool that suits the amount of hair and your purpose. Simply switching to a bigger one will not necessarily solve it, so also check the shape of the teeth and how easy the handles are to use.
Before putting it away, check for chipped teeth, rough splinters on the surface, and any wobble in the handles or hinge. If there is anything abnormal, refrain from using it. Do not apply oil near your hair, restore the shape with heat, or repair it with adhesive and reuse it, without any grounds for doing so for the item you own.
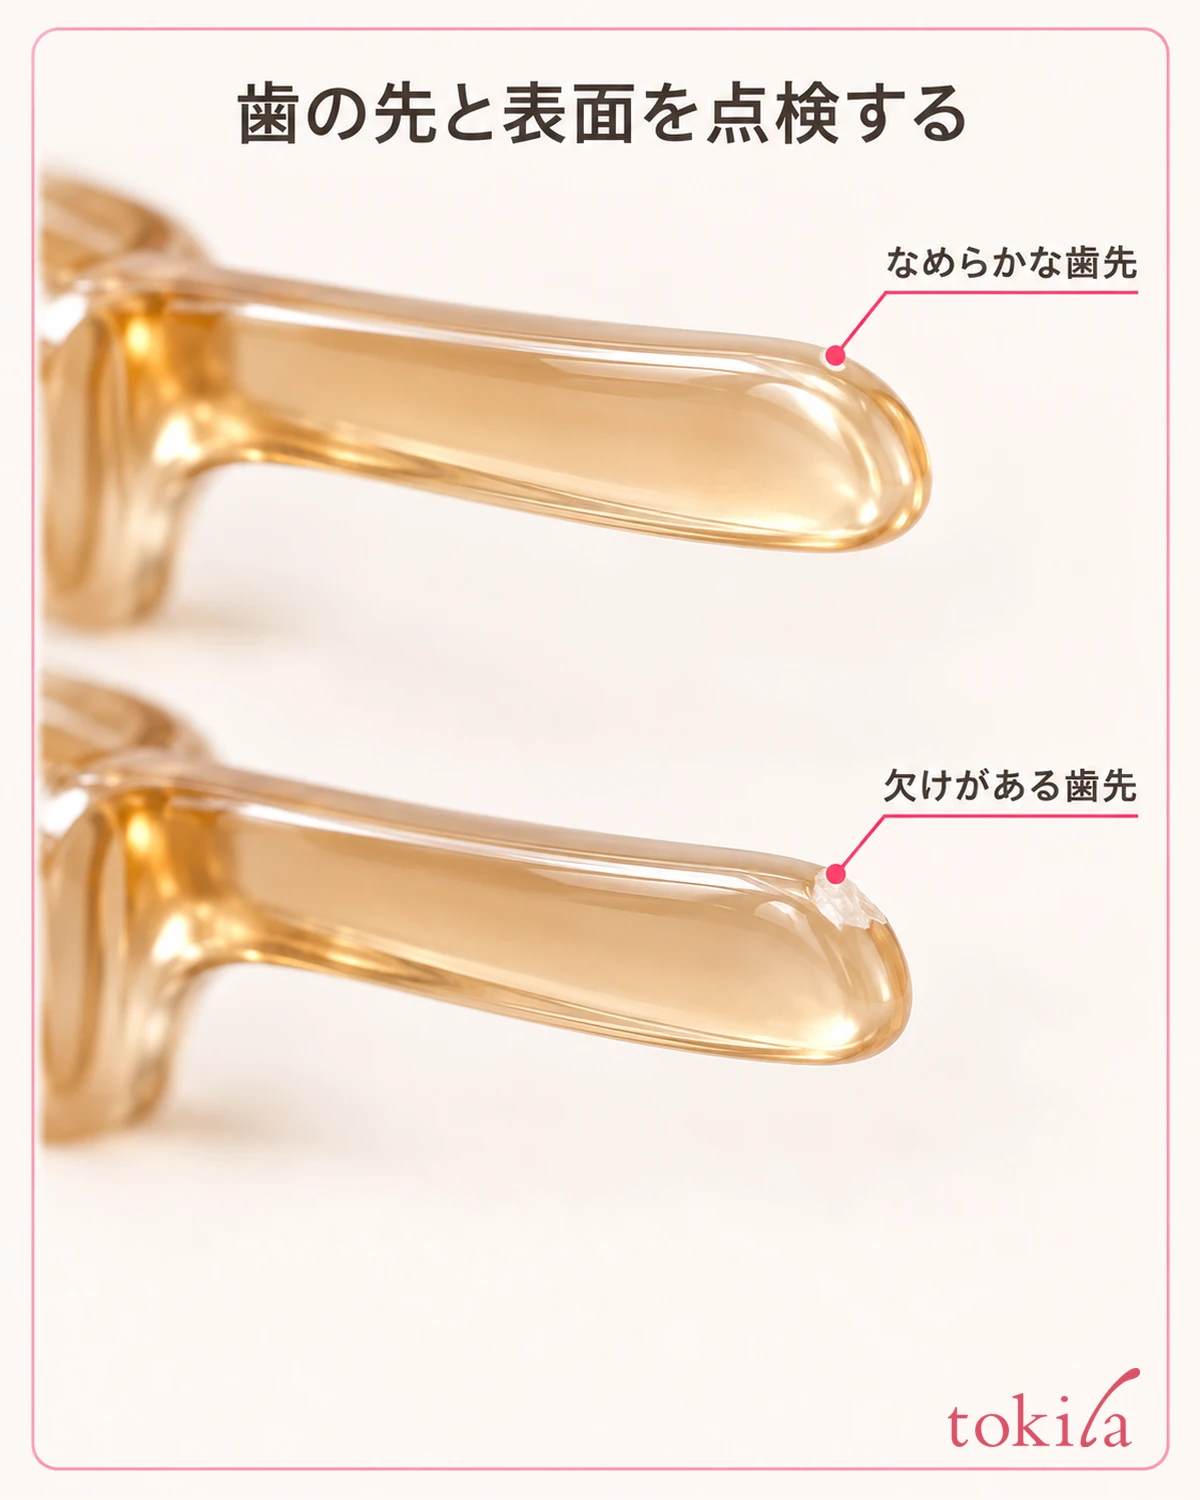
If you change the clipping position, the amount of hair and the type of tool all at once, it becomes hard to tell what made the difference. Decide on one point to review, such as using a tool with no damage and first checking whether hair gets rolled in around the handles. You do not need to recreate a state in which it cannot be removed safely in order to compare.
How to remove stuck hair and dirt, and whether it can be washed with water, depends on the material and the product's instructions. Even if much of it is resin, the structure differs, for example with metal parts inside. Do not decide it is washable by appearance alone; after completing any drying that is needed, store it so that the teeth and decoration do not snag on other tools.
On days when you also use a tool for curling your bangs, it is important not to mix up how you remove the clip and how you remove the roller. For the operation of unwinding hair from the tube, see what to check before removing bangs hair rollers. With a claw clip, go back and check in this order: support the lock of hair, move the designated handle, look to see that the teeth have separated, and stop if there is resistance.



