
You removed your nail polish, and although the color on your nails got lighter, your fingertips turned red. In that case, before you keep rubbing around the nail with the same cotton pad, try stopping for a moment. Looking separately at the color left on the nail and the color that has transferred to the cotton will show you what to change next.
Here, for nail polish that can be removed with ordinary remover, we sort out where to apply the cotton, how to move it, and when to replace it. Gel and peel-off types are removed differently. Check the label of what you have first, and match the amount of liquid and the time you leave it on to its instructions.
First, check the combination of the nail color you have on and the remover

Before you start removing, confirm what you applied. Air-drying polish, gel that is cured with a light, and peel-off color are all removed by different steps. Do not judge by the shine alone; look at the container or any instructions you kept, and check whether they specify removal with remover.
Next, check the purpose of the remover. A label saying "contains acetone" or "acetone-free" alone cannot tell you that it works on every kind of nail color. Read what it is meant to remove and how to use it, and check the amount to put on the nail, how to work it in, and how to handle it after use. If you cannot confirm the instructions, do not substitute a liquid meant for another purpose; put the work on hold.
Also look back at the moment when the color spread. What you should review differs depending on whether it transferred to the surroundings with the very first wipe, or whether you touched with the same cotton after removing several nails. It is important to tell whether a thick coat of polish remains on the nail or a thin color is on the skin, and not to lump them together into one task of rubbing the same spot hard.
If you are concerned about the color of the nail itself even after the surface color has come off, do not assume it is a leftover and keep piling on remover. These steps do not diagnose the cause of a color. If your nails or skin have pain, redness, wounds or the like, do not proceed, and if a worrying change continues, consult a medical institution.
This time, rather than finishing all ten nails quickly, we prioritize checking what transfers to the cotton from a single nail. Knowing the type of color you applied and its being consistent with the remover's label are the conditions for starting. Because it is hard to remove, do not add steps such as filing, peeling off, or switching to a stronger liquid on your own judgment.
Prepare fresh cotton and a place for the used pieces
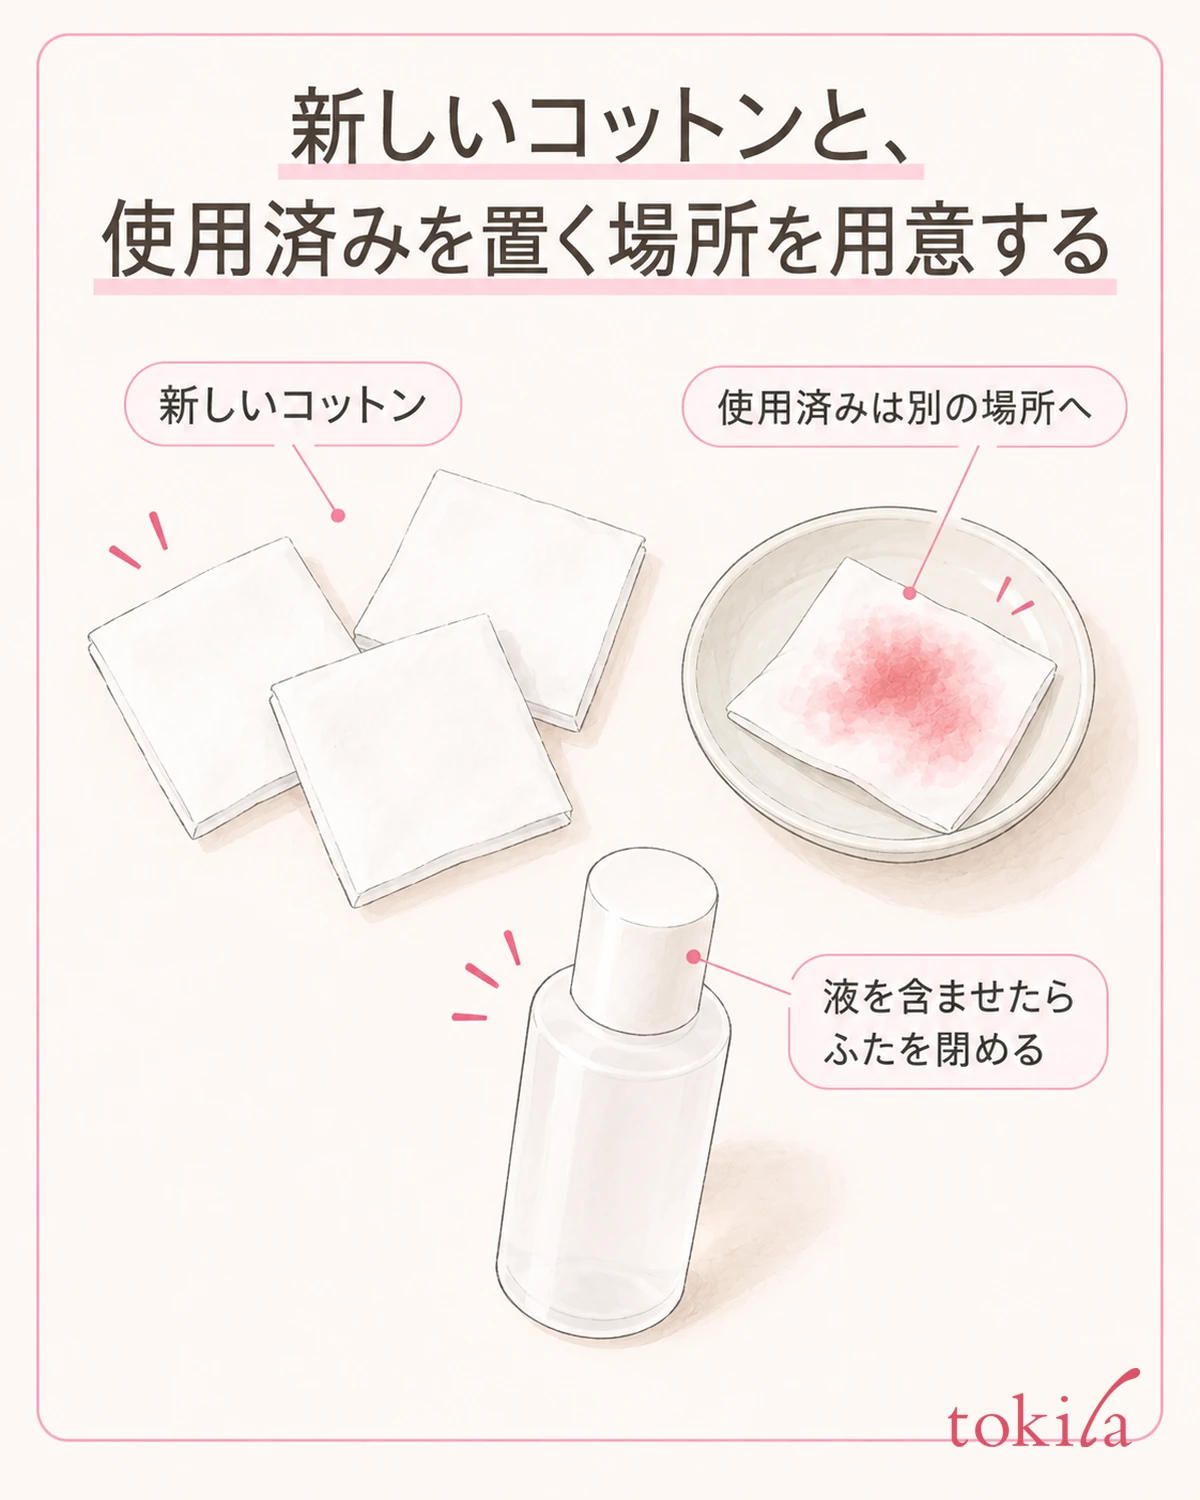
On the desk, set out the remover you will use, fresh cotton, and a place to temporarily put used pieces, each kept apart. Keep clothing and electronic devices away from the area where your hands move, and protect the work surface. Some materials are damaged by the liquid. Do not assume anything is fine to spill as long as there is a protective cover; check the product's precautions.
Do not use it near a flame, and work in a ventilated place. Moving your fingers while an open container sits right beside your hand makes it easy to knock over, so once you have soaked the cotton, close the cap and return it to a stable position. Warming the nails with a dryer or the like to remove the polish is not included in these steps. Also follow the precautions on the label while using it.
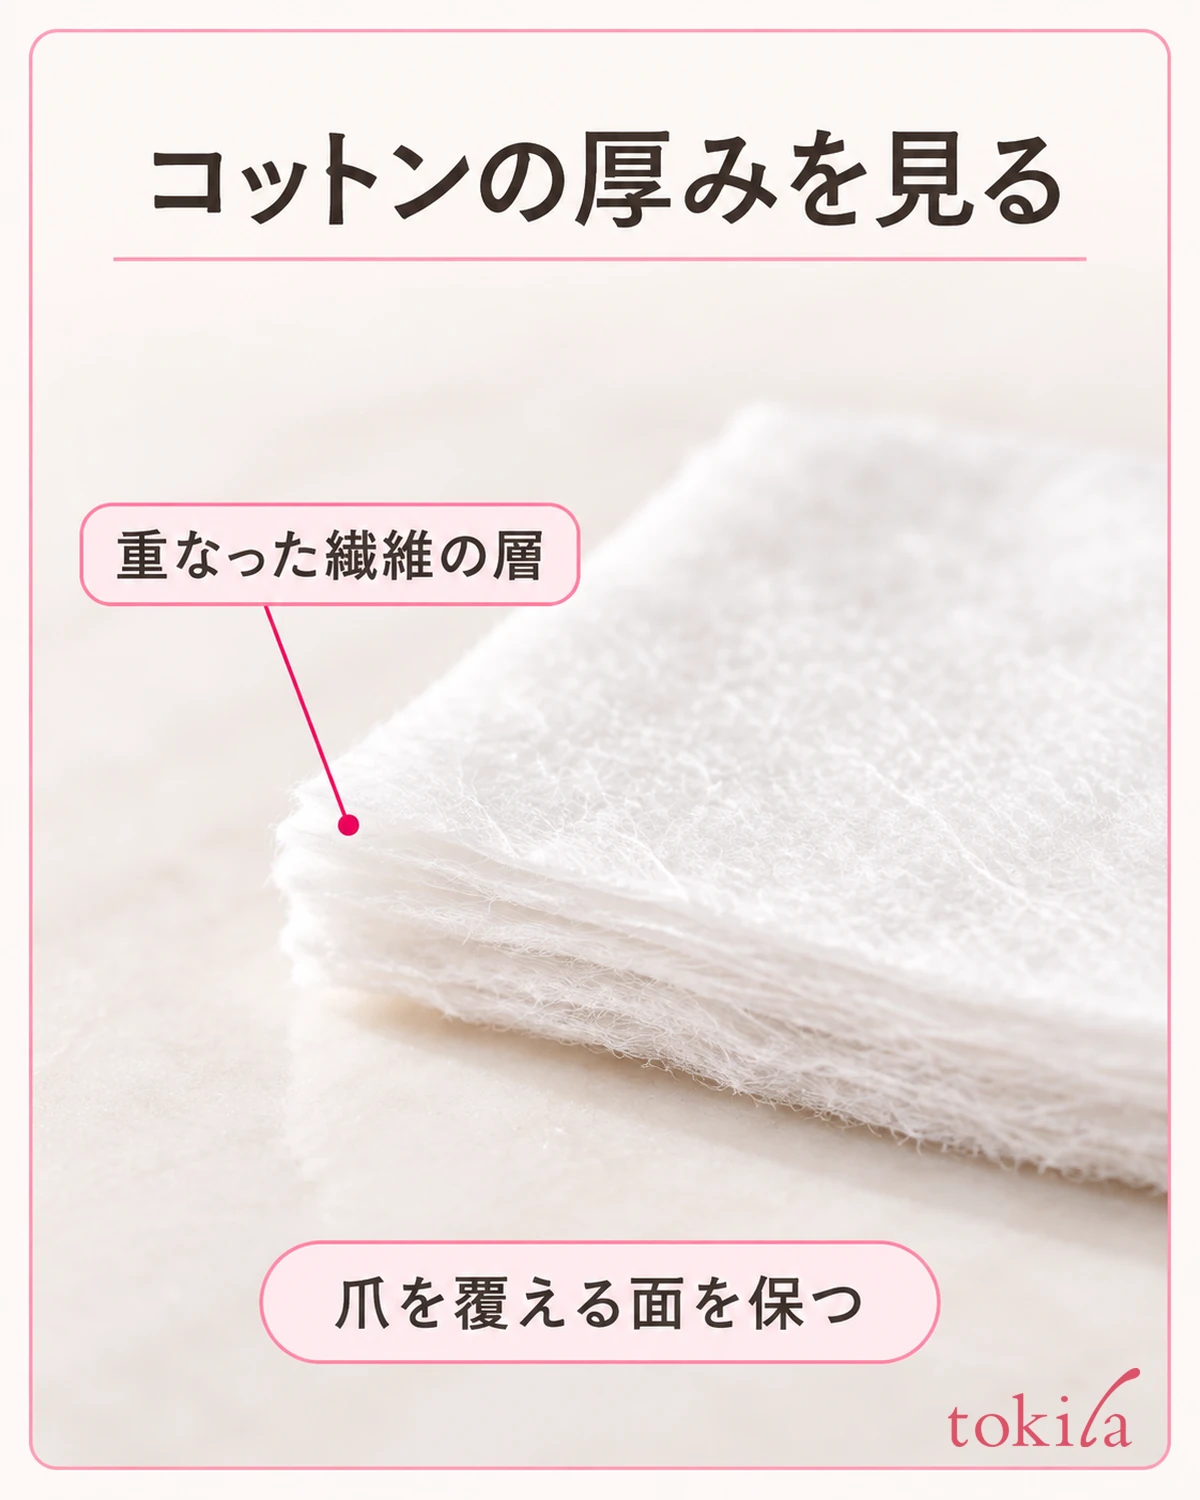
Choose cotton about big enough to cover the surface of the nail. It is more convenient to use pieces you can handle while seeing the surface you are applying than to press many tiny scraps with your fingertips. If you tear it too thin to fit the size of your nail, it may lose its shape partway through. Get it into a state where it is stable in your hand and you can tell which side goes on the nail.
Soak the cotton with the amount of remover the product specifies. Instead of tilting the bottle and pouring straight onto the nail, transfer it to the cotton in the specified way. Make sure the liquid does not run onto your hands or the desk, and do not start rubbing hard on a dry surface. If you are unsure about the amount, return to the container's directions for use before adding force.
Keep the unused white cotton and the cotton that has picked up color from overlapping. If you return a used piece on top of a fresh one, it becomes hard to tell which side you have used. Rather than fixing the number of pieces to save them, preparing so that you do not carry a colored side over to the next nail reduces the need to let go partway and search.
Place it on the nail, let it work in, and wipe without spreading to the surroundings
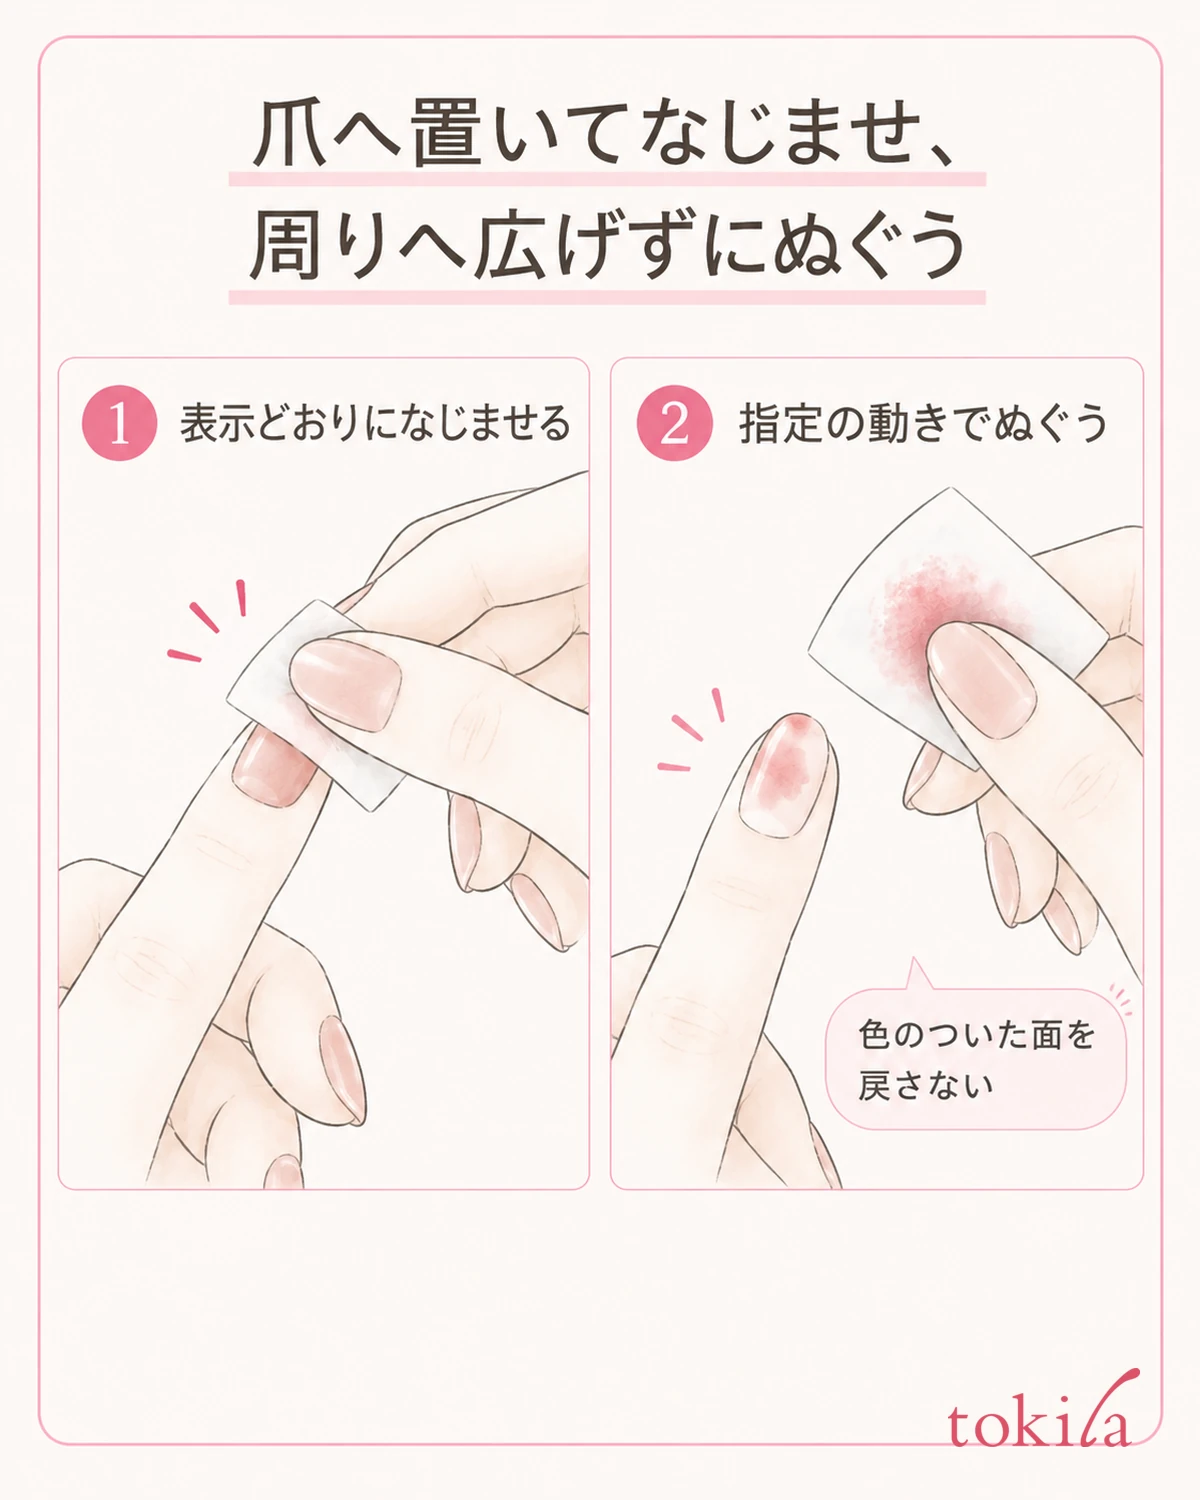
Rest one hand on the work surface in a posture where the finger you are removing from does not wander. Fit the remover-soaked cotton to the surface of the nail and let it work into the polish. Even when the instructions say to leave it on, follow the time given in your product's instructions. Do not think "the longer the better" and leave it until it dries, or wrap the whole finger.
Before you take the cotton off, check the surface covering the top of the nail and the position where you hold the finger. Avoid big back-and-forth movements over the skin outside the nail, and wipe gently as the instructions say. Some products specify pressing as you wipe, or pinching toward the center as you lift, so a key point is not to fix on a single way of moving.
For a product whose directions say to pinch toward the center, gather the cotton that covers the nail toward the center and lift it, so that you do not rub the colored side around the surroundings. You do not need to swing it widely to the left and right of the nail. On a small nail, shift the position of the fingers holding the cotton, check the surface touching the nail, and then make the specified movement.
After one wipe, look at the nail and the cotton separately. Even if color has transferred to the cotton, some may remain on the nail. Do not keep going back and forth on that same side as if polishing; switch to an uncolored side or fresh cotton, and work it in again as directed on the part that remains. Do not link not removing it all at once with not having enough force.
Even when glitter or layered coats remain, do not scratch the nail or scrape it off with a hard tool. Reconfirm that the color is within the remover's stated purpose, and return to the specified method. If it stays hard to remove, do not repeat the same movement without end; deciding not to force a finish that day is also necessary.
Replace a colored side, and check only the places that remain
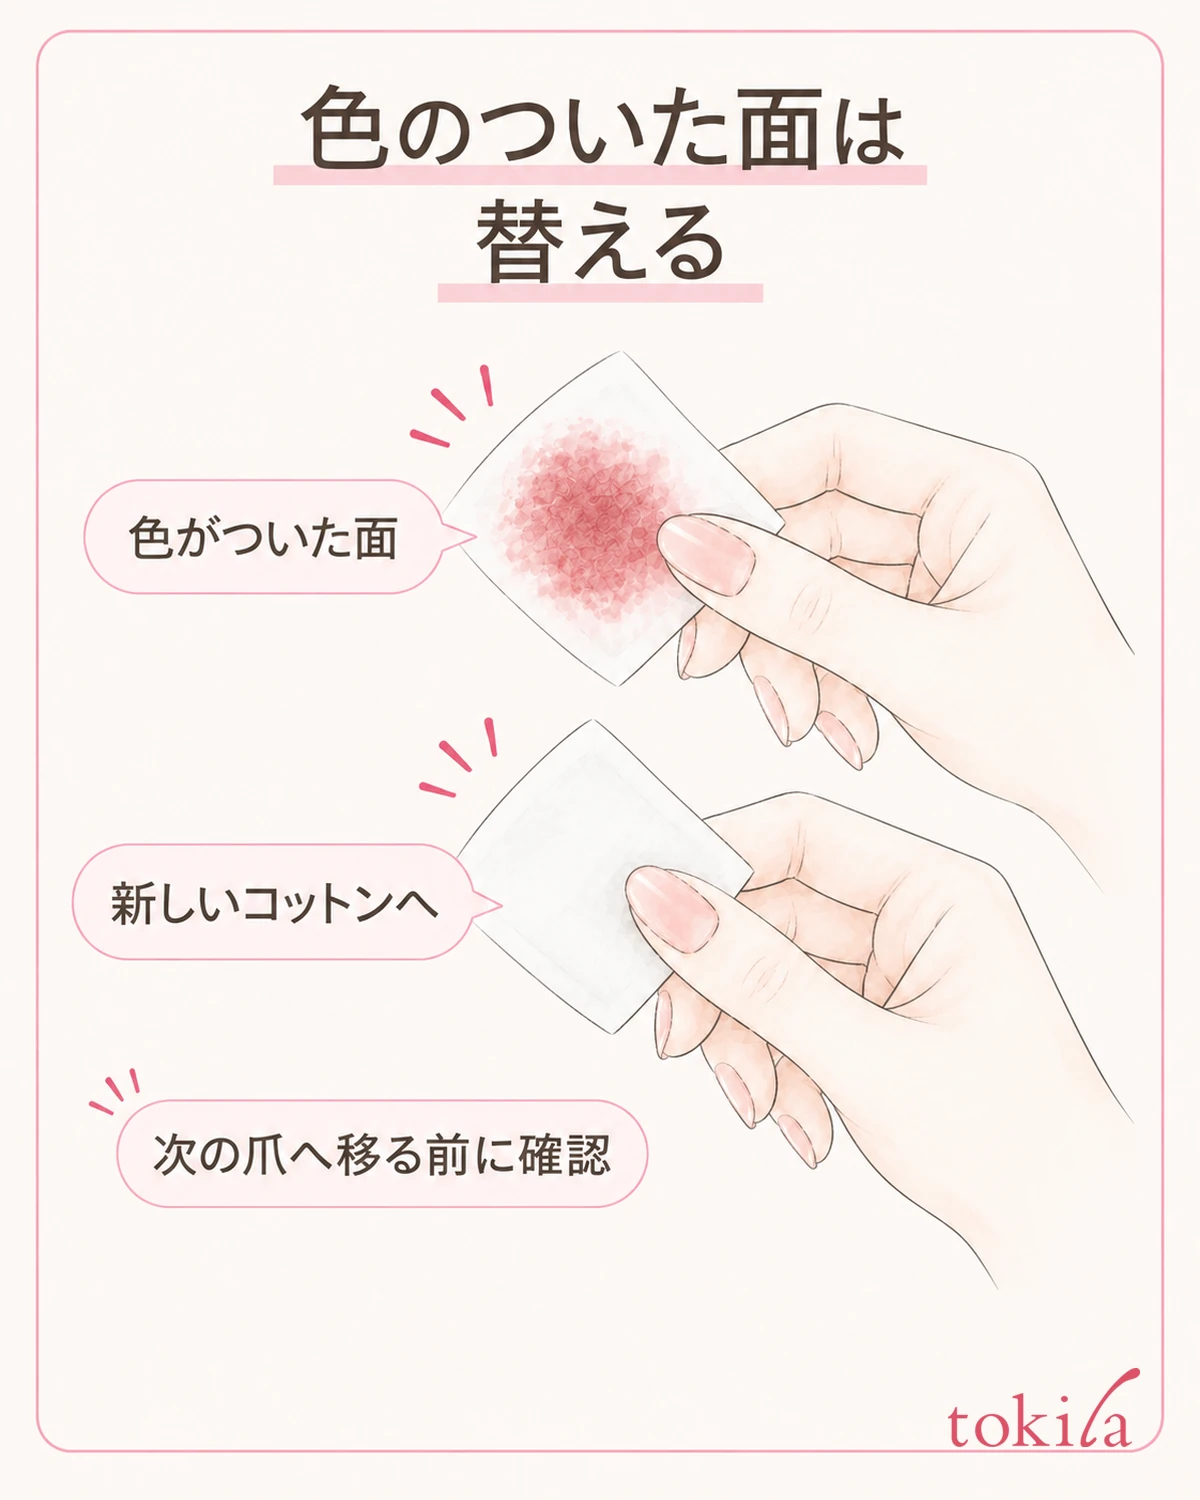
Do not decide when to replace the cotton only by "how many nails you have removed"; judge by looking at the side that touches the nail. If a wide area is colored, or if folding it brings a used side back against the nail, switch to a new piece. Even if you think you tucked the color inside, if it seeps out when you press with your hand, do not keep using that piece.
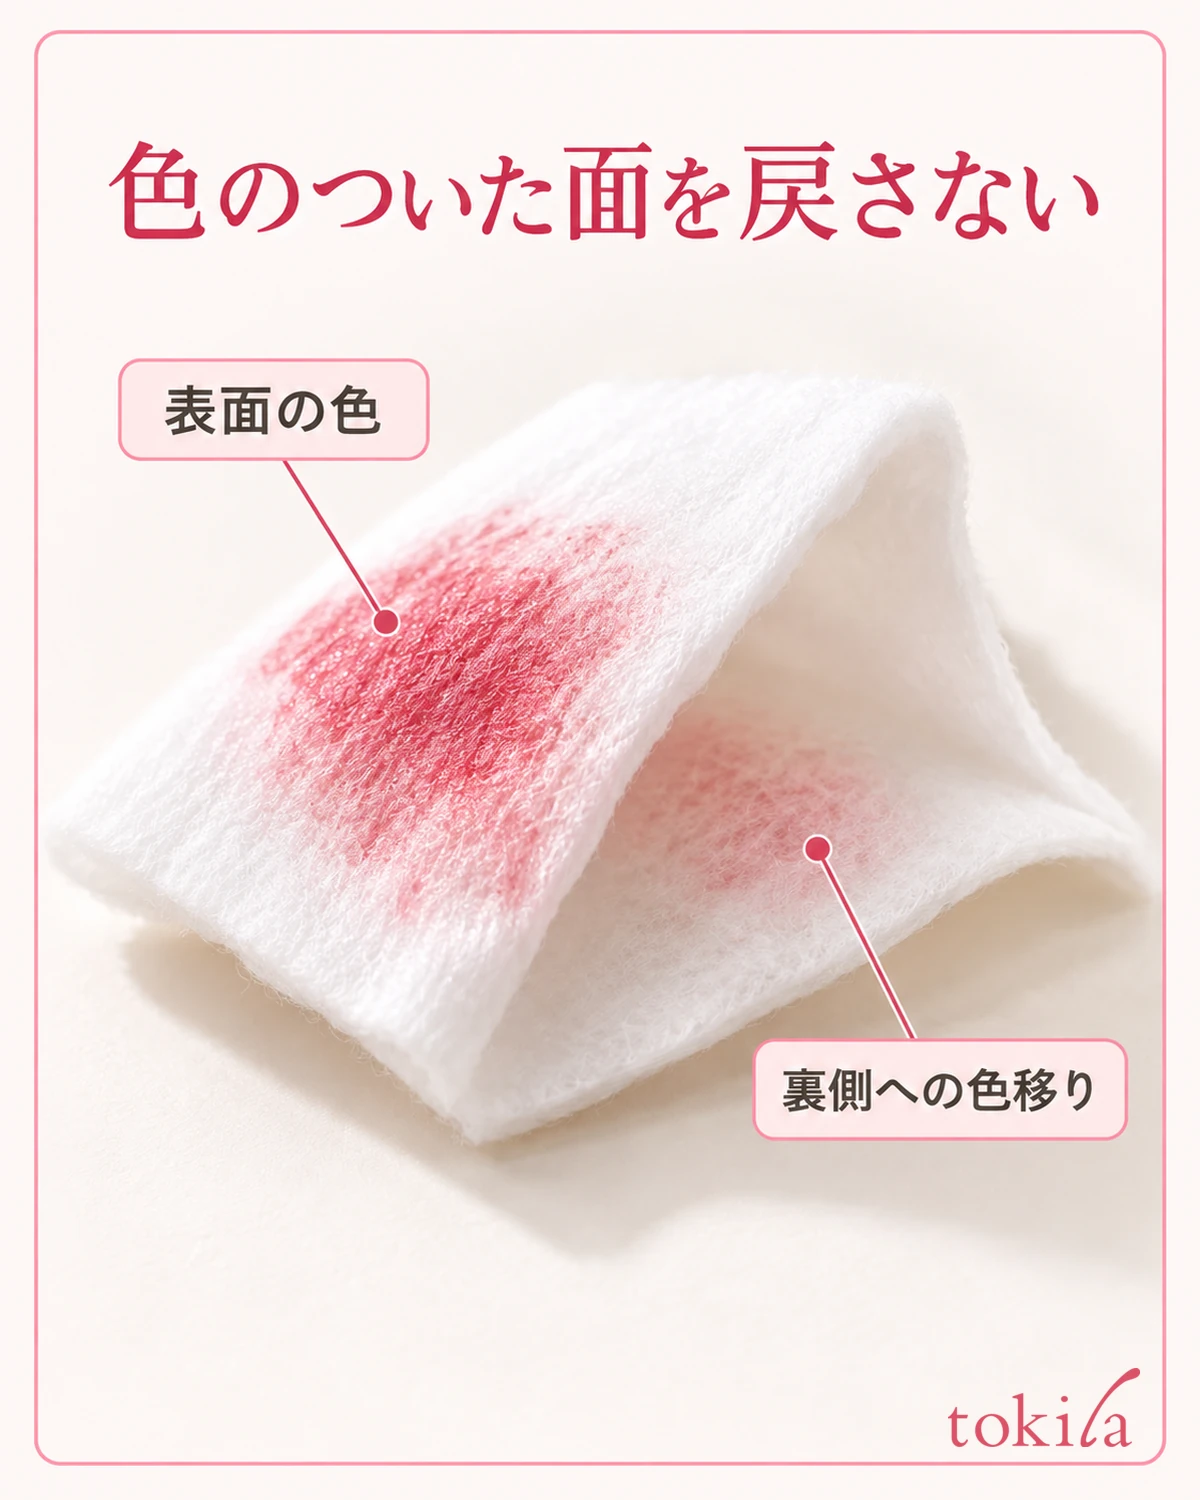
If an unused side of sufficient size still remains, fold the used side inward and check whether you can bring the uncolored side out. Even so, you do not need to rub the edge of the nail with a small, hard-rolled lump. If you cannot keep a side that covers the nail, it is dry, or you cannot tell which part is unused, replacing it will keep the operation organized.
Check the color of the cotton before moving to another finger, too. Even a side that looks white may have color through to the back, so open the fold to look or use fresh cotton. Do not carry the same side from a finger with a dark color to one with a light color, and look at the nail surface and its surroundings finger by finger before moving on.
Observe color left thinly along the edge of the nail separately from the broad coat in the center. Use an easy-to-handle edge of fresh cotton, and match the amount of liquid and how you move to the label. Do not push into the gap between nail and skin or lift the cuticle to chase it. It is important not to intensify the operation in order to remove color from places you cannot see.
For color on the surrounding skin as well, avoid wiping it widely with a dirty side. Remover is not a cleanser you can freely use on anything other than the nails. Follow the label for handling when it gets on the skin, and do not extend the steps for removing nail color as they are to the whole finger. Even if the color bothers you, avoid continuing removal until you feel irritation.
Connect the check after removal and the tidying up to the next application
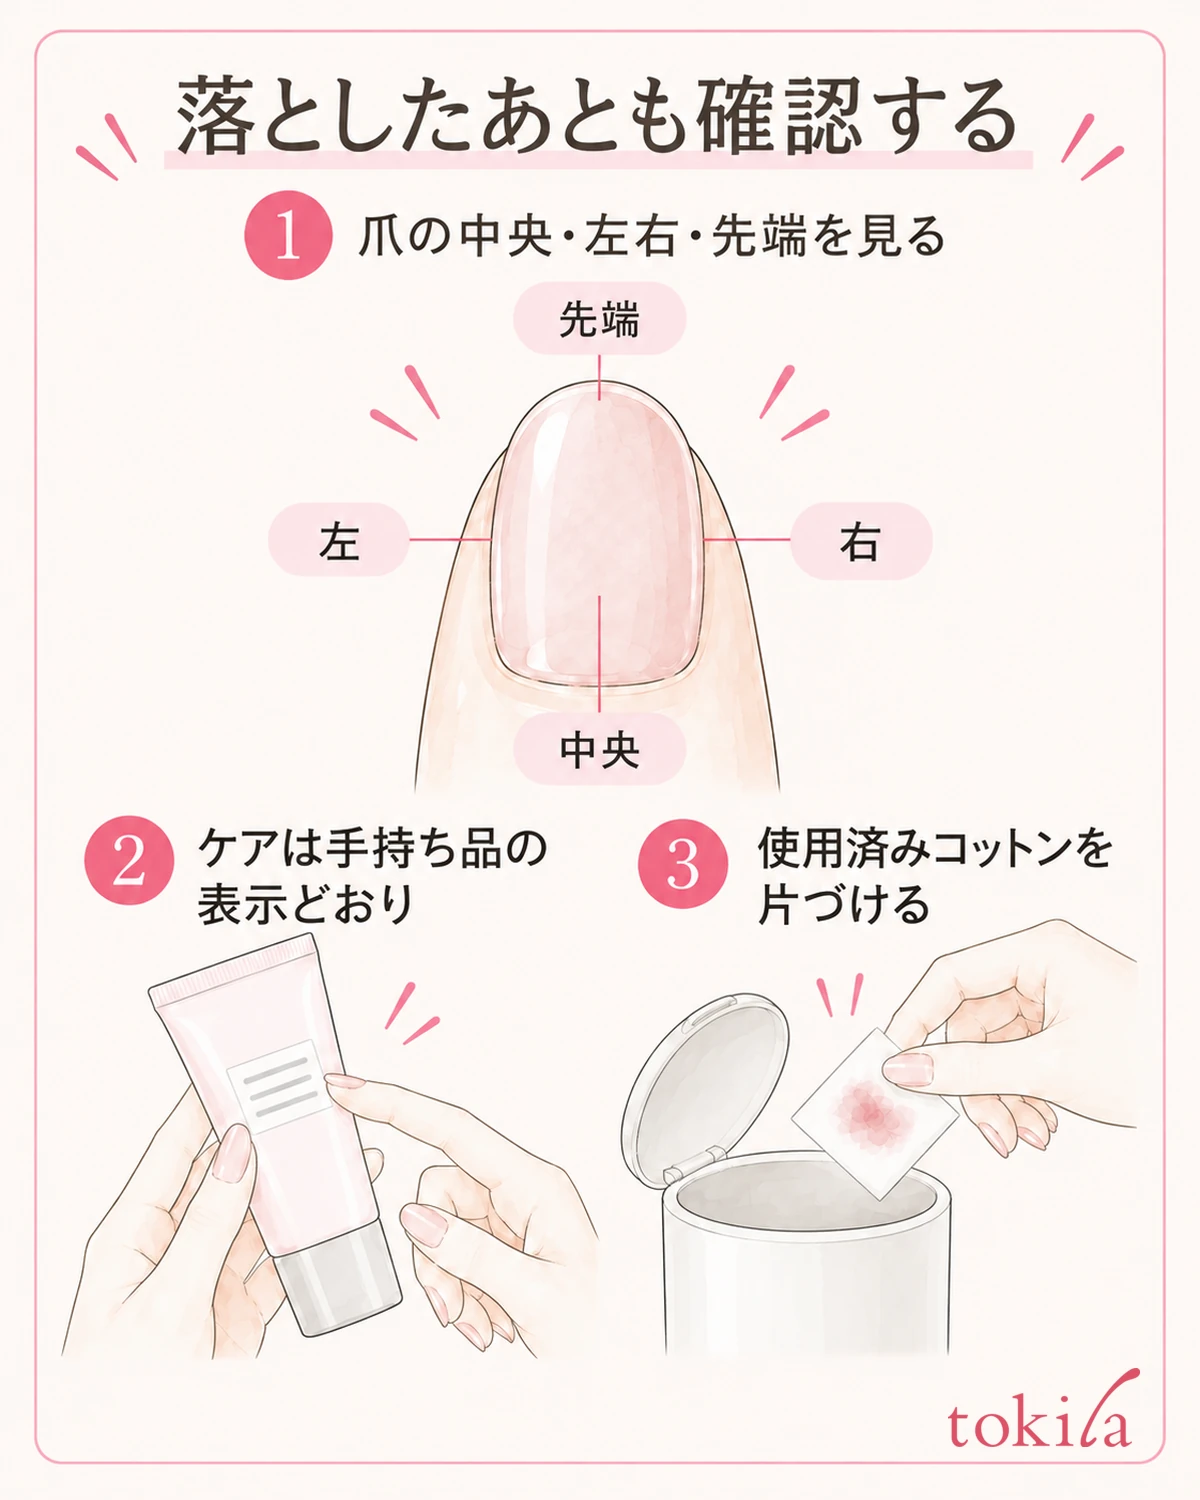
When you finish removing, check the center, the left and right edges, and the tip of the nail in a bright place. Separate whether coating that transfers to the cotton remains or only the surface color bothers you, and do not turn it into a process of rubbing every noticeable spot once more. Do not treat buffing the nail hard until it looks white as a sign that removal is complete.
If there are instructions to rinse after use or the like, handle it by that method. When moisturizing, use your nail oil or hand cream according to its instructions. Also avoid assuming that a remover containing moisturizing ingredients means no extra care is ever needed, or that an acetone-free one never irritates no matter how often you use it.
If you will repaint afterward, also check the condition of the nail surface before applying color. Unless a method of applying over remaining oil is specified, follow the preparation for the base coat or color. Thinking of care after removal and the next application as separate, instead of hurrying to layer color right after moisturizing, makes the process easier to choose.
Do not leave used cotton on the work surface; dispose of it in line with the remover's and your local municipality's guidance. Check that the container's cap is closed, and put it back where children and pets cannot touch it. Even when the removal is over, do not reuse colored cotton or things that contain the liquid for other purposes.
For next time, choose one thing from "check the label first," "do not put a colored side back," and "set out replacement cotton first" — whichever you could not do this time. For how to tell chips that need repainting, see also what to check when nail polish peels from the tips. For now, try going one nail at a time, looking at both the nail and the cotton.



